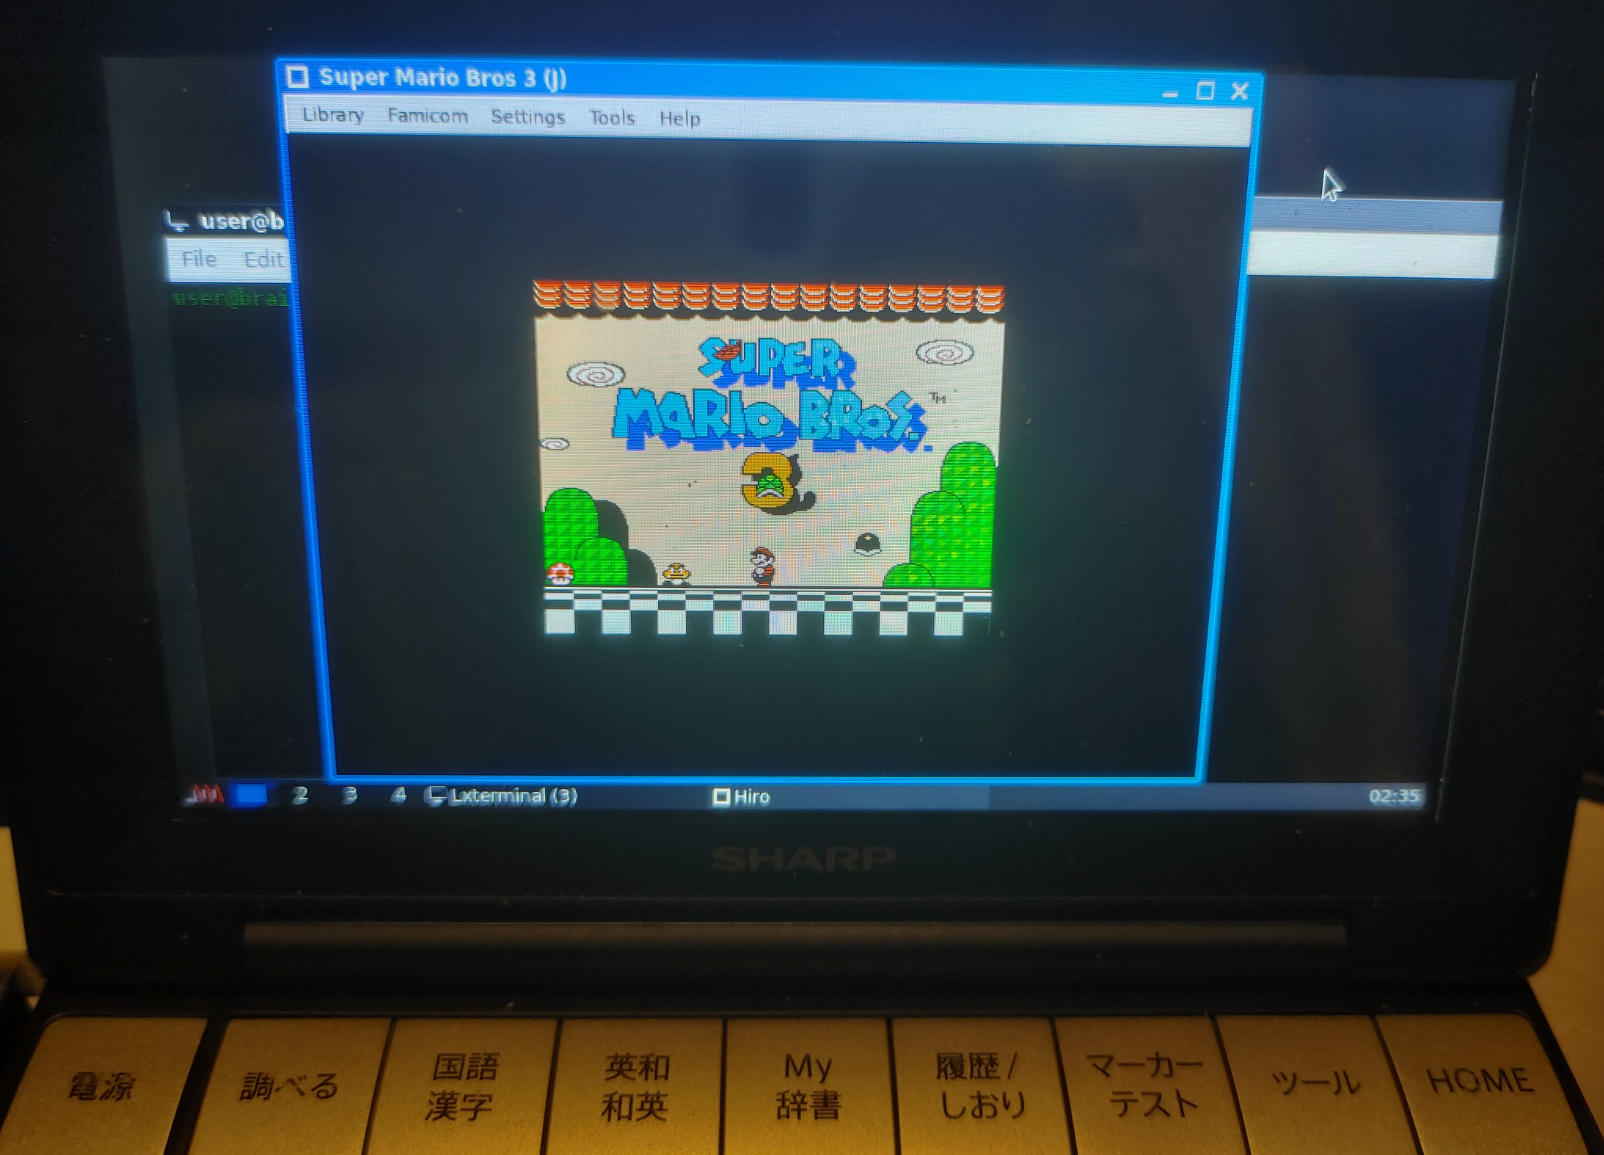
電子辞書Brainをいじる (4) Brainuxでアプリをインストールして遊ぶ

Brainuxにアプリをインストール

インストール方法のパターン

Brainuxにアプリをインストールには、いくつか方法があります。

  • Debinのレポジトリにあるソフトウェアの場合
    aptコマンドでダウンロードからインストールまで実施できます。

    apt show <パッケージ名>     パッケージの詳細を表示します。
    sudo apt install <パッケージ名>  パッケージをインストールします。
    dpkg -L <パッケージ名>      インストールパッケージのファイルリストを確認

apt search <パッケージ名の一部> パッケージ名やキーワードを検索します。
                (既にインストールされているかも確認できます。)

  • ソースからインストールするパターン
    ソースからインストールする場合は、基本的にドキュメントに書かれている方法でビルド、インストールします。
    ただし、ソース内にビルドを自動化するスクリプトがあれば、自動化したビルドが可能になります。

    「Makefile」がある場合は、make & sudo make install でインストールします。

    「configure」スクリプトが用意されている場合、スクリプトを実行してから、make & sudo make installでインストールします。

    Imakefile」がある場合は、xmkmf -a & make & sudo make install でインストールします。
    (環境に合わせてmakefileを作成してくれます。)

    「CMakeLists.txt」がある場合は、mkdir build & cd build & cmake .. & cmake –build . & cmake –install でインストールします。

    「*.cbpファイル(Code::Blocks IDE project、workspace files)がある」場合は、
    cbp2make -in Bomberman.cbp -out Makefile & make でビルドできます。
    インストールは、make installでできるかもしれませんが、基本的にアプリによります。


    ——————- 

(注意) 2025/12/27追記
なお本ブログでのインストール記事でのパッケージ導入ですが、
アプリインストール時点で不足しているものについて記載しています。
アプリのインストールする順番によっては、
必要なパッケージが記載されていない場合もありますので、
その場合は別途別途導入してください。

インストールするパッケージ名がわからない場合は、googleなどの検索で、
“apt <コマンド名>”や、”apt <ライブラリ名>”などで検索で探せる場合があります。
ソースからのビルドする場合は、”<ライプラリ名>-dev” というパッケージを
導入すればいいことが多いです。

インストール可能な正しいパッケージ名を調べるには、
“apt search <パッケージ名の一部 or キーワード>” で確認することができます。
また、apt search コマンドでは既に導入済かどうかについても確認できます。

——————-

apt等でいろいろアプリをインストールしてみます

実行成功

FDclone        CUI上で利用できるファイル&ディレクトリ管理ツール

xtightvncviewer    X11上で稼働するvncviewer

rdesktop       RDPプロトコルに対応した接続クライアント

xfreerdp2       RDPプロトコルに対応した接続クライアント

gngb         GAME BOY エミュレータ

openmsx       MSXエミュレータ(SDL1.2版で現実的な速度に。)[2025/12/22追加

fmsx        MSXエミュレータ(MSX1/2/2+) [2025/12/20追加]

dosbox       グラフィックス、サウンド、DOS を備えた x86 エミュレータ(Brainでは厳しい)

Neko Project 2 kai  PC9801/9821 エミュレータ

px68k       X68000エミュレータ(かなり遅いです。) 

libSDL2       ハードウェアへの低レベルアクセスを提供する開発ライブラリ

fceux 2.2.3 (SDL1.2版) ファミコンエミュレータ(音無しであれば実用的な速度で動作)

mplayer/smplayer  音楽・動画再生ツール

xpenguins     小さなペンギンがウィンドウ上を動き回るデスクトップマスコットアプリ

xmkmf       Imakefile から Makefile を生成するためのツール

cmake       CMakeLists.txtからMakefileを生成するためのツール

cbp2make     Code::Blocks IDE project (.cbp)からMakefileを生成するためのツール

oneko       X11猫(マウスカーソルを追いかける猫を表示するデスクトップマスコット)

macopix      アクティブウィンドウに座るマスコットプログラム

Emi Clock      美少女コスプレ時計 Emi Clock

xhime        常駐姫ちゃん (デスクトップマスコット的なアニメーションソフト)

xfishtank      X のルートで様々な熱帯魚が泳ぐ壁紙上の水槽が楽しめます。

xfireworks     Xのルートウィンドウ上で花火が打ちあがります

XMascot      Xの画面上で揺れるマスコットを表示する プログラム (2025/12/14追加)

xdesktopwaves   Xのルートウィンドウ上で水の波をシミュレーション

dclock       X Window System 向けの柔軟な表示設定が可能なデジタル時計

mxclock      絵柄が綺麗な時計です.

SunClock       時刻と地理データを表示可能な可愛い時計

Xantfarm     X11用のシンプルなアリ農場

XMangekyou    X11で動く万華鏡です

Xshodow     「書道」のアプリケーションです.

bb       AAlib に基づくアスキーアートデモ


動作未確認(動作遅延、動かない等)

remmina       複数の接続に対応した統合クライアント(動作はするが接続できない)

higan        マルチゲームコンソールエミュレータ(動作はするが遅すぎる)

fceux         ファミコンエミュレータ(動作は遅いです。)

nestopia       ファミコンエミュレータ(動作は遅いです。キー入力反応なし?)

java          Java VMの開発実行環境 (非常に遅い)


アプリケーション紹介

FDclone CUI上で利用できるファイル&ディレクトリ管理ツール

FDcloneは、古のDOS用のフリーツールであるFD(File&Directory)をUNIX ベースの OSに移植したものです。(FDclone公式ページ)
FDcloneはCUI上で利用できるファイル&ディレクトリ管理ツールということで、
Winowsで言えば、エクスプローラのような感じに使えます。

コマンドやファイル名を直接入力しなくても、ディレクトリの移動やファイルの操作支援ができるので、キー入力に工夫が必要なBrainuxにはピッタリなツールです。

Brainuxでは、apt経由で導入できます。

sudo apt install fdclone

事前にSDカードの文字化け対策をしておけば、/boot以下でも日本語文字も正しく表示できます。
(Brainux起動時にshellで起動した場合は、fbtermを起動してからFDcloneを起動すれば、日本語ファイル名も正しく表示されます。)

シフトを押しながらEで、fdclone自体の設定変更や確認ができます。
キー割り当てや、ランチャ、アーカイバ設定なども可能です。

「内部設定」のおすすめは、以下の通りです。

SORTTYPE: 名前順(昇り順), 直前のソート形式を保持
SORTTREE: 有効
WRITEFS: 使用禁止
LANGUAGE: 英語(English)ではFDcloneのメッセージが英語になります。ここをUTF-8に変更するとメッセージが日本語になりますが日本語表示できない環境では文字化けするので注意。
FNAMEKCODE: UTF-8

その他キー割り当てや、拡張子にあった実行コマンド等いろいろチューニング可能です。
変更したら、保存から「Overwrite」を実行して設定を保存します。

チューニング次第で何でもできるようになるツールですので、おすすめです。

なお、「unzip」や「lhasa」、「nkf」をaptでパッケージをインストールすることで、
zipやlzh内ファイルの解凍なしでの参照(決定[Enter])や解凍(u)、
UTF-8以外の文書ファイルの表示等(ファイル選択してx、先頭に”nkf “と入れて実行)
も可能になります。

sudo apt install unzip lhasa nkf

cabファイルについては、
別途「cabextract」パッケージをaptでインストールすれば
cabextract 展開したいファイル名.cab
で解凍できるようになります(-l オプションでリスト表示)。

cabファイルへの変換もしたいのであれば、「gcab」パッケージをaptでインストールすれば、gcabコマンドで圧縮(-c)、解凍(-x)、リスト表示(-t or -l)ができるようになります。

sudo apt install cabextract

user@brain:~$ sudo apt show fdclone
[sudo] password for user:
Package: fdclone
Version: 3.01j-1
Priority: optional
Section: shells
Maintainer: Elías Alejandro Año Mendoza <ealmdz@gmail.com>
Installed-Size: 1,103 kB
Depends: libc6 (>= 2.28), libtinfo6 (>= 6)
Homepage: http://hp.vector.co.jp/authors/VA012337/soft/fd/
Tag: interface::shell, interface::text-mode, role::program,
 scope::application, uitoolkit::ncurses, use::browsing, use::organizing,
 works-with::file
Download-Size: 504 kB
APT-Sources: http://archive.debian.org/debian bullseye/main armel Packages
Description: console-base lightweight file manager
 FD (FD represents "File and Directory") is an easy-to-use
 file management tool for Un*x newbies.  As its name shows,
 this is a rewrite from scratch - the original version was written
 by Atsushi Idei for MS-DOS(tm) and once very popular in Japan.
 Messages are available either in English or in Japanese.

user@brain:~$ sudo apt install fdclone
Reading package lists... Done
Building dependency tree... Done
Reading state information... Done
The following NEW packages will be installed:
  fdclone
0 upgraded, 1 newly installed, 0 to remove and 1 not upgraded.
Need to get 504 kB of archives.
After this operation, 1,103 kB of additional disk space will be used.
Get:1 http://archive.debian.org/debian bullseye/main armel fdclone armel 3.01j-1 [504 kB]
Fetched 504 kB in 2s (287 kB/s)
Selecting previously unselected package fdclone.
(Reading database ... 46263 files and directories currently installed.)
Preparing to unpack .../fdclone_3.01j-1_armel.deb ...
Unpacking fdclone (3.01j-1) ...
Setting up fdclone (3.01j-1) ...
Processing triggers for man-db (2.9.4-2) ...
user@brain:~$

xtightvncviewer X11上で稼働するvncviewer

昔から使われている画面転送プロトコルであるVNCのクライアントです。
X11上で動きます。

VNCは、今思うと昔のうちのホームページでメイン張ってたコンテンツでした。

もう25年も前の記事・・・・当時はかなりのキワモノ扱いのソフトウェアでした。
リナザウとかW-Zero3とかPSPとかでもクライアントを動かして遊んでました。なつかしい。

さっそく、Brainuxで動かせるかを試します。
インストールはApt経由で可能です。

sudo apt install xtightvncviewer

今回は、接続先としてUltraVNCを導入した環境に接続しています。

xtightvnc <接続先IP>:<DISPLAY番号>

例)
xtightvnc 192.168.29.47:1
<パスワード入力>

とりあえず、接続は可能です。
速度は、正直遅いです。

なお、VNCプロトコルには音声リダイレクトの機能はない(はず)なので、
音声リダイレクトをしたい場合は、Plusaudioとかを使うしかないと思います(未確認)。

user@brain:/etc/apt$ sudo apt show xtightvncviewer
Package: xtightvncviewer
Version: 1:1.3.10-3
Priority: optional
Section: x11
Source: tightvnc
Maintainer: Debian Remote Maintainers &lt;debian-remote@lists.debian.org&gt;
Installed-Size: 171 kB
Provides: vnc-viewer, vncviewer
Depends: libc6 (&gt;= 2.28), libjpeg62-turbo (&gt;= 1.3.1), libx11-6, libxaw7, libxext6, libxmu6, libxt6, zlib1g (&gt;= 1:1.1.4)
Recommends: xfonts-base
Suggests: ssh, tightvncserver
Homepage: https://www.tightvnc.com
Tag: interface::graphical, interface::x11, network::client, role::program,
 uitoolkit::athena, use::login, use::viewing, x11::application
Download-Size: 87.2 kB
APT-Sources: http://archive.debian.org/debian bullseye/main armel Packages
Description: virtual network computing client software for X
 VNC stands for Virtual Network Computing. It is, in essence, a remote
 display system which allows you to view a computing `desktop' environment
 not only on the machine where it is running, but from anywhere on the
 Internet and from a wide variety of machine architectures.
 .
 It is implemented in a client/server model. This package provides a client
 for X, with this you can connect to a vncserver somewhere in the network
 and display its content in a window. There are vncserver available for other
 operating systems.
 .
 The difference between the xtightvncviewer and the normal vncviewer is the
 data encoding, optimized for low bandwidth connections. If the client do not
 support jpeg or zlib encoding it can use the default one. Later versions of
 xvncviewer (&gt; 3.3.3r2) support a new automatic encoding that should be equally
 good as the tightvnc encoding.
 
user@brain:/etc/apt$ sudo apt install xtightvncviewer
Reading package lists... Done
Building dependency tree... Done
Reading state information... Done
Suggested packages:
  tightvncserver
Recommended packages:
  xfonts-base
The following NEW packages will be installed:
  xtightvncviewer
0 upgraded, 1 newly installed, 0 to remove and 1 not upgraded.
Need to get 87.2 kB of archives.
After this operation, 171 kB of additional disk space will be used.
Get:1 http://archive.debian.org/debian bullseye/main armel xtightvncviewer armel 1:1.3.10-3 &#91;87.2 kB]
Fetched 87.2 kB in 1s (64.1 kB/s)
Selecting previously unselected package xtightvncviewer.
(Reading database ... 44210 files and directories currently installed.)
Preparing to unpack .../xtightvncviewer_1%3a1.3.10-3_armel.deb ...
Unpacking xtightvncviewer (1:1.3.10-3) ...
Setting up xtightvncviewer (1:1.3.10-3) ...
update-alternatives: using /usr/bin/xtightvncviewer to provide /usr/bin/vncviewer (vncviewer) in auto mode
Processing triggers for man-db (2.9.4-2) ...
 
user@brain:/etc/apt$ apt list | grep xtightvncviewer
WARNING: apt does not have a stable CLI interface. Use with caution in scripts.
xtightvncviewer/oldstable,now 1:1.3.10-3 armel &#91;installed]
 
user@brain:~$ xtightvncviewer 192.168.29.47:1
Connected to RFB server, using protocol version 3.3
Performing standard VNC authentication
Password:
Authentication successful
Desktop name "win10-z800 ( 192.168.29.47 )"
VNC server default format:
  32 bits per pixel.
  Least significant byte first in each pixel.
  True colour: max red 255 green 255 blue 255, shift red 16 green 8 blue 0
Warning: Cannot convert string "-*-helvetica-bold-r-*-*-16-*-*-*-*-*-*-*" to type FontStruct
Using default colormap which is TrueColor.  Pixel format:
  16 bits per pixel.
  Least significant byte first in each pixel.
  True colour: max red 31 green 63 blue 31, shift red 11 green 5 blue 0


user@brain:~$ xtightvncviewer --help
TightVNC Viewer version 1.3.10

Usage: xtightvncviewer [<OPTIONS>] [<HOST>][:<DISPLAY#>]
       xtightvncviewer [<OPTIONS>] [<HOST>][::<PORT#>]
       xtightvncviewer [<OPTIONS>] -listen [<DISPLAY#>]
       xtightvncviewer -help

<OPTIONS> are standard Xt options, or:
        -via <GATEWAY>
        -shared (set by default)
        -noshared
        -viewonly
        -fullscreen
        -noraiseonbeep
        -passwd <PASSWD-FILENAME> (standard VNC authentication)
        -encodings <ENCODING-LIST> (e.g. "tight copyrect")
        -bgr233
        -owncmap
        -truecolour
        -depth <DEPTH>
        -compresslevel <COMPRESS-VALUE> (0..9: 0-fast, 9-best)
        -quality <JPEG-QUALITY-VALUE> (0..9: 0-low, 9-high)
        -nojpeg
        -nocursorshape
        -x11cursor
        -autopass

Option names may be abbreviated, e.g. -bgr instead of -bgr233.
See the manual page for more information.
user@brain:~$

rdesktop RDPプロトコルに対応した接続クライアント

rdesktopは、Windowsで使われているリモートコントロールサービスであるRemoteDesktop(RDP Service)に接続するためのツールです。
接続先でRDPを有効にするにはWindowsはPROエディションが必要です。

インストールはApt経由で可能です。

sudo apt install rdesktop

接続先でRDPを有効になっていれば、
たとえば、以下のコマンドで接続できます。

rdesktop -k en -x lan -a 8 -f <接続先IPアドレス> -u <ログインユーザ名> -p <Password>

例)
rdesktop -k en -x lan -a 8 -f 192.168.29.43 -u user -p userpass

-k :キーボードレイアウト(en)
-x :ネットワークモード(RDP5 experience)を指定します。
-a :色深度(32,24,16,8)
-f :フルスクリーンモード
-u :リモートデスクトップ(Windows)のユーザー名
-p :上記ユーザのWindowsパスワード
パスワード文字列に”!”などがある場合は、パスワード全てをシングルクォーテーションで括ります。

-f でフルスクリーン表示したときのBrainのキーボードでの解除は以下の同時押しです
≫の上向き + 文字切り替え + 決定   (Ctrl + Alt + Enter に相当)
それ以外だと、スタートメニューから電源->切断でもRDP接続を切断できます。

あと、usbサウンドデバイスを付けているのであれば、以下のオプションを追加すると音声のリダイレクションも可能でした。
ただ、画面描画が激しい状態だと音がとぎれてましたので、この辺はマシンパワーとかの取り合いをしている感じでした。なので音楽再生付きでyoutube鑑賞はムリゲーです。
どっちかだけなら何とかなるかもしれません。

-r sound:local:alsa

rdesktopは少し古いいツールなので、
Windows10や11に接続する際にNLA関係でエラーがでて接続できないときがあります。
その時は「RDP NLA」とかで検索して、Windows側で対応してみてください。
もしくは、次に試す「freerdp2」のほうを試してみてください。

user@brain:~$ sudo apt show rdesktop
Package: rdesktop
Version: 1.9.0-2+b1
Priority: optional
Section: x11
Source: rdesktop (1.9.0-2)
Maintainer: Laszlo Boszormenyi (GCS) <gcs@debian.org>
Installed-Size: 701 kB
Depends: libasound2 (>= 1.0.16), libc6 (>= 2.28), libgmp10, libgnutls30 (>= 3.6.14), libgssapi-krb5-2 (>= 1.17), libhogweed6, libnettle8, libpcsclite1 (>= 1.3.3), libtasn1-6 (>= 4.14), libx11-6, libxcursor1 (>> 1.1.2), libxrandr2
Suggests: pcscd
Homepage: https://www.rdesktop.org/
Tag: interface::graphical, interface::x11, network::client, protocol::ssl,
 role::program, scope::utility, uitoolkit::xlib, use::login,
 x11::application
Download-Size: 212 kB
APT-Sources: http://archive.debian.org/debian bullseye/main armel Packages
Description: RDP client for Windows NT/2000 Terminal Server and Windows Servers
 rdesktop is an open source client for Windows NT/2000 Terminal Server and
 Windows Server 2003/2008. Capable of natively speaking its Remote Desktop
 Protocol (RDP) in order to present the user's Windows desktop. Unlike Citrix
 ICA, no server extensions are required.


user@brain:~$ sudo apt install rdesktop
Reading package lists... Done
Building dependency tree... Done
Reading state information... Done
Suggested packages:
  pcscd
The following NEW packages will be installed:
  rdesktop
0 upgraded, 1 newly installed, 0 to remove and 1 not upgraded.
Need to get 212 kB of archives.
After this operation, 701 kB of additional disk space will be used.
Get:1 http://archive.debian.org/debian bullseye/main armel rdesktop armel 1.9.0-2+b1 [212 kB]
Fetched 212 kB in 1s (244 kB/s)
Selecting previously unselected package rdesktop.
(Reading database ... 44348 files and directories currently installed.)
Preparing to unpack .../rdesktop_1.9.0-2+b1_armel.deb ...
Unpacking rdesktop (1.9.0-2+b1) ...
Setting up rdesktop (1.9.0-2+b1) ...
Processing triggers for man-db (2.9.4-2) ...


user@brain:~$ rdesktop
rdesktop: A Remote Desktop Protocol client.
Version 1.9.0. Copyright (C) 1999-2016 Matthew Chapman et al.
See http://www.rdesktop.org/ for more information.

Usage: rdesktop [options] server[:port]
   -u: user name
   -d: domain
   -s: shell / seamless application to start remotely
   -c: working directory
   -p: password (- to prompt)
   -n: client hostname
   -k: keyboard layout on server (en-us, de, sv, etc.)
   -g: desktop geometry (WxH[@DPI][+X[+Y]])
   -i: enables smartcard authentication, password is used as pin
   -f: full-screen mode
   -b: force bitmap updates
   -L: local codepage
   -A: path to SeamlessRDP shell, this enables SeamlessRDP mode
   -V: tls version (1.0, 1.1, 1.2, defaults to negotiation)
   -B: use BackingStore of X-server (if available)
   -e: disable encryption (French TS)
   -E: disable encryption from client to server
   -m: do not send motion events
   -M: use local mouse cursor
   -C: use private colour map
   -D: hide window manager decorations
   -K: keep window manager key bindings
   -S: caption button size (single application mode)
   -T: window title
   -t: disable use of remote ctrl
   -N: enable numlock synchronization
   -X: embed into another window with a given id.
   -a: connection colour depth
   -z: enable rdp compression
   -x: RDP5 experience (m[odem 28.8], b[roadband], l[an] or hex nr.)
   -P: use persistent bitmap caching
   -r: enable specified device redirection (this flag can be repeated)
         '-r comport:COM1=/dev/ttyS0': enable serial redirection of /dev/ttyS0 to COM1
             or      COM1=/dev/ttyS0,COM2=/dev/ttyS1
         '-r disk:floppy=/mnt/floppy': enable redirection of /mnt/floppy to 'floppy' share
             or   'floppy=/mnt/floppy,cdrom=/mnt/cdrom'
         '-r clientname=<client name>': Set the client name displayed
             for redirected disks
         '-r lptport:LPT1=/dev/lp0': enable parallel redirection of /dev/lp0 to LPT1
             or      LPT1=/dev/lp0,LPT2=/dev/lp1
         '-r printer:mydeskjet': enable printer redirection
             or      mydeskjet="HP LaserJet IIIP" to enter server driver as well
         '-r sound:[local[:driver[:device]]|off|remote]': enable sound redirection
                     remote would leave sound on server
                     available drivers for 'local':
                     alsa:      ALSA output driver, default device: default
         '-r clipboard:[off|PRIMARYCLIPBOARD|CLIPBOARD]': enable clipboard
                      redirection.
                      'PRIMARYCLIPBOARD' looks at both PRIMARY and CLIPBOARD
                      when sending data to server.
                      'CLIPBOARD' looks at only CLIPBOARD.
         '-r scard[:"Scard Name"="Alias Name[;Vendor Name]"[,...]]
          example: -r scard:"eToken PRO 00 00"="AKS ifdh 0"
                   "eToken PRO 00 00" -> Device in GNU/Linux and UNIX environment
                   "AKS ifdh 0"       -> Device shown in Windows environment
          example: -r scard:"eToken PRO 00 00"="AKS ifdh 0;AKS"
                   "eToken PRO 00 00" -> Device in GNU/Linux and UNIX environment
                   "AKS ifdh 0"       -> Device shown in Microsoft Windows environment
                   "AKS"              -> Device vendor name
   -0: attach to console
   -4: use RDP version 4
   -5: use RDP version 5 (default)
   -o: name=value: Adds an additional option to rdesktop.
           sc-csp-name        Specifies the Crypto Service Provider name which
                              is used to authenticate the user by smartcard
           sc-container-name  Specifies the container name, this is usually the username
           sc-reader-name     Smartcard reader name to use
           sc-card-name       Specifies the card name of the smartcard to use
   -v: enable verbose logging

xfreerdp2 RDPプロトコルに対応した接続クライアント

rdesktop と同様のRDP Clientです。
rdesktopよりも比較的新しいソフトですので、NLA認証の問題も解決されているようです。

インストールはApt経由で可能です。

sudo apt install freerdp2-x11

接続先でRDPを有効になっていれば、
たとえば、以下のコマンドで接続できます。

xfreerdp /v:<接続先IPアドレス> /u:<ログインユーザ /p:<接続パスワード /f

例)
xfreerdp /v:192.168.29.43 /u:user /p:userpass /f

rdesktop同様、BrainにUSBサウンドデバイスを挿した状態で以下のコマンドオプションを追加すると音声も転送されます。
(一部ノイズ交じりなのも、画面描画が激しい状態だと音がとぎれるのも一緒)

/sound:sys:alsa

サウンドがうまく再生できないときは、以下のメッセージが今コンソール側に出ているっぽいので、ALSAのバッファがたりていないのかもしれません。
ALSA lib pcm.c:8545:(snd_pcm_recover) underrun occurred

user@brain:~$ sudo apt show freerdp2-x11
Package: freerdp2-x11
Version: 2.3.0+dfsg1-2+deb11u1
Priority: optional
Section: x11
Source: freerdp2
Maintainer: Debian Remote Maintainers <debian-remote@lists.debian.org>
Installed-Size: 553 kB
Provides: freerdp
Depends: libc6 (>= 2.4), libfreerdp-client2-2 (= 2.3.0+dfsg1-2+deb11u1), libfreerdp2-2 (>= 2.3.0+dfsg1), libwinpr2-2 (>= 2.1.0+dfsg1), libx11-6 (>= 2:1.2.99.901), libxcursor1 (>> 1.1.2), libxext6, libxfixes3, libxi6 (>= 2:1.2.99.4), libxinerama1, libxrandr2 (>= 2:1.5.0), libxrender1
Conflicts: freerdp-x11
Replaces: freerdp-x11
Homepage: https://www.freerdp.com/
Download-Size: 97.6 kB
APT-Sources: http://archive.debian.org/debian bullseye/main armel Packages
Description: RDP client for Windows Terminal Services (X11 client)
 FreeRDP is a libre client/server implementation of the Remote
 Desktop Protocol (RDP).
 .
 Currently, the FreeRDP client supports the following Windows Versions:
 .
  * Windows NT Server
  * Windows 2000 Terminal Server
  * Windows XP
  * Windows 2003 Server
  * Windows Vista
  * Windows 2008/2008r2/2011SBS Server
  * Windows 7
  * Windows 2012/2012r2 Server
  * Windows 8
  * Windows 10
 .
 This package contains the X11 based client.


user@brain:~$ sudo apt install freerdp2-x11
Reading package lists... Done
Building dependency tree... Done
Reading state information... Done

The following additional packages will be installed:
  libaom0 libavcodec58 libavutil56 libcodec2-0.9 libdav1d4 libfreerdp-client2-2 libfreerdp2-2 libgsm1 libopenjp2-7 libshine3 libsnappy1v5 libsoxr0
  libswresample3 libswscale5 libva-drm2 libva-x11-2 libva2 libvdpau1 libwebpmux3 libwinpr2-2 libx264-160 libx265-192 libxvidcore4 libzvbi-common libzvbi0
  ocl-icd-libopencl1
Suggested packages:
  opencl-icd
Recommended packages:
  va-driver-all | va-driver vdpau-driver-all | vdpau-driver
The following NEW packages will be installed:
  freerdp2-x11 libaom0 libavcodec58 libavutil56 libcodec2-0.9 libdav1d4 libfreerdp-client2-2 libfreerdp2-2 libgsm1 libopenjp2-7 libshine3 libsnappy1v5
  libsoxr0 libswresample3 libswscale5 libva-drm2 libva-x11-2 libva2 libvdpau1 libwebpmux3 libwinpr2-2 libx264-160 libx265-192 libxvidcore4 libzvbi-common
  libzvbi0 ocl-icd-libopencl1
0 upgraded, 27 newly installed, 0 to remove and 1 not upgraded.
Need to get 17.4 MB of archives.
After this operation, 45.1 MB of additional disk space will be used.
~
Processing triggers for libc-bin (2.31-13+deb11u11) ...


user@brain:~$ xfreerdp

FreeRDP - A Free Remote Desktop Protocol Implementation
See www.freerdp.com for more information

Usage: xfreerdp [file] [options] [/v:<server>[:port]]

Syntax:
    /flag (enables flag)
    /option:<value> (specifies option with value)
    +toggle -toggle (enables or disables toggle, where '/' is a synonym of '+')

    /a:<addin>[,<options>]            Addin
    /action-script:<file-name>        Action script
    /admin                            Admin (or console) session
    +aero                             Enable desktop composition
    /app:<path> or ||<alias>          Remote application program
    /app-cmd:<parameters>             Remote application command-line parameters
    /app-file:<file-name>             File to open with remote application
    /app-guid:<app-guid>              Remote application GUID
    /app-icon:<icon-path>             Remote application icon for user interface
    /app-name:<app-name>              Remote application name for user interface
    /app-workdir:<workspace path>     Remote application workspace path
    /assistance:<password>            Remote assistance password
    /auto-request-control             Automatically request remote assistance
                                      input control
    +async-channels                   Enable Asynchronous channels
                                      (experimental)
    +async-input                      Enable Asynchronous input
    +async-update                     Enable Asynchronous update
    /audio-mode:<mode>                Audio output mode
    +auth-only                        Enable Authenticate only
    -authentication                   Disable Authentication (experimental)
    +auto-reconnect                   Enable Automatic reconnection
    /auto-reconnect-max-retries:<retries>
                                      Automatic reconnection maximum retries, 0
                                      for unlimited [0,1000]
    +bitmap-cache                     Enable bitmap cache
    /bpp:<depth>                      Session bpp (color depth)
    /buildconfig                      Print the build configuration
    /cert:[deny,ignore,name:<name>,tofu,fingerprint:<hash>:<hash as hex>
          [,fingerprint:<hash>:<another hash>]]
                                      Certificate accept options. Use with care!
                                      * deny         ... Automatically abort
                                      connection if the certificate does not
                                      match, no user interaction.           *
                                      ignore       ... Ignore the certificate
                                      checks altogether (overrules all other
                                      options)                           * name
                                             ... Use the alternate <name>
                                      instead of the certificate subject to
                                      match locally stored certificates * tofu
                                            ... Accept certificate
                                      unconditionally on first connect and deny
                                      on subsequent connections if the
                                      certificate does not match * fingerprints
                                      ... A list of certificate hashes that are
                                      accepted unconditionally for a connection
    /cert-deny                        [deprecated, use /cert:deny] Automatically
                                      abort connection for any certificate that
                                      can not be validated.
    /cert-ignore                      [deprecated, use /cert:ignore] Ignore
                                      certificate
    /cert-name:<name>                 [deprecated, use /cert:name:<name>]
                                      Certificate name
    /cert-tofu                        [deprecated, use /cert:tofu] Automatically
                                      accept certificate on first connect
    /client-build-number:<number>     Client Build Number sent to server
                                      (influences smartcard behaviour, see
                                      [MS-RDPESC])
    /client-hostname:<name>           Client Hostname to send to server
    -clipboard[:[use-selection:<atom>]]
                                      Disable Redirect clipboard.
                                      * use-selection:<atom>  ... (X11) Specify
                                      which X selection to access. Default is
                                      CLIPBOARD. PRIMARY is the X-style
                                      middle-click selection.
    /codec-cache:[rfx|nsc|jpeg]       Bitmap codec cache
    -compression                      Disable compression
    /compression-level:<level>        Compression level (0,1,2)
    +credentials-delegation           Enable credentials delegation
    /d:<domain>                       Domain
    -decorations                      Disable Window decorations
    /disp                             Display control
    /drive:<name>,<path>              Redirect directory <path> as named share
                                      <name>. Hotplug support is enabled with
                                      /drive:hotplug,*. This argument provides
                                      the same function as "Drives that I plug
                                      in later" option in MSTSC.
    +drives                           Enable Redirect all mount points as shares
    /dvc:<channel>[,<options>]        Dynamic virtual channel
    /dynamic-resolution               Send resolution updates when the window is
                                      resized
    /echo                             Echo channel
    -encryption                       Disable Encryption (experimental)
    /encryption-methods:[40,][56,][128,][FIPS]
                                      RDP standard security encryption methods
    /f                                Fullscreen mode (<Ctrl>+<Alt>+<Enter>
                                      toggles fullscreen)
    -fast-path                        Disable fast-path input/output
    +fipsmode                         Enable FIPS mode
    /floatbar[:sticky:[on|off],default:[visible|hidden],show:
               [always|fullscreen||window]]
                                      floatbar is disabled by default (when
                                      enabled defaults to sticky in fullscreen
                                      mode)
    -fonts                            Disable smooth fonts (ClearType)
    /frame-ack:<number>               Number of frame acknowledgement
    /from-stdin[:force]               Read credentials from stdin. With <force>
                                      the prompt is done before connection,
                                      otherwise on server request.
    /g:<gateway>[:<port>]             Gateway Hostname
    /gateway-usage-method:[direct|detect]
                                      Gateway usage method
    /gd:<domain>                      Gateway domain
    /gdi:sw|hw                        GDI rendering
    /geometry                         Geometry tracking channel
    +gestures                         Enable Consume multitouch input locally
    /gfx[:[[RFX|AVC420|AVC444],mask:<value>]]
                                      RDP8 graphics pipeline
    /gfx-h264[:[[AVC420|AVC444],mask:<value>]
               [DEPRECATED] use /gfx:avc420 instead]
                                      RDP8.1 graphics pipeline using H264 codec
    +gfx-progressive                  Enable RDP8 graphics pipeline using progressive
                                      codec
    +gfx-small-cache                  Enable RDP8 graphics pipeline using small cache
                                      mode
    +gfx-thin-client                  Enable RDP8 graphics pipeline using thin client
                                      mode
    +glyph-cache                      Enable Glyph cache (experimental)
    /gp:<password>                    Gateway password
    -grab-keyboard                    Disable Grab keyboard
    /gt:[rpc|http[,no-websockets]|auto[,no-websockets]]
                                      Gateway transport type
    /gu:[[<domain>\]<user>|<user>[@<domain>]]
                                      Gateway username
    /gat:<access token>               Gateway Access Token
    /h:<height>                       Height
    -heartbeat                        Disable Support heartbeat PDUs
    /help                             Print help
    +home-drive                       Enable Redirect user home as share
    /ipv6                             Prefer IPv6 AAA record over IPv4 A record
    /jpeg                             JPEG codec support
    /jpeg-quality:<percentage>        JPEG quality
    /kbd:0x<id> or <name>             Keyboard layout
    /kbd-lang:0x<id>                  Keyboard active language identifier
    /kbd-fn-key:<value>               Function key value
    /kbd-list                         List keyboard layouts
    /kbd-lang-list                    List keyboard languages
    /kbd-remap:List of <key>=<value>,... pairs to remap scancodes
                                      Keyboard scancode remapping
    /kbd-subtype:<id>                 Keyboard subtype
    /kbd-type:<id>                    Keyboard type
    /load-balance-info:<info-string>  Load balance info
    /log-filters:<tag>:<level>[,<tag>:<level>[,...]]
                                      Set logger filters, see wLog(7) for
                                      details
    /log-level:[OFF|FATAL|ERROR|WARN|INFO|DEBUG|TRACE]
                                      Set the default log level, see wLog(7) for
                                      details
    /max-fast-path-size:<size>        Specify maximum fast-path update size
    /max-loop-time:<time>             Specify maximum time in milliseconds spend
                                      treating packets
    +menu-anims                       Enable menu animations
    /microphone[:[sys:<sys>,][dev:<dev>,][format:<format>,][rate:<rate>,]
                 [channel:<channel>]] Audio input (microphone)
    /monitor-list                     List detected monitors
    /monitors:<id>[,<id>[,...]]       Select monitors to use
    -mouse-motion                     Disable Send mouse motion
    /multimon[:force]                 Use multiple monitors
    +multitouch                       Enable Redirect multitouch input
    +multitransport                   Enable Support multitransport protocol
    -nego                             Disable protocol security negotiation
    /network:[modem|broadband|broadband-low|broadband-high|wan|lan|auto]
                                      Network connection type
    /nsc                              NSCodec support
    +offscreen-cache                  Enable offscreen bitmap cache
    /orientation:[0|90|180|270]       Orientation of display in degrees
    +old-license                      Enable Use the old license workflow (no CAL and
                                      hwId set to 0)
    /p:<password>                     Password
    /parallel[:<name>[,<path>]]       Redirect parallel device
    /parent-window:<window-id>        Parent window id
    +password-is-pin                  Enable Use smart card authentication with
                                      password as smart card PIN
    /pcb:<blob>                       Preconnection Blob
    /pcid:<id>                        Preconnection Id
    /pheight:<height>                 Physical height of display (in
                                      millimeters)
    /play-rfx:<pcap-file>             Replay rfx pcap file
    /port:<number>                    Server port
    -suppress-output                  Disable suppress output when minimized
    +print-reconnect-cookie           Enable Print base64 reconnect cookie after
                                      connecting
    /printer[:<name>[,<driver>]]      Redirect printer device
    /proxy:[<proto>://][<user>:<password>@]<host>:<port>
                                      Proxy settings: override env. var (see
                                      also environment variable below). Protocol
                                      "socks5" should be given explicitly where
                                      "http" is default.
    /pth:<password-hash>              Pass the hash (restricted admin mode)
    /pwidth:<width>                   Physical width of display (in millimeters)
    /rdp2tcp:<executable path[:arg...]>
                                      TCP redirection
    /reconnect-cookie:<base64-cookie> Pass base64 reconnect cookie to the
                                      connection
    /redirect-prefer:<FQDN|IP|NETBIOS>,[...]
                                      Override the preferred redirection order
    /relax-order-checks               Do not check if a RDP order was announced
                                      during capability exchange, only use when
                                      connecting to a buggy server
    /restricted-admin                 Restricted admin mode
    /rfx                              RemoteFX
    /rfx-mode:[image|video]           RemoteFX mode
    /scale:[100|140|180]              Scaling factor of the display
    /scale-desktop:<percentage>       Scaling factor for desktop applications
                                      (value between 100 and 500)
    /scale-device:100|140|180         Scaling factor for app store applications
    /sec:[rdp|tls|nla|ext]            Force specific protocol security
    +sec-ext                          Enable NLA extended protocol security
    -sec-nla                          Disable NLA protocol security
    -sec-rdp                          Disable RDP protocol security
    -sec-tls                          Disable TLS protocol security
    /serial[:<name>[,<path>[,<driver>[,permissive]]]]
                                      Redirect serial device
    /shell:<shell>                    Alternate shell
    /shell-dir:<dir>                  Shell working directory
    /size:<width>x<height> or <percent>%[wh]
                                      Screen size
    /smart-sizing[:<width>x<height>]  Scale remote desktop to window size
    /smartcard[:<str>[,<str>...]]     Redirect the smartcard devices containing
                                      any of the <str> in their names.
    /smartcard-logon                  Activates Smartcard Logon authentication.
                                      (EXPERIMENTAL: NLA not supported)
    /sound[:[sys:<sys>,][dev:<dev>,][format:<format>,][rate:<rate>,]
            [channel:<channel>,][latency:<latency>,][quality:<quality>]]
                                      Audio output (sound)
    /span                             Span screen over multiple monitors
    /spn-class:<service-class>        SPN authentication service class
    /ssh-agent                        SSH Agent forwarding channel
    /t:<title>                        Window title
    -themes                           Disable themes
    /timeout:<time in ms>             Advanced setting for high latency links:
                                      Adjust connection timeout, use if you
                                      encounter timeout failures with your
                                      connection
    /tls-ciphers:[netmon|ma|ciphers]  Allowed TLS ciphers
    /tls-seclevel:<level>             TLS security level - defaults to 1
    -toggle-fullscreen                Disable Alt+Ctrl+Enter to toggle
                                      fullscreen
    /tune:<setting:value>,<setting:value>
                                      [experimental] directly manipulate freerdp
                                      settings, use with extreme caution!
    /tune-list                        Print options allowed for /tune
    /u:[[<domain>\]<user>|<user>[@<domain>]]
                                      Username
    +unmap-buttons                    Enable Let server see real physical pointer
                                      button
    /usb:[dbg,][id:<vid>:<pid>#...,][addr:<bus>:<addr>#...,][auto]
                                      Redirect USB device
    /v:<server>[:port]                Server hostname
    /vc:<channel>[,<options>]         Static virtual channel
    /version                          Print version
    /video                            Video optimized remoting channel
    /vmconnect[:<vmid>]               Hyper-V console (use port 2179, disable
                                      negotiation)
    /w:<width>                        Width
    -wallpaper                        Disable wallpaper
    +window-drag                      Enable full window drag
    /window-position:<xpos>x<ypos>    window position
    /wm-class:<class-name>            Set the WM_CLASS hint for the window
                                      instance
    /workarea                         Use available work area

Examples:
    xfreerdp connection.rdp /p:Pwd123! /f
    xfreerdp /u:CONTOSO\JohnDoe /p:Pwd123! /v:rdp.contoso.com
    xfreerdp /u:JohnDoe /p:Pwd123! /w:1366 /h:768 /v:192.168.1.100:4489
    xfreerdp /u:JohnDoe /p:Pwd123! /vmconnect:C824F53E-95D2-46C6-9A18-23A5BB403532 /v:192.168.1.100

Clipboard Redirection: +clipboard

Drive Redirection: /drive:home,/home/user
Smartcard Redirection: /smartcard:<device>
Serial Port Redirection: /serial:<name>,<device>,[SerCx2|SerCx|Serial],[permissive]
Serial Port Redirection: /serial:COM1,/dev/ttyS0
Parallel Port Redirection: /parallel:<name>,<device>
Printer Redirection: /printer:<device>,<driver>
TCP redirection: /rdp2tcp:/usr/bin/rdp2tcp

Audio Output Redirection: /sound:sys:oss,dev:1,format:1
Audio Output Redirection: /sound:sys:alsa
Audio Input Redirection: /microphone:sys:oss,dev:1,format:1
Audio Input Redirection: /microphone:sys:alsa

Multimedia Redirection: /video
USB Device Redirection: /usb:id:054c:0268#4669:6e6b,addr:04:0c

For Gateways, the https_proxy environment variable is respected:
    export https_proxy=http://proxy.contoso.com:3128/
    xfreerdp /g:rdp.contoso.com ...

More documentation is coming, in the meantime consult source files

user@brain:~$

remmina 複数の接続に対応した統合クライアント(動作はするが接続できない)

様々なプロトコルに対応した接続用クライアントです。
ssh,RDP,VNC等
接続前のGUIは立ち上がりますが、実際に接続しようとしてもつながりません。
標準のsshでさえつながらないので、どこかネットワーク的にもうまくいっていないのかもしれません。

インストールはApt経由で可能です。

sudo apt install remmina remmina-plugin-rdp remmina-plugin-vnc

user@brain:~$ sudo apt show remmina
[sudo] password for user:
Package: remmina
Version: 1.4.11+dfsg-3
Priority: optional
Section: x11
Maintainer: Debian Remote Maintainers <debian-remote@lists.debian.org>
Installed-Size: 478 kB
Depends: libavahi-client3 (>= 0.6.16), libavahi-common3 (>= 0.6.16), libavahi-ui-gtk3-0 (>= 0.6.30), libayatana-appindicator3-1 (>= 0.4.90), libc6 (>= 2.28), libcairo2 (>= 1.6.0), libgcrypt20 (>= 1.8.0), libglib2.0-0 (>= 2.55.1), libgtk-3-0 (>= 3.21.5), libjson-glib-1.0-0 (>= 1.5.2), libpango-1.0-0 (>= 1.14.0), libsodium23 (>= 1.0.10), libsoup2.4-1 (>= 2.41.90), libssh-4 (>= 0.8.1), libssl1.1 (>= 1.1.0), libvte-2.91-0 (>= 0.51.90), remmina-common (= 1.4.11+dfsg-3), default-dbus-session-bus | dbus-session-bus
Recommends: remmina-plugin-rdp, remmina-plugin-vnc, remmina-plugin-secret
Suggests: remmina-plugin-exec, remmina-plugin-kwallet, remmina-plugin-nx, remmina-plugin-spice, remmina-plugin-www, remmina-plugin-xdmcp
Homepage: https://www.remmina.org/
Tag: interface::graphical, interface::x11, protocol::ssh, role::program,
 uitoolkit::gtk, x11::application
Download-Size: 161 kB
APT-Sources: http://archive.debian.org/debian bullseye/main armel Packages
Description: GTK+ Remote Desktop Client
 Remmina is a remote desktop client written in GTK+, aiming to be
 useful for system administrators and travellers, who need to work
 with lots of remote computers in front of either large monitors or
 tiny netbooks.
 .
 Remmina supports multiple network protocols in an integrated and
 consistent user interface.
 .
 Currently RDP, VNC, SPICE, WWW, NX, XDMCP, EXEC and SSH are supported.

user@brain:~$
user@brain:~$
user@brain:~$ sudo apt install remmina
Reading package lists... Done
Building dependency tree... Done
Reading state information... Done
The following additional packages will be installed:
  libavahi-glib1 libavahi-ui-gtk3-0 libayatana-appindicator3-1
  libayatana-ido3-0.4-0 libayatana-indicator3-7 libdbusmenu-glib4
  libdbusmenu-gtk3-4 libsodium23 libssh-4 remmina-common
Suggested packages:
  remmina-plugin-exec remmina-plugin-kwallet remmina-plugin-nx
  remmina-plugin-spice remmina-plugin-www remmina-plugin-xdmcp
Recommended packages:
  remmina-plugin-rdp remmina-plugin-vnc remmina-plugin-secret
The following NEW packages will be installed:
  libavahi-glib1 libavahi-ui-gtk3-0 libayatana-appindicator3-1
  libayatana-ido3-0.4-0 libayatana-indicator3-7 libdbusmenu-glib4
  libdbusmenu-gtk3-4 libsodium23 libssh-4 remmina remmina-common
0 upgraded, 11 newly installed, 0 to remove and 1 not upgraded.
Need to get 1,476 kB of archives.
After this operation, 5,820 kB of additional disk space will be used.
Do you want to continue? [Y/n] Y
Get:1 http://archive.debian.org/debian bullseye/main armel libavahi-glib1 armel 0.8-5+deb11u2 [44.0 kB]
~
Processing triggers for shared-mime-info (2.0-1) ...


user@brain:~$ sudo apt show remmina-plugin-rdp
Package: remmina-plugin-rdp
Version: 1.4.11+dfsg-3
Priority: optional
Section: gnome
Source: remmina
Maintainer: Debian Remote Maintainers <debian-remote@lists.debian.org>
Installed-Size: 132 kB
Depends: libc6 (>= 2.28), libcairo2 (>= 1.6.0), libcups2 (>= 1.6.0), libfreerdp-client2-2 (>= 2.2.0~), libfreerdp2-2 (>= 2.2.0~), libgdk-pixbuf-2.0-0 (>= 2.22.0), libglib2.0-0 (>= 2.41.1), libgtk-3-0 (>= 3.19.12), libwinpr2-2 (>= 2.0.0~git20160317.1.75ae3f5+dfsg1), libx11-6, remmina (= 1.4.11+dfsg-3)
Homepage: https://www.remmina.org/
Tag: role::plugin, uitoolkit::gtk
Download-Size: 51.2 kB
APT-Sources: http://archive.debian.org/debian bullseye/main armel Packages
Description: RDP plugin for Remmina
 Remmina is a remote desktop client written in GTK+, aiming to be
 useful for system administrators and travellers, who need to work
 with lots of remote computers in front of either large monitors or
 tiny netbooks.
 .
 Remmina supports multiple network protocols in an integrated and
 consistent user interface.
 .
 Currently RDP, VNC, SPICE, WWW, NX, XDMCP, EXEC and SSH are supported.
 .
 This package contains the RDP plugin for Remmina.


user@brain:~$ sudo apt install remmina-plugin-rdp
Reading package lists... Done
Building dependency tree... Done
Reading state information... Done
The following NEW packages will be installed:
  remmina-plugin-rdp
0 upgraded, 1 newly installed, 0 to remove and 1 not upgraded.
Need to get 51.2 kB of archives.
After this operation, 132 kB of additional disk space will be used.
Get:1 http://archive.debian.org/debian bullseye/main armel remmina-plugin-rdp armel 1.4.11+dfsg-3 [51.2 kB]
Fetched 51.2 kB in 1s (54.9 kB/s)
Selecting previously unselected package remmina-plugin-rdp:armel.
(Reading database ... 45099 files and directories currently installed.)
Preparing to unpack .../remmina-plugin-rdp_1.4.11+dfsg-3_armel.deb ...
Unpacking remmina-plugin-rdp:armel (1.4.11+dfsg-3) ...
Setting up remmina-plugin-rdp:armel (1.4.11+dfsg-3) ...


user@brain:~$ sudo apt show remmina-plugin-vnc
Package: remmina-plugin-vnc
Version: 1.4.11+dfsg-3
Priority: optional
Section: gnome
Source: remmina
Maintainer: Debian Remote Maintainers <debian-remote@lists.debian.org>
Installed-Size: 68.6 kB
Depends: libc6 (>= 2.28), libcairo2 (>= 1.6.0), libgdk-pixbuf-2.0-0 (>= 2.22.0), libglib2.0-0 (>= 2.26.0), libgtk-3-0 (>= 3.9.12), libvncclient1 (>= 0.9.10), remmina (= 1.4.11+dfsg-3)
Homepage: https://www.remmina.org/
Tag: role::plugin, uitoolkit::gtk
Download-Size: 31.1 kB
APT-Sources: http://archive.debian.org/debian bullseye/main armel Packages
Description: VNC plugin for Remmina
 Remmina is a remote desktop client written in GTK+, aiming to be
 useful for system administrators and travellers, who need to work
 with lots of remote computers in front of either large monitors or
 tiny netbooks.
 .
 Remmina supports multiple network protocols in an integrated and
 consistent user interface.
 .
 Currently RDP, VNC, SPICE, WWW, NX, XDMCP, EXEC and SSH are supported.
 .
 This package contains the VNC plugin for Remmina.


user@brain:~$ sudo apt install remmina-plugin-vnc
Reading package lists... Done
Building dependency tree... Done
Reading state information... Done
The following additional packages will be installed:
  liblzo2-2 libvncclient1
The following NEW packages will be installed:
  liblzo2-2 libvncclient1 remmina-plugin-vnc
0 upgraded, 3 newly installed, 0 to remove and 1 not upgraded.
Need to get 248 kB of archives.
After this operation, 501 kB of additional disk space will be used.
Do you want to continue? [Y/n] Y
Get:1 http://archive.debian.org/debian bullseye/main armel liblzo2-2 armel 2.10-2 [48.5 kB]
Get:2 http://archive.debian.org/debian bullseye/main armel libvncclient1 armel 0.9.13+dfsg-2+deb11u1 [168 kB]
Get:3 http://archive.debian.org/debian bullseye/main armel remmina-plugin-vnc armel 1.4.11+dfsg-3 [31.1 kB]
Fetched 248 kB in 3s (89.2 kB/s)
Selecting previously unselected package liblzo2-2:armel.
(Reading database ... 45107 files and directories currently installed.)
Preparing to unpack .../liblzo2-2_2.10-2_armel.deb ...
Unpacking liblzo2-2:armel (2.10-2) ...
Selecting previously unselected package libvncclient1:armel.
Preparing to unpack .../libvncclient1_0.9.13+dfsg-2+deb11u1_armel.deb ...
Unpacking libvncclient1:armel (0.9.13+dfsg-2+deb11u1) ...
Selecting previously unselected package remmina-plugin-vnc:armel.
Preparing to unpack .../remmina-plugin-vnc_1.4.11+dfsg-3_armel.deb ...
Unpacking remmina-plugin-vnc:armel (1.4.11+dfsg-3) ...
Setting up liblzo2-2:armel (2.10-2) ...
Setting up libvncclient1:armel (0.9.13+dfsg-2+deb11u1) ...
Setting up remmina-plugin-vnc:armel (1.4.11+dfsg-3) ...
Processing triggers for libc-bin (2.31-13+deb11u11) ...
user@brain:~$

higan  マルチゲームコンソールエミュレータ(動作はするが遅すぎる)

gngb GAME BOY エミュレータ

libSDL2  ハードウェアへの低レベルアクセスを提供する開発ライブラリ

libSDL2は、オーディオ, キーボード, マウス, ジョイスティック, グラフィックハードウェアへの低レベルアクセスを提供する開発ライブラリです。(SDL – Simple DirectMedia Layer )

実はdebian11レポジトリに、libSDL2としてすでに登録されているのでAPT経由でインストール自体はできます。
$ sudo apt show libsdl2-2.0-0

ただし、APTでインストールしたものだと、Brainux上で動かないようです。
具体的には、libSDL2に依存するパッケージが”Illigal instruction”エラーで異常終了します。
パッケージが、libSDL2に依存しているかについては、以下のコマンドで確認できます。
sudo apt show <パッケージ名>

このため、今回はlibSDL2をBrainuxで動くように再構築する必要があります。

先達の方の記事を参考に、再構築します。

ビルドツール類をインストールします。
$ sudo apt update
$ sudo apt-get install g++ build-essential libsdl2-dev

libSDL2のソースをダウンロードします。
$cd
$sudo apt source libsdl2

そのままでは動かないので、ソースコードを修正します。
$ cd libsdl2-2.0.14+dfsg2/include
$ sudo cp -p SDL_atomic.h SDL_atomic.h.org
$ sudo vi SDL_atomic.h

SDL_atomic.hの184行目を以下の通り修正する。
(“|| defined(__ARM_ARCH_5TE__)”を消すせばいいとのことです。)

#elif defined(__ARM_ARCH_6__) || defined(__ARM_ARCH_6J__) || defined(__ARM_ARCH_6K__) || defined(__ARM_ARCH_6T2__) || defined(__ARM_ARCH_6Z__) || defined(__ARM_ARCH_6ZK__) || defined(__ARM_ARCH_5TE__)

↓

#elif defined(__ARM_ARCH_6__) || defined(__ARM_ARCH_6J__) || defined(__ARM_ARCH_6K__) || defined(__ARM_ARCH_6T2__) || defined(__ARM_ARCH_6Z__) || defined(__ARM_ARCH_6ZK__)

SDL2の依存関係を解消して、ビルドします。
$ cd ~/libsdl2-2.0.14+dfsg2
$ sudo apt-get build-dep libsdl2
$ sudo dpkg-buildpackage

以下のようにエラーがでたら、修正のコミットが必要となります。

dpkg-source: info: local changes detected, the modified files are:
libsdl2-2.0.14+dfsg2/include/SDL_atomic.h
libsdl2-2.0.14+dfsg2/include/SDL_atomic.h.org
dpkg-source: info: you can integrate the local changes with dpkg-source --commit
dpkg-source: error: aborting due to unexpected upstream changes, see /tmp/libsdl2_2.0.14+dfsg2-3+deb11u1.diff.sPjez4
dpkg-buildpackage: error: dpkg-source -b . subprocess returned exit status 2

修正のコミットは以下のコマンドを実行します。
$ dpkg-source –commit

以下のように表示されるので、「Enter the desired patch name」はbrainと入力しています。
エディタが立ち上がったら、ctal-xで終了する

dpkg-source: info: local changes detected, the modified files are:
libsdl2-2.0.14+dfsg2/include/SDL_atomic.h
libsdl2-2.0.14+dfsg2/include/SDL_atomic.h.org
Enter the desired patch name: brain
dpkg-source: info: local changes have been recorded in a new patch: libsdl2-2.0.14+dfsg2/debian/patches/brain

再度、再構築コマンドを実行すると、延々とコンパイルが行われます。
(うちのBraiux環境[PW-SH3]で環境での実行では4.5時間ほどかかりました。Brainへの給電は必須です。)
$ dpkg-buildpackage

再構築が終わったら、1つ上のディレクトリにインストール用パッケージ(.deb)ファイルができているので、これをインストールします。
$ cd ..
$ sudo dpkg -i libsdl2-2.0-0_2.0.14+dfsg2-3+deb11u1_armel.deb
$ sudo dpkg -i libsdl2-dev_2.0.14+dfsg2-3+deb11u1_armel.deb

(以下3つは必要に応じてインストールしてください。)
$ sudo dpkg -i libsdl2-2.0-0-dbgsym_2.0.14+dfsg2-3+deb11u1_armel.deb
$ sudo dpkg -i libsdl2-dev-dbgsym_2.0.14+dfsg2-3+deb11u1_armel.deb
$ sudo dpkg -i libsdl2-doc_2.0.14+dfsg2-3+deb11u1_all.deb

これで、libSDL2に依存しているアプリケーションパッケージでも、”Illigal instruction”エラーが出なくなることを確認しました。(libSDL2に依存しているアプリケーションの再導入は不要です。)

ちなみに、再構築完了後に、以下のフォルダを確認すると、SDL2のテストプログラムが作成されていますので、確認できます。
~/libsdl2-2.0.14+dfsg2/debian/build-tests

試しにX11環境で”testgles2″ を実行してみたところ、2.20 frames per secondでした。

fceux ファミコンエミュレータ(動作は遅いです。->SDL1.2版では動きます。)


fceux 2.2.3 (SDL1.2版) ファミコンエミュレータ(音無しであれば実用的な速度で動作)


nestopia ファミコンエミュレータ(動作は遅いです。キー入力反応なし?)

openmsx  MSXエミュレータ(動作は遅い->SDL1.2版で現実的な速度に。)

openmsx 0.15 (SDL1.2版) インストール     2025/12/22追記

fMSX MSXエミュレータ(MSX1/2/2+)

java Java VMの開発実行環境 (非常に遅い)

Java VMの開発実行環境です。
開発環境インストール sudo apt install openjdk-11-jdk
実行環境インストール sudo apt install openjdk-11-jre

ただ、バージョン表示するだけでも1分程度かかる状況ですので、実用的ではないと思います。
一応、openjdk-11-demoパッケージの”Font2DTest.jar”を実行してみました。
X11上にFont2DTestのウィンドウ枠が出ることまでは確認しましたが、
あまりに遅くて諦めました。

user@brain:~$ java --version
openjdk 11.0.24 2024-07-16
OpenJDK Runtime Environment (build 11.0.24+8-post-Debian-2deb11u1)
OpenJDK Zero VM (build 11.0.24+8-post-Debian-2deb11u1, interpreted mode)
user@brain:~$


user@brain:~$ java -jar /usr/share/doc/openjdk-11-jre-headless/demo/jfc/Font2DTest/Font2DTest.jar

(2026/01/04追記)
BrainのCPUであるARM926EJ-Sのアーキテクチャはarmv5tejでjavaバイナリ実行支援である”Jazelle DBX命令(BXJ)”をサポートしているんだけど、この機能を利用できるJavaVMは現行のものではないみたい。

user@brain:~$ cat /proc/cpuinfo
Features : swp half thumb fastmult edsp java

過去のいくつかのJavaVMのバージョンで、Jazelle DBX命令を使えるものを探したのですが見つかりませんでした。


dosbox グラフィックス、サウンド、DOS を備えた x86 エミュレータ(Brainでは厳しい)


px68k X68000エミュレータ


xpenguins 小さなペンギンがウィンドウ上を動き回るデスクトップマスコットアプリ

XPenguins home page

ウィンドウの上をかわいい小さなペンギンが歩き回るX11アプリケーションです。
あと表示されているペンギンをクリックすると・・・・

インストールはApt経由で可能です。
sudo apt show xpenguins

X11環境で、Shellから”xpenguins &”で起動できます。

オプションで、いろいろ表示を指定できるのでぜひ試してみてください。
-n <ペンギンの数>でペンギンの数を増やしたり、–allでいろんなペンギン?を表示したりできますが、表示する数を増やすとさすがにちらつきます。ちらつきは、-m 150とかで軽減できるようです。

user@brain:~$ sudo apt show xpenguins
Package: xpenguins
Version: 2.2-11
Priority: optional
Section: games
Maintainer: Debian Games Team <pkg-games-devel@lists.alioth.debian.org>
Installed-Size: 1,139 kB
Depends: libc6 (>= 2.7), libx11-6, libxext6, libxpm4
Homepage: http://xpenguins.seul.org/
Tag: game::toys, interface::graphical, interface::x11, role::program,
 scope::utility, uitoolkit::xlib, use::entertaining, x11::screensaver
Download-Size: 172 kB
APT-Sources: http://archive.debian.org/debian bullseye/main armel Packages
Description: little penguins walk on your windows
 Ever wanted cute little penguins walking along the tops of your
 windows? Ever wanted to send an army of cute little penguins to invade
 the screen of someone else on your network? Probably not, but why not
 try this program out anyway, it's cool!


user@brain:~$
user@brain:~$ sudo apt install xpenguins
Reading package lists... Done
Building dependency tree... Done
Reading state information... Done
The following NEW packages will be installed:
  xpenguins
0 upgraded, 1 newly installed, 0 to remove and 2 not upgraded.
Need to get 172 kB of archives.
After this operation, 1,139 kB of additional disk space will be used.
Get:1 http://archive.debian.org/debian bullseye/main armel xpenguins armel 2.2-11 [172 kB]
Fetched 172 kB in 1s (131 kB/s)
Selecting previously unselected package xpenguins.
(Reading database ... 60135 files and directories currently installed.)
Preparing to unpack .../xpenguins_2.2-11_armel.deb ...
Unpacking xpenguins (2.2-11) ...
Setting up xpenguins (2.2-11) ...
Processing triggers for man-db (2.9.4-2) ...
user@brain:~$


user@brain:~$ xpenguins -h
XPenguins 2.2 (1 October 2001) by Robin Hogan
Usage: xpenguins [options]
Options:
  -d, --display        <display>    Send the penguins to specified display
  -m, --delay          <millisecs>  Set delay between frames
  -n, --penguins       <n>          Create <n> penguins (max 256)
  -q, --quiet                       Suppress all non-fatal messages
  -v, --version                     Show version information
  -h, --help                        Show this message
  -c, --config-dir     <dir>        Look for config files (and themes) in <dir>
  -p, --ignorepopups                Penguins ignore "popup" windows
  -r, --rectwin                     Regard shaped windows as rectangular
  -t, --theme          <theme>      Use named <theme>
  -l, --list-themes                 List available themes
  -i, --theme-info                  Describe a theme and exit (use with -t)
  -b, --no-blood                    Do not show any gory images
  -a, --no-angels                   Do not show any cherubim
  -s, --squish                      kill penguins with mouse
      --all                         Run all available themes simultaneously
      --random-theme                Choose a random theme
      --id             <window id>  Send penguins to window with this ID
      --nice           <ld1> <ld2>  Start killing penguins when load reaches
                                       <ld1>, kill all if load reches <ld2>
("--" can be replaced with "-" in all cases)
System data directory: /usr/share/xpenguins
user@brain:~$

user@brain:~$ xpenguins -l
Big Penguins
Bill
Classic Penguins
Penguins
Turtles

あと、テーマを追加することもできます。
オフィシャルページの右側の真ん中よりちょっと下にある、「XPenguins Themes」のところの
Source tarball:xpenguins_themes-1.0.tar.gz
ダウンロードして、解凍した後、themes以下の各フォルダを
/usr/share/xpenguins/themes/の下にコピーしてみてください。(要root権限)。
追加テーマは、なかなか攻めたラインナップとなっておりますのでぜひ試してみてください。

-l
 インストールされたテーマのリスト
-t “<テーマ名>”
 テーマを使用
–all
 すべてのテーマを利用。数が多い場合は -n 5 とかで数を制限しましょう


xmkmf Imakefile から Makefile を生成するためのツール

xmkmfは、X11アプリケーションがソース提供されているときに、コンパイルに必要な”Makefile”を環境に合わせて”Imakefiie”から作成してくれるツールです。

最近開発されたアプリケーションであれば、”configure”コマンドで環境に合わせて”Makefile”を作成してコンパイルすることも多いのですが、昔は”Imakefiie”を用意するアプリケーションも多かったのです。

インストールはApt経由で可能です。
sudo apt install xutils-dev

通常は、アプリケーションのソースディレクトリ(Imakefileがあるフォルダ)で以下のコマンドを実行します。
xmkmf

user@brain:~/xhime/xhime151/xhime1.51$ xmkmf
mv -f Makefile Makefile.bak
imake -DUseInstalled -I/usr/lib/X11/config
user@brain:~/xhime/xhime151/xhime1.51$

また、xmkmf -a のように -aオプションを付けると、
make Makefiles、make includes、make depend まで自動的に実行します。

user@brain:~/xhime/xhime151/xhime1.51$ xmkmf -a
mv -f Makefile Makefile.bak
imake -DUseInstalled -I/usr/lib/X11/config
make Makefiles
make: Nothing to be done for 'Makefiles'.
make includes
make: Nothing to be done for 'includes'.
make depend
gccmakedep  --      -Dlinux -D__arm__ -D__arm32__ -U__arm -Uarm -D_POSIX_C_SOURCE=199309L                              -D_POSIX_SOURCE -D_XOPEN_SOURCE                          -D_BSD_SOURCE -D_SVID_SOURCE                                 -D_LARGEFILE_SOURCE -D_FILE_OFFSET_BITS=64                                                                   -DFUNCPROTO=15 -DNARROWPROTO   -DSHAPE  -DAUDIO_DEVICE=\"/dev/audio\"  -DMAILSPOOL_PATH=\"/usr/spool/mail/\" -DXHIMEDAT_PATH=\"/usr/lib/X11/xhime\" -DXSYSV_SIG   -- xhime.c
user@brain:~/xhime/xhime151/xhime1.51$

あとは、通常通り、以下でビルド&インストールです。
make
make install

インストールログ

user@brain:~/xhime/xhime151/xhime1.51$ sudo apt show xutils-dev
Package: xutils-dev
Version: 1:7.7+5+b1
Priority: optional
Section: x11
Source: xutils-dev (1:7.7+5)
Maintainer: Debian X Strike Force <debian-x@lists.debian.org>
Installed-Size: 1,489 kB
Depends: libc6 (>= 2.7), cpp
Tag: devel::buildtools, devel::lang:c, devel::library, implemented-in::c,
 interface::commandline, role::devel-lib, role::program, scope::utility,
 works-with::software:source
Download-Size: 239 kB
APT-Sources: http://archive.debian.org/debian bullseye/main armel Packages
Description: X Window System utility programs for development
 xutils-dev provides a set of utility programs shipped with the X Window System
 that do not require the X libraries; many of these programs are useful
 even on a system that does not have any X clients or X servers installed.
 .
 The programs in this package include:
  - imake, a C preprocessor interface to the make utility;
  - lndir, a tool that creates a shadow directory of symbolic links to
    another directory tree;
  - makedepend, a tool to create dependencies in makefiles;
  - makeg, a tool for making debuggable executables.
 .
 This package also lscontains xorg-macros.m4, a set of macros used in configure
 scripts of X.Org packages.


user@brain:~/xhime/xhime151/xhime1.51$ sudo apt install xutils-dev
Reading package lists... Done
Building dependency tree... Done
Reading state information... Done
The following NEW packages will be installed:
  xutils-dev
0 upgraded, 1 newly installed, 0 to remove and 2 not upgraded.
Need to get 239 kB of archives.
After this operation, 1,489 kB of additional disk space will be used.
Get:1 http://archive.debian.org/debian bullseye/main armel xutils-dev armel 1:7.7+5+b1 [239 kB]
Fetched 239 kB in 1s (200 kB/s)
Selecting previously unselected package xutils-dev.
(Reading database ... 60570 files and directories currently installed.)
Preparing to unpack .../xutils-dev_1%3a7.7+5+b1_armel.deb ...
Unpacking xutils-dev (1:7.7+5+b1) ...
Setting up xutils-dev (1:7.7+5+b1) ...
Processing triggers for man-db (2.9.4-2) ...
user@brain:~/xhime/xhime151/xhime1.51$


user@brain:~/xhime/xhime151/xhime1.51$ xmkmf --help
usage:  /usr/bin/xmkmf [-a] [top_of_sources_pathname [current_directory]]
user@brain:~/xhime/xhime151/xhime1.51$


cmake CMakeLists.txtからMakefileを生成するためのツール

アプリケーションのソースを確認した際に、「CMakeLists.txt」があれば、
ここからビルド環境に合わせたMakefileを生成してビルドできます。

cmake コマンドは、apt経由でインストール可能です。

apt install cmake

ビルドは以下のような流れで実施できます。
mkdir build
cd build
cmake ..
cmake –build .
cmake –install

user@brain:~/oneko-git/oneko/build$ cmake ..
-- The C compiler identification is GNU 10.2.1
-- Detecting C compiler ABI info
-- Detecting C compiler ABI info - done
-- Check for working C compiler: /usr/bin/cc - skipped
-- Detecting C compile features
-- Detecting C compile features - done
-- Configuring done
-- Generating done
-- Build files have been written to: /home/user/oneko-git/oneko/build

user@brain:~/oneko-git/oneko/build$ cmake --build .
Scanning dependencies of target oneko
[ 50%] Building C object CMakeFiles/oneko.dir/oneko.c.o
[100%] Linking C executable oneko
[100%] Built target oneko


インストールログ

user@brain:~$ apt show cmake
Package: cmake
Version: 3.18.4-2+deb11u1
Priority: optional
Section: devel
Maintainer: Debian CMake Team <pkg-cmake-team@lists.alioth.debian.org>
Installed-Size: 19.4 MB
Depends: cmake-data (= 3.18.4-2+deb11u1), procps, libarchive13 (>= 3.3.3), libc6 (>= 2.28), libcurl4 (>= 7.16.2), libexpat1 (>= 2.0.1), libgcc-s1 (>= 3.5), libjsoncpp24 (>= 1.9.4), librhash0 (>= 1.2.6), libstdc++6 (>= 9), libuv1 (>= 1.11.0), zlib1g (>= 1:1.2.3.3)
Recommends: gcc, make
Suggests: cmake-doc, ninja-build
Homepage: https://cmake.org/
Tag: devel::buildtools, implemented-in::c++, interface::commandline,
 interface::text-mode, role::program, scope::utility,
 uitoolkit::ncurses, works-with::software:source
Download-Size: 3,384 kB
APT-Sources: http://archive.debian.org/debian bullseye/main armel Packages
Description: cross-platform, open-source make system
 CMake is used to control the software compilation process using
 simple platform and compiler independent configuration files. CMake
 generates native makefiles and workspaces that can be used in the
 compiler environment of your choice. CMake is quite sophisticated: it
 is possible to support complex environments requiring system
 configuration, pre-processor generation, code generation, and template
 instantiation.
 .
 CMake was developed by Kitware as part of the NLM Insight
 Segmentation and Registration Toolkit project. The ASCI VIEWS project
 also provided support in the context of their parallel computation
 environment. Other sponsors include the Insight, VTK, and VXL open
 source software communities.


user@brain:~$ apt install cmake
E: Could not open lock file /var/lib/dpkg/lock-frontend - open (13: Permission denied)
E: Unable to acquire the dpkg frontend lock (/var/lib/dpkg/lock-frontend), are you root?
user@brain:~$ sudo apt install cmake
[sudo] password for user:
Reading package lists... Done
Building dependency tree... Done
Reading state information... Done
The following additional packages will be installed:
  cmake-data libjsoncpp24 librhash0
Suggested packages:
  cmake-doc ninja-build
The following NEW packages will be installed:
  cmake cmake-data libjsoncpp24 librhash0
0 upgraded, 4 newly installed, 0 to remove and 2 not upgraded.
Need to get 5,317 kB of archives.
After this operation, 29.0 MB of additional disk space will be used.
Do you want to continue? [Y/n] Y
Get:1 http://archive.debian.org/debian bullseye/main armel cmake-data all 3.18.4-2+deb11u1 [1,725 kB]
Get:2 http://archive.debian.org/debian bullseye/main armel libjsoncpp24 armel 1.9.4-4 [66.9 kB]
Get:3 http://archive.debian.org/debian bullseye/main armel librhash0 armel 1.4.1-2 [141 kB]
Get:4 http://archive.debian.org/debian bullseye/main armel cmake armel 3.18.4-2+deb11u1 [3,384 kB]
Fetched 5,317 kB in 5s (1,066 kB/s)
Selecting previously unselected package cmake-data.
(Reading database ... 60811 files and directories currently installed.)
Preparing to unpack .../cmake-data_3.18.4-2+deb11u1_all.deb ...
Unpacking cmake-data (3.18.4-2+deb11u1) ...
Selecting previously unselected package libjsoncpp24:armel.
Preparing to unpack .../libjsoncpp24_1.9.4-4_armel.deb ...
Unpacking libjsoncpp24:armel (1.9.4-4) ...
Selecting previously unselected package librhash0:armel.
Preparing to unpack .../librhash0_1.4.1-2_armel.deb ...
Unpacking librhash0:armel (1.4.1-2) ...
Selecting previously unselected package cmake.
Preparing to unpack .../cmake_3.18.4-2+deb11u1_armel.deb ...
Unpacking cmake (3.18.4-2+deb11u1) ...
Setting up libjsoncpp24:armel (1.9.4-4) ...
Setting up librhash0:armel (1.4.1-2) ...
Setting up cmake-data (3.18.4-2+deb11u1) ...
Setting up cmake (3.18.4-2+deb11u1) ...
Processing triggers for man-db (2.9.4-2) ...
Processing triggers for libc-bin (2.31-13+deb11u11) ...
user@brain:~$


cbp2make Code::Blocks IDE project (.cbp)からMakefileを生成するためのツール(2025/12/13追加)

アプリケーションのソースを確認した際に、
「*.cbp」ファイル(Code::Blocks IDE project 、workspace files)があれば、
ここからMakefileを生成してビルドできます。

cbp2make コマンドは、apt経由でインストール可能です。

apt install cbp2make


アプリケーションのビルドは以下のような流れで実施できます。

cbp2make -in Projrct.cbp -out Makefile
make

make時にエラーが出た場合は、エラーに応じて対応してください。

例:allegro5ライブラリを利用していた場合、以下のように修正
LIB = -lallegro -lallegro_dialog -lallegro_image -lallegro_ttf -lallegro_audio -lallegro_acodec -lallegro_color -lallegro_font -lallegro_main -lallegro_memfile -lallegro_primitives

例:allegra4.4ライブラリを利用していた場合、以下のように修正
LIB = -lalleg

インストールは、make installでできるかもしれませんが、基本的にアプリによります。

user@brain:~$ cbp2make --help
Usage syntax:

        Generate makefile:
                cbp2make -in <project_file> [-cfg <configuration>] [-out <makefile>]
                         [-unix] [-windows] [-mac] [--all-os] [-targets "<target1>[,<target2>[, ...]]"]
                         [--flat-objects] [--flat-objpath] [--wrap-objects] [--wrap-options]
                         [--with-deps] [--keep-objdir] [--keep-outdir] [--target-case keep|lower|upper]
                         [--macros-case keep|lower|upper] [--quote-path auto|never|always]
                cbp2make -list -in <project_file_list> [-cfg <configuration>]
                         [-unix] [-windows] [-mac] [--all-os] [-targets "<target1>[,<target2>[, ...]]"]
                         [--flat-objects] [--flat-objpath] [--wrap-objects] [--wrap-options]
                         [--with-deps] [--keep-objdir] [--keep-outdir] [--target-case keep|lower|upper]

                         [--macros-case keep|lower|upper] [--quote-path auto|never|always]
        Manage toolchains:
                cbp2make --config toolchain --add [-unix|-windows|-mac] -chain <toolchain>
                cbp2make --config toolchain --remove [-unix|-windows|-mac] -chain <toolchain>

        Manage build tools:
                cbp2make --config tool --add [-unix|-windows|-mac] -chain <toolchain>
                         -tool <tool> -type <type> <tool options>
                cbp2make --config tool --remove [-unix|-windows|-mac] -chain <toolchain>
                         -tool <tool>

        Tool types:      pp=preprocessor as=assembler cc=compiler rc=resource compiler
                         sl=static linker dl=dynamic linker el=executable linker
                         nl=native linker
        Tool options (common):
                         -desc <description> -program <executable> -command <command_template>
                         -mkv <make_variable> -srcext <source_extensions> -outext <output_extension>
                         -quotepath <yes|no> -fullpath <yes|no> -unixpath <yes|no>
        Tool options (compiler):
                         -incsw <include_switch> -defsw <define_switch> -deps <yes|no>
        Tool options (linker):
                         -ldsw <library_dir_switch> -llsw <link_library_switch> -lpfx <library_prefix>
                         -lext <library_extension> -objext <object_extension> -lflat <yes|no>

        Manage platforms:
                cbp2make --config platform [-unix|-windows|-mac] [-pwd <print_dir_command>]
                         [-cd <change_dir_command>] [-rm <remove_file_command>]
                         [-rmf <remove_file_forced>] [-rmd <remove_dir_command>]
                         [-cp <copy_file_command>] [-mv <move_file_command>]
                         [-md <make_dir_command>] [-mdf <make_dir_forced>]
                         [-make <default_make_tool>]

        Manage global compiler variables:
                cbp2make --config variable --add [-set <set_name>] -name <var_name>
                         [-desc <description>] [-field <field_name>] -value <var_value>
                cbp2make --config variable --remove [-set <set_name>] [-name <var_name>]
                         [-field <field_name>]

        Manage options:
                cbp2make --config options --default-options "<options>"
                cbp2make --config show

        Common options:
                cbp2make --local        // use configuration from current directory
                cbp2make --global       // use configuration from home directory
                cbp2make --verbose      // show project information
                cbp2make --quiet        // hide all messages
                cbp2make --help         // display this message
                cbp2make --version      // display version information

user@brain:~$

インストールログ

user@brain:~$ apt show cbp2make
Package: cbp2make
Version: 147+dfsg-4
Priority: optional
Section: devel
Maintainer: Debian Science Team <debian-science-maintainers@lists.alioth.debian.org>
Installed-Size: 400 kB
Depends: libc6 (>= 2.4), libgcc-s1 (>= 3.5), libstdc++6 (>= 5.2), libtinyxml2.6.2v5
Homepage: https://sourceforge.net/projects/cbp2make/
Download-Size: 115 kB
APT-Sources: http://archive.debian.org/debian bullseye/main armel Packages
Description: Makefile generation tool for the Code::Blocks IDE
 cbp2make is a stand-alone build tool that allows you
 to generate makefile(s) for GNU Make out of Code::Blocks
 IDE project or workspace files.

user@brain:~$ sudo apt install cbp2make
[sudo] password for user:
Reading package lists... Done
Building dependency tree... Done
Reading state information... Done
The following NEW packages will be installed:
  cbp2make
0 upgraded, 1 newly installed, 0 to remove and 3 not upgraded.
Need to get 115 kB of archives.
After this operation, 400 kB of additional disk space will be used.
Get:1 http://archive.debian.org/debian bullseye/main armel cbp2make armel 147+dfsg-4 [115 kB]
Fetched 115 kB in 1s (91.0 kB/s)
Selecting previously unselected package cbp2make.
(Reading database ... 92070 files and directories currently installed.)
Preparing to unpack .../cbp2make_147+dfsg-4_armel.deb ...
Unpacking cbp2make (147+dfsg-4) ...
Setting up cbp2make (147+dfsg-4) ...
Processing triggers for man-db (2.9.4-2) ...

ser@brain:~$ cbp2make -in Bomberman.cbp -out Makefile
Starting cbp2make rev.147...
Using default configuration.
Loading file 'Bomberman.cbp': [DONE]
Generating makefile(s): Makefile: [DONE]
user@brain:~$


oneko X11猫(X11上で動作するマウスカーソルを追いかける猫を表示するデスクトップマスコット)

onelo(X11猫)は11上で動作するマウスカーソルを追いかける猫を表示するデスクトップマスコットです。

キャラがマウスカーソルが変化したネズミを追いかけて、追いつくと特定のアクションをしたのちに、眠りにつきます。

標準はマウスを追いかけるネコですが、オプションでいろいろなキャラに変更できます。
(ネコ、トラ、イヌ、BSDデーモン、(ccさくら)さくら、(ccさくら)知世)

上記公式サイトから、以下をダウンロードして、brainux上で解凍してインストールします。
current version for X Window System – [oneko-1.2.sakura.5.tar.gz]

マニュアルにも書いてありますが、Imakefileがありますのでxmkmf にて環境に合わせたMakefaileを生成して、ビルドします。

ビルド&インストール
tar xvf oneko-1.2.sakura.5.tar.gz
cd oneko-1.2.sakura.5
xmkmf -a
make
sudo make install

上記スクリーンショットは、oneko –tomoyo& を起動した後で、oneko –sakura& を起動した場合です。
すると、マウスカーソル(カード)を追いかける桜に知世がカメラを向けるというカオス原作再現な状況にできます。

インストールログ

user@brain:~/oneko$ tar xvf oneko-1.2.sakura.5.tar.gz
user@brain:~/oneko$ cd oneko-1.2.sakura.5


user@brain:~/oneko/oneko-1.2.sakura.5$ xmkmf -a
mv -f Makefile Makefile.bak
imake -DUseInstalled -I/usr/lib/X11/config
make Makefiles
make: Nothing to be done for 'Makefiles'.
make includes
make: Nothing to be done for 'includes'.
make depend
gccmakedep  --      -Dlinux -D__arm__ -D__arm32__ -U__arm -Uarm -D_POSIX_C_SOURCE=199309L                               -D_POSIX_SOURCE -D_XOPEN_SOURCE        -D_BSD_SOURCE -D_SVID_SOURCE                                 -D_LARGEFILE_SOURCE -D_FILE_OFFSET_BITS=64                                                           -DFUNCPROTO=15 -DNARROWPROTO   -DSHAPE   -- oneko.c


user@brain:~/oneko/oneko-1.2.sakura.5$ make
gcc -g -O2 -fno-strict-aliasing         -Dlinux -D__arm__ -D__arm32__ -U__arm -Uarm -D_POSIX_C_SOURCE=199309L                           -D_POSIX_SOURCE -D_XOPEN_SOURCE                                 -D_BSD_SOURCE -D_SVID_SOURCE                                 -D_LARGEFILE_SOURCE -D_FILE_OFFSET_BITS=64                                                   -DFUNCPROTO=15 -DNARROWPROTO   -DSHAPE    -c -o oneko.o oneko.c
In file included from /usr/include/arm-linux-gnueabi/sys/types.h:25,
                 from /usr/include/X11/Xlib.h:38,
                 from oneko.h:11,
                 from oneko.c:9:
/usr/include/features.h:187:3: warning: #warning "_BSD_SOURCE and _SVID_SOURCE are deprecated, use _DEFAULT_SOURCE" [-Wcpp]
  187 | # warning "_BSD_SOURCE and _SVID_SOURCE are deprecated, use _DEFAULT_SOURCE"
      |   ^~~~~~~
oneko.c:338:1: warning: return type defaults to ‘int’ [-Wimplicit-int]
  338 | GetResources()
      | ^~~~~~~~~~~~
oneko.c:437:1: warning: return type defaults to ‘int’ [-Wimplicit-int]
  437 | MakeMouseCursor()
      | ^~~~~~~~~~~~~~~
oneko.c:466:1: warning: return type defaults to ‘int’ [-Wimplicit-int]
  466 | SetupColors()
      | ^~~~~~~~~~~
oneko.c: In function ‘InitScreen’:
oneko.c:627:8: warning: extra tokens at end of #endif directive [-Wendif-labels]
  627 | #endif SHAPE
      |        ^~~~~
oneko.c: In function ‘Interval’:
oneko.c:745:5: warning: implicit declaration of function ‘pause’ [-Wimplicit-function-declaration]
  745 |     pause();
      |     ^~~~~
oneko.c: In function ‘DrawNeko’:
oneko.c:812:8: warning: extra tokens at end of #endif directive [-Wendif-labels]
  812 | #endif SHAPE
      |        ^~~~~
rm -f oneko
gcc -o oneko -g -O2 -fno-strict-aliasing       oneko.o -lXext -lX11   -lm
rm -f oneko._man
if test -z "true" ; then \
   cd `dirname oneko` && \
   ln -s `basename oneko.man` `basename oneko._man`; \
else \
             cpp -undef -traditional  -D__apploaddir__=/etc/X11/app-defaults -D__filemansuffix__=5x -D__osfilemansuffix__=5 -D__libmansuffix__=3x -D__oslibmansuffix__=3 -D__mansuffix__=1x -D__osmansuffix__=1 -D__syscallmansuffix__=2x -D__ossysmansuffix__=2 -D__gamemansuffix__=6x -D__osgamemansuffix__=6 -D__miscmansuffix__=7x -D__osmiscmansuffix__=7 -D__admmansuffix__=8x -D__osadmmansuffix__=8 -D__miscmansuffix__=7x -D__osmiscmansuffix__=7 -D__drivermansuffix__=4x -D__osdrivermansuffix__=4 -D__adminmansuffix__=8 -D__projectroot__=/usr -D__xconfigfile__=xorg.conf -D__xconfigdir__=/usr/lib/X11 -D__xlogfile__=Xorg -D__xservername__=Xorg -D__appmansuffix__=1x -D__xorgversion__="\"`echo 7 7 0 | sed -e 's/ /./g' -e 's/^/Version\\\ /'`\" \"X Version 11\"" -D__vendorversion__="`echo 7 7 0 | sed -e 's/ /./g' -e 's/^/Version\\\ /'` X.Org"  \
     < oneko.man | sed -e '/^#  *[0-9][0-9]*  *.*$/d'                   -e '/^#line  *[0-9][0-9]*  *.*$/d'                      -e '/^[         ]*XCOMM$/s/XCOMM/#/'                    -e '/^[         ]*XCOMM[^a-zA-Z0-9_]/s/XCOMM/#/'       -e '/^[  ]*XHASH/s/XHASH/#/'                     -e '/\@\@$/s/\@\@$/\\/' >oneko._man; \
fi


user@brain:~/oneko/oneko-1.2.sakura.5$ sudo make install
[sudo] password for user:
install -c   oneko /usr/bin/oneko
install in . done
user@brain:~/oneko/oneko-1.2.sakura.5$


user@brain:~$ oneko --help
oneko: Unknown option "--help".
Usage: oneko [<options>]

Options are:
-display <display>      : Neko appears on specified display.
-fg <color>             : Foreground color
-bg <color>             : Background color
-speed <dots>
-time <microseconds>
-idle <dots>
-name <name>            : set window name of neko.
-towindow               : Neko chases selected window.
-toname <name>          : Neko chases specified window.
-tofocus                : Neko runs on top of focus window
-rv                     : Reverse video. (effects monochrome display only)
-position <geometry>   : adjust position relative to mouse pointer.
-debug                 : puts you in synchronous mode.
-patchlevel            : print out your current patchlevel.
-neko Use neko bitmaps
-tora Use tora bitmaps
-dog Use dog bitmaps
-bsd_daemon Use bsd_daemon bitmaps
-sakura Use sakura bitmaps
-tomoyo Use tomoyo bitmaps
user@brain:~$

なお、GittHubにも同じバージョンとも思われるソースが上がっていますので、こちらからもインストールできます(見た感じソースやドキュメントの文字コードが変更されているだけのようです)。
ですが、Imakefileが入っていないので、先ほどの手順ではビルドできません。
README.md ドキュメントの通り、clangツールを使用してコンパイルするか、
Imakefileの代わりにCMakeLists.txtがありますので、cmakeコマンドでインストール可能です。(こちらのソースの場合、システムへのインストールは手動になるようです。)


macopix アクティブウィンドウに座るマスコットプログラム

MaCoPiXは、UNIX系OS(要X Window System)、Microsoft Windows(7以降)、macOS(10.9以降)で動作するマスコットプログラムです。

キャラクターは、マスコットデータ(おすわりマスコット)に登録されたメッセージやしぐさでランダムに動きます。
公式ページにあるキャラクターデータは、2003-2007年公開当時の人気キャラクター関係が多数登録されています。
([はやて×ブレード] [マリみて] [秋桜] [みずいろ] [Pia2] [月姫] [とらハ] [こみパ] [Kanon] [ONE])

公式ページ

インストールは、APT経由で可能です。
(データは新規サイトのものであれば、アプリからダウンロード可能)

sudo apt install macopix

以下のコマンドで起動が可能です。マスコットデータは、~/.macopix/に保存されている .mcpx ファイルになります。

macopix <マスコットデータ名> &

今回は公式データの中から、現状おそらく唯一の現役キャラであると思われる「高町なのは」を召喚します。

「高町なのは」は、「とらいあんぐるハート」グループにいますのでこちらのマスコットデータをダウンロードして設定します。
注)「魔法少女リリカルなのは」はもうすぐ新作TVシリーズも始まるTVシリーズ3作、映画4作やスピンオフ作品まで出ている人気作ですが、元もは大人向けゲームのファンディスクでのパロディ企画企画から派生したスピンオフ作品です(現在で元ネタよりも有名な作品となっているものの1つ)。

マスコットを右クリックして、Mascot Launcherで「とらいあんぐるハート1・2・3」から「高町なのは」を選択します。
このままだとコメントが文字化け(□)しますが、そこは設定変更で対応できます。

ただし、コンフィグ画面が大きいので、BrainのX画面では設定変更できないので、
PC等のX11画面上のターミナルから、
ssh -X <BrainuxのIPアドレス>

で、Brainuxにアクセスして、macopix &で起動します。
あとはマスコットを右クリックして、Configから「Resource」->「Font/Color」画面で、
「Default for Clock」と「Default for Balloon」のフォントを日本語文字列対応の「IPAGithic Regular」あたりに変更します。

その他の設定部分も必要に応じて変更してください。
もしこれでダメな場合は、Macotのほうのフォントも変更してみてください。

(かなり細かい調整ができますので、公式ページを参考にしてください。)

設定を変更したら、右下の「OK」をクリックして設定画面を終了させます。
あらためてマスコットを右クリックして、「Save」->「Save all」で保存します。

これで次回起動時に反映されますが、
起動方法のところで書いた通り、起動時のマスコット指定だけは毎回起動時オプションに指定が必要です。

インストールログ

user@brain:~$ apt show macopix
Package: macopix
Version: 3.4.0+dfsg.1-3
Priority: optional
Section: games
Maintainer: Ying-Chun Liu (PaulLiu) <paulliu@debian.org>
Installed-Size: 4,962 kB
Depends: libc6 (>= 2.28), libcairo2 (>= 1.10.0), libgdk-pixbuf-2.0-0 (>= 2.25.2), libglib2.0-0 (>= 2.35.9), libgtk-3-0 (>= 3.21.5), libpango-1.0-0 (>= 1.14.0), libssl1.1 (>= 1.1.0), libx11-6
Breaks: macopix-gtk2 (<< 3.4.0-1)
Replaces: macopix-gtk2 (<< 3.4.0-1)
Homepage: http://rosegray.sakura.ne.jp/macopix/
Tag: uitoolkit::gtk
Download-Size: 381 kB
APT-Sources: http://archive.debian.org/debian bullseye/main armel Packages
Description: Mascot Constructive Pilot for X
 MaCoPiX (Mascot Constructive Pilot for X) is a desktop mascot application for
 UNIX / X Window system. You can make window sitters, fixed desktop mascots,
 and, furthermore, desktop clock mascots, using MaCoPiX.


user@brain:~$ sudo apt install macopix
[sudo] password for user:
Reading package lists... Done
Building dependency tree... Done
Reading state information... Done
The following NEW packages will be installed:
  macopix
0 upgraded, 1 newly installed, 0 to remove and 2 not upgraded.
Need to get 381 kB of archives.
After this operation, 4,962 kB of additional disk space will be used.
Get:1 http://archive.debian.org/debian bullseye/main armel macopix armel 3.4.0+dfsg.1-3 [381 kB]
Fetched 381 kB in 1s (377 kB/s)
Selecting previously unselected package macopix.
(Reading database ... 63691 files and directories currently installed.)
Preparing to unpack .../macopix_3.4.0+dfsg.1-3_armel.deb ...
Unpacking macopix (3.4.0+dfsg.1-3) ...
Setting up macopix (3.4.0+dfsg.1-3) ...
Processing triggers for man-db (2.9.4-2) ...
user@brain:~$


(macopix:2313): Gtk-WARNING **: 15:50:50.278: cannot open display:
user@brain:~$ macopix --help
 macopix : Mascot Constructive Pilot for X   Ver3.4.0
  [usage] % macopix [options] (mascot file)
     -h, --help               : Print this message
     -c, --common-dir         : Print COMMON Directory
     -b, --biff               : Turn on the biff function
     -s, --signal             : Turn on the time signal
     -o, --offset offset[%]   : Set offset-value for Focus Following
     -r, --rcfile rc-file     : Set the resource file
     -m, --menu   menu-file   : Set the file for quick menu
     -mg --mag    magnify     : Set magnification percentage of mascot
     -i, --ip-style (0|1|2|3) : Set interpolation style for magnification
## For Installation
     -a, --auto-install       : Set mascot auto install ON
     -na --no-auto-install    : Set mascot auto install OFF
     -O, --over-write         : Permit to overwrite files in user dir
     --install-user-mascot (mascot)  : Mascot Installation to User Dir.
     --install-user-menu (menu)      : Menu Installation to User Dir.
     --install-common-mascot (mascot): Mascot Installation to Common Dir.
     --install-common-menu (menu)    : Menu Installation to Common Dir.
## For Socket Message
     --sockmsg                : Start MaCoPiX as Socket Message Receiver
     --message (text)         : Send Message to Socket Message Receiver
     --message-expire (time)  : Socket Message Expire Time[ms]
     --message-type-lump      : Force to Set Lump Sum Balloon
     --message-type-step      : Force to Set Stepping Balloon
     --message-step (frame)   : Stepping Interval Frame for SockeMsg
     -nc, --no-duet-click     : Duet Animation [Click] OFF
     -nr, --no-duet-random    : Duet Animation [Random] OFF

 ================== Installed Menus ==================
   !!! Common Directory - /usr/share/macopix/ - does not exist.

  !!! User Directory - /home/user/.macopix/ - does not exist.
user@brain:~$


Emi Clock  美少女コスプレ時計 Emi Clock

美少女コスプレ時計 Emi Clockは古のジョーク時計アプリです。
種類のかわいい文字盤と、26種類の衣装を選ぶことができるコスプレ時計です

公式サポートページ

X11版のソースコートのダウンロード先が公式ページからリンクされていますので、
こちらからダウンロードできます。

X11版 Emi Clock 2.0.2 
emiclock-2.0.2.tar.gz

インストールは、以下のような流れで行えます。
Imakefileがありますのでxmkmf にて環境に合わせたMakefaileを生成して、ビルドします。

cd
mkdir emiclock
cd emiclock/

wget https://ftp.vector.co.jp/11/78/1347/emiclock-2.0.2.tar.gz
tar zxvf emiclock-2.0.2.tar.gz
cd emiclock-2.0.2

xmkmf -a
make
sudo make install

ただうちの環境では、makeinstallすると、メニューの2段階目以降が表示されなくなりましたので、以下のリソースファイルをリネームして暫定で回避しています。

/etc/X11/app-defaults/EmiClock

/etc/X11/app-defaults/EmiClock.bk

インストールログ

user@brain:~$ mkdir emiclock
user@brain:~$ cd emiclock/

user@brain:~/emiclock$ wget https://ftp.vector.co.jp/11/78/1347/emiclock-2.0.2.tar.gz
--2025-11-30 16:55:04--  https://ftp.vector.co.jp/11/78/1347/emiclock-2.0.2.tar.gz
Resolving ftp.vector.co.jp (ftp.vector.co.jp)... 141.147.176.138
Connecting to ftp.vector.co.jp (ftp.vector.co.jp)|141.147.176.138|:443... connected.
HTTP request sent, awaiting response... 200 OK
Length: 308682 (301K) [application/gzip]
Saving to: ‘emiclock-2.0.2.tar.gz’
emiclock-2.0.2.tar. 100%[===================>] 301.45K  1.13MB/s    in 0.3s
2025-11-30 16:55:05 (1.13 MB/s) - ‘emiclock-2.0.2.tar.gz’ saved [308682/308682]
user@brain:~/emiclock$


user@brain:~/emiclock$ tar zxvf emiclock-2.0.2.tar.gz
emiclock-2.0.2/
emiclock-2.0.2/00.README
~
emiclock-2.0.2/sys/netaudio/audio.c
user@brain:~/emiclock$


user@brain:~/emiclock$ cd emiclock-2.0.2


user@brain:~/emiclock/emiclock-2.0.2$ xmkmf -a
mv -f Makefile Makefile.bak
imake -DUseInstalled -I/usr/lib/X11/config
make Makefiles
make: Nothing to be done for 'Makefiles'.
make includes
make: Nothing to be done for 'includes'.
make depend
gccmakedep  --      -Dlinux -D__arm__ -D__arm32__ -U__arm -Uarm -D_POSIX_C_SOURCE=199309L                               -D_POSIX_SOURCE -D_XOPEN_SOURCE        -D_BSD_SOURCE -D_SVID_SOURCE                                 -D_LARGEFILE_SOURCE -D_FILE_OFFSET_BITS=64                                                           -DFUNCPROTO=15 -DNARROWPROTO      -- main.c EmiClock.c menu.c gengine.c        gdata_cbase.c gdata_char.c gdata_cmono.c credit.c credit_mono.c        sound.c rcfile.c misc.c CascadeMenu.c version.c
user@brain:~/emiclock/emiclock-2.0.2$


uuser@brain:~/emiclock/emiclock-2.0.2$ make
rm -f main.o
gcc -c -g -O2 -fno-strict-aliasing         -Dlinux -D__arm__ -D__arm32__ -U__arm -Uarm -D_POSIX_C_SOURCE=199309L                                -D_POSIX_SOURCE -D_XOPEN_SOURCE                                 -D_BSD_SOURCE -D_SVID_SOURCE                                 -D_LARGEFILE_SOURCE -D_FILE_OFFSET_BITS=64                                           -DFUNCPROTO=15 -DNARROWPROTO     -DSIGTYPE=void main.c
In file included from /usr/include/arm-linux-gnueabi/sys/types.h:25,
                 from /usr/include/X11/Xlib.h:38,
                 from /usr/include/X11/Intrinsic.h:53,
                 from main.c:44:
~
fi
user@brain:~/emiclock/emiclock-2.0.2$


user@brain:~/emiclock/emiclock-2.0.2$ sudo make install
[sudo] password for user:
install -c   emiclock /usr/bin/emiclock
cp resources/Xaw/EmiClock.ad .
install -c -m 0444 EmiClock.ad /etc/X11/app-defaults/EmiClock
install in . done
user@brain:~/emiclock/emiclock-2.0.2$


user@brain:~/emiclock/emiclock-2.0.2$ ./emiclock --help
./emiclock: Unknown command line option "--help".
Usage: ./emiclock [options]
        -toolkitoption ...
        -nossound
        -nosave
        -noscache
        -noshape
        -perfect
        -grayscale
        -gray4
        -mono
        -help
        -version
user@brain:~/emiclock/emiclock-2.0.2$

xhime 常駐姫ちゃん (X11上で動作するデスクトップマスコット的なアニメーションソフト)

xhimeはX11上で動作するデスクトップマスコット的なアニメーションソフトです。
常駐姫ちゃんとも呼ばれています。(オリジナルはPC98版で、それをX11に移植したものですす。)
(「姫ちゃんのリボン」という昔のアニメのキャラクターをモデルにしたスクトップマスコットです。)

インストールは、aptなどでのインストールはできず、ソースからコンパイルする必要があります。
xhime – 常駐姫ちゃん X Window System 版 – からソース アーカイブを入手し、
解凍したものをBrainxに転送して、コンパイルするのですが、
まずは Imakefileから Makefileを生成します。
xmkmf -a

user@brain:~/xhime/xhime151/xhime1.51$ xmkmf -a
mv -f Makefile Makefile.bak
imake -DUseInstalled -I/usr/lib/X11/config
make Makefiles
make: Nothing to be done for 'Makefiles'.
make includes
make: Nothing to be done for 'includes'.
make depend
gccmakedep  --      -Dlinux -D__arm__ -D__arm32__ -U__arm -Uarm -D_POSIX_C_SOURCE=199309L                              -D_POSIX_SOURCE -D_XOPEN_SOURCE                          -D_BSD_SOURCE -D_SVID_SOURCE                                 -D_LARGEFILE_SOURCE -D_FILE_OFFSET_BITS=64                                                                   -DFUNCPROTO=15 -DNARROWPROTO   -DSHAPE  -DAUDIO_DEVICE=\"/dev/audio\"  -DMAILSPOOL_PATH=\"/usr/spool/mail/\" -DXHIMEDAT_PATH=\"/usr/lib/X11/xhime\" -DXSYSV_SIG   -- xhime.c

In file included from xhime.c:28:
/usr/lib/gcc/arm-linux-gnueabi/10/include/varargs.h:4:2: error: #error "GCC no longer implements <varargs.h>."
    4 | #error "GCC no longer implements <varargs.h>."
      |  ^~~~~
/usr/lib/gcc/arm-linux-gnueabi/10/include/varargs.h:5:2: error: #error "Revise your code to use <stdarg.h>."
    5 | #error "Revise your code to use <stdarg.h>."
      |  ^~~~~
user@brain:~/xhime/xhime151/xhime1.51$

エラーになりました。
非常に古いソフトウェアなので、ソースの修正が必要なようです。

理由は、現在非推奨になっている”varargs.h”というヘッダファイルを使っていて、
最新の環境ではコンパイルできないためです。

このため以下の部分を修正します。(varargs.hをstdarg.hに変更する関係で、該当するソース部分も変更する必要があります。)

28行目付近

include <varargs.h>

include <stdarg.h>

 
118行付近

void
Error(va_alist)
va_dcl
{
va_list args;
char *fmt;

fprintf(stderr, "%s: ", ProgramName);

va_start(args);
fmt = (char *)va_arg(args, char *);
vfprintf(stderr, fmt, args);
va_end(args);

fprintf(stderr, "\n");
}

void
ErrorExit(va_alist)
va_dcl
{
va_list args;
char *fmt;

fprintf(stderr, "%s: ", ProgramName);

va_start(args);
fmt = (char *)va_arg(args, char *);
vfprintf(stderr, fmt, args);
va_end(args);

fprintf(stderr, "\n");
exit(1);
}

void Error(const char *fmt, …)
{
    va_list args;
    fprintf(stderr, "%s: ", ProgramName);
    va_start(args, fmt);
    vfprintf(stderr, fmt, args);
    va_end(args);
    fprintf(stderr, "\n");
}

void ErrorExit(const char *fmt, …)
{
    va_list args;
    fprintf(stderr, "%s: ", ProgramName);
    va_start(args, fmt);
    vfprintf(stderr, fmt, args);
    va_end(args);
    fprintf(stderr, "\n");
    exit(1);
}

改めて、コンパイルします。
(Makeでワーニングが出てますが、まずはコンパイルを目指します。)
xmkmf -a
make
make install

実行は ”xhime &” でマスコット(姫ちゃん)が表示されます。

マウスの左ボタンで移動ができます。右ボタンで終了します。 中央のボタンを押すと、表示ウィンドウを一番上に(Raise)します。 デフォルトでは Return キーに反応してアニメーションが変化します。

が、Returnキーを押しても、アニメーション(いけいけGoGOジャーンプ)してくれません。
コンパイル時のワーニング部分にキー入力判別のあたりがあるのでこの辺は後日対応したいですね。(warning: ‘XKeycodeToKeysym’ is deprecated [-Wdeprecated-declarations])

xhime -use_vm &  で起動すると、姫ちゃんの周りにウィンドウ枠が表示されますが、
その中であればEnterキーに反応しますので、動作確認にどうぞ。

(2026/1/17追記)
xtermからxhimeを起動したところ、Enterキーに反応しました。
Brainux標準のlxterminal から起動すると反応しないので、
何か条件があるのかもしれません。


インストールログ

user@brain:~/xhime/xhime151/xhime1.51$ xmkmf -a
mv -f Makefile Makefile.bak
imake -DUseInstalled -I/usr/lib/X11/config
make Makefiles
make: Nothing to be done for 'Makefiles'.
make includes
make: Nothing to be done for 'includes'.
make depend
gccmakedep  --      -Dlinux -D__arm__ -D__arm32__ -U__arm -Uarm -D_POSIX_C_SOURCE=199309L                              -D_POSIX_SOURCE -D_XOPEN_SOURCE                          -D_BSD_SOURCE -D_SVID_SOURCE                                 -D_LARGEFILE_SOURCE -D_FILE_OFFSET_BITS=64                                                                   -DFUNCPROTO=15 -DNARROWPROTO   -DSHAPE  -DAUDIO_DEVICE=\"/dev/audio\"  -DMAILSPOOL_PATH=\"/usr/spool/mail/\" -DXHIMEDAT_PATH=\"/usr/lib/X11/xhime\" -DXSYSV_SIG   -- xhime.c


user@brain:~/xhime/xhime151/xhime1.51$ make
gcc -g -O2 -fno-strict-aliasing         -Dlinux -D__arm__ -D__arm32__ -U__arm -Uarm -D_POSIX_C_SOURCE=199309L          -D_POSIX_SOURCE -D_XOPEN_SOURCE                          -D_BSD_SOURCE -D_SVID_SOURCE                                 -D_LARGEFILE_SOURCE -D_FILE_OFFSET_BITS=64                                                                   -DFUNCPROTO=15 -DNARROWPROTO   -DSHAPE  -DAUDIO_DEVICE=\"/dev/audio\"  -DMAILSPOOL_PATH=\"/usr/spool/mail/\" -DXHIMEDAT_PATH=\"/usr/lib/X11/xhime\" -DXSYSV_SIG    -c -o xhime.o xhime.c
In file included from /usr/include/arm-linux-gnueabi/sys/types.h:25,
                 from /usr/include/X11/Xlib.h:38,
                 from xhime.c:13:
/usr/include/features.h:187:3: warning: #warning "_BSD_SOURCE and _SVID_SOURCE are deprecated, use _DEFAULT_SOURCE" [-Wcpp]
  187 | # warning "_BSD_SOURCE and _SVID_SOURCE are deprecated, use _DEFAULT_SOURCE"
      |   ^~~~~~~
xhime.c: In function ‘CheckEvent’:
xhime.c:944:3: warning: ‘XKeycodeToKeysym’ is deprecated [-Wdeprecated-declarations]
  944 |   XKeycodeToKeysym(MyDisplay, event.xkey.keycode, ix) );
      |   ^~~~~~~~~~~~~~~~
In file included from xhime.c:13:
/usr/include/X11/Xlib.h:1687:15: note: declared here
 1687 | extern KeySym XKeycodeToKeysym(
      |               ^~~~~~~~~~~~~~~~
xhime.c:946:7: warning: ‘XKeycodeToKeysym’ is deprecated [-Wdeprecated-declarations]
  946 |       if (XKeycodeToKeysym(MyDisplay, event.xkey.keycode, ix) == ActionKeysym){
      |       ^~
In file included from xhime.c:13:
/usr/include/X11/Xlib.h:1687:15: note: declared here
 1687 | extern KeySym XKeycodeToKeysym(
      |               ^~~~~~~~~~~~~~~~
xhime.c: In function ‘ResetChild’:
xhime.c:1333:3: warning: implicit declaration of function ‘wait’ [-Wimplicit-function-declaration]
 1333 |   wait(&stat);
      |   ^~~~
xhime.c: In function ‘OpenData’:
xhime.c:411:31: warning: ‘strncat’ specified bound 256 equals destination size [-Wstringop-overflow=]
  411 |    if (STR_TAIL(path) != '/') strncat(path, "/", sizeof(path));
      |                               ^~~~~~~~~~~~~~~~~~~~~~~~~~~~~~~~
xhime.c: In function ‘GetMailPath’:
xhime.c:581:36: warning: ‘strncat’ specified bound 256 equals destination size [-Wstringop-overflow=]
  581 |     if (STR_TAIL(MailPath) != '/') strncat(MailPath, "/", sizeof(MailPath));
      |                                    ^~~~~~~~~~~~~~~~~~~~~~~~~~~~~~~~~~~~~~~~
xhime.c: In function ‘OpenData.part.0’:
xhime.c:412:4: warning: ‘strncat’ specified bound 256 equals destination size [-Wstringop-overflow=]
  412 |    strncat(path, fname, sizeof(path));
      |    ^~~~~~~~~~~~~~~~~~~~~~~~~~~~~~~~~~
xhime.c:419:4: warning: ‘strncat’ specified bound 256 equals destination size [-Wstringop-overflow=]
  419 |    strncat(path, fname, sizeof(path));
      |    ^~~~~~~~~~~~~~~~~~~~~~~~~~~~~~~~~~
xhime.c: In function ‘GetMailPath’:
xhime.c:582:5: warning: ‘strncat’ specified bound 256 equals destination size [-Wstringop-overflow=]
  582 |     strncat(MailPath, (char *)getenv("USER"), sizeof(MailPath));
      |     ^~~~~~~~~~~~~~~~~~~~~~~~~~~~~~~~~~~~~~~~~~~~~~~~~~~~~~~~~~~
rm -f xhime
gcc -o xhime -g -O2 -fno-strict-aliasing       xhime.o -lXext -lX11   -lm
user@brain:~/xhime/xhime151/xhime1.51$


user@brain:~/xhime/xhime151/xhime1.51$ sudo make install
[sudo] password for user:
install -c   xhime /usr/bin/xhime
+ mkdir -p /usr/lib/X11/xhime
+ install -c -m 0444 rh110.xhm /usr/lib/X11/xhime
install in . done
user@brain:~/xhime/xhime151/xhime1.51$


user@brain:~/xhime/xhime151/xhime1.51$ xhime --help
xhime version 1.51 by `Shochan' Shoichi-NAKAYAMA (C) 1994-1996,1998
  Original: `rhime.exe' by MSP-Iris (C) 1994
usage: xhime [<options>] [<filename.xhm>]
  options are:
    -help              Print usage message and exit
    -display <host:n>  Specify the host and display number
    -geometry <+X+Y>   Specify the geometry
    -key <keyname>     Specify the keysym of the special key
    -nokey             Don't check for the special key
    -noshape           Don't use shape extension
    -bg <color>        Specify the background color
    [-N | -B | -D]     Draw in normal, brighter, or darker colors
    -<statenumber>     Specify the action state
    -use_wm            Use window manager
    -audio <audiofile> Specify audio file
     [-audev <dev>|-aucmd <cmd>]
                        Specify audio device or command
     -showaudio         the same as ``-aucmd showaudio''
    -biff              Enable biff feature
     -file <mailfile>   Specify the mail file
     -update <sec>      Specify the mail polling interval
     -nobell            Don't ring the bell when mails arrive


xfishtank X のルートで様々な熱帯魚が泳ぐ壁紙上の水槽が楽しめます。

X のルートを水槽にして、様々な熱帯魚が泳ぐ壁紙上の水槽を楽しめます。

インストールは、APT経由で可能です

sudo apt instsll xfishtank

実行は、” xfishtank & “で起動できます。
デフォルトでは、泡の数:32、魚の数:10です。
必要であれば、オプションで、変更できます。
 

インストールログ

user@brain:~$ apt show xfishtank
Package: xfishtank
Version: 2.5-1+b1
Priority: optional
Section: games
Source: xfishtank (2.5-1)
Maintainer: Marius Gavrilescu <marius@ieval.ro>
Installed-Size: 449 kB
Depends: libc6 (>= 2.10), libimlib2 (>= 1.4.5), libx11-6
Homepage: http://jim.rees.org/computers/xfishtank.html
Tag: game::toys, interface::graphical, interface::x11, role::program,
 scope::utility, uitoolkit::xlib, use::entertaining, x11::screensaver
Download-Size: 77.7 kB
APT-Sources: http://archive.debian.org/debian bullseye/main armel Packages
Description: turns your X root into an aquarium
 Enjoy an animated aquarium background with a variety of tropical fish
 swimming in it on your screen.


user@brain:~$ sudo apt install xfishtank
Reading package lists... Done
Building dependency tree... Done
Reading state information... Done
The following additional packages will be installed:
  libid3tag0 libimlib2
The following NEW packages will be installed:
  libid3tag0 libimlib2 xfishtank
0 upgraded, 3 newly installed, 0 to remove and 3 not upgraded.
Need to get 293 kB of archives.
After this operation, 1,129 kB of additional disk space will be used.
Do you want to continue? [Y/n] Y
Get:1 http://archive.debian.org/debian bullseye/main armel libid3tag0 armel 0.15.1b-14 [29.9 kB]
Get:2 http://archive.debian.org/debian bullseye/main armel libimlib2 armel 1.7.1-2+deb11u1 [185 kB]
Get:3 http://archive.debian.org/debian bullseye/main armel xfishtank armel 2.5-1+b1 [77.7 kB]
Fetched 293 kB in 2s (125 kB/s)
Selecting previously unselected package libid3tag0:armel.
(Reading database ... 73715 files and directories currently installed.)
Preparing to unpack .../libid3tag0_0.15.1b-14_armel.deb ...
Unpacking libid3tag0:armel (0.15.1b-14) ...
Selecting previously unselected package libimlib2:armel.
Preparing to unpack .../libimlib2_1.7.1-2+deb11u1_armel.deb ...
Unpacking libimlib2:armel (1.7.1-2+deb11u1) ...
Selecting previously unselected package xfishtank.
Preparing to unpack .../xfishtank_2.5-1+b1_armel.deb ...
Unpacking xfishtank (2.5-1+b1) ...
Setting up libid3tag0:armel (0.15.1b-14) ...
Setting up libimlib2:armel (1.7.1-2+deb11u1) ...
Setting up xfishtank (2.5-1+b1) ...
Processing triggers for man-db (2.9.4-2) ...
Processing triggers for libc-bin (2.31-13+deb11u11) ...


user@brain:~$ xfishtank --help
xfishtank: invalid option -- '-'
usage: xfishtank
                [-c color]  background color
                [-b limit]  number of bubbles (default 32)
                [-f limit]  number of fish (default 10)
                [-i mult]   move interval (default 0.2)
                [-r rate]   move frequency (default 0.2)
                [-m num]    median cut to this many colors
                [-C num]    use only this many color cells
                [-d]        clip fish, swim on root window
                [-p file]   fish swim on picture in file
                [host:display]
user@brain:~$


xfireworks Xのルートウィンドウ上で花火が打ちあがります

XFireworks は、X のルートウィンドウで花火大会を開催します。
これは、日本語の “花火大会” の模倣です。 日本で夏に行われる上に有名なイベントであり、川辺で行われます。花火の種類も豊富で,とってもきれいです.

起動は、「xfireworks &」です。
「xfireworks -no-direct-draw &」で起動すると花火の動きがスムーズになる気がするけど、
安定しているのは、「xfireworks &」のほうな気もします。

オプションで、打ち上げ頻度や残像の残り方などのパラメータが変更できるようで、
好みにあわせてみてください(詳細は、man xfireworksを参照してください。)

インストールは、APT経由で可能です

sudo apt instsll xfireworks


XMascot Xの画面上で揺れるマスコットを表示する プログラム (2025/12/14追加)

XMascot のページ

XMascot は、X Window System の画面上に可愛いマスコットを表示する プログラムです。
重力加速度と鎖の長さから振り子運動を計算して、マスコットを揺らしてくれます。
標準の重力加速度は 0.17G(地球加速度の1/6,月面上と同じ)、減衰係数0.01です。
調整すると、揺れ方が変わります。

詳しくは、公式ページのFAQをご確認ください。

標準では、動物シリーズ(10種類)、星座シリーズ(12種類)のキャラクターが用意されています。

また、このアプリ公開当時はいくつかの外部データが公開されていたのですが、
ページごと消えているところも多く、現時点で探してみると以下の2つが見つかりました。
「同級生2」マスコット
「下級生」マスコットのページ

インストールは、aptなどでのインストールはできず、ソースからコンパイルする必要があります。今回は、追加データも含めてインストールしてみます。
途中、そのままではエラーになるので、文字コードの変換やソースなどの一部変更等を行っています。

$ cd
$ mkdir XMascot
$ cd XMascot
$ wget https://cclub-flying.dsl.gr.jp/products/xmascot/xmascot2.6a.tar.gz
$ wget https://cclub-flying.dsl.gr.jp/products/xmascot/dokyu2/dokyu2mas.tar.gz
$ wget https://cclub-flying.dsl.gr.jp/~sage/bin/kakyumas.tar.gz

$ tar zxvf xmascot2.6a.tar.gz
$ cd xmascot2.6a
$ cd mascots
$ tar zxvf ../../dokyu2mas.tar.gz
$ mv dokyusei2 dokyu2
$ mkdir kakyu
$ cd kakyu
$ tar zxvf ../../../kakyumas.tar.gz
$ cd ../../

$ find ./ -type f -not -name ‘.gif’ -not -name ‘.mag’ -not -name ‘.au’ -not -name ‘.raw’ | xargs -i nkf -w -Lu –overwrite {};

$ vi Imakefile

XMascot.ad:: XMascot.ad.sed
sed ‘s!SOUND_COMMAND_NAME!$(SOUND_COMMAND)!;s!XMASDIR!$(XMASDIR)!’ XMascot.ad.sed > $@
sed ‘s!menu1!menu1!’ mascots/zodiac/zodiac.Xdefaults >> $@
XCOMM sed ‘s!menu1!menu2!’ mascots/dokyu2/dokyu2.Xdefaults >> $@
XCOMM sed ‘s!menu1!menu3!’ mascots/nadesico/nadesico.Xdefaults >> $@
XCOMM sed ‘s!menu1!menu4!’ mascots/kakyu/kakyu.Xdefaults >> $@
XCOMM sed ‘s!menu1!menu5!’ mascots/eva/eva.Xdefaults >> $@

XMascot.ad:: XMascot.ad.sed
sed ‘s!SOUND_COMMAND_NAME!$(SOUND_COMMAND)!;s!XMASDIR!$(XMASDIR)!’ XMascot.ad.sed > $@
sed ‘s!menu1!menu1!’ mascots/zodiac/zodiac.Xdefaults >> $@
sed ‘s!menu1!menu2!’ mascots/dokyu2/dokyu2.Xdefaults >> $@
XCOMM sed ‘s!menu1!menu3!’ mascots/nadesico/nadesico.Xdefaults >> $@
sed ‘s!menu1!menu4!’ mascots/kakyu/kakyu.Xdefaults >> $@
XCOMM sed ‘s!menu1!menu5!’ mascots/eva/eva.Xdefaults >> $@

——————-

japanese/XMascot.ad:: japanese/XMascot.ad.sed
sed ‘s!SOUND_COMMAND_NAME!$(SOUND_COMMAND)!;s!XMASDIR!$(XMASDIR)!’ japanese/XMascot.ad.sed > $@
sed ‘s!menu1!menu1!’ mascots/zodiac/zodiac.Xdefaults.jp >> $@
XCOMM sed ‘s!menu1!menu2!’ mascots/dokyu2/dokyu2.Xdefaults.jp >> $@
XCOMM sed ‘s!menu1!menu3!’ mascots/nadesico/nadesico.Xdefaults.jp >> $@
XCOMM sed ‘s!menu1!menu4!’ mascots/kakyu/kakyu.Xdefaults.jp >> $@
XCOMM sed ‘s!menu1!menu5!’ mascots/eva/eva.Xdefaults.jp >> $@

japanese/XMascot.ad:: japanese/XMascot.ad.sed
sed ‘s!SOUND_COMMAND_NAME!$(SOUND_COMMAND)!;s!XMASDIR!$(XMASDIR)!’ japanese/XMascot.ad.sed > $@
sed ‘s!menu1!menu1!’ mascots/zodiac/zodiac.Xdefaults.jp >> $@
sed ‘s!menu1!menu2!’ mascots/dokyu2/dokyu2.Xdefaults.jp >> $@
XCOMM sed ‘s!menu1!menu3!’ mascots/nadesico/nadesico.Xdefaults.jp >> $@
sed ‘s!menu1!menu4!’ mascots/kakyu/kakyu.Xdefaults >> $@
XCOMM sed ‘s!menu1!menu5!’ mascots/eva/eva.Xdefaults.jp >> $@

$ vi xmascot.h

enum{ NODAT, STRING, ID, SYMBOL, RESERVE } TokenType;

typedef enum{ NODAT, STRING, ID, SYMBOL, RESERVE } TokenType;

$ xmkmf -a
$ make
$ sudo make install

$ sudo cp mascots/dokyu2/.mag /usr/lib/X11/xmascot/
$ sudo cp mascots/kakyu/.mag /usr/lib/X11/xmascot/
$ sudo chmod +r /usr/lib/X11/xmascot/*.*

これで、一通りインストールが完了しました。それぞれ、以下で起動できます。

$ xmascot &
$ xmascot -name dokyu2 &     #同級生2マスコット
$ xmascot -name kakyu &     #下級生マスコット


(参考)
マスコットデータ フォルダ:          
  /usr/lib/X11/xmascot/
Xリソースファイル(Unicode:日本語リソース):  
  /usr/lib/X11/en_US.UTF-8/app-defaults/XMascot
Xリソースファイル(Default:デフォルトリソース):
  /etc/X11/app-defaults/XMascot


もし、xmascot &で起動して全てのキャラクターをメニューから選択したいのであれば、Xリソースファイルを、以下のように置換してみてください。
(viでは、:%s/dokyu2/menu2./g のように操作すると、文字列の一括置換ができます。)

dokyu2* -> menu2. kakyu -> *menu3.

*menu2.popup.label: -> *menu2.title:
*menu3.popup.label: -> *menu3.title:

*menusNum: 2 -> *menusNum: 4


xdesktopwaves Xのルートウィンドウ上で水の波をシミュレーション

xdesktopwaves は X ウィンドウシステムを水面下におくセルオートマトンです。 ウィンドウとマウスが海上の船のようになり、各動きが水の波を引き起こします。 雨を触らせたり嵐で水をかきみだしたりすることもできます。

xfishtank、XMascot(下で紹介)と一緒に動かすと、結構いい感じになります。
(XMascotの減衰係数を0にするのがコツで、これにより波が発生しつつけます。)

インストールは、APT経由で可能です

sudo apt instsll xdesktopwaves


dclock X Window System 向けの柔軟な表示設定が可能なデジタル時計

Dclock の主要機能は、その描画方法における柔軟性の高さです。
“date” からの出力による “Wednesday, 3rd Jan” のような表示さえ可能です。
Dclock はアラーム設定もサポートしています

表示はいろいろとカスタマイズ可能です(例)。

dclock                   12時間表示(デフォルト)
dclock -m                 24時間表示
dclock -date “%p %Y-%m-%d (%a) “ 下にAM/PM表示 年-月-日(曜日省略形)を表示
dclock -m -date “%Y-%m-%d (%a)” -dateup 24時間&上に年-月-日(曜日省略形)を表示
dclock -m -seconds            24時間&秒を表示する

インストールは、APT経由で可能です

sudo apt instsll dclock


mxclock 絵柄が綺麗な時計です.

公式サイト

普通の時計です。サイズ変更は出来ません。
マウスの左右ボタンで文字盤(4種類)を切替えられます。
起動時オプションで秒針も表示できます(-sec)

    <起動時のオプション>
            -sec
                    秒針を表示します。
            -p patternnumber
                    時計の図柄を選択します。-p 1 という感じで使います。
                    使用できるパターンは0〜3の4通りです。
            -display hostname:display[.screen]
                    表示するディスプレイの指定をします。
            -geometry {+-}xoff{+-}yoff
                    表示位置の指定をします。

    <実行中の操作>
            マウスの左右ボタンで文字盤を切替えられます。

インストールは、aptなどでのインストールはできず、ソースからコンパイルする必要があります。

$ cd
$ mkdir mxclock
$ cd mxclock/
$ wget https://ftp.vector.co.jp/05/92/1347/mxclock.taz
$ tar xf mxclock.taz
$ cd mxclock.d
$ xmkmf -a
$ make
$ sudo make install


SunClock 時刻と地理データを表示可能な可愛い時計

sunclock は、世界地図を表示し、昼の地域を明るく、夜の地域を暗く描画 することにより、地球に太陽光が照らされた地域を示します。 デフォルトのタイムゾーンに対するローカルタイムを示すだけでなく、 主要な都市の GMT 時間、法定時および太陽時、都市の緯度経度、 地球上の任意の二点間の距離を表示できます。 Sunclock は、経線、緯線、南北回帰線および極圏を表示できます。 時間の進み方を加速し、四季の移り変わりを表示する組み込み機能を 有しています。

メインは世界地図表示ですね。都市の選択とかはやり方がわからなくて、できていませんが
世界地図だけでも環境インテリア的にはいいかと。

(詳細は、man sunclockを参照してください。)

インストールは、APT経由で可能です
sudo apt instsll sunclock


Xantfarm X11用のシンプルなアリ農場

公式サイト:xantfarm

Xantfarmはアリ塚をシミュレートし、ルートウィンドウに表示します。
アリの世界には三つの元素があります:空気です。 アリは空気中を移動し、を掘り起こし、それを砂として落とします。 アリには3つの行動があります:さまよい運搬する、パニックです。 プログラムにはいくつかの簡単な確率が組み込まれています これは、放浪運搬の間の切り替えを制御します。 パニックになるのを見るには、カーソルでアリをつついてみてください。

実行例
xsetroot -solid Brown
xantfarm ~/.xantfarm.checkpoint -num 10 -c 150 -air Cyan -sand Coral -ant Black

定期的に状況を保存して、次回起動時に続きから開始できるようにします
(5000サイクル間隔で保存なので標準の15cpsだと5分に1回保存します・)
-num:100 (アリの数 標準は10)
-c :150 (1秒間に実行するサイクル(CPS) 標準は15)
あと、空(-air),砂(-sand),アリ(-ant)の色も変えられます。
地面の色は、X11のルートウィンドウの色になりますので、別で指定します。
xsetroot -solid Brown

色指定は、X11 color names – Wikipediaが参考になります。

終了後に画面が残るので、xsetroot コマンドで初期化してください。
 

インストールは、ソースからのビルドになります。

$ cd
$ mkdir xantfarm
$ cd xantfarm
$ wget https://www.acme.com/software/xantfarm/xantfarm_14Aug2014.tar.gz
$ tar zxf xantfarm_14Aug2014.tar.gz
$ cd xantfarm
$ xmkmf -a
$ make
$ sudo make install


———-

XMangekyou X11で動く万華鏡です

公式サイト:XMangekyou

万華鏡です.
変化しながらくるくるまわる映像はとってもきれいですが,トリップしすぎて
まわりに怪しがられないように気をつけてください.
壁紙に張り付けることもできます.
ある条件で,アニメーションがはじまっちゃったりします。

いろいろ表示のカスタマイズができるようです。
詳しくは、”nkf README.euc | more”で確認してください。

アニメーションが始める条件については、どこにも記載がありませんが
ぜひソースファイルを読んで、条件を探してみてください。
場所探すのはそんなに難しくはありません。あとは条件を満たしてみてください。


インストールは、ソースからのビルドになります。

$ cd
$ mkdir XMangekyou
$ cd XMangekyou
$ wget https://kozos.jp/myfreesoft/xmangekyou-2.0.1.tar.gz
$ tar zxf xmangekyou-2.0.1.tar.gz
$ cd xmangekyou-2.0.1

・configure.hを変更します。
#define XMANGEKYOU_LIB “/usr/X11R6/lib/X11/XMangekyou/”

#define XMANGEKYOU_LIB “/usr/local/lib/X11/XMangekyou/”

・Makefileを変更します。
XMANGEKYOU_PREFIX = /usr/X11R6

XMANGEKYOU_PREFIX = /usr/local

$ make
$ sudo make install


———-

Xshodow「書道」のアプリケーションです.

公式サイト:XShodou

XShodou は,UNIX の X Window System 上で動作する, 「書道」のアプリケーションです. マウスのドラッグを繰り返すことにより,だれでも気がるに「書道」 が楽しめます.

Shodou は FreeBSD 用ですが,Tck/Tk で書いてあるので,
UNIX ならば それほど苦労することなく,移植できるでしょう.
実行には Tck/Tk が必要です.
詳しい使用方法は,インストール後に man xshodou をご覧ください.

起動は、テーミナル上で「xshodou」で起動します。

マウスで筆をシミュレーションして書道をすることができます。
マウスドラッグで筆の移動。
マウスの右クリックを押すと筆を下に下げます(=線が太くなる)、
逆にマウスの左クリックを押すと筆を上にあげます(=線が細くなる)

なので残念ながらタッチパネルだけで操作すると1筆書きになっちゃいます。

インストールは上に書かれているように、Tck/Tk で書かれているので、
環境に合わせてファイルを書き替えてからインストールするだけです
(ビルドは不要)。

$ cd
$ mkdir XShodou
$ cd XShodou
$ wget https://kozos.jp/myfreesoft/xshodou-1.11.tar.gz
$ tar zxf xshodou-1.11.tar.gz
$ cd xshodou-1.11
$ sudo apt install tcl tk

$ vi Makefile
XSHODOU_PREFIX = /usr/X11R6

XSHODOU_PREFIX = /usr/local

$ vi xshodou
#!/usr/local/bin/wish

#!/usr/bin/wish

set title_file /usr/X11R6/lib/X11/XShodou/xshodou-title.xbm

set title_file /usr/local/lib/X11/XShodou/xshodou-title.xbm

$ sudo make install


————

bb AAlib に基づくアスキーアートデモ


https://packages.debian.org/bullseye/bb

起動:bb

本パッケージには、移植性の高いアスキーアートグラフィックライブラリである、 AAlib を用いたアスキーアートの ‘高品質な AV デモ’ が含まれます。 このデモは、テキスト端末又は X11 端末で表示可能です。

Brain上で、アスキーアートアニメーションデモが表示できます。
(6-7分程度)

なお最初にサウンド有効するか聞かれますが、Brainでは音楽と表示が同期されず、音楽だけが流れ続けますので、サウンドは無効にしましょう。
(サウンドはUSBサウンドデバイス経由ですが、クリアに再生されていました。)


 インストール:APT経由 ”sudo apt install bb”


———-

○ gamine 幼児向けインタラクティブゲーム

https://packages.debian.org/bullseye/games/gamine

起動:gamine

Gamineは、キーボード操作ができない2歳児向けに設計されたゲームです。

子供はマウスを使って画面上に色付きの点や線を描くことができます。
タッチパネルでも操作できますが、ゆっくり操作したほうがいい感じで書けます。


 インストール:APT経由 ”sudo apt install gamine”


———- 

〇 golly ハッシュライフアルゴリズムを使用したライフゲームシミュレーター

https://packages.debian.org/bullseye/games/golly

起動:golly

Gollyは、任意の大きさのセルグリッドを用いてコンウェイのライフゲームをシミュレートします。オプションでハッシュライフアルゴリズムを使用することができ、これにより巨大なパターンの世代数を高速に計算したり、一度に多くの世代先まで計算したりすることが可能になります。

Gollyは、セルオートマトンを表示および編集するためのグラフィカルインターフェースを提供します。コピー&ペースト、ズーム、自動調整、複数レイヤー、およびパターンの異なる領域をウィンドウの異なる領域で同時に表示する機能をサポートしています。

Gollyは、RLE、Life 1.05/1.06、dblife、およびmacrocellファイル形式からパターンを読み込むことができます。また、画像をLifeパターンとして解釈することも可能です。Gollyには、Life用語集のコピーを含む統合ヘルプ機能が備わっています。

Gollyは、8セル近傍を持つ2次元セルオートマトンに関する他のルールもサポートしており、1次元セルオートマトンもサポートしています。


 インストール:APT経由 ”sudo apt install golly”


———- 


Brainで「痛デスクトップ」?

上記のアプリを組み合わせると、こんなbrainで「痛デスクトップ環境」が作れます。

痛デスクトップ レシピ
xeyes &
emiclock &
oneko -tomoyo &
oneko -sakura &
xhime &
macopix trh_nanoha.mcpx &
xpenguins –all -n 10 -m 150 &
Terminai 内アプリ: top

アクアリウム時計 レシピ
xfishtank &
xdesktopwaves &
XMascot &      # 蟹、重力加速度 0.02G、減衰係数 0.00
dclock -m &
xclock &


他、試してみてほしいアプリありましたら、コメントで

教えてください

Views: 755

カテゴリー: Brainux | コメントする

電子辞書Brainをいじる (3) BrainuxでX11(X window system)とUSBサウンドデバイスで遊ぶ

BrainuxとX環境への接続について

Brainuxには、標準でX環境(X11[X window system])が利用できます。

X環境(X11[X Window system])の1つの特徴として、アプリケーションと表示するシステムが独立していて、アプリケーションを動かすサーバと、画面描画するサーバが別でも構わないことです。

X11はクライアント/サーバモデルで提供しているのですが、
あくまで画面描写が主体となっているため、一般的な認識とは逆になります。

・ここでの「クライアント」は、GUIを表示するプログラム(Xアプリケーション)になります。
・ここでの「サーバー」は、クライアント(Xアプリケーション)からの要求を受け付けて、画面に表示する内容を管理するプログラム(X11[X window system])になります。

Brainの画面でX11アプリケーションを利用するには、いくつかのパターンがあります。

  1. Brainを直接操作して、Brain上でXアプリケーションを起動し、Brainの画面で操作する
  2. Brainから他PCにsshでログインして、他PC上でXアプリケーションを起動し、Brainの画面で操作する
  3. 他PCからsshでBrainにログインして、Brain上でXアプリケーションを起動し、Brainの画面で操作する
  4. 他PCでログインして、他PC上でXアプリケーションを起動し、Brainの画面で操作する

起動操作Xアプリケーション実行Xアプリ表示(操作)
1.Brainを直接操作して、Brain上でXアプリケーションを起動し、Brainの画面で操作するBrainBrainBrain
2.Brainから他PCにsshでログインして、他PC上でXアプリケーションを起動し、Brainの画面で操作するBrain->他PC他PCBrain
3.他PCからsshでBrainにログインして、Brain上でXアプリケーションを起動し、Brainの画面で操作する他PC->BrainBrainBrain
4.他PCでログインして、他PC上でXアプリケーションを起動し、Brainの画面で操作する他PC他PCBrain

ここでは、以下を想定して、それぞれの方法での接続例を紹介します。

brain(IP:192.168.29.11) Brainux環境
他PC(IP:192.168.29.19) X11環境を持ったLinuxを想定

今回の環境的には、USBホストアダプタを使って、USBネットワークアダプタ経由でネットワークに接続しています。
(USBでホストPCを経由してネットワークに接続する(USB Ethernet Gadget)だと、他PCからBrainへの通信について制限が出てくるので、ホストPCがX11導入したLinuxであればいけるかもといったところ)


1.Brainを直接操作して、Brain上でXアプリケーションを起動し、Brainの画面で操作する

起動操作Xアプリケーション実行Xアプリ表示(操作)
BrainBrainBrain

これがBrainuxでの一般的な操作になります。
Brain上でBrainuxを起動する際には、「xinitrc」か「jvm」を選択して起動すれば、X環境が立ち上がります。

あとは、terminalを起動し、Xアプリケーションを起動してください。
DISPLAY環境変数にはすでに:0は設定されているので、明示的に設定する必要はありません。(xeyesは、マウスカーソルの方向を向く目玉のアプリケーションです。)

xeyes &

user@brain:~$ printenv DISPLAY
:0
user@brain:~$ xeyes &
[1] 1714

その他デフォルトで、x11-appsというパッケージが導入されているようです。
xeyes(目玉アプリ)以外にも、oclock(アナログ時計),xclock(アナログ時計),calc(電卓)、xedit(エディタ)、xmore(ビューア)あたりは普通に使えると思います。

x11-apps

 - ビットマップ画像を操作するツール atobm, bitmap および bmtoa
 - 多面体を動画表示するデモプログラム ico
 - グラフィカルな時計 oclock および xclock
 - render拡張の実装を検査するプログラム rendercheck
 - ウィンドウの不透明度属性を設定するツール transset
 - 新着メールを通知するツール xbiff
 - 関数電卓デスクトップアクセサリ xcalc
 - カットアンドペーストしたテキスト選択部分の管理ツール xclipboard
 - システムコンソールメッセージを監視する xconsole
 - PNG から X のカーソルファイルを作成するツール xcursorgen
 - ditroff 出力用ビューア xditview
 - X 用のシンプルなテキストエディタ xedit
 - 二つの目がポインタを追いかけるデモプログラム xeyes
 - グラフィックデモ xgc
 - システム平均負荷モニタ xload
 - X のロゴを表示するデモプログラム xlogo
 - X 画面の一部を拡大する xmag
 - マニュアルページブラウザ xman
 - テキストページャ xmore
 - X セッションのウィンドウダンプ ("スクリーンショット") を取る
  ユーティリティ xwd
 - xwd によって作成されたウィンドウダンプのビューア xwud
 - X Window System 上でのグラフィック性能をベンチマークするツール x11perf 
  および x11perfcomp (Xmarkは入っていないようです)

2.Brainから他PCにsshでログインして、他PC上でXアプリケーションを起動し、Brainの画面で操作する

起動操作Xアプリケーション実行Xアプリ表示(操作)
Brain->他PC他PCBrain

Brainから、他PCにSSHログインして起動したXアプリケーションを、Brainの画面に出す方法です。
Terminalを立ち上げて、sshでログインする際に、-X オプションを設定することで、アクセス元のX環境に画面表示のリダイレクトをしてくれます。(DISPLAY環境変数は自動設定されます。)

ssh -X user@192.168.29.19
xeyes &

user@brain:~$ ssh -X user@192.168.29.19
user@192.168.29.19's password:
Welcome to Linuxfx 11.2 22.04.6 LTS (GNU/Linux 5.15.0-67-generic x86_64)

 * Documentation:  https://help.ubuntu.com
 * Management:     https://landscape.canonical.com
 * Support:        https://ubuntu.com/advantage

 * Introducing Expanded Security Maintenance for Applications.
   Receive updates to over 25,000 software packages with your
   Ubuntu Pro subscription. Free for personal use.

     https://ubuntu.com/pro
Last login: Sat Nov  8 17:21:53 2025 from 192.168.29.11

nasubi@nasubi-vmwarevirtualplatform:~$ printenv DISPLAY
localhost:10.0

nasubi@nasubi-vmwarevirtualplatform:~$ xeyes &
[1] 11904

3.PCからsshでBrainにログインして、Brain上でXアプリケーションを起動し、Brainの画面で操作する

起動操作Xアプリケーション実行Xアプリ表示(操作)
他PC->BrainBrainBrain

他PCからsshでBrainにログインして、Brain上でXアプリケーションを起動する方法です。
他PCはWindows上でもputty等でのsshアクセスでもかまいません。問題ありません。
Brainのキーボードで直接入力すると、特殊なキーバインドの違いや反応の悪さなどで、他PCでアプリの起動をする場合等に使用できます(デバック向けかな)。

以下の通り、画面表示先を指定する、DISPLAY環境変数を手動で設定すればOKです。

export DISPLAY=:0
xeyes &

user@pc1:~$ ssh user@192.168.29.11

login as: user
user@192.168.29.11's password:
Linux brain 5.4.149-gaa3edcd5fcbc #2 PREEMPT Mon Dec 23 11:34:55 UTC 2024 armv5tejl

  ____            _
 |  _ \          (_)
 | |_) |_ __ __ _ _ _ __  _   ___  __
 |  _ <| '__/ _` | | '_ \| | | \ \/ /
 | |_) | | | (_| | | | | | |_| |>  <
 |____/|_|  \__,_|_|_| |_|\__,_/_/\_\

           by Brain Hackers

   https://github.com/brain-hackers

Last login: Sun Nov  9 15:00:04 2025 from 192.168.29.19
user@brain:~$ printenv DISPLAY

user@brain:~$ export DISPLAY=:0

user@brain:~$ printenv DISPLAY
:0

user@brain:~$ xeyes &
[1] 1770

4.他PCでログインして、他PC上でXアプリケーションを起動し、Brainの画面で操作する

起動操作Xアプリケーション実行Xアプリ表示(操作)
他PC他PCBrain

これは、Xアプリケーションの実行ウィンドウのみを、Braiに表示させるものです。
ただし、Brain上で、X11側で、Xアプリケーションからの接続を許可させる必要があるため、通常と違う手順が必要です。

接続許可は、xhosts というコマンドを利用します。
ただし、Brainux標準では、xhostは導入されていないようです。

user@brain:~$ xhost
bash: xhost: command not found

まずは、BrainにXアプリケーションからの接続を許可すためのコマンド(xhost)を導入します。
(一度導入すれば、大丈夫です。)

sudo apt update
sudo apt show x11-xserver-utils

user@brain:~$ sudo apt update
Hit:1 http://archive.debian.org/debian bullseye InRelease
Hit:2 https://packagecloud.io/brainhackers/brainux/any any InRelease
Reading package lists... Done
Building dependency tree... Done
Reading state information... Done
1 package can be upgraded. Run 'apt list --upgradable' to see it.


user@brain:~$ sudo apt show x11-xserver-utils
Package: x11-xserver-utils
Version: 7.7+8
Priority: optional
Section: x11
Maintainer: Debian X Strike Force <debian-x@lists.debian.org>
Installed-Size: 476 kB
Depends: libc6 (>= 2.26), libice6 (>= 1:1.0.0), libx11-6, libxaw7, libxcursor1 (>> 1.1.2), libxext6, libxi6, libxmu6, libxmuu1, libxrandr2 (>= 2:1.5.0), libxrender1, libxt6, libxxf86vm1, cpp
Suggests: nickle, cairo-5c, xorg-docs-core
Conflicts: iceauth, sessreg, xgamma, xhost, xmodmap, xrandr, xrdb, xrefresh, xrgb, xset, xsetmode, xsetpointer, xsetroot, xstdcmap, xvidtune
Breaks: arandr (<< 0.1.9)
Replaces: iceauth, sessreg, xbase-clients (<< 1:7.3), xgamma, xhost, xmodmap, xrandr, xrdb, xrefresh, xrgb, xset, xsetmode, xsetpointer, xsetroot, xstdcmap, xutils (<< 1:7.2), xvidtune
Tag: implemented-in::c, interface::commandline, role::program,
 uitoolkit::TODO, x11::xserver
Download-Size: 158 kB
APT-Sources: http://archive.debian.org/debian bullseye/main armel Packages
Description: X server utilities
 An X client is a program that interfaces with an X server (almost always via
 the X libraries), and thus with some input and output hardware like a
 graphics card, monitor, keyboard, and pointing device (such as a mouse).
 .
 This package provides a miscellaneous assortment of X Server utilities
 that ship with the X Window System, including:
  - iceauth, a tool for manipulating ICE protocol authorization records;
  - rgb;
  - sessreg, a simple program for managing utmp/wtmp entries;
  - xcmsdb, a device color characteristic utility for the X Color Management
    System;
  - xgamma, a tool for querying and setting a monitor's gamma correction;
  - xhost, a very dangerous program that you should never use;
  - xmodmap, a utility for modifying keymaps and pointer button mappings in X;
  - xrandr, a command-line interface to the RandR extension;
  - xrdb, a tool to manage the X server resource database;
  - xrefresh, a tool that forces a redraw of the X screen;
  - xset, a tool for setting miscellaneous X server parameters;
  - xsetmode and xsetpointer, tools for handling X Input devices;
  - xsetroot, a tool for tailoring the appearance of the root window;
  - xstdcmap, a utility to selectively define standard colormap properties;
  - xvidtune, a tool for customizing X server modelines for your monitor.


user@brain:~$ sudo apt install x11-xserver-utils
Reading package lists... Done
Building dependency tree... Done
Reading state information... Done
Suggested packages:
  nickle cairo-5c xorg-docs-core
The following NEW packages will be installed:
  x11-xserver-utils
0 upgraded, 1 newly installed, 0 to remove and 1 not upgraded.
Need to get 158 kB of archives.
After this operation, 476 kB of additional disk space will be used.
Get:1 http://archive.debian.org/debian bullseye/main armel x11-xserver-utils armel 7.7+8 [158 kB]
Fetched 158 kB in 1s (127 kB/s)
Selecting previously unselected package x11-xserver-utils.
(Reading database ... 44310 files and directories currently installed.)
Preparing to unpack .../x11-xserver-utils_7.7+8_armel.deb ...
Unpacking x11-xserver-utils (7.7+8) ...
Setting up x11-xserver-utils (7.7+8) ...
Processing triggers for man-db (2.9.4-2) ...


user@brain:~$ xhost
access control enabled, only authorizaed clients cat connect

次に、BrainでBrainuxを起動する際に、「shell」で起動してください。
(そのまま「xinitrc」か「jvm」で起動してしまうと、X接続用のポート(:0の場合6000)が閉じているため接続できません。)

shellが起動したら、以下のコマンドでXを起動します。

user@brain:~$ stratx -- -listen tcp

Brain上でXが起動したら、terminalを起動して、アクセス許可を設定します(X起動毎に設定が必要です。)
(今回は、”192.168.29.19″からのアクセスを許可するものとします。)

xhost +192.168.29.19

(なお「xhost +」とすると、すべての接続を許可する設定になってしまいます。セキュリティ的には非推奨になります。)
+はBrainのキーボードでは、「シフト+記号+F」ですが、入力がしずらい場合があります。

user@brain:~$ xhost
access control enabled, only authorizaed clients cat connect
SI:localuser:user

user@brain:~$ xhost +192.168.29.19
192.168.29.19 being added to access contol list

user@brain:~$ xhost
access control enabled, only authorizaed clients cat connect
INET:192.168.29.19
SI:localuser:user

ここまで終われば、他PC(Linux)でTerminalを立ち上げて、
DISPLAY環境変数を上書き設定します。
(BraiのIPは192.168.29.11とした場合)

export DISPLAY=192.168.29.11:0
xeyes &

user@pc1:~$ printenv DISPLAY
:0

user@pc1:~$ export DISPLAY=192.168.29.11:0

user@pc1:~$ printenv DISPLAY
192.168.29.11:0

user@pc1:~$ xeyes &


X環境への接続についての補足

上記の接続の組合せでも、X環境を利用することができます。
例えば、3の後に2をやることで、疑似的に4の接続にすることも可能です。
(4.の特殊なXnの立ち上げや設定が不要)

起動操作Xアプリケーション実行Xアプリ表示(操作)
他PC->Brain->他PC他PCBrain

2.Brainから他PCにsshでログインして、他PC上でXアプリケーションを起動し、Brainの画面で操作する
4.他PCでログインして、他PC上でXアプリケーションを起動し、Brainの画面で操作する

ssh user@192.168.29.11

export DISPLAY=:0
ssh -X nasubi@192.168.29.19

xeyes &

user@pc1:~$ ssh user@192.168.29.11

user@brain:~$ export DISPLAY=:0
user@brain:~$ ssh -X nasubi@192.168.29.19

user@pc1:~$ xeyes &

実際にやってみると、他PC上でXアプリケーションを起動する以下の方法では、
速度的にも問題なくアプリケーションを利用することができます。

これらは、俗にいう「シンクライアント」運用になります。
別PCに処理をさせて、結果のみBrainに表示させ、
BrainにUSBキーボードとマウスを付ければ、ハンドヘルドPCの出来上がりです。

また、これまでの説明の中のサーバ指定を逆にすれば、別サーバのX画面に、Braiux上で起動したアプリケーションを表示することもできますが、ここでは割愛します。

難点をいれば、現状Sound再生はされないといったところぐらいでしょうか・・・

参考
ローカルからリモートのXサーバにウィンドウを飛ばす


xterm の設定変更について(Xリソースファイルの管理)

lxterminaiは 40MB程度と結構メモリを消費するので、
メモリ消費量が比較的少ない(8MB)ターミナルとして
xtermも使えるようにしておきます。

ただxtermのデフォルトでは、白地に黒文字で目が痛いので
黒地に白文字に変更するためには、
xtermの設定変更として、Xのリソースファイルに追記します。

Xのリソースファイルは、アプリごとに以下のフォルダにまとめられています。
/etc/X11/app-defaults/

xtermの場合、/etc/X11/app-default/XTerm に追記します。

黒地に白文字に変更するには、ファイルの最後に、以下の行を追加します。

$ sudo vi /etc/X11/app-defaults/XTerm
xterm*reverseVideo:on

なお、ユーザ単位での設定では一般的に
~/.Xresourcesに追加するように書かれている資料もありますが、
Brainuxでは、このファイルを参照する様にはなっていないので、
もしユーザ単位でリソースファイルを切り替えたいのであれば、
~/.xprofileに、以下のような行を追加してみてください。
起動時に、~/.Xresourcesが読み込みされるようになります。

$ vi ~/.Xresources
xtermreverseVideo:on
x-terminal-emulatorreverseVideo:on

$ vi ~/.xprofile
xrdb -merge ~/.Xresources

起動時にフォントのワーニングが出る場合は、フォントをインストールします。
$ sudo apt install xfonts-base xfonts-100dpi xfonts-75dpi

$ sudo apt install x11-xserver-utils
$ xset +fp /usr/share/fonts/X11/misc
$ xset fp rehash


JWMのメニューにアプリケーション(xterm)に追加する

現状JWMのメニューには、Terminal(lxterminal)しかアプリが登録されていないので、
xtermを追加してみます。

調べてみると、JWMのコンフィグは、以下にありました。
/etc/jwm/system.jwmrc

なお、ユーザごとにカスタマイズしたいのであれば、
先ほどのファイルを、~/.jwmrcにコピーすれば、これらの設定が優先的に使われます。

/etc/jwm/system.jwmrcファイルの先頭部分を確認してみると、
以下のようになっていました。

<?xml version=”1.0″?>
<JWM>
<!– The root menu. –>
<RootMenu onroot=”12″> <Include>/etc/jwm/debian-menu</Include>
<Program icon=”terminal.png” label=”Terminal”>lxterminal</Program>
<Separator/>
<Program icon=”lock.png” label=”Lock”> xlock -mode blank </Program>
<Separator/>
<Restart label=”Restart” icon=”restart.png”/>
<Exit label=”Exit” confirm=”true” icon=”quit.png”/>
</RootMenu>

ここで、メニューに、xtermの定義を追加してみます。
ついでに、Includeの行の下に<Separator/>も追加しています。
<Program label=”xterm”>xterm</Program>

$ sudo vi /etc/jwm/system.jwmrc

<Include>/etc/jwm/debian-menu</Include>
<Program icon=”terminal.png” label=”Terminal”>lxterminal</Program>
<Separator/>
 ↓
<Include>/etc/jwm/debian-menu</Include>
<Separator/>
<Program icon=”terminal.png” label=”Terminal”>lxterminal</Program>
<Program label=”xterm”>xterm</Program>
<Separator/>

設定に間違いがないか、以下のコマンドでチェックします。
$ jwm -p

最初は /etc/jwm/debian-menu ファイルがないため、そこは失敗しますが、
今回はその分はエラーでOKです。それ以外にエラーが出ないことを確認します。

では以下のコマンドで、設定をリロードします。
$ jwm -reload

すると、xtermが追加されました。

xtermをクリックすると、、定義したxtermが起動しました。


OSに登録されたアプリケーションをJWMに表示する

BrainuxはDebian11ベースのOSですので、DebianにAptコマンドでアプリをインストールすると、以下のフォルダにアプリケーション登録ファイル(*.desktop)が登録されています。
/usr/share/applications

この登録ファイルを元に自動でJWMの設定ファイルに変換してくれるツールを導入します
xdgmenumaker

$ cd
$ mkdir xdgmenumaker
$ cd xdgmenumaker
$ git clone https://github.com/gapan/xdgmenumaker.git
$ cd xdgmenumaker/
$ sudo apt install txt2tags
$ make
$ pip install pyxdg

もし、pip install pyxdgがエラーになった場合は、以下に置き換えてください
(Debian 12 以降でpipが禁止されているため)
$ sudo apt install python3-xdg

$ sudo make install
$ sudo touch /etc/jwm/debian-menu
$ sudo chmod 666 /etc/jwm/debian-menu
$ xdgmenumaker -n -i -f jwm > /etc/jwm/debian-menu

もし、xdgmenumaker を実行したときに、”import gi”とエラーになったときは、以下を実行してください。
$ sudo apt install python3-gi python3-gi-cairo gir1.2-gtk-3.0

dbind-WARNING **: のワーニングが出た場合は、
無視して大丈夫です(Debian13環境だと出るそうです)。
出さないようにするは、以下のようにファイルの最後に追記してください。
(反映には、再ログインが必要です。)
$ sudo vi /etc/environment
NO_AT_BRIDGE=1

実行に成功したら、以下のコマンドで、設定をリロードします。
$ jwm -reload

すると、apt経由でインストールしたアプリケーションの分のメニューが追加されました。


ただ、この状態だとaptでアプリを追加しても自動でメニューへの反映がされません。
JWM起動時に自動的に反映させてもいいのですが、起動してからJWMが操作できるまでにかなり時間がかかるため、「メニューの反映」をreload menuとして登録して、手動で登録できるようにします(アイコンが不要であれば-iオプションを消すとMenu動作が軽くなります)。

$ sudo vi /etc/jwm/reloadjwmmenu

#!/bin/sh
NO_AT_BRIDGE=1 xdgmenumaker -n -i -f jwm > /etc/jwm/debian-menu
jwm -reload
exit

$ sudo chmod 755 /etc/jwm/reloadjwmmenu


作成したスクリプトをsystem.jwmrcに登録します。
<Program label=”ReloadMenu”>sh /etc/jwm/reloadjwmmenu</Program>

ついでに、VirtualKeybordも追加しておきました。
これで「.profile」で自動起動しなくてもよくなります。
<Program label=”VirtualKeybord”>xvkbd</Program>

$ sudo vi /etc/jwm/system.jwmrc

<!– The root menu. –>
<RootMenu onroot=”12″>
<Include>/etc/jwm/debian-menu</Include>
<Separator/>
<Program icon=”terminal.png” label=”Terminal”>lxterminal</Program>
<Program label=”Xterm”>xterm</Program>
<Program label=”VirtualKeybord”>xvkbd</Program>
<Separator/>
<Program icon=”lock.png” label=”Lock”>
xlock -mode blank
</Program>
<Separator/>
<Program label=”ReloadMenu”>sh /etc/jwm/reloadjwmmenu</Program>
<Restart label=”Restart” icon=”restart.png”/>
<Exit label=”Exit” confirm=”true” icon=”quit.png”/>
</RootMenu>

これで、ReloadMenuをクリックすれば、メニューの反映が行われます。

なお、標準ではxlockが入っていないので、不要であれば、Lockの行は消してください。
多分もっといい方法がありそうだけど、とりあえず動いたということで良しとします。

今は、Lockの行の代わりに、以下のように「OS Reboot」を設定すると、
JWMから再起動できるようにしています。

$ sudo vi /etc/jwm/system.jwmrc

<!– The root menu. –>
<RootMenu onroot=”12″>
<Include>/etc/jwm/debian-menu</Include>
<Separator/>
<Program icon=”terminal.png” label=”Terminal”>lxterminal</Program>
<Program label=”Xterm”>xterm</Program>
<Program label=”VirtualKeybord”>xvkbd</Program>
<Separator/>
<Program label=”OS Reboot”>
/usr/bin/xterm -e sh -c ‘echo run Reboot;sudo reboot’
</Program>

<Separator/>
<Program label=”JWM ReloadMenu”>sh /etc/jwm/reloadjwmmenu</Program>
<Restart label=”JWM Restart” icon=”restart.png”/>
<Exit label=”Exit” confirm=”true” icon=”quit.png”/>
</RootMenu>


X11画面のスクリーンショットを撮る方法

X11画面のスクリーンショットは、「scrot」コマンドで取得できるようです。

scrotは、以下のコマンドでインストールできます。
$ sudo apt install scrot

コマンドオプションでいろいろ取得方法をカスタマイズできるようです。

scrot     画面全体のスクリーンショットを撮ります。
scrot -ub   タイトルバー+アクティブウインドウのスクリーンショットを撮ります。
scrot -sb   カーソルの形が+に変わるので、
       その後ウインドウをクリックすると、タイトルバー+クリックしたウインドウ
       のスクリーンショットを撮ります。(ウインドウ範囲外だと全画面)
       左クリック長押しで範囲指定すると、その範囲のスクリーンショット
       を撮ります。

また、scrot -d 10 のように、-dで秒数を指定すると、10秒後に取得されます。

スクリーンショット取得先は、、
指定がなければ、カレントディレクトリに
「2025-12-18-204617_854x480_scrot.png」といった名前で保存されます。

出力先を指定する場合は、以下のようにしてみてください。
scrot ‘%Y-%m-%d-%H%M%S_$wx$h_scrot.png’ -e ‘mv $f ~/screenshot/’

これで~/screenshot/に「2025-12-18-212923_854x480_scrot.png」のような名前で保存されます。

また、リモートPCからssh -X(Xリダイレクトオプション付)でログインしている場合、
リモート側でscrot コマンドを実行して、遠隔実行することも可能です。
ssh -Xでログインしていない場合は -D :0 のようにBrain側のDiskplay番号を追加でOKです。


これでスクリーンショットが取れるようになりましたが、毎回コマンドを打つのも面倒です。
今回は、JWMのキーバインド設定をして、USBキーボードの”PrtSc(PrintScreen)”キーでスクリーンショットが取得できるように設定してみます。
参考:JWM設定)(参考:JWMConfig

sudo vi /etc/jwm/system.jwmrc

ファイルの最後のほうに、キーバインド設定がありますので、ここの最後に追記します
(mask設定は、Shift=”S”,Ctrl=”C”,ALT=”A”が対応します。ただSAとしたときにALTの認識に不具合出る場合もあるそうなのでこの辺は調整が必要かもしれません。)

<Key key=”Print”>exec:scrot ‘%Y-%m-%d-%H%M%S_$wx$h_scrot.png’ -e ‘mv $f ~/screenshot/'</Key>
<Key mask=”A” key=”Print”>exec:scrot -ub ‘%Y-%m-%d-%H%M%S_$wx$h_scrot.png’ -e ‘mv $f ~/screenshot/'</Key>
<Key mask=”CA” key=”Print”>exec:scrot -sb ‘%Y-%m-%d-%H%M%S_$wx$h_scrot.png’ -e ‘mv $f ~/screenshot/'</Key>

これで、以下のようなキーバインドになります。
(ただし、jwmのメニュー表示中は、このキーバインドは聞かないようです。)

・PrintScreen      で全画面のスクリーンショット
・ALT+PrintScreen   でアクティブウインドウのスクリーンショット
・Ctrl+ALT+PrintScreen でウィンドウ選択 or 範囲指定のスクリーンショット

もし、Brainのキーボードでスクリーンショットを撮りたいのなら、
キー指定を <Key mask=”CA” key=”s”> とかにすればCtrl+ALT+”s”がキーバインドになります。(“exec:xdotool key ctrl+alt+Print”に割当でキー入力のエミュレートでもいけます)[参考]

JWMのコンフィグファイルを変更したら、jwm -pで構成チェックをした後で、
JWMメニューのRestartをクリックするか、jwm -restart コマンドを実行で設定が反映されます。


あと今回気づいたのですが、JWMのキーバインド使えば
タッチパネルでの右クリック対応はxbindkeys使わなくてもいけますね
これで500kbぐらいメモリ消費量を削減できます。
sudo vi /etc/jwm/system.jwmrc 追加&JWMリスタート
<Key mask=”CA” key=”z”>exec:xdotool click 3</Key>

vi ~/.xprofile 一部コメント化
# bash xbind_keys_autostart

/etc/jwm/system.jwmrc 例


BrainuxでのSound再生について

標準の環境では、Brainuxではサウンドデバイスを認識していないため、Sound再生されません。
Brain に内蔵されているスマートアンプには大きく分けて Yamaha 系と Rohm 系があるとのことで、現状Brainux上でのSound再生は、現状解析中で非対応だそうです。

試しにUSBサウンドデバイスを付けてみたところ、OSとしては認識しました。

Bus 001 Device 004: ID 0d8c:000c C-Media Electronics, Inc. Audio Adapter

ターミナル上でのコマンド上では使用できましたが、一部ノイズが乗ります。

user@brain:~$ sudo lsusb
Bus 001 Device 003: ID 0b95:772b ASIX Electronics Corp. AX88772B
Bus 001 Device 004: ID 0d8c:000c C-Media Electronics, Inc. Audio Adapter
Bus 001 Device 002: ID 05e3:0610 Genesys Logic, Inc. Hub
Bus 001 Device 001: ID 1d6b:0002 Linux Foundation 2.0 root hub


user@brain:~$ aplay -l
**** List of PLAYBACK Hardware Devices ****
card 0: Set [C-Media USB Headphone Set], device 0: USB Audio [USB Audio]
  Subdevices: 1/1
  Subdevice #0: subdevice #0


user@brain:~$ aplay -L
null
    Discard all samples (playback) or generate zero samples (capture)
default
    Default Audio Device
sysdefault
    Default Audio Device
hw:CARD=Set,DEV=0
    C-Media USB Headphone Set, USB Audio
    Direct hardware device without any conversions
plughw:CARD=Set,DEV=0
    C-Media USB Headphone Set, USB Audio
    Hardware device with all software conversions
default:CARD=Set
    C-Media USB Headphone Set, USB Audio
    Default Audio Device
sysdefault:CARD=Set
    C-Media USB Headphone Set, USB Audio
    Default Audio Device
front:CARD=Set,DEV=0
    C-Media USB Headphone Set, USB Audio
    Front output / input
surround21:CARD=Set,DEV=0
    C-Media USB Headphone Set, USB Audio
    2.1 Surround output to Front and Subwoofer speakers
surround40:CARD=Set,DEV=0
    C-Media USB Headphone Set, USB Audio
    4.0 Surround output to Front and Rear speakers
surround41:CARD=Set,DEV=0
    C-Media USB Headphone Set, USB Audio
    4.1 Surround output to Front, Rear and Subwoofer speakers
surround50:CARD=Set,DEV=0
    C-Media USB Headphone Set, USB Audio
    5.0 Surround output to Front, Center and Rear speakers
surround51:CARD=Set,DEV=0
    C-Media USB Headphone Set, USB Audio
    5.1 Surround output to Front, Center, Rear and Subwoofer speakers
surround71:CARD=Set,DEV=0
    C-Media USB Headphone Set, USB Audio
    7.1 Surround output to Front, Center, Side, Rear and Woofer speakers
iec958:CARD=Set,DEV=0
    C-Media USB Headphone Set, USB Audio
    IEC958 (S/PDIF) Digital Audio Output
dmix:CARD=Set,DEV=0
    C-Media USB Headphone Set, USB Audio
    Direct sample mixing device


user@brain:~$ amixer -c0
Simple mixer control 'Headphone',0
  Capabilities: pvolume pswitch pswitch-joined
  Playback channels: Front Left - Front Right
  Limits: Playback 0 - 151
  Mono:
  Front Left: Playback 44 [29%] [-20.13dB] [on]
  Front Right: Playback 44 [29%] [-20.13dB] [on]
Simple mixer control 'Mic',0
  Capabilities: pvolume pvolume-joined cvolume cvolume-joined pswitch pswitch-joined cswitch cswitch-joined
  Playback channels: Mono
  Capture channels: Mono
  Limits: Playback 0 - 32 Capture 0 - 16
  Mono: Playback 23 [72%] [34.36dB] [off] Capture 0 [0%] [0.00dB] [on]
Simple mixer control 'Auto Gain Control',0
  Capabilities: pswitch pswitch-joined
  Playback channels: Mono
  Mono: Playback [on]


user@brain:~$ speaker-test -t sine -c 2 -f 220

speaker-test 1.2.4

Playback device is default
Stream parameters are 48000Hz, S16_LE, 2 channels
Sine wave rate is 220.0000Hz
Rate set to 48000Hz (requested 48000Hz)
Buffer size range from 2048 to 16384
Period size range from 1024 to 1024
Using max buffer size 16384
Periods = 4
was set period_size = 1024
was set buffer_size = 16384
 0 - Front Left
 1 - Front Right
^CTime per period = 4.344596
user@brain:~$

user@brain:~$ aplay sample.wav

ALSAを使っているaplayではノイズが出るにせよ音が鳴るし、
amixerや、alsamixerも動いています。

なお、plusaudioは初期未導入っぽいので、この辺が影響してそうです。
この辺もう少しし調べたいのですが、正直勉強不足です。

まあ、USBサウンドデバイスつけないといけないから、おま環ではあります。

この辺が参考になるのだろうか?
Linux の Audio 機能をコマンドラインで設定
X11 Forwarding で音声を再生する

音楽・動画再生は?

音楽・動画再生としては、mplayer や smplayerが apt経由でインストール可能です。

・mplayer コマンドラインの音楽・動画再生プレイヤーです。
・smplayer mplayerのラッパーで、GUI操作インターフェイスを提供します。

sudo apt update
sudo apt install mplayer
sudo apt install smplayer

user@brain:~$ sudo apt show mplayer
[sudo] password for user:
Package: mplayer
Version: 2:1.4+ds1-1+deb11u1
Priority: optional
Section: video
Maintainer: Debian Multimedia Maintainers <debian-multimedia@lists.debian.org>
Installed-Size: 4,301 kB
Depends: liba52-0.7.4 (>= 0.7.4), libaa1 (>= 1.4p5), libasound2 (>= 1.0.16), libass9 (>= 1:0.13.6), libaudio2, libavcodec58 (>= 7:4.2), libavformat58 (>= 7:4.2), libavutil56 (>= 7:4.0), libbluray2 (>= 1:0.2.2), libbs2b0, libc6 (>= 2.29), libcaca0 (>= 0.99.beta17-1), libcdio-cdda2 (>= 10.2+2.0.0), libcdio-paranoia2 (>= 10.2+2.0.0), libcdio19 (>= 2.1.0), libdca0 (>= 0.0.5), libdv4 (>= 1.0.0), libdvdnav4 (>= 4.1.3), libdvdread8 (>= 4.1.3), libegl1, libenca0 (>= 1.9), libfaad2 (>= 2.7), libfontconfig1 (>= 2.12.6), libfreetype6 (>= 2.2.1), libfribidi0 (>= 0.19.2), libgif7 (>= 5.1), libgl1, libjack-jackd2-0 (>= 1.9.10+20150825) | libjack-0.125, libjpeg62-turbo (>= 1.3.1), liblirc-client0, libmad0 (>= 0.15.1b-3), libmng1 (>= 1.0.10), libmpeg2-4 (>= 0.5.1), libmpg123-0 (>= 1.13.7), libogg0 (>= 1.0rc3), libopenal1 (>= 1.14), libpng16-16 (>= 1.6.2-1), libpostproc55 (>= 7:4.0), libpulse0 (>= 0.99.1), libsdl1.2debian (>= 1.2.11), libsmbclient (>= 2:4.0.3+dfsg1), libspeex1 (>= 1.2~beta3-1), libswresample3 (>= 7:4.0), libswscale5 (>= 7:4.0), libtheora0 (>= 1.0), libtinfo6 (>= 6), libvdpau1 (>= 0.2), libvorbisidec1 (>= 1.2.1+git20180316), libx11-6, libxext6, libxinerama1, libxss1, libxv1, libxvidcore4 (>= 1.2.2), libxvmc1 (>= 2:1.0.12), libxxf86dga1, libxxf86vm1, zlib1g (>= 1:1.1.4)
Suggests: bzip2, fontconfig, fonts-freefont-ttf, mplayer-doc, netselect | fping
Homepage: https://www.mplayerhq.hu
Tag: interface::graphical, interface::x11, role::program, uitoolkit::sdl,
 x11::application
Download-Size: 2,057 kB
APT-Sources: http://archive.debian.org/debian bullseye/main armel Packages
Description: movie player for Unix-like systems
 MPlayer plays most MPEG, VOB, AVI, Ogg/OGM, VIVO,
 ASF/WMA/WMV, QT/MOV/MP4, FLI, RM, NuppelVideo, yuv4mpeg, FILM, RoQ, PVA files,
 supported by many native, XAnim, RealPlayer, and Win32 DLL codecs. It can
 also play VideoCD, SVCD, DVD, 3ivx, RealMedia, and DivX movies.
 .
 Another big feature of MPlayer is the wide range of supported output
 drivers. It works with X11, Xv, DGA, OpenGL, SVGAlib, fbdev,
 but also SDL.
 .
 Not all of the upstream code is distributed in the source tarball.
 See the README.Debian and copyright files for details.


user@brain:~$ sudo apt install mplayer
Reading package lists... Done
Building dependency tree... Done
Reading state information... Done
The following additional packages will be installed:
  liba52-0.7.4 libass9 libaudio2 libavformat58 libbluray2 libbs2b0
  libcdio-cdda2 libcdio-paranoia2 libcdio19 libchromaprint1 libdca0 libdvdnav4
  libdvdread8 libenca0 libfaad2 libgif7 libgme0 libldb2 liblirc-client0
  libmad0 libmng1 libmpeg2-4 libnorm1 libopenmpt0 libpgm-5.3-0 libpostproc55
  librabbitmq4 libsmbclient libsrt1.4-gnutls libssh-gcrypt-4 libtalloc2
  libtdb1 libtevent0 libudfread0 libvorbisfile3 libvorbisidec1 libwbclient0
  libzmq5 python3-ldb python3-talloc samba-libs
Suggested packages:
  nas libbluray-bdj libdvdcss2 lirc fonts-freefont-ttf mplayer-doc netselect
  | fping
Recommended packages:
  libaacs0
The following NEW packages will be installed:
  liba52-0.7.4 libass9 libaudio2 libavformat58 libbluray2 libbs2b0
  libcdio-cdda2 libcdio-paranoia2 libcdio19 libchromaprint1 libdca0 libdvdnav4
  libdvdread8 libenca0 libfaad2 libgif7 libgme0 libldb2 liblirc-client0
  libmad0 libmng1 libmpeg2-4 libnorm1 libopenmpt0 libpgm-5.3-0 libpostproc55
  librabbitmq4 libsmbclient libsrt1.4-gnutls libssh-gcrypt-4 libtalloc2
  libtdb1 libtevent0 libudfread0 libvorbisfile3 libvorbisidec1 libwbclient0
  libzmq5 mplayer python3-ldb python3-talloc samba-libs
0 upgraded, 42 newly installed, 0 to remove and 1 not upgraded.
Need to get 12.1 MB of archives.
After this operation, 39.5 MB of additional disk space will be used.
Do you want to continue? [Y/n] Y
Get:1 http://archive.debian.org/debian bullseye/main armel libtalloc2 armel 2.3.1-2+b1 [26.5 kB]
~
Processing triggers for libc-bin (2.31-13+deb11u11) ...


user@brain:~$ sudo apt show smplayer
Package: smplayer
Version: 20.6.0~ds0-1
Priority: optional
Section: video
Maintainer: Debian Multimedia Maintainers <debian-multimedia@lists.debian.org>
Installed-Size: 4,357 kB
Depends: mpv (>= 0.6.2) | mplayer, libc6 (>= 2.28), libgcc-s1 (>= 3.5), libqt5core5a (>= 5.14.1), libqt5dbus5 (>= 5.14.1), libqt5gui5 (>= 5.14.1) | libqt5gui5-gles (>= 5.14.1), libqt5network5 (>= 5.14.1), libqt5widgets5 (>= 5.14.1), libqt5xml5 (>= 5.1), libstdc++6 (>= 5), libx11-6, zlib1g (>= 1:1.1.4)
Recommends: smplayer-themes, smplayer-l10n
Homepage: http://smplayer.sourceforge.net/
Tag: interface::graphical, interface::x11, role::program, uitoolkit::qt,
 use::playing, works-with::audio, works-with::video, x11::application
Download-Size: 1,873 kB
APT-Sources: http://archive.debian.org/debian bullseye/main armel Packages
Description: Complete front-end for MPlayer and mpv
 Qt5 front-end for mplayer and forks, with basic features like playing
 videos, DVDs, and VCDs to more advanced features like support
 for MPlayer filters and more. One of the most interesting features
 of SMPlayer: it remembers the settings of all files you play.
 So you start to watch a movie but you have to leave... don't
 worry, when you open that movie again it will resume at the same
 point you left it, and with the same settings: audio track,
 subtitles, volume...


user@brain:~$ sudo apt install smplayer
Reading package lists... Done
Building dependency tree... Done
Reading state information... Done
The following additional packages will be installed:
  libdouble-conversion3 libinput-bin libinput10 libmd4c0 libpcre2-16-0
  libqt5core5a libqt5dbus5 libqt5gui5 libqt5network5 libqt5widgets5 libqt5xml5
  libwacom-common libwacom2 libxcb-icccm4 libxcb-image0 libxcb-keysyms1
  libxcb-randr0 libxcb-render-util0 libxcb-shape0 libxcb-util1
  libxcb-xinerama0 libxcb-xinput0 libxkbcommon-x11-0
Suggested packages:
  qt5-image-formats-plugins qtwayland5
Recommended packages:
  qttranslations5-l10n libqt5svg5 qt5-gtk-platformtheme libwacom-bin
  smplayer-themes smplayer-l10n
The following NEW packages will be installed:
  libdouble-conversion3 libinput-bin libinput10 libmd4c0 libpcre2-16-0
  libqt5core5a libqt5dbus5 libqt5gui5 libqt5network5 libqt5widgets5 libqt5xml5
  libwacom-common libwacom2 libxcb-icccm4 libxcb-image0 libxcb-keysyms1
  libxcb-randr0 libxcb-render-util0 libxcb-shape0 libxcb-util1
  libxcb-xinerama0 libxcb-xinput0 libxkbcommon-x11-0 smplayer
0 upgraded, 24 newly installed, 0 to remove and 1 not upgraded.
Need to get 10.2 MB of archives.
After this operation, 34.0 MB of additional disk space will be used.
Do you want to continue? [Y/n] Y
Get:1 http://archive.debian.org/debian bullseye/main armel libdouble-conversion3 armel 3.1.5-6.1 [39.6 kB]
~
Processing triggers for hicolor-icon-theme (0.17-2) ...
user@brain:~$


user@brain:~$ mplayer
MPlayer 1.4 (Debian), built with gcc-10 (C) 2000-2019 MPlayer Team
Usage:   mplayer [options] [url|path/]filename

Basic options: (complete list in the man page)
 -vo <drv>        select video output driver ('-vo help' for a list)
 -ao <drv>        select audio output driver ('-ao help' for a list)
 vcd://<trackno>  play (S)VCD (Super Video CD) track (raw device, no mount)
 dvd://<titleno>  play DVD title from device instead of plain file
 -alang/-slang    select DVD audio/subtitle language (by 2-char country code)
 -ss <position>   seek to given (seconds or hh:mm:ss) position
 -nosound         do not play sound
 -fs              fullscreen playback (or -vm, -zoom, details in the man page)
 -x <x> -y <y>    set display resolution (for use with -vm or -zoom)
 -sub <file>      specify subtitle file to use (also see -subfps, -subdelay)
 -playlist <file> specify playlist file
 -vid x -aid y    select video (x) and audio (y) stream to play
 -fps x -srate y  change video (x fps) and audio (y Hz) rate
 -pp <quality>    enable postprocessing filter (details in the man page)
 -framedrop       enable frame dropping (for slow machines)

Basic keys: (complete list in the man page, also check input.conf)
 <-  or  ->       seek backward/forward 10 seconds
 down or up       seek backward/forward  1 minute
 pgdown or pgup   seek backward/forward 10 minutes
 < or >           step backward/forward in playlist
 p or SPACE       pause movie (press any key to continue)
 q or ESC         stop playing and quit program
 + or -           adjust audio delay by +/- 0.1 second
 o                cycle OSD mode:  none / seekbar / seekbar + timer
 * or /           increase or decrease PCM volume
 x or z           adjust subtitle delay by +/- 0.1 second
 r or t           adjust subtitle position up/down, also see -vf expand

 * * * SEE THE MAN PAGE FOR DETAILS, FURTHER (ADVANCED) OPTIONS AND KEYS * * *

user@brain:~$
user@brain:~$

mplayerで、再生したファイルを指定すれば、そのままALSAで再生されました。
(USB Audioデバイスを付けている場合)
mplayerでの音声再生では、ほとんどノイズは気になりませんでした。
[CUI,X11環境両方で実行可能]

mplayer pianos-by-jtwayne-7-174717.mp3

user@brain:/boot/sound$ mplayer pianos-by-jtwayne-7-174717.mp3
MPlayer 1.4 (Debian), built with gcc-10 (C) 2000-2019 MPlayer Team
do_connect: could not connect to socket
connect: No such file or directory
Failed to open LIRC support. You will not be able to use your remote control.

Playing pianos-by-jtwayne-7-174717.mp3.
libavformat version 58.45.100 (external)
Audio only file format detected.
Load subtitles in ./
==========================================================================
Opening audio decoder: [mpg123] MPEG 1.0/2.0/2.5 layers I, II, III
AUDIO: 44100 Hz, 2 ch, s16le, 256.0 kbit/18.14% (ratio: 32000->176400)
Selected audio codec: [mpg123] afm: mpg123 (MPEG 1.0/2.0/2.5 layers I, II, III)
==========================================================================
AO: [pulse] Init failed: Connection refused
Failed to initialize audio driver 'pulse'
AO: [alsa] 48000Hz 2ch s16le (2 bytes per sample)
Video: no video
Starting playback...
A:  18.5 (18.5) of 18.0 (18.0) 75.0%


Exiting... (End of file)
user@brain:/boot/sound$

smplayerでも音声再生OKです。

smplayer pianos-by-jtwayne-7-174717.mp3
[X11環境時で実行可能]

同様に動画ファイル(mp4ファイル)も試しましたが、
安定して音声・動画再生はされました。

ただ、さすがにマシンパワー不足で、
動画と音声の同期がうまくいっていませんでした。
(音声が先行する)
再生時パラメータや、動画ファイルの作成パラメータの調整が必要かもしれません。
(-autosync 30 -cache 8192 -framedropのオプションを付けてみたけど、やっぱり遅い)

mplayer -vo fbdev2 /dev/fd0 ./file.mp4
[CUI上で実行する場合、-vo fbdev2 /dev/fd0 オプションを付け得れば再生されました。]

mplayer ./file.mp4
[X11環境上で実行可能]

smplayer file.mp4
[X11環境上で実行可能]

PulseAudio導入について

ALSAに引き続き、PulseAudioの導入も検討していますが、
結構重いそうだし、ALSA強制指定で動くものも多いので、いったん保留。
音楽のリダイレクトはあとで試してみたい。

fmsx,openMSX関連で、Brainuxに「pulseaudio」を入れてみました。

インストール: sudo apt install pulseaudio

インストール直後はサービスが起動していないのですが、以下のコマンドで操作できます。

#pulseaudio起動コマンド
pulseaudio --start

#起動状況確認コマンド
pactl info

#pulseaudioの停止コマンド
pulseaudio -k

ただし、標準では自動実行が設定されてしまっているため、再起動しても自動的に起動してしまいます。

pulseaudio 起動設定確認コマンド

$ systemctl --user status pulseaudio.service

● pulseaudio.service - Sound Service
Loaded: loaded (/usr/lib/systemd/user/pulseaudio.service; enabled; vendor preset: enabled)
Active: active (running) since Sat 2025-12-20 14:18:53 JST; 30min ago
TriggeredBy: ● pulseaudio.socket
Main PID: 472 (pulseaudio)
CPU: 4.902s
CGroup: /user.slice/user-1000.slice/user@1000.service/app.slice/pulseaudio.service
└─472 /usr/bin/pulseaudio --daemonize=no --log-target=journal

自動機能の無効化は以下です。これで自動起動しなくなります。

pulseaudio 自動起動抑止コマンド

$ systemctl --user mask pulseaudio.service pulseaudio.socket

もし、一時的にpulseaudioを起動したいのであれば、以下のようなコマンドを打てばOKです

#pulseaudio起動コマンド
pulseaudio --start

#pulseaudioの停止コマンド
pulseaudio -k


結果としては,Pulseaudioが無効との時うまく動くアプリと、
逆にPulseaudioが有効の時うまくいくアプリがあるっぽい。

ALSAを直接叩いているようなアプリでは問題なく聞ける音楽でもPulseaudioが有効だと、ぶつ切りでまともに聞けなくなるし、
逆に、Pulseaudio経由で音楽を鳴らしているアプリでは、Pulseaudioが起動していたほうがちゃんとうまくなる気がしてます。

Pulseaudioが起動していると、メモリも10MB以上消費するので、
Brainuxでは通常Pulseaudioを利用しないで、必要なときのみ起動するほうがいいでしょう。

openMSXとかだと、PulseAudioを起動したほうが音がちゃんと出ることもあるので、
いったんは必要に応じて手動起動で運用してみます。


Views: 621

カテゴリー: Brainux | コメントする

電子辞書Brainをいじる (2) Brainuxの初期設定とネットワークに接続して遊ぶ

Brainuxをいじって遊ぶ

前回作成したMicroSDから改めてBrainuxを起動します。
電子辞書のメニュー(HOME -> ツール -> 追加コンテンツ -> 追加アプリ・動画)に進んで、
「launch Linux」をクリックすることで、Linux(Brailunx)を起動できます。

環境的には、Brainuxは、Debian GNU/Linux 11 (bullseye)ベースのようです。

大体初代ラズパイの半分くらいの性能のメインボードに以下のハードウェアをついている感じです。
・ディスプレイ(タッチパネル付き)
・キーボード
・バッテリ回り


ハードウェア等の情報を表示させてみる

手始めに、Brainuxから見えるハードウェア情報を表示してみます。
Terminalを立ち上げて、コマンドを入力します。


lscpu CPU情報表示

CPUは、ARMv5 tejlですね(Debianのアークテクチャ的にはArmelに相当します)。
NXP i.MX233 / NXP i.MX28 の場合は ARM926EJ-S コア、命令セットが ARMv5Tとのことです。

性能的には大体初代ラズパイの半分くらいの性能でしょうか?

user@brain:~$ lscpu
Architecture:        armv5tejl
Byte Orcer:          Little Endian
CPU(s):              1
On-line CPU(s) list: 0
Thread(s) per core:  1
Core(s) per socket:  1
Socket(s):           1
Vencor ID:           ARM
Model:               5
Model name:          ARM926
Stepping:            r0p5
BogoMIPS:            226.09
Flags:               swp half thumb fastmult edsp java


free メモリ使用状況表示(SWAP設定後)

Brainのメインメモリは128MBです。
前回作成したSwap領域も認識しています(2048MBは少し多かったかもしれません。512MB程度でよかったかも)。

user@brain:~$ free
       total   used      free  shared  buff/cache    available
Mem:   118352  42684     5892     204       69776        70476
Swap: 2097148   7424  2089724


lsusb USBデバイスの一覧を表示

USBホストコントローラが認識されています。

user@brain:~$ lsusb
Bus 001 Device 001: ID 1d6b:0002 Linux Foundation 2.0 root hub

user@brain:~$ lsusb -t
/:  Bus 01.Port 1: Dev 1, Class=root_hub, Driver=ci_hdrc/1p, 480M


lsblk ブロックデバイス(ストレージ)の一覧を表示(領域拡張後)

microSD(mmcblk1)が認識されています。

user@brain:~$ lsblk
NAME         MAJ:MIN RM  SIZE RO TYPE MOUNTPOINT
mmcblk0      179:0    0  7.3G  0 disk
mmcblk0boot0 179:8    0    4M  1 disk
mmcblk0boot1 179:16   0    4M  1 disk
mmcblk1      179:24   0 29.1G  0 disk
├─mmcblk1p1  179:25   0   16G  0 part /boot
└─mmcblk1p2  179:26   0 13.1G  0 part /


mount マウント状況

問題なくマウントとされています。
/boot vFAT領域
/ etc4領域

user@brain:~$ mount
/dev/mmcblk1p2 on / type ext4 (rw,relatime)
devtmpfs on /dev type devtmpfs (rw,relatime,size=59072k,nr_inodes=14768,mode=755)
proc on /proc type proc (rw,nosuid,nodev,noexec,relatime)
sysfs on /sys type sysfs (rw,nosuid,nodev,noexec,relatime)
tmpfs on /dev/shm type tmpfs (rw,nosuid,nodev)
devpts on /dev/pts type devpts (rw,nosuid,noexec,relatime,gid=5,mode=620,ptmxmode=000)
tmpfs on /run type tmpfs (rw,nosuid,nodev,size=23672k,nr_inodes=819200,mode=755)
tmpfs on /run/lock type tmpfs (rw,nosuid,nodev,noexec,relatime,size=5120k)
cgroup2 on /sys/fs/cgroup type cgroup2 (rw,nosuid,nodev,noexec,relatime,nsdelegate)
debugfs on /sys/kernel/debug type debugfs (rw,nosuid,nodev,noexec,relatime)
configfs on /sys/kernel/config type configfs (rw,nosuid,nodev,noexec,relatime)
/dev/mmcblk1p1 on /boot type vfat (ro,relatime,fmask=0022,dmask=0022,codepage=437,iocharset=iso8859-1,shortname=mixed,errors=remount-ro)
tmpfs on /run/user/1000 type tmpfs (rw,nosuid,nodev,relatime,size=11832k,nr_inodes=2958,mode=700,uid=1000,gid=1000)
user@brain:~$


df diskfree 空き容量確認

マウントされた領域の利用状況を確認d系ます。
(/や/bootの利用状況は、初期値ではなく、いろいろアプリを追加した後の値になります。)

user@brain:/boot$ df
Filesystem     1K-blocks    Used Available Use% Mounted on
/dev/root       13491400 4392740   8503332  35% /
devtmpfs           59072       0     59072   0% /dev
tmpfs              59176       0     59176   0% /dev/shm
tmpfs              23672     556     23116   3% /run
tmpfs               5120       4      5116   1% /run/lock
/dev/mmcblk1p1  16745464 1852752  14892712  12% /boot
tmpfs              11832       0     11832   0% /run/user/1000
user@brain:/boot$


lsipc システムパラメータ情報を表示

システムの各種パラメータを表示します。

user@brain:~$ lsipc
RESOURCE DESCRIPTION                                     LIMIT USED  USE%
MSGMNI   Number of message queues                        32000    0 0.00%
MSGMAX   Max size of message (bytes)                      8192    -     -
MSGMNB   Default max size of queue (bytes)               16384    -     -
SHMMNI   shared memory segments                           4096    1 0.02%
SHMALL   shared memory pages                        4278190079  256 0.00%
SHMMAX   Max size of shared memory segment (bytes)  4278190079    -     -
SHMMIN   Min size of shared memory segment (bytes)           1    -     -
SEMMNI   Number of semaphore identifiers                 32000    0 0.00%
SEMMNS   Total number of semaphores                 1024000000    0 0.00%
SEMMSL   Max semaphores per semaphore set.               32000    -     -
SEMOPM   Max number of operations per semop(2)             500    -     -
SEMVMX   Semaphore max value                             32767    -     -


uname -a 使用中のシステム名を表示

CPUアーキテクチャは、armv5tejl になります。

user@brain;~$ uname -a
Linux brain 5.4.149-gaa3edcd5fcbc #2 PREEMPT mon Dec 23 11:34:55 UTC 2024 armv5tejl GNU/Linux


hostnamectl ホスト名以外のシステム情報をまとめて表示

OSとしては、Debian GNU/Linux 11 (bullseye)がベースのようです。
Linux カーネルは 5.4ですね。

user@brain:~$ hostnamectl
 Static hostname: brain
       Icon name: computer
      Machine ID: 53a6555e84a4429e91f249e408c94340
         Boot ID: ca54ace460be410ca0409c4750963fe7
Operating System: Debian GNU/Linux 11 (bullseye)
          Kernel: Linux 5.4.149-gaa3edcd5fcbc
    Architecture: arm


ip address ネットワーク情報を表示

現状は外向けのネットワークアダプタなどはつけていないのでIP付与はありません。

user@brain:~$ ip address
1: lo: LOOPBACK, UP, LOWER_UP> mtu 65536 qdisc noqueue state UNKNOWN group default qlen 1000
    link/loopback 00:00:00:00:00:00 brd 00:00:00:00:00:00
    inet 127.0.0.1/8 scope host lo
       valid_lft forever preferred_lft forever
    inet6 ::1/128 scope host
       valid_lft forever preferred_lft forever
2: sito@NONE: <NOARP> mtu 1480 qdisc noop state DOWN group default qlen 1000
    link/sit 0.0.0.0 brd 0.0.0.0

ほかにも、さまざまなコマンドが実行できます。
slコマンドまで入っているのは少し笑いましたが。


BrainにUSB機器を接続して、認識させる。

Brainuxでは、外部電源供給可能なMicroAタイプのUSBホストアダプタを利用すると、
USB機器を認識することができます。(動くかどうかはドライバ次第ですが)
(Brainux起動時のデフォルトではUSBホストモードになってます。)
(Brainからの給電ができないため外部電源供給が必須です。)

外部電源供給可能なMicroAタイプのUSBホストアダプタは、以下が使用できました。

使用できたホストアダプタ(おすすめ順)

●給電付OTGアダプタ(Shigezoneさんで購入) 充電〇

秋葉原の東京ラジオデパートにあるShigezoneさんで販売している
給電付きOTGアダプタも利用できました。こちらはBrainへの充電も可能です。
USBA側コネクタは 1つなので、複数USB機器を接続したいなら別途USB-HUBが必要です。
(11/16時点での価格:350円)

Type-B(A)コネクタの向きで右と左の2種類がありますが、今回は右を買いました。
右だとBrainにつけたときにUSB-Aコネクタ側が後ろに向きます。(左だと、前に向きます。)

アイネックス USBホストアダプタ 補助電源付 ADV-120 充電×

Amazonで入手したものが利用できました。
ただ、このホストアダプタ経由でのBrainへの充電はされないみたいなのでBrainの充電切れには注意してください。
(11/16時点での価格:727円)

Richer-R 4ポートマイクロUSBハブUSB2.0 OTG拡張アダプタ スマートフォンとタブレット用充電ケーブル 充電△? USB-HUB付き 認識にくせあり 

Amazonで入手したものが利用できました。
4ポートのUSBHUBにもなっているので、複数のusb機器を認識させるのには便利です。
接続するホスト機器によって123と切り替えスイッチがあるタイプですが、いったん3の位置で使っています(違いが判りません)。
あとBrainuxで認識させるのに癖があって、認識しない場合はBrainに接続している状態で、一回充電ケーブルを抜いて再度充電ケーブルを接続すると、認識する場合があるようです。
使用中のBrainへの充電も可能ですが給電能力は少し弱めかもしれません。
(11/16時点での価格:599円)

Brain にも給電できるUSBホストアダプタ(Wince上で給電を確認できるもの)を使用したとしても、Brainux起動時から給電している場合はBrainに給電されているようです。 ですが、私の使っているUSBホストアダプタ(Shigezoneさんで購入したやつ)だけかもしれませんが、一度でも給電を止めると給電を再開としたとしてもBrainには給電されていないように見えます(そのうちバッテリ不足でBrainの電源が落ちます)。


lsusbコマンドで、現在認識しているUSB機器が確認できます。

例えばこんな感じです。
認識している機器
有線NIC、タッチパッド付きキーボード、マウス、USBAudioデバイス、USB-HUB、
Brain内部のUSBコントローラ

lsusb -tで見ると、Driverも当たっていますね。
(UVCデバイスのように対応するドライバがないと、Driver=,とドライバ名が表示されません。UVCデバイス認識すると使い道が広がるのだが、使うにはカーネル構築が必要とのことなので、断念)

user@brain:~$ lsusb
Bus 001 Device 018: ID 0b95:772b ASIX Electronics Corp. AX88772B
Bus 001 Device 017: ID 1997:2433 Shenzhen Riitek Technology Co., Ltd wireless mini keyboard with touchpad
Bus 001 Device 016: ID 413c:301a Dell Computer Corp. Dell MS116 Optical Mouse
Bus 001 Device 015: ID 0d8c:000c C-Media Electronics, Inc. Audio Adapter
Bus 001 Device 014: ID 05e3:0610 Genesys Logic, Inc. Hub
Bus 001 Device 001: ID 1d6b:0002 Linux Foundation 2.0 root hub


user@brain:~$ lsusb -t
/:  Bus 01.Port 1: Dev 1, Class=root_hub, Driver=ci_hdrc/1p, 480M
    |__ Port 1: Dev 14, If 0, Class=Hub, Driver=hub/4p, 480M
        |__ Port 1: Dev 15, If 3, Class=Human Interface Device, Driver=usbhid, 12M
        |__ Port 1: Dev 15, If 1, Class=Audio, Driver=snd-usb-audio, 12M
        |__ Port 1: Dev 15, If 2, Class=Audio, Driver=snd-usb-audio, 12M
        |__ Port 1: Dev 15, If 0, Class=Audio, Driver=snd-usb-audio, 12M
        |__ Port 2: Dev 16, If 0, Class=Human Interface Device, Driver=usbhid, 1.5M
        |__ Port 3: Dev 17, If 0, Class=Human Interface Device, Driver=usbhid, 12M
        |__ Port 3: Dev 17, If 1, Class=Human Interface Device, Driver=usbhid, 12M
        |__ Port 4: Dev 18, If 0, Class=Vendor Specific Class, Driver=asix, 480M


有線LANでネットワークに接続する

Brainuxでは、USB有線lANを使ってネットワークに接続できます。
必要なものは、外部電源供給可能なMicroAタイプのUSBホストアダプタと、USB接続タイプの有線LANアダプタです。

USB接続タイプの有線LANアダプタについては、手持ちにLogitecのUSBHUB付きの100Mbpsの有線LANアダプタがあったので、試しにつないでみたら使えました。
USB-HUB付であれば、USBマウスやキーボードも追加で繋げられるので便利です。
ロジテック 有線LANアダプタ USB 2.0 USB2.0ハブ3ポート付 LAN-TXU2H3A

有線LANでつないでみると、LANアダプタを認識してLANにつながりました。
LANアダプタはASIX Electronics AX88772B として認識しています。
DHCPでIPを自動取得(192.168.29.11)して、DGW(192.168.29.1)へのPingも通りました。

user@brain:~$ lsusb
Bus 001 Device 003: ID 0b95:772b ASIX Electronics Corp. AX88772B
Bus 001 Device 002: ID 05e3:0610 Genesys Logic, Inc. Hub
Bus 001 Device 001: ID 1d6b:0002 Linux Foundation 2.0 root hub

user@brain:~$ ip a
1: lo: <LOOPBACK,UP,LOWER_UP> mtu 65536 qdisc noqueue state UNKNOWN group default qlen 1000
    link/loopback 00:00:00:00:00:00 brd 00:00:00:00:00:00
    inet 127.0.0.1/8 scope host lo
       valid_lft forever preferred_lft forever
    inet6 ::1/128 scope host
       valid_lft forever preferred_lft forever
2: sit0@NONE: <NOARP> mtu 1480 qdisc noop state DOWN group default qlen 1000
    link/sit 0.0.0.0 brd 0.0.0.0
3: enx3495db26e312: <BROADCAST,MULTICAST,UP,LOWER_UP> mtu 1500 qdisc pfifo_fast state UP group default qlen 1000
    link/ether 34:95:db:26:e3:12 brd ff:ff:ff:ff:ff:ff
    inet 192.168.29.11/24 brd 192.168.29.255 scope global dynamic noprefixroute enx3495db26e312
       valid_lft 35584sec preferred_lft 35584sec
    inet6 2001:240:2838:d900:851d:d6d3:c49:13b3/64 scope global dynamic noprefixroute
       valid_lft 14033sec preferred_lft 14033sec
    inet6 fe80::ac3e:9541:641d:cf01/64 scope link noprefixroute
       valid_lft forever preferred_lft forever

user@brain:~$ sudo ping 192.168.29.1
[sudo] password for user:
PING 192.168.29.1 (192.168.29.1) 56(84) bytes of data.
64 bytes from 192.168.29.1: icmp_seq=1 ttl=64 time=2.77 ms
64 bytes from 192.168.29.1: icmp_seq=2 ttl=64 time=0.871 ms
64 bytes from 192.168.29.1: icmp_seq=3 ttl=64 time=1.18 ms
64 bytes from 192.168.29.1: icmp_seq=4 ttl=64 time=0.864 ms
^C
--- 192.168.29.1 ping statistics ---
4 packets transmitted, 4 received, 0% packet loss, time 3005ms
rtt min/avg/max/mdev = 0.864/1.419/2.766/0.787 ms
user@brain:~$

ちなみに、USB有線LANアダプタの代わりにUSBテザリング可能なモバイルルータを接続しても外部通信可能でした。
今回は手持ちのAterm MR04LNをUSBテザリング有効にして、USBホストアダプタ経由で接続したら、ちゃんとNDIS機器として認識してインターネットへの通信ができました。
(が、モバイルルータでNATされているので、Brain->外部ネットワークへの通信は可能ですが、逆に外部からBrainへの通信は厳しいことになります。)

user@brain:~$ sudo lsusb
Bus 001 Device 005:ID 0400:047e NEC Corp. LTE Mobile Router

あと、USB無線LANドングルについては、USB機器としては認識しましたが、wpa_supplicantの設定がうまくいかず、現状成功していません。

USBでホストPCを経由してネットワークに接続する(USB Ethernet Gadget)

BrainをUSB機器としてPCに認識させて、ネットワークに接続する方法です。
USBケーブル1本でBrainをネットワークに接続することができます。

「sudo brain-config」 コマンドでUSB Controllerのモードを変更すると、
パソコンとUSBケーブルを1本でつないで、ホストPCを経由して外部ネットワークに接続することができるようです。(Brain->外部ネットワークへの通信は可能ですが、逆はホストPC->Brain方向への通信のみが可能です。)

Brainへの充電も同時にしてくれますので、長時間Brainを使いたいならこちらですが、
USBキーボード・マウスとの併用はできません。

  • Host[USB Host Mode]モード
     BrainがUSB ホストアダプタを経由してUSB機器を認識できるモード(デフォルト)
     USBキーボードやマウス、USBネットワークアダプタ等を直接使うことができます。
  • Peripheral[USB Devioce Mode (for Gadget)]モード
     BrainをUSB機器として、他PC等のデバイスとして認識させることができるモードです。
     ただし、BrainがUSB機器を認識することはできません。

詳しいやり方は、Brainux Wikiに書かれています。
USB Ethernet Gadget

作業は大体はこのページの通りです。
UBSケーブルを接続して、ホストPCからピポッと鳴れば、接続しているはずです。
sudo ip aを実行して、IPv4アドレスが付与されていればOKです。

user@brain:~$ sudo ip a
[sudo] password for user:
1: lo: <LOOPBACK,UP,LOWER_UP> mtu 65536 qdisc noqueue state UNKNOWN group default qlen 1000
    link/loopback 00:00:00:00:00:00 brd 00:00:00:00:00:00
    inet 127.0.0.1/8 scope host lo
       valid_lft forever preferred_lft forever
    inet6 ::1/128 scope host
       valid_lft forever preferred_lft forever
2: sit0@NONE: <NOARP> mtu 1480 qdisc noop state DOWN group default qlen 1000
    link/sit 0.0.0.0 brd 0.0.0.0
3: usb0: <BROADCAST,MULTICAST,UP,LOWER_UP> mtu 1500 qdisc pfifo_fast state UP group default qlen 1000
    link/ether 8a:15:8b:44:3a:02 brd ff:ff:ff:ff:ff:ff
    inet 192.168.137.226/24 brd 192.168.137.255 scope global dynamic usb0
       valid_lft 604708sec preferred_lft 604708sec
    inet6 2001:240:2838:d9f1:8815:8bff:fe44:3a02/64 scope global dynamic mngtmpaddr
       valid_lft 13384sec preferred_lft 13384sec
    inet6 fe80::8815:8bff:fe44:3a02/64 scope link
       valid_lft forever preferred_lft forever

上記の場合、3: usb0:のブロックを確認すると、192.168.137.226が割り当たっていますね。
これが、ホストPCから見たBrainのIPアドレスになります。
(ホストPCでNATされているので、ホストPCからのみBrainにアクセスできます。)

inet 192.168.137.226/24 brd 192.168.137.255 scope global dynamic usb0

IPv4が割り当たっていない場合は、DHCPでのIP取得ができていない場合があるので、
USBケーブルのつけなおしをしてみたり、以下のコマンドを打ってみてください。

sudo dhclient

これで、DHCPからIP取得されれば、外部へのPingも通るようになります。

PCからSSHでアクセスする

Brainがネットワークににつながったので、PCからSSHに接続してみる。
ip a コマンドの結果を確認すると、DHCPで割り振られたIPが192.168.29.11だった場合、
そのIPでログインしてみると、無事接続できました。
認証情報は コンソールと一緒で、user/brain でOKでした。

同様にWINSCPでSFTPプロトコルにてログインできるので、
ファイルのやり取りもネットワーク経由でOKです。


ブラウザ(midori)を試す

Brainuxには標準でブラウザも搭載しています。

Midori という軽量および高速な動作を目的としたブラウザが標準でありますので
X11上環境上で起動します。

midori &

速度とレスポンスを無視すれば、普通にGoogleにもSSL接続できます。

定番の「阿部寛」さんのホームページもOKです。
(もうすぐhttpでの接続ができなくなって、https接続のみになるそうので、いまのうちに)

さすがに重いので、Midoriによる日常的なブラウジングは難しいです。

ブラウザ(NerSurf)を試す

Netserfも標準で入っていますが、midoriよりは軽いですが、標準でJavascriptが有効になっていないようで、googleにアクセスすると警告が出ます。

terminalから、netsurf &で起動出来ます。

Javascrptは、右上の横三本線から、Edit->Preferences->Contentー>Enable Javascriptにチェックを入れれば有効にできるようですが、Javascriptを有効にしても私の環境ではGoogle検索は失敗しました。

netsurfは使えるレベルのレスポンスに感じますが、表示できるサイトに制限があるようです。

ネットワークにつながったので、aptでパッケージ更新してみる。

Brainuxのベースは、「Debian GNU/Linux 11 (bullseye)」なので、ネット経由でのパッケージ管理ツールも入っています。

すでに導入しているOSパッケージの更新は以下のコマンドになります。

sudo apt update
sudo apt upgrade

ただし、2025/11/05時点でやってみると、標準ではパッケージが保管されているレポジトリにアクセスできなくてスキップされているようです。

user@brain:/$ sudo apt update
[sudo] password for user:
Hit:1 http://deb.debian.org/debian bullseye InRelease
Hit:2 http://deb.debian.org/debian bullseye-updates InRelease
Hit:3 http://deb.debian.org/debian-security bullseye-security/updates InRelease
Hit:4 https://packagecloud.io/brainhackers/brainux/any any InRelease
Reading package lists... Done
Building dependency tree... Done
Reading state information... Done
1 package can be upgraded. Run 'apt list --upgradable' to see it.
N: Skipping acquire of configured file 'main/binary-armel/Packages' as repository 'http://deb.debian.org/debian bullseye InRelease' doesn't support architecture 'armel'
N: Skipping acquire of configured file 'contrib/binary-armel/Packages' as repository 'http://deb.debian.org/debian bullseye InRelease' doesn't support architecture 'armel'
N: Skipping acquire of configured file 'non-free/binary-armel/Packages' as repository 'http://deb.debian.org/debian bullseye InRelease' doesn't support architecture 'armel'
N: Skipping acquire of configured file 'main/binary-armel/Packages' as repository 'http://deb.debian.org/debian-security bullseye-security/updates InRelease' doesn't support architecture 'armel'
N: Skipping acquire of configured file 'contrib/binary-armel/Packages' as repository 'http://deb.debian.org/debian-security bullseye-security/updates InRelease' doesn't support architecture 'armel'
N: Skipping acquire of configured file 'non-free/binary-armel/Packages' as repository 'http://deb.debian.org/debian-security bullseye-security/updates InRelease' doesn't support architecture 'armel'

user@brain:/$ sudo apt upgrade
Reading package lists... Done
Building dependency tree... Done
Reading state information... Done
Calculating upgrade... Done
The following packages will be upgraded:
  x11-ico-dvd
1 upgraded, 0 newly installed, 0 to remove and 0 not upgraded.
Need to get 799 kB of archives.
After this operation, 0 B of additional disk space will be used.
Do you want to continue? [Y/n] Y
Get:1 https://packagecloud.io/brainhackers/brainux/any any/main armel x11-ico-dvd armel 0.0.1 [799 kB]
Fetched 799 kB in 4s (178 kB/s)
(Reading database ... 44210 files and directories currently installed.)
Preparing to unpack .../x11-ico-dvd_0.0.1_armel.deb ...
Unpacking x11-ico-dvd (0.0.1) over (0.0.1) ...
Setting up x11-ico-dvd (0.0.1) ...
user@brain:/$

brainのコミュニティを確認すると、OSのarmelアーキテクチャ(32bit ARMv4T以上)がdebian11の公式レポジトリから削除されてしまった影響とのことです。
>Debian 11 bullseye のフルサポートは去年で終了していて、既に LTS 期間に入っているようです。LTS 期間のサポート対象として armel は外れているので、サポート終了の結果としてリポジトリから消滅したものと思われます。

現状のレポジトリリストを確認すると、以下のようでした。
/etc/apt/sources.list debian公式のレポジトリが登録
/etc/apt/sources.list.d/* brainux用のレポジトリが登録

user@brain:/$ ls /etc/apt
apt.conf.d   keyrings       sources.list    trusted.gpg.d
auth.conf.d  preferences.d  sources.list.d

user@brain:/$ cat /etc/apt/sources.list
deb http://deb.debian.org/debian bullseye main contrib non-free
deb-src http://deb.debian.org/debian bullseye main contrib non-free
deb http://deb.debian.org/debian bullseye-updates main contrib non-free
deb-src http://deb.debian.org/debian bullseye-updates main contrib non-free
deb http://deb.debian.org/debian-security bullseye-security/updates main contrib non-free
deb-src http://deb.debian.org/debian-security bullseye-security/updates main contrib non-free

user@brain:/$ ls /etc/apt/sources.list.d
packagecloud.list

user@brain:/$ ls /etc/apt/sources.list.d/packagecloud.list
/etc/apt/sources.list.d/packagecloud.list

user@brain:/$ cat /etc/apt/sources.list.d/packagecloud.list
deb [signed-by=/etc/apt/keyrings/brainhackers_brainux-archive-keyring.gpg] https://packagecloud.io/brainhackers/brainux/any/ any main
deb-src [signed-by=/etc/apt/keyrings/brainhackers_brainux-archive-keyring.gpg] https://packagecloud.io/brainhackers/brainux/any/ any main

user@brain:/$

で、コミュニティの情報を元に、ブラウザでサイトを確認しながら試行錯誤していましたが、
以下のレポジトリを指定すると、apt updateできているっぽい。

/etc/apt/sources.list

deb http://archive.debian.org/debian bullseye main contrib non-free
deb-src http://archive.debian.org/debian bullseye main contrib non-free

user@brain:/$ cd /etc/apt

user@brain:/etc/apt$ ls
apt.conf.d   keyrings       sources.list    trusted.gpg.d
auth.conf.d  preferences.d  sources.list.d

user@brain:/etc/apt$ sudo cp sources.list sources.list.20251106
[sudo] password for user:

user@brain:/etc/apt$ ls
apt.conf.d   keyrings       sources.list           sources.list.d
auth.conf.d  preferences.d  sources.list.20251106  trusted.gpg.d

user@brain:/etc/apt$ sudo vi sources.list

user@brain:/etc/apt$ cat sources.list
deb http://archive.debian.org/debian bullseye main contrib non-free
deb-src http://archive.debian.org/debian bullseye main contrib non-free

user@brain:/etc/apt$ sudo apt update
Get:1 http://archive.debian.org/debian bullseye InRelease [116 kB]
Hit:2 https://packagecloud.io/brainhackers/brainux/any any InRelease
Get:3 http://archive.debian.org/debian bullseye/contrib Sources [43.2 kB]
Get:4 http://archive.debian.org/debian bullseye/main Sources [8,500 kB]
Get:5 http://archive.debian.org/debian bullseye/non-free Sources [81.0 kB]
Get:6 http://archive.debian.org/debian bullseye/main armel Packages [7,778 kB]
Get:7 http://archive.debian.org/debian bullseye/main Translation-en [6,235 kB]
Get:8 http://archive.debian.org/debian bullseye/contrib armel Packages [37.3 kB]
Get:9 http://archive.debian.org/debian bullseye/contrib Translation-en [46.9 kB]
Get:10 http://archive.debian.org/debian bullseye/non-free armel Packages [51.6 kB]
Get:11 http://archive.debian.org/debian bullseye/non-free Translation-en [92.5 kB]
Fetched 23.0 MB in 1min 47s (214 kB/s)
Reading package lists... Done
Building dependency tree... Done
Reading state information... Done
1 package can be upgraded. Run 'apt list --upgradable' to see it.

この更新後、apt show コマンドで、パッケージ情報も取得できるようになって、
パッケージインストールもできているみたいのでいけてるかな?
(なお、試しに導入したxtightvncviewerは起動・接続共に成功しましたが、画面表示レスポンスが遅いので使い方に制限が出そうです。チューニングで解決するかもしれませんが。)

user@brain:/etc/apt$ sudo apt show xtightvncviewer
Package: xtightvncviewer
Version: 1:1.3.10-3
Priority: optional
Section: x11
Source: tightvnc
Maintainer: Debian Remote Maintainers <debian-remote@lists.debian.org>
Installed-Size: 171 kB
Provides: vnc-viewer, vncviewer
Depends: libc6 (>= 2.28), libjpeg62-turbo (>= 1.3.1), libx11-6, libxaw7, libxext6, libxmu6, libxt6, zlib1g (>= 1:1.1.4)
Recommends: xfonts-base
Suggests: ssh, tightvncserver
Homepage: https://www.tightvnc.com
Tag: interface::graphical, interface::x11, network::client, role::program,
 uitoolkit::athena, use::login, use::viewing, x11::application
Download-Size: 87.2 kB
APT-Sources: http://archive.debian.org/debian bullseye/main armel Packages
Description: virtual network computing client software for X
 VNC stands for Virtual Network Computing. It is, in essence, a remote
 display system which allows you to view a computing `desktop' environment
 not only on the machine where it is running, but from anywhere on the
 Internet and from a wide variety of machine architectures.
 .
 It is implemented in a client/server model. This package provides a client
 for X, with this you can connect to a vncserver somewhere in the network
 and display its content in a window. There are vncserver available for other
 operating systems.
 .
 The difference between the xtightvncviewer and the normal vncviewer is the
 data encoding, optimized for low bandwidth connections. If the client do not
 support jpeg or zlib encoding it can use the default one. Later versions of
 xvncviewer (> 3.3.3r2) support a new automatic encoding that should be equally
 good as the tightvnc encoding.

user@brain:/etc/apt$ sudo apt install xtightvncviewer
Reading package lists... Done
Building dependency tree... Done
Reading state information... Done
Suggested packages:
  tightvncserver
Recommended packages:
  xfonts-base
The following NEW packages will be installed:
  xtightvncviewer
0 upgraded, 1 newly installed, 0 to remove and 1 not upgraded.
Need to get 87.2 kB of archives.
After this operation, 171 kB of additional disk space will be used.
Get:1 http://archive.debian.org/debian bullseye/main armel xtightvncviewer armel 1:1.3.10-3 [87.2 kB]
Fetched 87.2 kB in 1s (64.1 kB/s)
Selecting previously unselected package xtightvncviewer.
(Reading database ... 44210 files and directories currently installed.)
Preparing to unpack .../xtightvncviewer_1%3a1.3.10-3_armel.deb ...
Unpacking xtightvncviewer (1:1.3.10-3) ...
Setting up xtightvncviewer (1:1.3.10-3) ...
update-alternatives: using /usr/bin/xtightvncviewer to provide /usr/bin/vncviewer (vncviewer) in auto mode
Processing triggers for man-db (2.9.4-2) ...

user@brain:/etc/apt$ apt list | grep xtightvncviewer
WARNING: apt does not have a stable CLI interface. Use with caution in scripts.
xtightvncviewer/oldstable,now 1:1.3.10-3 armel [installed]

user@brain:~$ xtightvncviewer 192.168.29.47:1
Connected to RFB server, using protocol version 3.3
Performing standard VNC authentication
Password:
Authentication successful
Desktop name "win10-z800 ( 192.168.29.47 )"
VNC server default format:
  32 bits per pixel.
  Least significant byte first in each pixel.
  True colour: max red 255 green 255 blue 255, shift red 16 green 8 blue 0
Warning: Cannot convert string "-*-helvetica-bold-r-*-*-16-*-*-*-*-*-*-*" to type FontStruct
Using default colormap which is TrueColor.  Pixel format:
  16 bits per pixel.
  Least significant byte first in each pixel.
  True colour: max red 31 green 63 blue 31, shift red 11 green 5 blue 0

ただ、このレポジトリもいつまで使えるのかはちょっと不安・・・・
むりやりdebian 12 Bookworm にアップデートされた強者もいらっしゃるようなので、
そのうち切り替えるのを試してみるかもしれません。
ただ、説明の中でのvirtualboxのゲストOSが何なのかがわからなくて調査中。
How to upgrade Brainux to Debian 12:
Brainux を Debian 12 にアップグレードする方法

それと、この状態でapt upgradeしても毎回「x11-ico-dvd」が引っかかってくるのですが、これは別原因かな。

user@brain:/etc/apt$ sudo apt upgrade
Reading package lists... Done
Building dependency tree... Done
Reading state information... Done
Calculating upgrade... Done
The following packages will be upgraded:
  x11-ico-dvd
1 upgraded, 0 newly installed, 0 to remove and 0 not upgraded.
Need to get 799 kB of archives.
After this operation, 0 B of additional disk space will be used.
Do you want to continue? [Y/n] Y
Get:1 https://packagecloud.io/brainhackers/brainux/any any/main armel x11-ico-dvd armel 0.0.1 [799 kB]
Fetched 799 kB in 4s (194 kB/s)
(Reading database ... 44210 files and directories currently installed.)
Preparing to unpack .../x11-ico-dvd_0.0.1_armel.deb ...
Unpacking x11-ico-dvd (0.0.1) over (0.0.1) ...
Setting up x11-ico-dvd (0.0.1) ...

/boot領域を読み書き可能としてマウントする(暫定対応)

mountの実行結果の通り、Brainux起動直後では、
/boot領域はro(ReadOnly)としてマウントされています。

/dev/mmcblk1p1 on /boot type vfat (ro,relatime,fmask=0022,dmask=0022,codepage=437,iocharset=iso8859-1,shortname=mixed,errors=remount-ro)

/boot領域を読み書き可能になるためには、以下のようにコマンドを入力すると、
rootユーザであれば読み書き可能になります(再起動ごとに必要です。)。

sudo mount -o remount,rw /boot

user@brain:~$ mount | grep boot
/dev/mmcblk1p1 on /boot type vfat (ro,relatime,fmask=0022,dmask=0022,codepage=437,iocharset=iso8859-1,shortname=mixed,errors=remount-ro)

user@brain:~$ sudo mount -o remount,rw /boot
[sudo] password for user:

user@brain:~$ mount | grep boot
/dev/mmcblk1p1 on /boot type vfat (rw,relatime,fmask=0022,dmask=0022,codepage=437,iocharset=iso8859-1,shortname=mixed,errors=remount-ro)

user@brain:~$ ls -al / | grep boot
drwxr-xr-x  11 root root       8192 Jan  1  1970 boot

ls -alの結果の通り、この状態では一般ユーザでは/boot以下の領域は書き込みできません。
書き込みが必要な場合は、sudoコマンドを使ってroot権限で操作してください。

/boot領域を読み書き可能設定の永続化とvFAT領域(/boot)の文字化けについて

WinCEの領域について、Brainuxでファイル表示してみると、
ファイル名に2バイト文字を使っているフォルダがが ‘???’ となっているものがあります。
(Windows上で見ると「アプリ」というフォルダが文字化けしています)

user@brain:/boot$ ls -al /boot
total 5956
~
drwxr-xr-x  8 root root    8192 Dec 23  2024 '???'

これは、Windows上でのファイル名はShift-JISとして扱いますが、
Brainux(Linux)ではUTF8として扱うため、不整合が出ているためです。
この不整合を修正します。

/lib/systemd/system/boot.mount を編集します。

user@brain:~$ cat /lib/systemd/system/boot.mount
[Unit]
Description=Mount boot partition

[Mount]
What=/dev/mmcblk1p1
Where=/boot
Options=ro

[Install]
WantedBy=multi-user.target
user@brain:~$
user@brain:~$

Options=roとなっているところを以下のように変更します。

Options=ro

Options=rw,utf8

user@brain:~$ sudo vi /lib/systemd/system/boot.mount


user@brain:~$ cat /lib/systemd/system/boot.mount
[Unit]
Description=Mount boot partition

[Mount]
What=/dev/mmcblk1p1
Where=/boot
Options=rw,utf8

[Install]
WantedBy=multi-user.target
user@brain:~$

設定を変更したら、再起動して、あたらめてBrainuxを起動します。

sudo shutdown -r now

X11上のターミナルや、他PCからsshにアクセスした場合は、正常に文字化けが解消されています。
また、sudo コマンドで管理者権限で操作したときは、/bootフォルダ以下の編集もできるようになりました。

まずは、書き込みの確認から

user@brain:~$ mount | grep boot
/dev/mmcblk1p1 on /boot type vfat (rw,relatime,fmask=0022,dmask=0022,codepage=437,iocharset=iso8859-1,shortname=mixed,utf8,errors=remount-ro)
user@brain:~$


user@brain:/boot$ ls -al /boot
total 5956
~
drwxr-xr-x  8 root root    8192 Dec 23  2024  アプリ

もし、一般ユーザであっても/bootの読み書きを許すのであれば、
/lib/systemd/system/boot.mount を以下のように変更して下さい
(umaskの指定で、fmask.dmaskの両方が変更されます。)

Options=rw,utf8,umask=0000

user@brain:~$ mount | grep boot
/dev/mmcblk1p1 on /boot type vfat (rw,relatime,fmask=0000,dmask=0000,allow_utime=0022,codepage=437,iocharset=iso8859-1,shortname=mixed,utf8,errors=remount-ro)


しかし、Brainux起動時にshellを起動した場合だけでは、まだ2バイト文字が表示できていません。これは、標準コンソールが2バイト文字の表示をサポートしていないためです。

2バイト文字の表示をするためには、標準コンソール上でfbtermを起動します。
fbterm上では、正常に2バイト文字が表示されます。

fbterm

ただし、デフォルトのフォントでは、文字が崩れる場合があるので、
exitでfbtermを終了してから、フォントを追加します。

sudo apt install fonts-ipafont
fc-cache -fv
fc-list | grep -i ipa

cd
sudo vi .fbtermrc

fonts-names=mono

fonts-names=IPAGothic,mono
に変更します。

また、文字表示サイズが小さければ、お好みでフォントサイズを変更してください。

font-size=12

font-size=16

user@brain:~$ sudo apt show fonts-ipafont
Package: fonts-ipafont
Version: 00303-21
Priority: optional
Section: fonts
Maintainer: Debian Fonts Task Force <debian-fonts@lists.debian.org>
Installed-Size: 34.8 kB
Pre-Depends: dpkg (>= 1.15.6~)
Depends: fonts-ipafont-gothic, fonts-ipafont-mincho
Breaks: otf-ipafont (<< 00303-1), ttf-ipafont (<= 00203-13)
Replaces: otf-ipafont (<< 00303-1)
Homepage: https://ipafont.ipa.go.jp/
Tag: culture::japanese, made-of::font, role::data, role::metapackage,
 x11::font
Download-Size: 12.3 kB
APT-Sources: http://archive.debian.org/debian bullseye/main armel Packages
Description: Japanese OpenType font set, all IPA Fonts
 IPA Fonts are JIS X 0213:2004 compliant OpenType fonts based on TrueType
 outlines provided by Information-technology Promotion Agency, Japan
 (IPA) from 2003.  These are suitable for both display and printing.
 .
 This metapackage depends on fonts-ipafont-{mincho,gothic} packages to
 provide IPA Mincho, IPA P Mincho, IPA Gothic, and IPA P Gothic Fonts.


user@brain:~$ sudo apt install fonts-ipafont
Reading package lists... Done
Building dependency tree... Done
Reading state information... Done
The following additional packages will be installed:
  fonts-ipafont-gothic fonts-ipafont-mincho
The following NEW packages will be installed:
  fonts-ipafont fonts-ipafont-gothic fonts-ipafont-mincho
0 upgraded, 3 newly installed, 0 to remove and 1 not upgraded.
Need to get 8,252 kB of archives.
After this operation, 28.7 MB of additional disk space will be used.
Do you want to continue? [Y/n] Y
Get:1 http://archive.debian.org/debian bullseye/main armel fonts-ipafont-gothic all 00303-21 [3,515 kB]
Get:2 http://archive.debian.org/debian bullseye/main armel fonts-ipafont-mincho all 00303-21 [4,725 kB]
Get:3 http://archive.debian.org/debian bullseye/main armel fonts-ipafont all 00303-21 [12.3 kB]
Fetched 8,252 kB in 10s (829 kB/s)
Selecting previously unselected package fonts-ipafont-gothic.
(Reading database ... 46320 files and directories currently installed.)
Preparing to unpack .../fonts-ipafont-gothic_00303-21_all.deb ...
Unpacking fonts-ipafont-gothic (00303-21) ...
Selecting previously unselected package fonts-ipafont-mincho.
Preparing to unpack .../fonts-ipafont-mincho_00303-21_all.deb ...
Unpacking fonts-ipafont-mincho (00303-21) ...
Selecting previously unselected package fonts-ipafont.
Preparing to unpack .../fonts-ipafont_00303-21_all.deb ...
Unpacking fonts-ipafont (00303-21) ...
Setting up fonts-ipafont-mincho (00303-21) ...
update-alternatives: using /usr/share/fonts/opentype/ipafont-mincho/ipam.ttf to provide /usr/share/fonts/truetype/fonts-japanese-mincho.ttf (fonts-japanese-mincho.ttf) in auto mode
Setting up fonts-ipafont-gothic (00303-21) ...
update-alternatives: using /usr/share/fonts/opentype/ipafont-gothic/ipag.ttf to provide /usr/share/fonts/truetype/fonts-japanese-gothic.ttf (fonts-japanese-gothic.ttf) in auto mode
Setting up fonts-ipafont (00303-21) ...
Processing triggers for fontconfig (2.13.1-4.2) ...


user@brain:~$ fc-cache  -fv
/usr/share/fonts: caching, new cache contents: 0 fonts, 2 dirs
/usr/share/fonts/opentype: caching, new cache contents: 0 fonts, 3 dirs
/usr/share/fonts/opentype/ipafont-gothic: caching, new cache contents: 2 fonts, 0 dirs
/usr/share/fonts/opentype/ipafont-mincho: caching, new cache contents: 2 fonts, 0 dirs
/usr/share/fonts/opentype/noto: caching, new cache contents: 28 fonts, 0 dirs
/usr/share/fonts/truetype: caching, new cache contents: 2 fonts, 1 dirs
/usr/share/fonts/truetype/dejavu: caching, new cache contents: 22 fonts, 0 dirs
/usr/local/share/fonts: caching, new cache contents: 0 fonts, 0 dirs
/home/user/.local/share/fonts: skipping, no such directory
/home/user/.fonts: skipping, no such directory
/usr/share/fonts/opentype: skipping, looped directory detected
/usr/share/fonts/truetype: skipping, looped directory detected
/usr/share/fonts/opentype/ipafont-gothic: skipping, looped directory detected
/usr/share/fonts/opentype/ipafont-mincho: skipping, looped directory detected
/usr/share/fonts/opentype/noto: skipping, looped directory detected
/usr/share/fonts/truetype/dejavu: skipping, looped directory detected
/var/cache/fontconfig: not cleaning unwritable cache directory
/home/user/.cache/fontconfig: cleaning cache directory
/home/user/.fontconfig: not cleaning non-existent cache directory
fc-cache: succeeded


user@brain:~$ fc-list | grep -i ipa
/usr/share/fonts/opentype/ipafont-mincho/ipam.ttf: IPAMincho,IPA明朝:style=Regular
/usr/share/fonts/opentype/ipafont-gothic/ipagp.ttf: IPAPGothic,IPA Pゴシック:style=Regular
/usr/share/fonts/opentype/ipafont-mincho/ipamp.ttf: IPAPMincho,IPA P明朝:style=Regular
/usr/share/fonts/opentype/ipafont-gothic/ipag.ttf: IPAGothic,IPAゴシック:style=Regular
/usr/share/fonts/truetype/fonts-japanese-mincho.ttf: IPAMincho,IPA明朝:style=Regular
/usr/share/fonts/truetype/fonts-japanese-gothic.ttf: IPAGothic,IPAゴシック:style=Regular


user@brain:~$ cd


user@brain:~$ cat .fbtermrc
# Configuration for FbTerm

# Lines starting with '#' are ignored.
# Note that end-of-line comments are NOT supported, comments must be on a line of their own.


# font family names/pixelsize used by fbterm, multiple font family names must be seperated by ','
# and using a fixed width font as the first is strongly recommended
font-names=IPAGothic,mono
font-size=12

# force font width (and/or height), usually for non-fixed width fonts
# legal value format: n (fw_new = n), +n (fw_new = fw_old + n), -n (fw_new = fw_old - n)
#font-width=
#font-height=

# default color of foreground/background text
# available colors: 0 = black, 1 = red, 2 = green, 3 = brown, 4 = blue, 5 = magenta, 6 = cyan, 7 = white
color-foreground=7
color-background=0

# max scroll-back history lines of every window, value must be [0 - 65535], 0 means disable it
history-lines=1000

# up to 5 additional text encodings, multiple encodings must be seperated by ','
# run 'iconv --list' to get available encodings.
text-encodings=

# cursor shape: 0 = underline, 1 = block
# cursor flash interval in milliseconds, 0 means disable flashing
cursor-shape=0
cursor-interval=500

# additional ascii chars considered as part of a word while auto-selecting text, except ' ', 0-9, a-z, A-Z
word-chars=._-

# change the clockwise orientation angle of screen display
# available values: 0 = 0 degree, 1 = 90 degrees, 2 = 180 degrees, 3 = 270 degrees
screen-rotate=0

# specify the favorite input method program to run
input-method=

# treat ambiguous width characters as wide
#ambiguous-wide=yes


user@brain:~$

・localeの設定をします

sudo apt install locales-all

sudo brain-config を起動して、以下のメニューに移動します。
3 Localisation Options
L1 Locale

en_US.UTF-8 UTF-8はすでに選択されています。

ja_JP.UTF-8 UTF-8 を選択して Ok

システム言語設定を英語にする場合
en_US.UTF-8 を選択してOK

システム言語設定を日本語にする場合
ja_JP.UTF-8 を選択してOk

ログインし直してfbtermを起動します。

user@brain:~$ sudo apt show locales-all
Package: locales-all
Version: 2.31-13+deb11u11
Priority: optional
Section: localization
Source: glibc
Maintainer: GNU Libc Maintainers <debian-glibc@lists.debian.org>
Installed-Size: 227 MB
Depends: libc-l10n (>> 2.31)
Homepage: https://www.gnu.org/software/libc/libc.html
Download-Size: 10.8 MB
APT-Sources: http://archive.debian.org/debian bullseye/main armel Packages
Description: GNU C Library: Precompiled locale data
 This package contains the precompiled locale data for all supported locales.
 A better alternative is to install the locales package and only select
 desired locales, but it can be useful on a low-memory machine because some
 locale files take a lot of memory to be compiled.


user@brain:~$ sudo apt install locales-all
Reading package lists... Done
Building dependency tree... Done
Reading state information... Done
The following NEW packages will be installed:
  locales-all
0 upgraded, 1 newly installed, 0 to remove and 1 not upgraded.
Need to get 10.8 MB of archives.
After this operation, 227 MB of additional disk space will be used.
Get:1 http://archive.debian.org/debian bullseye/main armel locales-all armel 2.31-13+deb11u11 [10.8 MB]
Fetched 10.8 MB in 13s (849 kB/s)
Selecting previously unselected package locales-all.
(Reading database ... 46337 files and directories currently installed.)
Preparing to unpack .../locales-all_2.31-13+deb11u11_armel.deb ...
Unpacking locales-all (2.31-13+deb11u11) ...
Setting up locales-all (2.31-13+deb11u11) ...


user@brain:~$ sudo brain-config


user@brain:~$ locale
LANG=en_US.UTF-8
LANGUAGE=
LC_CTYPE="en_US.UTF-8"
LC_NUMERIC="en_US.UTF-8"
LC_TIME="en_US.UTF-8"
LC_COLLATE="en_US.UTF-8"
LC_MONETARY="en_US.UTF-8"
LC_MESSAGES="en_US.UTF-8"
LC_PAPER="en_US.UTF-8"
LC_NAME="en_US.UTF-8"
LC_ADDRESS="en_US.UTF-8"
LC_TELEPHONE="en_US.UTF-8"
LC_MEASUREMENT="en_US.UTF-8"
LC_IDENTIFICATION="en_US.UTF-8"
LC_ALL=
user@brain:~$

これで、X11環境でなくても、日本語表示できるようになりました。


日本語(全角)文字列の入力について (2025/12/10追加)

これで、fbterm上でjwm上での日本語(全角)文字列の出力は成功しましたが、
次に日本語(全角)文字列の入力もできるようにしたいです。

Brain関連のサイトも参考にします。
日本語を表示・入力する – Brain Hackers

デフォルトで日本語入力のためのパッケージは入っているようです。
入っていなければ、パッケージを追加します。
apt install fbterm uim-fep uim-anthy

以下の設定を追加します。

$ vi ~/.uim        以下の”&lt;”は”<“に、”&gt”は”>”に変換してください。

(define default-im-name 'anthy-utf8)
(define-key generic-on-key?  '("<Control>`" "<Control> "))
(define-key generic-off-key? '("<Control>`" "<Control> "))

これで、
Ctrl+`(Ctrl+[英語キーボード認識での日本語キーボードでの半角/全角]) か、 
Ctrl+スペース で
全角/半角の入力を切り替えにできます。
(本当はALT+’とかにしたかったのですが、うまくいかなかった)

ここまでで、事前準備は完了です。
そうしたら、コンソール上で全角文字を入力してみます。
Shell上のfbterm上や、
jwm上のTermial(lxterminalやxterm)で以下のコマンド入力してください

uim-fep

するとコンソール/ターミナルの一番下に”anthy-utf8[[An- R]”と表示されます。
あとは設定した切替キーを押すたびに、半角/全角が切り替えできます。
入力したらスペースやカーソル上下で選んで、実行(Enter)で確定です。

日本語(全角)文字列が不要になった場合は、以下のコマンドでuim-fepを終了できます
exit

—-

ただし、この時点ではコンソールソフトウェア以外では日本語全角文字の入力ができませんでした。調べてみると、uim-ximを使うといいようです。

パッケージのインストール
$ sudo apt install uim-xim uim-gtk2.0 uim-gtk3 uim-qt5

なお、上記設定後に1度リブートした後は、
X環境上のTerminal(lxterminal)でも、日本語入力ができるようになりました。
(最下段のFEPステータスは表示されません。表示したい場合はuim-fepを起動)

その他のコマンドについて対応するため、
以下のファイルを編集します。

$ vi ~/.xprofile

export CLUTTER_IM_MODULE=xim
export GTK_IM_MODULE=’uim’
export QT_IM_MODULE=’uim’
export QT4_IM_MODULE=’uim’
export XMODIFIERS=’@im=uim’
uim-xim &
uim-toolbar-gtk3-systrray &
uim-toolbar-gtk3 &

toolbar2つについては、必須ではないので不要であれば#でコメントアウトしてください
(起動後に右クリックから終了することもできます。)

これでX環境を再起動すると、対応したアプリで日本語入力可能になります。
(Toolbarの2つは、ターミナルを起動すると正しく表示されます)

アプリ側でも全角文字のサポート対応が必要な場合があるので、
日本語入力できるかはアプリ次第になります。
(gedit [sudo apt install gedit] では、日本語入力できることを確認しています。)

もし、普段日本語入力しないのであれば、メモリ確保のためにコメント化して、
必要なときのみ手動で起動するのも手かもしれません。
(toolbar分だけでメモリの27MBくらいを消費します)
uim-xim [2.3M] 、uim-toolbar-gtk3-systrray [14M]、uim-toolbar-gtk3 [13M]

もしくは、コンソール上でuim-fepでの入力できるようにするという運用もあります。

ただこの環境だとxtermでの文字変換中に文字化け(確定すると正常)するので、
そのうち、別のIMについても調べてみたいです。

多分この辺が参考になりそう
Debian系で複数のIM(インプットメソッド)を立ち上げる


BrainuxのX環境でのタッチパネル操作について (2025/12/12追加)

Brainの画面はタッチパネルになっているので、
マウス操作と左クリックについては標準でできるようになっています。

ただ、右クリックについてはタッチパネルから操作できないようで、
USBマウスを接続するしか方法が見つかりませんでした。

なので、今回タッチパネルで右クリックできないか調査してみました。
JVMは軽量のWindowsマネージャだから、この辺の機能はドライバ次第。

まずは、タッチパネルのデバイス名を確認します

$ sudo apt install xinput
$ xinput

user@brain:~$ xinput
⎡ Virtual core pointer                          id=2    [master pointer  (3)]
⎜   ↳ Virtual core XTEST pointer                id=4    [slave  pointer  (2)]
⎜   ↳ mxs-lradc-ts                              id=6    [slave  pointer  (2)]
⎣ Virtual core keyboard                         id=3    [master keyboard (2)]
    ↳ Virtual core XTEST keyboard               id=5    [slave  keyboard (3)]
    ↳ brain-kbd-gpio                            id=16   [slave  keyboard (3)]
user@brain:~$

タッチパネルのデバイス名は、「mxs-lradc-ts」で認識されていますね。
i.MX SoC 系のタッチスクリーンで、組み込み系や軽量Linuxでよく使われているみたい。

このデバイスは xinput では認識されてるけど、右クリックのエミュレーションが有効かどうかは別問題。Evdev ドライバを使っているといいんだけど・・・・

$ xinput list-props “mxs-lradc-ts”

user@brain:~$ xinput list-props "mxs-lradc-ts"
Device 'mxs-lradc-ts':
        Device Enabled (115):   1
        Coordinate Transformation Matrix (116): 1.000000, 0.000000, 0.000000, 0.000000, 1.000000, 0.000000, 0.000000, 0.000000, 1.000000
        Device Accel Profile (239):     0
        Device Accel Constant Deceleration (240):       1.000000
        Device Accel Adaptive Deceleration (241):       1.000000
        Device Accel Velocity Scaling (242):    10.000000
        Device Product ID (243):        0, 0
        Device Node (244):      "/dev/input/event1"
        Evdev Axis Inversion (245):     0, 0
        Evdev Axis Calibration (246):   173, 3948, 3981, 353
        Evdev Axes Swap (247):  0
        Axis Labels (248):      "Abs X" (236), "Abs Y" (237), "Abs Pressure" (238)
        Button Labels (249):    "Button Unknown" (235), "Button Unknown" (235), "Button Unknown" (235), "Button Wheel Up" (121), "Button Wheel Down" (122)
        Evdev Scrolling Distance (250): 0, 0, 0
        Evdev Middle Button Emulation (251):    0
        Evdev Middle Button Timeout (252):      50
        Evdev Middle Button Button (253):       2
        Evdev Third Button Emulation (254):     0
        Evdev Third Button Emulation Timeout (255):     1000
        Evdev Third Button Emulation Button (256):      3
        Evdev Third Button Emulation Threshold (257):   20
        Evdev Wheel Emulation (258):    0
        Evdev Wheel Emulation Axes (259):       0, 0, 4, 5
        Evdev Wheel Emulation Inertia (260):    10
        Evdev Wheel Emulation Timeout (261):    200
        Evdev Wheel Emulation Button (262):     4
        Evdev Drag Lock Buttons (263):  0
user@brain:~$

Evdev ドライバを使っているようです。
右クリックであるThird Buttonの情報を抜き出してみると

        Evdev Third Button Emulation (254):     0
        Evdev Third Button Emulation Timeout (255):     1000
        Evdev Third Button Emulation Button (256):      3
        Evdev Third Button Emulation Threshold (257):   20

ドライバ的にはエミュレーション機能は持っているけど、無効状態でした。
ほかの設定も併せて有効にしてみます。(「”」,「”」 は「”」に打ち直してみてください。)

コマンド

$ xinput set-prop "mxs-lradc-ts" "Evdev Third Button Emulation" 1
$ xinput set-prop "mxs-lradc-ts" "Evdev Third Button Emulation Timeout" 750
$ xinput set-prop "mxs-lradc-ts" "Evdev Third Button Emulation Threshold" 30

;Timeout: 長押しと判定するまでの時間(ミリ秒)
;Threshold: 指を動かさずに押し続ける許容距離(ピクセル)

これで、タッチパネルを長押しすると、右クリックメニューが出てきました。

ただ、この設定は、再起動すると初期化されるので、
起動時に自動設定されるように、~/.xprofileに追記しておきます。

$ vi ~/.xprofile

xinput set-prop "mxs-lradc-ts" "Evdev Third Button Emulation" 1
xinput set-prop "mxs-lradc-ts" "Evdev Third Button Emulation Timeout" 750
xinput set-prop "mxs-lradc-ts" "Evdev Third Button Emulation Threshold" 30

—-

また、長押しがうまくいかない方のために
マウスクリックをエミュレーションするコマンドを使う方法も紹介します。

$ sudo apt install xdotool
$ xdotool click 3

これで、現在マウスカーソルがあるところで、右クリックを押したことになります。
xbindkeysあたりと組み合わせれば、特手の本体キーに右クリックを割り当てることも
可能です。

$ sudo apt install xbindkeys tcl tk
$ xbindkeys –defaults > ~/.xbindkeysrc

設定するキーは xbindkeys -k で確認できます。
試しに、Ctrl + ALT + z(>>の上 + 文字切替 + z)を入力すると、
Control+Alt + z
と表示されるので、そのまま定義ファイルに設定して、
xbindkeysを起動すれば OKです。
設定したキーを入力すると右クリックをしたことになります。

$ vi ~/.xbindkeysrc

"xdotool click 3"
 Control+Alt + z


$ xbindkeys

キー割り当てについは、別のアプリとぶつからないように調整してください。
Brain本体キーの「>>下」「ツール」「HOME」あたりがBrainuxで使えないのが痛い

なお、再起動後も設定を永続する場合は、以下の行を追加して下さい。

$ vi ~/.xprofille
bash xbindkeys_autostart 


Brainux のX環境でのソフトウェアキーボードについて

Brainについてはキー数が少ないため、Brainux上でのキー入力は
一般的なキーバインドでは無いです。
特に記号については、キーの割り当て表を見ながらではないと正直覚えきれないのと、
私のPW-SH3では一部キーでは、勝手にリピートしてしまうこともあり、
USBキーボードの出番になることも多いです。

Brainの画面はタッチパネル機能付きですので、
今回X11用のソフトウェアキーボードを見つけましたので、試してみました。

xvkbd X11用ソフトウェア仮想キーボード
xvkbdは、X Window System用の仮想(グラフィカル)キーボードプログラムです。画面に表示されたキーボードをクリックすることで、他のクライアント(ソフトウェア)に文字を入力することができます。キオスク端末やハンドヘルドデバイスなど、ハードウェアキーボードを搭載していないシステムでも使用できます。また、コマンドラインオプションで指定した文字を他のクライアントに送信する機能も備えています。

インストールは、APT経由で可能です。
sudo apt install xvkbd

起動は、X環境上のターミナルから以下のコマンドで可能です。
xvkbd &

標準では、英語キーボードタイプ(ファンクションキー&テンキー付き)で表示されます。

キーをいくつか入力すると、単語補完機能により、候補を表示させる機能があります。
(“te”まで入れた結果、いくつかの単語が候補で出ています。)

右下の”xvkbd”キーから、表示形式などのカスタマイズができます。
標準では、keypad(10キー)とFunction(ファンクションキー)にチェックが入っているので
テンキー&ファンクションキー付きで表示されています。

もし単語補完機能が不要であれば、”xvkbd”キーメニューから「Propety」 に進めば、
設定可能です。
Dynamic Dictionay Weight に “0” を入力し、[Integrate Completion Panel?]の選択を外して、xvkbdを再起動すれば、単語補完機能は無効になるようです。

「Keypad」「Sun Funtion Keys」で、10キー、ファンクションキーを
それぞれ別ウインドウとして分離表示することも可能です。

コマンド起動時から、10キー、ファンクションキーを表示しないようにするためには、
以下のように実行します。
xvkbd -compact &

同様に起動時に以下のようにすると、Shiftの押下状況に応じて、
入力される文字のみ表示されるようになります。
xvkbd -modal &


個人的に残念なのは、
本体部分のReturnキーの上のキーがそのままではDELキーになり、
SHIFTを押すことでBSキーになることです。
DELキーとBSキーでは圧倒的にBSキーのほうが使用回数が多いので、
これが逆であれば、理想通りでした。

と、いうことで、設定ファイルを書き換えて入れ替えできるか確かめてみます。

xvkbd の設定ファイルは、/etc/X11/app-defaults/XVkbd-common になりますので、
このファイルのバックアップを取って更新してみます。

変更前 cat /etc/X11/app-defaults/XVkbd-common

変更内容
  sudo vi /etc/X11/app-defaults/XVkbd-common

   1ブロック: 75 <-> 45
  2,3ブロック:BackSpace <-> Delete
   4ブロック:BackSpace <-> Delete , Del <-> BS
   5ブロック:Delete -> BackSpace , BS -> Del
   6ブロック:BackSpace -> Delete , Del -> BS

変更後 cat /etc/X11/app-defaults/XVkbd-common

一度、xvkbdを終了して、あたらしく、起動します。
できたー

もし、BrainuxのX環境起動時に自動的に、xvkbdを起動させたいのであれば、
~/.xprofile に以下のように追記してください。

$ vi ~/.xprofile
xvkbd &


(参考)Terminal上で使用可能なコマンド[2024-12-23-202715版]

userでpathが通っているコマンド

user@brain:~$
Display all 918 possibilities? (y or n)
!                                     fi                                    pushd
./                                    file                                  pwd
:                                     fincore                               pwdx
[                                     find                                  py3clean
[[                                    findmnt                               py3compile
]]                                    flex                                  py3versions
{                                     flex++                                pydoc3
}                                     flock                                 pydoc3.9
aclocal                               fmt                                   pygettext3
aclocal-1.16                          fold                                  pygettext3.9
aconnect                              for                                   pygmentize
addpart                               free                                  python3
addr2line                             function                              python3.9
alias                                 fuser                                 python3.9-config
alsabat                               g++                                   python3-config
alsaloop                              g++-10                                qemu-arm-static
alsamixer                             gcc                                   ranlib
alsatplg                              gcc-10                                rbash
alsaucm                               gcc-ar                                rcp
amidi                                 gcc-ar-10                             rdma
amixer                                gcc-nm                                read
anthy-agent                           gcc-nm-10                             readarray
anthy-dic-tool                        gcc-ranlib                            readelf
aplay                                 gcc-ranlib-10                         readlink
aplaymidi                             gcov                                  readonly
apropos                               gcov-10                               realpath
apt                                   gcov-dump                             rendercheck
apt-cache                             gcov-dump-10                          renice
apt-cdrom                             gcov-tool                             reset
apt-config                            gcov-tool-10                          resize
apt-extracttemplates                  gencat                                resizepart
apt-ftparchive                        geqn                                  resolvectl
apt-get                               getconf                               return
apt-key                               getent                                rev
apt-mark                              getopt                                rgrep
apt-sortpkgs                          getopts                               rlogin
ar                                    git                                   rm
arch                                  git-receive-pack                      rmdir
arecord                               git-shell                             rnano
arecordmidi                           git-upload-archive                    routef
arm-linux-gnueabi-addr2line           git-upload-pack                       routel
arm-linux-gnueabi-ar                  gmake                                 rpcgen
arm-linux-gnueabi-as                  gnome-terminal                        rsh
arm-linux-gnueabi-c++filt             gnome-terminal.wrapper                rtstat
arm-linux-gnueabi-cpp                 gold                                  runcon
arm-linux-gnueabi-cpp-10              gpasswd                               run-parts
arm-linux-gnueabi-dwp                 gpg                                   rview
arm-linux-gnueabi-elfedit             gpg-agent                             rvim
arm-linux-gnueabi-g++                 gpgcompose                            savelog
arm-linux-gnueabi-g++-10              gpgconf                               scp
arm-linux-gnueabi-gcc                 gpg-connect-agent                     script
arm-linux-gnueabi-gcc-10              gpgparsemail                          scriptlive
arm-linux-gnueabi-gcc-ar              gpgsm                                 scriptreplay
arm-linux-gnueabi-gcc-ar-10           gpgsplit                              sdiff
arm-linux-gnueabi-gcc-nm              gpgtar                                sed
arm-linux-gnueabi-gcc-nm-10           gpgv                                  select
arm-linux-gnueabi-gcc-ranlib          gpg-wks-server                        select-default-iwrap
arm-linux-gnueabi-gcc-ranlib-10       gpg-zip                               select-editor
arm-linux-gnueabi-gcov                gpic                                  sensible-browser
arm-linux-gnueabi-gcov-10             gprof                                 sensible-editor
arm-linux-gnueabi-gcov-dump           grep                                  sensible-pager
arm-linux-gnueabi-gcov-dump-10        groff                                 seq
arm-linux-gnueabi-gcov-tool           grog                                  set
arm-linux-gnueabi-gcov-tool-10        grops                                 setarch
arm-linux-gnueabi-gold                grotty                                setpriv
arm-linux-gnueabi-gprof               groups                                setsid
arm-linux-gnueabi-ld                  gtbl                                  setterm
arm-linux-gnueabi-ld.bfd              gtf                                   setxkbmap
arm-linux-gnueabi-ld.gold             gtk-update-icon-cache                 sftp
arm-linux-gnueabi-lto-dump-10         gunzip                                sg
arm-linux-gnueabi-nm                  gzexe                                 sh
arm-linux-gnueabi-objcopy             gzip                                  sha1sum
arm-linux-gnueabi-objdump             h2ph                                  sha224sum
arm-linux-gnueabi-pkg-config          h2xs                                  sha256sum
arm-linux-gnueabi-python3.9-config    hash                                  sha384sum
arm-linux-gnueabi-python3-config      hd                                    sha512sum
arm-linux-gnueabi-ranlib              head                                  shasum
arm-linux-gnueabi-readelf             help                                  shift
arm-linux-gnueabi-size                helpztags                             shopt
arm-linux-gnueabi-strings             hexdump                               shred
arm-linux-gnueabi-strip               history                               shuf
arm-unknown-linux-gnueabi-pkg-config  host                                  size
as                                    hostid                                skill
aseqdump                              hostname                              sl
aseqnet                               hostnamectl                           slabtop
atobm                                 htop                                  sleep
autoconf                              ico                                   slogin
autoheader                            ico-dvd                               snice
autom4te                              iconv                                 soelim
automake                              id                                    sort
automake-1.16                         iecset                                source
autoreconf                            if                                    speaker-test
autoscan                              ifnames                               splain
autoupdate                            in                                    split
awk                                   infocmp                               ss
axfer                                 infotocap                             ssh
b2sum                                 install                               ssh-add
base32                                instmodsh                             ssh-agent
base64                                ionice                                ssh-argv0
basename                              ip                                    ssh-copy-id
basenc                                ipcmk                                 ssh-keygen
bash                                  ipcrm                                 ssh-keyscan
bashbug                               ipcs                                  startx
bg                                    ipython3                              stat
bind                                  ischroot                              stdbuf
bison                                 ispell-wrapper                        streamzip
bison.yacc                            jobs                                  strings
bitmap                                join                                  strip
bmtoa                                 journalctl                            stty
bootctl                               json_pp                               su
brain-config                          jwm                                   sudo
break                                 kbxutil                               sudoedit
builtin                               kernel-install                        sudoreplay
bunzip2                               kill                                  sum
busctl                                killall                               suspend
busybox                               kmod                                  sync
bwrap                                 koi8rxterm                            systemctl
bzcat                                 last                                  systemd
bzcmp                                 lastb                                 systemd-analyze
bzdiff                                lastlog                               systemd-ask-password
bzegrep                               lcf                                   systemd-cat
bzexe                                 ld                                    systemd-cgls
bzfgrep                               ld.bfd                                systemd-cgtop
bzgrep                                ldd                                   systemd-delta
bzip2                                 ld.gold                               systemd-detect-virt
bzip2recover                          less                                  systemd-escape
bzless                                lessecho                              systemd-hwdb
bzmore                                lessfile                              systemd-id128
c++                                   lesskey                               systemd-inhibit
c89                                   lesspipe                              systemd-machine-id-setup
c89-gcc                               let                                   systemd-mount
c99                                   lex                                   systemd-notify
c99-gcc                               lexgrog                               systemd-path
caller                                libnetcfg                             systemd-resolve
captoinfo                             libpng16-config                       systemd-run
case                                  libpng-config                         systemd-socket-activate
cat                                   libtoolize                            systemd-stdio-bridge
catchsegv                             link                                  systemd-sysusers
catman                                linux32                               systemd-tmpfiles
cc                                    linux64                               systemd-tty-ask-password-agent
cd                                    linux-check-removal                   systemd-umount
c++filt                               linux-update-symlinks                 tabs
chage                                 linux-version                         tac
chattr                                ln                                    tail
chcon                                 lnstat                                tar
chfn                                  local                                 tasksel
chgrp                                 locale                                taskset
chmod                                 localectl                             tbl
choom                                 localedef                             tee
chown                                 logger                                tempfile
chrt                                  login                                 test
chsh                                  loginctl                              then
cksum                                 logname                               tic
clear                                 logout                                time
clear_console                         look                                  timedatectl
cmp                                   ls                                    timeout
col                                   lsattr                                times
colcrt                                lsblk                                 tload
colrm                                 lscpu                                 tmux
column                                lsinitramfs                           toe
comm                                  lsipc                                 top
command                               lslocks                               touch
compgen                               lslogins                              tput
complete                              lsmem                                 tr
compopt                               lsmod                                 transset
continue                              lsns                                  trap
convert-dtsv0                         lspgpot                               troff
coproc                                lsusb                                 true
corelist                              lto-dump-10                           truncate
cp                                    lua                                   tset
cpan                                  lua5.1                                tsort
cpan5.32-arm-linux-gnueabi            luac                                  tty
cpio                                  luac5.1                               type
cpp                                   lxterm                                typeset
cpp-10                                lxterminal/                           tzselect
c_rehash                              ly                                    ucf
crontab                               lzcat                                 ucfq
csplit                                lzcmp                                 ucfr
ctstat                                lzdiff                                udevadm
curl                                  lzegrep                               uim-fep
cut                                   lzfgrep                               uim-fep-tick
cvt                                   lzgrep                                uim-help
cvtsudoers                            lzless                                uim-m17nlib-relink-icons
dash                                  lzma                                  uim-module-manager
date                                  lzmainfo                              uim-sh
dbus-cleanup-sockets                  lzmore                                uim-toolbar
dbus-daemon                           m17n-db                               ul
dbus-monitor                          m4                                    ulimit
dbus-run-session                      make                                  umask
dbus-send                             make-first-existing-target            umount
dbus-update-activation-environment    man                                   unalias
dbus-uuidgen                          mandb                                 uname
dd                                    manpath                               uncompress
debconf                               man-recode                            unexpand
debconf-apt-progress                  mapfile                               uniq
debconf-communicate                   mawk                                  unlink
debconf-copydb                        mcookie                               unlzma
debconf-escape                        md5sum                                unmkinitramfs
debconf-set-selections                md5sum.textutils                      unpigz
debconf-show                          mesg                                  unset
deb-systemd-helper                    midori                                unshare
deb-systemd-invoke                    migrate-pubring-from-classic-gpg      until
declare                               mkdir                                 unxz
delpart                               mkfifo                                update-alternatives
df                                    mknod                                 update-mime-database
dh_autotools-dev_restoreconfig        mktemp                                uptime
dh_autotools-dev_updateconfig         more                                  usb-devices
dh_numpy3                             mount                                 usbhid-dump
dh_xsf_substvars                      mountpoint                            usbreset
dialog                                mt                                    users
diff                                  mt-gnu                                utmpdump
diff3                                 mv                                    uxterm
dir                                   namei                                 vdir
dircolors                             nano                                  vi
dirmngr                               nawk                                  view
dirmngr-client                        neofetch                              vim
dirname                               neqn                                  vim.basic
dirs                                  netstat                               vimdiff
disown                                netsurf                               vim.tiny
dmesg                                 netsurf-gtk                           vimtutor
dnsdomainname                         networkctl                            vmstat
do                                    newgrp                                w
domainname                            nice                                  wait
done                                  nisdomainname                         wall
dpkg                                  nl                                    watch
dpkg-architecture                     nm                                    watchgnupg
dpkg-buildflags                       nmcli                                 wc
dpkg-buildpackage                     nm-online                             wdctl
dpkg-checkbuilddeps                   nmtui                                 wget
dpkg-deb                              nmtui-connect                         whatis
dpkg-distaddfile                      nmtui-edit                            whereis
dpkg-divert                           nmtui-hostname                        which
dpkg-genbuildinfo                     nohup                                 while
dpkg-genchanges                       nproc                                 whiptail
dpkg-gencontrol                       nroff                                 who
dpkg-gensymbols                       nsenter                               whoami
dpkg-maintscript-helper               nstat                                 wpa_passphrase
dpkg-mergechangelogs                  numfmt                                write
dpkg-name                             objcopy                               write.ul
dpkg-parsechangelog                   objdump                               X
dpkg-query                            oclock                                x11perf
dpkg-realpath                         od                                    x11perfcomp
dpkg-scanpackages                     openssl                               xargs
dpkg-scansources                      pager                                 xauth
dpkg-shlibdeps                        partx                                 xbiff
dpkg-source                           passwd                                xcalc
dpkg-split                            paste                                 xclipboard
dpkg-statoverride                     patch                                 xclock
dpkg-trigger                          pathchk                               xconsole
dpkg-vendor                           pcmanfm                               xcursorgen
dtc                                   pdb3                                  xcutsel
dtdiff                                pdb3.9                                xdg-dbus-proxy
du                                    peekfd                                xditview
dwp                                   perf                                  xedit
echo                                  perl                                  xeyes
editor                                perl5.32.1                            xgc
egrep                                 perl5.32-arm-linux-gnueabi            xinit
elfedit                               perlbug                               xinput_calibrator
elif                                  perldoc                               xkbbell
else                                  perlivp                               xkbcomp
enable                                perlthanks                            xkbevd
enable_rndis_gadget                   pgrep                                 xkbprint
enc2xs                                pic                                   xkbvleds
encguess                              pico                                  xkbwatch
env                                   piconv                                xload
eqn                                   pidof                                 xlogo
esac                                  pidwait                               xmag
eval                                  pigz                                  xman
ex                                    pinentry                              xmore
exec                                  pinentry-curses                       Xorg
exit                                  ping                                  xsubpp
expand                                ping4                                 xterm
expiry                                ping6                                 x-terminal-emulator
export                                pinky                                 xwd
expr                                  pip                                   x-window-manager
f2py3                                 pip3                                  xwud
f2py3.9                               pkaction                              x-www-browser
factor                                pkcheck                               xxd
faillog                               pkexec                                xz
fallocate                             pkg-config                            xzcat
false                                 pkill                                 xzcmp
fbterm                                pkttyagent                            xzdiff
fc                                    pl2pm                                 xzegrep
fc-cache                              pldd                                  xzfgrep
fc-cat                                pmap                                  xzgrep
fc-conflist                           pod2html                              xzless
fcitx                                 pod2man                               xzmore
fcitx4-config                         pod2text                              yacc
fcitx-autostart                       pod2usage                             yes
fcitx-configtool                      podchecker                            ypdomainname
fcitx-dbus-watcher                    popd                                  zcat
fcitx-diagnose                        pr                                    zcmp
fcitx-remote                          preconv                               zdiff
fcitx-skin-installer                  printenv                              zdump
fc-list                               printf                                zegrep
fc-match                              prlimit                               zfgrep
fc-pattern                            prove                                 zforce
fc-query                              prtstat                               zgrep
fc-scan                               ps                                    zip
fc-validate                           pslog                                 zipcloak
fdtdump                               pstree                                zipdetails
fdtget                                pstree.x11                            zipnote
fdtoverlay                            ptar                                  zipsplit
fdtput                                ptardiff                              zless
fg                                    ptargrep                              zmore
fgrep                                 ptx                                   znew

sudo コマンド上でpathが通っているコマンド

(なお、slコマンドだけはsudo上での実行はpathが通っていなくて、出来ないようです。)

accessdb
addgnupghome
addgroup
add-shell
adduser
agetty
alsabat-test
alsactl
alsa-info
applygnupgdefaults
arp
arpd
aspell-autobuildhash
avahi-daemon
badblocks
blkdeactivate
blkdiscard
blkid
blkzone
blockdev
bridge
capsh
cfdisk
chcpu
chgpasswd
chmem
chpasswd
chroot
cpgr
cppw
cron
ctrlaltdel
debugfs
delgroup
deluser
depmod
devlink
dhclient
dhclient-script
dmsetup
dmstats
dpkg-fsys-usrunmess
dpkg-preconfigure
dpkg-reconfigure
dumpe2fs
e2freefrag
e2fsck
e2image
e2label
e2mmpstatus
e2scrub
e2scrub_all
e2undo
e4crypt
e4defrag
faillock
fake-hwclock
fdformat
fdisk
filefrag
findfs
fsck
fsck.cramfs
fsck.ext2
fsck.ext3
fsck.ext4
fsck.minix
fsfreeze
fstab-decode
fstrim
genl
getcap
getpcaps
getty
groupadd
groupdel
groupmems
groupmod
grpck
grpconv
grpunconv
halt
hwclock
iconvconfig
ifconfig
ifdown
ifquery
ifup
init
insmod
installkernel
invoke-rc.d
ipmaddr
iptunnel
isosize
ispell-autobuildhash
iw
killall5
ldattach
ldconfig
locale-gen
logrotate
logsave
losetup
mii-tool
mke2fs
mkfs
mkfs.bfs
mkfs.cramfs
mkfs.ext2
mkfs.ext3
mkfs.ext4
mkfs.minix
mkhomedir_helper
mkinitramfs
mklost+found
mkswap
modinfo
modprobe
nameif
NetworkManager
newusers
nft
nologin
pam-auth-update
pam_getenv
pam_timestamp_check
parted
partprobe
pivot_root
plipconfig
poweroff
pwck
pwconv
pwunconv
rarp
raw
readprofile
reboot
remove-default-ispell
remove-default-wordlist
remove-shell
resize2fs
resolvconf
rmmod
rmt
rmt-tar
route
rsyslogd
rtacct
rtcwake
rtmon
runlevel
runuser
select-default-ispell
select-default-wordlist
service
setcap
sfdisk
shadowconfig
shutdown
slattach
sshd
start-stop-daemon
sudo_logsrvd
sudo_sendlog
sulogin
swaplabel
swapoff
swapon
switch_root
sysctl
tarcat
tc
telinit
th-cmd
thd
tipc
tune2fs
tzconfig
unix_chkpwd
unix_update
update-ca-certificates
update-default-aspell
update-default-ispell
update-default-wordlist
update-dictcommon-aspell
update-dictcommon-hunspell
update-icon-caches
update-initramfs
update-locale
update-passwd
update-rc.d
useradd
userdel
usermod
validlocale
vigr
vipw
visudo
wipefs
wpa_action
wpa_cli
wpa_supplicant
zic
zramctl

Views: 1115

カテゴリー: Brainux | コメントする