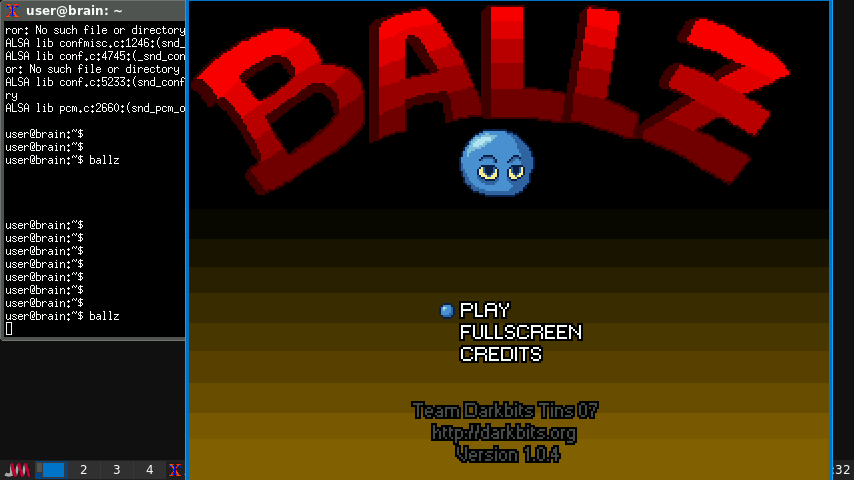
SDL系ライブラリ(SDL1.2,SDL2)を利用しているゲーム
SDL1.2ライブラリを利用したソフトウェア
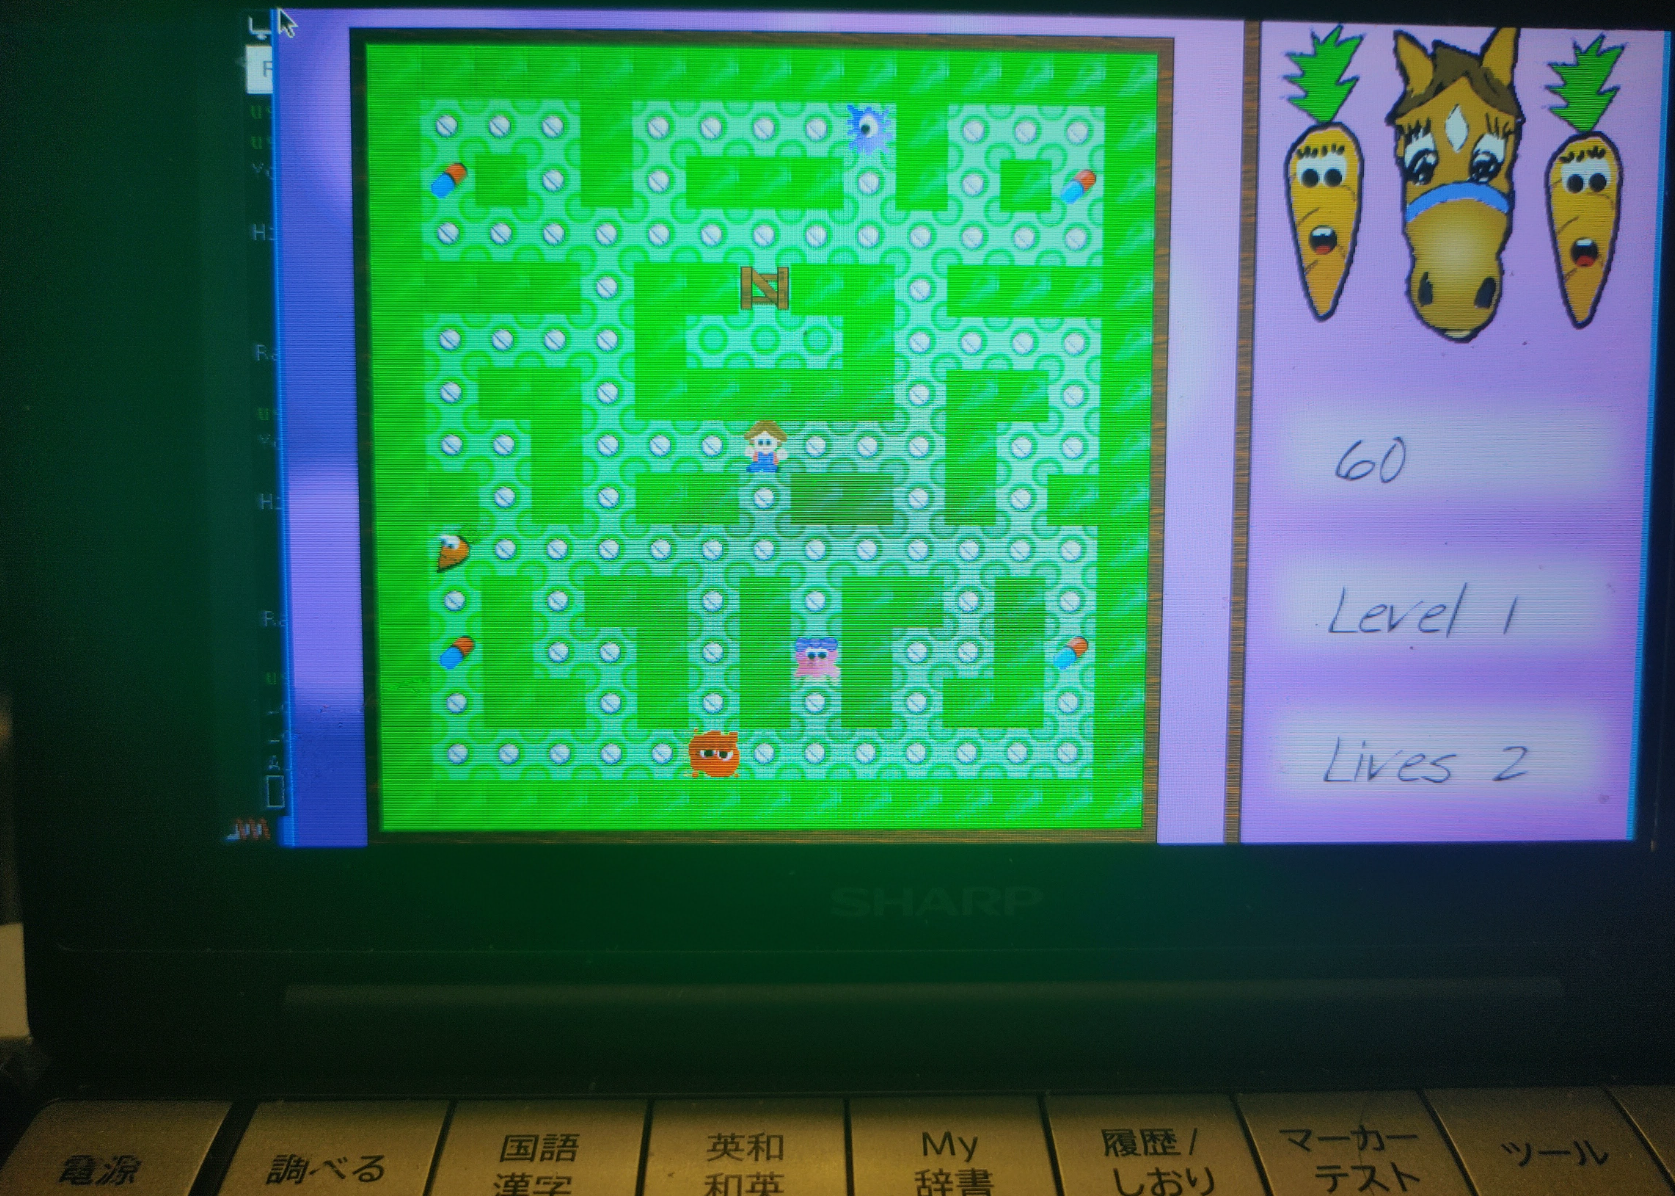
◎ hannah pacman-like game, child oriented (パックマン風のドットイートゲーム)
https://packages.debian.org/bullseye/hannah
パックマンライクなドットイートゲームです。
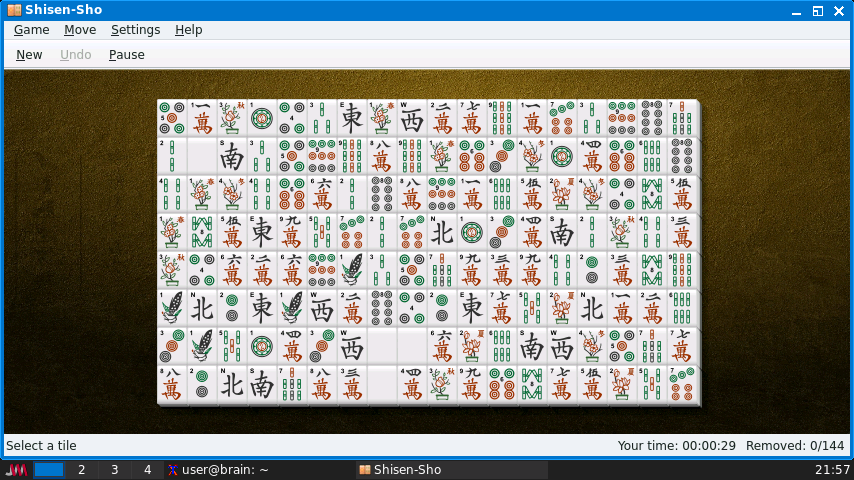
起動そのままの状態では、Brainの解像度の関係で迷路の一番下が隠れているので、
そこは残念ですが、速度、音楽(要USBサウンドデバイス)ともに正常に遊べます。
ゲーム自体は以下のようにすれば、画面を移動することで、
ゲーム画面すべてを表示させて遊べます。
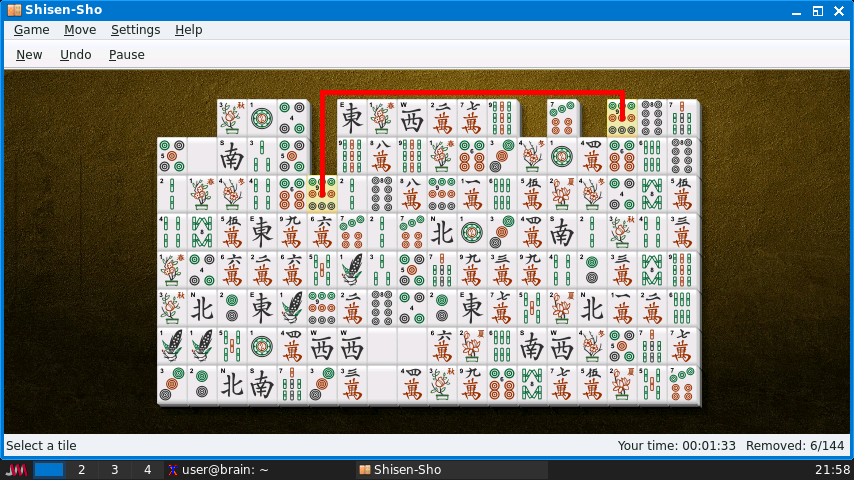
・LayerをAboveに変更
・Moveで、街路全体が表示されるように、Windowを上に移動する。
(移動すると、ウィンドウから終了はできないので、コンソールから
Ctrl+Cで終了する必要があります。)
詳しい説明は、man hannahで確認してください。
インストール:APT経由 ”sudo apt install hannah”
[trixie 以降でSDL2に移行済。t64のライブラリと依存なし。]
[trixieベースのBrainuxでは、sudo apt -t bookworm install hannahで導入可能]
———-
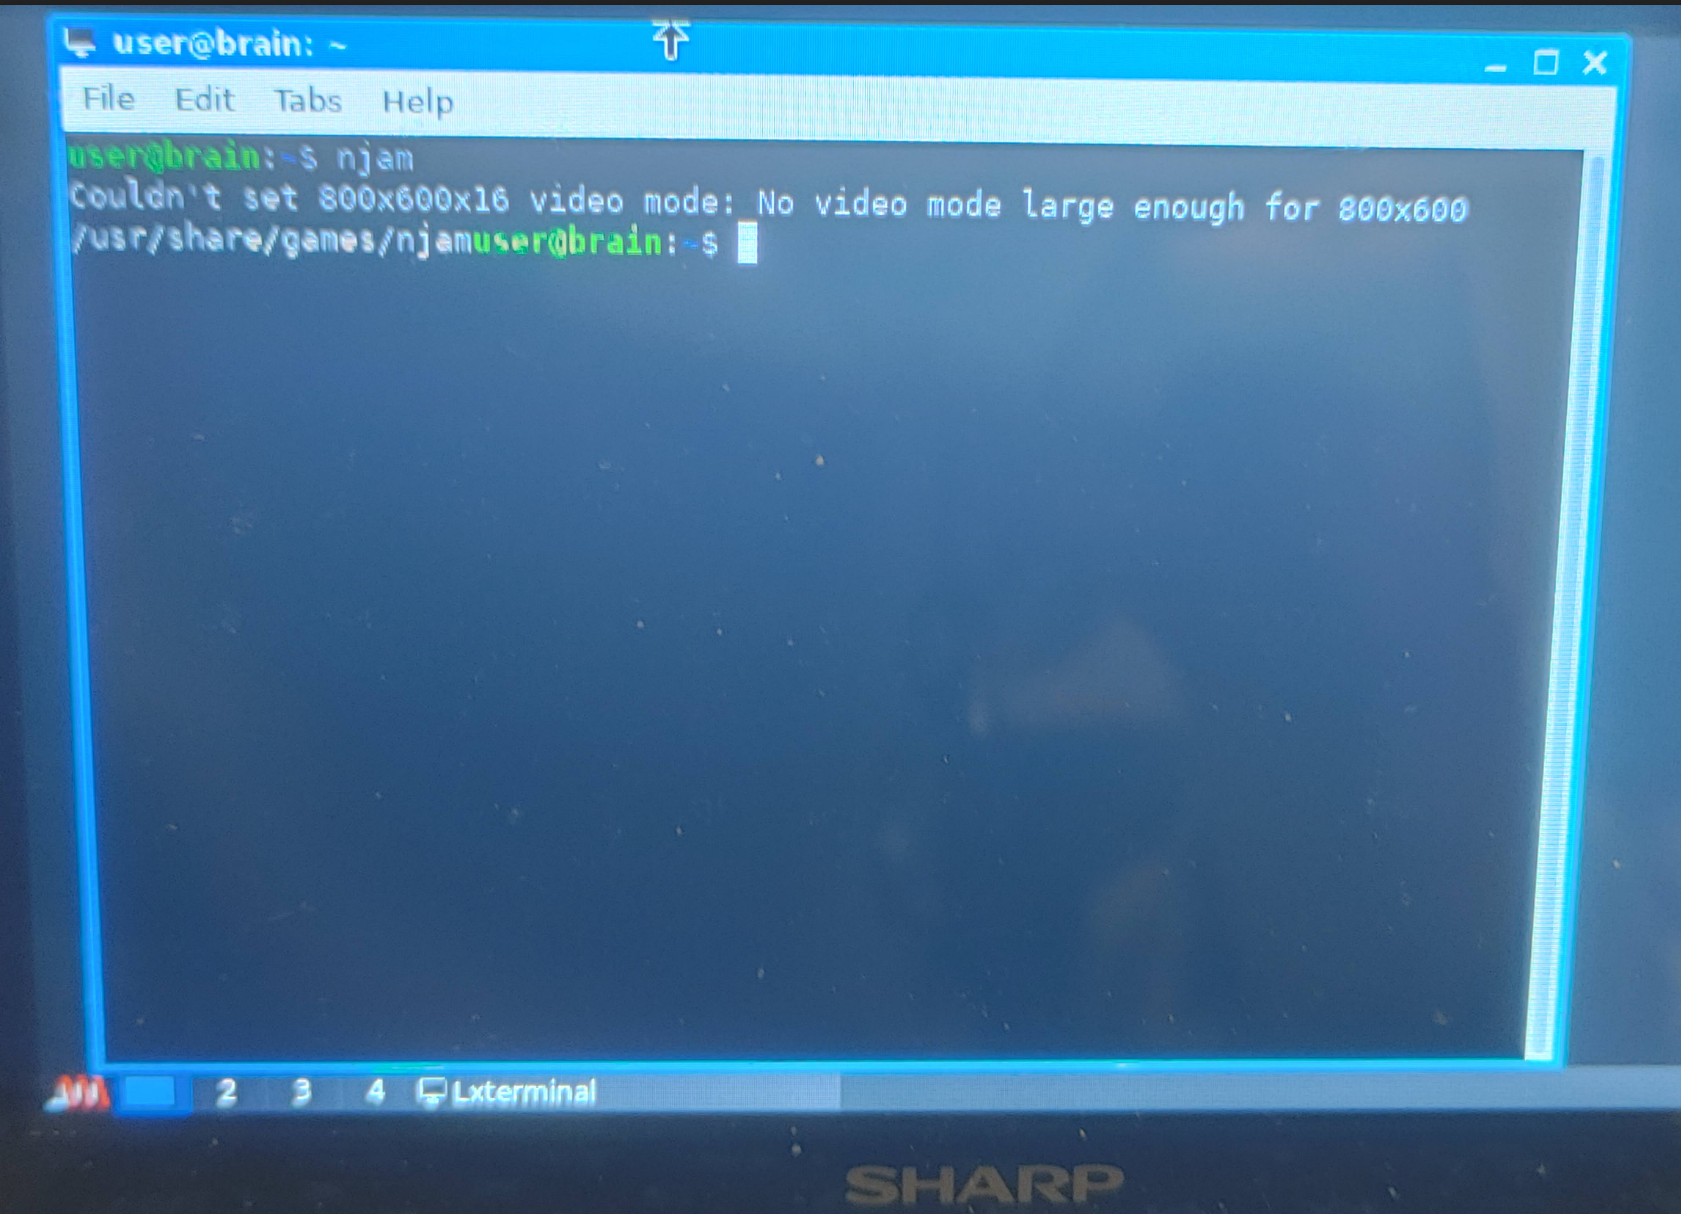
✕ njam pacman-like game with multiplayer support(ドットイートゲーム)
https://packages.debian.org/bullseye/njam
Brainでは解像度が足りなくて、起動できませんでした。
(起動には 800x600x16bit の解像度が必要。)
インストール:APT経由 ”sudo apt install njam”
———-
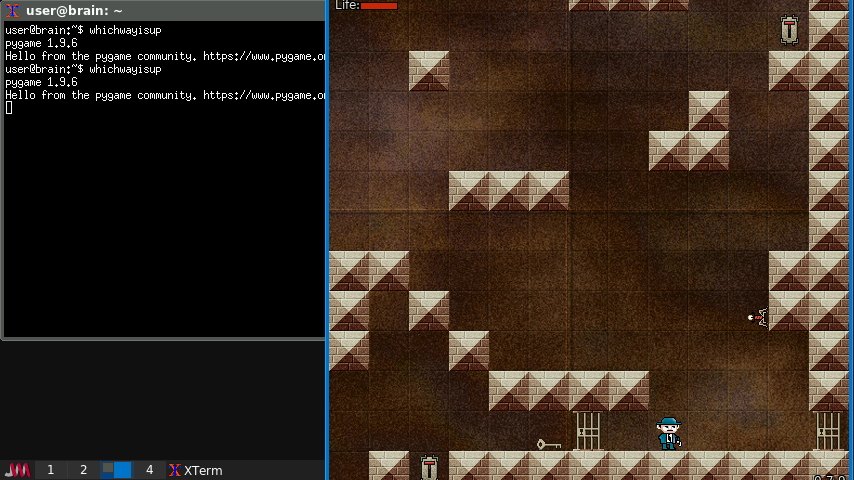
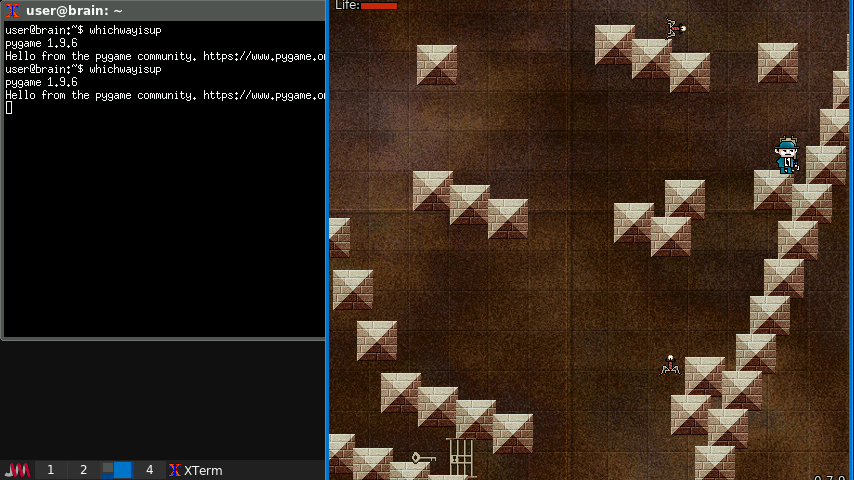
◎ Berusky 倉庫番ベースの論理ゲーム
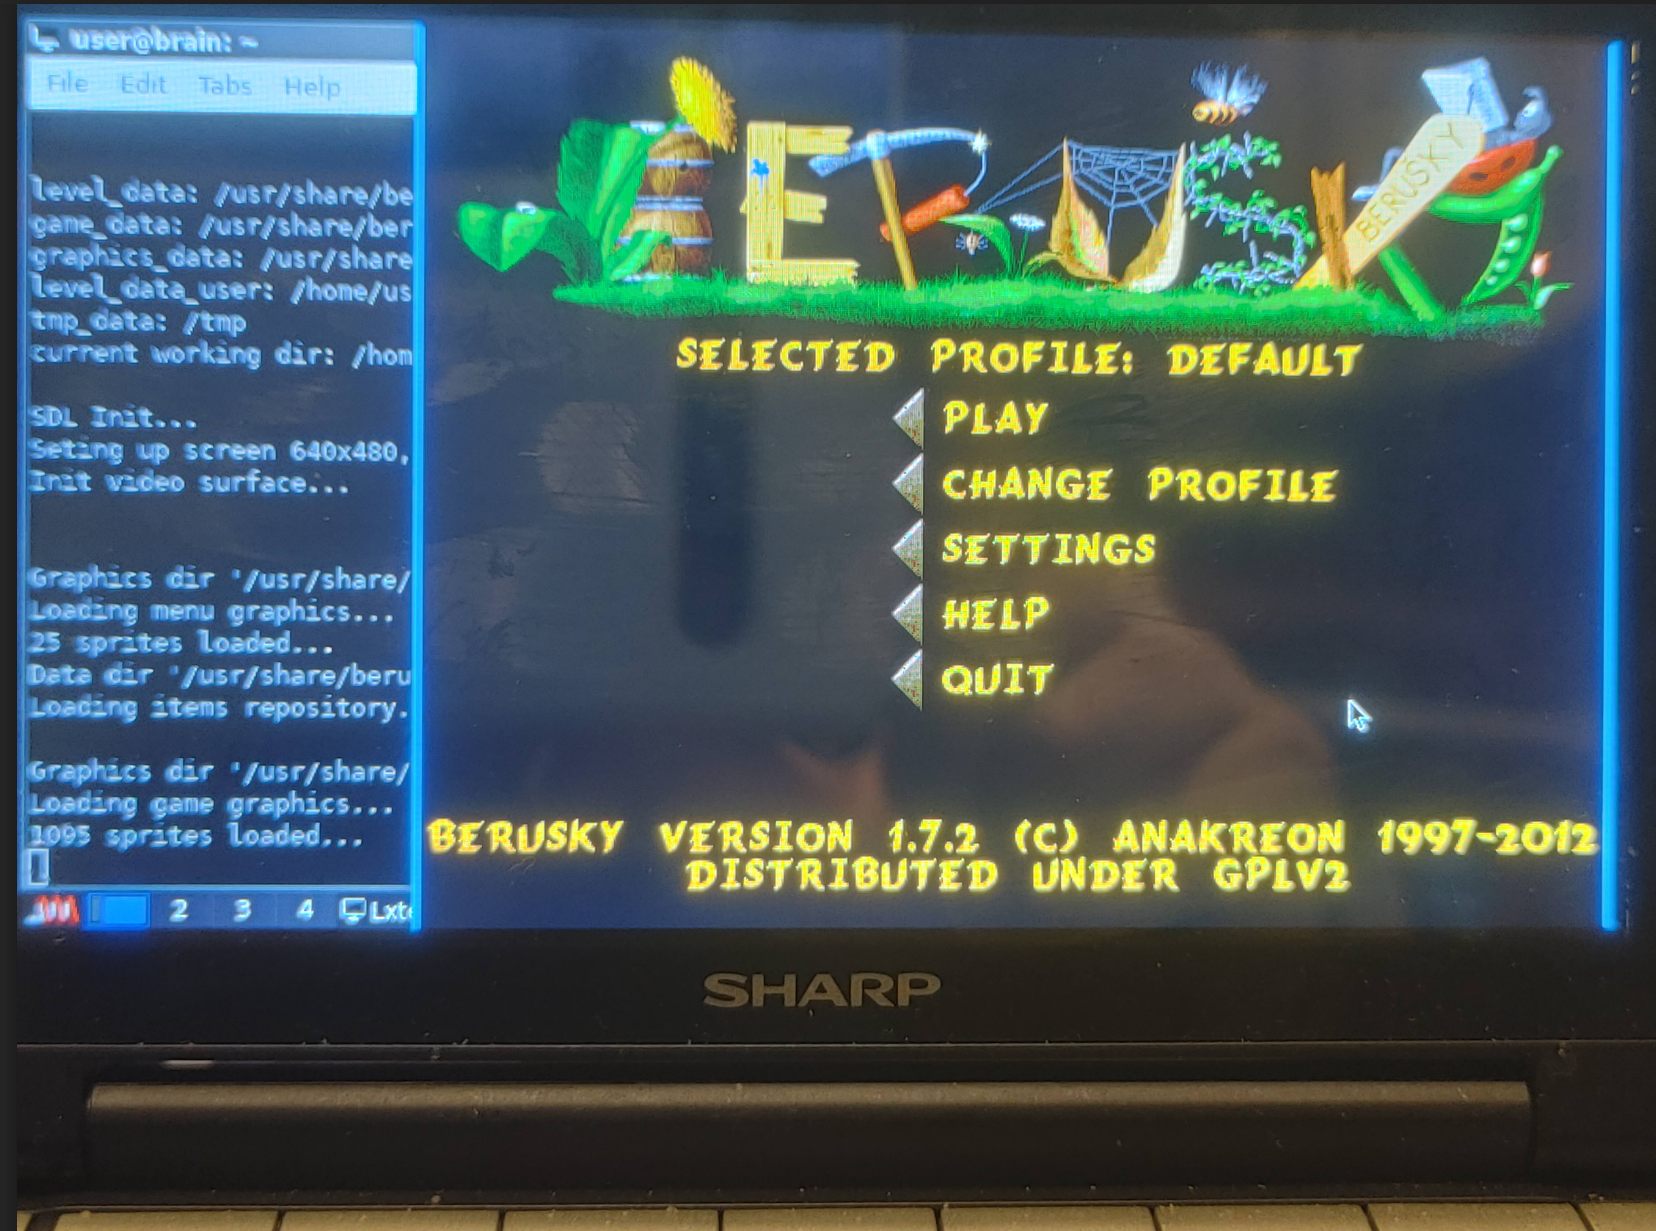

https://packages.debian.org/bullseye/Berusky
berusky は古典的なパズルゲーム倉庫番ベースのフリーな論理ゲームです。
迷宮で箱を動かすという昔のアイデアは爆発物、石、特別な門などといった
新しい論理アイテムににより拡張されています。
加えて、5 つまでのバグを 協調させてプレイヤで制御できます。
(ゲーム中では約 120 まで存在する)
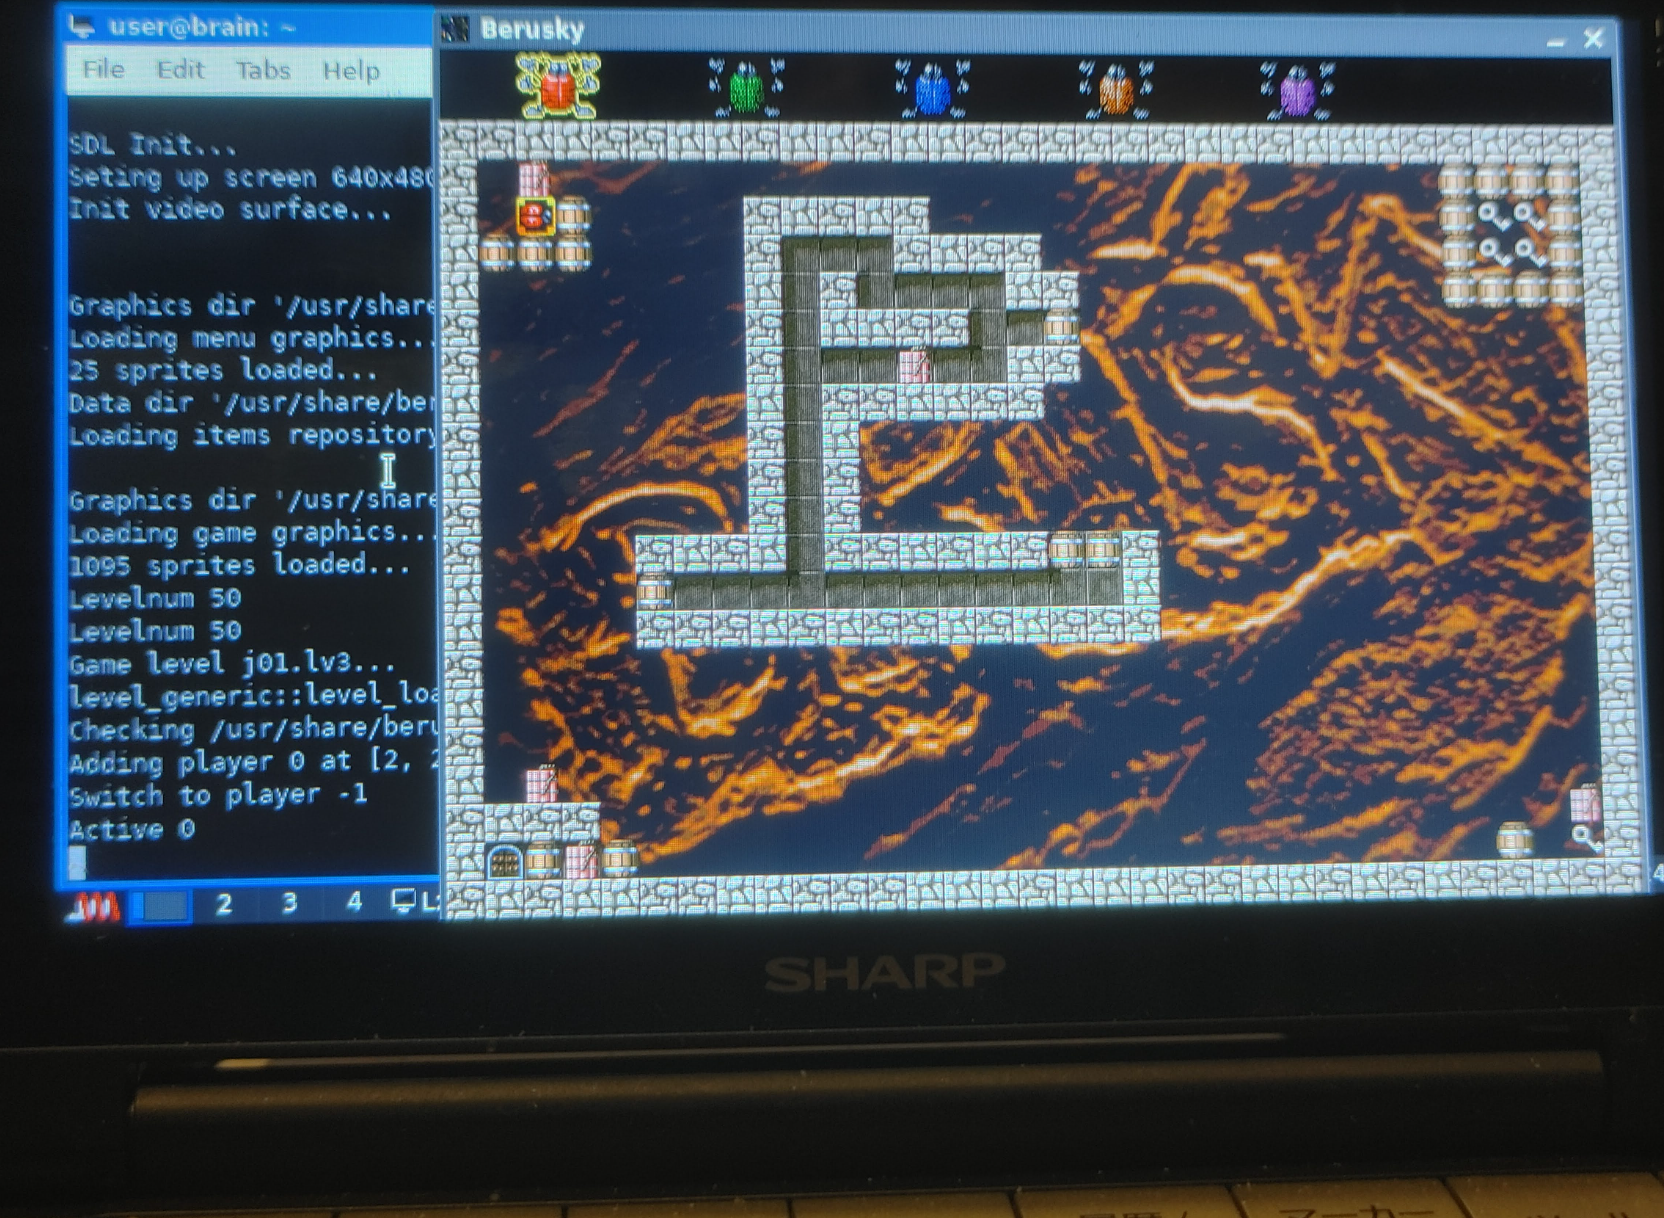
レベルを上げるためには、5 種類の鍵を手に入れ、さらに脱出するための道も
確保する必要があります。
Brainでは起動最初にHIGH RESOLUTION MODE にするか聞いてくるので
NOを選んでください。
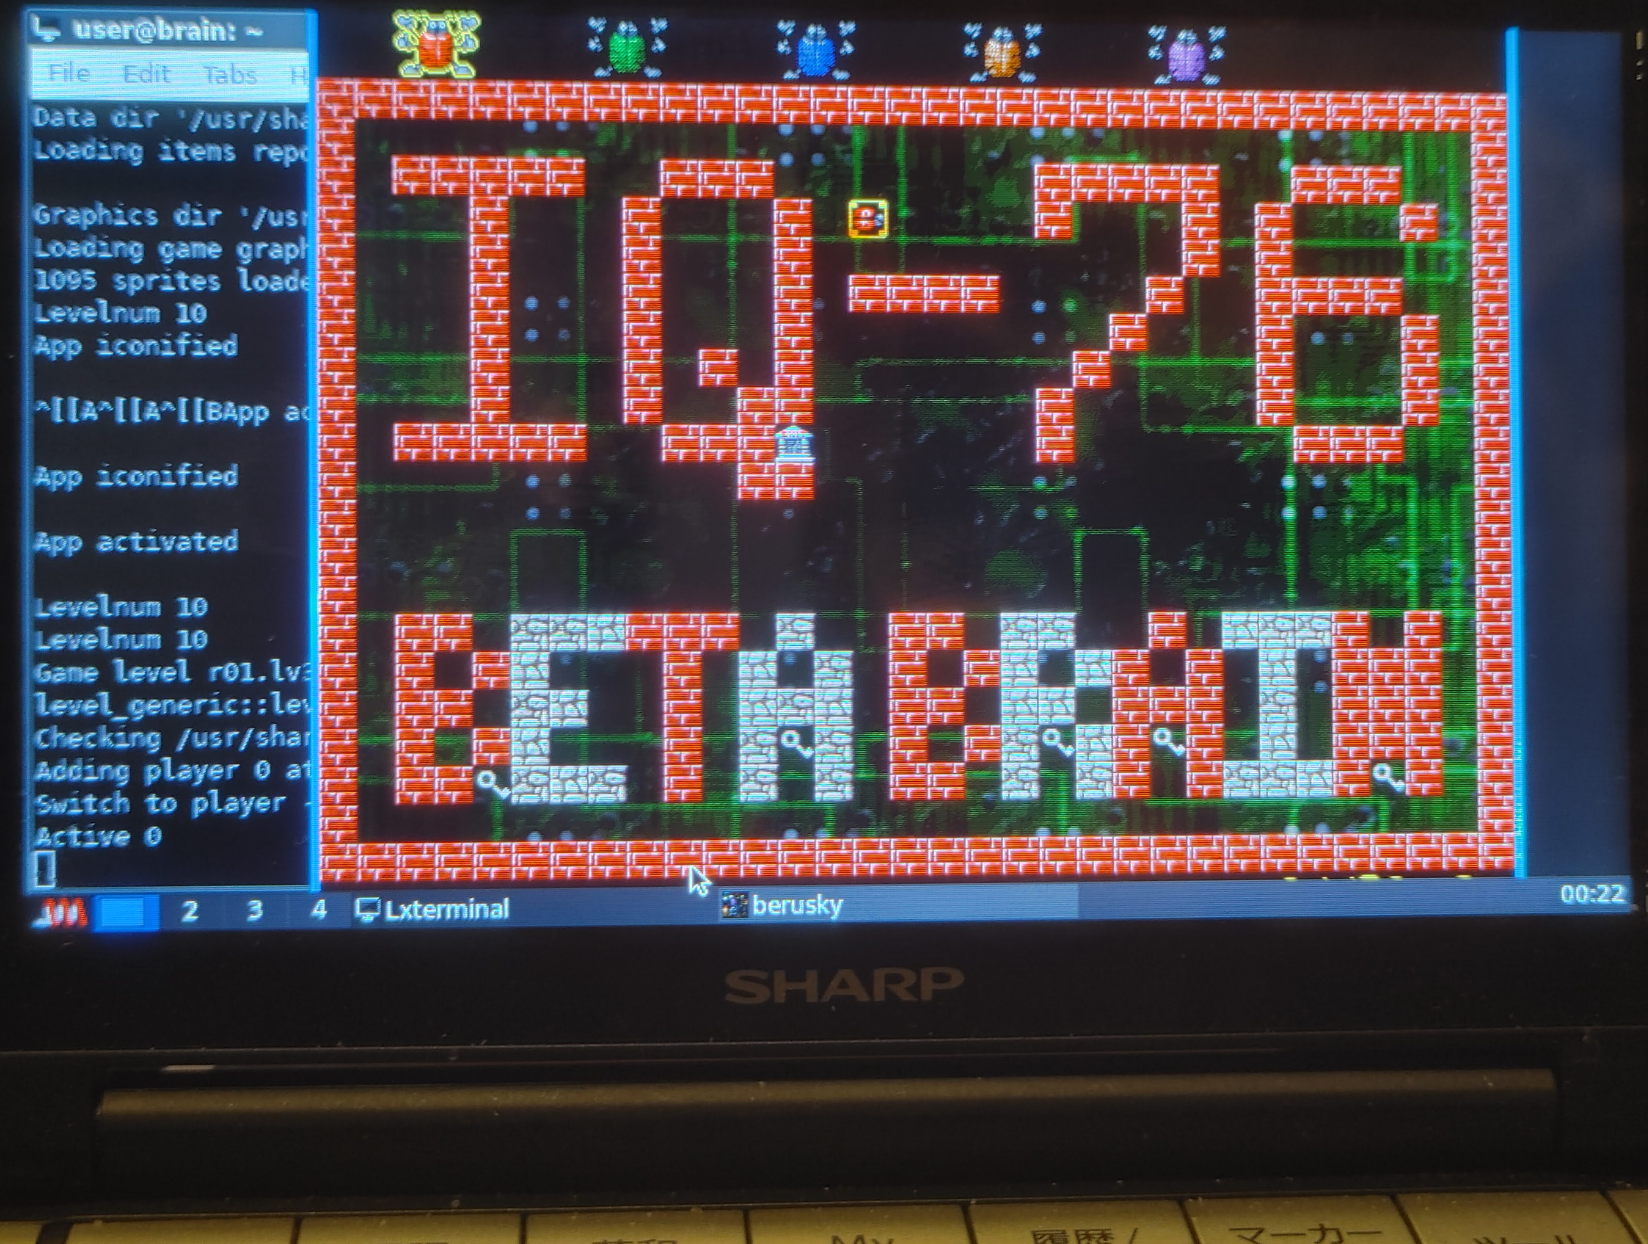
それでも画面下部が隠れてしますので、最上位表示+Window移動で対応してください。
ゲーム内容としては、5つのバグを操作してカギを集めて出口に進むゲームのようです。
操作するバグは「国語辞典」(TAB)で切り替えできます
バグの移動はカーソルキーですがシフトを押しながらだと早く移動できます。
「調べる」(ESC)でメニューが出ますので,ここからリトライ(Ctrl+R)などもできます。
詳しくはゲームの中のHELPでも確認できます。
詳しい説明は、man beruskyで確認してください。
インストール:APT経由 ”sudo apt install berusky”
———-
〇 gemdropx Gem Drop X – X11 用のアクションパズルゲーム(Magical Drop風ゲーム)
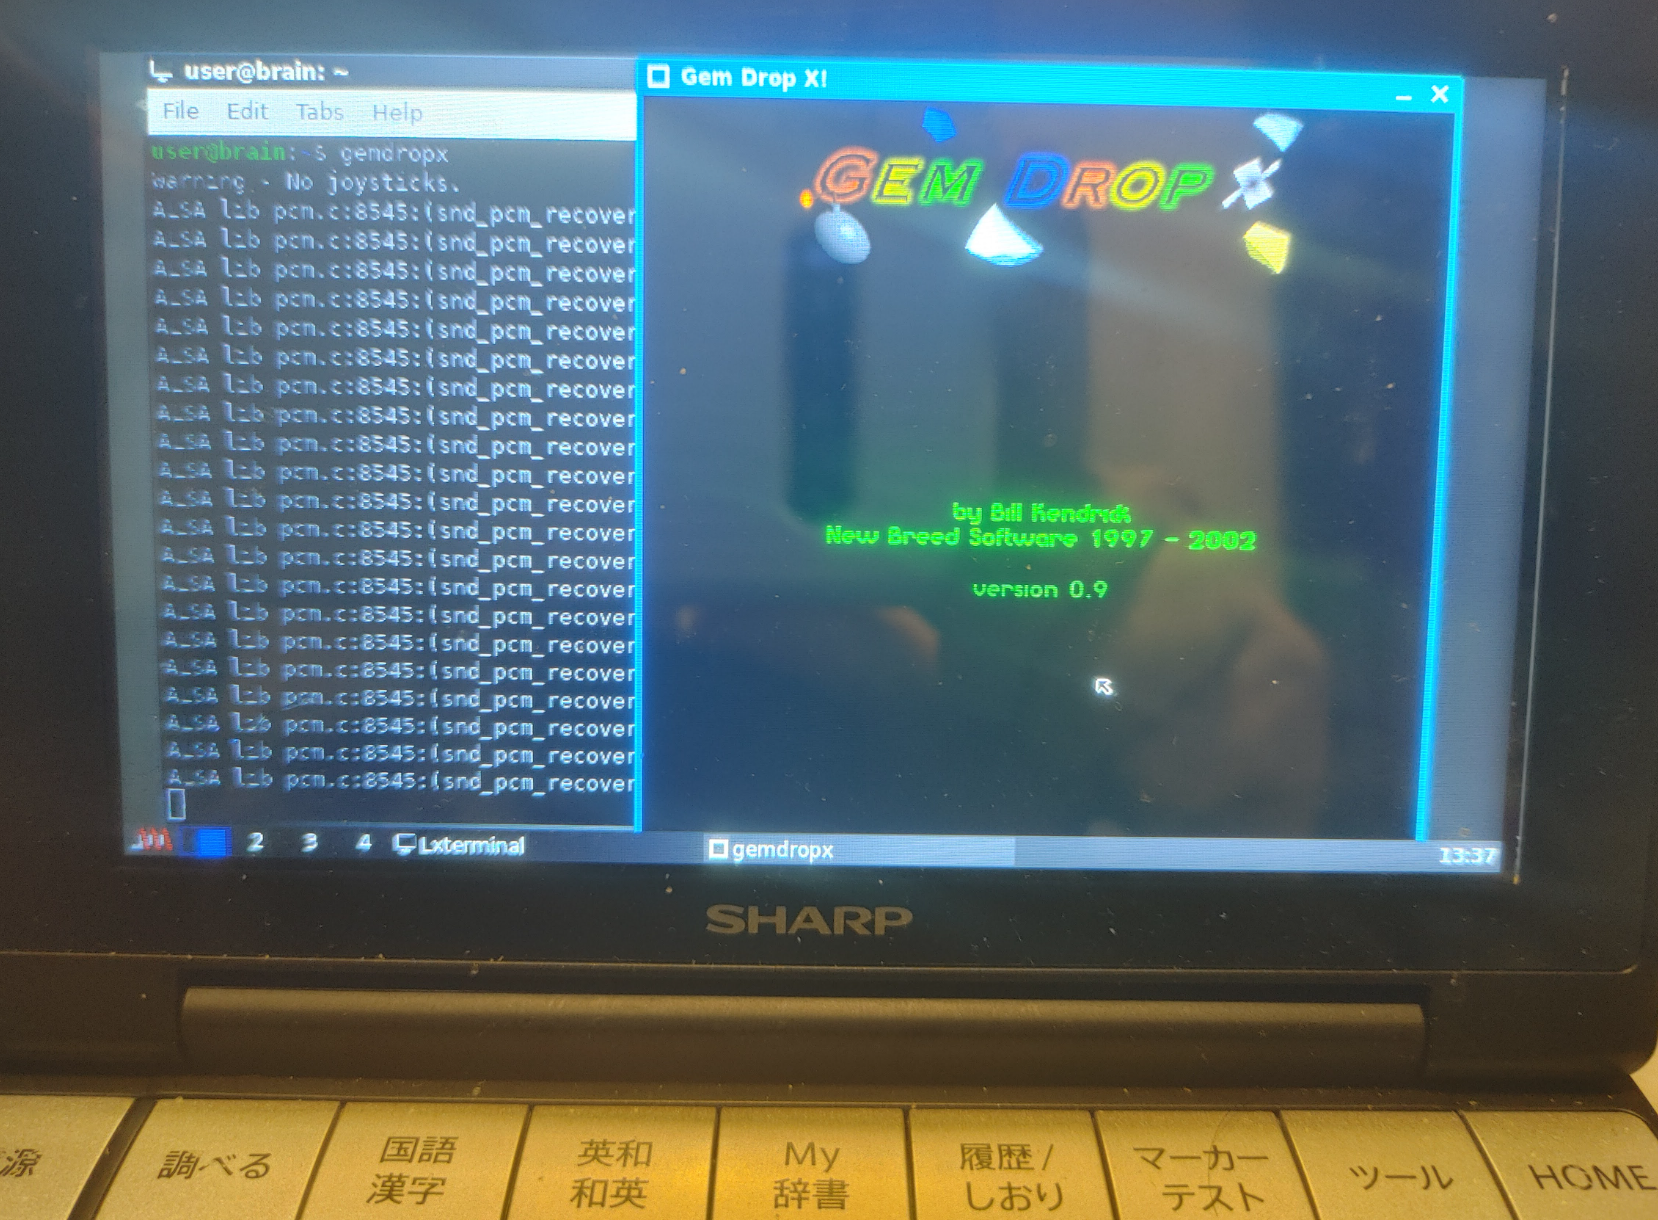
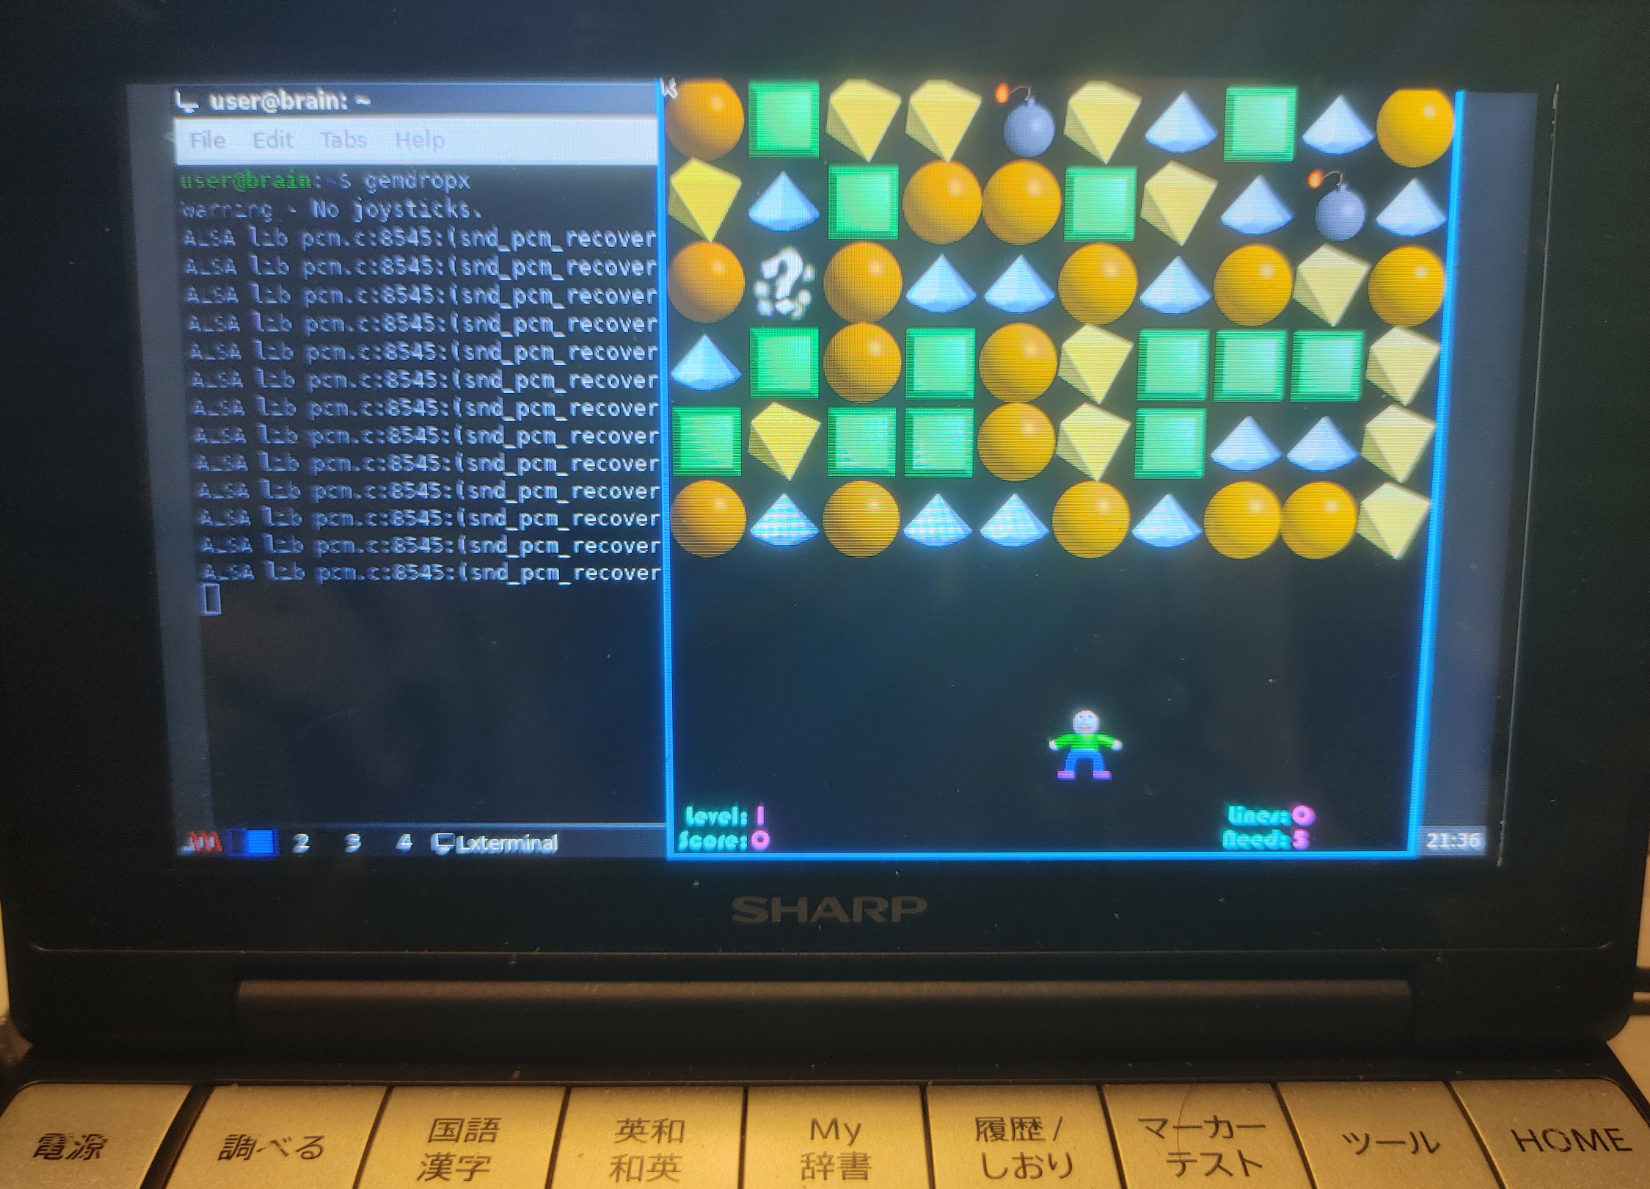
https://packages.debian.org/bullseye/gemdropx
Windowの画面位置を調整する必要がありますが、十分遊べます。
(A,Z,カーソルで操作できます。)
ゲーム自体は、以下のようにすれば、画面を移動して遊べます。
・LayerをAboveに変更
・Moveで、街路全体が表示されるように、Windowを上に移動する。
(移動すると、ウィンドウから終了はできないので、”ESC”キーで終わらせられます。)
USBサウンドデバイスを付ければ、音楽も聴けます。
詳しい説明は、man gemdropxで確認してください。
インストール:APT経由 ”sudo apt install gemdropx”
———-
◎ amoebax ぷよぷよ風パズルアクションゲーム


https://packages.debian.org/bullseye/amoebax
起動は「amoebax」です。同じ色のアメーバを4つつなげると消えるという
ぷよぷよ風パズルアクションゲームです。
「練習」「通常(コンピュータとの対戦)」「対戦(2Player or 4Playerでのトーナメント戦)」
で遊べます。
最初の画面解像度が800×600になってしまうので、optionで640×480にしましょう。
遊ぶときはWindowのLayerをAboveに変更すると、いちばん下まで表示されるので
おすすめめです。
optionではほかにフルスクリーンモードでの切り替えや、音量変更。操作キー変更
ができます。
音楽ありだと音がとぎれとぎれになってしまうので、音楽なしのほうがいいかも
しれません。(USBサウンドデバイスを付けている場合、起動時に –disable-sound を
付ければ音楽なしになります。)
操作は、
メニュー:カーソルキーで移動、決定(Enter)で選択です。
ゲーム中:左右下で移動、上で回転になります(1プレイヤー時)、
一時停止は「調べる」or「戻る」(ESC)です。
詳しい説明は、man amoebaxで確認してください。
インストール:APT経由 ”sudo apt install amoebax”
———-
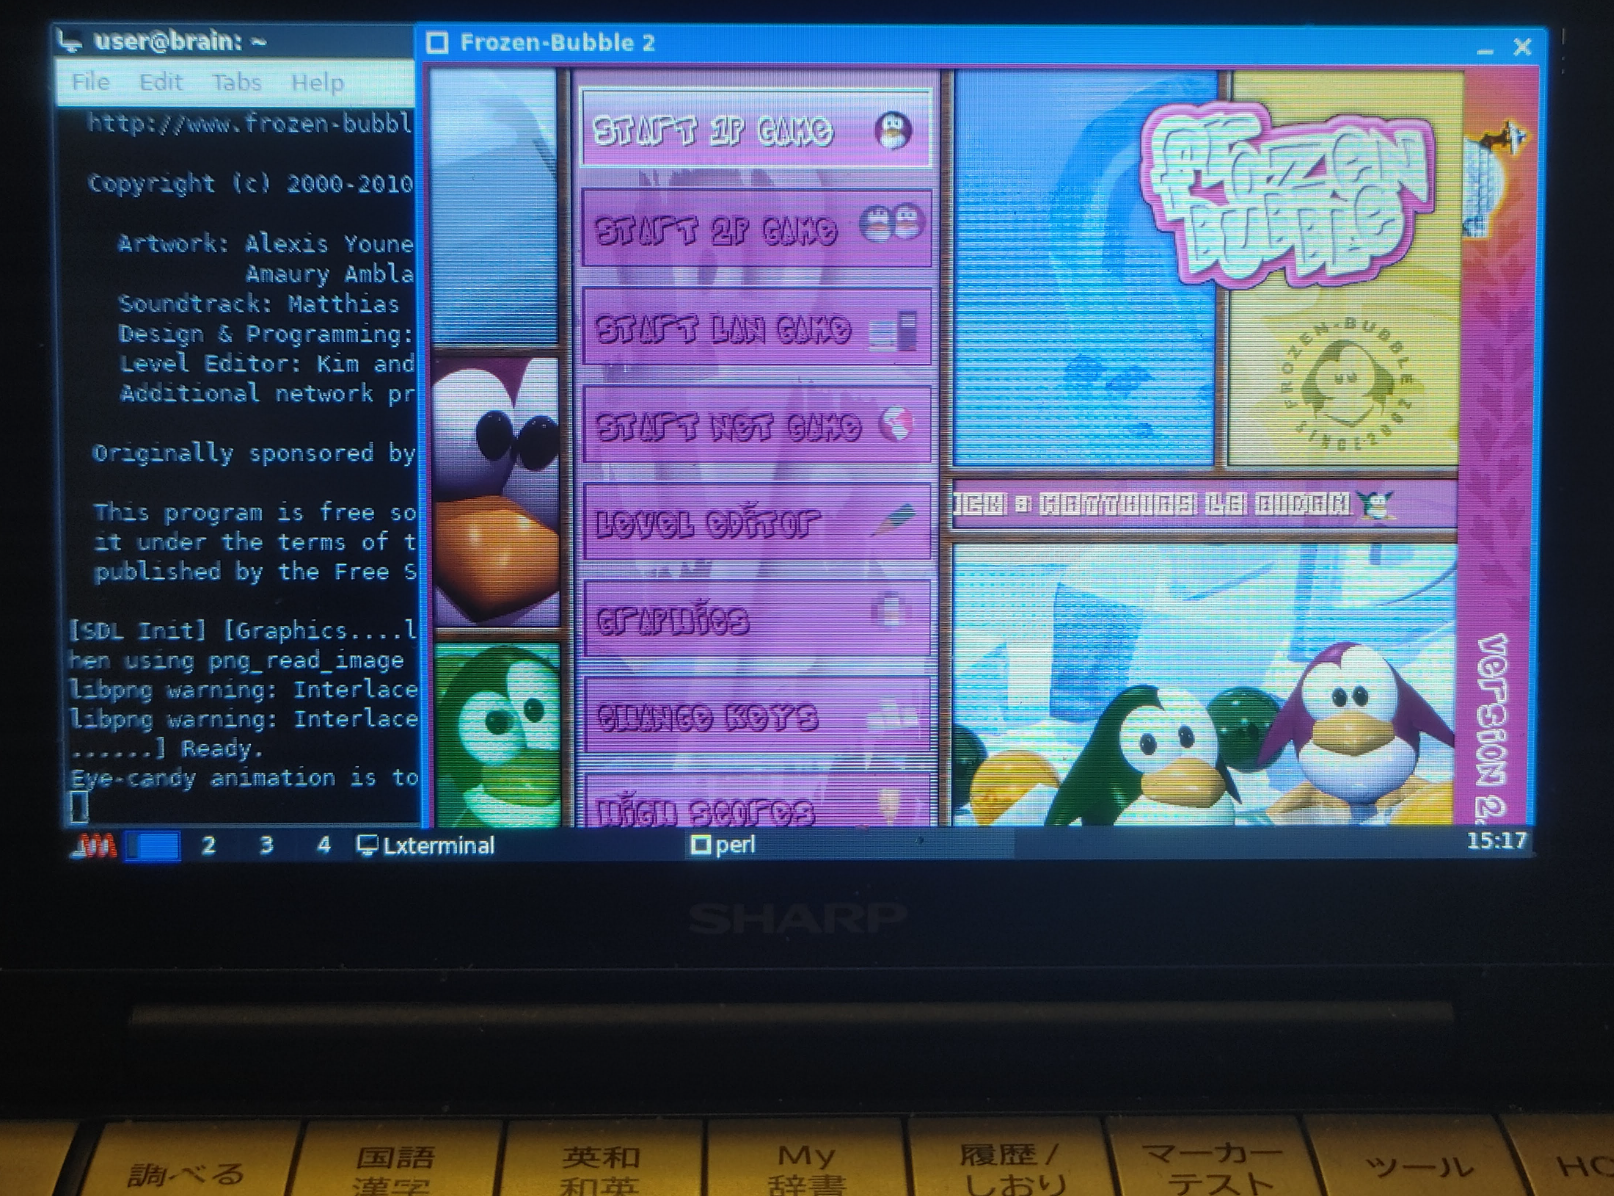
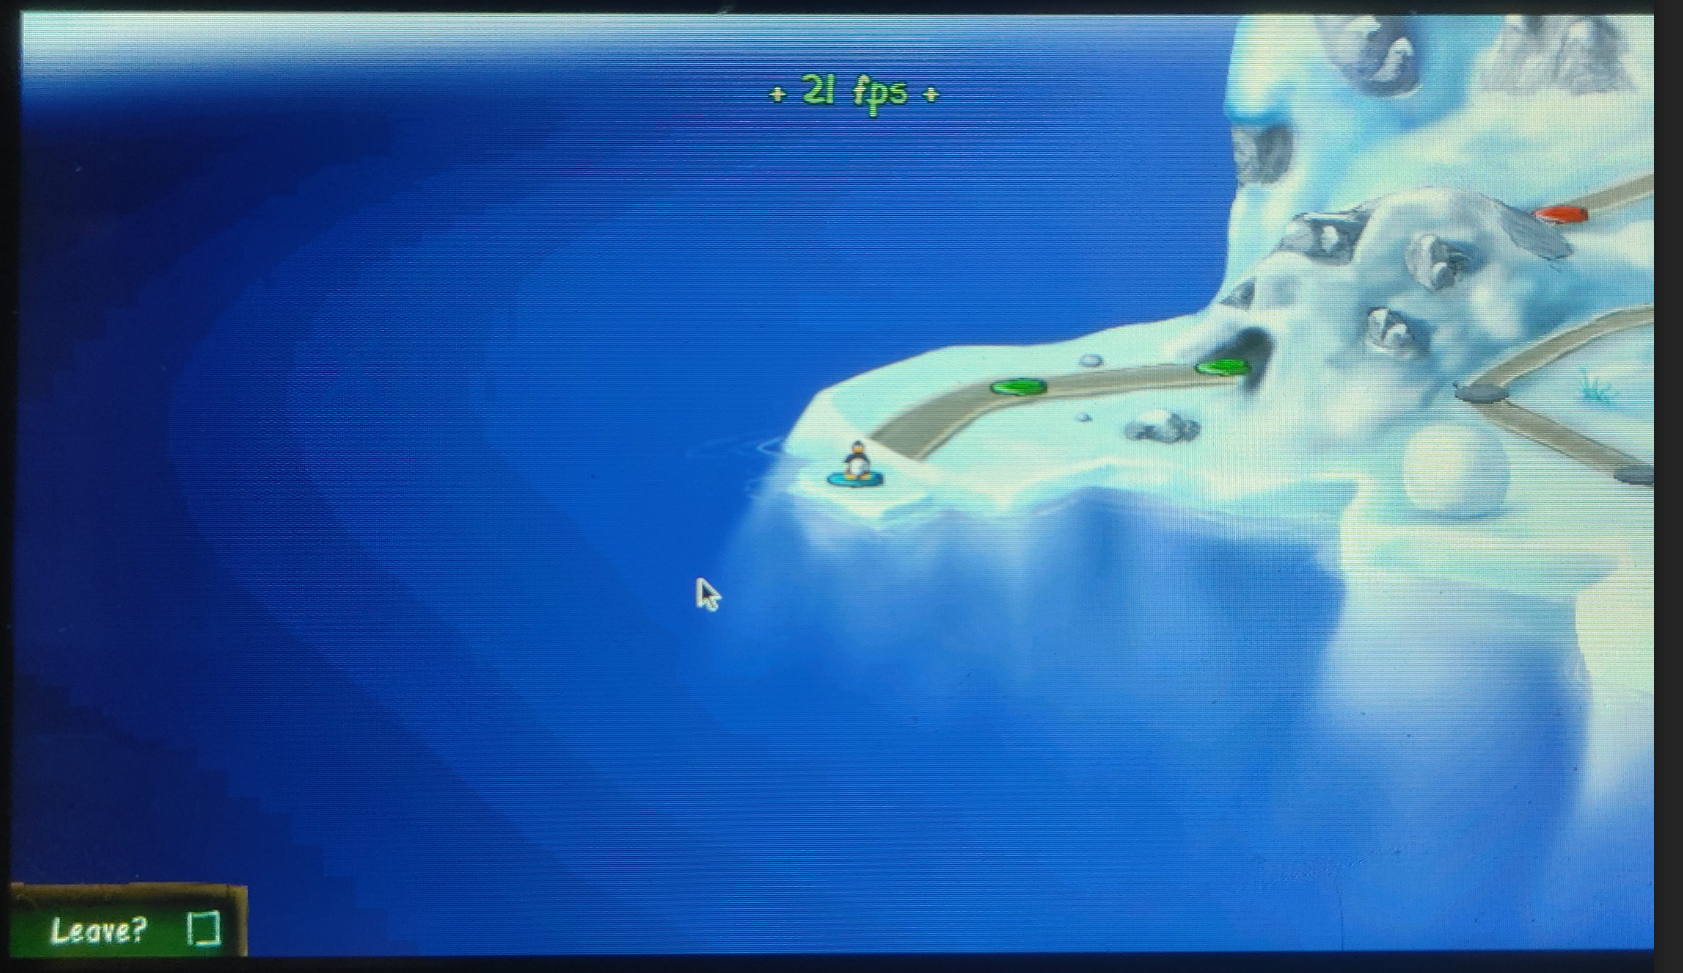
◎ frozen-bubble 同じ色の泡をまとめて撃って弾ける「パズルボブル」クローン
https://packages.debian.org/bullseye/frozen-bubble
バブルを弾き出すクールなゲーム!
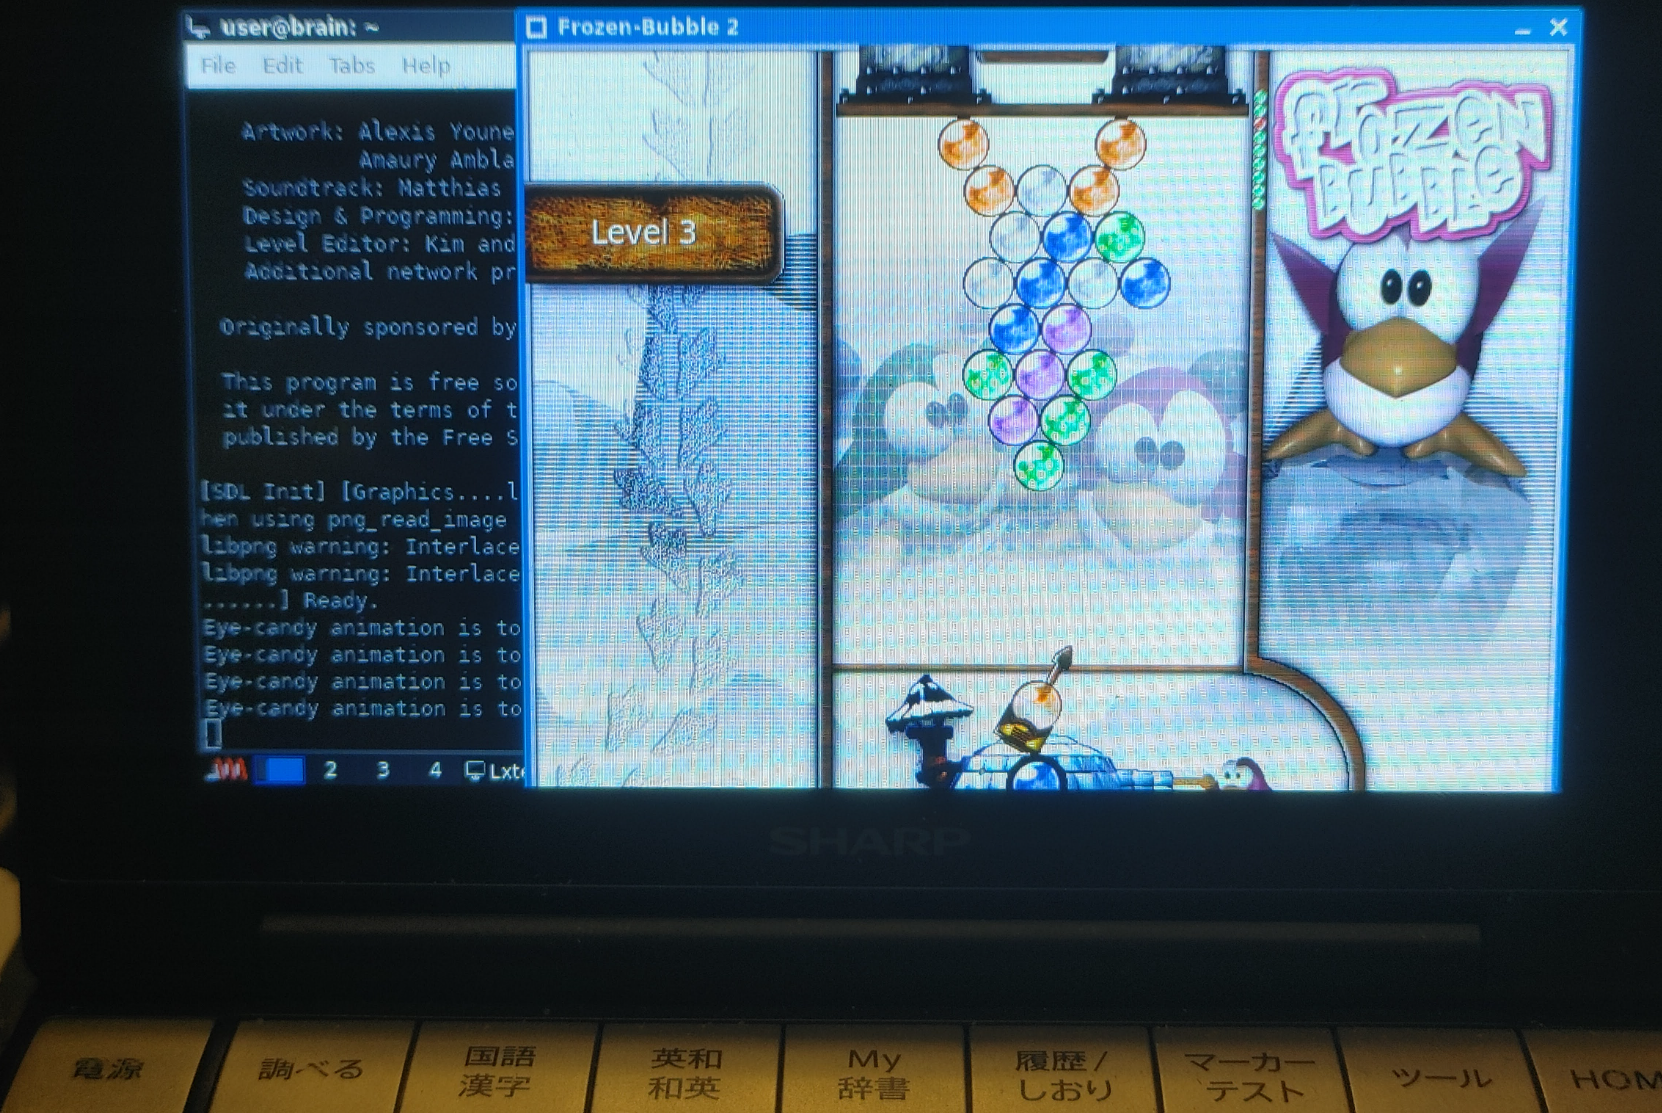
Frozen-Bubble は、同じ色の泡をまとめて撃って弾ける人気の「パズルボブル」クローンです。
プレイヤーはペンギンとなり、矢印キーを使って色付きのバブルを複数のバブルに
狙いを定め、画面下部のラインの下を通過する前にすべてのバブルを消すことが目的です。
100のシングルプレイヤーレベル、2プレイヤーモード、音楽、そして印象的なグラフィック
を特徴としています。また、プレイヤーが独自のレベルを作成してプレイできる
レベルエディターも搭載されています。
起動については、「frozen-bubble」ですが、
そのままでは、Brainには荷が重いので、以下のようにオプションをつけて起動することを
お勧めします。(さらに簡略化した–very-slow-machineもあります。)
ほかにもいろいろオプションがあるので試してみてください。
frozen-bubble –slow-machine
USBサウンドデバイスを付けているときは、音を消すと快適になります。
frozen-bubble –slow-machine –no-sound # 音無し
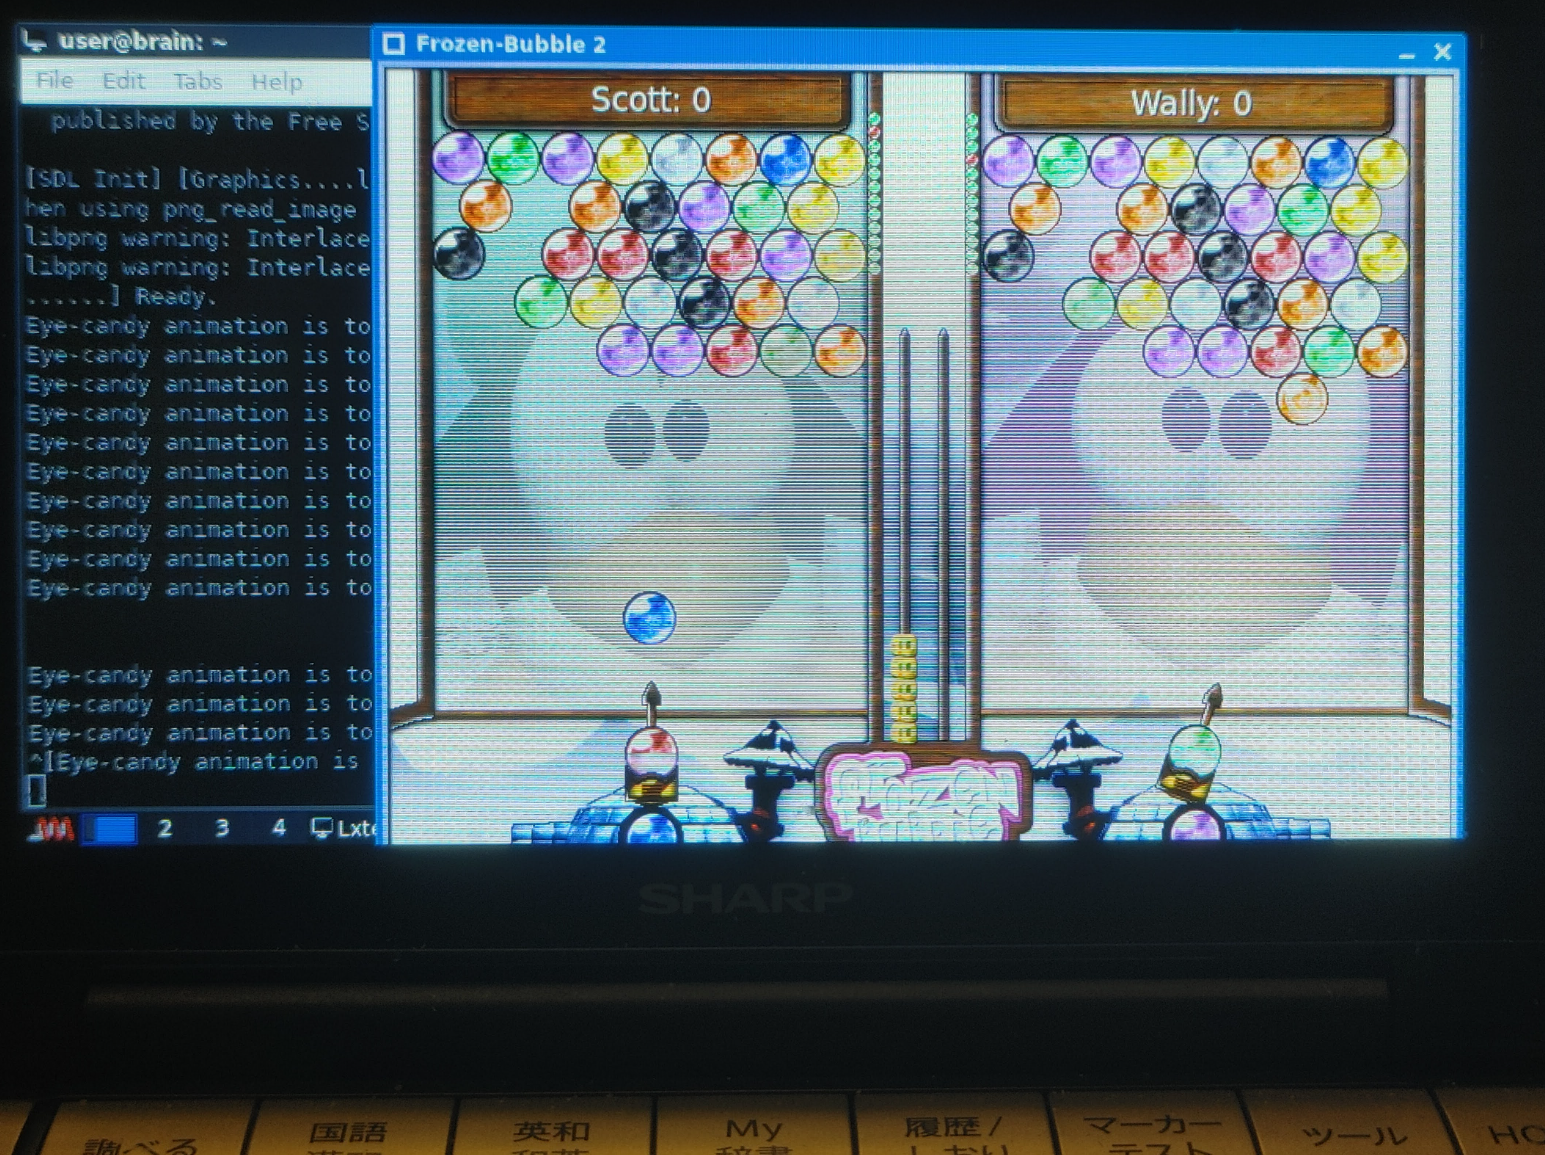
ゲームとしては1人プレイ/2人同時プレイです。
コンピュータ対戦はないようですが、疑似的に妨害が入るトレーニングモードはあります。
xbubbleと比較して、こちらは画面がきれい。ネット対戦機能ありですが、
その分少し遅い。コンピュータ対戦がないのが特徴です。
詳しい説明は、man frozen-bubbleで確認してください。
インストール:APT経由 ”sudo apt install frozen-bubble”
———-
◎ OpenSyobonAction オープン版しょぼんのアクション (2025/12/12追加)
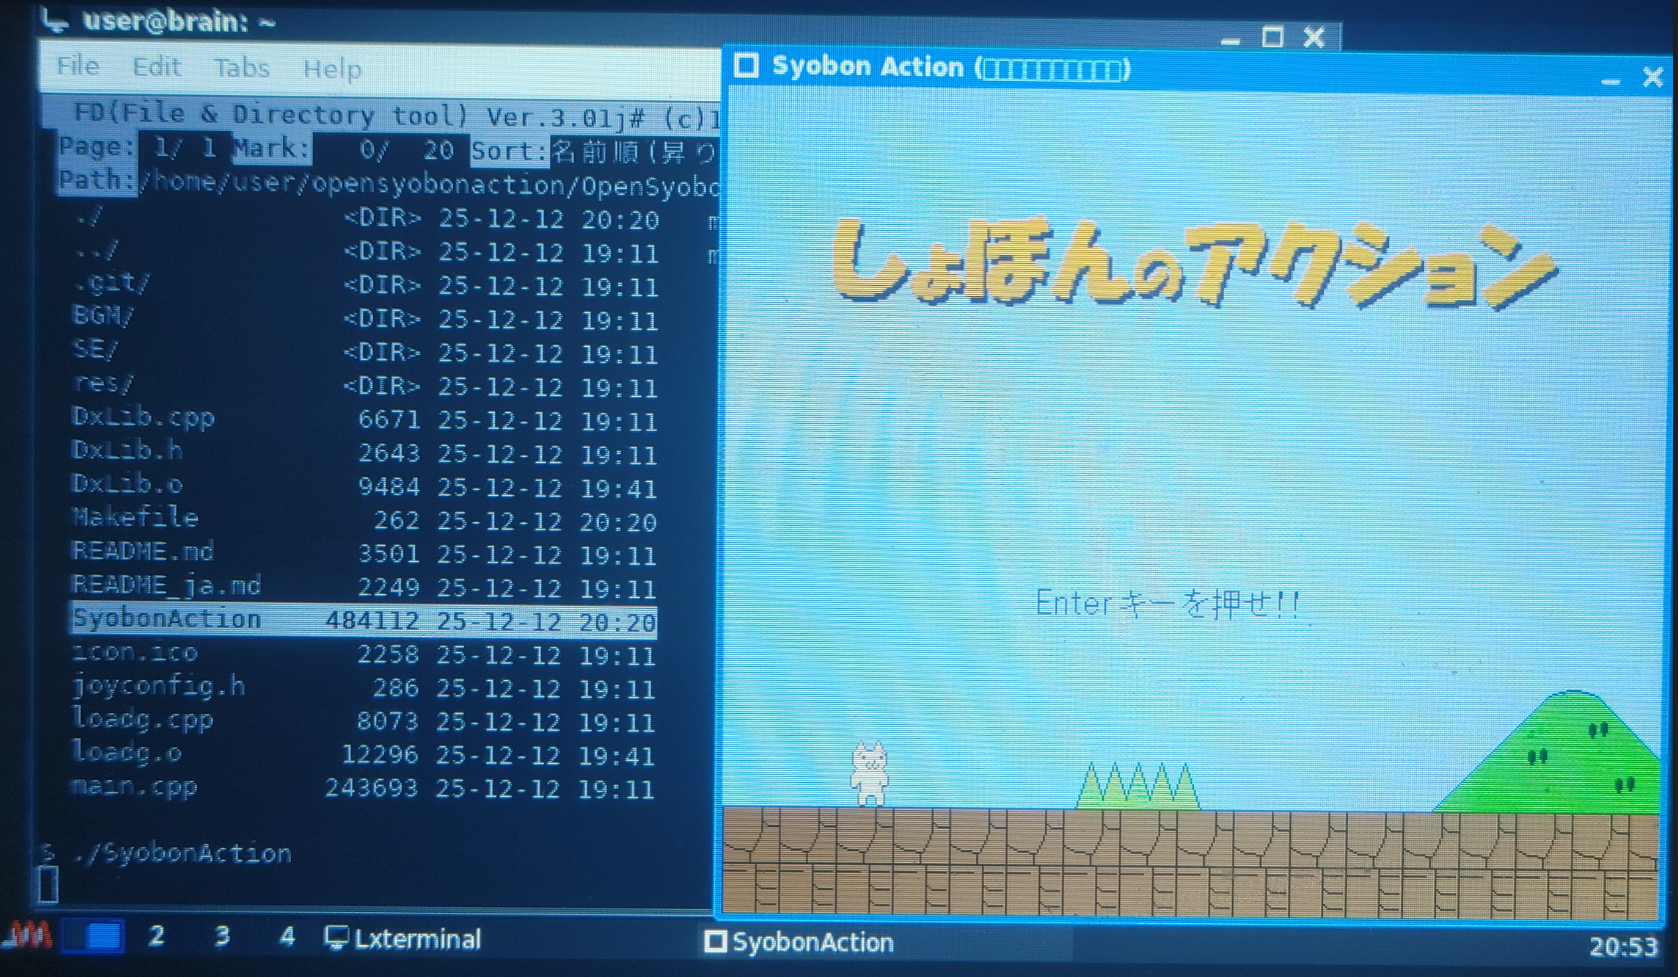
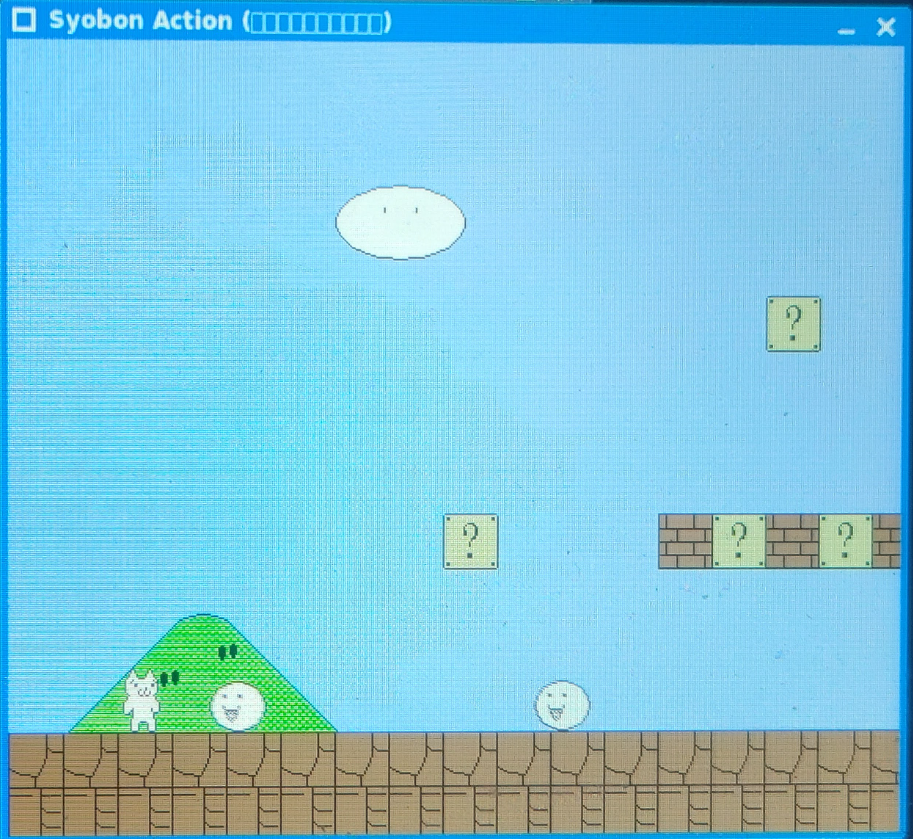
有名な即死ゲーの有名な即死ゲーの「しょぼんのアクション」オープン版です。
OpenSyobonAction
起動はビルドを実行したフォルダで、「.\SyobonAction」です。
BrainのCE環境用にもリリースされている方がいますので、
遊ぶだけならそちらのほうが手軽かつ高速ですが、
今回はSDL1.2のコンパイル例として紹介します。
Brainux版のメリットとしては、USBサウンドデバイスを付けていると、
音楽、効果音が鳴ることだけです。ただし動作は遅くなるので難しいところ。
SyobonAction -nosoundで、音楽を無効化できます。
- 左右キー:移動
- 上かZキー:ジャンプ
- スペース押し続け:2倍速
- Oキー:自滅
- ESC:終了
- F1:タイトルへ
- タイトル時に、1〜9キーを押すと、任意のステージで遊べます。
- タイトル時に、0キーは不思議ダンジョン(バグが起きる可能性があります)
詳細は、公式ページを確認してください。
インストール:ソースを入手してインストール
インストール手順詳細(クリックで表示)
インストール手順詳細(クリックで表示)
$ cd
$ mkdir opensyobonaction
$ cd opensyobonaction/
$ sudo apt install libsdl1.2-dev libsdl-image1.2-dev libsdl-mixer1.2-dev
$ sudo apt install libsdl-gfx1.2-dev libsdl-ttf2.0-dev libsdl-net1.2-dev
$ git clone https://github.com/akemin-dayo/OpenSyobonAction
$ cd OpenSyobonAction/
$ make
もし、コンパイル中にヘッダファイルがないようなエラーが出たら、それに相当する、開発用パッケージを導入してください(上でapt installしているのがその辺です)。
最後のリンクでエラーが出たら、Makefileの2行目について、以下のように書き換えてみてください(これも、エラーが出たモジュールを追加していきます)。
$ vi Makefile
gcc main.o loadg.o DxLib.o -o SyobonAction `sdl-config --libs` -lSDL_gfx -lSDL_image -lSDL_mixer -lSDL_ttf
↓
gcc main.o loadg.o DxLib.o -o SyobonAction `sdl-config --libs` -lSDL_gfx -lSDL_image -lSDL_mixer -lSDL_ttf -lm -lstdc++
$ make
$ .\SyobonAction
———-
◎ pingus Lemmings(TM) のフリーなクローン
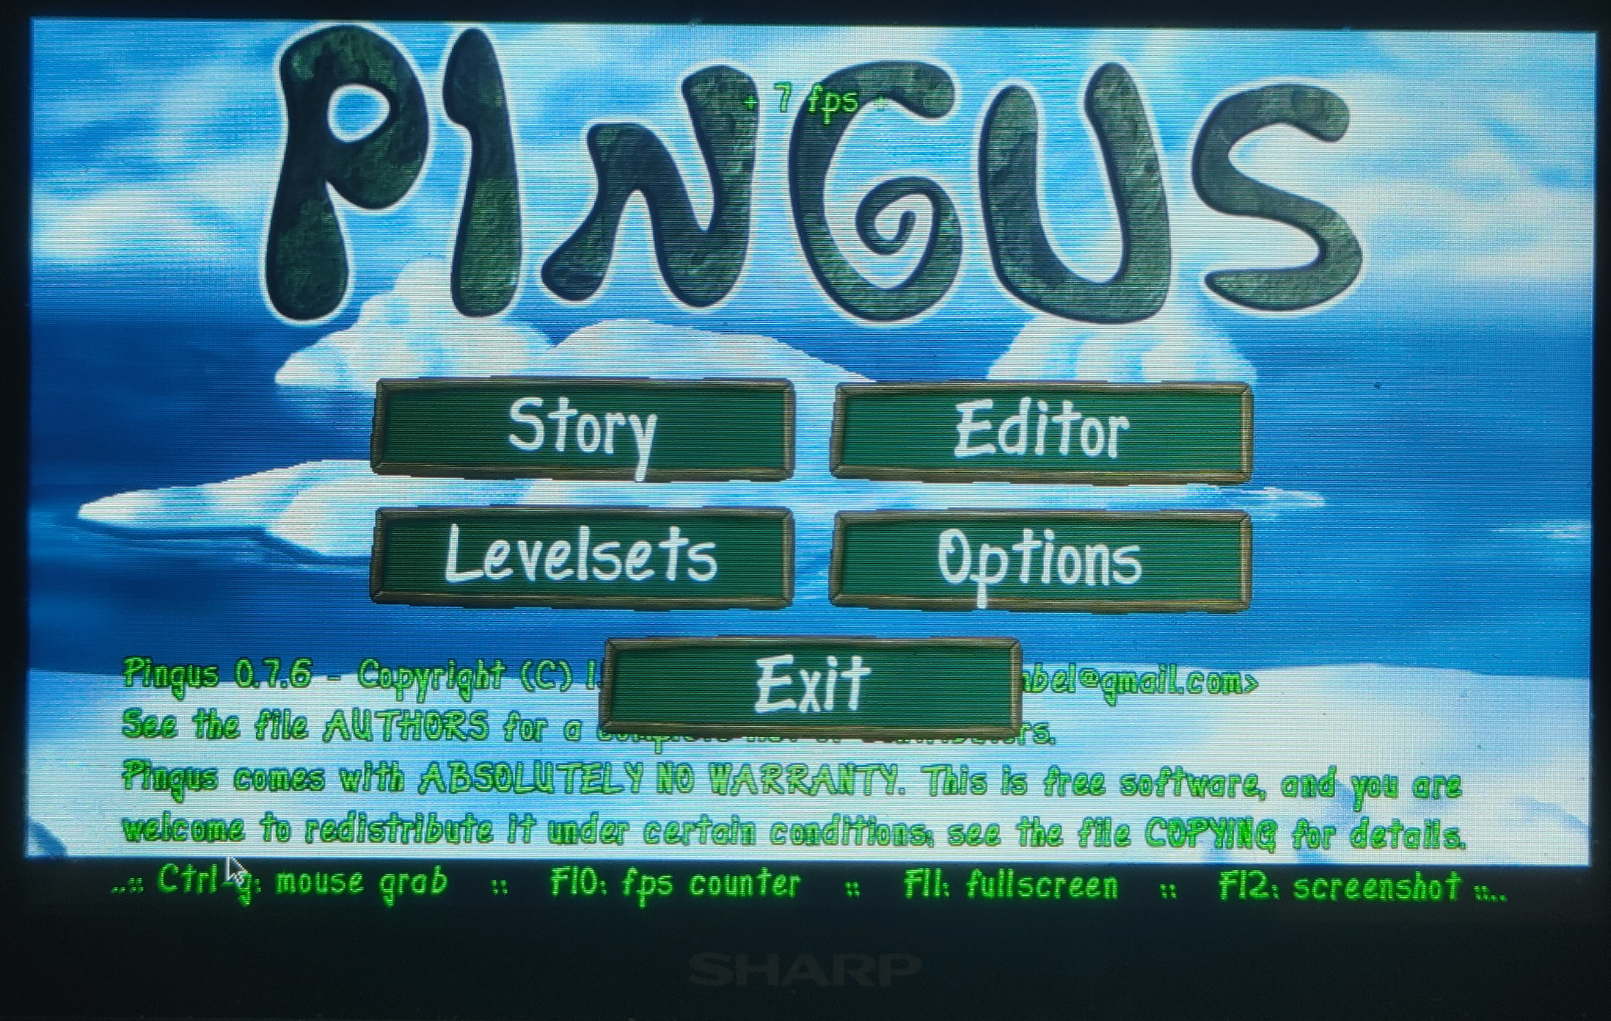

https://packages.debian.org/bullseye/pingus
Pingus は、人気の高いゲームである Lemmings (レミングス) のフリーなクローン です。
あなたの目的は、障害物やペンギン罠に満ち溢れた世界で、ペンギンの大群を
安全に誘導することです。(レミングとは異なり) ペンギンは若干賢いですが、
全体を見渡すという必要なことにしばしば欠けるので、
彼らを救うのはあなた の手に委ねられました。
起動については、以下のように起動することをお勧めします。
(フルスクリーン、音なし)
pingus -f -R 854×480 -s -m
思ったり快適に遊べます(fps8-22ぐらい出ます)。
基本はマウス操作ですが、タッチパネル操作もできるので、Brain本体だけでも純分楽しめます。(OpenGLライブラリに依存していたので無理かと思ったのですが、レンダリングがSDLであれば、OpenGL機能は使わないらしく、以外にも快適です。)
プレイは、右側の動作指示をクリックしてから、対象のペンギンをクリックして操作します。
調べる(ESC)で中断できるようです。
Story(Tutorial)だけで、20以上のステージがあり、
さらにLevelsetsからテーマごとに総計50以上のステージが用意されています。
ネットワークにつながっていれば、簡単にインストールできるのでお勧めします。
インストール:APT経由 ”sudo apt install pingus”
———-
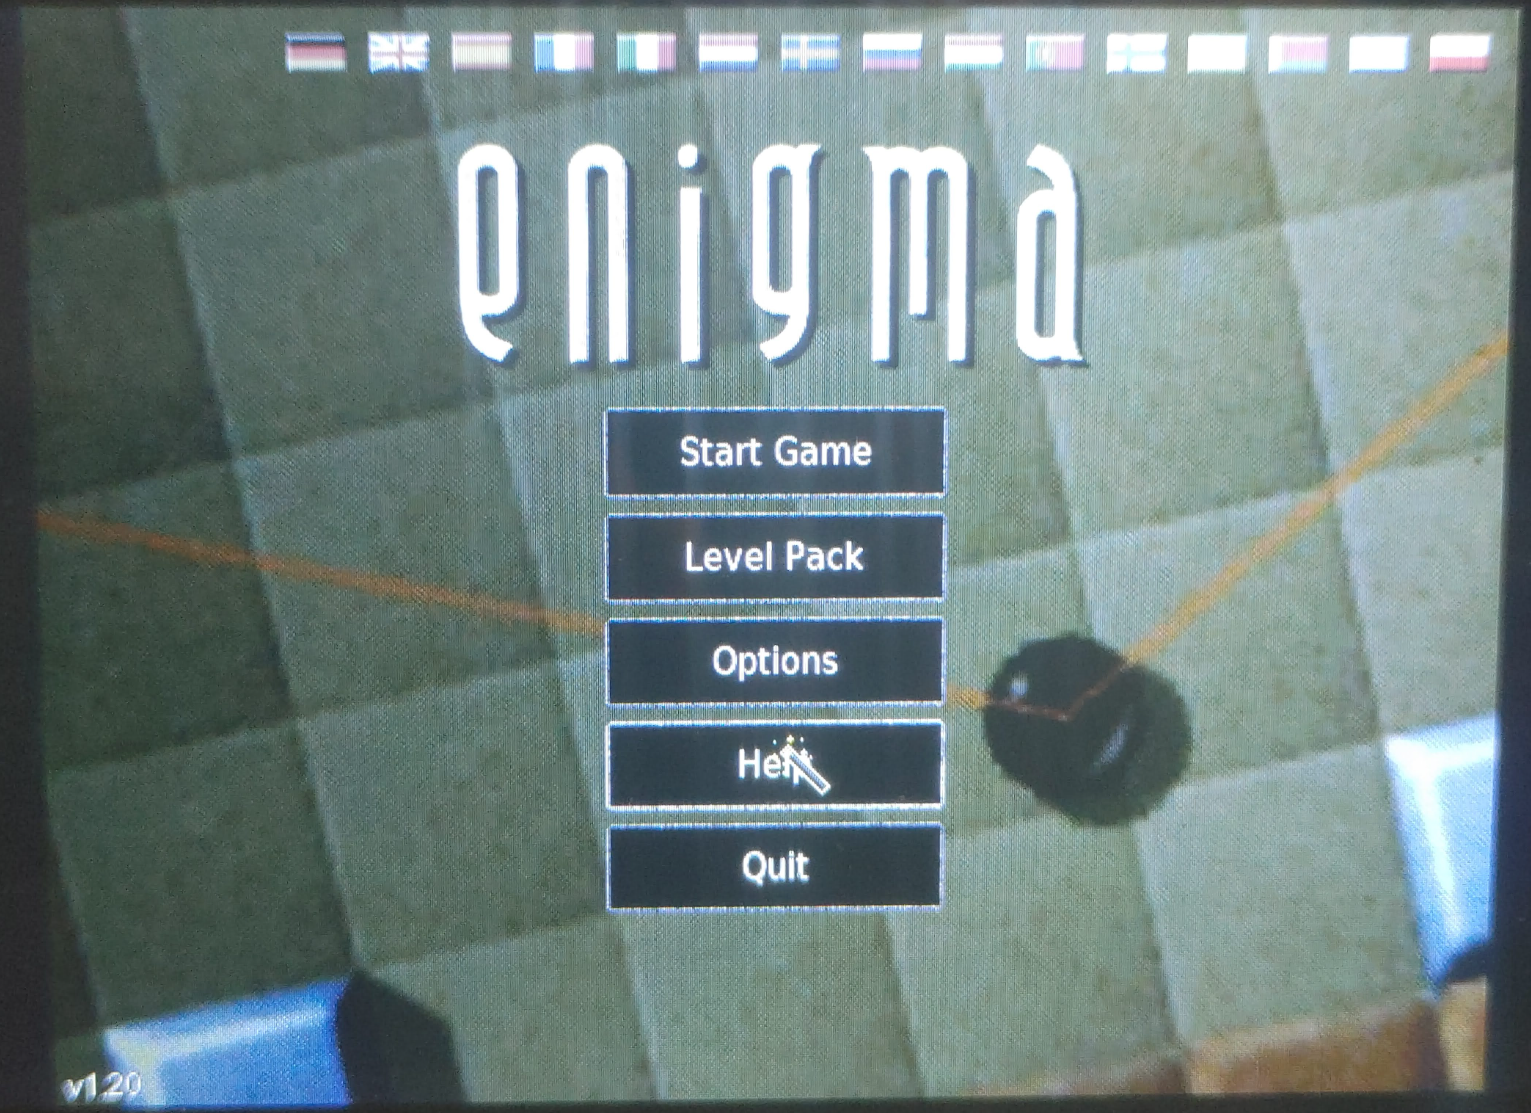
◎ enigma マウスでビー玉をコントロールするゲーム


https://packages.debian.org/bullseye/enigma
https://enigma.nongnu.org/
Enigma はパズルゲームで、Atari ST 用の Oxyd や Amiga 用の Rock’n’Roll、 古き良き Marble Madness などに似ています。 また、倉庫番に似た面や、オリジナルの倉庫番の概念への興味深いひねり が加えられています。
Enigma での目的は、Oxyd 石のペアを配置して露わにすることです。 聞いただけなら単純そうですが、Oxyd 石は隠れたり、触れなくなったり、 予期せぬ罠で守られていたりするので、事は難しくなります。これらの障害物を 克服するには、しばしばかなりの器用さと機転が必要となります (そしてとてもハマります)。
マウスの移動でビー玉を動かして、ステージをクリアしていくゲームです。
ですので、brainで遊ぶには、USBマウスが別途必要です(タッチパネルの反応なし)。
右クリックでアイテムの選択、左クリックで一番左のアイテムが使えるようです。
調べる(ESC)で、メニューが出てステージのリスタートなどが選択できます。
Brainで稼働する場合、
ウインドウモードでは、画面下が隠れてしますので、OptionsからFullscreenをyesにしてください。もしくは、Videomodeを640×480->320×240に変更することもできますが、画面が小さすぎるのでおすすめできません。
あと音楽を鳴らすとはノイズが多いので、起動オプションで無効化することをお勧めします(効果音くらいなら大丈夫です)。
enigma –nomusic
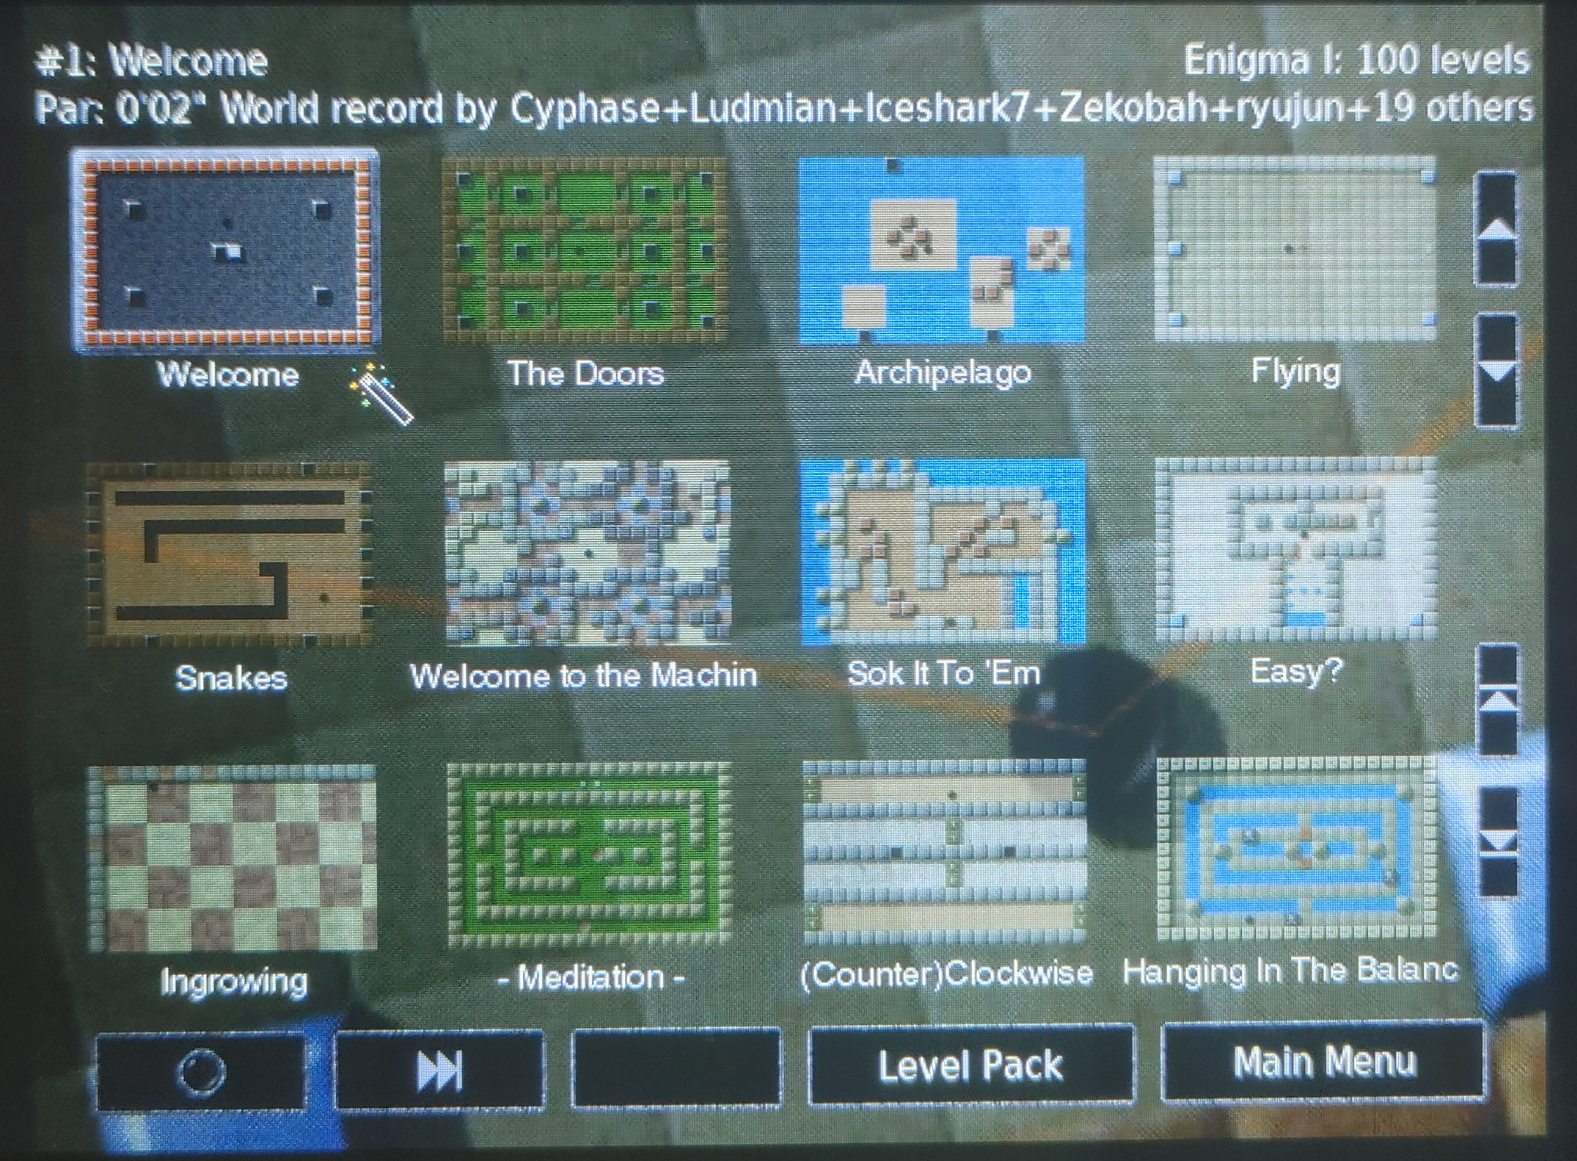
速度的にも、Level Packの最初の読み込み(多分各面データの読み込み)には
時間がかかりますが、ゲームが始まってしまえば、非常に快適に遊ぶことができます。
あとはステージに応じたクリア条件を探していってください。
神経衰弱したり、隠されたマークを探したり、いろいろなギミックがあります。
イライラ棒的なステージや倉庫番的なステージも存在するようです。
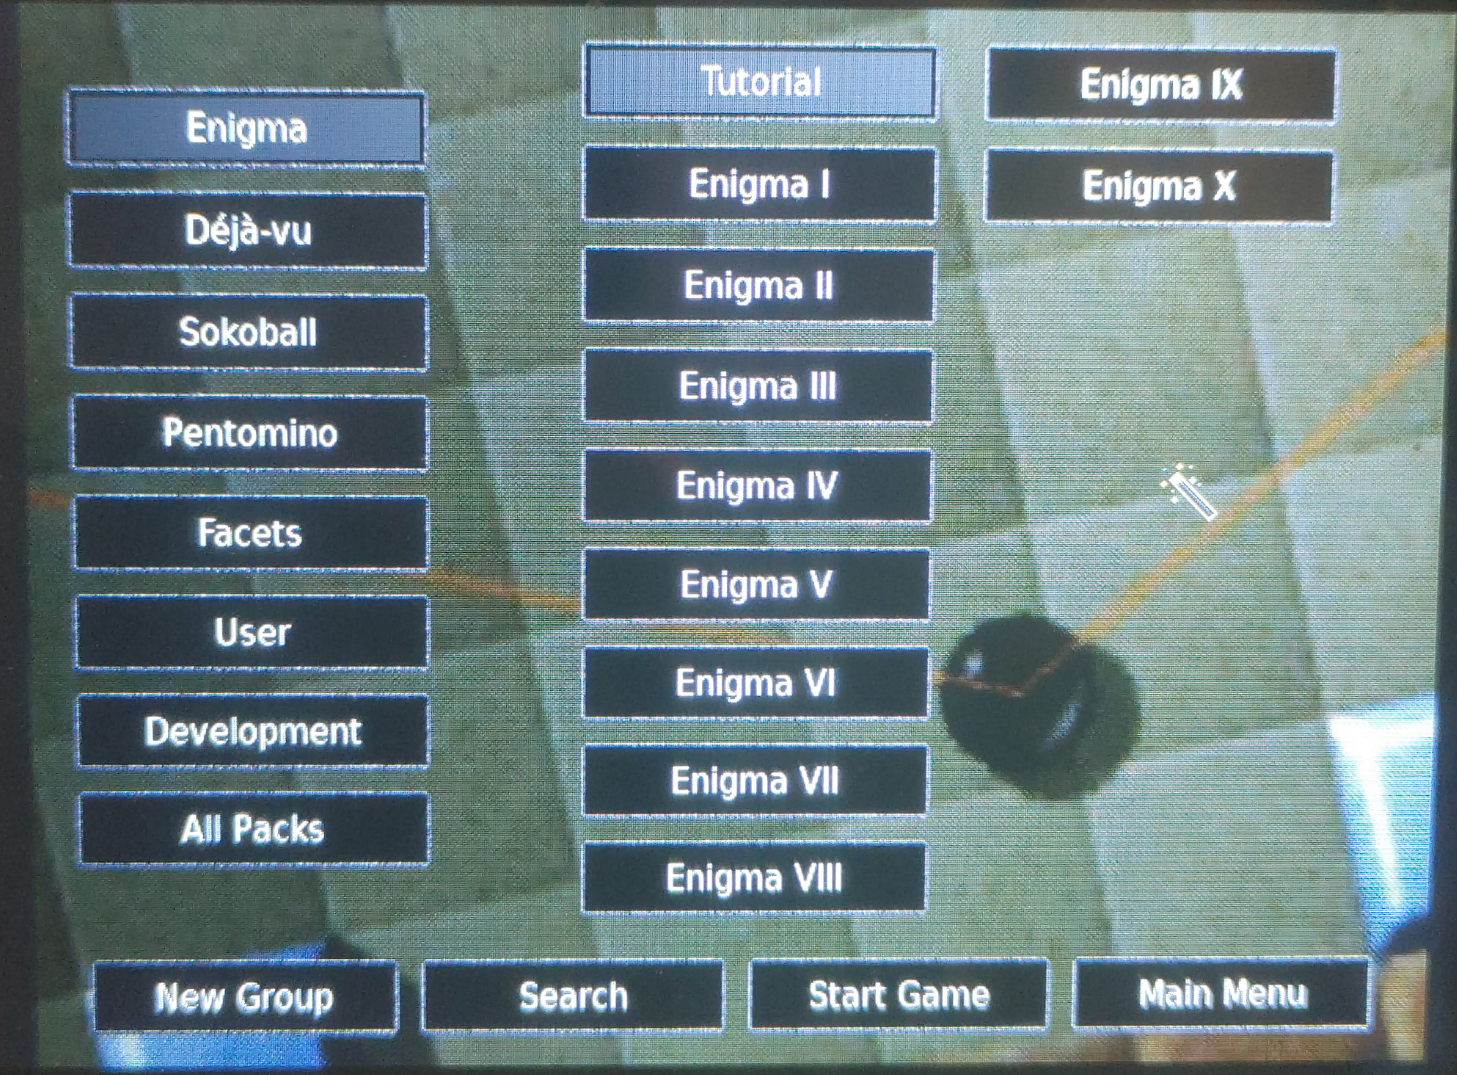
ステージはチュートリアルだけで66面。
チュートリアルのほかにもLevel Packが40以上あることを考えると、
とんでもないステージ数が用意されています。
debian11のaptでダウンロードできるのは、バージョン1.20のようですが、
2014年に1.21が出ていて、50くらいのステージが追加されているとのことなので、
すべてのステージをクリアした方は、公式からソールからビルトしてみてください。
2021年に最新の1.30が出て、日本語翻訳がサポートしているようですが、
SDL2.0に移行されてしまっているようですので、Brainでの稼働はできるかどうか不明です。
1.30ではステージ数も追加されているとのことで、総計2606にもなるそうです。
マニュアル
https://manpages.ubuntu.com/manpages/focal/en/man6/enigma.6.html
インストール:APT経由 ”sudo apt install enigma”
[trixie以降でSDL2に移行済。t64のライブラリと依存あり。]
[trixieベースのBrainuxでは、bookwormからソースを入手してビルドの必要あり]
———-
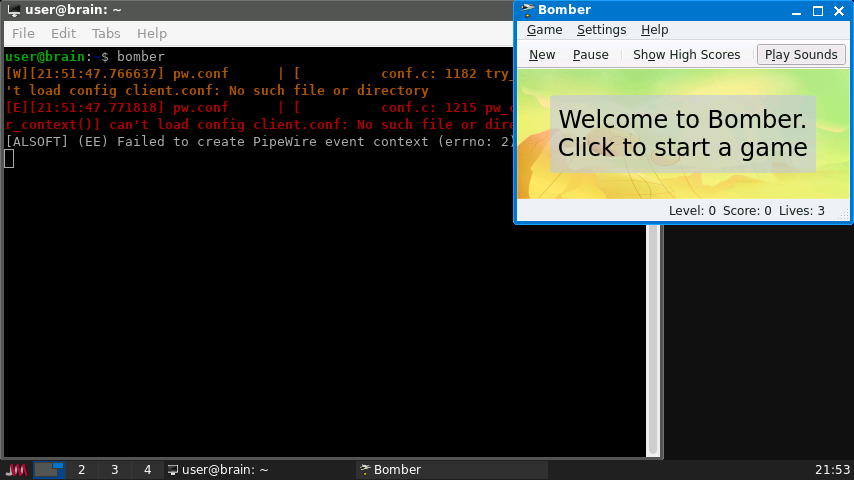
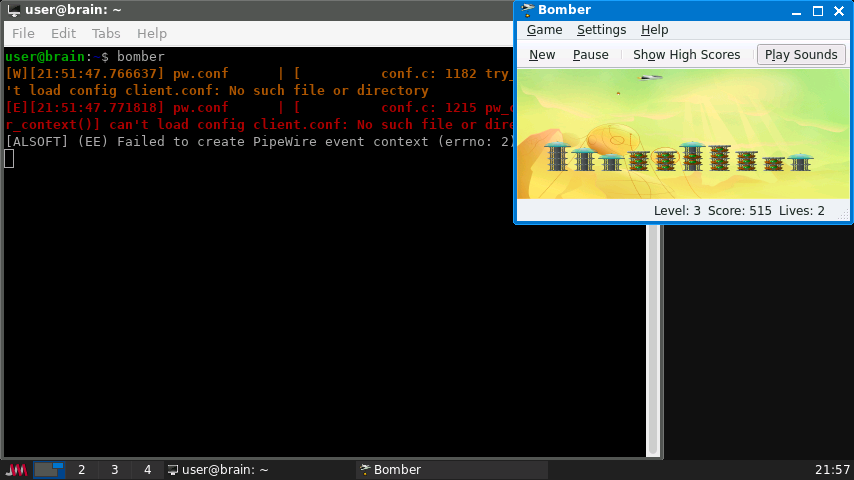
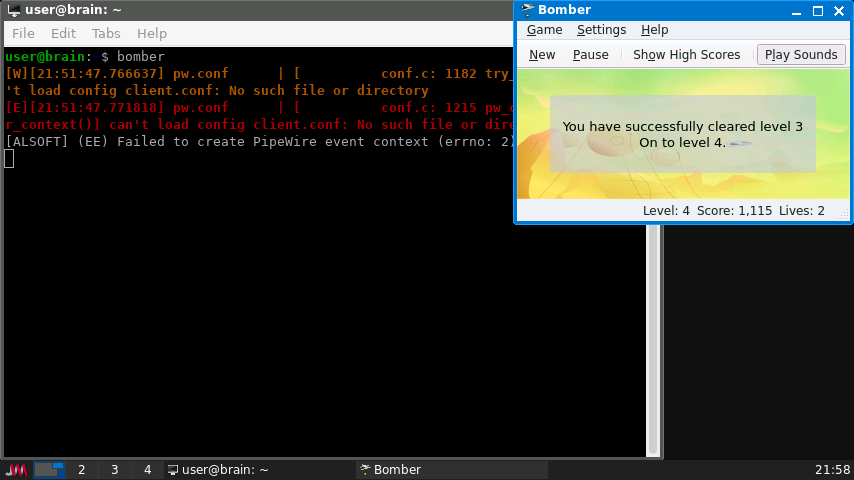
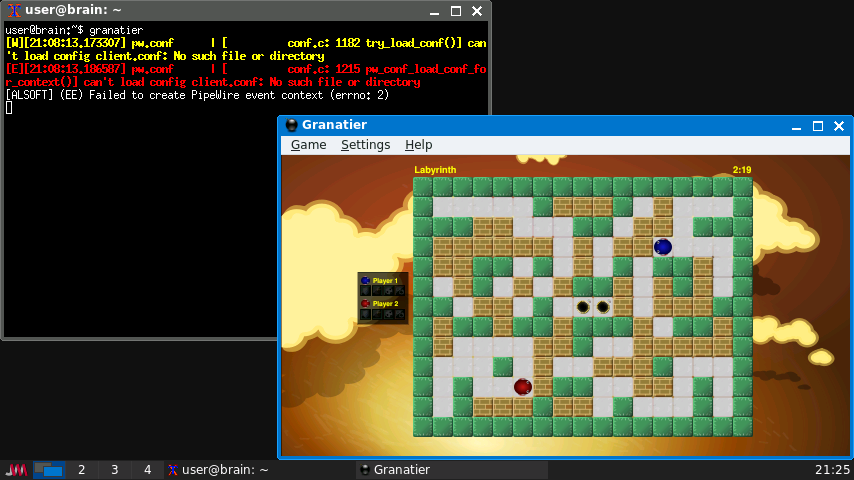
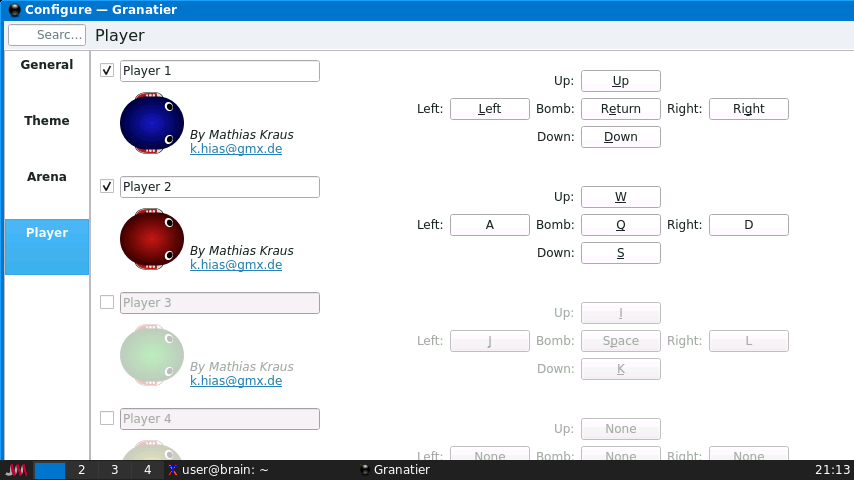
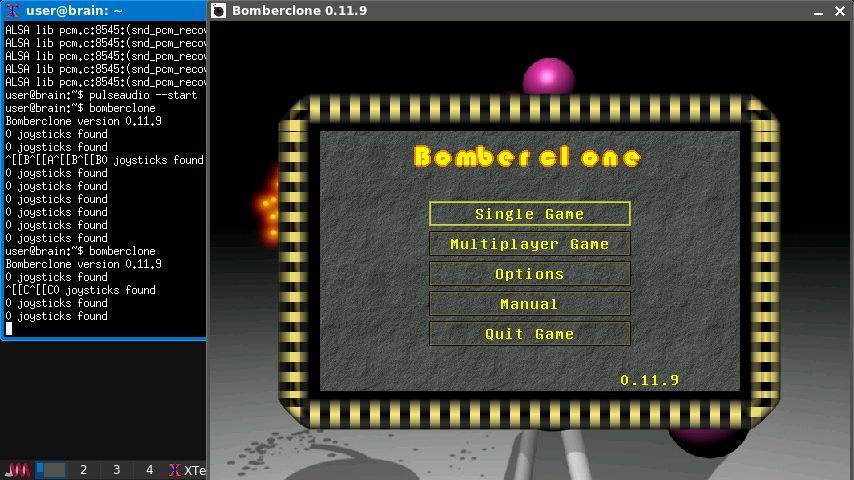
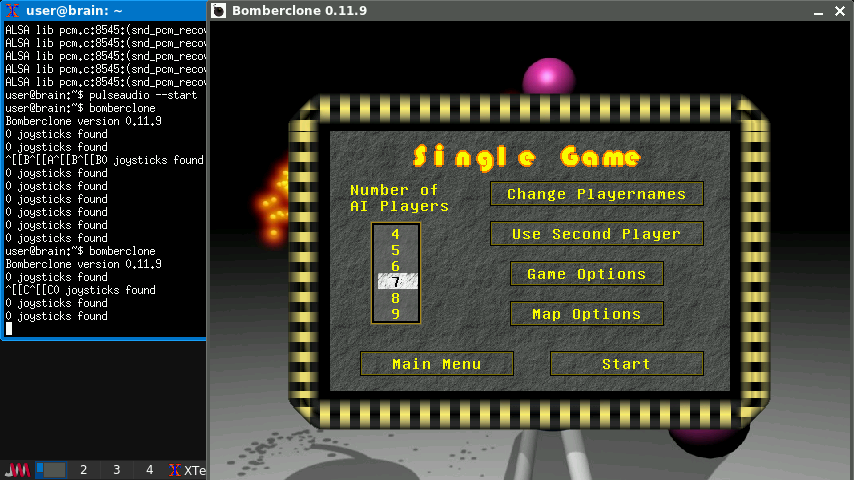
◎ bomberclone 無料のボンバーマンクローン
https://packages.debian.org/bullseye/bomberclone
BomberCloneは、LinuxとWindowsでプレイできる無料のボンバーマン風ゲームです。
ゲームのルールはシンプル。ステージを駆け抜け、他のプレイヤーを爆撃するだけです。
パワーアップアイテムが用意されており、体力アップ、ステージの移動速度アップ、
爆弾投下数アップなど、様々な効果が得られます。
BomberClone は、IPv4 または IPv6 ネットワーク経由のマルチプレイヤー モード、
またはローカル AI とのシングルプレイヤー モードでプレイできます。
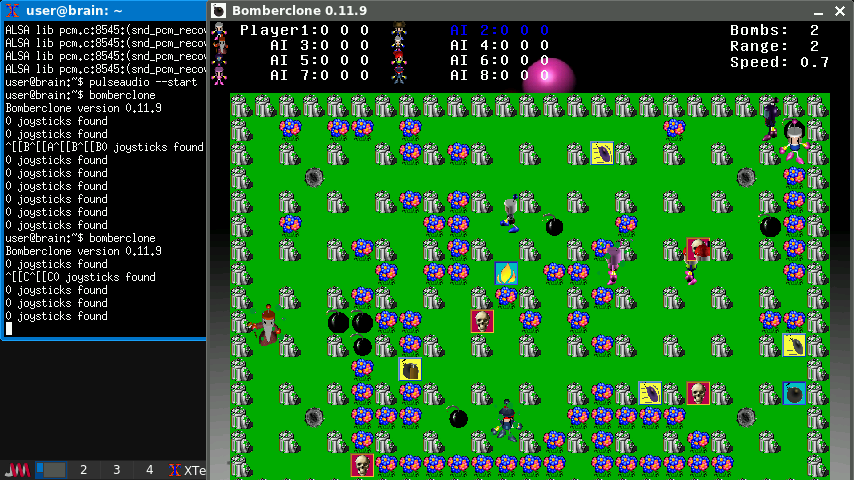
対戦ボンバーマンです。
Brain単体ではプレイヤーは1-2人、AIは最大15人まで設定できます。
画面の一番下が隠れるので、ウインドウを最前面にするか、
oprtionでfullscreenにするといいでしょう。
1人プレイでは、カーソルで移動、Ctlで爆弾を置く。Shiftがスペシャルキーになります。
ただ、Tilesetについては、壊れる壁がわかりにくいものがありますので、
MAP OptionでTilesetを固定したほうがいいかもしれません。
詳しい説明は、man bombercloneで確認してください。
インストール:APT経由 ”sudo apt install bomberclone”
———-
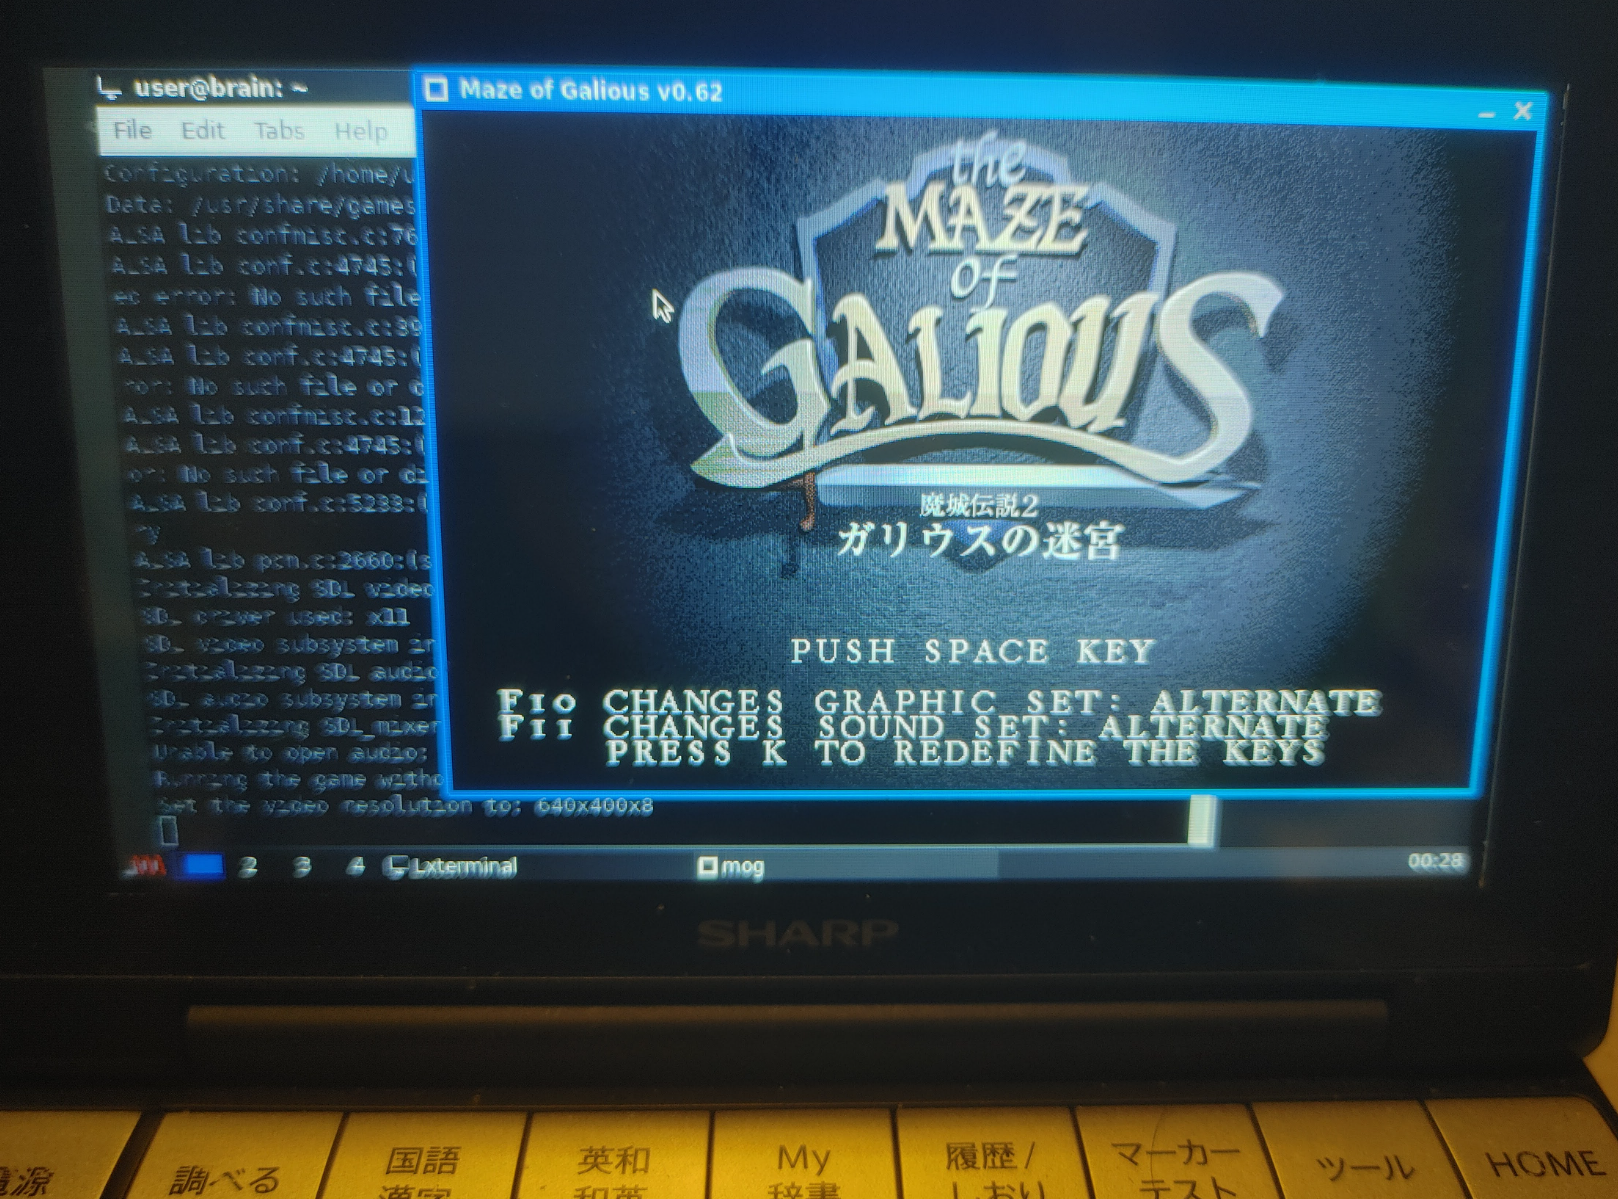
△ mazeofgalious Galious の迷宮(MSX版クローン)
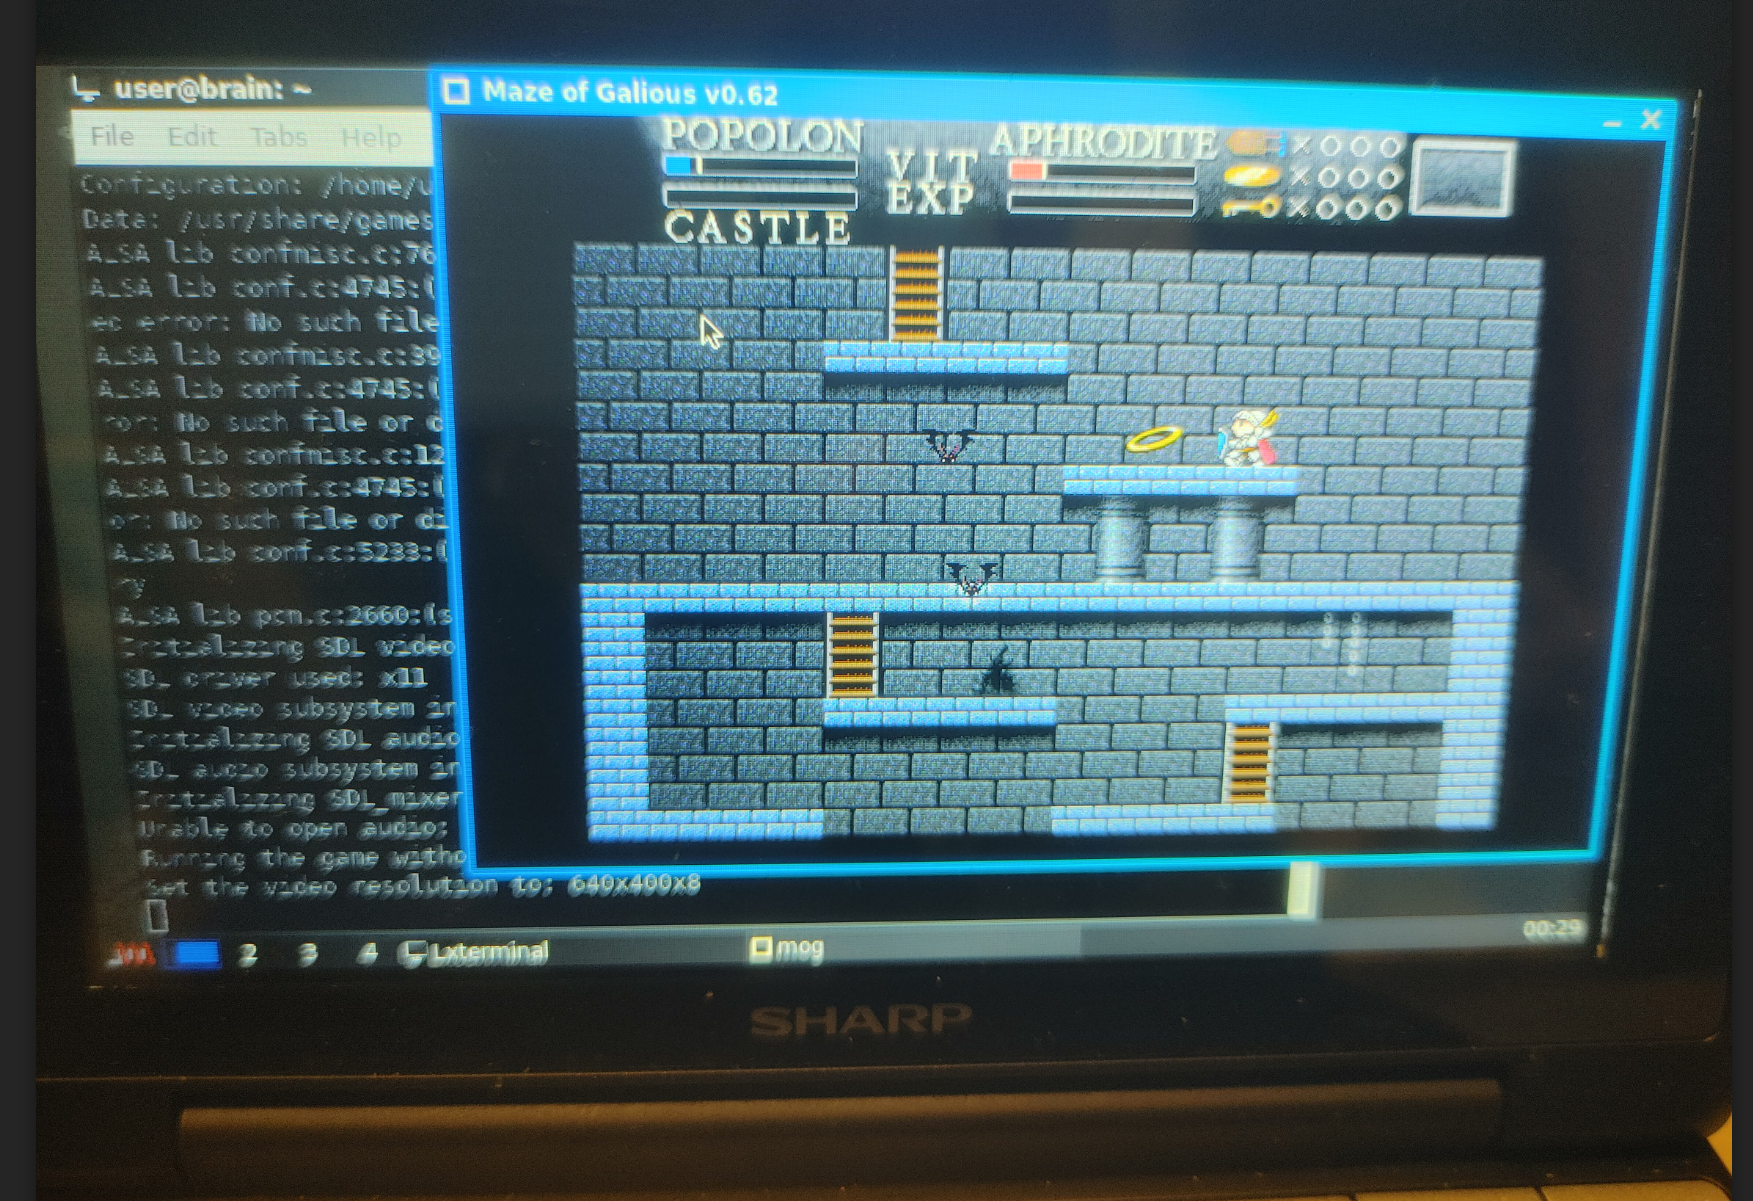
https://packages.debian.org/bullseye/mazeofgalious
MSX版のガリウスの迷宮クローンです。
音楽もなりますが、非常に遅いです。
ただ音無しならば、遅いなりに何とかプレイ可能なレベルで動きます。
が快適とまではいかないので、最後まで遊ぶには厳しいかも。
詳しい説明は、man mogで確認してください。
インストール:APT経由 ”sudo apt install mazeofgalious”
———-
◎ BoboBot ロックマン的なアクションゲーム
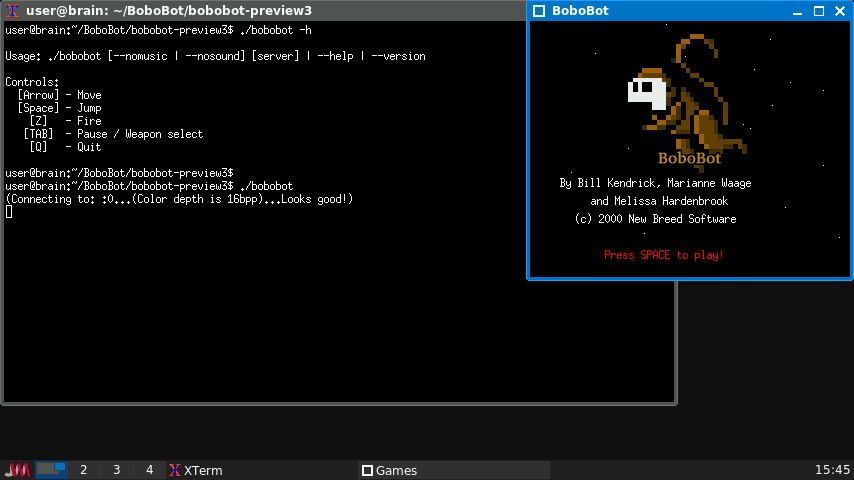
公式サイト:http://www.newbreedsoftware.com/bobobot/
起動:cd BoboBot/bobobot-preview3; ./bobobot
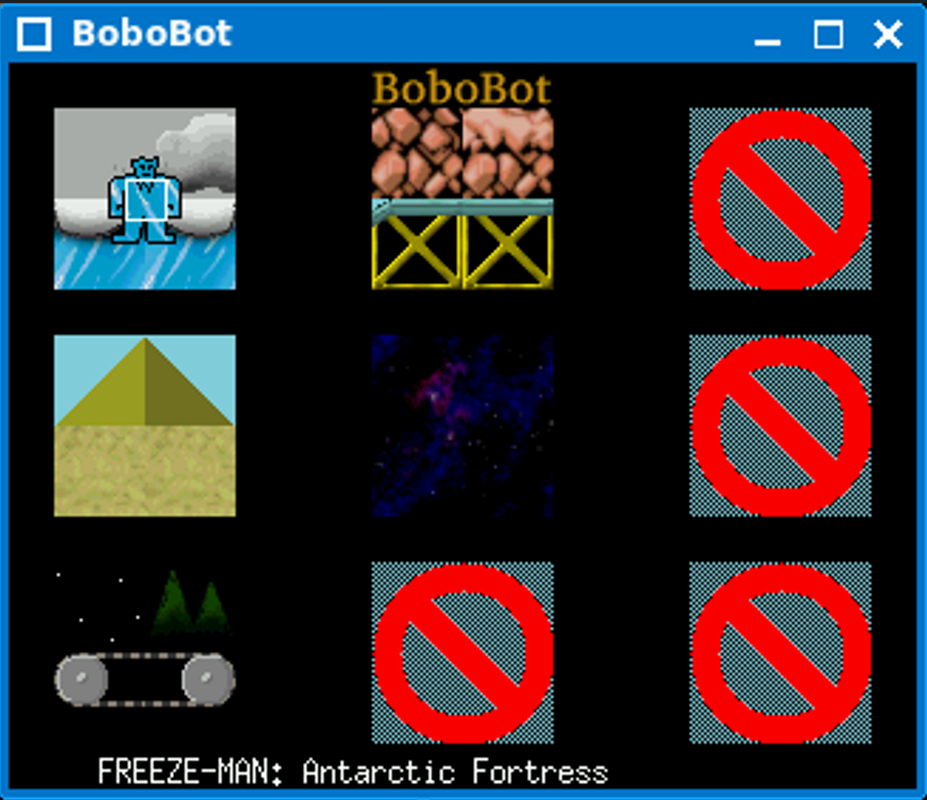
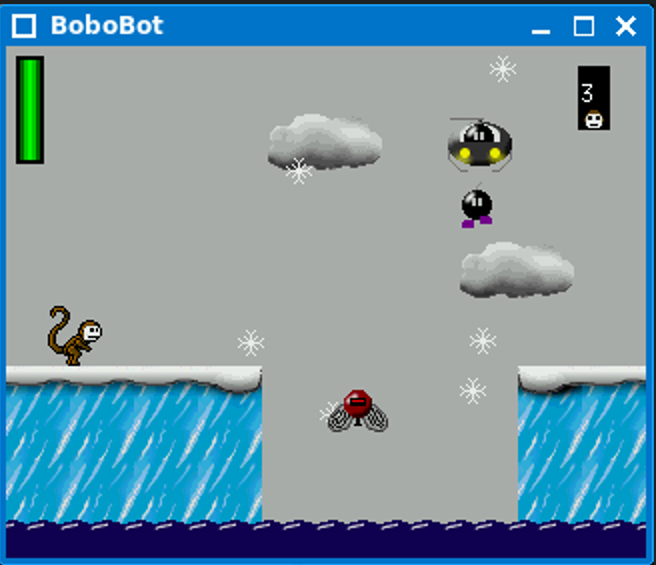
「ボボボット」は、プラットフォームゲーム、つまり「ラン&ジャンプ」ジャンルに属するシングルプレイヤーゲームです。任天堂のファミコンで発売された「ロックマン」シリーズをベースにしています。
スクロールはありませんが、ゲームの各レベルには複数の画面があり、左右や上下に移動できます。秘密にもご注目ください!
ゲームは、8つのレベルから1つを選んで開始します。画面いっぱいに広がる敵や障害物を突破した後は、そのレベルの「ボス」を倒さなければなりません。
クリアすると新しい武器が手に入り、残りの7つのレベルから1つを選んで進むことになります。8つのエリアすべてをクリアすると、最終レベルに進み、地球の災厄の背後にある邪悪な勢力を発見し、運が良ければそれを破壊することができます。
ダメージを受けた時(必ずダメージを受けます)、敵を倒すと時々出現するバナナで体力を回復できます。また、スペシャルウェポンを使い切った時は、ナットとボルトで体力を回復できます。ナットとボルトも時々出現します。そして、大切なエクストラライフをワンアップで手に入れる方法もお忘れなく!
ぶっちゃけロックマンです。
カーソルの左右で移動、SPC or 上でジャンプします。
Zで弾を打ちます(TABでポーズ&武器選択)
キー操作が独特なので、なれるまでは難しいです。
インストール:ソースを入手してインストール
インストール手順詳細(クリックで表示)
インストール手順詳細(クリックで表示)
$ cd
$ mkdir BoboBot
$ cd BoboBot
$ wget https://tuxpaint.org/ftp/unix/x/bobobot/src/bobobot-preview3.tar.gz
$ tar zxf bobobot-preview3.tar.gz
$ cd bobobot-preview3
$ make
デフォルトのインストール先=ビルドしているカレントフォルダのようで、
make 実行時の最後にエラーになりますが、実行時フォルダの下に
bobobot ファイルが作成されていて実行属性がついていれば,OKです。
また、make 時にオプションを付けることでサウンド等を有効にすることができますが、
brainuxでは標準でSound無効ですし、有効にすると重くなるので不要かもしれません。
ジョイパットサポートもありますが、別でドライバが必要みたいですが既に入手が難しそうです。
詳細はINSTALLファイルを確認してください。(SOUND=YES MUSIC=YES JOY=YES)
———-
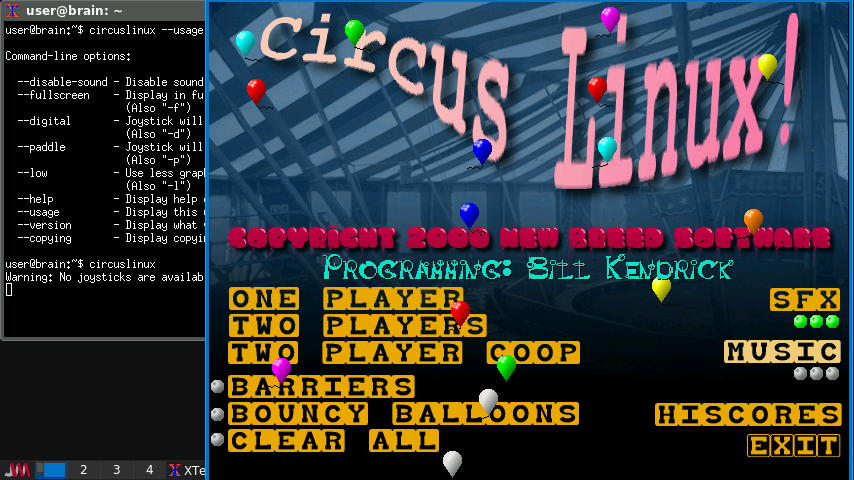
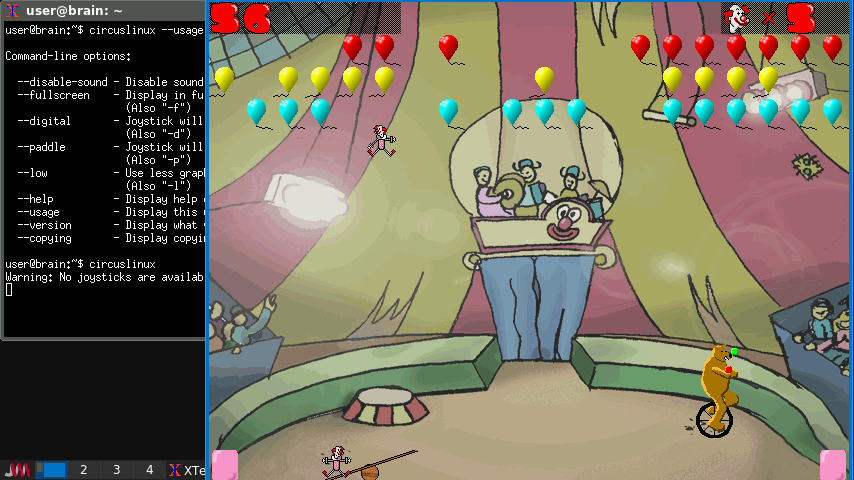
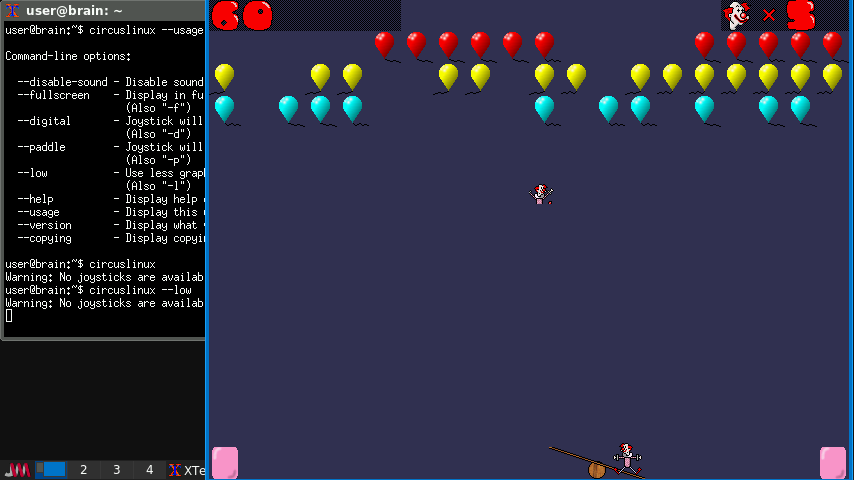
◎ Circus Linux! アーケードゲーム「Circus」/Atari2600「Circus Atari」風ゲーム
公式サイト:http://www.newbreedsoftware.com/circus-linux/
https://packages.debian.org/bullseye/circuslinux
起動:circuslinux
「Circus Linux!」は、Atari, Inc. が制作した Atari 2600 ゲーム「Circus Atari」のクローンです (「Circus Atari」自体は、単に「Circus」という名前の以前のアーケード ゲームのクローンです)。
シーソーを画面上で左右に動かして、ピエロを空中に飛ばして風船を割るのが目的です。
ピエロは一番高い位置に到達すると、風船を割ってまた落ちていきます。
(ゲームプレイは名作「Breakout」や「Arkanoid」に似ています。)
シーソーの移動は、マウスや、タッチパネル、カーソルキーでできますが、
カーソルキーでは、移動が間に合わないかもしれません。
また、Brainuxで動かす場合には、MUSICは音がぶつ切りになるので無効化したほうがいいです(タイトル画面で変更できます)。
効果音だけなら大丈夫そうですが、–disable-soundで音を強制的に無効化も可能です。
あと、以下のオプションも使えます。
–fullscreen フルスクリーン表示します(通常は鵜ウィンドウ表示)
–low 低スペックPC用に画面をシンプルにします。
–usage コマンドオプションが確認できます。
インストール:APT経由 ”sudo apt install circuslinux”
(aptでインストール可能なことに後で気づきました。)
インストール2:ソースを入手してインストール
(ビルド時にジョイスティックサポートを有効化しています。)
インストール手順詳細(クリックで表示)
インストール手順詳細(クリックで表示)
$ cd
$ mkdir circuslinux
$ cd circuslinux
$ wget https://tuxpaint.org/ftp/unix/x/circus-linux/src/circuslinux-1.0.3.tar.gz
$ tar zxf circuslinux-1.0.3.tar.gz
$ cd circuslinux-1.0.3
$ sudo apt install libsdl1.2-dev libsdl-image1.2-dev libsdl-mixer1.2-dev
$ ./configure –enable-joystick
$ make
$ sudo make install
———-
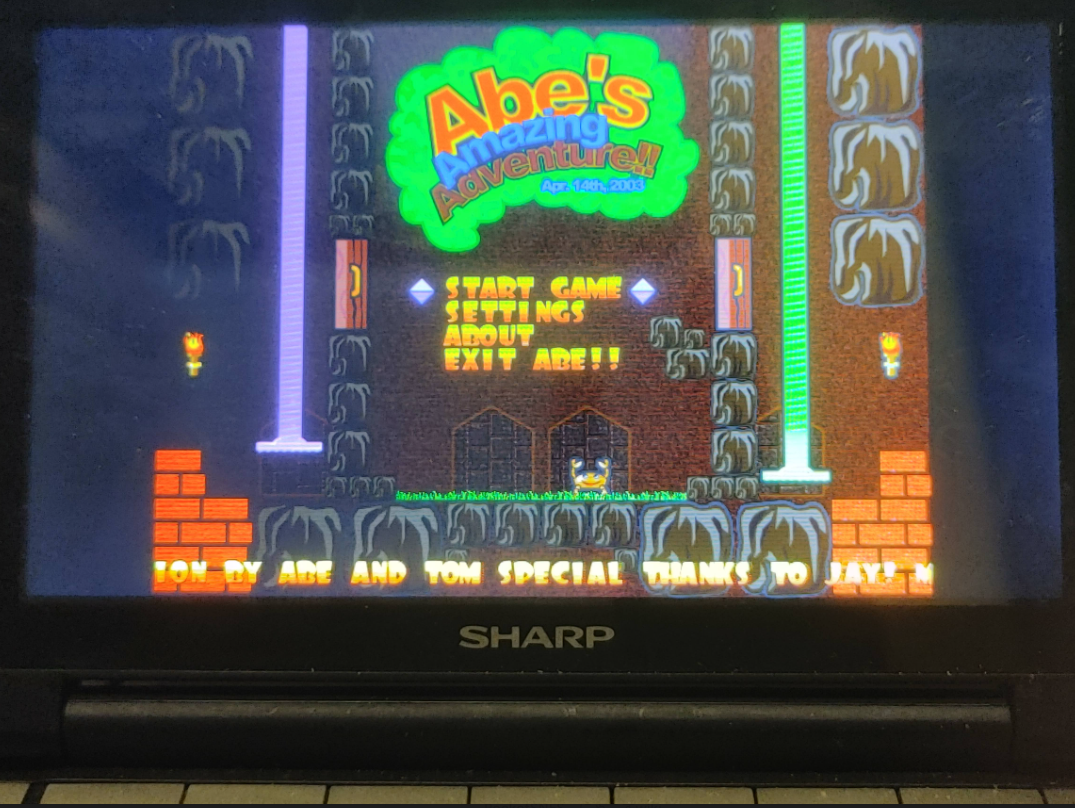
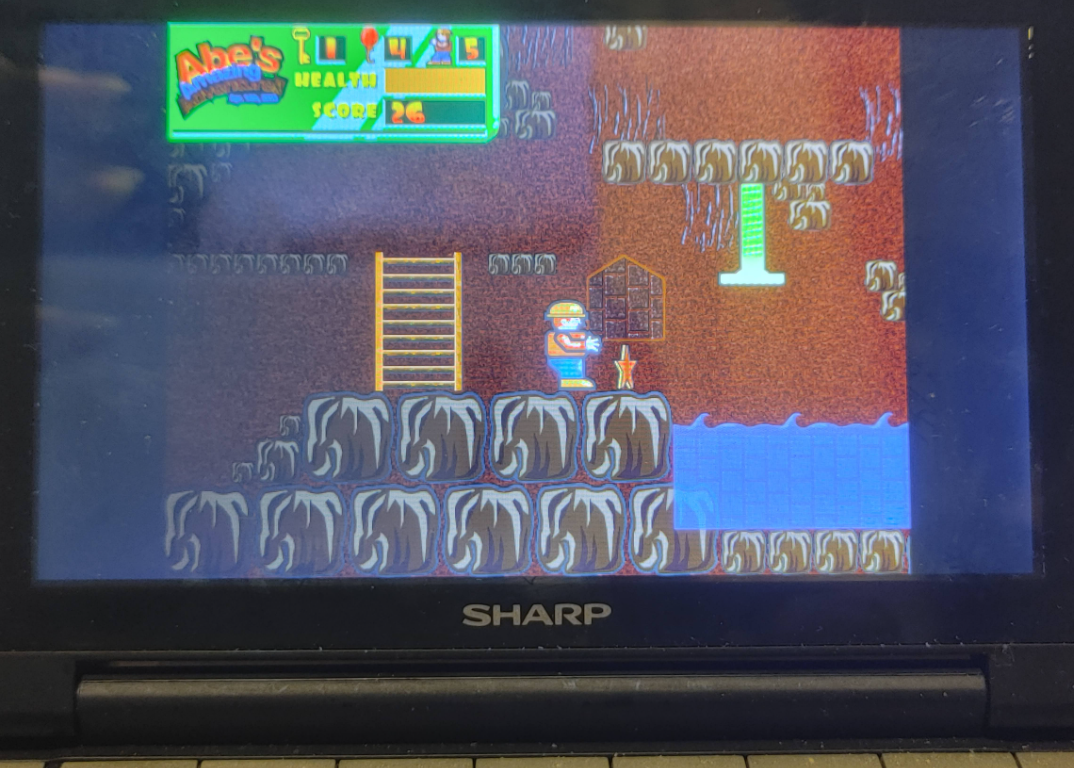
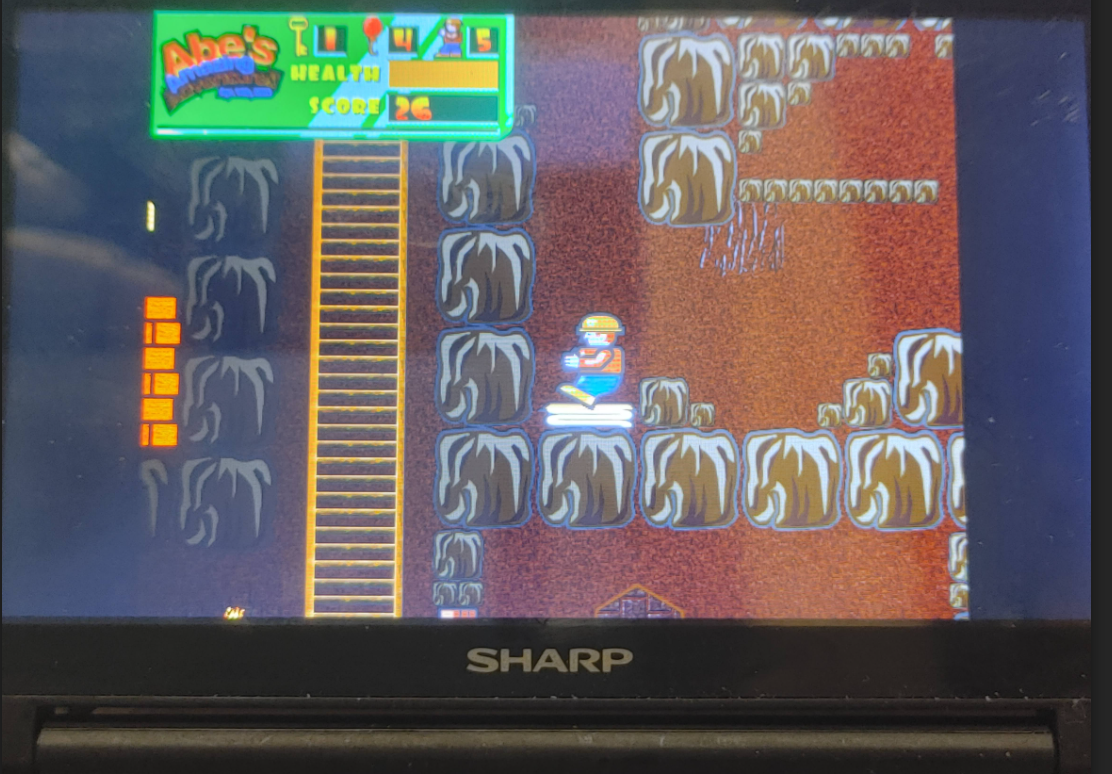
〇 Abe’s Amazing Adventure ピットフォールII的なアクションゲーム
https://packages.debian.org/bullseye/abe
起動:abe
横スクロールゲーム「エイブのすごい冒険」
スクロール、プラットフォームジャンプ、鍵集め、古代ピラミッド探索を繰り返すゲーム。コモドール+4向けの類似ゲームに似たスタイルを彷彿とさせます。このゲームは、若い世代に、これまでプレイできなかったクールなゲームを全て紹介することを目指しています。
●縦横スクロールゲーム
古代ピラミッドを探検します。昔のゲームのようにシンプルで分かりやすいです。
足場をジャンプしながら上下左右に動き回って鍵や宝石を集めます。
Brainux上では、ゲームスピードは少し遅いです。
が、音無しであれば、何とか遊べるレベルです。
また、起動しないといはpulesaudioを起動してみてください。
「START GAME」でエンターキーを押して開始します。
↑↓←→キーで移動して、鍵などのアイテムを取りながら進みます。
鍵を持っていれば扉が開きます。どの鍵でも大丈夫です。
風船を持っていれば、好きな時に少しの間だけ空中を移動できます。
星のマークの所で自動セーブされます。次に再開する時はそこから始まります。
ただし、ライフがなくなってゲームオーバーになった場合は最初からです。
【操作】 [space]:ジャンプ [Enter]:風船を使う [Esc]:終了 [g]:神モード?切替
インストール:APT経由 ”sudo apt install abe”
———-
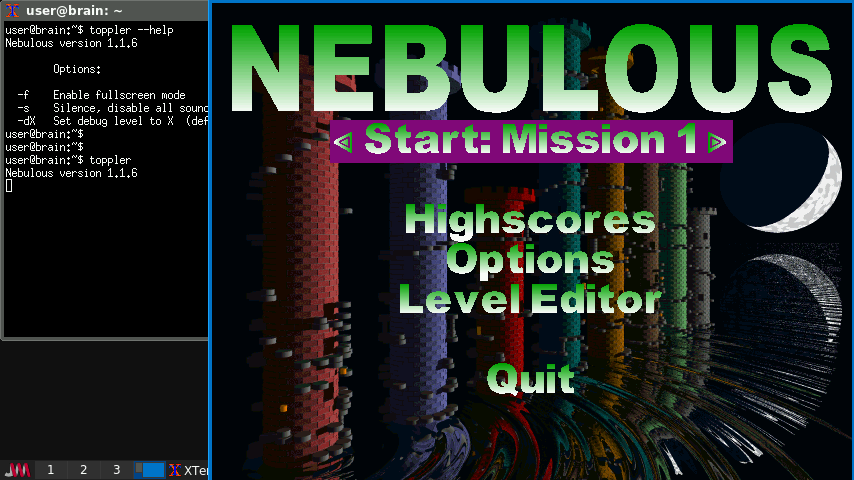
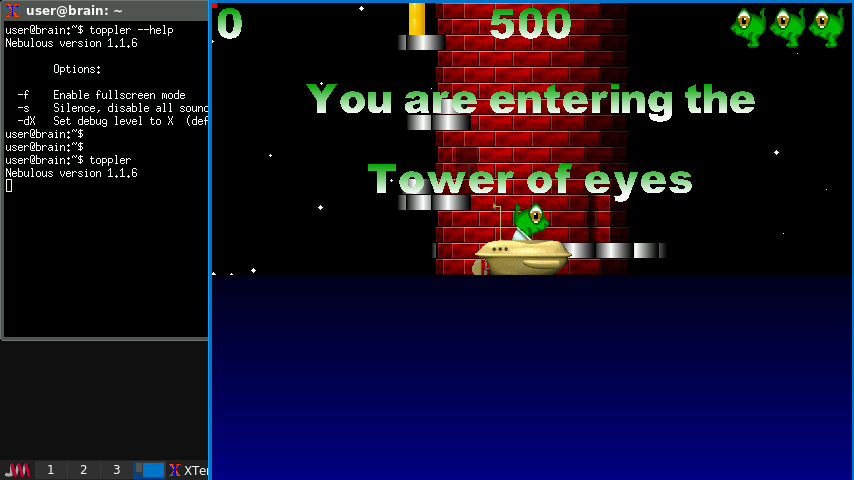
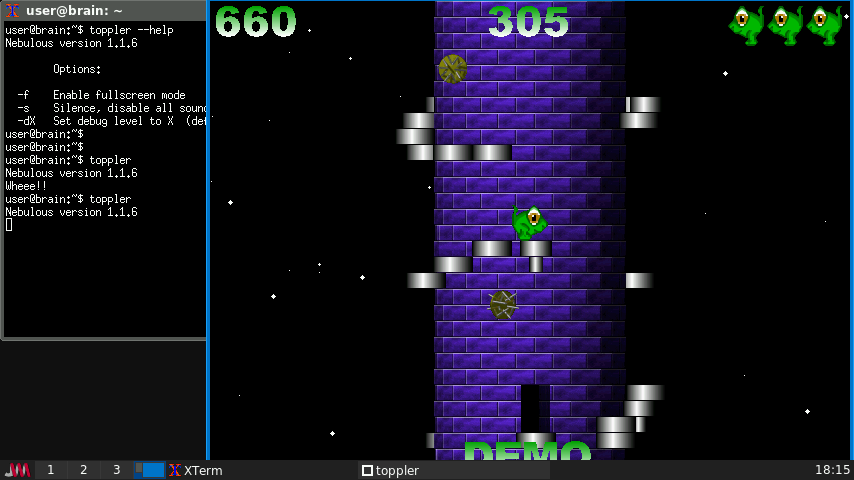
◎ TowerToppler(別名Nebulous) 障害を避けながら塔を登るアクションゲーム(キョロちゃんランド)
サイト:tower toppler download | SourceForge.net
https://packages.debian.org/bullseye/toppler
起動:toppler
★障害を避けながら塔を登るアクションゲーム
Tower Toppler(別名Nebulous)は、古い「走ってジャンプする」ゲームの再実装です。
(「キョロちゃんランド」の元ネタといったほうがわかりやすいかもしれません。)
ゲームの目的は、小さな緑色の動物を 8 棟あるタワーの各々のターゲットドア まで導くことで、現在 2 つのミッションがあります。ターゲットドアは通常、 タワーの最上階にあります。
しかし、エレベータを使ったり、ドアや踊り場の迷宮を歩き回って道を見つけ ることだけが、解決すべき問題ではありません。タワー内には他の生物が大量 に棲息しており、あなたを踊り場の端から押し出して、ターゲットドアに辿り 着くのを邪魔しようとするのです。
「Start: Mission 1」でエンターキーを押して開始します。
デモ画面が表示されている時は、何かキーを押せば最初のメニューに戻ります。
プレイ中にエスケープキーを押すとメニューが表示されます。
【操作】 [←]:左へ [→]:右へ [↑]:塔の中へ/台を上げる [↓]:台を下げる [space]:撃つ
Braiで遊ぶ場合にはウィンドウを最前面にするか、フルスクリーンモードで遊びましょう
音は無いほうが動きがいいのでおすすめします
(メニューか、-sオプションでsound無効化できます。)。
インストール1:APTからインストール”sudo apt install toppler”
[bookworm 以降でSDL2に移行済。t64のライブラリと依存なし。]
[trixieベースのBrainuxでは、sudo apt -t bullseye install topplerで導入可能]
(後でaptからインストーつ出来ることに気づきました)
インストール2:ソースを入手してインストール
(ビルド時に最適化オプションを追加しています。)
インストール手順詳細(クリックで表示)
インストール手順詳細(クリックで表示)
$ cd
$ mkdir toppler
$ cd toppler
ここからtoppler-1.1.6.tar.gzファイルをダウンロードして、~/topplerに転送
https://sourceforge.net/projects/toppler/files/toppler/1.1.6
$ tar zxf toppler-1.1.6.tar.gz
$ cd toppler-1.1.6
$ ./configure
$ vi Makefile
CFLAGS= -g -O2
↓
CFLAGS= -O3 -march=native
CXXFLAGS= -g -O2
↓
CXXFLAGS= -O3 -march=native
$ make
$ make install
———-
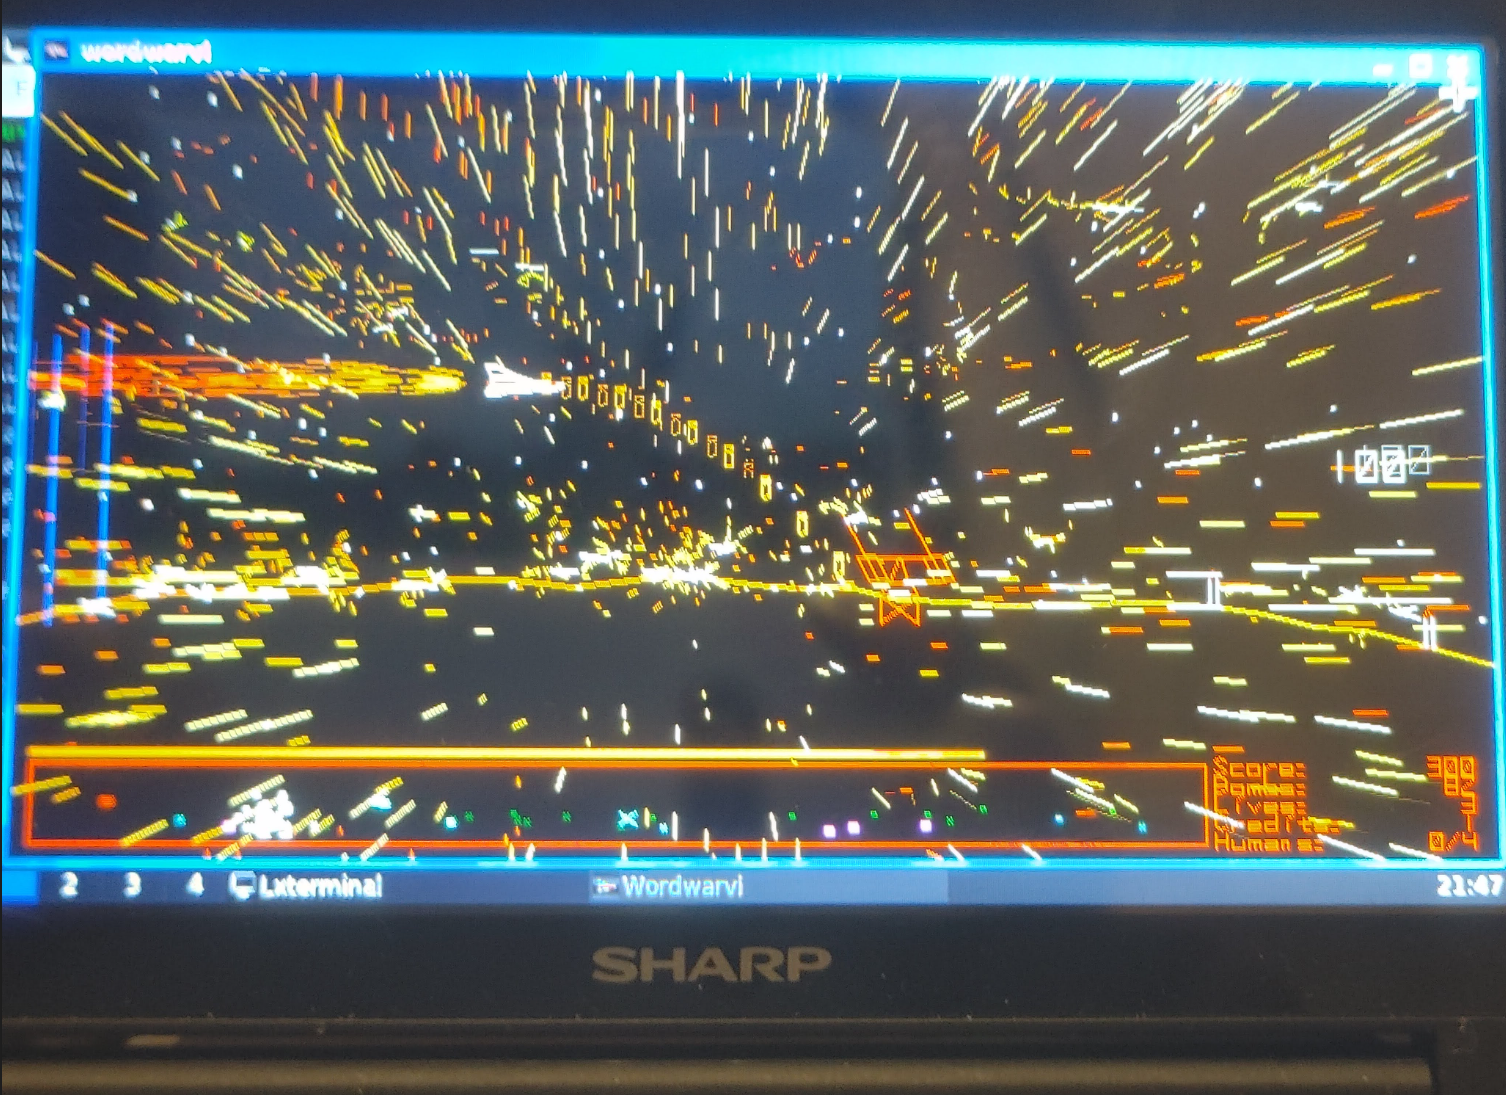
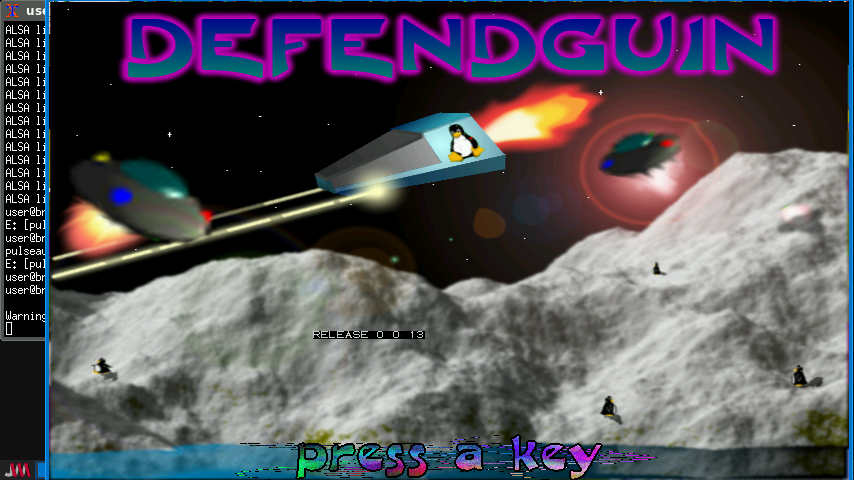
◎ Defendguin アーケードゲーム「Defender」のクローン

https://libregamewiki.org/Defendguin
起動:defendguin
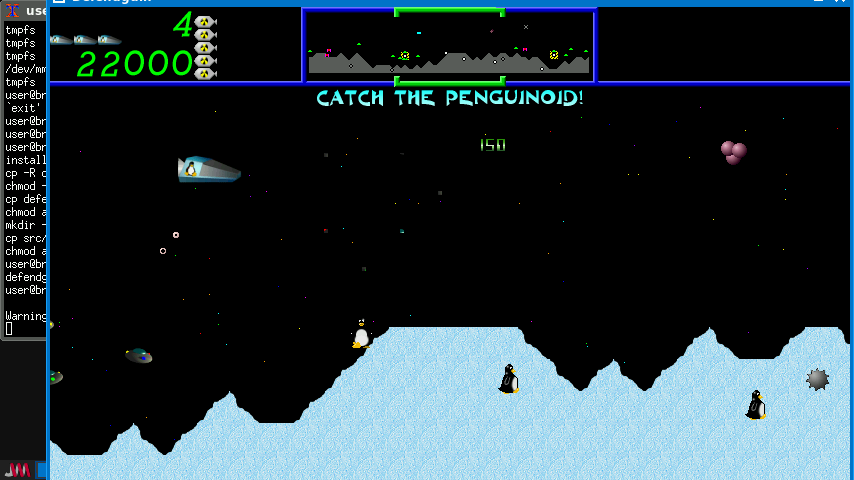
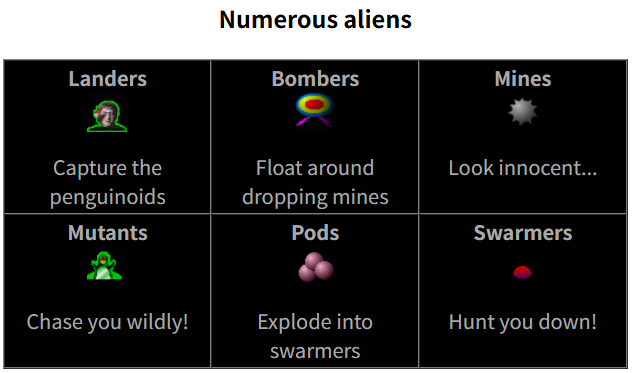
Defendguinは、アーケードゲーム「Defender」のクローンですが、Linuxテーマになっています。あなたの使命は、捕獲され変異させられてしまう小さなペンギノイドたちを守ることです。
高速横スクロールアクション
たくさんの音楽と面白い効果音
たくさんの特殊効果
レーザーとスマート爆弾
ジョイスティックまたはキーボードによるコントロール
1人または2人用
勝てば、大きなボスと楽しいエンディングシーケンスが登場します!
Braiux上でも非常に快適にプレイできます。
音も出ます。が事前にPlusaudioを起動したほうがいいです(pulseauido –start)。
これでも効果音のみまでで曲まで流すと音のぶつ切りが激しすぎます。
(optionsからEffects、Musicそれぞれのボリュームを設定できます。)
Game controls:(キー操作の他にジョイパッドも対応しているようです。)
Up/Down Move up/down
Left/Right Face/move left/right
Space/FireB Fire lasers
Alt/FireA Detonate Smart Bomb
1/FireC Thrust
2/FireD Reverse
P/Tab Pause/Unpause
Escape Abort game
インストール:ソースを入手してインストール
(ビルド時に最適化オプションを追加しています。)
インストール手順詳細(クリックで表示)
インストール手順詳細(クリックで表示)
$ cd
$ mkdir Defendguin
$ cd Defendguin
$ wget https://tuxpaint.org/ftp/unix/x/defendguin/src/defendguin-0.0.13.tar.gz
$ tar zxf defendguin-0.0.13.tar.gz
$ cd defendguin-0.0.13
$ vi Makefile
CFLAGS=-Wall $(SDL_CFLAGS) -DDATA_PREFIX=\”$(DATA_PREFIX)\” -D$(NOSOUNDFLAG) \
-DJOY_$(JOY)
↓
CFLAGS=-Wall $(SDL_CFLAGS) -DDATA_PREFIX=\”$(DATA_PREFIX)\” -D$(NOSOUNDFLAG) \
-DJOY_$(JOY) -O3 -march=native
$ make
$ sudo make install
———-
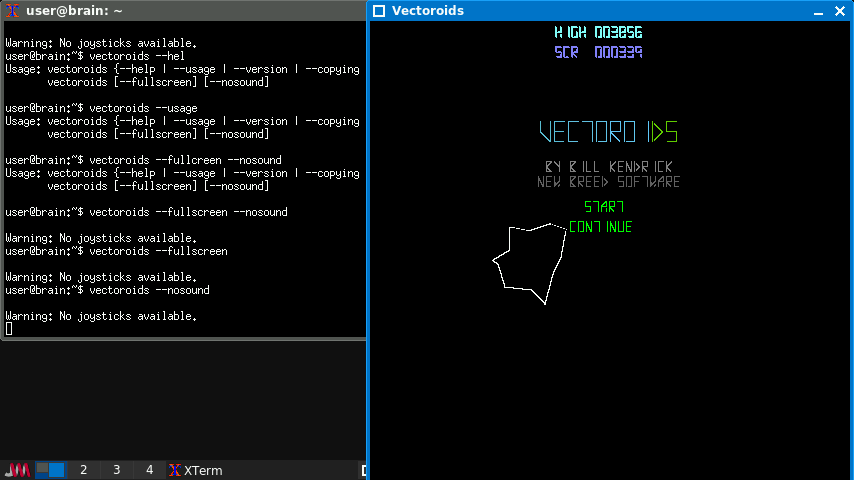
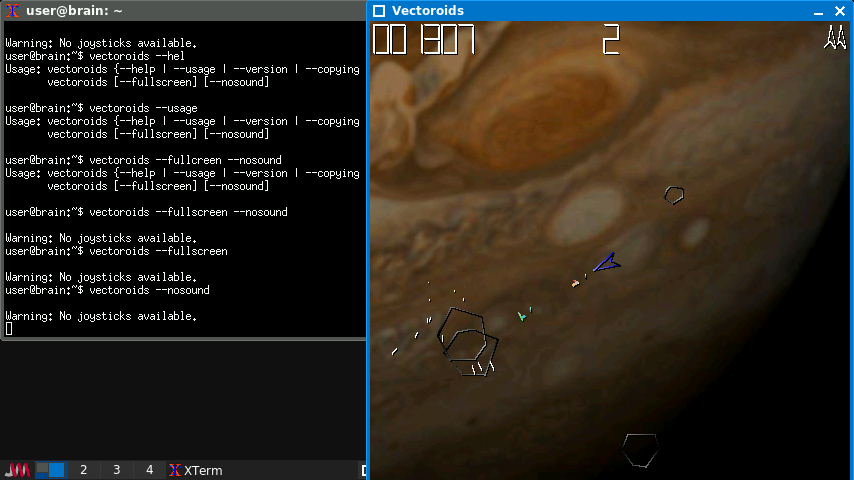
◎ vectoroids 古典的なアーケードゲームの “アステロイド” のグラフィック強化版です。
https://packages.debian.org/bullseye/vectoroids
起動:vectoroids
“Vectoroids” はベクターベースのロックシューティングゲームであり、 古典的なアーケードゲームの “アステロイド” に似ています。 宇宙船を操縦し、小惑星を射撃してずっと小さなかけらとして破壊しつつ、 UFO との衝突や UFO からの射撃を回避しようとします。
“Vectoroids” は Agenda VR3 Linux ベース PDA 向けに同じ作者により書かれた
X-Window ゲーム”Agendaroids” 用のソースに基づいた SDL ゲームです。
Brainux上では、フルスクリーン、音無しであれば十分プレイ可能です。
(音ありだと、少し遅いですが。)
←→で、自機の回転
↑ 後方に噴射して、前向に加速する
SPC:弾を発射
ESC(調べる):ゲーム中断
vectoroids –fullscreen –nosound
でフルスクリーン、音無しで起動します。
公式サイト:http://www.newbreedsoftware.com/vectoroids/
のソースだとSDL2利用と記載があったので、
AptのほうではSDL1.2になっていたのでびっくりしました。
インストール:APT経由 ”sudo apt install vectoroids”
[trixie 以降でSDL2に移行済。t64のライブラリと依存なし。]
[trixieベースのBrainuxでは、sudo apt -t bookworm install vectoroidsで導入可能]
———-
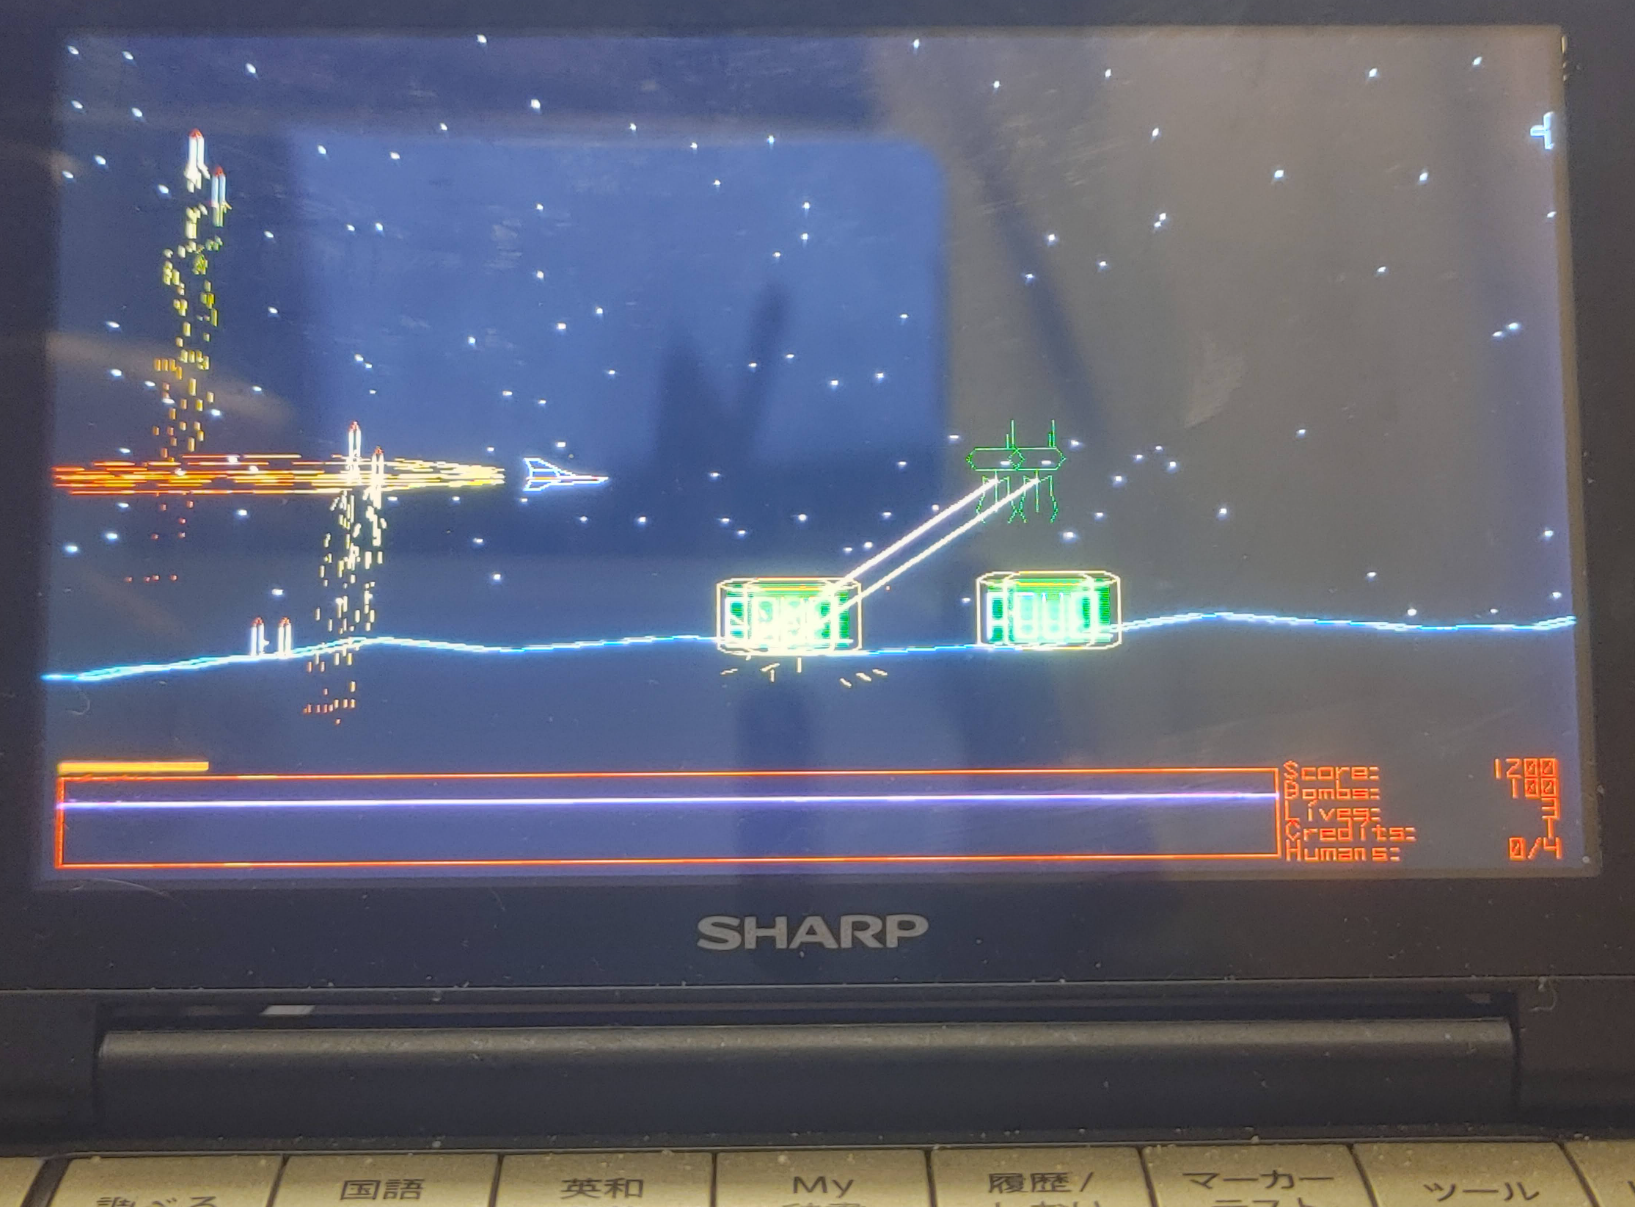
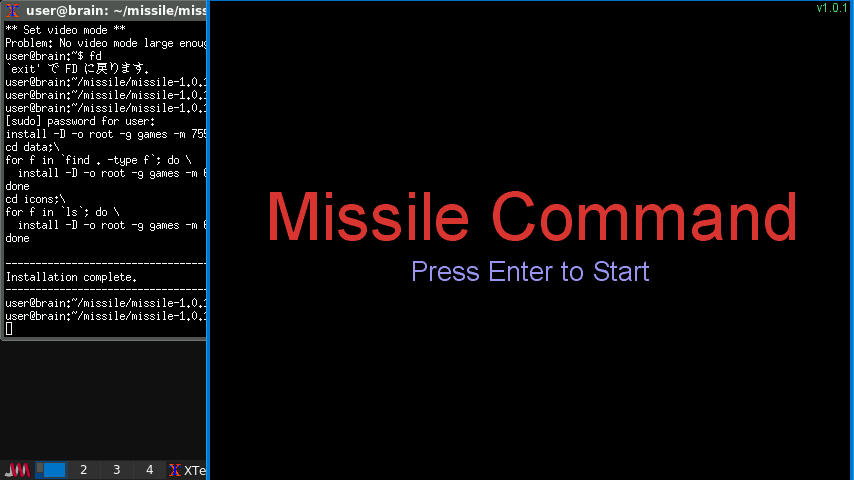
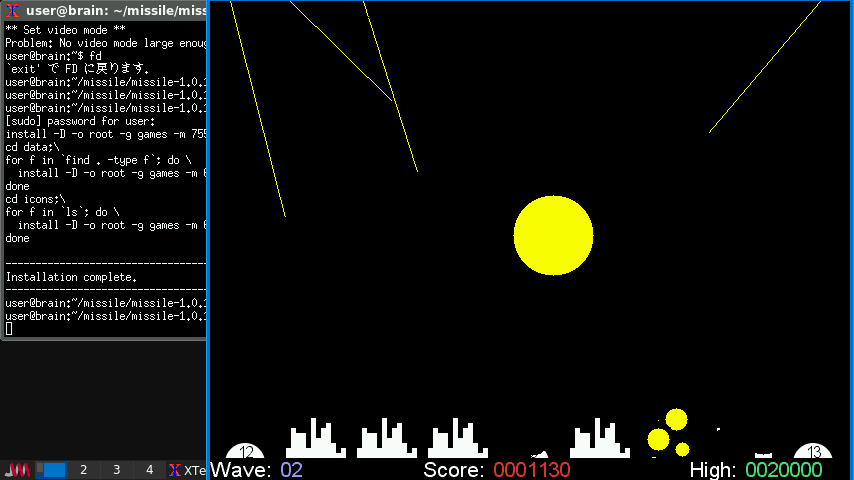
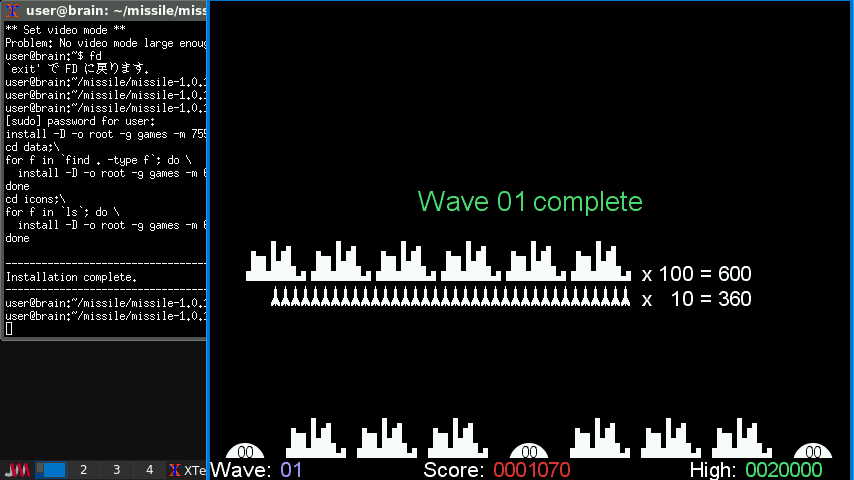
◎ Missile Command 「ミサイル・コマンド」クローンです
ソースダウンロード先:https://sourceforge.net/projects/missile/
起動:missile
3ボタンマウスがあると快適に遊べます。効果音もUSBサウンドデバイスがあれば鳴ります。
(Brain単体でタッチパネル操作だと、左のミサイル発射基地からのみミサイル発射可能です)
差し迫った核の破滅から街を救う Atari ゲームのクローンです。
マウスで照準を囲碁化して、右クリック、中央クリック、左クリックで、
それぞれ、左、中央、右のミサイル発射基地から防衛ミサイルを発射します。
ミサイルの段数が切れたり、ミサイル発射基地が破壊されると、
そこからミサイルは打てなくなります。
すべての都市が破壊されたらゲームオーバーです。
インストール:ソースを入手してインストール
(ビルド時に最適化オプションを追加しています。)
インストール手順詳細(クリックで表示)
インストール手順詳細(クリックで表示)
$ cd
$ mkdir missile
$ cd missile
ダウンロードしたファイルをコピーする
https://sourceforge.net/projects/missile/files/missile/1.0.1/
missile-1.0.1.tar.gz
$ tar zxf missile-1.0.1.tar.gz
$ cd missile-1.0.1
そのままだと一部ビルドに失敗するので、makefileを修正(ついでにcpu最適化)
$ vi Makefile
CFLAGS = -Wall -O2 $(OPTS) `sdl-config –cflags`
#CFLAGS = -Wall -g `sdl-config –cflags`
LIBS = `sdl-config –libs` -lSDL_image $(SND_LIBS)
↓
CFLAGS = -Wall -O3 -match=native $(OPTS) `sdl-config –cflags`
#CFLAGS = -Wall -g `sdl-config –cflags`
LIBS = `sdl-config –libs` -lSDL_image $(SND_LIBS) -lm
$ make
$ make install
———-
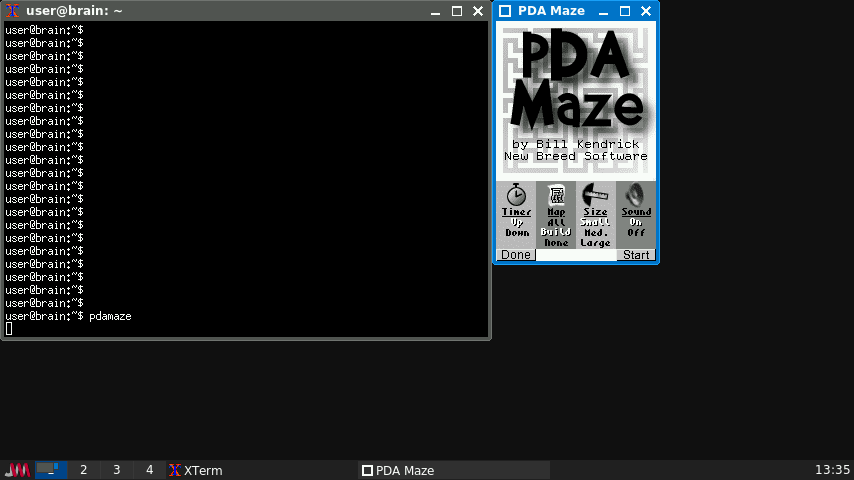
〇 PDA Maze 一人称視点(3D)の迷路ゲーム
http://www.newbreedsoftware.com/pdamaze/
起動:pdamaze
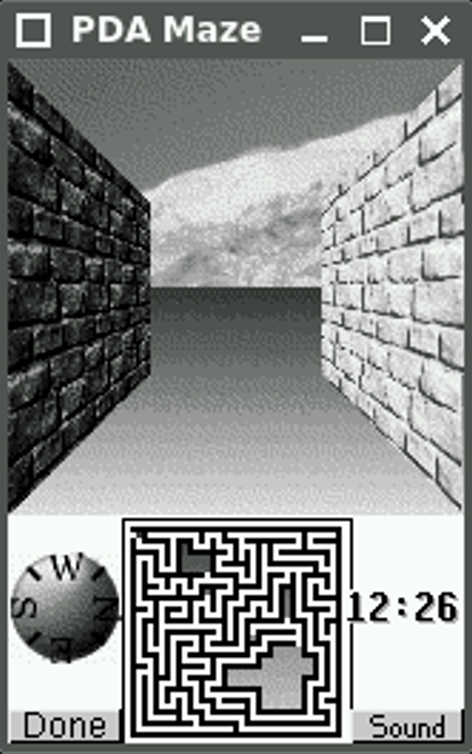
「PDA Maze」は一人称視点(3D)の迷路ゲームです。LinuxベースのPDAであるAgenda VR3向けに設計されていますが、X-Windowを搭載したあらゆるデバイス(LinuxやUnixデスクトップ、その他のLinuxベースのPDAなど)で動作します。
3D、第一視点ビュー(速度向上のため事前レンダリング済み)
回転すると画面がスクロールします
両側で異なる色の壁
背景(スカイライン)写真4枚
ボタン(キーボード)とスタイラス(マウス)によるコントロール
ゲームタイマー
さまざまな迷路のサイズ
部分的なマップ(作成しながら)、全体マップ、概要マップなしのモード
画面は小さいですが、遊べます。
インストール:ソースを入手してインストール
(ビルド時に最適化オプションを追加しています。)
インストール手順詳細(クリックで表示)
インストール手順詳細(クリックで表示)
$ cd
$ mkdir pdamaze
$ cd pdamaze
$ wget https://tuxpaint.org/ftp/unix/agenda/pdamaze/src/pdamaze-2001.10.05.tar.gz
$ tar zxf pdamaze-2001.10.05.tar.gz
$ cd pdamaze-2001.10.05
$ vi makefile
CFLAGS=-O2 -Wall -I/usr/include $(EXTRA_CFLAGS)
↓
CFLAGS=-O3 -match=native -Wall -I/usr/include $(EXTRA_CFLAGS)
$ make
$ sudo ln -s /home/user/pdamaze/pdamaze-2001.10.05/pdamaze.host /usr/local/bin/pdamaze
$ pdamaze
———-
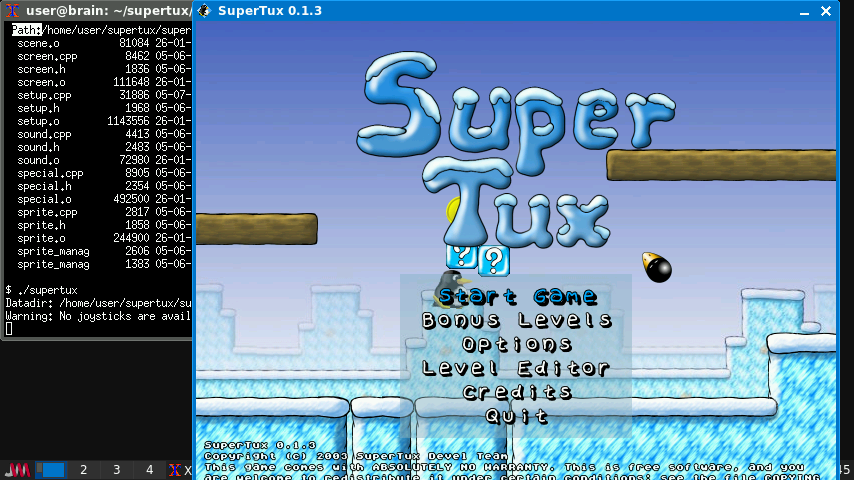
◎ Super Tux Tux が主人公の古典的な跳んで走る二次元横スクロールゲーム

公式サイト:公式サイト
ソースダウンロード先:https://sourceforge.net/projects/super-tux/files/supertux
起動:supertux
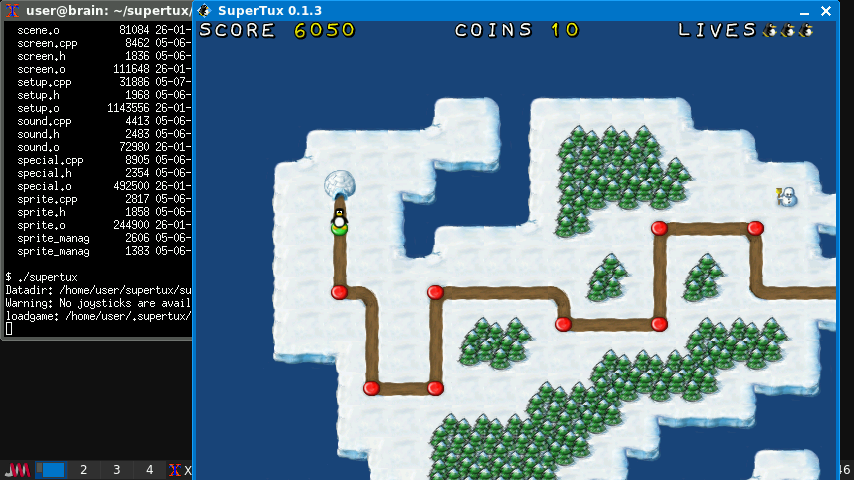
Tux が主人公の古典的な跳んで走る二次元横スクロールゲーム
SuperTux はオリジナルのスーパーマリオに似たスタイルの古典的な 二次元横スクロールの跳んで走るゲームです。あなたはペンギン Tux の役で、悪い Nolok の下から Penny を取り戻さなくてはなりません。
Supertuxは、aptレポジトリにもあります(起動はsupertux2でした。)
これはSDL2を使ったバージョン(0.6.2)なのですが、
あまりに遅く,何とかタイトル画面は表示されましたが、そこから先に進めませんでした。
なので、SDl1.2使用していた時代の昔のソースを探して、独自ビルトしてみました。
(openglも無効化)
結果として非常に快適にプレイできます(10-15fps)くらい。
曲の再生も含め効果音も問題なく再生してくれます。
USBサウンドデバイスなどで音を鳴らす場合は、PulseAudioを起動してください。
曲の再生を無効化すると、少しだけfpsが上がります(20fpsぐらい)
オプションで音のON/OFFやフルスクリーン、キーバインドなども行えます。
ゲーム内容はぶっちゃけて言えばスーパーマリオです。
雪玉を取れば大きくなるし、花を取ればファイヤーボール投げるし、
スター取れば一時的に無敵にもなります。
「Start Game」をクリックして次に進み、スロットを選択します。
ルートとペンギンが表示されたら、矢印キーでペンギンを動かします。
既にクリアしたレベルと次のレベルしかペンギンは行けません。
エンターキーを押すと、ペンギンのいるレベルからスタートします。
コインやアイテムを取りながら、ペンギンを右方向に進めます。
スクロールは右だけです。左には戻れません。
左シフトキーを押しながら移動すると走ります。
制限時間内にゴールまで行ければクリアです。
【操作】 [←]:左へ [→]:右へ [space]:Jump [↑]:Door/Switch [↓]:Duck [左Ctrl]:Action [Esc]:メニュー
ジャンプはボタンを押している時間でジャンプの高さが変わるタイプです。
インストール:ソースを入手してインストール
(ビルド時に最適化オプションを追加しています。)
ただし公式サイトからでは最新のソースしか入手できないので、
sourceforge.netからダウンロードしています。
(SDL1.2を利用していて、OPENGLが無効化できそうな 0.1.3をビルドしています。)
インストール手順詳細(クリックで表示)
インストール手順詳細(クリックで表示)
$ cd
$ mkdir supertux
$ cd supertux
以下からソースをダウンロードして、Brainに転送
https://sourceforge.net/projects/super-tux/files/supertux/0.1.3/
supertux-0.1.3.tar.bz2
$ tar jxf supertux-0.1.3.tar.bz2
$ cd supertux-0.1.3
$ ./configure –prefix=/usr/local -disable-opengl –with-x
一部ビルド時にファイルを修正(ついでにCPU最適化も指定)
$ vi Makefile
CFLAGS = -g -O2 -I/usr/include/SDL -D_GNU_SOURCE=1 -D_REENTRANT
↓
CFLAGS = –O3 -march=native -fpermissive -I/usr/include/SDL -D_GNU_SOURCE=1 -D_REENTRANT
CXXFLAGS = -g -O2 -I/usr/include/SDL -D_GNU_SOURCE=1 -D_REENTRANT -DNOOPENGL -DDATA_PREFIX='”${prefix}/share/supertux”‘
↓
CXXFLAGS = -O3 -march=native -fpermissive -I/usr/include/SDL -D_GNU_SOURCE=1 -D_REENTRANT -DNOOPENGL -DDATA_PREFIX='”${prefix}/share/supertux”‘
$ vi src/Makefile
CFLAGS = -g -O2 -I/usr/include/SDL -D_GNU_SOURCE=1 -D_REENTRANT
↓
CFLAGS = -O3 -march=native -fpermissive -I/usr/include/SDL -D_GNU_SOURCE=1 -D_REENTRANT
CXXFLAGS = -g -O2 -I/usr/include/SDL -D_GNU_SOURCE=1 -D_REENTRANT -DNOOPENGL -DDATA_PREFIX='”${prefix}/share/supertux”‘
↓
CXXFLAGS = -O3 -march=native -fpermissive -I/usr/include/SDL -D_GNU_SOURCE=1 -D_REENTRANT -DNOOPENGL -DDATA_PREFIX='”${prefix}/share/supertux”‘
$ vi src/music_manager.cpp
// insert into music list
std::pair<std::map<std::string, MusicResource>::iterator, bool> result =
musics.insert(
std::make_pair<std::string, MusicResource> (file, MusicResource()));
↓
// insert into music list
std::pair<std::map<std::string, MusicResource>::iterator, bool> result =
musics.insert(
std::make_pair(file, MusicResource()));
$ make
$ sudo make install
$ supertux
———-
〇 The Legend of Edgar [edgar] 2Dアクション+謎解きゲーム
公式サイト:https://www.parallelrealities.co.uk/games/edgar
ソース入手先:https://sourceforge.net/p/legendofedgar/code/HEAD/tree/tags/1.20/
legendofedgar-code-r1175-tags-1.20.zip
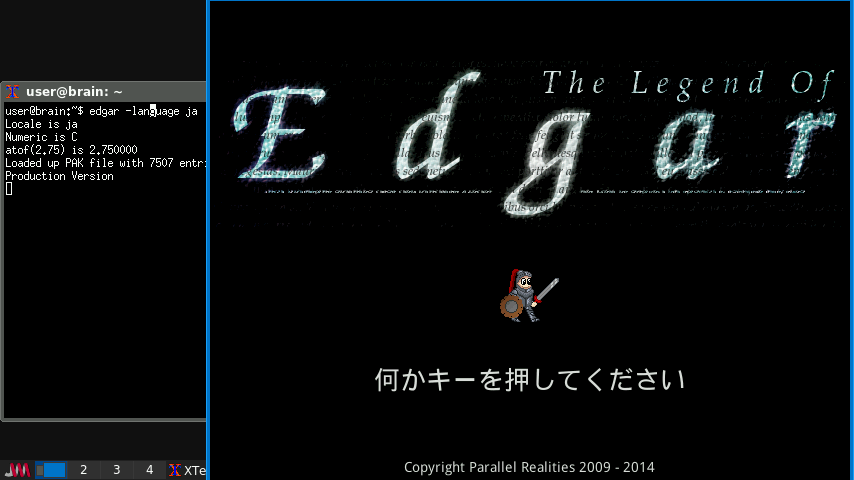
起動:edgar -language ja #日本語に切り替え可能です。
紹介動画:https://www.youtube.com/watch?v=3y_GEXdkVck
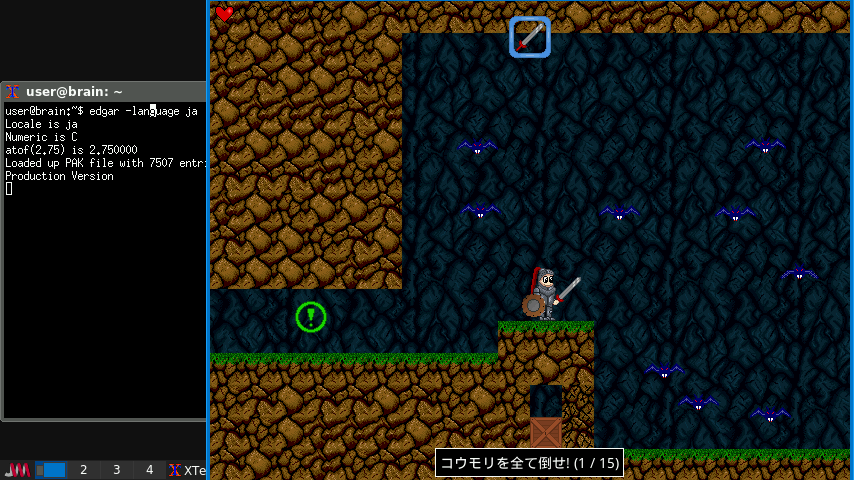
●アクション+謎解きゲーム
ゼルダの伝説(というよりはリンクの冒険)のようなアクションRPGです。
かなりボリュームがありそうです。
いろいろなキーを使いますが、チュートリアルで練習できます。
最初は、何かキーを押してメニューを表示します。
↑↓キーで [新しいゲームの開始] を選び、エンターキーを押してスタートします。
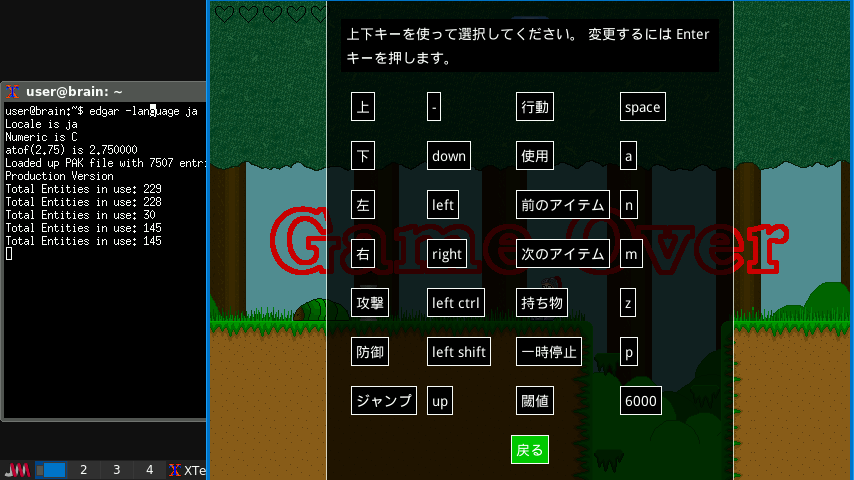
「オプション」の「操作設定…」でキーの設定を変えることができます。
【操作】 [←]:左へ [→]:右へ [space]:ジャンプ [Esc]:メニュー [p]:一時停止
[左Ctrl]:(攻撃) 剣を使う・つるはしを振る
[左Alt]:(防御) 盾を構える
[c]:(行動) スイッチを動かす・話す・押している間は物を引っ張る・Save
[a]:(使用) 武器などの装備・餌をまく
[z]:持ち物の表示/非表示、表示中は上下左右で移動して行動[c]で選択
[.]/[,]:持ち物の並び変更
[↑]/[↓]:エレベーターの上下
一度押してから引っ張れば動きます。
保存メニューは10個のうち1つを↑↓キーで選んでエンターキーを押します。
Escキーを押すと保存しないでメニュー閉じます。「戻る」はメインメニューを表示します。
私は以下のように変更しましたが、チュートリアルをプレイしながら
使いやすいキーバインドにしましょう。
・上(↑)を-
・防御(左Alt) を左SHift
・ジャンプ(スペース)を上
・行動(c)をスペース
・前のアイテム(,)をn
・次のアイテム(.)をm
その他メニューからはサウンド設定や、全画面表示、ヒント表示などを設定できます。
Brainで動かす場合でも音無しであれば現実的な速度で動きます。
効果音ありの場合は少し遅いです。曲付きの場合はプレイが難しいレベルになります。
(音を鳴らす場合は、PulseAudioを有効にしてください[pulseaudio –start]。)
インストール:ソースを入手してインストール
(ビルド時に最適化オプションを追加しています。ビルド時間は1時間ちょっとです)
インストール手順詳細(クリックで表示)
インストール手順詳細(クリックで表示)
$ cd
$ mkdir legendofedgar
$ cd legendofedgar
ソースファイルをダウンロードして、Brainに転送
ソース入手先:https://sourceforge.net/p/legendofedgar/code/HEAD/tree/tags/1.20/
legendofedgar-code-r1175-tags-1.20.zip
$ unzip legendofedgar-code-r1175-tags-1.20.zip
$ cd legendofedgar-code-r1175-tags-1.20
#Makefileを編集します(CPU最適化を変更)
$ vi Makefile
ifeq ($(DEV),1)
CFLAGS = -Wall -Werror -g -pedantic -DVERSION=$(VERSION) -DRELEASE=$(RELEASE) -DDEV=$(DEV) -DINSTALL_PATH=\”$(DATA_DIR)\” -DLOCALE_DIR=\”$(LOCALE_DIR)\” -DPAK_FILE=\”$(PAK_FILE)\” -DUNIX=$(UNIX)
else
CFLAGS = -Wall -pedantic -DVERSION=$(VERSION) -DRELEASE=$(RELEASE) -DDEV=$(DEV) -DINSTALL_PATH=\”$(DATA_DIR)\” -DLOCALE_DIR=\”$(LOCALE_DIR)\” -DPAK_FILE=\”$(PAK_FILE)\” -DUNIX=$(UNIX)
endif
↓
ifeq ($(DEV),1)
CFLAGS = -Wall -Werror -O3 -march=native -pedantic -DVERSION=$(VERSION) -DRELEASE=$(RELEASE) -DDEV=$(DEV) -DINSTALL_PATH=\”$(DATA_DIR)\” -DLOCALE_DIR=\”$(LOCALE_DIR)\” -DPAK_FILE=\”$(PAK_FILE)\” -DUNIX=$(UNIX)
else
CFLAGS = -Wall -O3 -march=native -pedantic -DVERSION=$(VERSION) -DRELEASE=$(RELEASE) -DDEV=$(DEV) -DINSTALL_PATH=\”$(DATA_DIR)\” -DLOCALE_DIR=\”$(LOCALE_DIR)\” -DPAK_FILE=\”$(PAK_FILE)\” -DUNIX=$(UNIX)
endif
$ make
$ sudo make install
$ edgar
———-
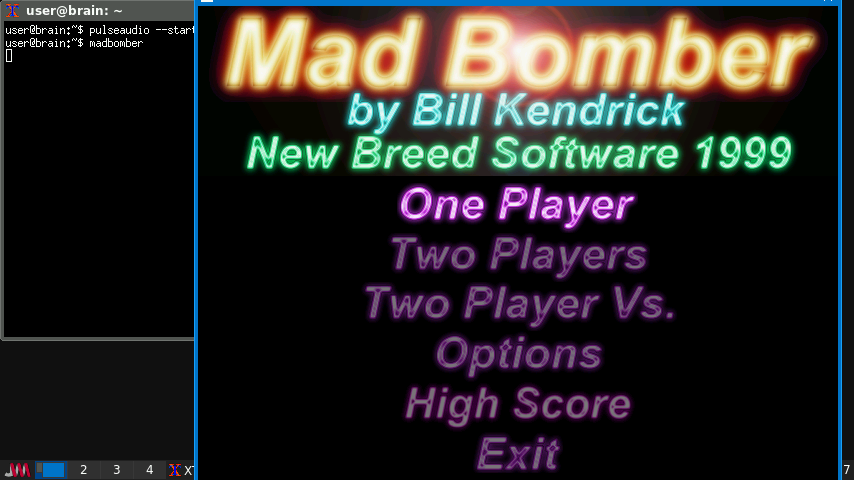
〇 madbomber Kaboom! クローン

https://packages.debian.org/bullseye/madbomber
起動:madbomber
“Mad Bomber” は、Activision 社製の古典的な Atari 2600 用コンソールゲームで、 Larry Kaplan 作の “Kaboom!” のクローンです。
小綺麗なグラフィックと音響効果、 BGM を備えています。
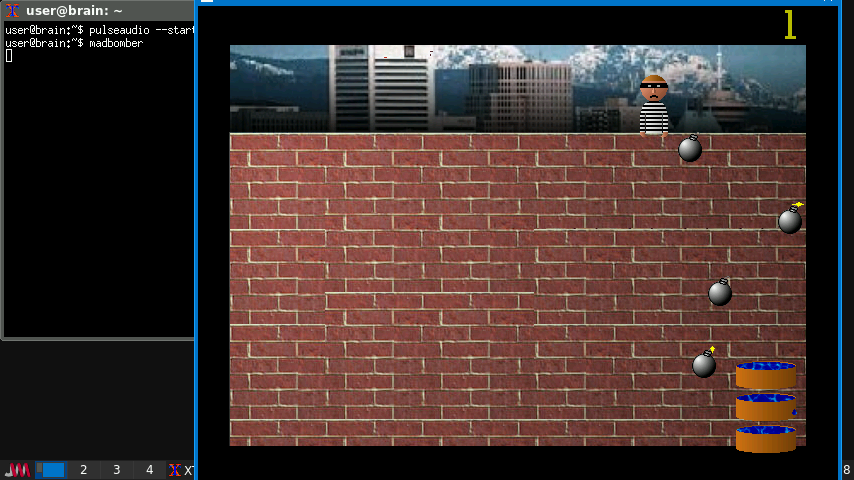
Mad Bomber は都市のならず者で、あらゆるところに爆弾を落とします!
あなたの任務は、爆弾が地面に当たって破裂する前に、それを受けとめることです。
幸運なことに、あなたは確実に爆弾の威力を失わせるバスケットをいくつか 持っています。
移動は、マウス・タッチパネル・カーソルキーで出来ますが、
カーソルキーだと移動が間に合わないかもしれません。
安定して音を再生するには、PulseAudioを起動してください。(pulseaudio –start)
Musicまでは厳しいですが、効果音までならなんとかなります(optionsで変更できます)。
madbomber -fullscreenで全画面表示にすることもできます。
インストール:APT経由 ”sudo apt install madbomber”
———–
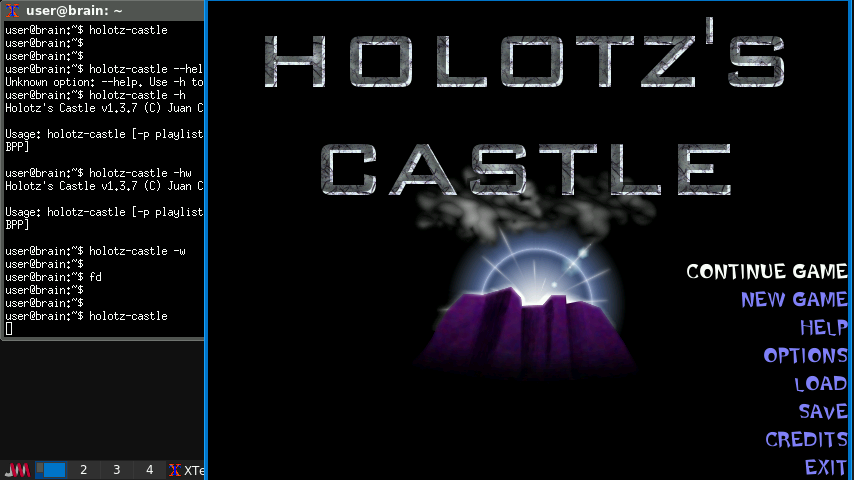
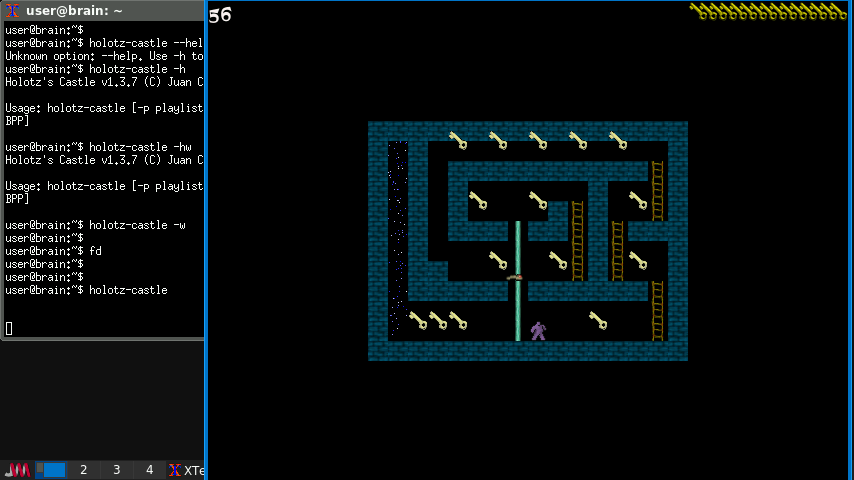
〇 Holotz-Castle 数多くの神秘があるプラットフォームゲーム
https://packages.debian.org/bullseye/holotz-castle
起動:holotz-castle
数多くの神秘があるプラットフォームゲーム
Holotz の城の壁の向こうには、大いなる神秘が隠されています。あなたは Ybelle と Ludar が生きて城から脱出するのを手助けできるでしょうか? このきわめてエキサイティングなプラットフォームゲームで、あなたの器 用さを試してください!
城には大いなる神秘が隠されています。生きて脱出できるでしょうか。
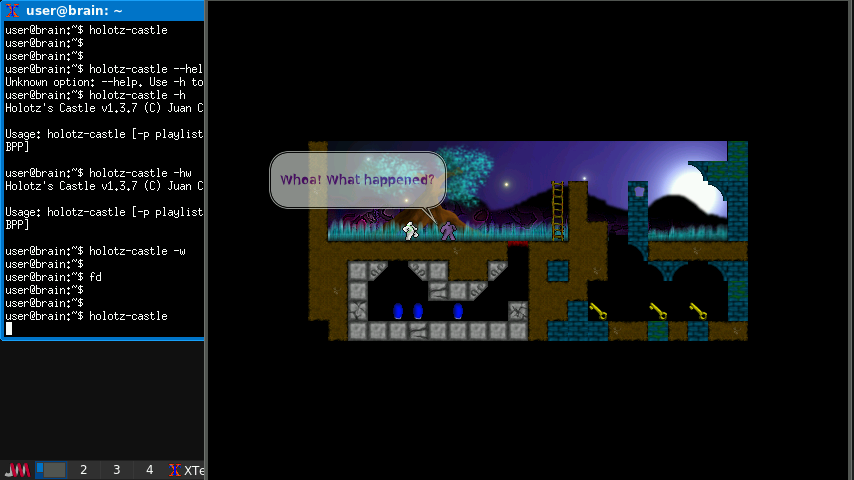
全ての鍵を集めて出口から脱出します。
泡が立ち上っているような所が出口です。そこでジャンプすれば次に進みます。
【会話】 [space]:1つ飛ばす [Enter]:まとめて飛ばす
【操作】 [space]:ジャンプ [↑↓←→]:移動 [F1]:ヘルプ [Esc]:終了
時間内にすべてのカギを集めてゴールに行ってジャンプすればクリアです。
音ありですと少し遅いですが、遊べないほどではないです。
windowsモードでは、画面下が表示されませんが、最前面表示&移動で対応できます。
また、フルスクリーンにすれば表示されます。
holotz-castle -f –fps 5とかで、フルスクリーン/5fps設定になります。
インストール:APT経由 ”sudo apt install holotz-castle”
———–
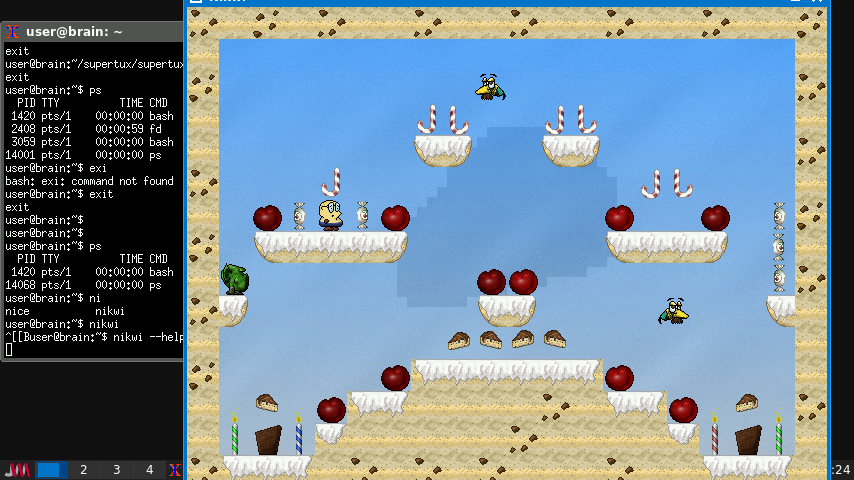
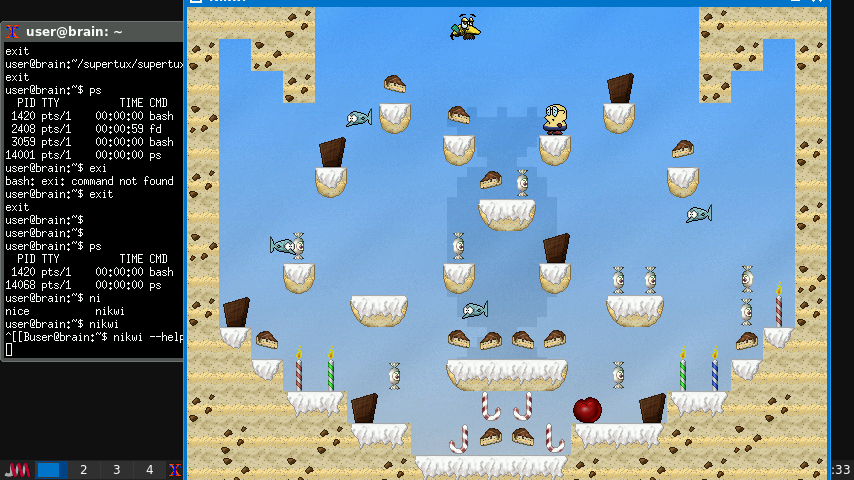
△ nikwi キャンディーの収集が任務のプラットフォームゲーム(ステージ最初にWait有)

https://packages.debian.org/bullseye/nikwi
起動:nikwi
絶対的な夢の中にいる 9 歳の男の子の役を演じます: 夢の中では、世界はおかしで できています! 夢の中で Nikwi を操ります。30 段階に分けられる各レベルで現れる 全てを食べられますが、一方で Nikwi の夢を悪夢に変えようとするモンスター をかいくぐらなければいけません。
Nikwi は 5 種類のキャンディーテーマ、10 種類以上のモンスターや障害物 (それぞれがユニークに振る舞う)からなるおかしをテーマとする 30 段階の レベルでのプレイが特徴です。全てのテーマで新しいゲーム要素が追加されます。
カーソルキーの左右で移動、上でジャンプです。
すべてのお菓子を食べると、さらにお菓子が現れるのでそれを取ればステージクリアです。
ゲーム中は非常に快適なのですが、
1プレイ毎にステージが始まる前に待ち時間が発生します(60秒くらい?)。
それを覚悟するのであれば、十分に楽しめます。
この待ち時間がなければ非常にうれしいのですが・・・
インストール:APT経由 ”sudo apt install nikwi”
———-
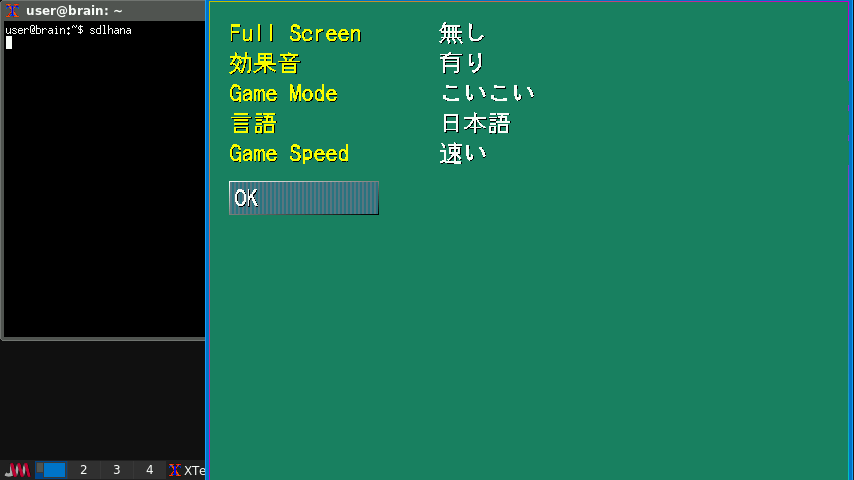
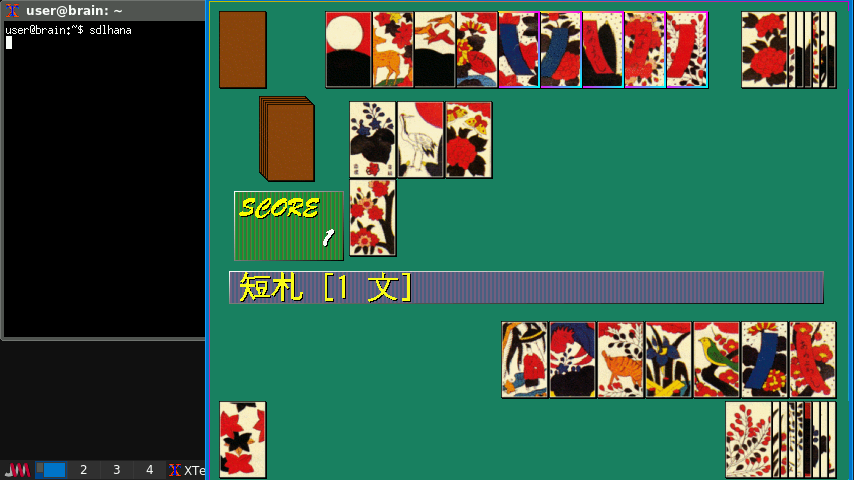
◎ SDL Hana コンピュータ対戦可能な花札(こいこい)です。
サイト;https://github.com/weimzh/sdlhana
起動:sdlhana
花札(こいこい、五烏)です。
「Start Game」をクリックして開始します。
下側の8枚が自分の手札です。その中から1枚をクリックして場に出します。
あとは勝手にやってくれます。
エスケープキーを押せば終了します。
場にある札と同じ月の札を持っていればそれを出して、 場の札と出した札を自分のものにします。
なければ適当な札を捨て札として場に出します。
それから山の一番上の札を場に出して、 同じ月の札が場にあれば2枚とも自分のものにします。
同じ月の札が場に複数ある場合は札の枠の色が変わるので、欲しい札をクリックします。
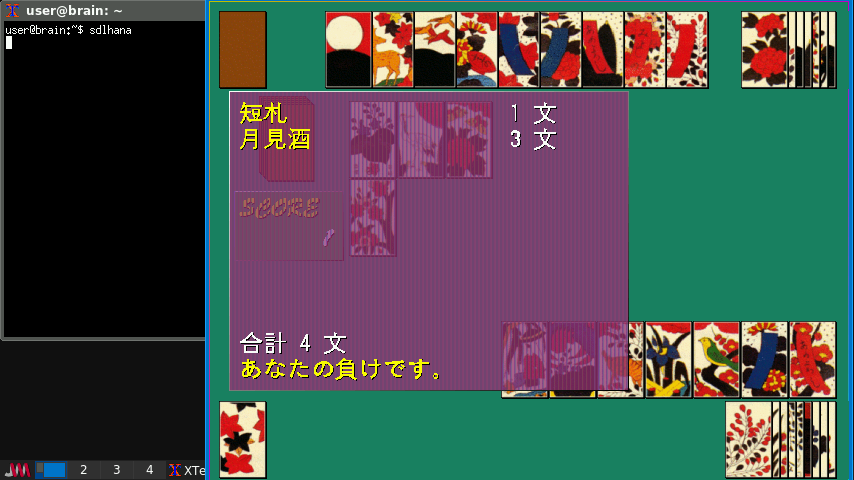
役は五光・三光・花見で一杯・猪鹿蝶・赤短・青短などがあり、点数が決まっています。
役ができると確認メッセージが出て、そこで上がることができます。
Noをクリックすると、そこまでの点数が計算されて勝ちが確定します。
Yesをクリックするとゲームを続けます。
相手が役を作って上がってしまったら、こちらの負けになります。
上がれるのは役ができた時だけです。
勝った場合は自分の作った役の合計点がSCOREに加算されます。
負けた場合は相手の点数がSCOREから引かれます。
相手が上がった時に自分の点数のほうが多くても、負けてしまえば何にもなりません。
Brainの画面上では、ウィンドウの最前面化か、フルスクリーン表示すればゲーム画面すべてを出すことができます。
オプションでフルスクリーン、効果音、花札のルール、言語、ゲームスピードが変更できるので各自の好みに合わせてください。
音を出す場合は、PluseAudioを起動(pulseaudio –start)しておくとノイズが減ります。
スピード感もありますし、タッチパネルでの操作もできますので、Brainで遊ぶにはおすすめかもしれません。
ただ、花札のルールを知っていればですが。(私はルールがよくわかっていません)
インストール:ソースを入手してインストール
(ビルド時に最適化オプションを追加しています。)
インストール手順詳細(クリックで表示)
インストール手順詳細(クリックで表示)
$ cd
$ mkdir sdlhana
$ cd sdlhana
$ git clone https://github.com/weimzh/sdlhana.git
$ cd sdlhana/
$ autoreconf -f -i
$ ./configure CFLAGS=”-O3 -march=native” CXXFLAGS=”-O3 -march=native”
これで、Makefileの内容が、以下のように変更されます(CPU最適化)。
CFLAGS = -g -O2
CXXFLAGS = -g -O2
↓
CFLAGS = -O3 -march=native
CXXFLAGS = -O3 -march=native
$ make
$ sudo make install
$ sdlhana
———-
◎ tworld Chip’s Challenge Game エンジンをエミュレーション
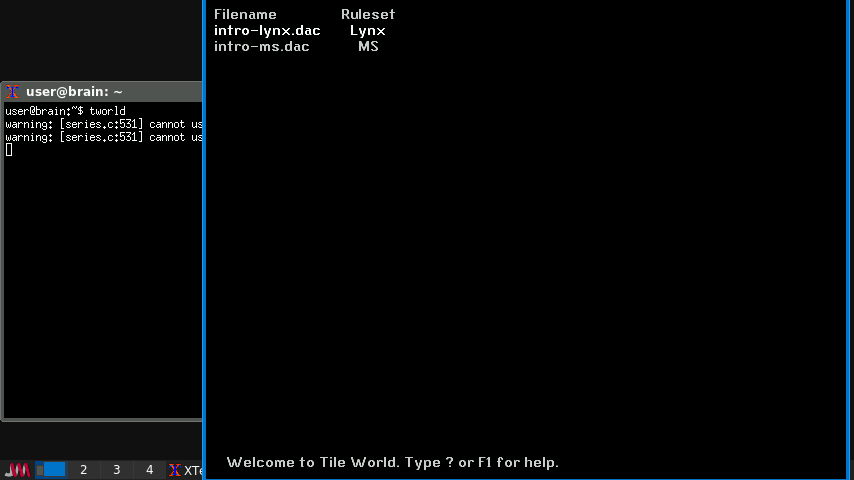
https://packages.debian.org/bullseye/tworld
起動:tworld
Tile World は “Chip’s Challenge” ゲームのエミュレーションです。 “Chip’s Challenge” はオリジナルは Atari Lynx 用に Chunk Sommerville により作成され、後に (他の移植に加え) Microsoft により MS Windows に移植されました。
注意: Tile World はゲームエンジンのみの移植です。オリジナルのレベルセットに 含まれる chips.dat ファイルは含まれません。このファイルには著作権があり、 フリーで配布できません。chips.dat ファイルは元々は “Chip’s Challenge’ の MS 版の 一部です。個のバージョンのゲームのコピーを持っているならば、Tile World で ゲームを楽しむためにファイルを利用できます。だけども、このファイルのコピーを持って いなくても、CCLP2 を含むオリジナルのゲームのファンにより作成された多くのフリーで 利用可能なレベルセットを使って Tile World を楽しめます。 Microsoft がリリースしたバージョンはゲームのルールに多くの変更点を加えていますので、 Tile World は MS 版もオリジナルの Atari Lynx 版のどちらもエミュレートできます。
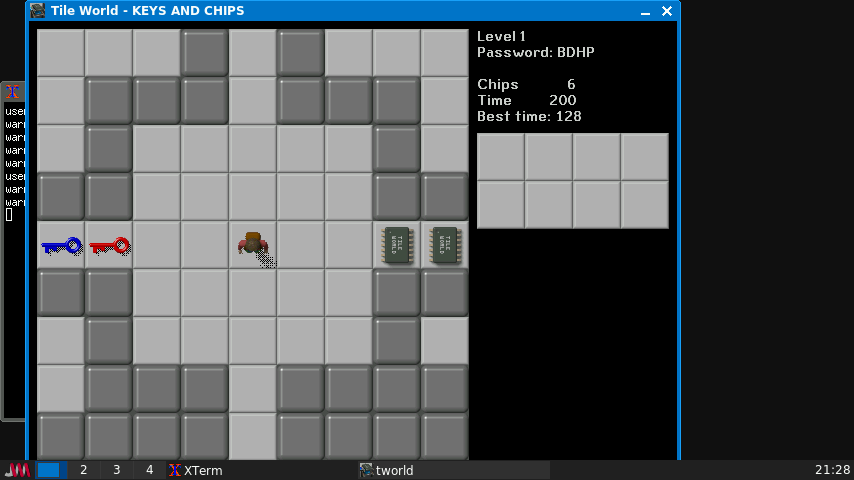
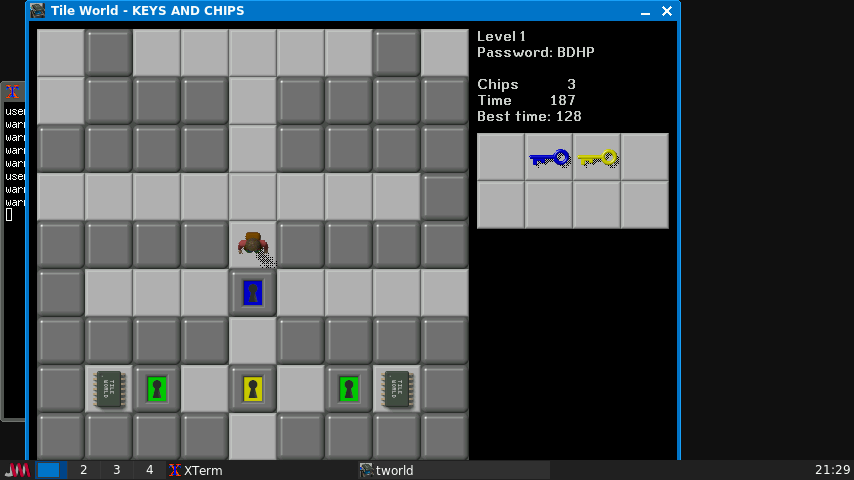
Chip’s Challengeは、主人公チップを操作し、障害物や罠を乗り越えてコンピューターチップを集め、ステージをクリアしていくクラシックなパズル迷路ゲームです。戦略とアクションの要素を融合させ、多くのファンに愛されています。
ゲーム内容は、カギで扉を開けたり、石を活用したり、滑る床を攻略して
チップを回収して先に進んでいきます。
カーソルキーで移動。
BkSPで一時停止です。もう一度BkSPキーを押せば再開します。
Ctrl+Rキーでステージリトライします。
Qキーで現在のステージを離脱。
この時にN,P,PgUP,PgDNでステージセレクト、SPCでスタートします。
Gキーで、ステージパスワードを入力
Tabでベストタイムのリプレイが見れたりします。
Shift+Qでゲーム終了です。
操作系・オプション系は、”man tworld”でも確認できます。
インストール:APT経由 ”sudo apt install tworld”
[trixie 以降でパッケージなし。t64のライブラリと依存なし。]
[trixieベースのBrainuxでは、sudo apt -t bookworm install tworldで導入可能]
もしMS版のChip’s Challengeを持っている方は、ゲームのCHIPS.DATを
/usr/share/games/tworld/dataにchips.datという名前でコピーすると、
そのデータでも遊べるそうです(データセットが追加される)。
———-
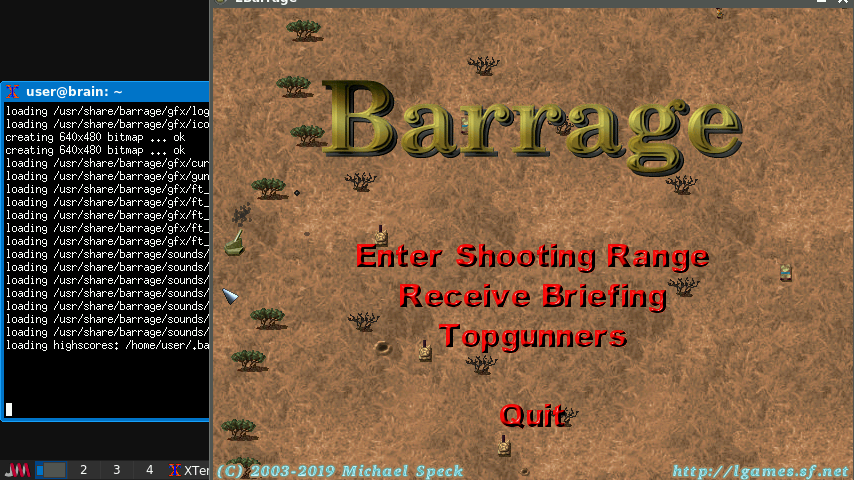
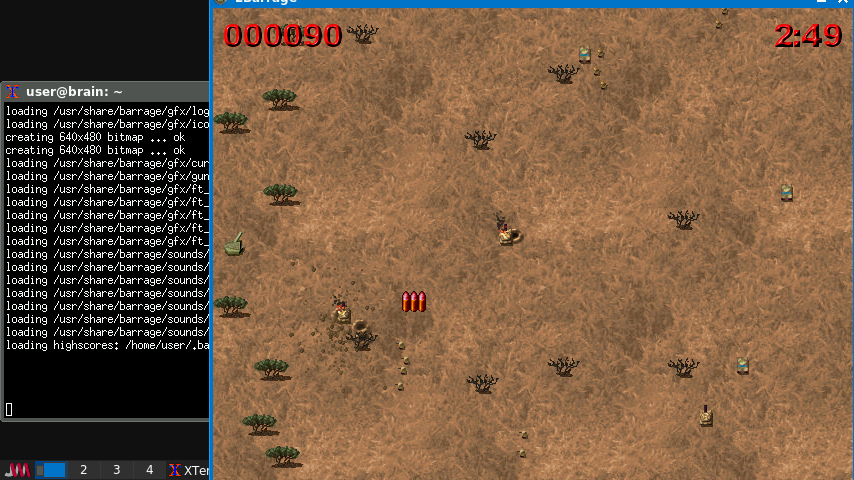
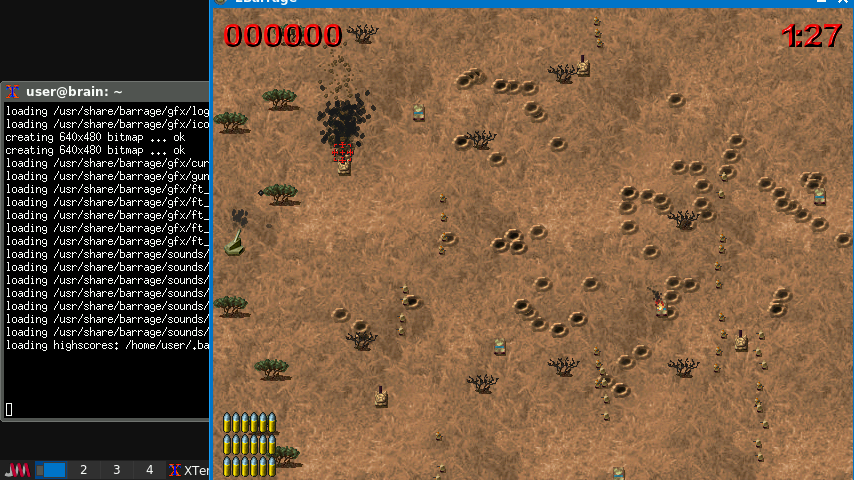
〇 barrage 戦車やシープ・歩兵を砲撃して進行を止めるアクションゲーム
https://packages.debian.org/bullseye/barrage
起動: barrage -w -d 15
バラージは、射撃場で3分以内にできるだけ多くのダミーターゲットを撃ち抜く、破壊的なアクションゲームです。プレイヤーは銃を操作し、ダミーの兵士、ジープ、戦車に大小さまざまな手榴弾を発射します。ゲームプレイはシンプルですが、高得点を獲得するのは簡単ではありません。
●3分間で出来るだけ多くの敵を倒すゲーム
「Enter Shooting Range」をクリックしてスタートします。
マウスカーソルが照準器の時にクリックすると、 その地点に左中央の砲台から弾が飛んできます。
カーソルが砲弾の形の時は弾切れです。右クリックして弾を補充します(スコア-36)。
動いている敵の進行を止めれば加点、敵を画面の外に出したら減点になります。
【爆撃成功】戦車:+50、ジープ:+20、兵士:+5
【敵が通過】戦車:-25、ジープ:-10、兵士:0
【弾補充】 -36
Brainの場合、なぜかフルスクリーン表示するとカーソルの動きがぎこちなくなるので、
Window表示にしたほうがいいかもしれません。
ただ敵が通過するとスコアが減ってしまうので、なかなか得点が維持できません。
なかなかに難しいです。
インストール:APT経由 ”sudo apt install barrage”
起動オプションの詳細は”man barrage”で確認できます。
-d <Delay>
-w Windowモード
-f フルスクリーンモード(デフォルト)
-s サウンド無効化
なお、最新のソースとしては以下で公開されているようです。
https://lgames.sourceforge.io/Barrage/
高難度のゲームですが、ソースを確認したところ、
src/defs.hでスコアを調整できそうですので、改造素体にはいいかもしれません(未確認)。
(define SCORE_*)
———-
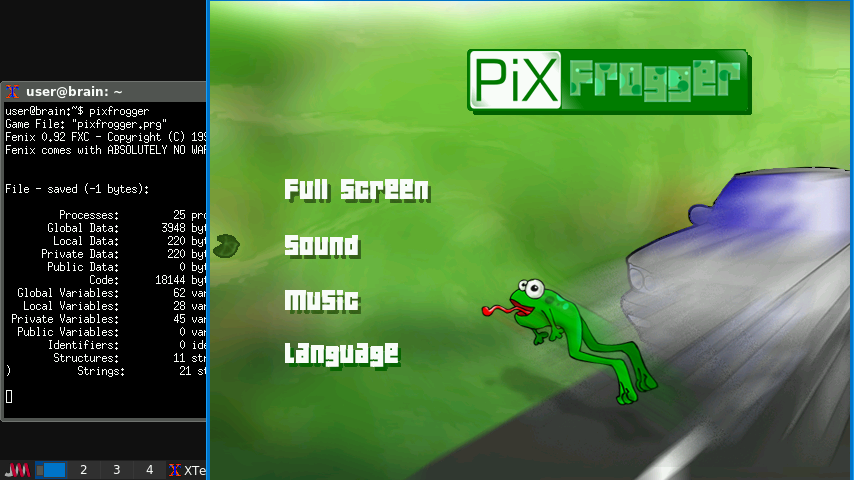
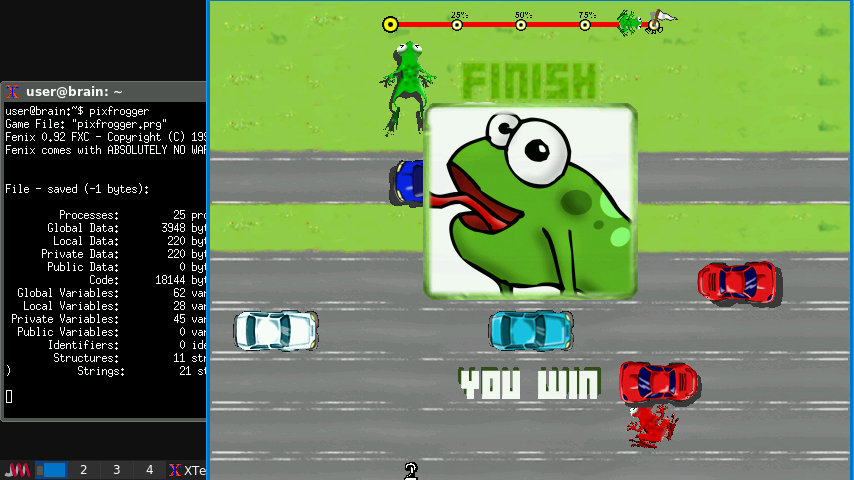
〇 pixfrogger カエルが道を渡るのを手伝う(Froggerによく似た競争ゲーム)
https://packages.debian.org/bullseye/pixfrogger
起動:pixfrogger
PiX Froggerは、クラシックゲーム「フロッガー」のクローンです。カエルが車やトラックに轢かれないように道路を渡るのを手伝うゲームです。カエルは画面下部からスタートし、プレイヤーが操作できるのはカエルが跳ねる方向を選ぶことだけです。
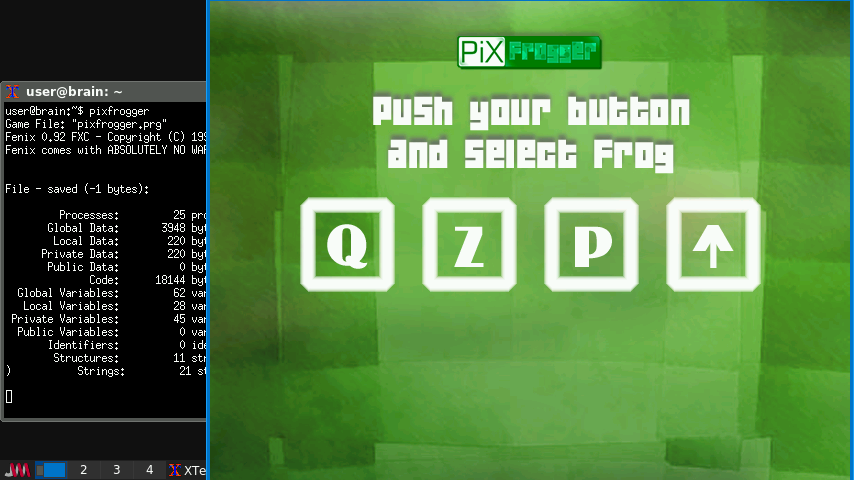
キーボードを使って最大4人同時プレイが可能です。
●カエルを助けて道を横断するゲーム
自分のカエルを前に進めます。カエルは前に進むか止まることしかできません。
止まっていても画面がスクロールするので、後ろから押される感じで進みます。
最初に4つのキーが表示されます。そのキーがそれぞれのカエルを動かします。
自分が操作するカエルのキーを押します。急がないとすぐにスタートします。
何も押さないとデモになります。
エスケープキーを押すとメニューを表示します。
【カエルを前へ】[↑]:緑 [z]:黄 [p]:青 [q]:赤
最初の4つのキーが表示されているときに、自分が操作するキーを押せばエントリーされます。エントリ^されていないカエルは、コンピュータ操作になります。
最後まで生き残るか、最初にゴールにたどりつけば勝利です。
自分に割り当てられたキーを入力すれば、先に進みます。
画面から取り残されそうになると、勝手に進むので注意です。
自分がやられても、勝者が決まるまでゲームは続きます。
インストール:APT経由 ”sudo apt install pixfrogger”
[trixie 以降でパッケージなし(fenixパッケージ依存)。t64のライブラリと依存あり。]
[trixieベースのBrainuxでは、bookwormのfenixのソースからビルドする必要あり?]
———-
〇 amphetamine ユニークなビジュアル効果を使った飛んで走るゲーム
https://packages.debian.org/bullseye/amphetamine
起動:amphetamine
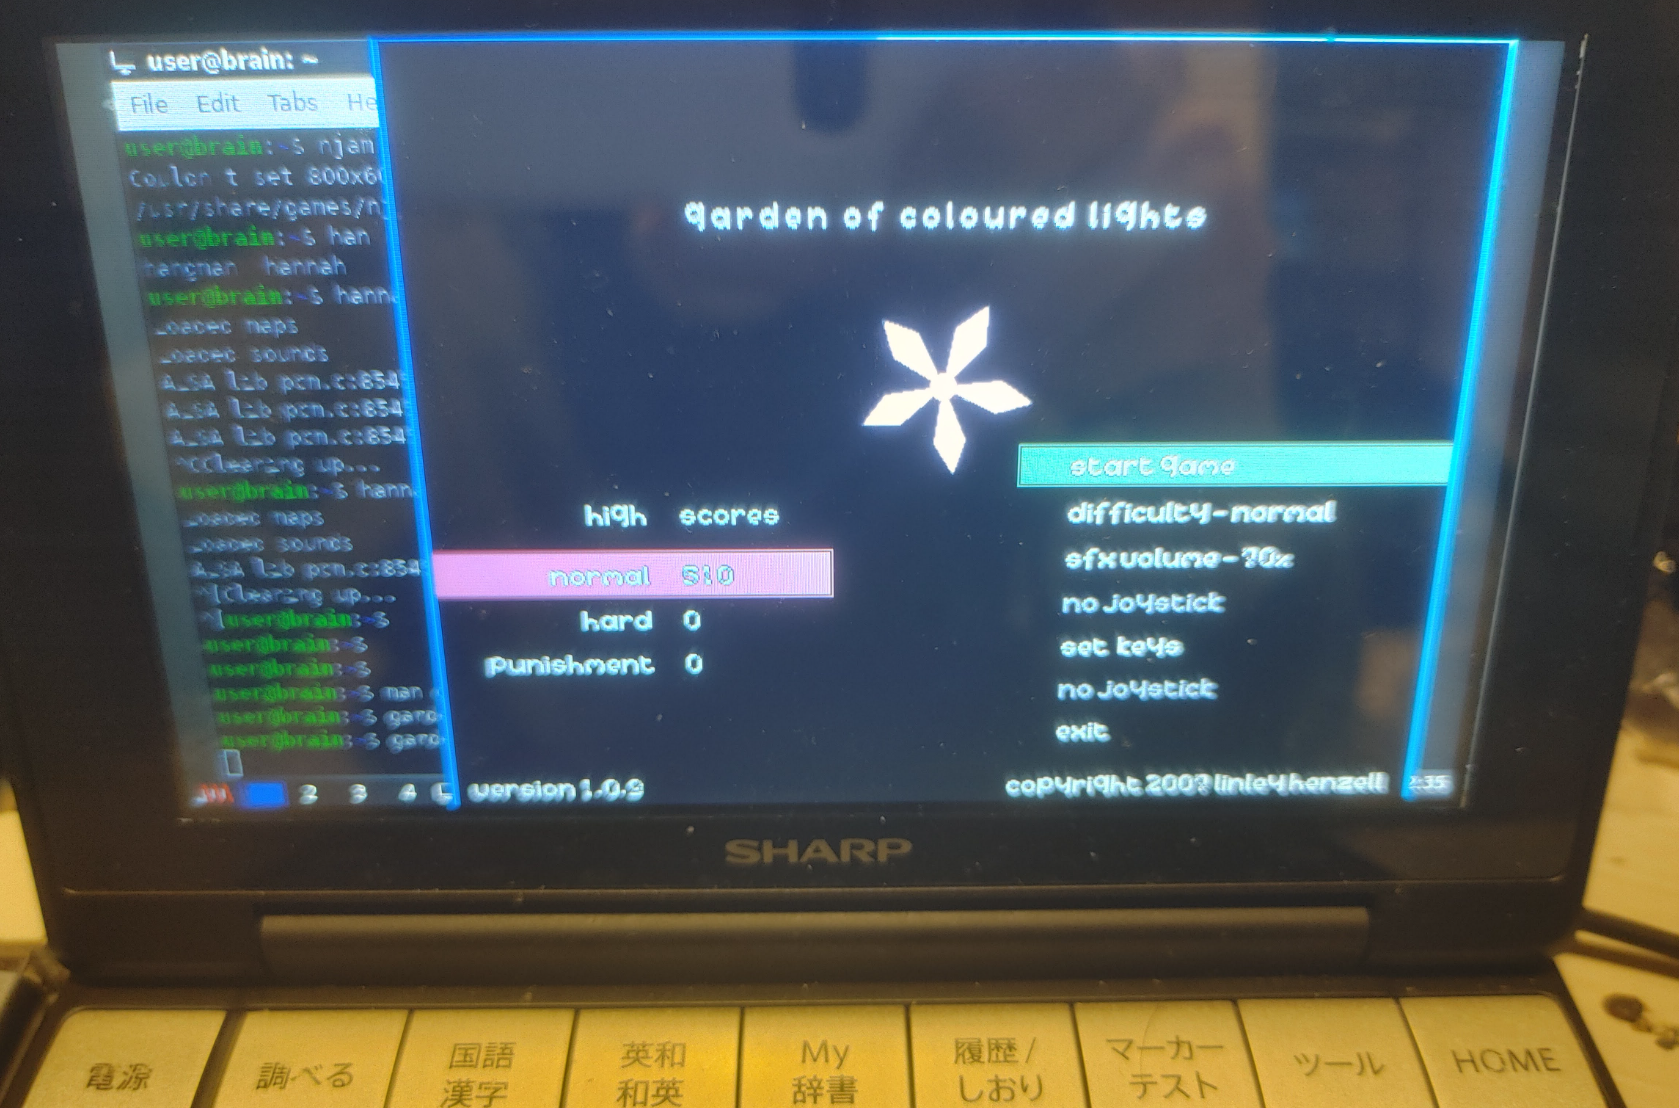
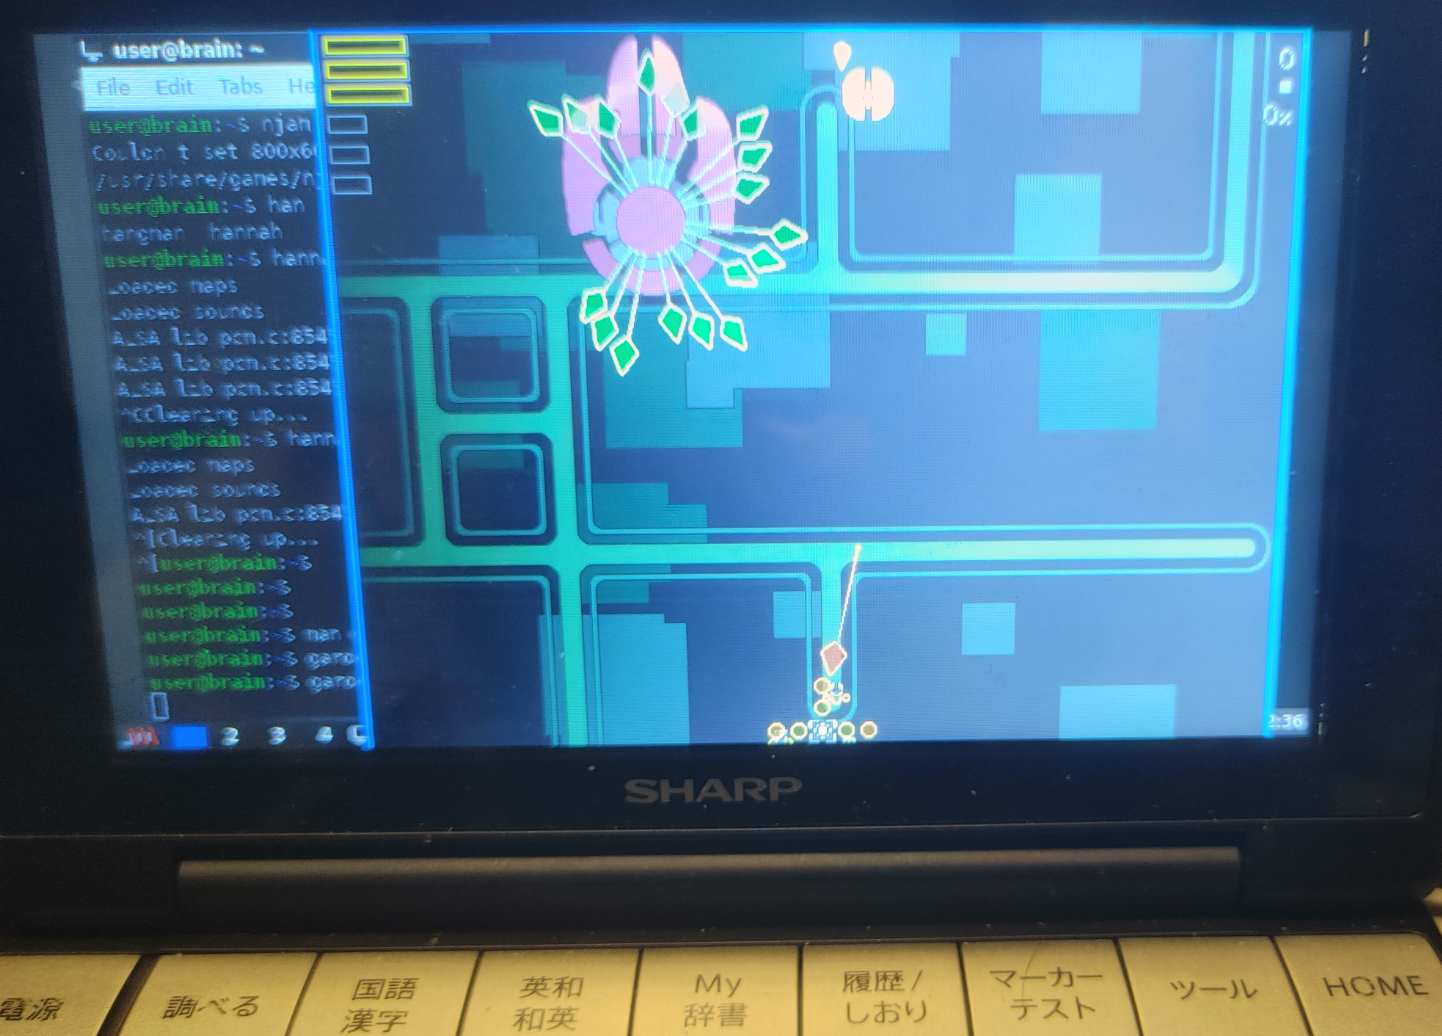
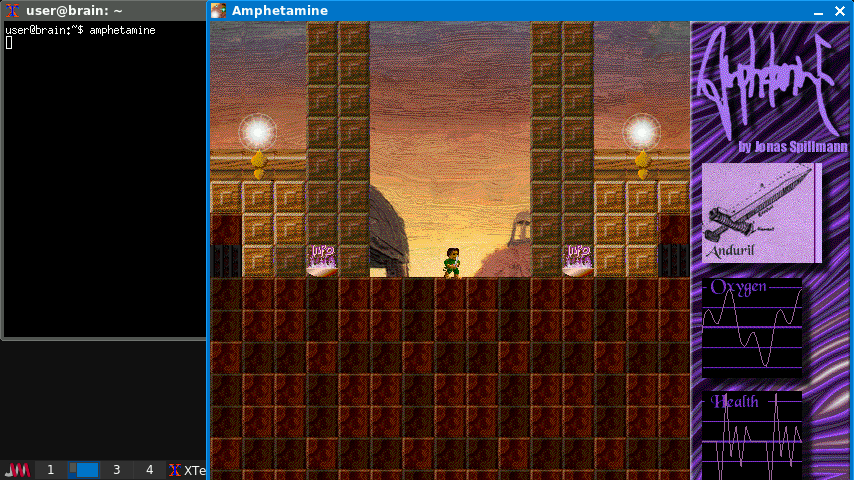
Amphetamine はエキサイティングな飛んで走るゲームであり、色付き照明、 霧やコロナといったユニークなビジュアル効果を提供します。 魔法の武器を使って 7 匹の邪悪なモンスターと戦います。
●ユニークなビジュアル効果を使った飛んで走るゲーム
エキサイティングな飛んで走るゲームです。
魔法の武器を使って、7(?) 匹の邪悪なモンスターと戦います。
スペースキーを押して開始します。
難易度は、最も簡単な [BLOSSOM]が初期値です。
右側の「Health」の波がなくなったらゲームオーバーです。
ゲームオーバーになっても、エスケープキーを押さなければメインメニューに戻りません。
点滅している丸い玉の所でセーブできます。
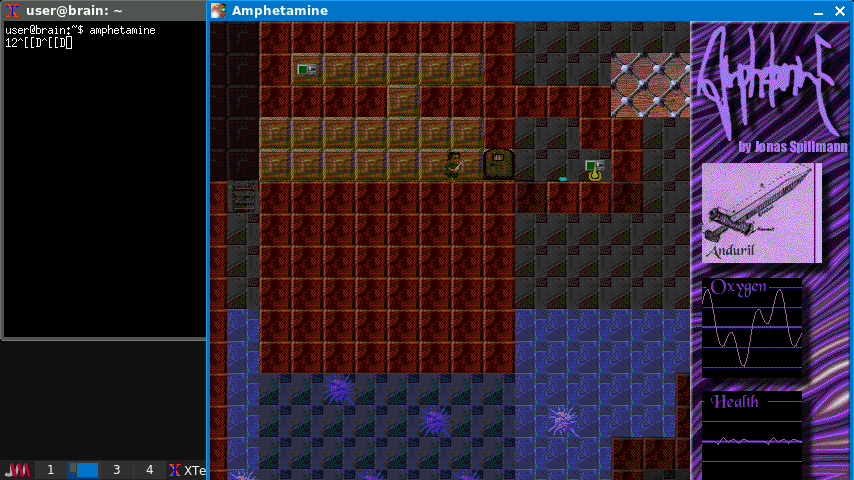
照明のスイッチや鉄格子の開閉はアクションキーで行います。
武器は拾った順に保存され、順番に切り替えるか番号で直接指定します。
最初はナイフだけ持っています。
【武器】 [x]:次の武器 [y]:前の武器 [1~8]:武器
【操作】 [←]:左へ [→]:右へ [space]:ジャンプ/泳ぐ [Tab]:アクション [Ctrl]:戦う
Brain上での起動は、少し動作が遅い気もしますが遊べないほどではありません。
仕掛けを見つけて、どんどん進んでいくタイプのゲームのようです。
効果音も鳴ります(要pulseaudio起動)
インストール:APT経由 ”sudo apt install amphetamine”
———-
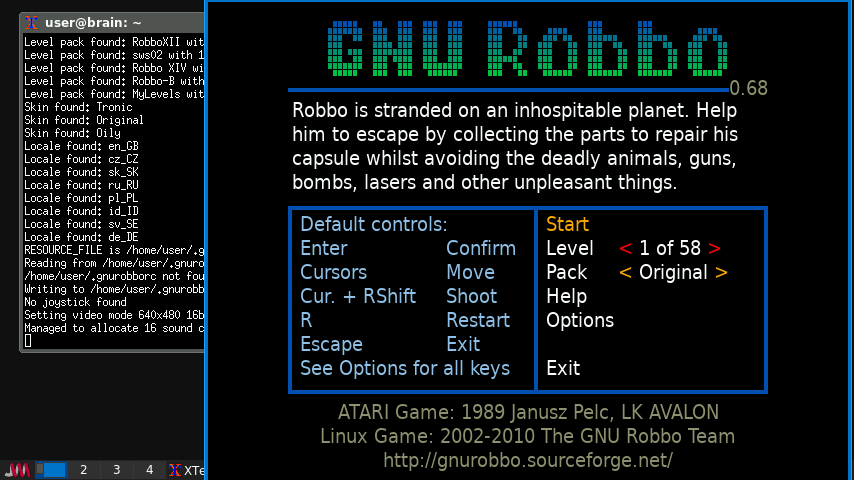
◎ GNU Robbo ATARI XE/XL から移植された論理ゲーム

https://packages.debian.org/bullseye/gnurobbo
起動:gnurobbo
GNU Robbo は非常にやみつきになる論理ゲームです。 小さなロボットを動かして緊急カプセルの部品を集めつつ敵意のある惑星から 脱出しなければなりません。
元々は “LK. Avalon” 出身の Janusz Pelc により Atari XE/XL 向けに製作されました。
●やみつきになる論理ゲーム
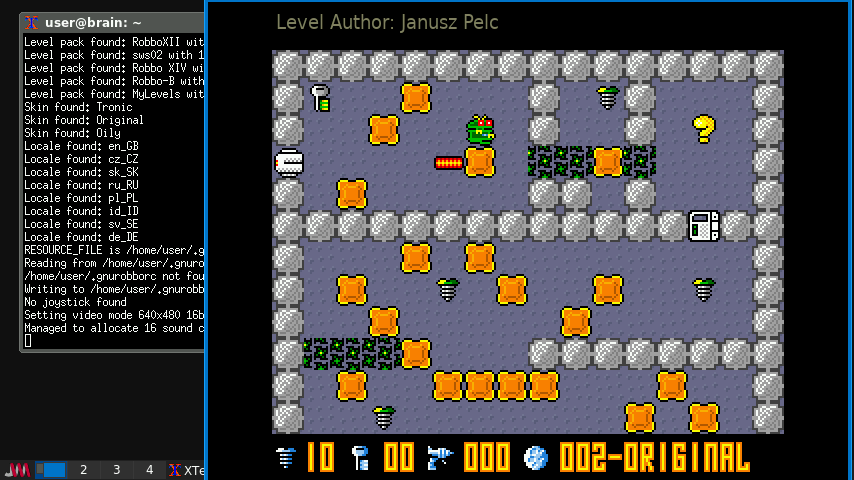
小さなロボットを動かして緊急カプセルの部品を集めながら、敵意ある惑星を脱出します。
【基本】 [Enter]:確定 [r]:リスタート [Esc]:メニュー
【操作】 [←]:左へ [→]:右へ [↑]:上へ [↓]:下へ [右Shift]+[↑↓←→]:撃つ
↑↓キーで「Start」を選び、エンターキーを押して開始します。
「Help」に、ブロックやアイテムに関する説明があります。
爆弾を撃つと、爆発して周囲8マスを消去します。
Brain上だと、ウインドウを最上位表示にして、上に移動することをお勧めします。
Optionで設定変更ができます。
全体的に遅めですが、OptionでGameSpeedでFastにすると、少しは早くなります。
あと、ボタン設定で右シフトがBrainのキーボードにないのですが、
「Modifier2」を選択して、左シフト(シフト)を指定することで、
Brainのシフトキーでミサイルを撃てるようになります(ミサイルを持っていれば)
ゲーム内容は、倉庫番要素やカギで扉を開けたり、爆弾をミサイルで破壊して周囲8マスを誘爆させたりして緊急カプセルのパーツ(ネジ)をすべて集めて、緊急カプセルにたどり着けばクリアのようです。
インストール:APT経由 ”sudo apt install gnurobbo”
———-
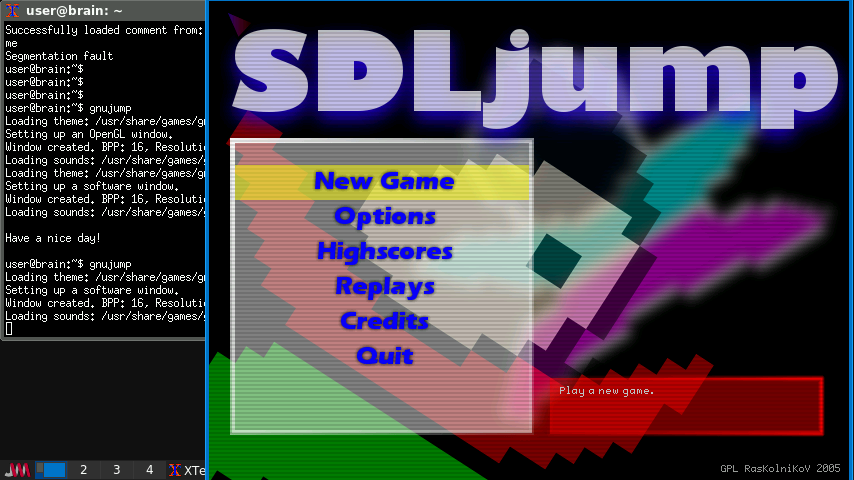
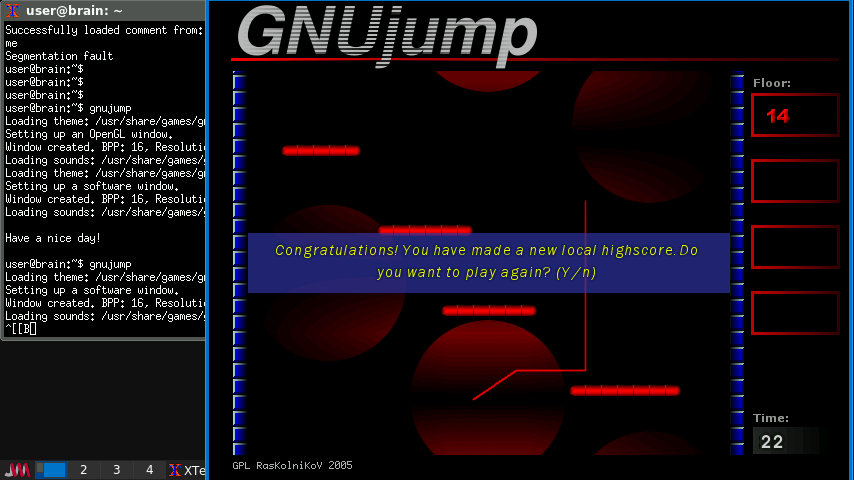
△ gnujump SDL1.2用ジャンピングゲーム(要OPELGL無効化)
https://packages.debian.org/bullseye/gnujump
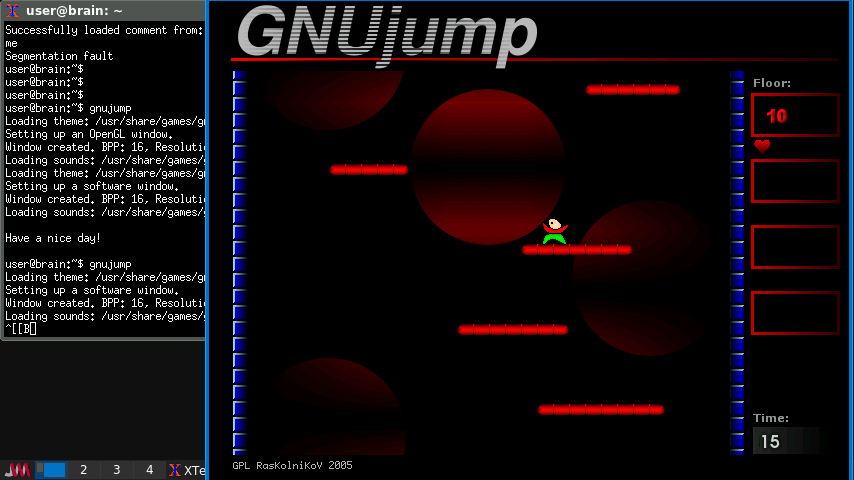
生存のために飛び回らなくてはならないプラットフォームゲーム
このゲームの目標は、落下せずに次の階に飛び乗ることです。崩れつつある塔で上 に上がるほど床の落下速度は上昇します。だれよりも長く生き延びてみてくださ い。シングルプレイヤモードではできる限り高く上がってみましょう。
現時点では、このゲームは sdljump と呼ばれています (そして、メニュでもそのよ うに現れます) が、パッケージ名は上流開発元の改名に従い変更されています。新 バージョンのゲームも gnujump と呼ばれるでしょう。
このゲームは xjump のクローンであり、xjump の全機能に加え、次の機能が追加 されています:
- マルチプレイヤモード (4 人まで、ネットワーク非対応)
- 可能な限りなめらかなグラフィック (xjump スタイルを保ちつつも)
- 異なるテーマを利用可能
- レンダリングに OpenGL を利用可能
- 音楽とサウンドエフェクト
- ゲームの記録 (と再生)
初期はOPENGLが有効になっているので、動作は異常に重いです。
Options -> Graphic Option -> Opengl をOffにすると操作できるようになります。
設定後一度終了すると、その後は設定が保存されます。
ただ、xjumpよりも挙動が独特で非常に難しいです。
インストール:APT経由 ”sudo apt install gnujump”
———-
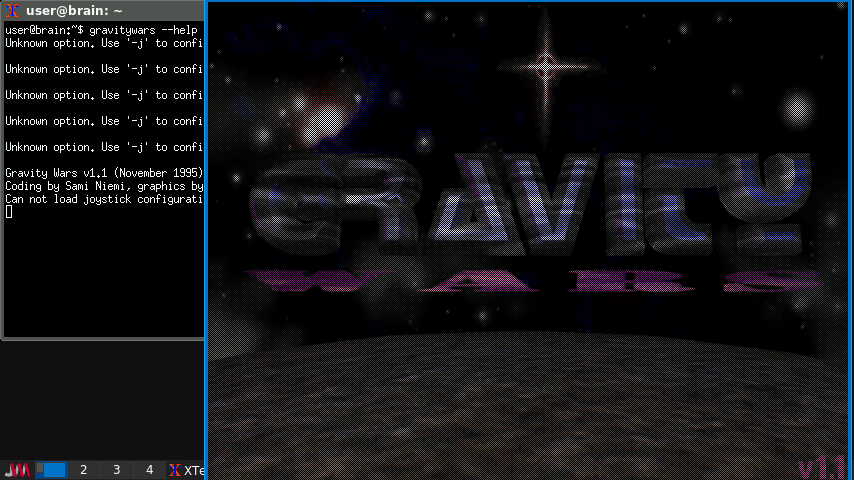
〇 gravitywars Gravity Force クローン
https://packages.debian.org/bullseye/gravitywars
起動:gravitywars
Gravity Wars は Amiga の最も偉大なゲームである Gravity Force にインスパイア されました。このバージョンは少し違いがありますが、より高い解像度を持ち、 グラフィックも改善されています。
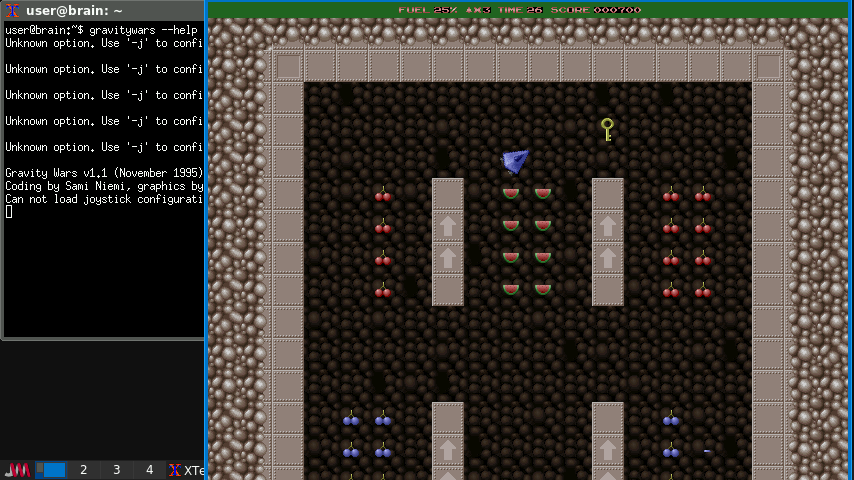
このゲームの目的は、重力や慣性に抗いながら、スタスター噴射と方向変更だけで 宇宙船を出口まで誘導することです。水、ドアの噴射、ボーナスオブジェクト、 FAN (すなわち風) といった新機能や、弾丸や水の噴出といった特別な効果が 追加されています。
Gravity Wars は、開発元ではもはや維持されていないため、この Debian パッケージを最新の開発版とみなすべきです。
●Gravity Force クローン
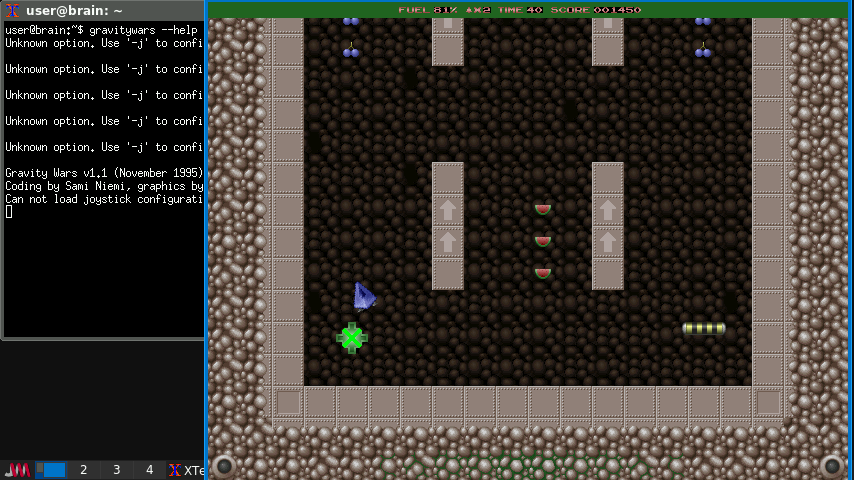
重力や慣性に抗いながら、スラスター噴射と方向変換だけで宇宙船を出口まで誘導します。
水・ドアの噴射・ボーナスオブジェクト・風などの新機能が追加されています。
弾丸や水の噴出といった特別な効果も追加されています。
エンターキーを押して開始します。
【操作】 [←]:左回転 [→]:右回転 [↑]:噴射 [Ctrl]:撃つ [Esc]:終了
[f]:フルスクリーンモード切替
Brainだと、画面解像度的に最上位表示&画面移動をしたほうがいいです。
速度的には遅い気もしますが、これくらいではないと私ではクリアできません。
ゲーム的には、すべてのカギを取って出口に行けばいいようです。
なお、コンティニューは、起動時に
ゲーム最初に表示されるlevel-codeを追加してください。。
例
$ gravitywars EVFYVB # level2から起動
インストール:APT経由 ”sudo apt install gravitywars”
———-
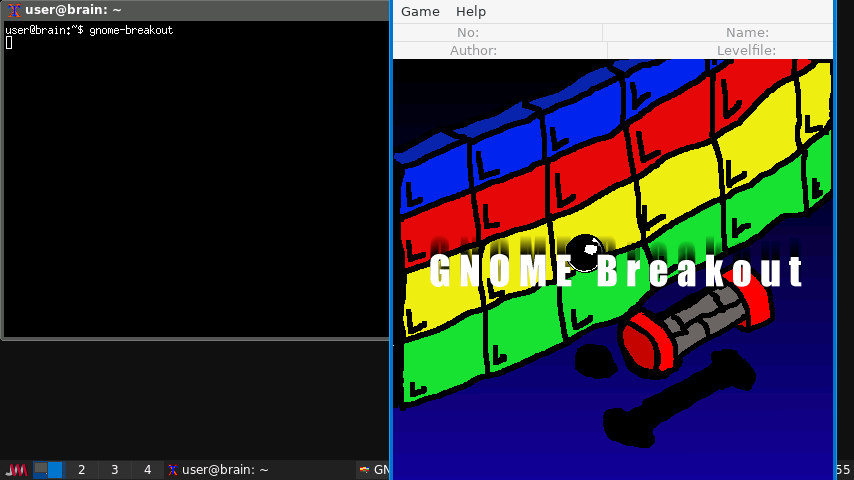
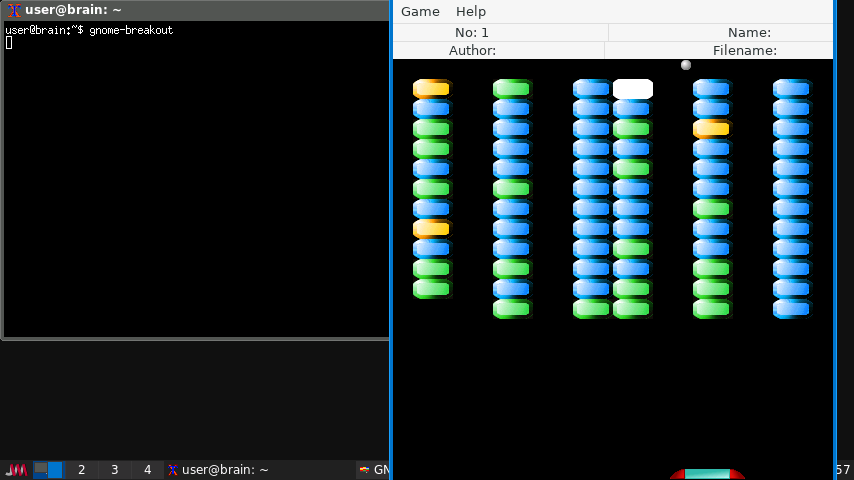
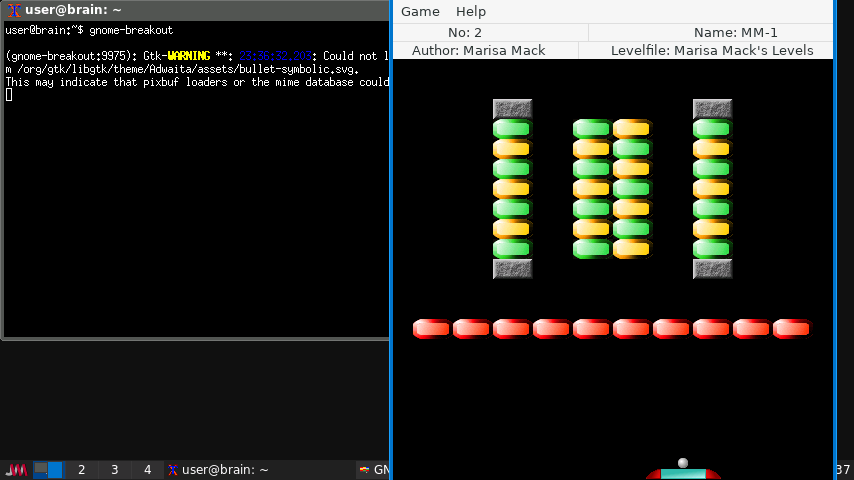
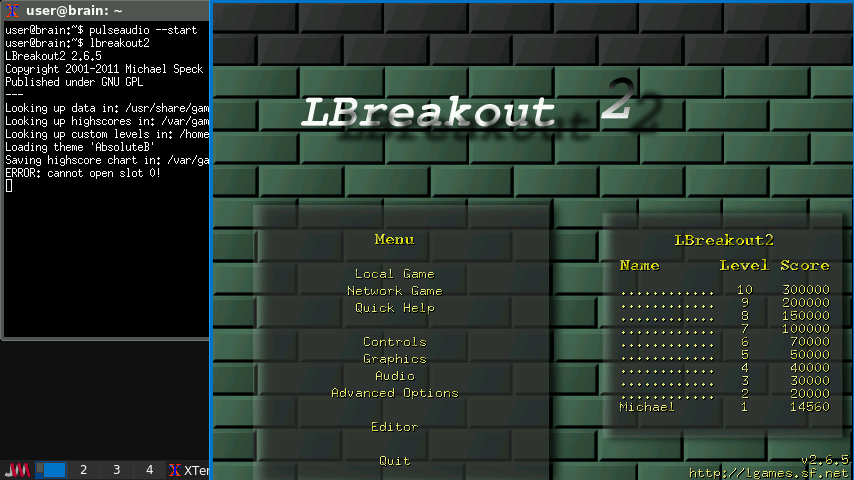
◎ LBreakout2 美しいグラフィックのボールとパドルのゲーム
https://packages.debian.org/bullseye/lbreakout2
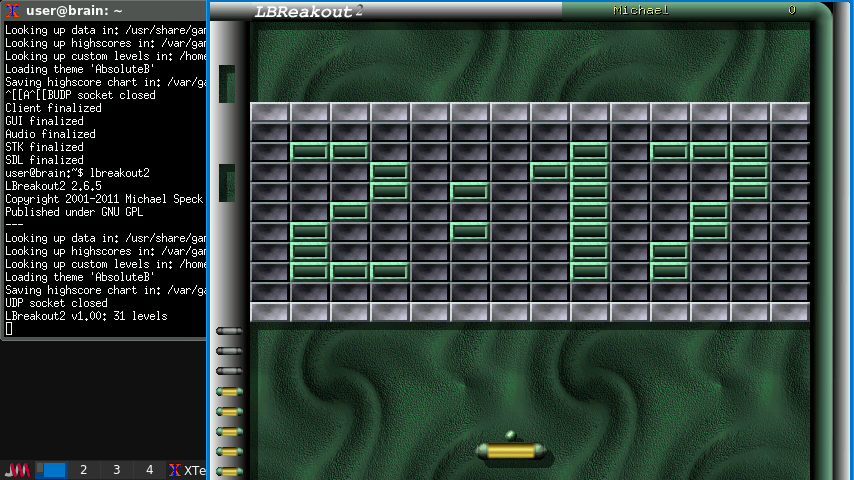
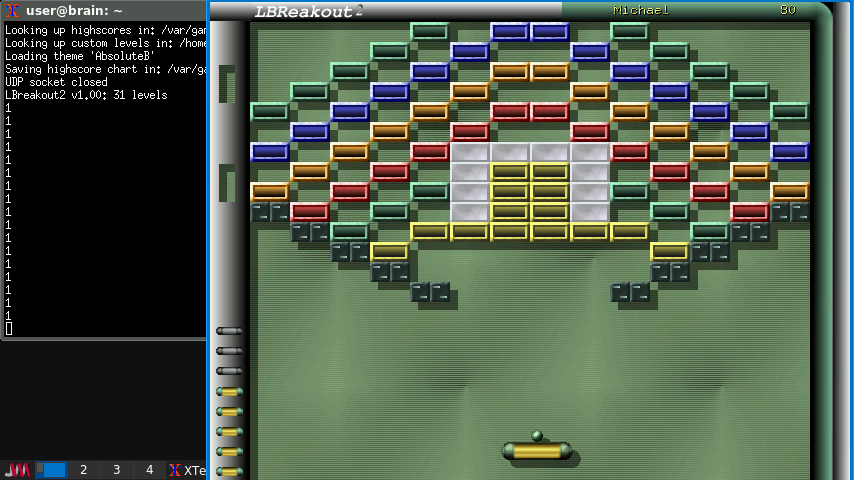
breakout2は、クラシックなブレイクアウトやクロスボウイングに似たゲームで、グラフィックの強化やエフェクトが多数追加されています。フィールド下部のパドルを操作し、ボールを跳ね返させて上部のブロックを破壊します。
lbreakout2はゲーム「lbreakout」の完全な書き直しです。
lbreakoutのユーザーはおそらくこれをインストールしたいと思うでしょう。
●ネット対戦可能なブロック崩し
「Local Game」をクリックして次に進み、「Start Original Set」で開始します。
クリックするか、スペースキーを押してボールを打ちます。
はね返ってきたら、マウスでパドルを左右に動かして打ち返します。
パドルは←→キーでも動かせます。
ゲームオーバーでメッセージが出ます。
You’ve lost all lives…
Do you want to buy a continue for 100% of your score? y/n
このメッセージに[y]と答えると続きができます。[n]は終了します。
マウス操作推奨です。キーボードでも操作できますが、多分移動が間に合いません。
サウンドも鳴ります(pulseaudio起動推奨)が、微妙に音がずれている気がするので、オプションで無効化してもいいかもしれません。
ブロックを壊すと偶にいろんなアイテムが降ってきますので、それを拾うとそれに対応した効果が出ます(アイテムによっては時間制限があるようです)。
アイテムの種類が大量にあるので、詳細はLBreakout2 Manualを確認してみてください。
Original Setだけで31面あり、その他AddOnでCustom Levelsetが大量に収録されているので
かなりの面を楽しめます。
面の途中でESCキーを押すと途中中断できます。
この場合、Resume Last Gameから続きができるようになります
(ただしハイスコアの保存ができなくなるとのことです。)
ゲームオーバー時にコンティニューしない場合は、Resume Last Gameはリセットされます。
インストール:APT経由 ”sudo apt install lbreakout2”
[trixie以降でSDL2に移行済(lbreakouthdに切替)。t64のライブラリと依存あり。]
[trixieベースのBrainuxでは、bookwormからソースを入手してビルドの必要あり]
———-
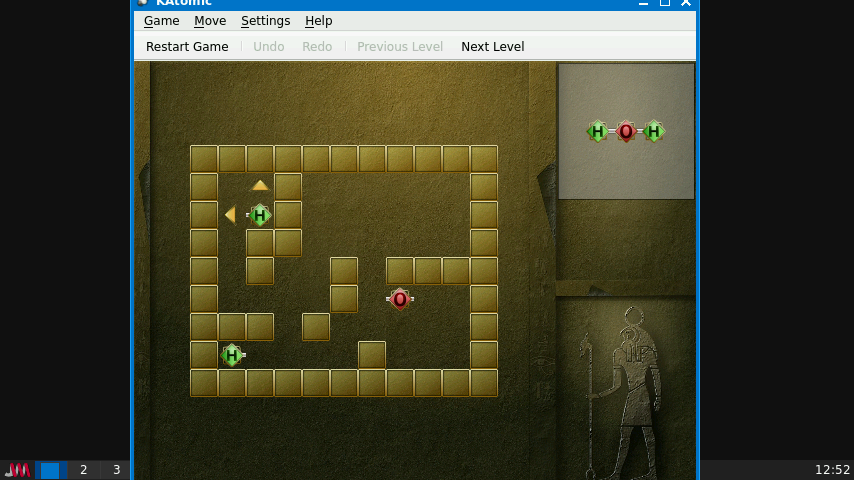
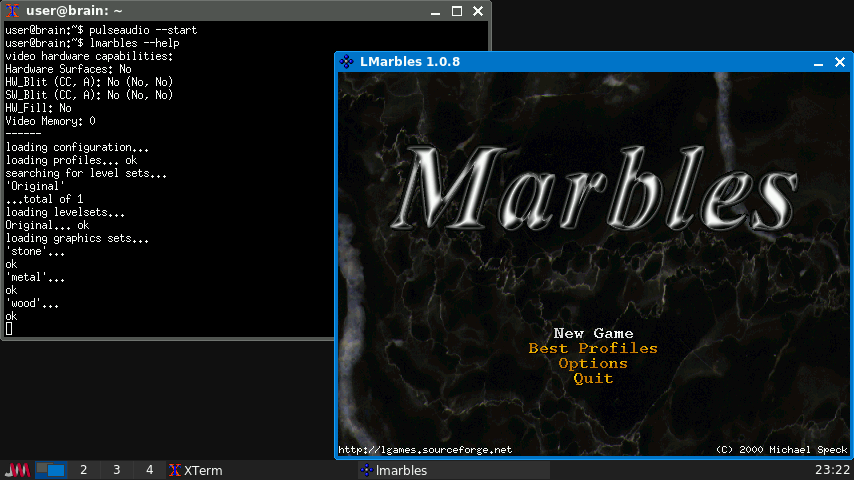
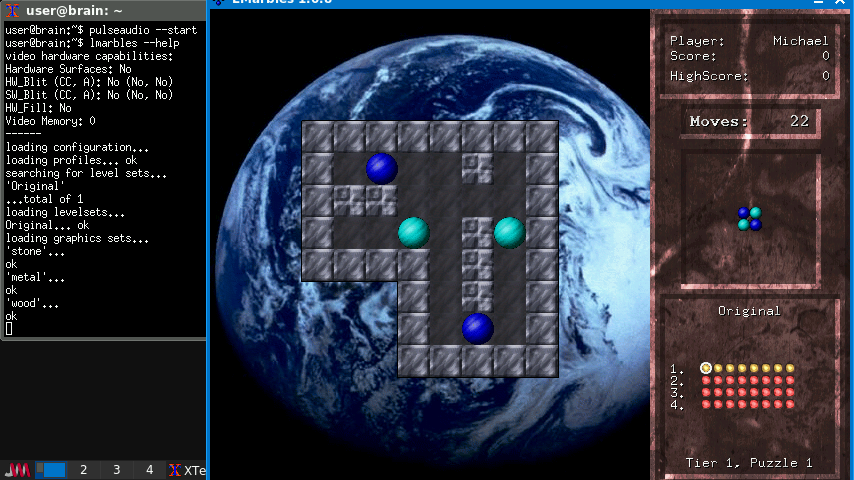
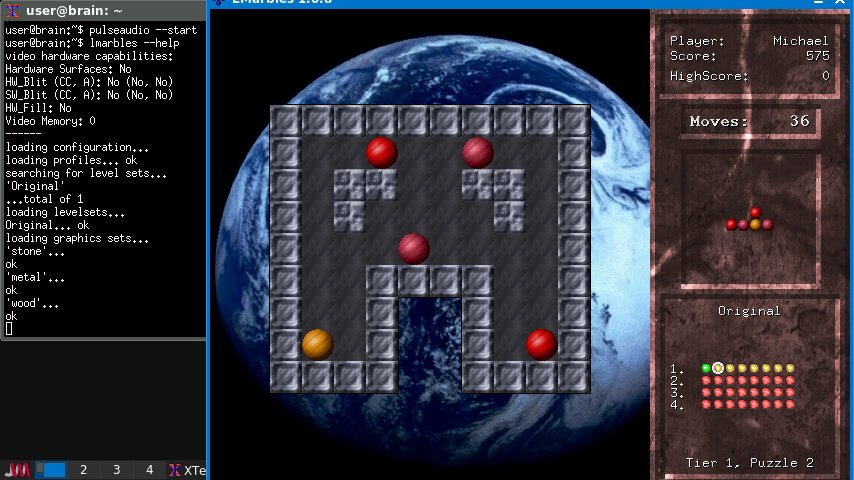
◎ LMarbles 色とりどりのビー玉で形を作るゲーム (KAtomicの亜種)
https://packages.debian.org/bullseye/lmarbles
起動:lmarbles
色とりどりのビー玉で形を作るゲーム
このゲームの目的は、制限時間内にビー玉を一つずつ使って、多少複雑な図形を作り、次のレベルに進むことです。簡単そうに聞こえますか?しかし、問題があります。ビー玉が動き始めると、壁か他のビー玉に当たるまで止まりません。
●色付きビー玉で形を作るゲーム
左側のばらばらになっているビー玉を集めて、右側の絵と同じ形にします。
ただし動かす回数が制限されています。その回数以内に絵を完成させないとやり直しです。
「New Game」をクリックして次に進み、「Start」で開始します。
ビー玉をクリックすると矢印が表示されます。
(タッチパネルでも操作可能です。)
矢印をクリックするとその方向に滑ります。ぶつかるまで止まりません。
【操作】 [←]:左へ [→]:右へ [↑]:上へ [↓]:下へ [space]:Undo [Esc]:一時停止
[r]リトライ
KAtomicの亜種です(接続の足がない分、移動の組合せが多くなってます。)。
Brainだと画面が少し狭いので、最前面化+上に移動でゲーム画面を出すことができます。
もしくはオプションからフルスクリーンモードにしてください。
USBサウンドデバイスがある場合は、PulseAudioを起動しておいてもらえれば、効果音も問題なく出ます。
インストール:APT経由 ”sudo apt install lmarbles”
———–
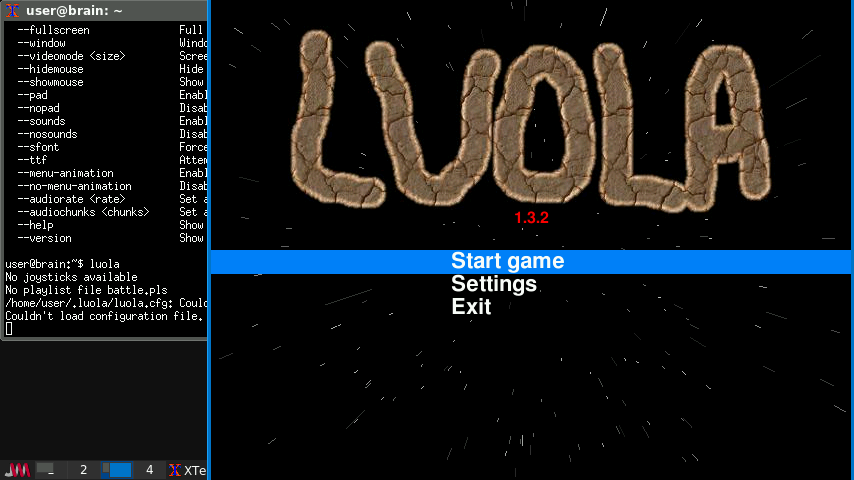
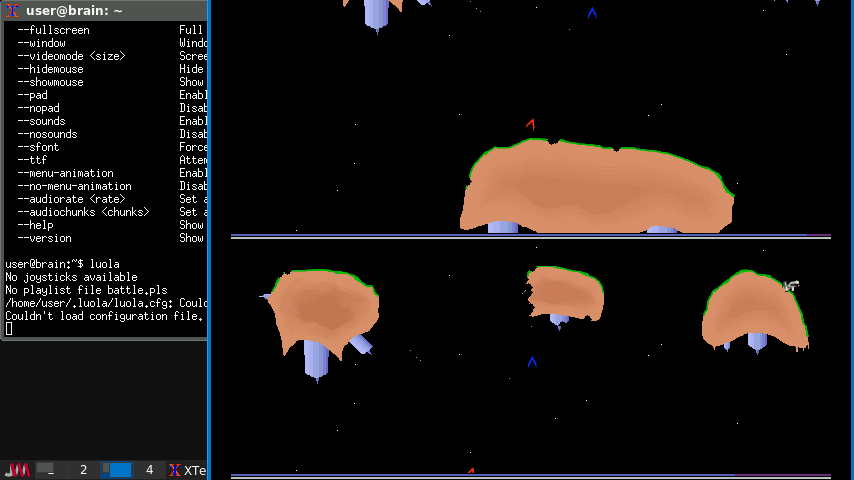
〇 Luola マルチプレイヤー洞窟飛行ゲーム
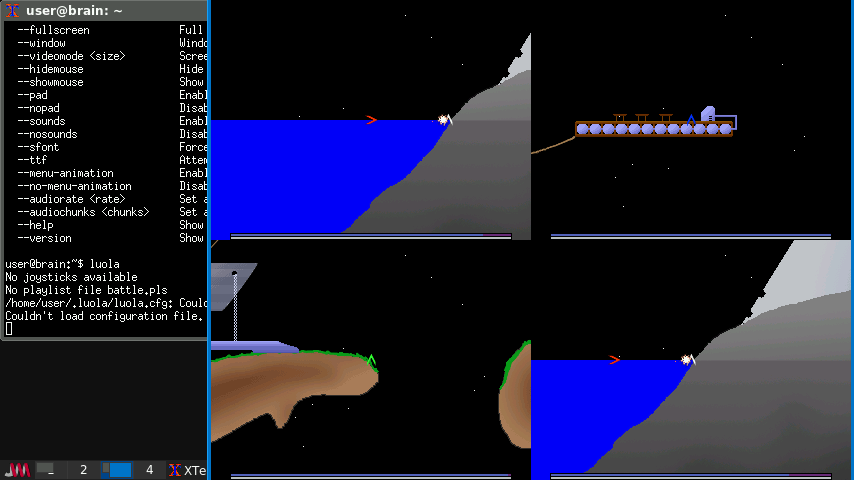
https://packages.debian.org/bullseye/luola
起動:luola
Luola は、さまざまなレベルで小さな V 字型の船を飛ばす 2D アーケード ゲームです。
Luolaのジャンル「Luolalentely」(洞窟飛行)はフィンランドで非常に人気があります。洞窟飛行ゲーム自体はフィンランド発祥ではありませんが、最近の洞窟飛行ゲームの多くはフィンランド発祥です。
●マルチプレイヤ洞窟飛行ゲーム
小さな V字型をした船を飛ばします。
プレイヤーが2人の場合は画面が上下に分割されます。
↑↓キーで「Start game」を選び、エンターキーを押して次に進みます。
【操作1】 [w]:前進 [s]:後退 [a]:左へ [d]:右へ [左Shift]:撃つ [左Ctrl]:撃つ(特殊)
【操作2】 [↑]:前進 [↓]:後退 [←]:左へ [→]:右へ [右Shift]:撃つ [右Ctrl]:撃つ(特殊)
複数プレイヤーで、それぞれ自機を操作して、相手を破壊するゲームのようです。
基本は2-4人プレイのゲームですが、
1人で遊ぶ場合は「Player 2」でエンターキーを押して「Go!」で次に進みます。
エンターキーを押してゲームを開始します。
Brainで操作する場合は、Player1で操作するか、Player2で一部キーバインドを変更する必要があります。
1人プレイだと、いろんなマップを探索できるのですが、いつまでたっても終わりません。
弾を撃って、壁を崩して先に進んだりできますし、爆弾のようなものを撃つと誘爆して大爆発させたりはできます。
1人で遅部には、Player1,2-4を有効にして、Player1を操作して、Player2-4を探して破壊するといった遊び方はできます(一人宝さがしゲーム的な遊び方)。
公式ページは、多分https://luolamies.org/software/luola/です。
そこにはこのように書かれていました。
・2~4人用
・チームプレイ
・パイロットを射出する能力と人間としてレベル内を歩き回る能力
・トゥルーカラーレベルのアートワークと、水流から爆発物まで12種類以上の地形タイプをサポート
・カスタムレベルパレットをサポートしているため、V-WingやWingsなどの実質的にすべての洞窟飛行ゲームからレベルをロードできます。
・降雪、生き物、自動砲塔、ジャンプゲートなどのレベルスペシャル
・キーボードとゲームパッドの入力をサポート
インストール:APT経由 ”sudo apt install luola”
———–
◎ meritous アクションアドベンチャーダンジョン探索ゲーム
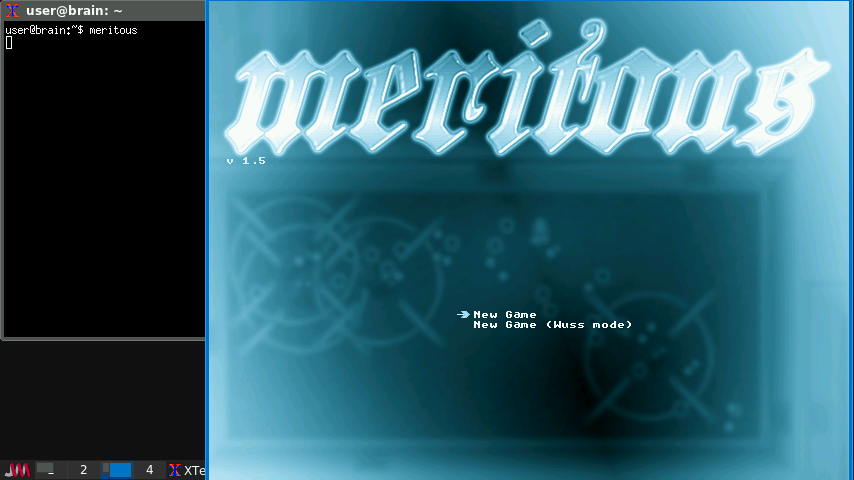
https://packages.debian.org/bullseye/meritous
起動:meritous
惑星の地表の遥か下に、ある秘密が隠されている。そこは無限の力を持つ場所。そんなユートピアを支配しようとする者は、やがて自らの命を絶つことになるだろう。自身を苦しめる苦難に終止符を打ちたいPSI使いのMERITは、答えを求めて神聖なオルクス・ドームへと旅立つ。
Meritousは、シンプルな操作性ながらも、リアルタイムバトルにおけるパワーと回復時間のバランスを取ることが難しいアクションアドベンチャーゲームです。プロシージャル生成される世界を舞台に、プレイヤーは数千もの部屋を探索し、強力なアーティファクトや役立つツールを探し、最終的にオルクス・ドームを悪の手から解放します。
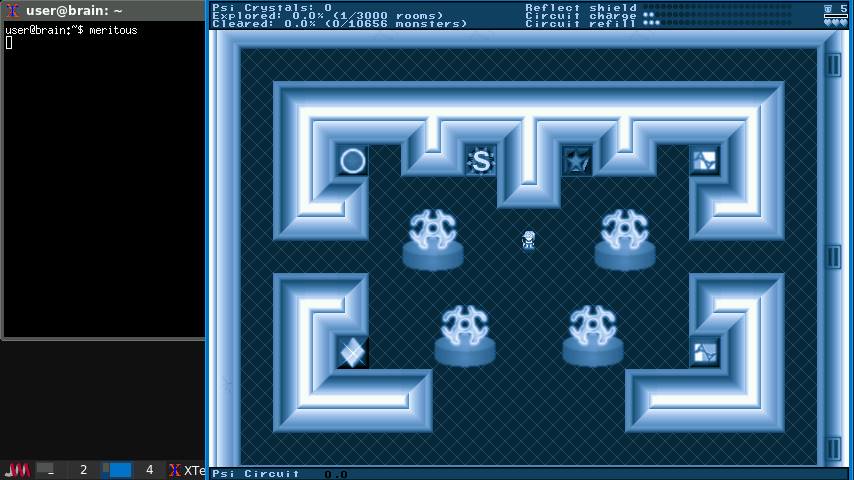
●たくさんの部屋を探索するゲーム
隣り合った部屋から部屋へ移動して、クリスタルやツールを探します。
そこにはモンスターがいて攻撃してきます。
↑↓キーで「New Game」を選び、エンターキーを押して開始します。
「S」マークでセーブできます。
【基本】[Esc]:終了 [p]:一時停止 [h]:ヘルプ
【操作】[space]:チャージ [Tab]:マップ [Enter]:トリガー
ドアを通って隣の部屋に行きます。
チェックポイント(★マーク)を見つけると、入ったことのある部屋のマップが見えます。
最初の部屋を含めた一度入ったチェックポイントに移動したりできます(Enterで選択、ESCor TABfで移動)。
(マップは入ったことのある部屋しか表示されません。)
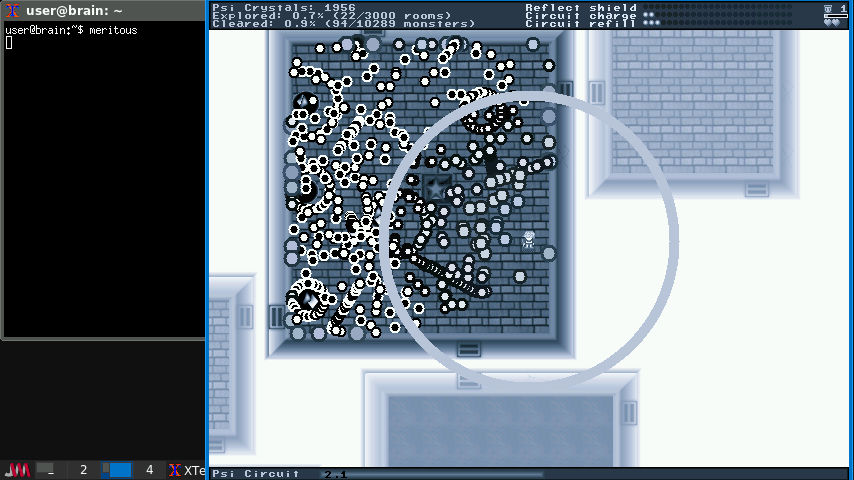
Space長押しでチャージして、離すと円状に攻撃して敵や敵の出す弾に攻撃できます。
チャージ時間が長いほど、広範囲に攻撃できます(チャージ状況は画面下に表示されます)。
ただし、一度攻撃したら、前回のチャージ時間に応じて時間がたたないと、チャージが開始できません。
気分は弾幕シューティングで弾を避けながらボムで敵を破壊していくイメージです。
敵を倒すなどして、クリスタルを集めて最初の部屋に戻ります。
クリスタルがあれば、shield・charge・refillのアップグレードができます。
「左上」upgrade shields (シールドのサイズ強化)
「右上」upgrade circuit charge (psi回路が充電される速度)
「右下」upgrade circuit refill (サイショット後にサイ回路が再充電される速度)
弾や敵に当たるとダメージを受け、ハートがなくなると1機失います。
機数がなくなれば、ゲームオーバーです(右上に表示があります)
[Wuss modeは低難易度モードで、ハートがなくなるとスタートメニューに戻るだけになり、アップグレードに必要なクリスタルが少なくなります。]。
これ終わらせるタイミングがわからくなって、ずーっと遊んでしまします。
詳しくは、以下のページを確認してください。
※http://asceai.net/meritous/
※https://github.com/richelbilderbeek/meritous
インストール:APT経由 ”sudo apt install meritous”
———–
◎ moon-lander 古典的な月着陸船に基づくゲーム
https://packages.debian.org/bullseye/moon-lander
起動:moon-lander
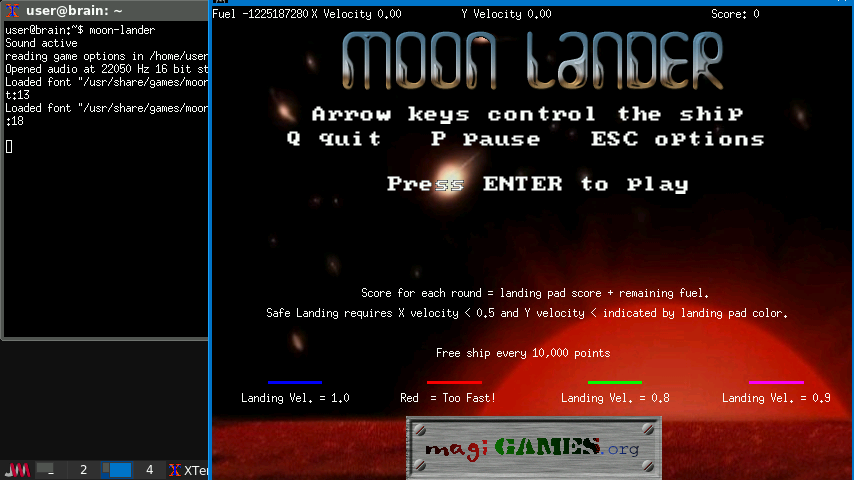
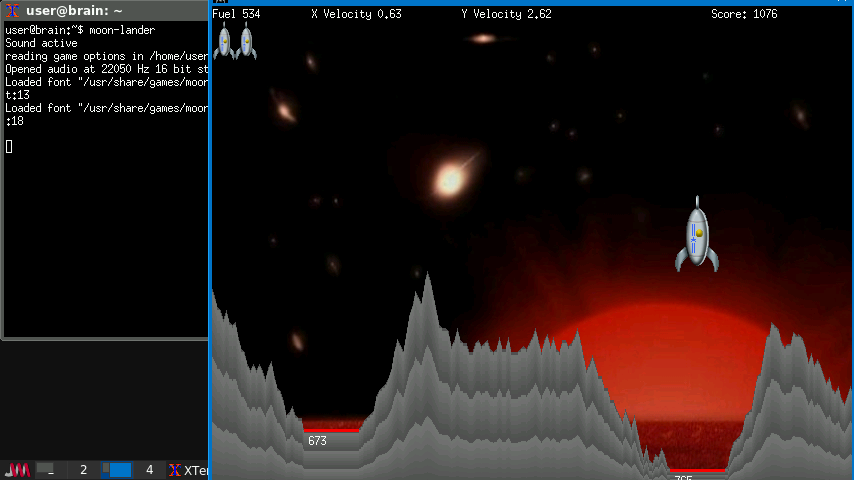
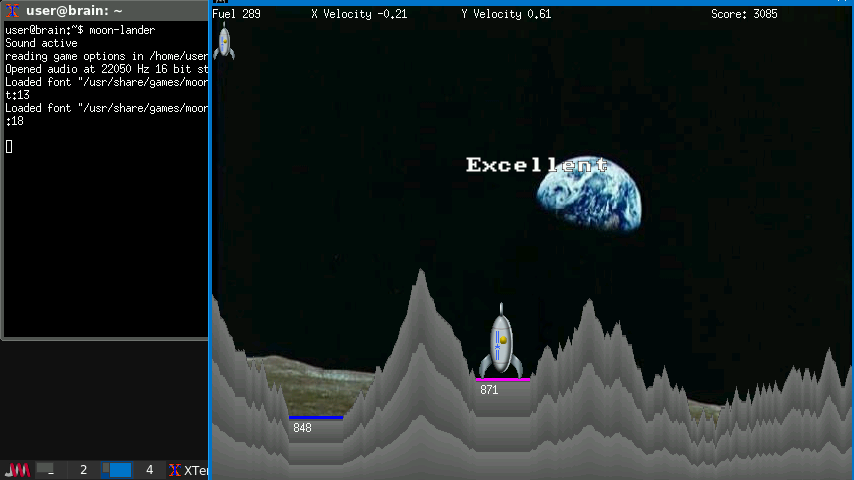
MonnLander は古典的な moonlander ゲームの、楽しく愉快で現代的な グラフィカルバージョン (サウンド付) です。目的は、重力に抗いつつ限られた 燃料を使って、あなたのロケット船を安全に着陸させることです。
●古典的な月着陸船に基づくゲーム
重力に抗いつつ、限られた燃料を使ってロケット船を安全に着陸させます。
エンターキーを押して開始します。
ロケット船の位置を↑↓←→キーで調整して無事に着陸させます。
画面上に現在のロケットの移動量が表示されていますので、それを参考に安全に着陸します。
安全に着陸できる移動量は、X軸が±0.5以内、Y軸は着陸場所の色で変わります
(青:-1.0以上、緑:-0.8以上、ピンク:-0.9以上、赤は着陸速度が速すぎを示しています。)
インストール:APT経由 ”sudo apt install moon-lander”
———–
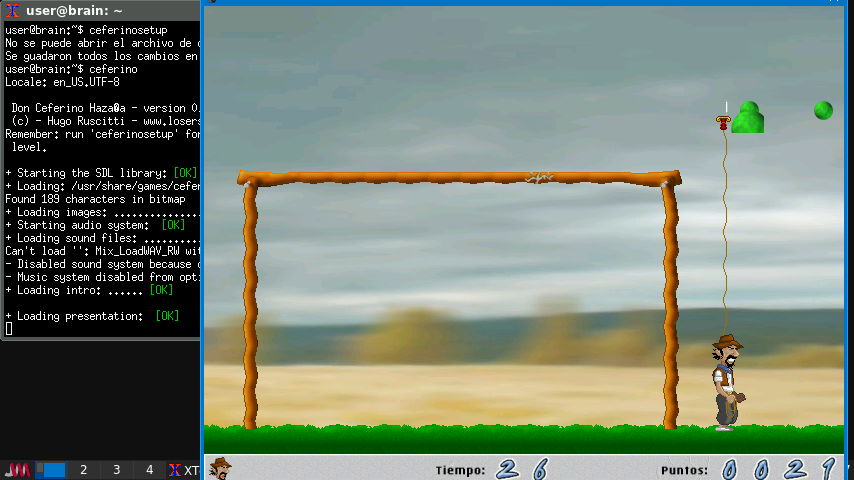
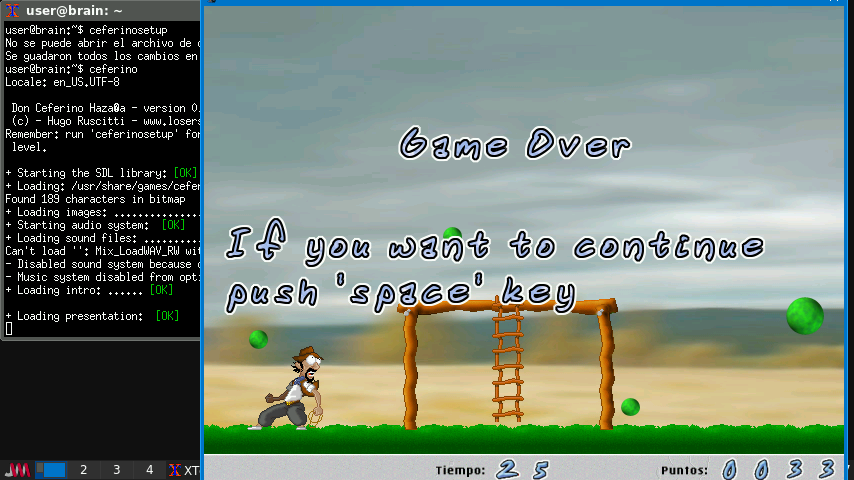
◎ ceferino1 Super Pang 似のアクションゲーム
https://packages.debian.org/bullseye/ceferino
起動:ceferino
ceferinosetup
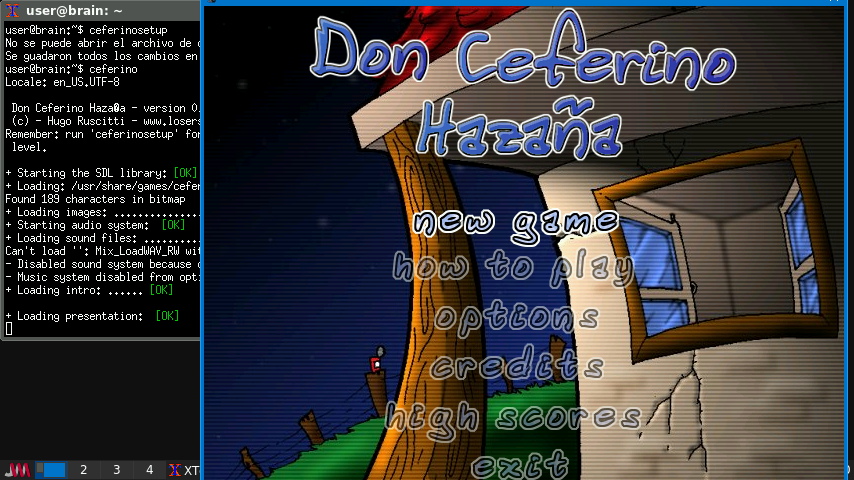
‘Super Pang’ に似たゲームです。あなたは周りを跳ね回る小さな緑色のボール から攻撃を受け、それらをナイフで破壊しなければなりません。しかしながら ナイフは上方にしか投げることができないため、ボールを破壊するにはその下 方に位置取らなければなりません。さらに悪いことに、大きなボールを破壊す ると、そいつは消えて無くなる代わりに 2 個の小さなボールに分裂します。 レベルはラダーで繋がった小さな台で構成されているので、上下したり必要に 応じて覆いにすることができます。
●ボールを破壊するゲーム
ナイフを投げて跳ね回る緑色のボールを破壊します。時間制限があります。
ナイフは上方しか投げられません。ボールを破壊するにはその下に行く必要があります。
大きなボールを破壊すると2つの小さなボールに分裂します。
はしごの掛かった台にボールがぶつかると跳ね返ります。
それを支える柱はボールを跳ね返しません。
【操作】[←]:左へ [→]:右へ [↑]:上へ [↓]:下へ [x]:投げる [z]:走る
[p]一時停止
設定を変更する場合は、「ceferinosetup」を起動することで設定変更ができます。
メニューは、上下キー・JKキーで移動してSpaceや、Enterで選択です。
ボールにナイフかナイフにつながったロープに当てれば、
分裂 or 消滅 します。
時々アイテムが落ちてくるので、それを拾えばそれぞれの効果が発生します。
(例:時間が止まる。 連射できる。 ロープが張っている時間が増える。 等)
アイテムの効果は、やられるか1面クリアするまでです。
インストール:APT経由 ”sudo apt install ceferino”
———–
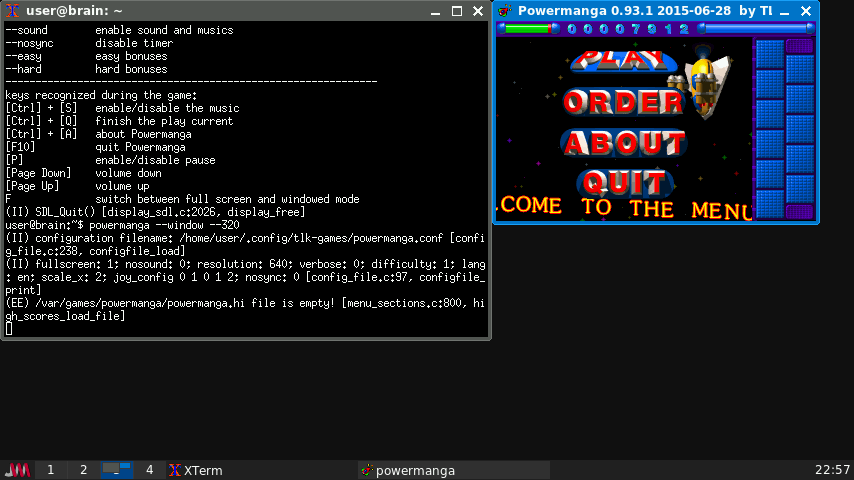
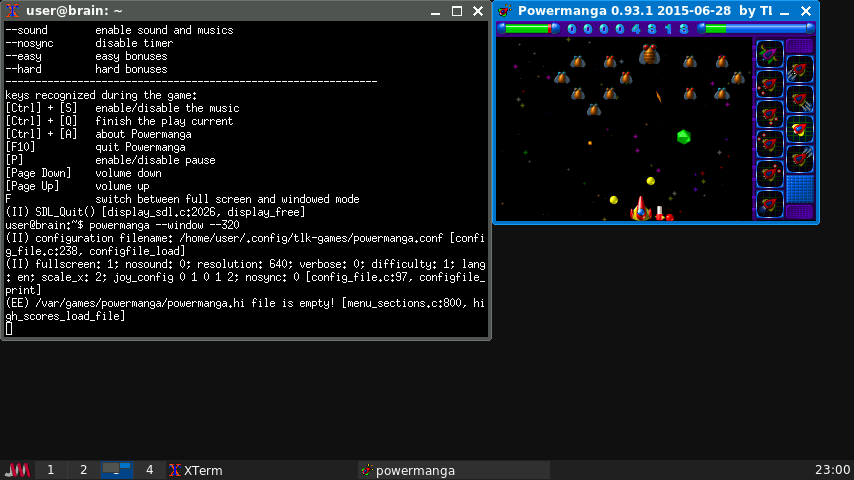
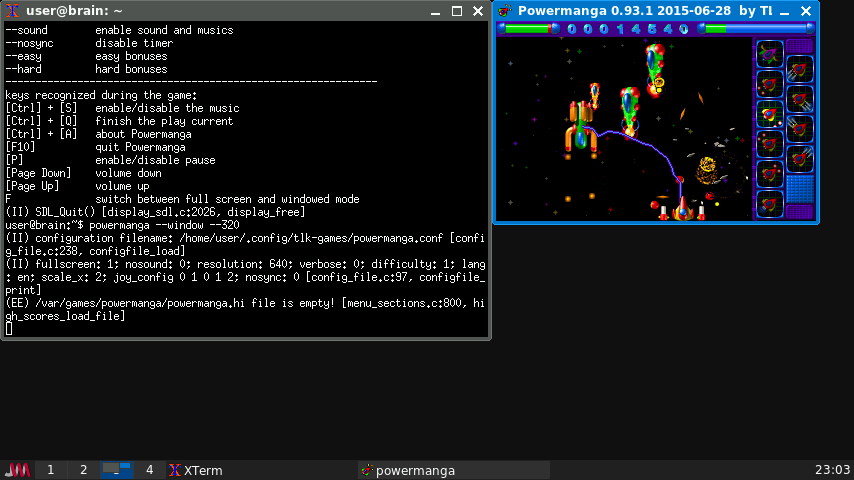
◎ Powermanga 鮮やかな 3D グラフィックを備えた縦方向シューティングゲーム
https://packages.debian.org/bullseye/powermanga
起動:powermanga –window –320
Powermanga はシューティングゲームで、60 種類の敵、40 種類の隕石、無数の 兵器、レベルの最後に登場する多くの悪者、宇宙船のパワーアップ、その他多 くの驚くべきことがあります。
●縦方向シューティングゲーム
60種類の敵と40種類の隕石、それに無数の兵器があります。
レベルの最後に登場する多くの敵に加えて 宇宙船のパワーアップなど、
多くの驚きがあります。
エンターキーを押してメニューを表示します。
↑↓キーで「PLAY」を選び、エンターキーを押して開始します。
【操作】 [↑][↓][←][→]:移動 [space]:撃つ [p]:一時停止 [Esc]:メニュー
Brainuxでプレイする場合はそのままでは少し遅いので、
オプションで –window —320を指定すれば速度を上げて遊べます。
USBサウンドデバイスを付けている場合はゲーム中にCtrl+Sで音楽・効果音の切り替えができます(効果音のみにすることも出来ます)
サウンドを出す場合は、Pulseaudio有効化推奨です。
powermanga –helpで起動時オプションの一覧を出すことも可能ですのでカスタマイズしてみてください。。
なお、起動時のオープニングデモはゴリゴリにアニメーションしているので、
ぜひ見てみてください。
インストール:APT経由 ”sudo apt install powermanga”
———–
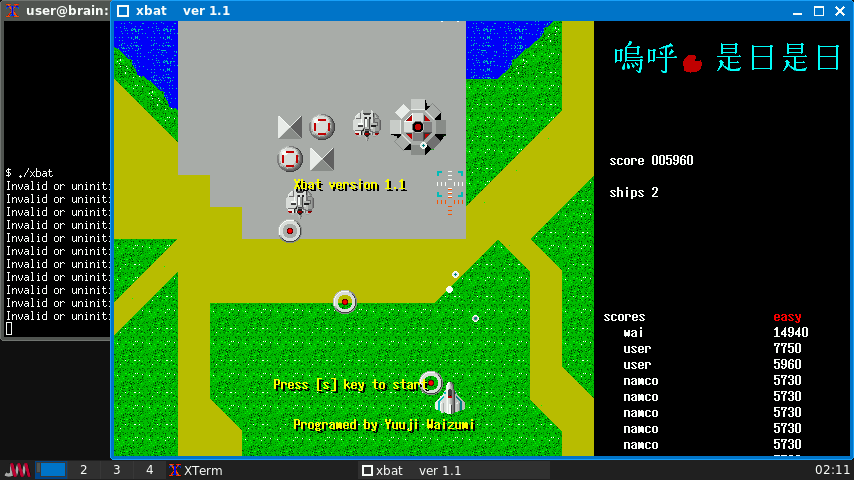
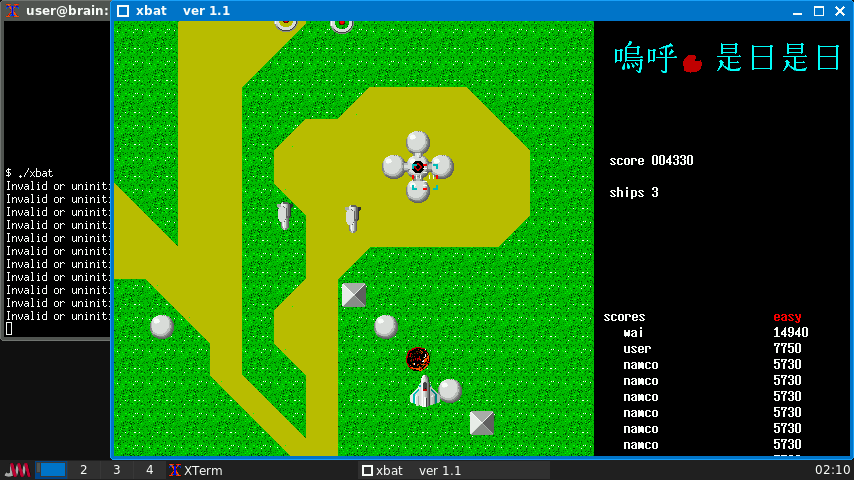
◎ xbat ゼビウス(ナムコ製ゲーム)風アクションシューティングゲーム

https://www2d.biglobe.ne.jp/~oga/pc/linux/ltool.html#linux_xevjoy
起動:xbat
ゼビウス(ナムコ製ゲーム)風アクションシューティングゲームです。
というか、音が鳴らない以外はまんまゼビウスです。
(正確には、「「ゼビウスのクローン」のバトルス」のクローンらしい)
●縦スクロールのシューティングゲーム
1983年にリリースされたnamcoのXEVIOUSのようなゲームです。
↑↓←→キーで爆撃をよけながら、敵機または地上を攻撃します。
【操作】[x]:敵機を攻撃 [z]:地上を攻撃 [s]:スタート [q]:終了 [c]:設定
Brainで動かす場合、縦解像度が足りませんが、画面に上が表示されていればプレイはでき案すので、実害はないと思います。
Cキーからのセットアップで変更も出来ますが、
起動時に、-g で連射モード、-hsでハイスピードモード、-mode 0-4で難易度が変更できます。
その他オプションは -hで起動すれば表示されます。
インストール:ソースからコンパイル(公式サイトがすでにないため別のところから入手)
インストール手順詳細(クリックで表示)
インストール手順詳細(クリックで表示)
$ mkdir xbat
$ cd xbat
ソースファイルをダウンロードして、Brainに転送します。
https://www2d.biglobe.ne.jp/~oga/cgi/download.cgi?linux/xev111.tar.gz
$ tar zxf xev111.tar.gz
$ cd Xev111/
CPUタイプに従い変更します。(変更しないと自機が動きません)。
$ vi Imakefile
#UNION=0
UNION=1
$ xmkmf -a
$ make make clean
$ make xbat
$ sudo make install
ただ、これだけだと、以下の不具合が発生しました。
・不具合1:Sキーを押してゲームを開始するとMemoryFaultが発生する(デモは正常に動作)
・不具合2:自機がやられた際に、MemoryFaultが発生する。
上記を回避するために以下のようにソースを変更します。
(暫定なので、副作用がある可能性がありますが、動くこと優先)
不具合1対策(ほんとに暫定)
>map_chijou_enemy[scrl_ptr][i]に不正な値が入っている模様。
enemy.c
260: Cinit_func[map_chijou_enemy[scrl_ptr][i].char_no]
261: (enemy_no,map_chijou_enemy[scrl_ptr][i].x,
262: map_chijou_enemy[scrl_ptr][i].char_no);
↓
int char_no = map_chijou_enemy[scrl_ptr][i].char_no;
if (char_no >= 0 && Cinit_func[char_no] != NULL) {
Cinit_func[char_no](enemy_no, map_chijou_enemy[scrl_ptr][i].x, char_no);
} else {
fprintf(stderr, “Invalid or uninitialized Cinit_func[%d]\n”, char_no);
}
不具合2対策
>JikiBomb(5);の実行で、一部変数anim[5]に不正な値が設定されてしまっている模様。
xev.c
JikiBomb(i%6);
↓
JikiBomb(i%5);
ソースを変更したら、再度make xbatしてください。
実行に問題なくなったら、sudo make installでインストールです。
なお、参考までにエラーがあったときは以下のように調査します。
(不具合2の場合)
$ gdb .\xbat
(gdb) run
エラーが発生したら、実行がストップします。
バックトレースログを表示するには、以下のように入力します。
(gdb) backtrace
#0 0x00408c9c in JikiBomb (i=i@entry=5) at bomb.c:144
#1 0x00402b00 in Explosion (nokori=3) at xev.c:234
#2 0x00403084 in Play () at xev.c:449
#3 0x00401efc in main (argc=, argv=) at xev.c:560
また、エラー発生時の変数の確認もできます。
(gdb) print anim[4]
$1 = 0
(gdb) print anim[5]
$1 = 1919381362
終了はquitです。
(gdb) quit
実行がうまくいったら、
デバック情報削除(-g削除)&高速化(-O3 -match=native)してもいいと思います。
(そのままでも十分早いですが)
$vi Makefile
CXXDEBUGFLAGS = -g -O2 -fno-strict-aliasing
↓
CXXDEBUGFLAGS = -O3 -march=native -fno-strict-aliasing
CDEBUGFLAGS = -g -O2 -fno-strict-aliasing
↓
CDEBUGFLAGS = -O3 -march=native -fno-strict-aliasing
$ make make clean
$ make xbat
$ sudo make install
後は必要に応じて、ジョイスティックパッチも紹介があるのですが、
私のBrainux環境だと、ジョイパットを接続しても/dev/js0 や/dev/input/js0が
使えなかったので、認識できる環境をお持ちの方であれば、パッチを当ててみてください。
私の環境ではジョイパットが
/dev/input/by-id/usb-DragonRise_Inc._Generic_USB_Joystick-event-joystick
/dev/input/by-path/platform-ci_hdrc.0.:1.3:1.0-event-joystick
で認識しているっぽいので、なんかすれば使えそうな気もしますが断念します。
———-
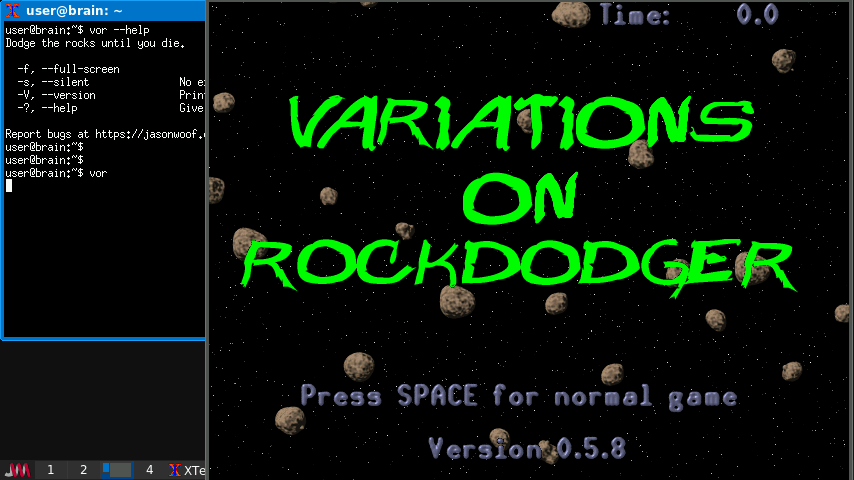
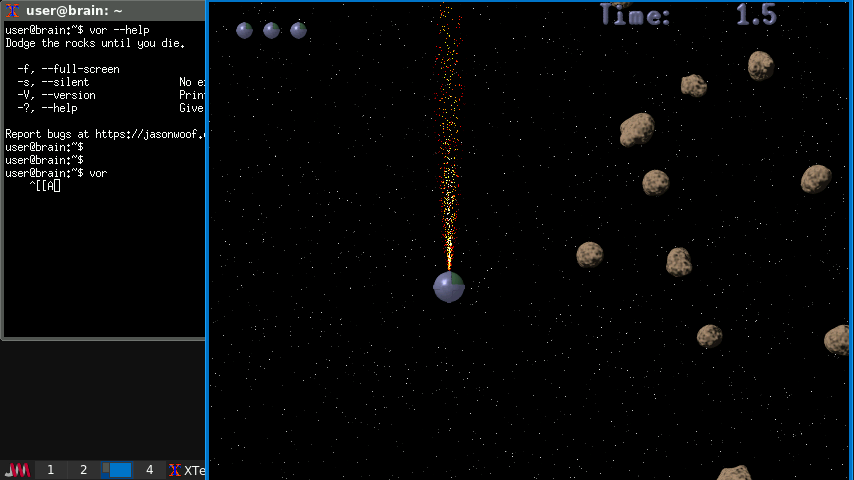
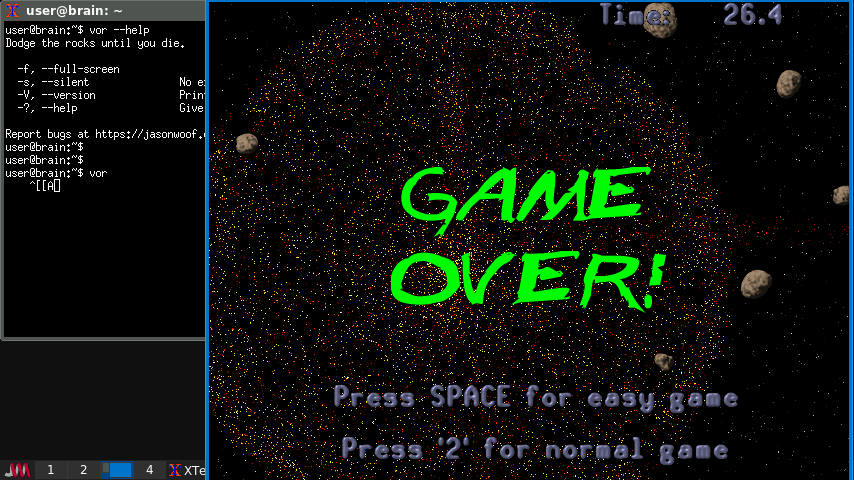
◎ VoR 宇宙で岩を避ける2Dアクションゲーム
https://packages.debian.org/bullseye/vor
起動:vor
VoRは、反射神経を試すシンプルでテンポの速いアクションゲームです。優れたゲームプレイ、優れた物理演算、美しいグラフィック、そしてレトロなシンセサイザー風の力強いビートが、昔ながらの2Dゲームを彷彿とさせます。
●岩石を避けて進むゲーム
スペースキーを押して開始します。
([1:Easy mode] [2:normal mode])
岩石をよけながら右方向に進みます。
エスケープキーを押すと終了します。
【操作】[←]:左へ [→]:右へ [↑]:上へ [↓]:下へ [space]:一時停止 [f]:フル/Window切替
移動については、ジェットを噴射してその反動で進むことになるので、
移動量に慣性が発生することで、機敏に動くことはできません。
その分先を予想して操作することになるので、結構難しいです。
(個人的には、操作が反転したもの(噴射する方向のキーを押す)を遊んでみたい。)
(というか、ソースを探したら結構簡単に変更できそう・・・・)
(ソース:https://github.com/JasonWoof/vor/ 怪しそうな箇所:main.cのgameloop())
インストール:APT経由 ”sudo apt install vor”
———-
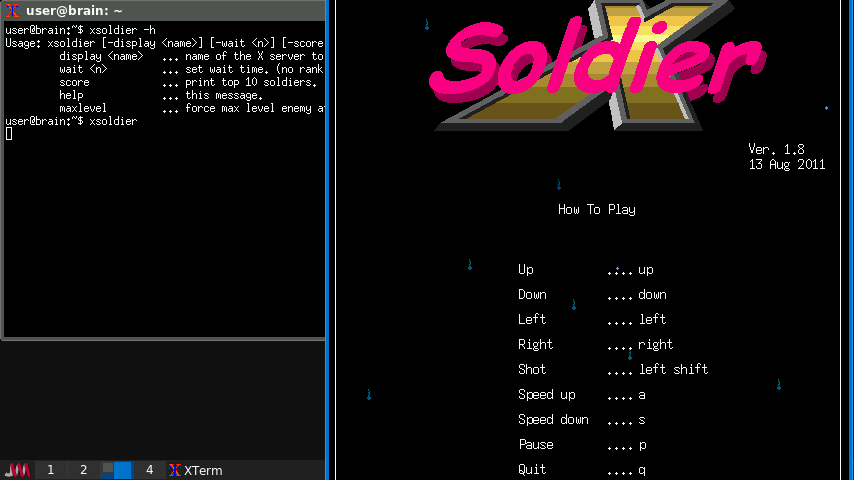
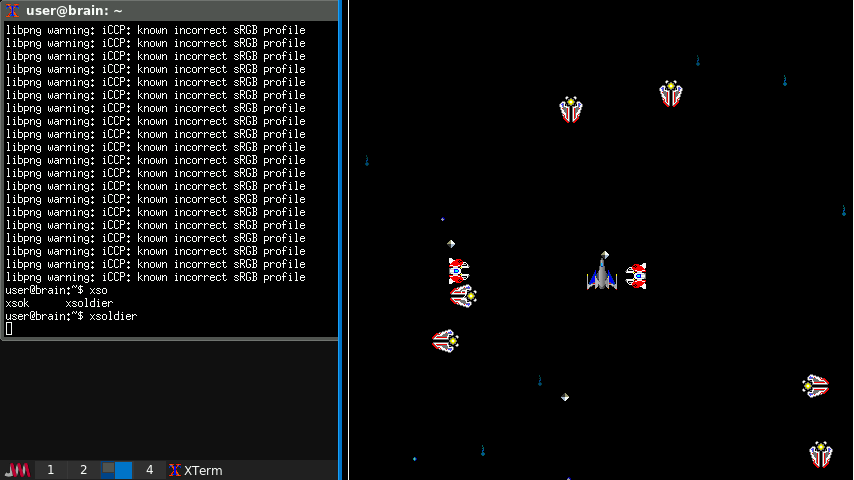
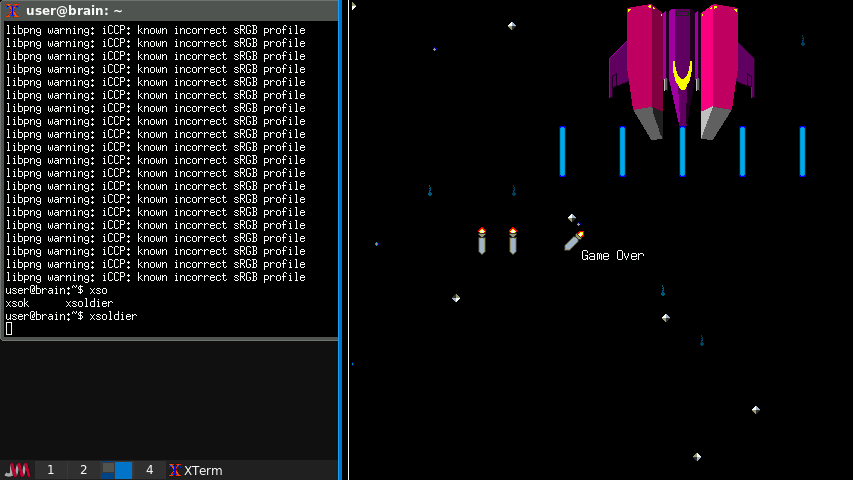
◎ X Soldier 「撃たない」ボーナス付きのシューティングゲーム
https://packages.debian.org/bullseye/xsoldier
起動:xsoldier
縦スクロールウィンドウで宇宙船を操作し、敵を撃ち倒します。各ステージの最後に出現するボスを倒すか、ボスが飽きて逃げるまで生き延びることができれば、次のステージに進むことができます。
xsoldierにはユニークな機能があります。それは「撃たない」ボーナスです。撃たないことでかなり良いスコアを獲得できます。もしこのゲームが単純な「全滅」ゲームで、撃つことが常に良いことなら、なぜわざわざ撃たなければならないのでしょうか?
xsoldierを単純な「全滅」ゲームとしてプレイすることもできます(そしてそれが生き残るための最良の方法です)。しかし、スコアを気にするなら、最小限の弾数ですべての敵を倒す必要があります。
X11上で動くシューティングゲーム
スペースキーを押して開始します。
敵をよけながらシフトキーで攻撃します。
いろいろなアイテムが出てきます。攻撃力をアップするアイテムもあります。
シフトキーを押しっぱなしにして撃ちまくることもできます。
【操作1】[←]:左へ [→]:右へ [↑]:上へ [↓]:下へ
[シフト]:攻撃 [a]:加速 [s]:減速 [p]:一時停止 [q]:終了
Brainで実行すると、縦解像度が足りないので、
ちょうど見える位置に移動してあげれば、プレイは可能です。
ただ、自機が見えないエリアは発生するので、プレイ時には注意が必要です。
ゲーム速度は、速いくらいなのですが、
「a」「s」キーで速度調整したり、起動時オプションの -wait から調整可能です。
ちなみに、攻撃はかなり激しいので
「「撃たない」ボーナス」の取得はかなり難しそうです。
インストール:APT経由 ”sudo apt install xsoldier”
———-
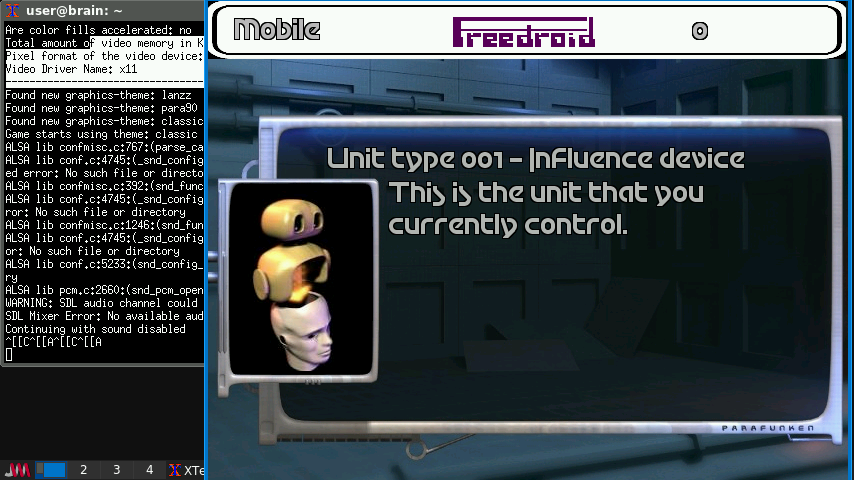
◎ freedroid Paradroid クローン – 戦略的 shoot-em up 型シューティングゲーム
https://packages.debian.org/bullseye/freedroid
起動:freedroid
全ドロイドを宇宙船から一掃しなければなりません。これを達成するため、あ なたのデバイスはより強力なドロイドを操らなければならず、強力であればあ るほど最強の相手に立ち向かうことができます。しかし永遠にドロイドを操る ことはできず、自分のデバイスには寿命すらあるため、自分のエネルギーを管 理する必要もあるでしょう。
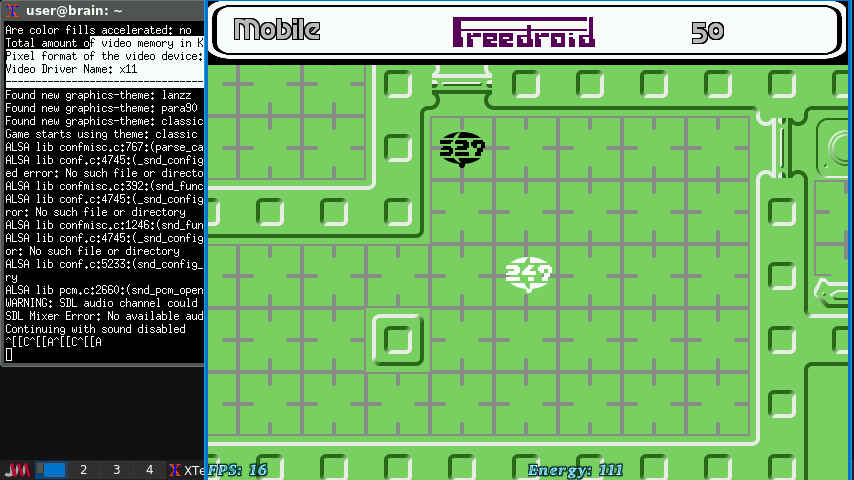
●宇宙船の中で敵を消していくゲーム
Paradroidのクローンです。宇宙船から敵を一掃します。
スペースキーを押して開始します。
ESCキーでメニュが表示されます。メニュー項目はスペースキーで決定します。
↑↓←→キーで移動しながらスペースキーを押すか、クリックすると撃ちます。
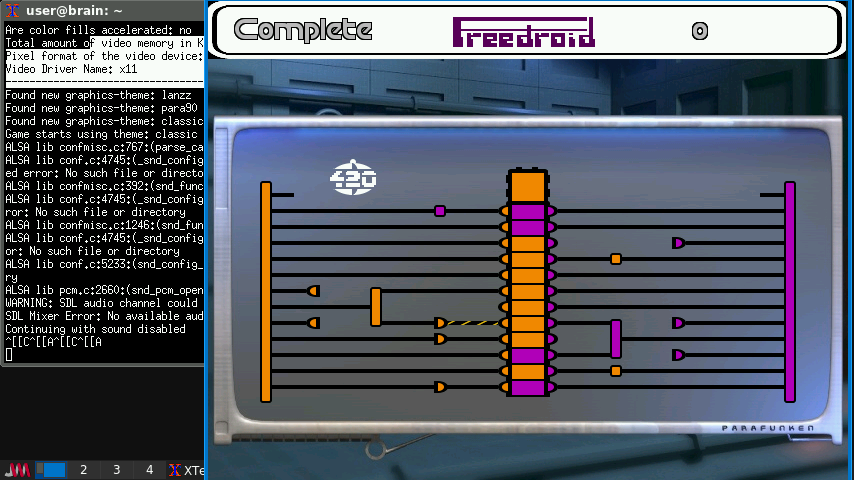
↑↓←→キーを押さない状態で、スペースキーかマウスの右ボタンを押しながら敵にぶつかると、乗っ取りゲームになります。
乗っ取りゲームは、←→キーで左右どちらか選び、エンターキーを押してゲームを始めます。 制限時間があります。
乗っ取りゲームは、中央の柱の数取りゲームのようです。
自分の色の数が多いほうが勝ちですが、ロボットごとに通電できる数に制限あるようで、
弱い敵から挑みましょう(ドロイドのアイコンの数字が強さっぽいです。)
ゲームに勝てば敵ロボットの制御を奪うことができます。
論理回路を読み解くと、1つの通電で複数の柱への通電にすることもできるので、
このようなルールを利用すると有利に進められます。
エネルギーがなくなれば、ゲームオーバーですのでその前に敵を乗っ取りを成功する必要があります。
ゲームのルールについて、以下あたりが参考になるかもしれません。
・https://uridiumauthor.blogspot.com/2017/04/the-paradroid-transfer-game.html
・https://www.lemon64.com/review/paradroid/90
コンソールの所でスペースキーを押すと、地図を見ることができます。
Shipmapは船を横から見た図で緑色が現在の階層です。
Deckmapは現在の階層を上から見た図です。
エレベーターのプレートに乗って[e]キーを押すと、Shipmapが表示されます。
↑↓キーで行き先の階層を指定し、スペースキーを押して確定します。
【基本操作】[p]:一時停止 [q]:終了 [Esc]:メニュー
インストール:APT経由 ”sudo apt install freedroid”
———-
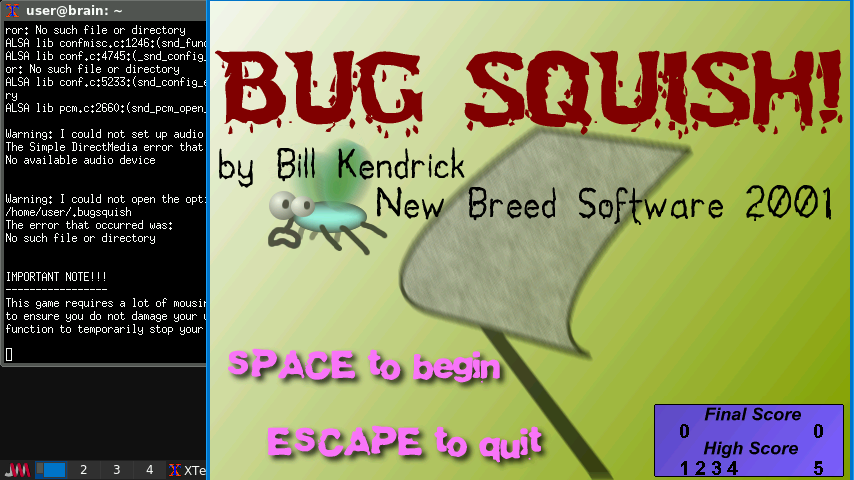
〇 BugSquish 虫があなたの腕から血を吸おうとしています!ハエたたきでやっつけろ!!
https://packages.debian.org/bullseye/bugsquish
起動:bugsquish
「Bug Squish」は、ライトガンアーケードゲームに似たアクションゲームですが、
マウスで操作します。ビルが名前を思い出せないmacOSゲームをベースにしています。
虫があなたの腕から血を吸おうとしています!血が尽きる前にハエたたきで潰しましょう。
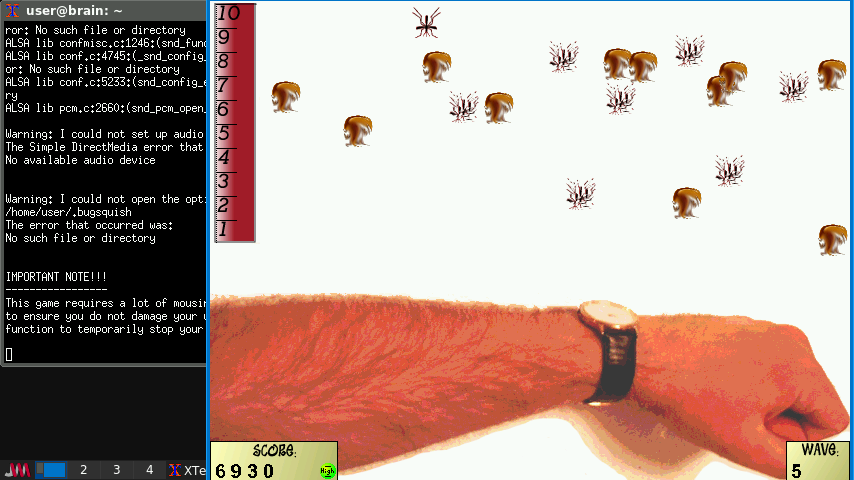
●虫たちがあなたの腕から血を吸おうとしています!
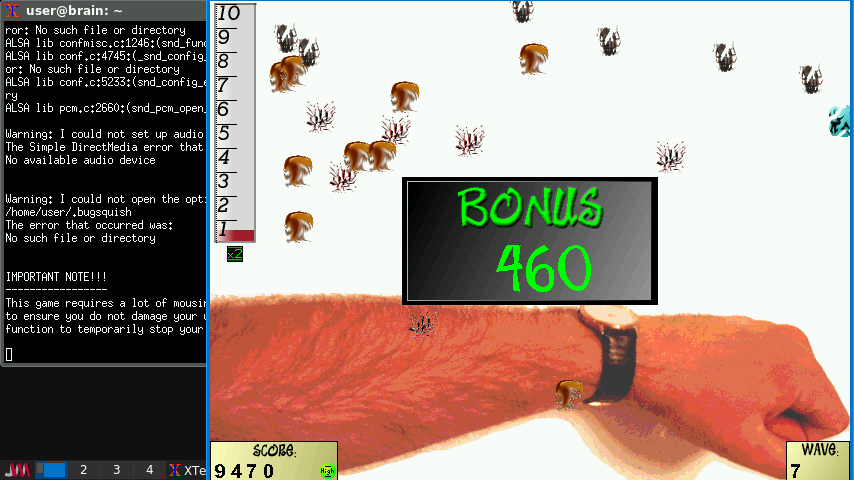
スペースキーを押して開始します。上から降りてくる虫をクリックして退治します。
血を吸われると左の目盛りが下がり腕の色が変わっていきます。
目盛りが0になったらゲームオーバーです。
ゲーム中にエスケープキーを押すと終了します。ゲームに戻っても最初からになります。
Brainの場合は、マウス操作するよりもタッチパネル操作したほうが直感的に遊べるかもしれません。
ただ、絵柄的にもきれいなものではないので、その辺の生理的に好き嫌いが出るゲームかもしれません。この辺は上のスクリーンショットで合うか合わないかを確認してください。
インストール:APT経由 ”sudo apt install bugsquish”
———-
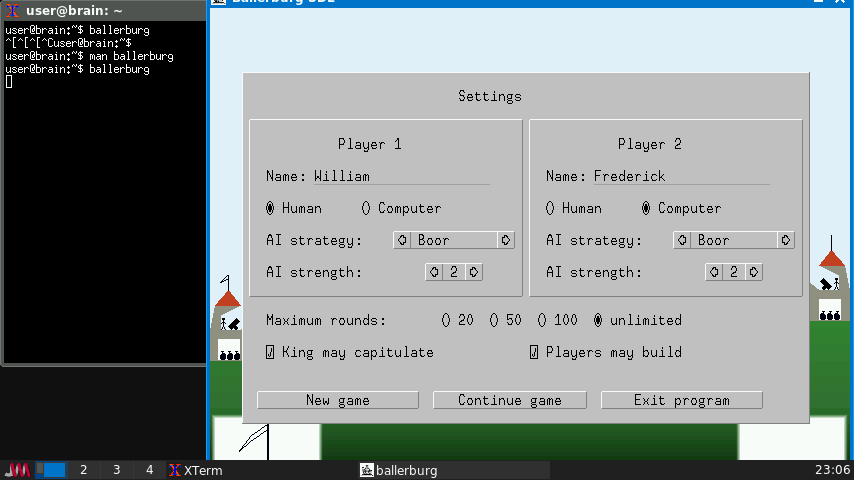
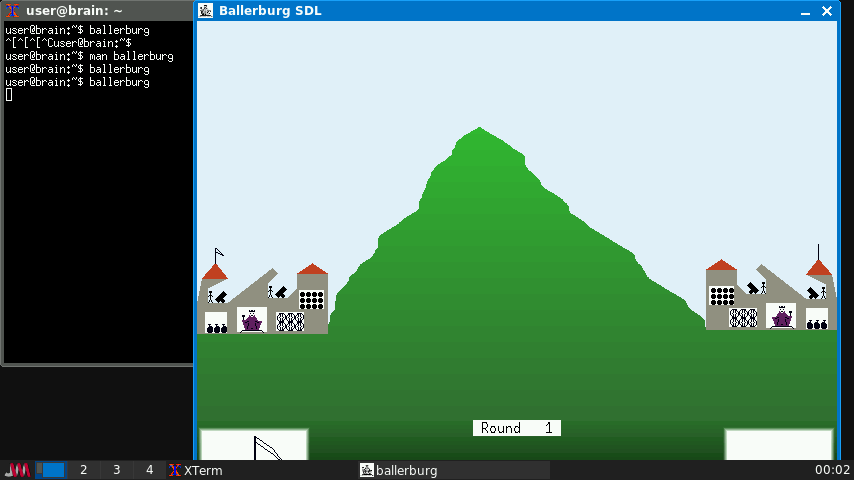
〇 ballerburg 古典的な城の戦闘ゲーム(砲弾当てゲーム)
https://packages.debian.org/bullseye/ballerburg
https://baller.frama.io
山で隔てられた 2 つの城が、敵の王を殺すか、敵を弱らせて王が降伏するかのいずれかの方法で、砲弾で互いを倒そうとします。
Ballerburgは1987年にEckhard Kruse氏によってAtari STマシン(当時としては斬新なコンピュータでした)向けに開発されました。25年以上の歳月を経て、ついにオリジナルのソースコードが現代のオペレーティングシステム向けに移植されました。
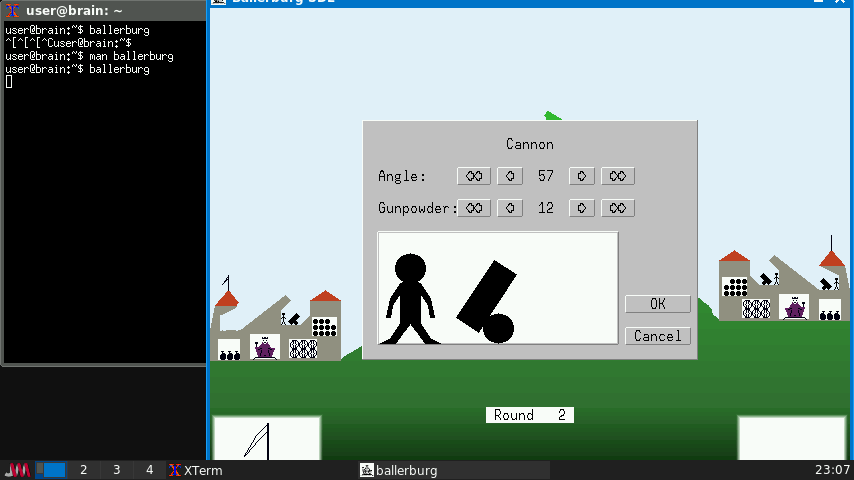
自分の陣地の砲台をクリックすると、砲台の発射角度と打ち出す強さを指定して攻撃します。ターン性で攻撃して、最初に王様をやっつけたほうが勝ちです。
なお、敵の設備を破壊して相手を弱らせて降伏させることも出来るようです。
ESC 設定画面を表示します。
f ウィンドウ/フルスクリーンモード
t ハイスコア履歴を表示します
q ゲームを終了します。
ESCメニューから相手をコンピュータにしたりも出来ます
(両方コンピュータにも出来ます。)
NewGameで城の種類(配置)を変えることも可能です。
音を鳴らす場合は、pulseaudio推奨です。
インストール:APT経由 ”sudo apt install ballerburg”
[trixie 以降でSDL2に移行済。t64のライブラリと依存なし。]
[trixieベースのBrainuxでは、sudo apt -t bookworm install ballerburgで導入可能]
———-
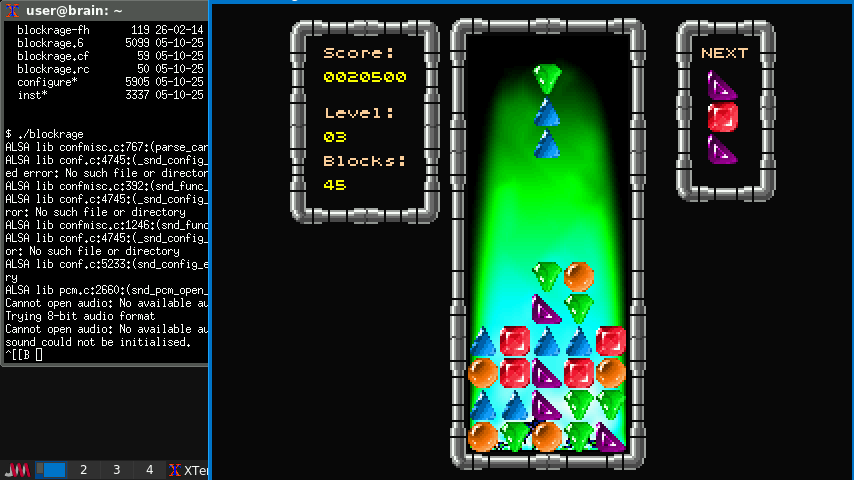
◎ Block Rage コラムスみたいなゲーム(DOSの古典Xixitのリメイク)

Block Rage download | SourceForge.net
Block Rage – Browse /blockrage/0.2.3 at SourceForge.net
起動:blockrage
非常に中毒性のある落下ブロックゲームで、詳細なグラフィックとアニメーション化されたプラズマ背景が特徴です。2人用のホットシートモードで友達に挑戦しよう!素晴らしいDOSのクラシックに強くインスパイアされています。
●コラムスみたいなゲーム(DOSの古典Xixitのリメーク)
初期表示が「1P Game」になっているので、エンターキーを押して開始します。
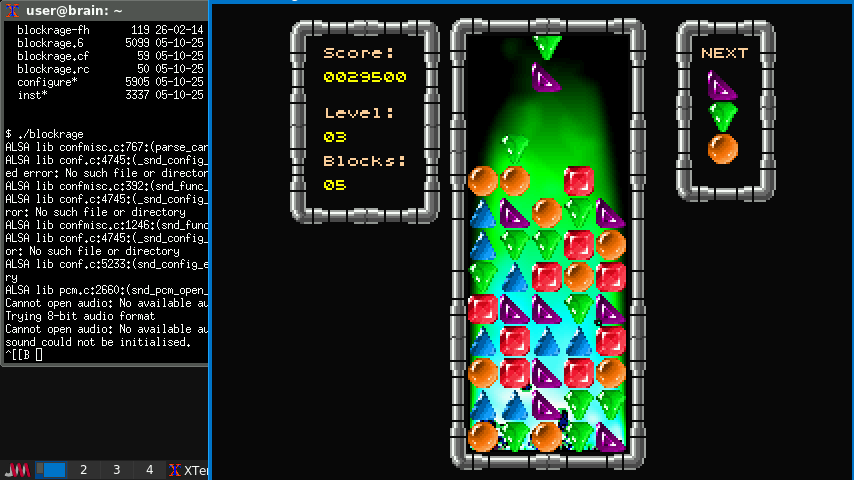
落ちてくるブロックの同じパーツを縦・横・斜めに3つ以上揃えて消します。
2人で対戦する場合は [2P vs. Game]を選択します。
【操作】 [Esc]:一時停止や中断など
【1人目】[←]:左へ [→]:右へ [↑]/[↓]:回転 [右Shift]:落とす
【2人目】[A]:左へ [D]:右へ [W]/[S]:回転 [Q]:落とす
brainの場合、1Player操作では右シフトがないので、
Spaceとか”-”に変えてもいいのかもしれません。
(Optionsから変更できます)
x11版のxjewelだと、画面の上か下が隠れてしまい、次のブロックが判りづらいので、
Brainで遊ぶにはこっちのほうがいいかもしれません。
あと2人対戦プレイもこちらなら可能です。
インストール:ソースからコンパイル
インストール手順詳細(クリックで表示)
インストール手順詳細(クリックで表示)
$ mkdir blockrage
$ cd blockrage
ファイルをダウンロードして、Brainに転送します。
https://sourceforge.net/projects/blockrage/files/blockrage/0.2.3/
blockrage-0.2.3.tar.gz
$ tar zxf blockrage-0.2.3.tar.gz
$ cd blockrage-0.2.3
#ビルド時にエラーになるので、ソースを修正する
$ cd src
$ sed -i /\bstatx\b/stat_x/g main.c
$ sed -i /\bstaty\b/stat_y/g main.c
#最適化
$ vi Makefile
CFLAGS=-s –O2 -Wall `sdl-config –cflags` -DSYSCONFDIR=\”${sysconfdir}/${progname}\”
↓
CFLAGS=-s -O3 -march=native -Wall `sdl-config –cflags` -DSYSCONFDIR=\”${sysconfdir}/${progname}\”
$ cd ..
$ ./configure
$ make
$ sudo make install
———-
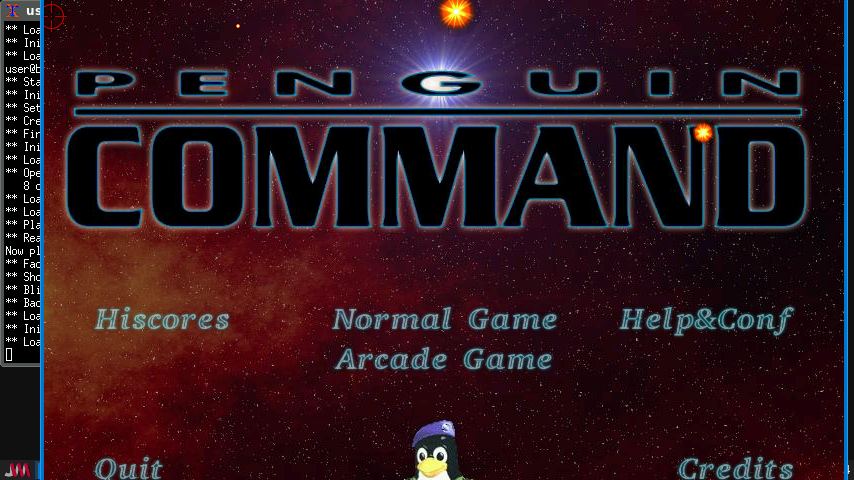
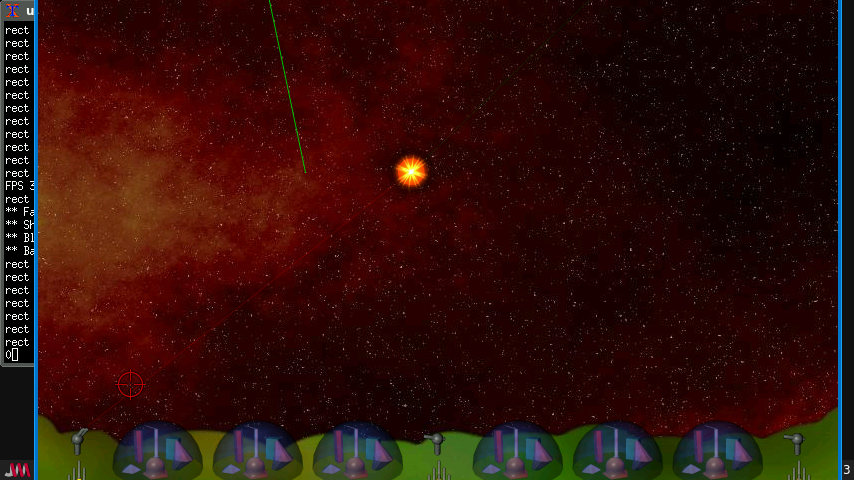
◎ penguin-command ミサイルコマンドクローン(グラフィック改良版)
https://packages.debian.org/source/bullseye/penguin-command
https://www.linux-games.com/penguin-command
起動:penguin-command -w
これは古典的な「ミサイルコマンド」ゲームのクローンですが、グラフィックと音楽が改良されています。
あなたは、ミサイル、航空機、スマート爆弾を迎撃し、 都市を防衛しなければなりません。
ゲームプレイはわずかに変更されています。ペンギンコマンドはGPLライセンスです。
そのままで起動すると、フルスクリーン表示で、要800×600なのでBrainでは起動できません。
penguin-command -w で起動することでゲームは起動できますが、
ウィンドウをかなり上のほうに移動することで、
やっとゲームプレイ自体ができるようになります。
ゲーム中は、マウスで照準を動かします。
ミサイルは、左、中央、右の砲台から、それぞれ左クリック、中央クリック、右クリックで発射できますが、キーボードのA,S,Dをでも発射できます。
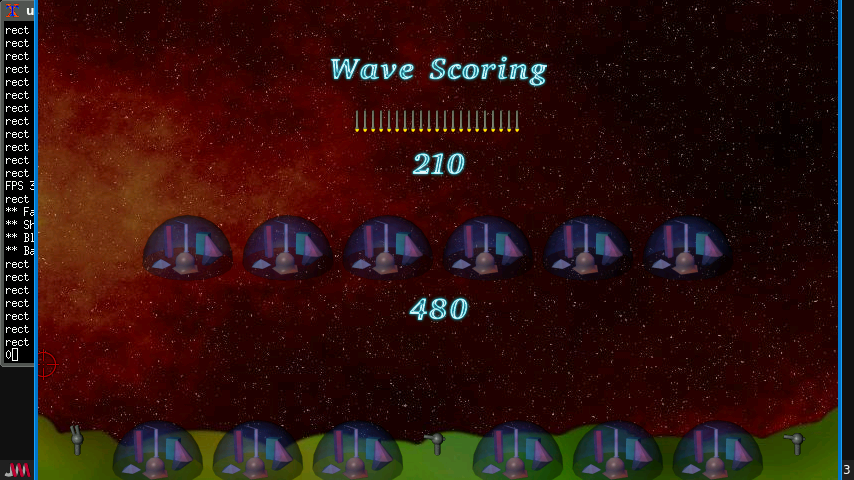
基本的にはMissle Commandと同じですが、こちらは画面がカラフルなのとMusicがある、
それとコンフィグ設定画面(開始wave、sound/musicの音量調整)もある点が異なります。
あとaptでインストールできることもメリットかもしれません。
インストール:APT経由 ”sudo apt install penguin-command”
———-
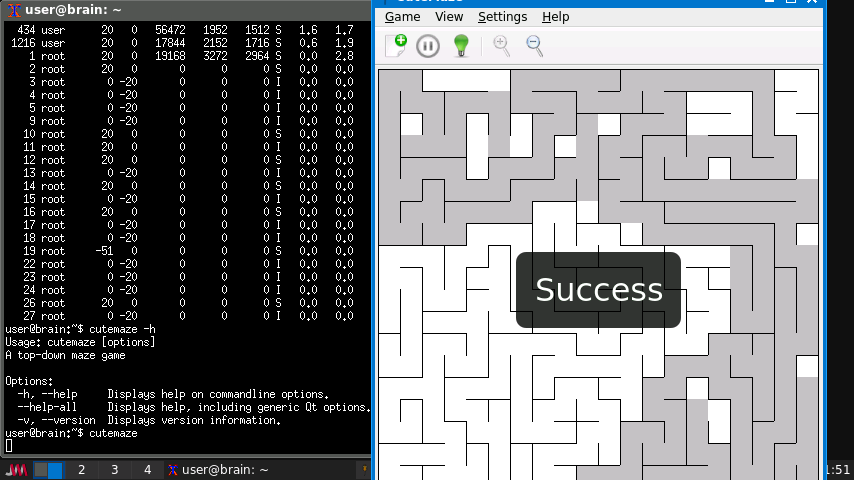
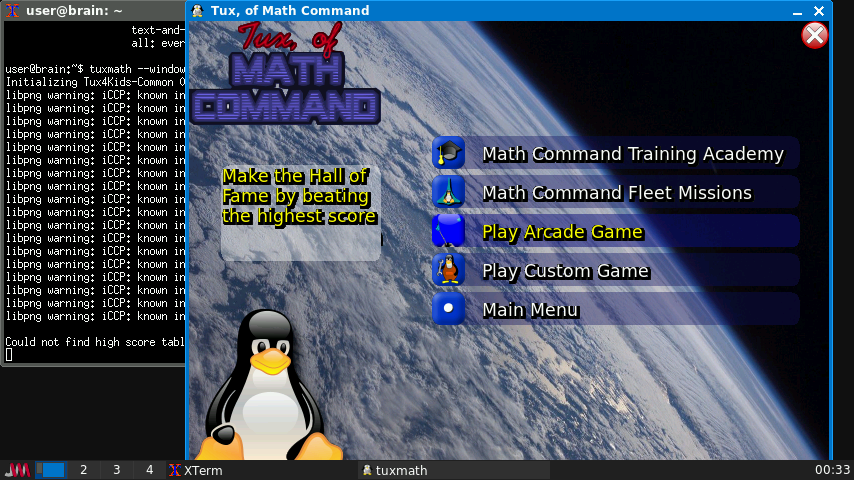
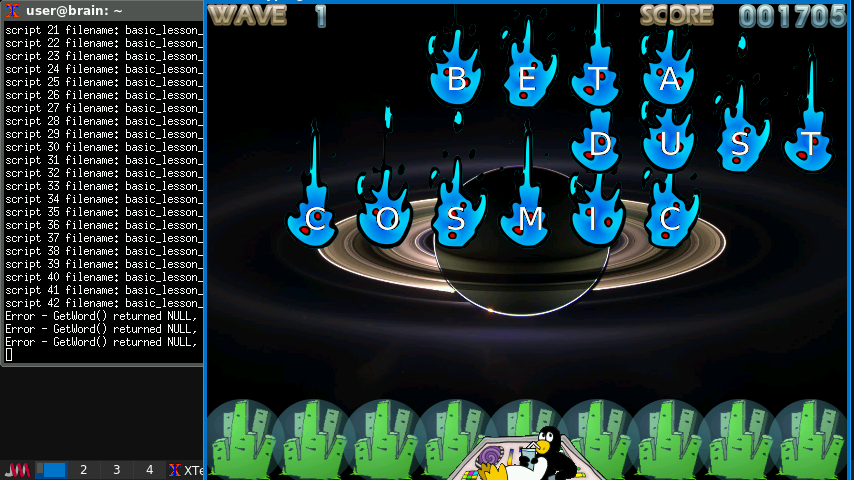
△ tuxmath 子供向けの Tux による数学ゲーム(最初の起動だけ5分ぐらいかかります)
https://packages.debian.org/bullseye/tuxmath
起動:tuxmath
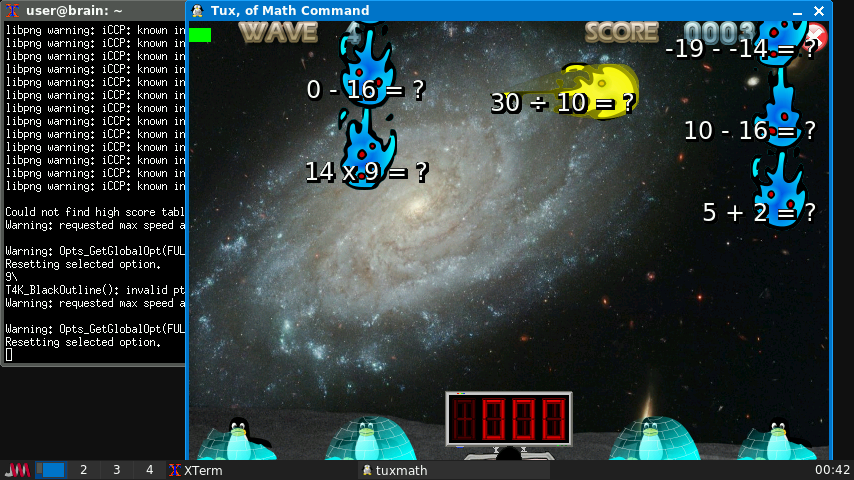
“Tux, of Math Command” (省略して “TuxMath”) は Linux のマスコットである Tux が主役の教育的アーケード ゲームです! 古典的なアーケードゲーム “Missile Command” に基づいており、Tux は都市を防衛します。しかし、このゲームでは、 数学の問題を解くことで都市を守らなければならないのです。
簡単な数字の入力から、正負の数の足し算、引き算、掛け算、割り算まで、様々な計算を学習できます。4歳から10歳くらいのお子様を対象としています。
Brainでは、最初CPU使用率がほぼ100%で張り付き、黒い画面が出てゲームがなかなか起動しませんが、時間が待つとタイトル画面が表示されます。気長に待ちましょう(5分くらい)。
ただ、一度タイトル画面が出てしまえば、あとはそれなりの速度で動いてくれます。
(Waveの間に少し待たされますが)
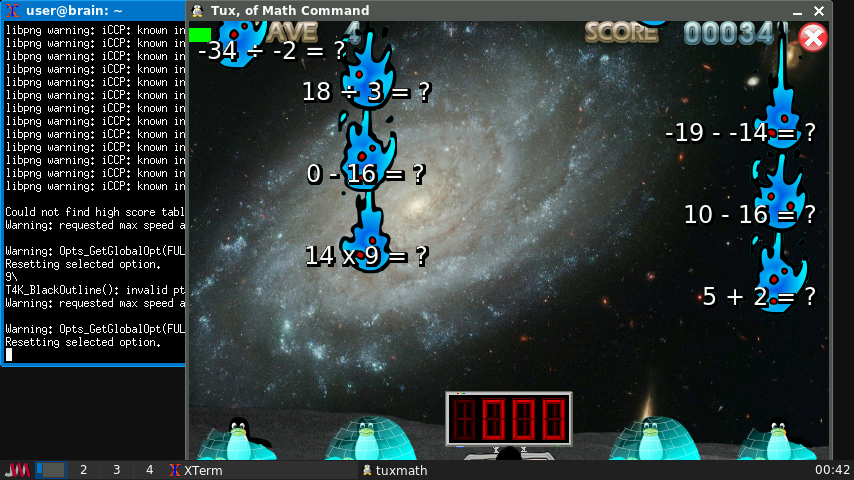
ゲームは上から計算式が降ってきますので、計算式が成り立つ数字をキー入力してEnterキーを押すと、それを破壊出来ます。
破壊出来なくて、下のドームがすべて破壊されてしまったらゲームオーバーです。
ボム的なミサイルもあり、今ある降ってくる計算式をすべて破壊する緊急避難的なアイテムもあります。
アーケードゲームを選ぶと、難易度が選択できます。
Hardにすると2桁の掛け算とかも出てくるので、安産だと意外と難しいです。
また、起動時のオプションで、動作を指定することができます。
–windowed ウィンドウモード
–nosound サウンドを無効化
–answersfirst 計算式の最初の数字を答えにします。 ? + num2 = num3
(通常はnum1 + num2= ?)
–answersmiddle 計算式の真ん中の数字を答えにします。 num1 + ? = num3
その他のオプション-hでヘルプを出すことが出来ます。
インストール:APT経由 ”sudo apt install tuxmath”
———-
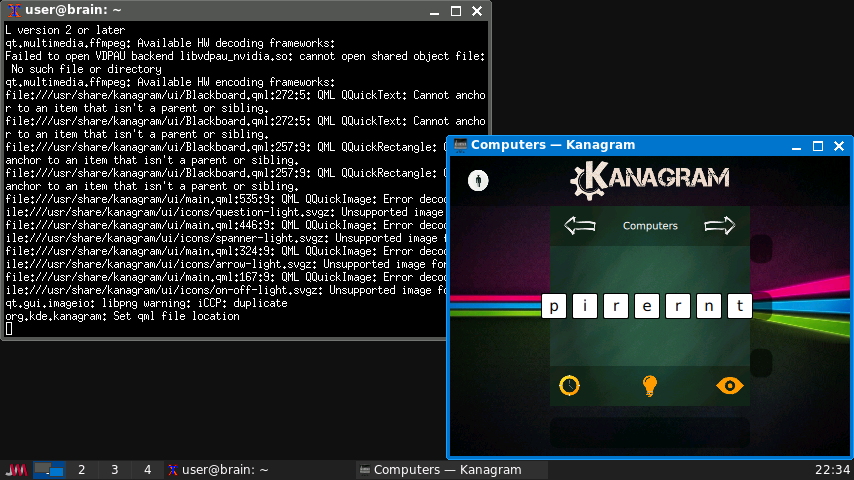
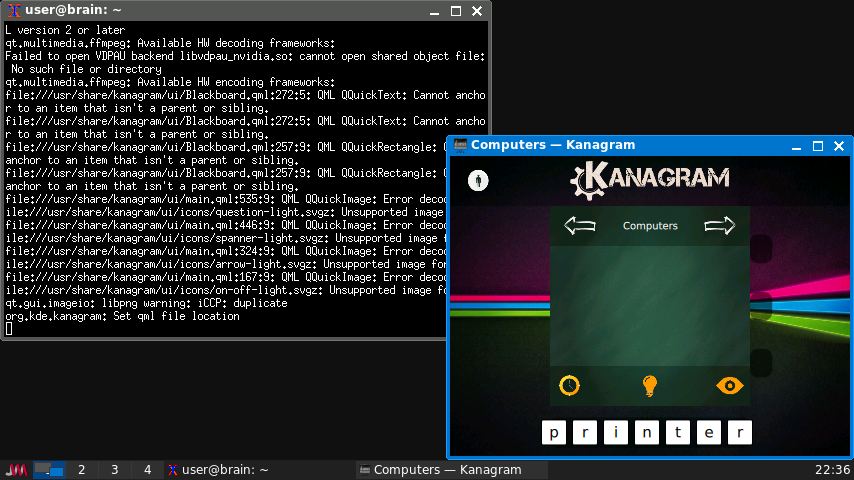
◎ tuxtype Tux が主人公の教育的タイピングゲーム
https://packages.debian.org/bullseye/tuxtype
起動:tuxtype
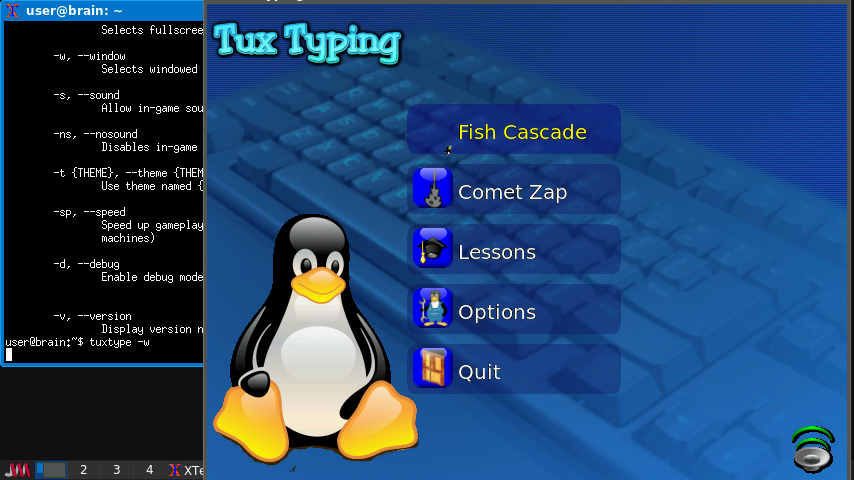
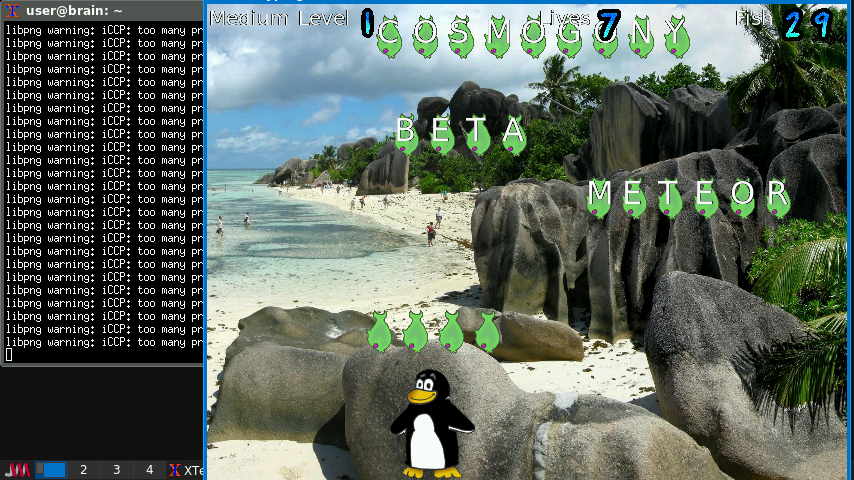
TuxTyping は Linux Penguin である Tux が主人公の教育的 タイピングゲームです。プレイヤは画面の上から落ちてくる魚を食べるように Tux を導きます。魚の上には文字が書かれており、プレイヤが対応するキー を押すと、Tux は魚を食べられるように位置を変更します。
ゲームは子供がタイピングを学ぶことを意図していますが、経験を積んだ タイピストが挑戦的と思えるような高い難易度のゲームも含まれます。
隕石落下パターンもあります。
ゲーム開始時に少し待ちますが、ゲームが始まれば、Lessons以外は普通に遊べます。
Fish Cascxade 空から魚が降ってきます
Comet ZIP 空から隕石が降ってきます
Lessons キーボードタイピングのレッスンです(これだけ反応が遅い)。
インストール:APT経由 ”sudo apt install tuxtype”
———-
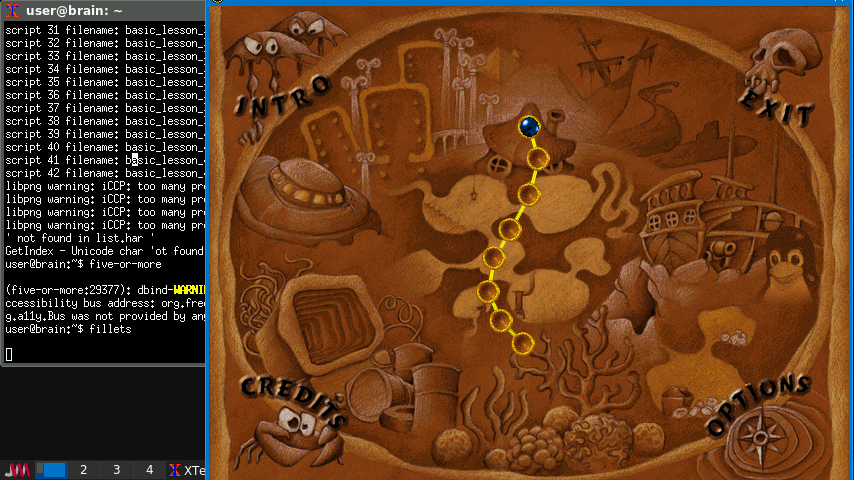
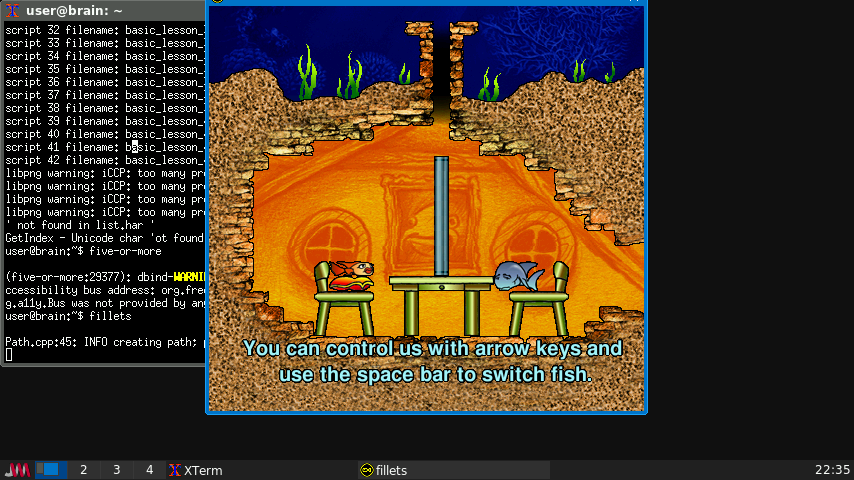
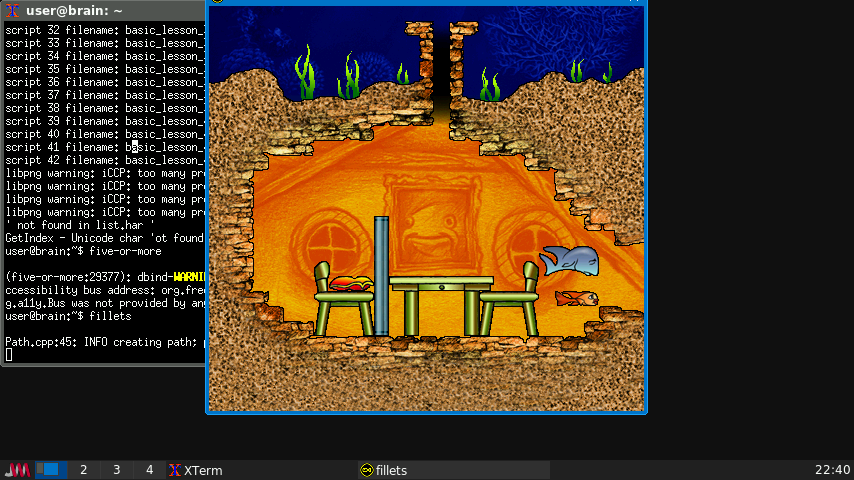
○ fillets 倉庫番スタイルの世界を救うウィットに富んだ魚についてのパズルゲーム
https://packages.debian.org/bullseye/fillets-ng
起動:fillets
Fish Fillets は厳密に言うとパズルゲームです。70 レベルのゲームの全ての目的は 常に同じです: 安全に脱出する道を探すことです。魚は周囲の状況や水面下の王国の 様々な住民についてウィットの効いた意見を述べたり、魚の努力についてコメント します。ゲーム全体は静かで快適な音楽が流れる中で進行します。
●海をモチーフにした倉庫番形式のパズルゲーム
障害物を押して通り道を作り、大小2匹の魚を出口まで動かします。
中央の青い点滅をクリックすると開始します。
直接クリックするかスペースキーを押して魚を切り替え、↑↓←→キーで動かします。
大きい魚は[w][s][a][d]キー、小さい魚は[i][k][j][l]キーでも上下左右に動かせます。
【操作】 [Esc]:終了 [Back space]:再スタート [-]:Undo [F1]:キー説明
オプションでいろいろな言語が選択できます。
英・チェコ・仏・独・瑞・伊・波・西・蘭・勃・典・スロベニア・伯・露・エスペラント語
もちろん日本語はありません。
英語の文章がたくさん出てきますが、読まなくてもなんとかなります。
2匹の魚の大きさの違うことを利用して、うまく先に進んでいきます。
キャラによって動かせるものの変わるようです。
Brainの場合、画面が解像度が狭いので、もしかしたら画面全部が見偉くて進めなくなる場面があるかもしれません。2面が少し怪しいですがウィンドウを移動知れば何とかなりました。。3面も見た感じ行けそうです。4面以降は確認していません。
(本来、縦:480<525が必要です)
BS リスタート
F1 ヘルプ表示
F2 セーブ
F3 ロード
インストール:APT経由 ”sudo apt install fillets-ng”
———-
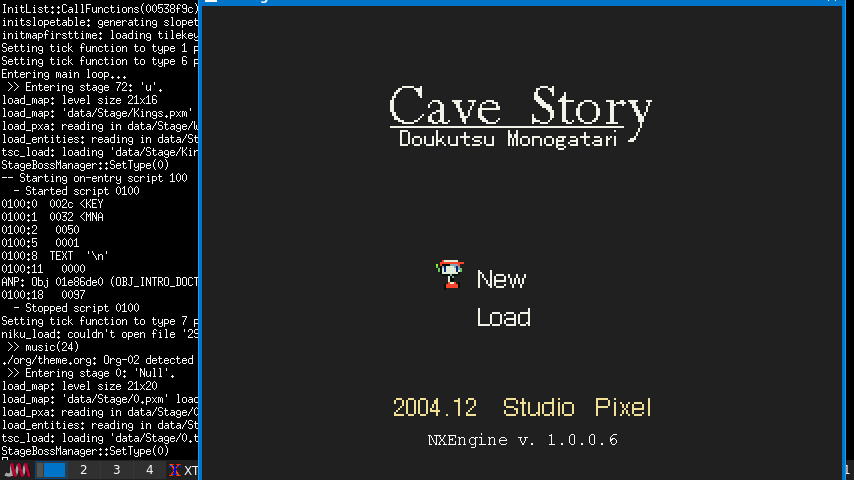
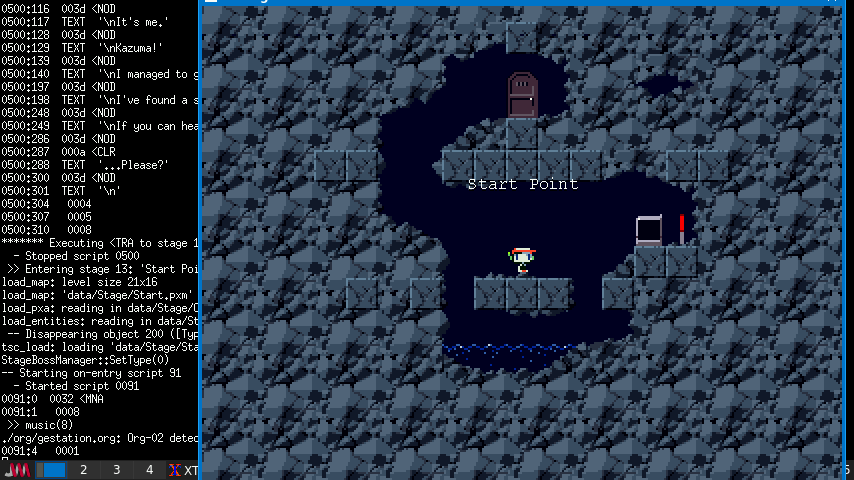
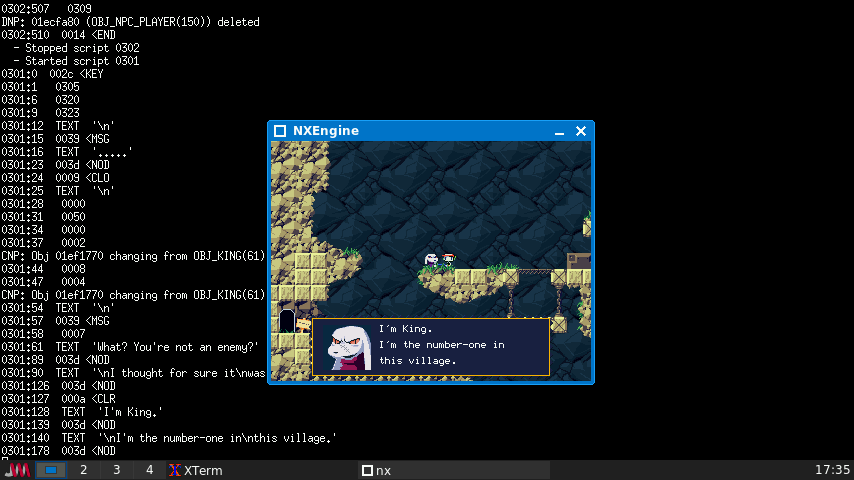
◎ CaveStory 洞窟物語 フリーのPCアクションゲーム
https://www.cavestory.org/download/cave-story.php
https://nxengine.sourceforge.io
起動:cd cavestory\nx ; ./nx
洞窟物語とは、開発室Pixelによって製作されたフリーのPCアクションゲームです。
現在では商用ゲームとしても販売されています。
オリジナルは2004年末の発表ですが、以下の要素により主にレトロアクションゲームファンの間でヒットしたことで知られています。
- 完全ドット絵
- 独自音源によるBGM
- 自分語りをしない主人公
- 想像の余地をあえて残すストーリー
- ゲームバランスがきわめて良く、完成度が高い
初出はWindows版で日本語表示ですが、上記のソースは、Windows版の英語翻訳版のデータ利用前提になっているため、すべてのメッセージが英語になります。
(データを日本語版オリジナルにしてしまうと、一部は日本語になりますがメッセージなどの大部分は文字化けします)
Brainでの実行では、画面サイズ標準の640×480だと少し遅いので、
320×240に変更することをお勧めします(方法はインストール手順に記載)
また、サウンドを鳴らせられる場合は,
pulseaudioを有効にすること推奨です(pulseaudio –start)
MUSICを有効にしていると、全体的に音がノイズまみれになるので無効化したほうがいいでしょう。(効果音はOK)
操作:(デフォルト)
←→ 左右移動
↑ メニューでの上移動
↓ 入口に入る、操作する等、メニューでの下移動
Z ジャンプ / 選択
X 攻撃
A 前の武器
S 後の武器
Q インベントリ表示
W マップ表示
インストール:ソースからインストール
インストール手順詳細(クリックで表示)
インストール手順詳細(クリックで表示)
$ mkdir cavestory
$ cd cavestory
#ソースをダウンロードして転送
#https://nxengine.sourceforge.io
#Downloads v1.0.0.6 (2014-07-15):nx-src-1006.tar.bz2
#ゲームデータをダウンロードして転送
#https://www.cavestory.org/download/cave-story.php
#English translation by Aeon Genesis (Pre-patch):cavestoryen.zip
$ unzip cavestoryen.zip
$ tar xf nx-src-1006.tar.bz2
$ cd nx
$sudo apt-get install libsdl1.2-dev libsdl-mixer1.2-dev libsdl-image1.2-dev libsdl-ttf2.0-dev
#最適化設定
$ cp Makefile Makefile.org
$ sed -i ‘s/-g -O2/-O3 -march=native/g’ Makefile
#一部エラーになるので、ソースを修正します
$ vi player.cpp
725 | { LEFTKEY, RIGHTKEY, UPKEY, JUMPKEY, FIREKEY, -1 };
↓
725 | { LEFTKEY, RIGHTKEY, UPKEY, JUMPKEY, FIREKEY, (char)-1 };
$ make
$ ./nx
実行すると、English translation by Aeon Genesisの
「Doukutsu.exe」とDataフォルダをコピーする様指示されるので、ESCキーで抜けてコピーします。
$ cd ..
$ cp -r CaveStory/* nx/
$ cd nx
$ ./nx
#再度実行して、Enterキーを押すとデータコンバートが始まります。
#成功したら、Enterでゲームが始まります(初回のみ少し時間がかかります。)
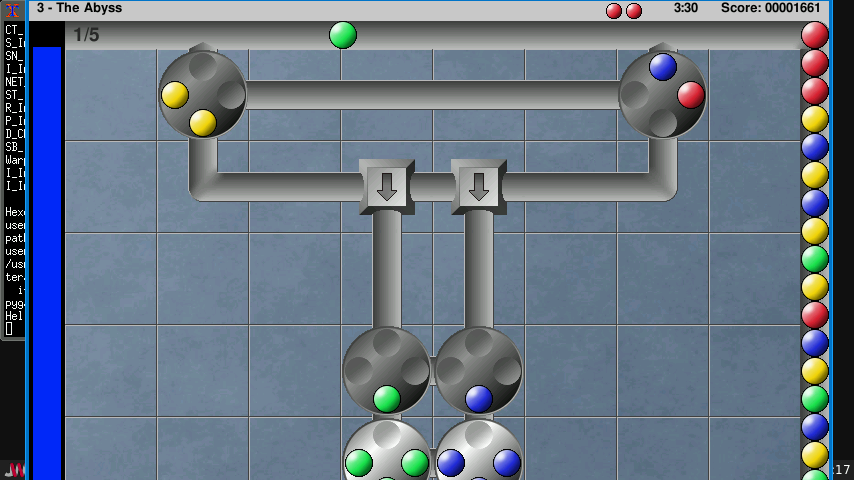
#ゲームイベントシーンの後に移動できるようになります。
#ただし、この状態では少し遅いので、コンフィグを設定します。
#ESC -> F3 でコンフィグ変更ができます。
・Resolution: 640×480 -> 320×240
・Music: On -> Off (SoundDeviceを付けていると、音がとぎれとぎれになってしまうため)
その他、ここからキー設定なども出来ます。
———-
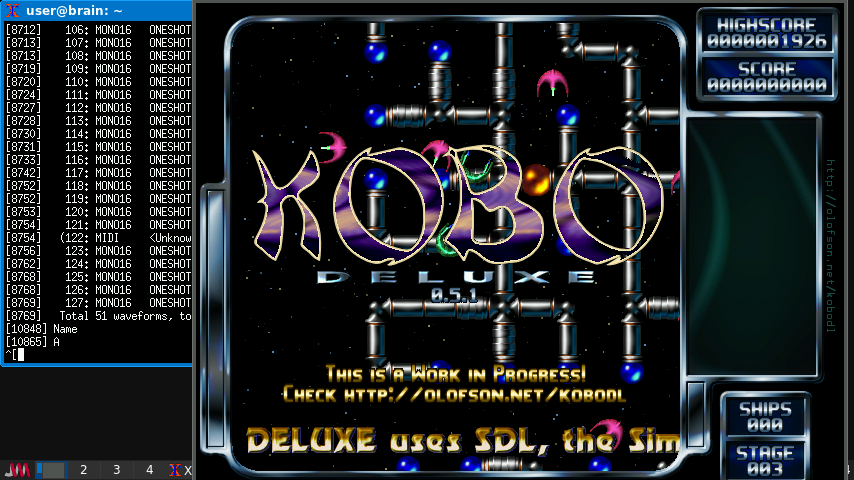
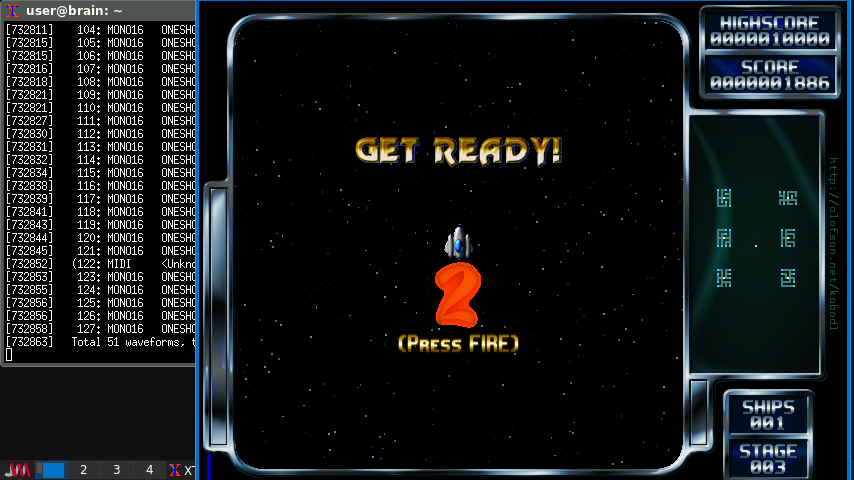
◎ Kobo Deluxe ボスコニアン風 宇宙戦闘ゲーム
https://packages.debian.org/bullseye/kobodeluxe
起動:kobodl (2回目以降)
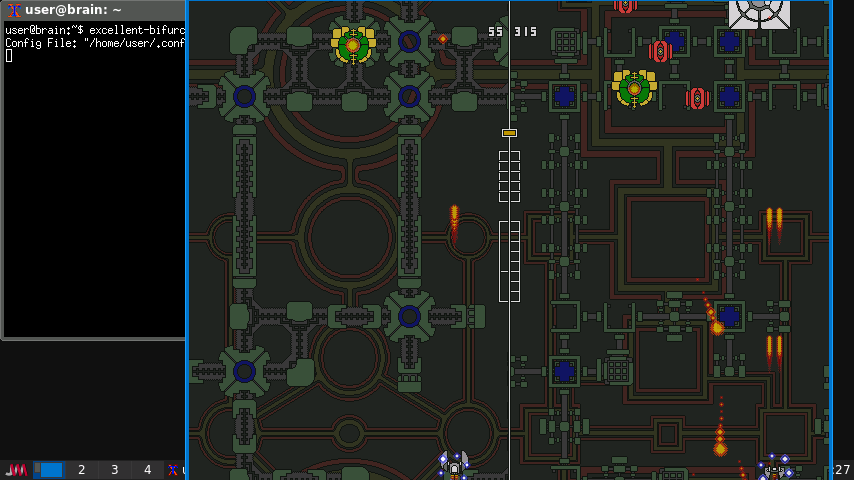
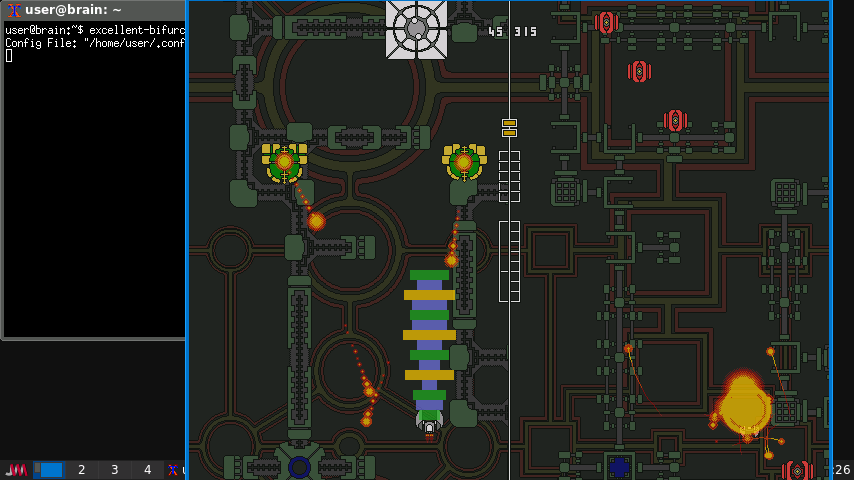
Kobo Deluxe は第三者視点の二次元スクロールシューティングゲームであり、シン プルかつ応答の速い制御システムが特徴です。そこでは、あなたに砲撃を加え、追跡 し、取り囲んで猛烈な射撃を行い、さらにはあなたの宇宙船に向けて他の宇宙船を 体当りさせようとさえする膨大な数の敵船に立ち向かいつつ、迷路の形をした基地を 破壊しなければなりません。難易度が滑らかに上昇するアクションがたくさんつ まった 50 種類のレベルや、うまく立ち向かうために様々な戦略が必要となるさま ざまな敵の組み合わせがあります。古典的なアーケードスタイルの楽しみが満載です。
★上下左右スクロール型シューティングゲーム
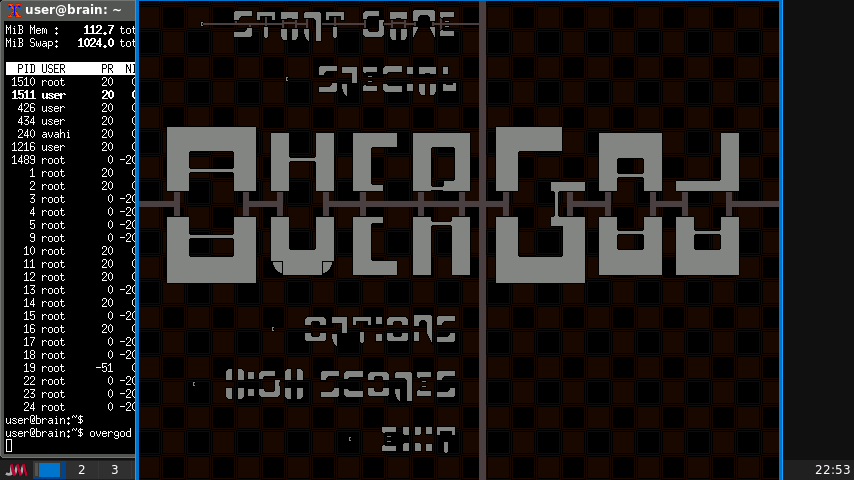
スペースキーを押してメニューを表示します。
名前を入力してエンターキーを押し、「Ok」で先に進みます。これは初回だけです。
「Start Game!」でエンターキーを押して次に進みます。
取りあえずレベルはそのまま「Classic」で、エンターキーを押して開始します。
(Classicは1発アウト、それ以外はシールド制のようです(敵との接触は1発ポイですが)。)
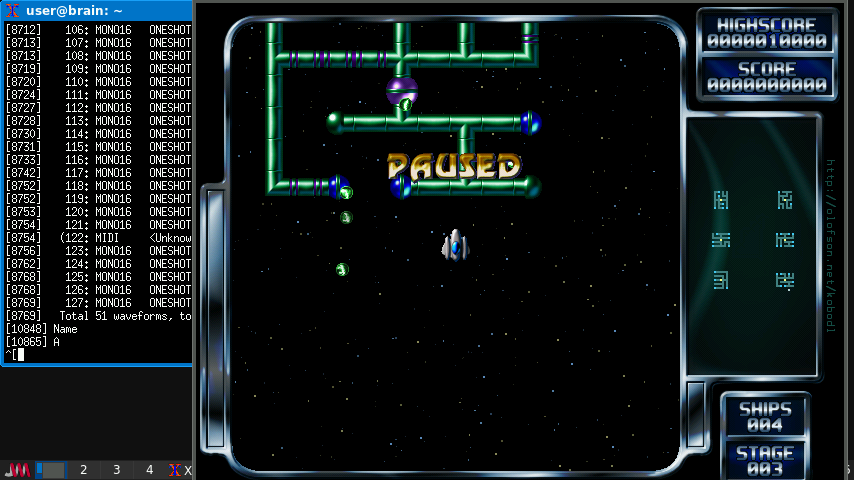
【基本】[space]:一時停止/再開 [Esc]:メニュー表示
【操作】[←]:左へ [→]:右へ [↑]:上へ [↓]:下へ [Ctrl]/[Shift]:撃つ
パイプに付いている球体を攻撃します。 全部消せば次に進みます。
右側に少し広域のマップが表示されています。自分の位置が確認できます。
5秒間のカウントダウンの途中でも、キーを押して再開できます。
Brainでもゲーム中はかなりスムーズに動きます。
ボスコニアンのように4方向スクロールしつつ、敵の基地を破壊していきます。
迷路の形をした基地は、小さい青●を攻撃して、少しずつ崩していくか、
大きい紫●のコアを破壊すれば破壊出来ます。
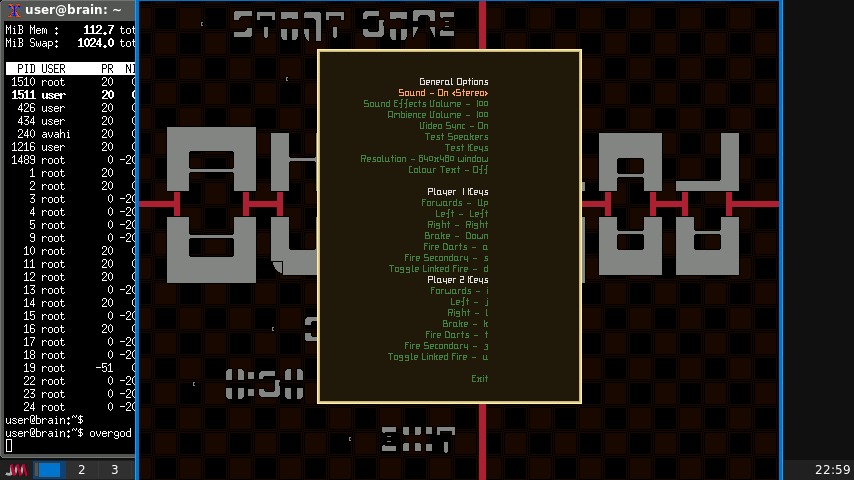
インストール:APT経由 ”sudo apt install kobodeluxe”
その後、ターミナルで次のコマンドをいくつか実行する必要があります:
sudo chmod -R a+w /usr/share/kobo-deluxe/
次に、次のコマンド ラインから kobodl を起動します:
$ kobodl -cached_sounds -noalpha
初回のロードにはおそらく 5 分ほどかかります。
これは、-cached_sounds オプションを追加している限り、ゲームをプレイするたびに
オーディオ ファイルを解析する必要がないように、オーディオ (実際には実行時に解析
される一連のコードです!) を生のファイルに処理しているためです。
-noalpha オプションは、メニューフォントが全く表示されない問題を修正します。
おそらく SDL/アルファブレンディングに問題があると思われますが、
-noalpha で修正されます。
次回以降は、kobodl ですぐにゲームできます。
———-
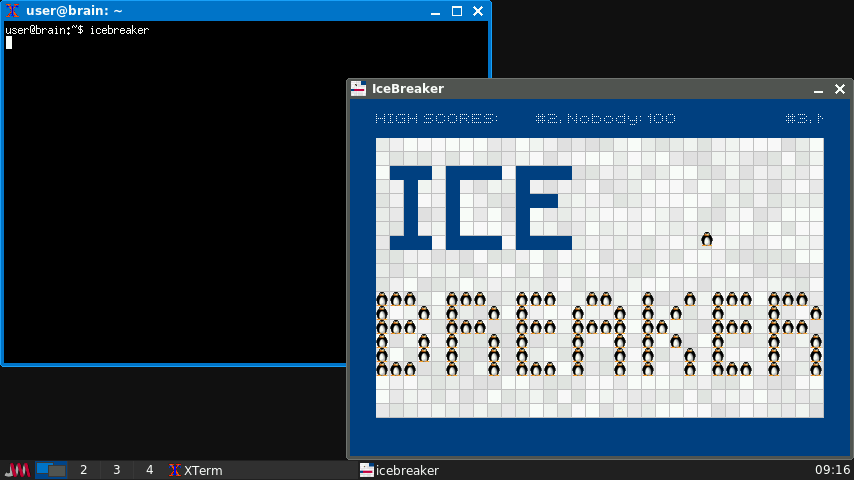
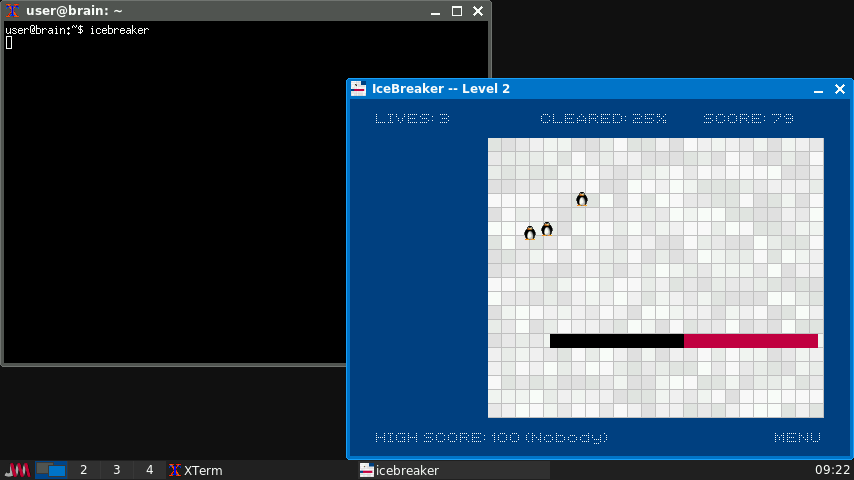
○ icebreaker ペンギンを避けて氷山を崩せ
https://packages.debian.org/bullseye/icebreaker
起動:icebreaker
ええっと、南極の氷山には何千匹ものペンギンがいます。 ユーザはペンギンを捕まえてフィンランドに連れていく任務に選ばれました。 フィンランドでは、ペンギンは世界支配のための秘密の計画に必須です。
ペンギンを捕まえるため、氷山を小さなかけらに崩す必要があります。 (明確な理由は分かりませんが、ペンギンは水を恐れます。ええと、それで、 “マトリックス” はもっとプロット上に穴はありましたが、それでも ヒットしました。) 特別なハイテク GNU ツールを使って氷山を数列溶かせば、氷山を崩せます。
氷山の 80% 以上を溶かせば、残りのかけらは小さくなり、運ぶのにちょうど良くなります。 もちろん、どうにかしてそれ以上溶かせれば、郵便料金を節約できますので、ギークの 評判 (別名 “スコア”) を指数関数的に増加させられます。
●跳ね回るペンギンを囲い込むゲーム
壁を作って、ペンギンのいなくなった領域を消していきます。
クリックして開始します。
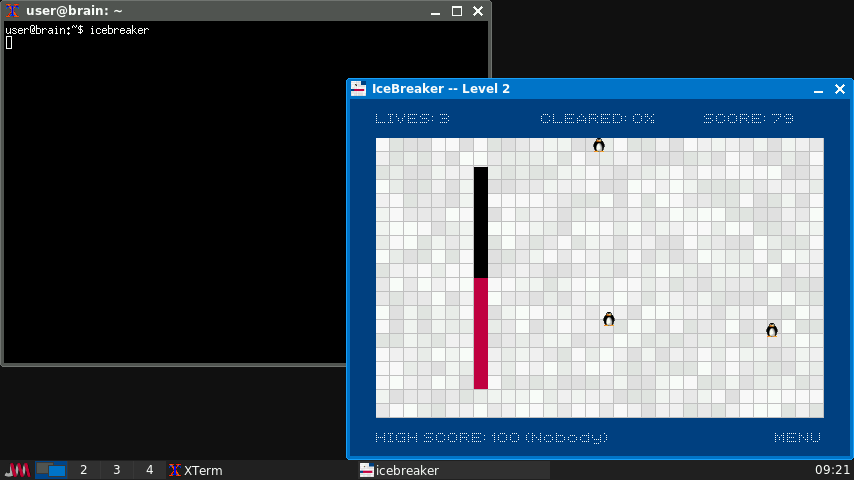
マウスの左ボタンを押すと、そこから上下または左右に壁が伸びます。
右ボタンを押して壁を作る方向を切り替えます。
壁の完成前にペンギンがぶつかると「LIVES」が減り、その位置で壁の伸びが止まります。
「LIVES」が0になるとゲームオーバーです。
壁が完成したらペンギンのいない領域が消えます。80%以上消すとクリアです。
次に進むとペンギンが1匹増えます。どんどん増えていきます。
ペンギンをクリックすると「アウチ」と言います。
インストール:APT経由 ”sudo apt install icebreaker”
———-
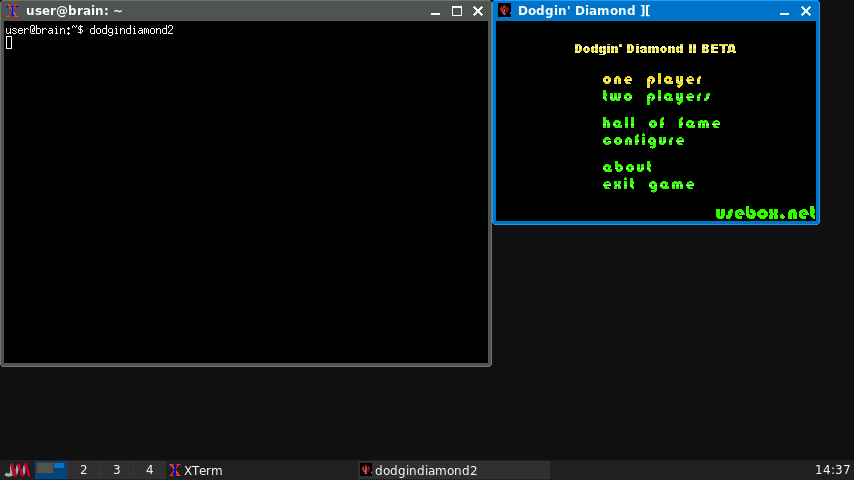
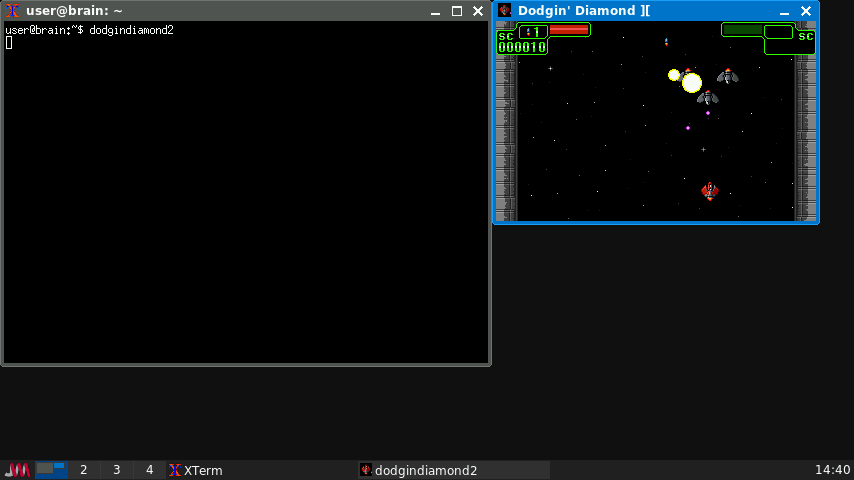
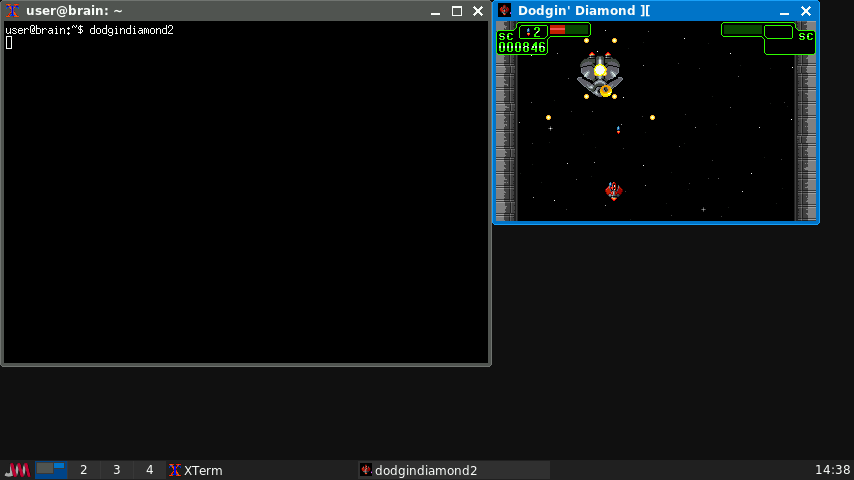
◎ Dodgin’Diamond 2 1 人または 2 人用の軽快なアーケード式シューティングゲーム
https://packages.debian.org/bullseye/dodgindiamond2
起動:dodgindiamond2
低い解像度のグラフィック、上下スクロール式のアクション、エネルギーベー スのゲームプレイ、複数のパワーレベルを持った異なる兵器などを備えた、古 典的アーケードゲームであることを目指しています。
●1人または2人用の軽快なアーケード式射撃ゲーム
低解像度グラフィック・上下スクロール式アクション・エネルギーベースのゲームプレイ。
複数のパワーレベルを持つ 異なる兵器を備えた古典的アーケードゲームを目指して作られました。
↑↓キーで「one player」を選び、エンターキーを押して開始します。
【操作】 [←]:左へ [→]:右へ [↑]:上へ [↓]:下へ [m]:撃つ
画面が少し小さいですが、ちゃんとした縦スクロールゲームです。
パワーアップアイテムを取ることで。時期の弾もパワーアップしていきます。
シールド制なので、敵の弾に当たっても何発かが耐えられます。
Configure から、操作デバイス変更、Soundquelity変更/フルクリーン・Windowモードの変更等ができます。
インストール:APT経由 ”sudo apt install dodgindiamond2”
————
◎ Ketm 古典的な 2D スクロール式シューティングゲーム
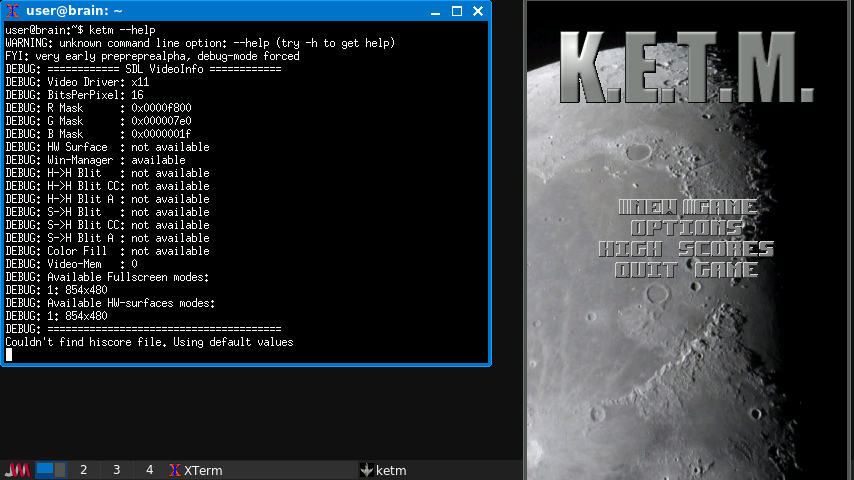
https://packages.debian.org/bullseye/ketm
起動:ketm
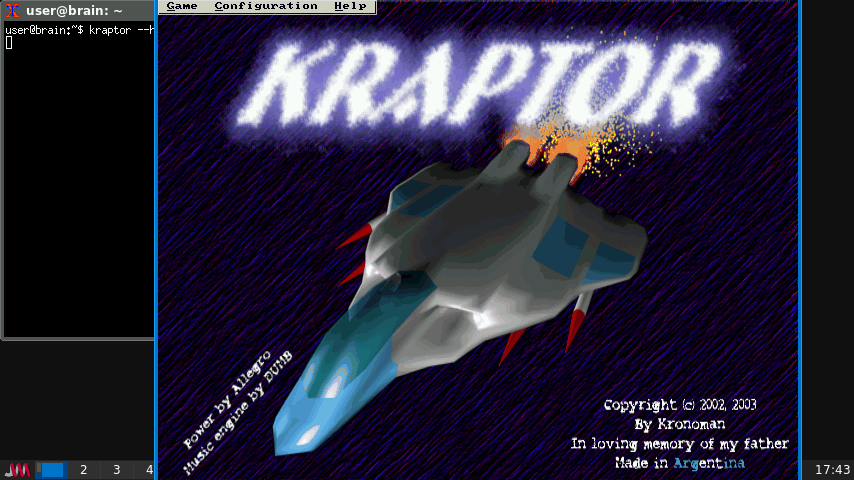
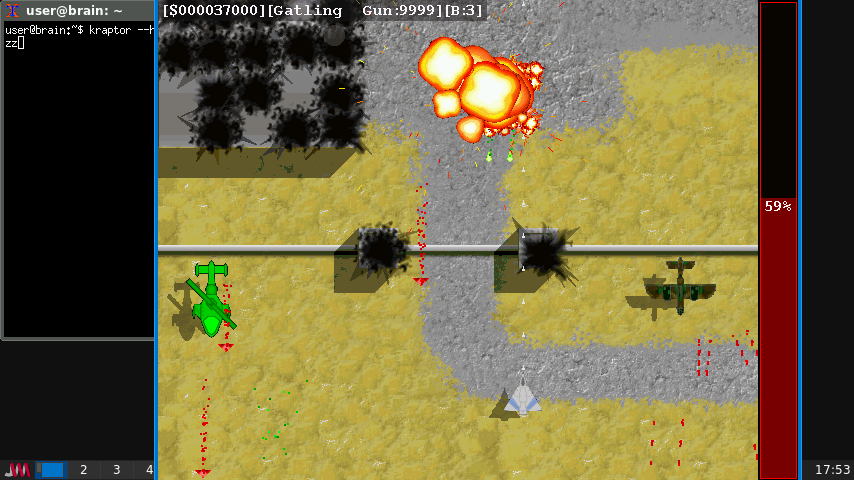
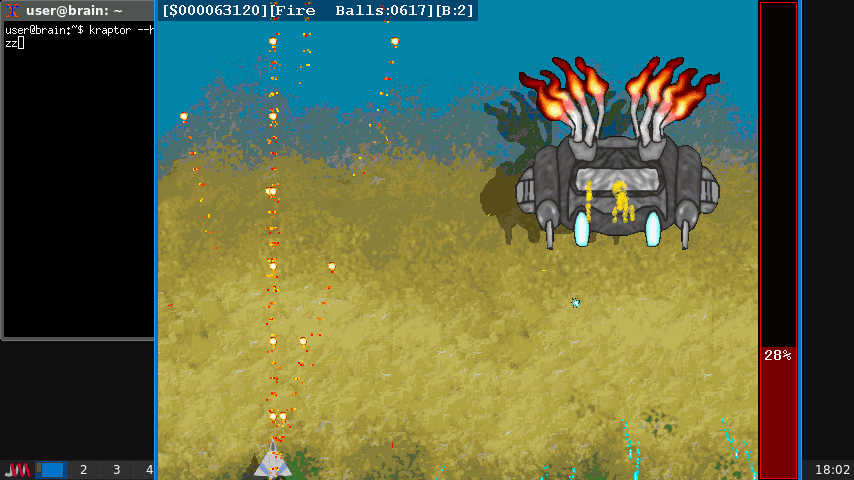
Ketm はハイカラーで高解像度の古典的なゲームで、Raptor や Tyrian, Galagaの類 似品です。あなたは宇宙パイロットで、秘密の試作宇宙船を操ります。一定の間隔 で、悪玉たちの攻撃を受けます。宙域から連中を一掃する (つまり、動くものは皆 殺してしまう – Kill Everything That Moves) のが任務です。途中でいくつかの武 器を獲得して、宇宙船を改良していくようにしてください。
●古典的な2Dスクロール式シューティングゲーム
秘密の試作宇宙船を操って敵を一掃します。
途中で武器を獲得して宇宙船を改良していきます。
エスケープーキーを押してメニューを表示します。
↑↓キーで「NEW GAME」を選び、スペースキーを押して開始します。
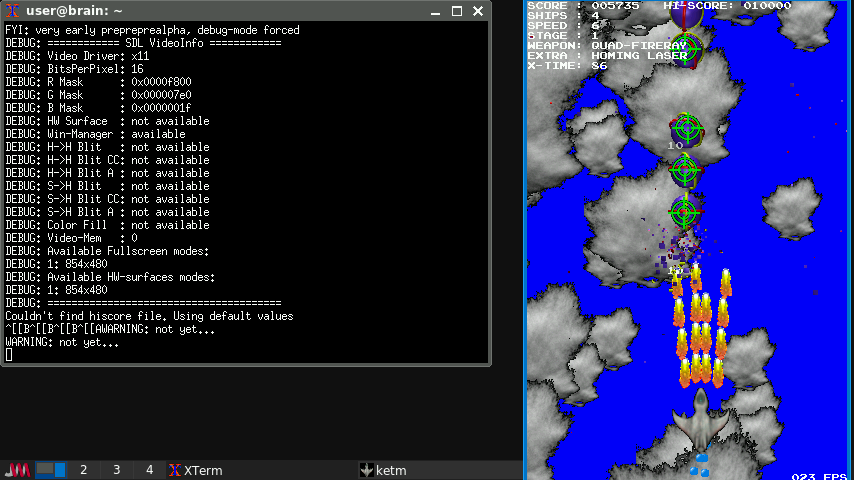
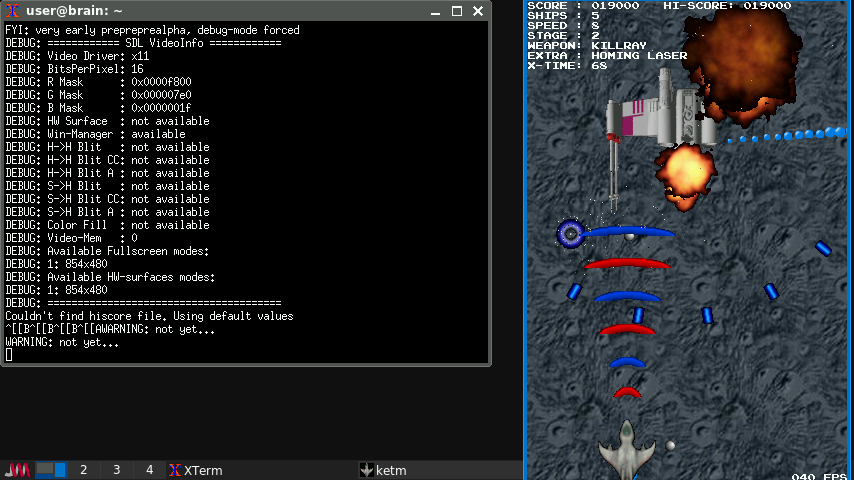
インベーダーゲームのようにひたすら撃って、ボスを倒したら次のレベルに進みます。
いろいろなアイテムが流れてきます。それを取るとパワーが上がったりします。
スコアの名前入力は、最下行右端の「OK」を選んでスペースキーを押せば終わります。
【操作】 [←]:左へ [→]:右へ [↑]:上へ [↓]:下へ [space]:撃つ [Esc]:一時停止
Brainでも非常に快適にプレイできます。
パワーアップアイテムで武装が変わるので、好みの武装を探しましょう。
インストール:APT経由 ”sudo apt install ketm”
———–
◎ Sopwith 1980年代の第一次世界大戦の横スクロールドッグファイティングゲームの移植
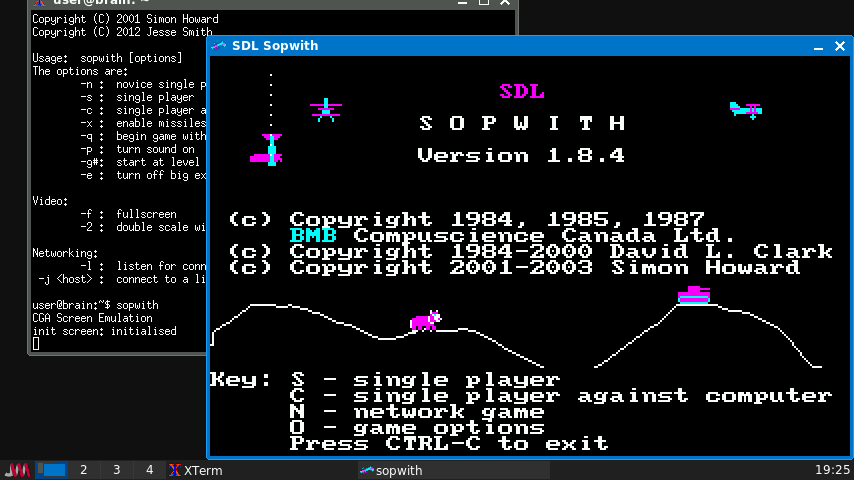
https://packages.debian.org/bullseye/sopwith
起動:sopwith
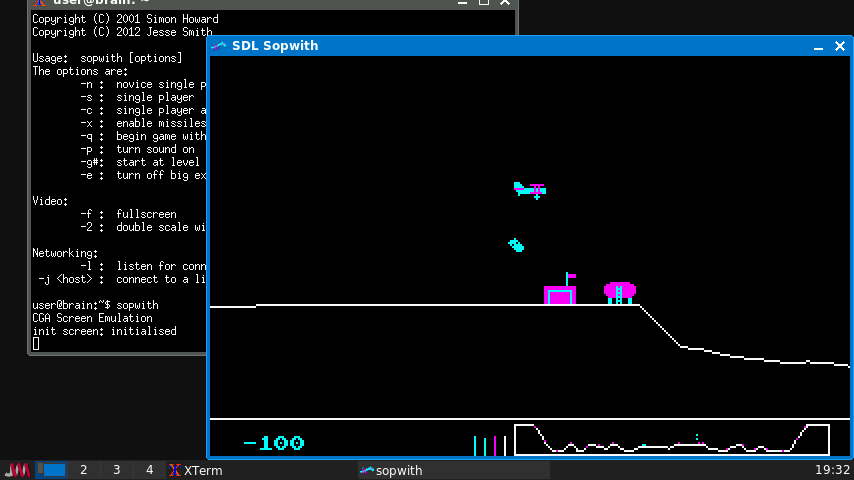
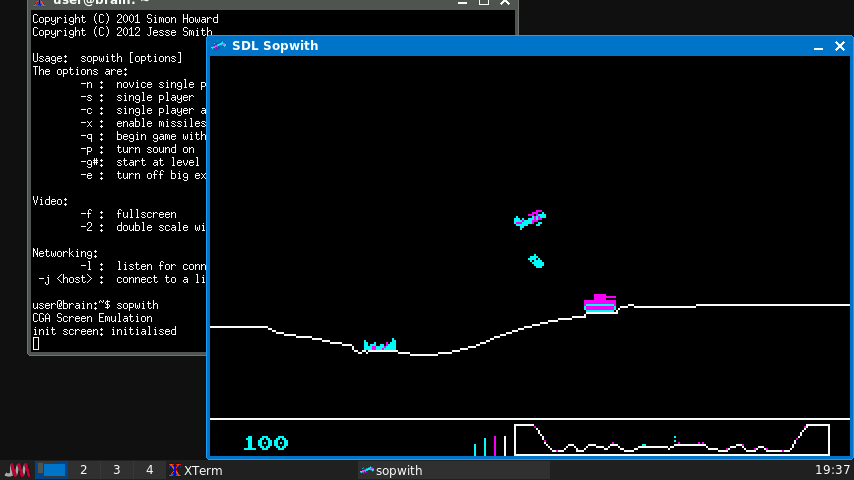
これは、BMB Compuscience CanadaのDavid L. Clark氏が開発した1980年代のゲームのアップデート版です。SDLツールキットを使用して*nix環境で動作するように調整されています。粗いグラフィック、お粗末なAI、そしてひどいサウンドがあなたを待っています。ゲームプレイはシンプルで中毒性があり、楽しいです。「横スクロール」ゲームで、複葉機を操縦して静止したフィールドを横切り、敵の陣地や飛行機を破壊します。
●横スクロールのドッグファイトゲーム
敵の野営地と飛行機を破壊します。
自動操縦にすると最初の場所に戻ります。
[s]キーを押して次に進み、[n]キーを押して開始します。
【操作?】[h]:自動操縦 [v]:フレア発射 [m]:ミサイル発射 [Ctrl]+[c]:終了
【操作】[,]:上へ [/]:下へ [.]:宙返り [z]:遅く [x]:速く [space]:撃つ [b]:爆弾投下
Brainでも十分な速度でプレイしますが、操縦は癖があり結構難しいです。
自機が地形や拠点や弾だけでなく、自分の爆弾や爆風に当たっても墜落します。
メニューから[c]キーで敵の複葉機(コンピュータ操作)との対戦も可能ですが、
さらに難しくなります。
インストール:APT経由 ”sudo apt install sopwith”
———–
◎ hex-a-hop 六角形のタイルをベースにしたパズルゲーム
https://packages.debian.org/bullseye/hex-a-hop
起動:hex-a-hop
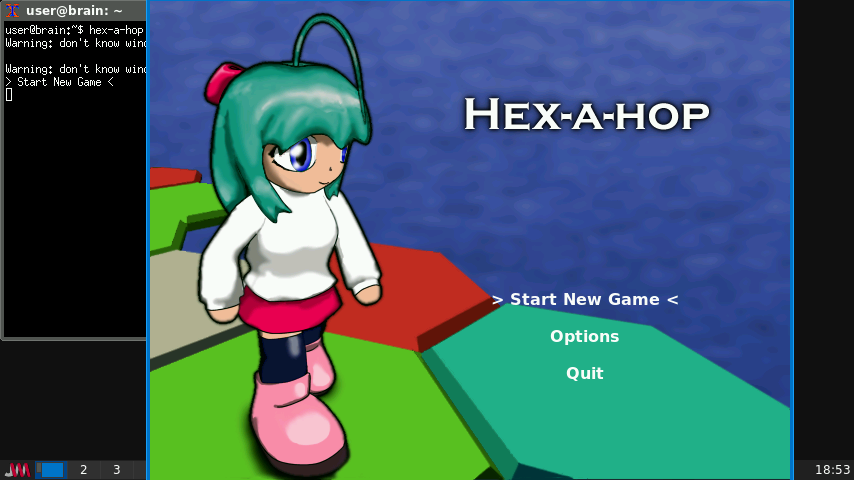
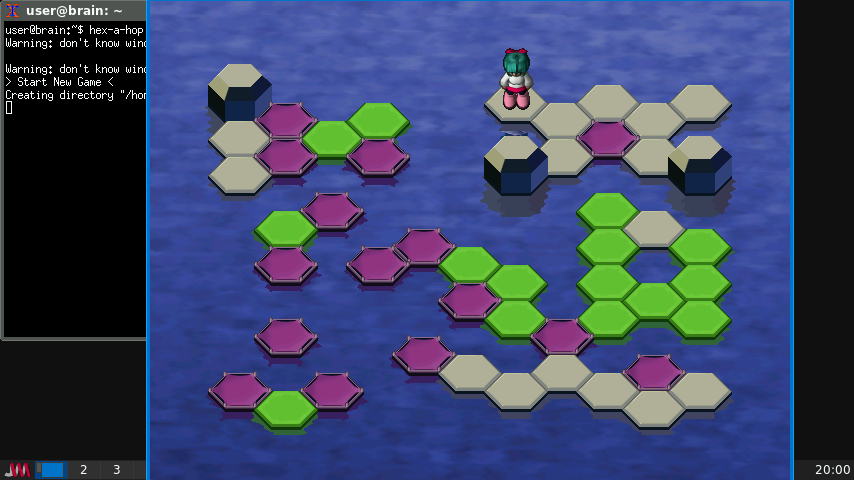
Hex-a-hopは、女の子が六角形のマップにある緑のタイルをすべて壊し、罠にかからないように安全なタイルに足を踏み入れる、素晴らしいパズルゲームです。ゲームを進めていくと、より多くの種類のタイルが登場し、レベルが進むにつれて難易度が上がり、面白くなります。間違えた場合は、無限のやり直し機能を使ってやり直すことができます。各レベルを好きなだけ時間をかけてクリアできます。
●かわいい女の子がタイルを壊すゲーム
最初に操作と目標の説明があります。日本語です。とても快適です。
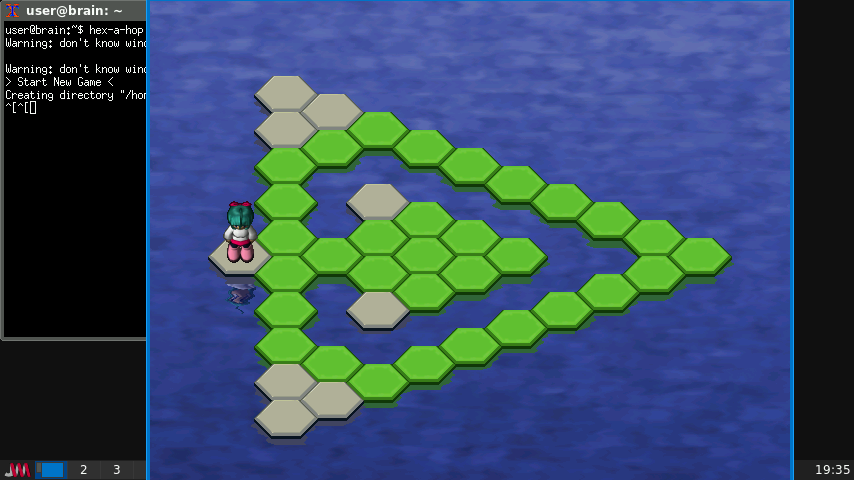
女の子が隣のタイルに飛び移ります。緑のタイルに乗るとひびが入ります。
ひびの入ったタイルから隣に移動すると、乗っていたタイルは壊れてしまいます。
緑のタイルを全て壊せばクリアです。
また乗った2マス先にジャンプする紫のパネル(ジャンプ台?)なんてのも出てきました。
他にもいろんなパネルが出てくるようです。
クリックするか、[q]・[w]・[e]・[a]・[s]・[d]の6つのキーを押すと移動できます。
バックスペースキーか、[u]キーを押すと1つ前の状態に戻ります。
エスケープキーまたはマウスのミドルボタンを押すとメニューが表示されます。
見かけは3D描画のようですが、Brain上でも問題なくプレイ可能です。
タッチ操作も出来ますので、Brain単体でもプレイOKです。
サウンドが有効の場合、Musicを有効にしていると動作が重くなりますが遊べないほどではありません。気になる方は、効果音までにしておいたほうがいいでしょう。
なお、7ステージグリアして、7%コンプリートと表示されていますので、
もしかしたら100面くらいあるのかも知れません。
インストール:APT経由 ”sudo apt install hex-a-hop”
———-
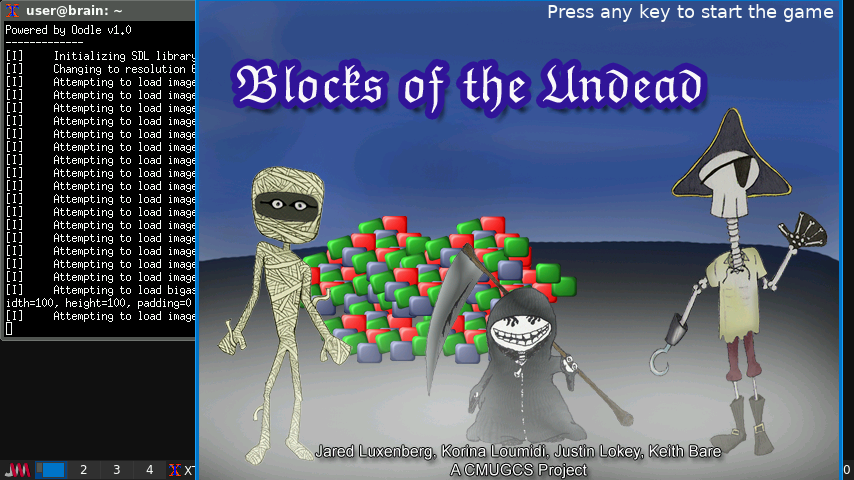
◎ blocks-of-the-undead おどろおどろしい雰囲気の Tetris Attack 風パズルゲーム
https://packages.debian.org/bullseye/blocks-of-the-undead
起動:blocks-of-the-undead
Blocks of the Undead はパズルゲームです。
ステージからブロックをスワップしながら全て除去しなければなりません。
●同じ色をまとめて消すゲーム
横に並んだ2つのブロックを入れ替えます。
縦または横に同じ色を3つ以上並べれば消えます。
ブロックが全部消えればクリアです。全て消せない状態になったらゲームオーバーです。
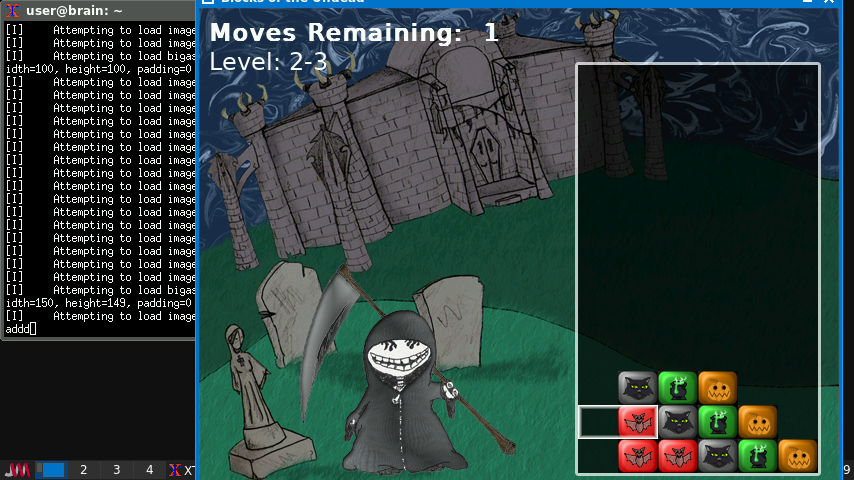
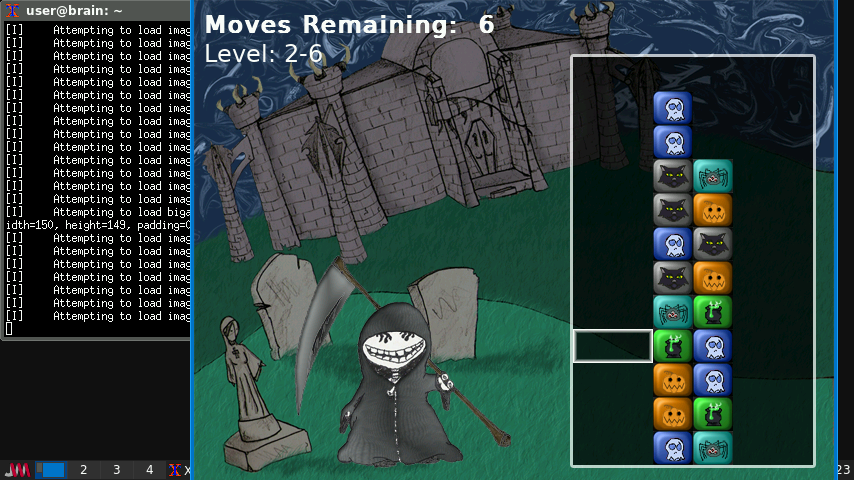
マウスを動かしてカーソルの位置を決め、 クリックするかスペースキーを押して入れ替えます。
エスケープキーを押すと終了します。
ブロックが上から落ちてくる場合は、急がないと手遅れになることがあります。
操作はマウスで移動&左クリックで交換 ですが、 WASD&Spaceでも操作できます。
[R]:でリトライできるようです。
パネルを交換出る回数には制限があり、制限以内にすべてのブロックを消す必要があります。
2-5まではすんなりクリアできるのですが、2-6が難しくクリアできてません。
後1ステップあればクリアできるところまでは行ったのですが、そのあと1ステップが遠い・・
インストール:APT経由 ”sudo apt install blocks-of-the-undead”
———-
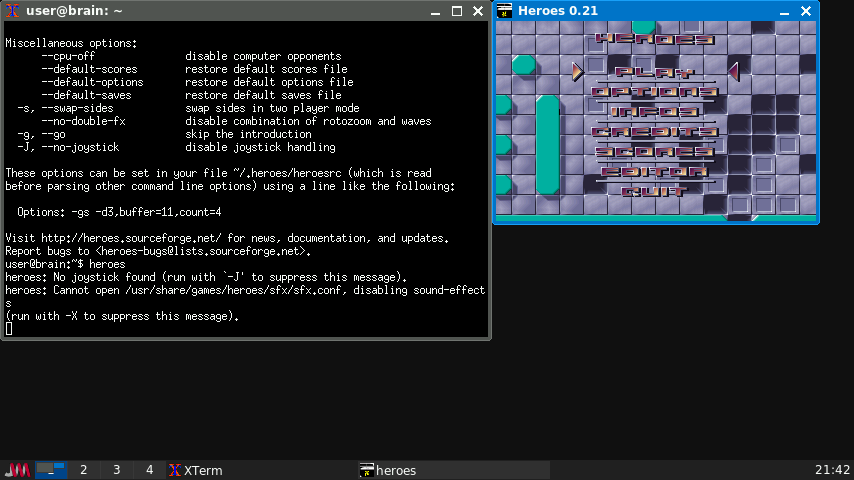
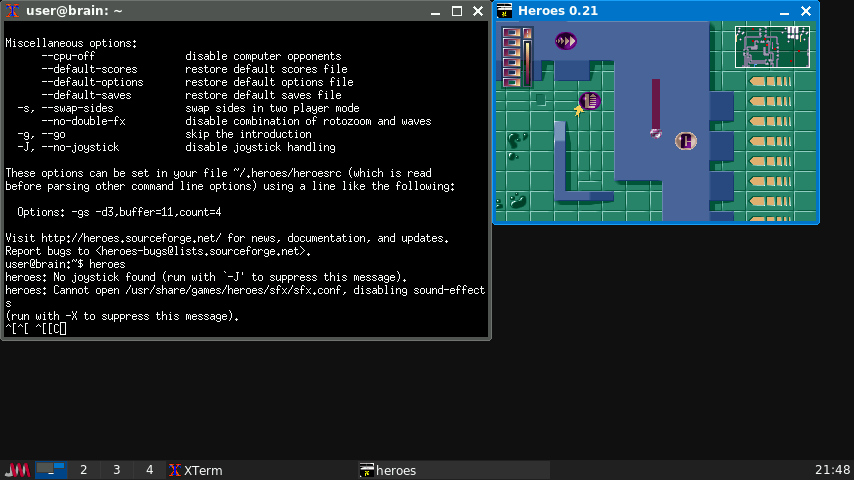
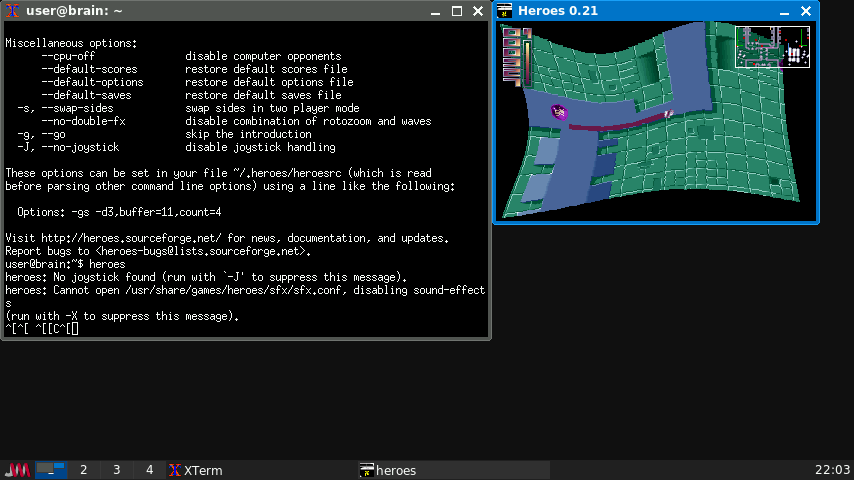
○ heroes パワーアップアイテムを集めつつ敵の軌跡を避けるゲーム
https://packages.debian.org/bullseye/heroes
起動:heroes
Heroes は、かつての “Tron” や “Nibbles” といったゲームに似ていますが、 グラフィカル面での多くの改善や新規ゲーム機能が含まれています。小さな 乗り物を操って疾走し、障害物や敵の軌跡、あるいは自分自身の軌跡を避けながら、 パワーアップアイテムを集めなくてはなりません。
数種類のプレイスタイルがあります。”全ボーナスを獲得せよ”、デスマッチ、 “歩行者を吹っ飛ばせ” などです。すべてのゲームスタイルで 1 人用モードあるいは 2 人 (分割スクリーン) 用モードでのプレイが可能です。
効果音が欲しい場合は heroes-sound-effects パッケージを インストールしてください。ゲーム中の BGM が欲しい場合は heroes-sound-tracks パッケージをインストールしてください。
●障害物を避けつつアイテムを集めるゲーム
小さな乗り物を操って、障害物を避けながらパワーアップアイテムを集めます。
数種類のプレイスタイルがあり、それぞれに1人用と分割画面の2人用があります。
↑↓←→で方向を変えます。
右のシフトキーを押している間は止まります。
右のコントロールキーを押している間は速く移動します。
コンピュータ操作を含むマルチプレイ可能なスネークゲームのようなゲームです。
自機については、障害物や自分や敵の後ろの部分に当たったりして、
移動できない状況になったり、爆発に巻き込まれたりすると自機がやらるようです。
画面サイズが小さいのですが、その分非常に高速に動作します。
なにかのアイテムの効果だと思いますが、ラスタースクロール的な演出も見られました。
Optionで、キーバインドなども変更できます。
ただ、ルールがいろいろあるようなのですがすべて把握できていません。
インストール:APT経由 ”sudo apt install heroes”
“sudo apt install heroes-sound-effects heroes-sound-tracks”
———–
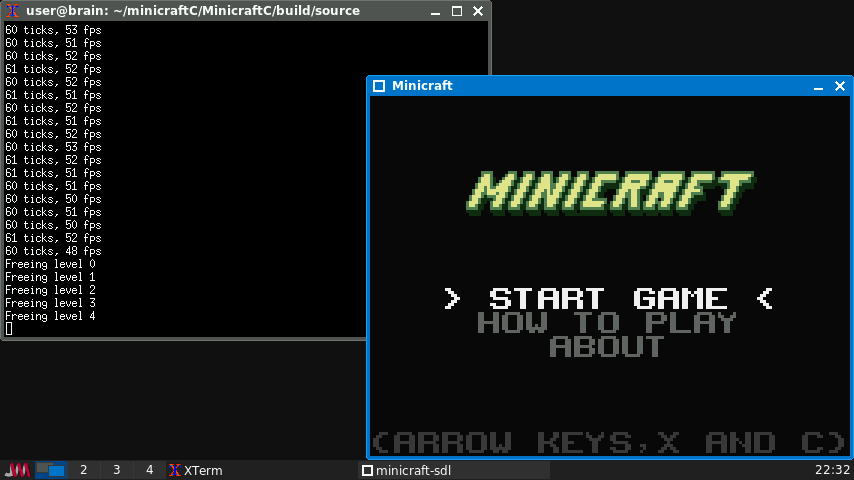
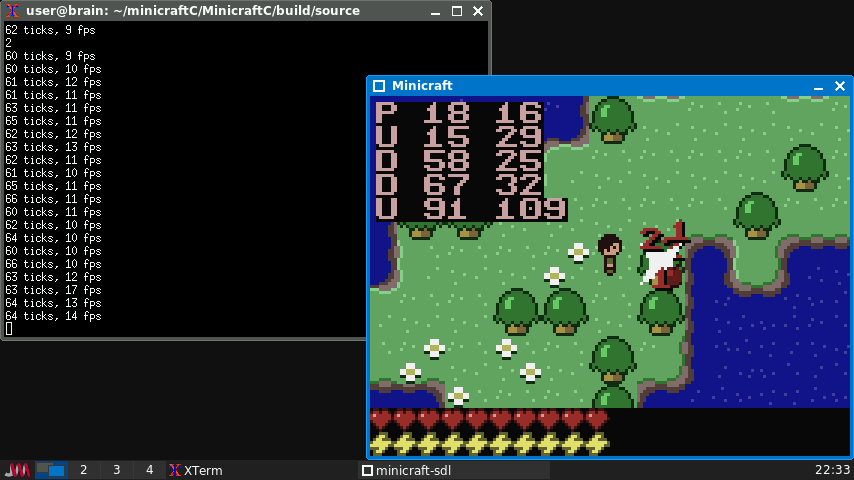
◎ MinicraftC mincraftの要素のある2D版アクションゲーム

GitHub – GameHerobrine/MinicraftC: Port of Minicraft to C · GitHub
起動:cd minicraftC/minicraftC ; ./minicraft-sdl
詳細は不明ですが、2D版のmincraftのようなアクションゲームです。
素材を集めて、武器や装備などをクラフトしていきます。
例えば、木を攻撃すると、木片やリンゴなどが名に入ります。
そして木片から、木の剣・斧・くわ・ツルハシ・シャベルなどが作れます。
操作は、カーソルキーまたはwasdキーで移動。
X:で、インベントリを見たり、ものを取り出し、
C:でアイテムをつかったり、攻撃したり出来ます。
右上に座標がでており、それぞれ意味があるようです。
P:プレイヤーの現在位置
U:昇り階段
D:下り階段
最終目的は、Wizardを倒すことです。
インストール:ソースからインストール
オリジナルはjava版ですが、Cに移植されたものをビルドします。
インストール手順詳細(クリックで表示)
$ cd
$ mkdir minicraftC
$ cd minicraftC
$ git clone https://github.com/GameHerobrine/MinicraftC.git
$ cd MinicraftC/
$ vi source/CMakeLists.txt
 5: set(CMAKE_C_FLAGS "${CMAKE_C_FLAGS} -lSDLmain -lSDL -lm")
   ↓
   set(CMAKE_C_FLAGS "${CMAKE_C_FLAGS}")

   find_package(SDL REQUIRED)
   find_package(SDL_mixer REQUIRED)
   include_directories(${SDL_INCLUDE_DIR})
   include_directories(${SDL_MIXER_INCLUDE_DIR})


 90: target_include_directories(minicraft-sdl PUBLIC ".")
   ↓
    target_include_directories(minicraft-sdl PUBLIC ".")

    target_link_libraries(minicraft-sdl
     ${SDL_LIBRARY}
     ${SDL_MIXER_LIBRARY}
     m
    )
$ make
$ ln build/source/minicraft-sdl ./minicraft-sdl
$ minicraft-sdl
———–
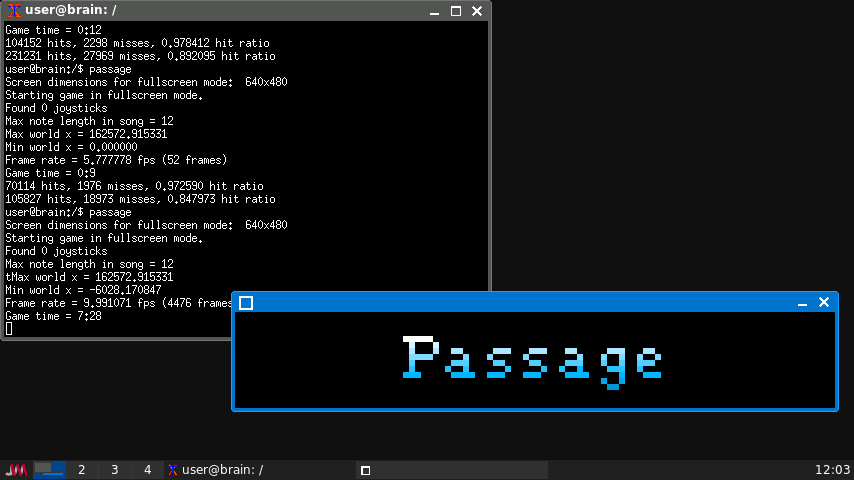
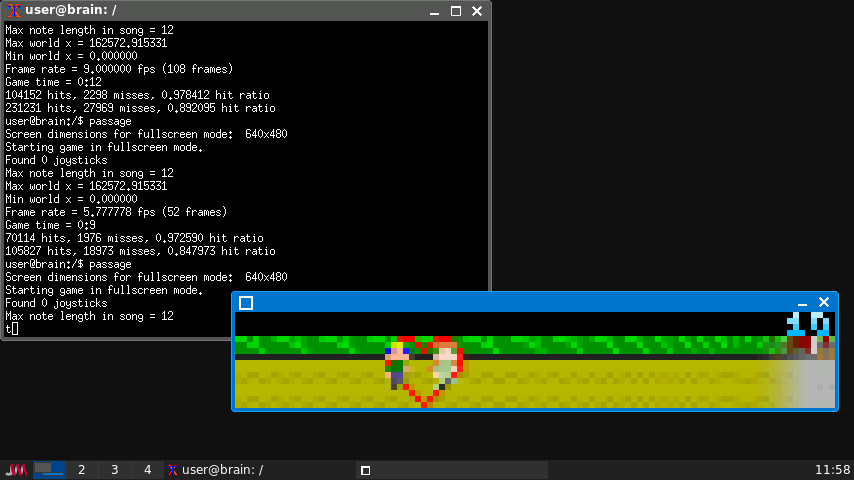
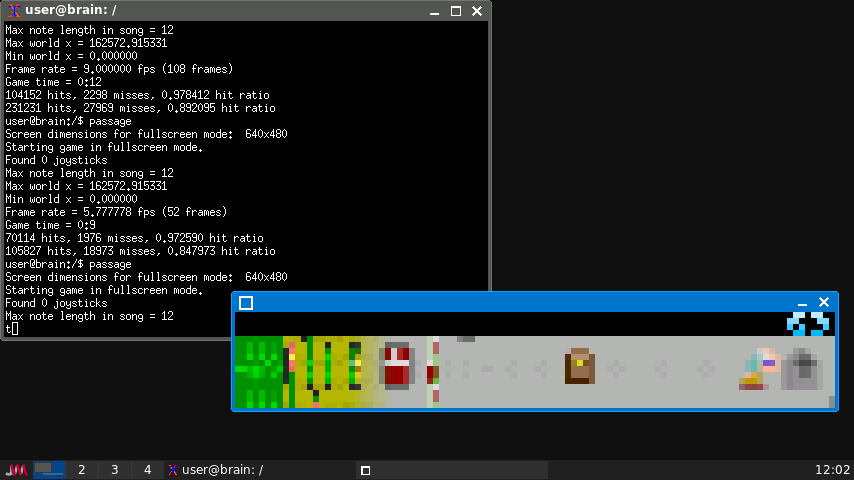
○ passage 人生の歩みについてのゲーム
https://packages.debian.org/bullseye/passage
https://hcsoftware.sourceforge.net/passage/
起動:passage
Passageは、ジェイソン・ローラーによる短編の自伝的ピクセルアートゲームです。プレイ時間は約5分です。Passageは、死を忘れるなというメッセージを伝えるゲームとして制作されました。このゲームを楽しんだ方は、続編の「Gravitation」もぜひお試しください。もし気に入らなかった場合は、ウェブサイトに掲載されている制作者の声明と、ウェブサイトからリンクされている他のユーザーの体験談をお読みください
●5分ぐらいで人の一生を考えるゲーム
↑↓←→キーで歩き回って宝を探します。エスケープキーを押すと終了します。
右方向に進むとカウンターが増えます。
途中で結婚すると2人で一緒に進みます。2人だと狭い所には行けません。
1人でたくさんの宝を見つけるか、不自由でも2人で進むか考えます。
時間が経過するとキャラクターも年老いていきます。動かなくても5分間の命です。
F Window Mode / FullScreen mode 切り替え
B 拡大率変更
インストール:APT経由 ”sudo apt install passage”
———–
○ Gravitation 躁病、憂鬱、そして創造のプロセスに関するゲーム
https://packages.debian.org/bullseye/gravitation
起動:gravitation
「Gravitation」は、ジェイソン・ローラーによる自伝的なピクセルアートの短編ゲームです。前作「Passage」の続編です。約8分でプレイできます。もし迷ったら、ぜひプレイを続けてください。それでもゲームの内容が理解できない場合は、ウェブサイトに掲載されているゲーム開発者の声明や、ウェブサイトにリンクされている他のプレイヤーの体験談をお読みください。
●星を落として暖炉にくべるゲーム
エンターキーを押して開始します。
最初は画面の一部しか表示されません。
表示範囲がだんだん小さくなり、最小サイズになると逆に大きくなっていきます。
この繰り返しになります。ジャンプできる高さは表示範囲に影響されます。
上のほうにある青い星(アイデア)を下に落とすと、氷のブロックになります。
落とした氷ブロックの数字は、カウントダウンしていきます。
ブロックを暖炉まで押していくとブロックの数字分得点できます。
右下に表示されている数字は残り秒数です。480秒(8分)の制限時間があります。
【操作】 [←]:左へ [→]:右へ [space]:ジャンプ(長押しで高く) [Esc]:終了
インストール:APT経由 ”sudo apt install gravitation”
———-
◎ maelstrom Asteroidsに似たアーケードスタイルのゲーム
https://packages.debian.org/bullseye/maelstrom
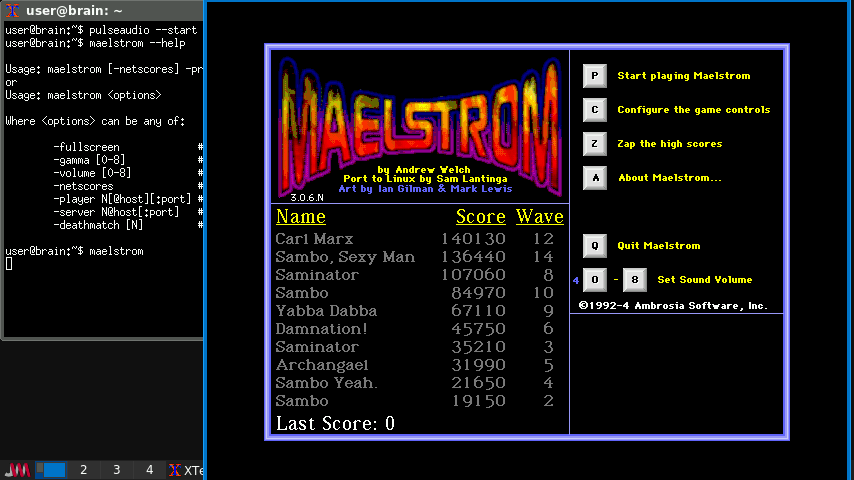
起動:maelstrom
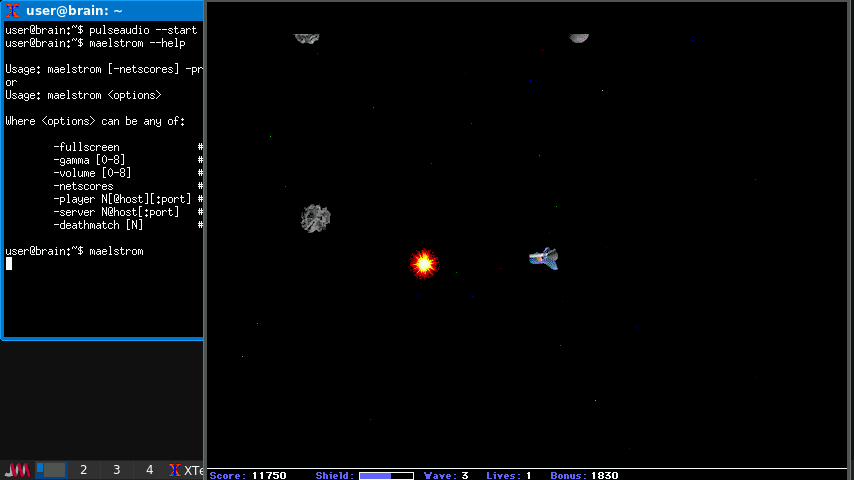
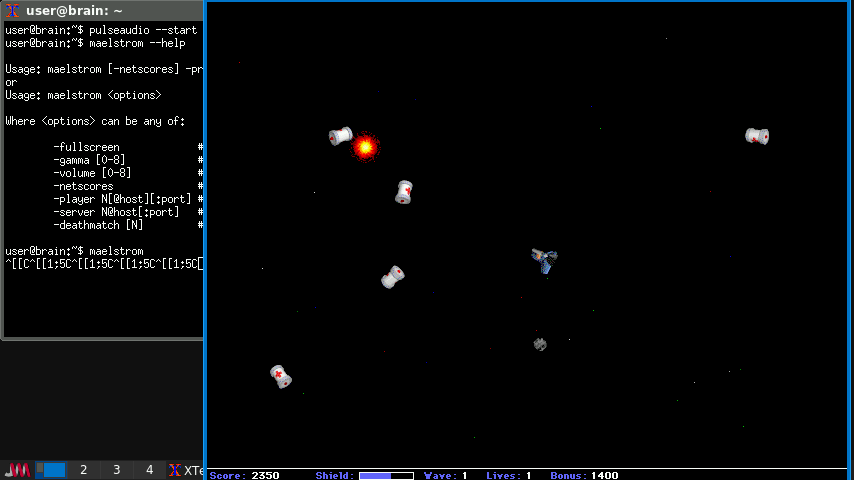
これは、Andrew Welch が Macintosh 用に作成した高解像度の「Asteroids」スタイルのアーケード ゲームの移植版です。
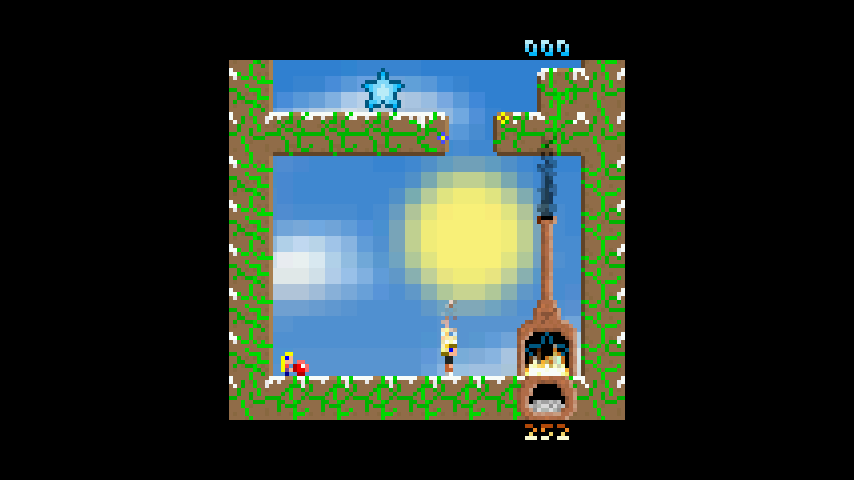
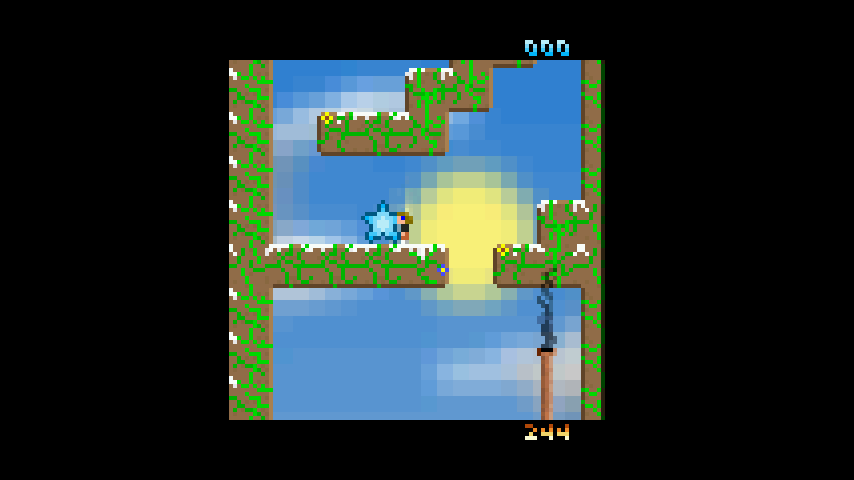
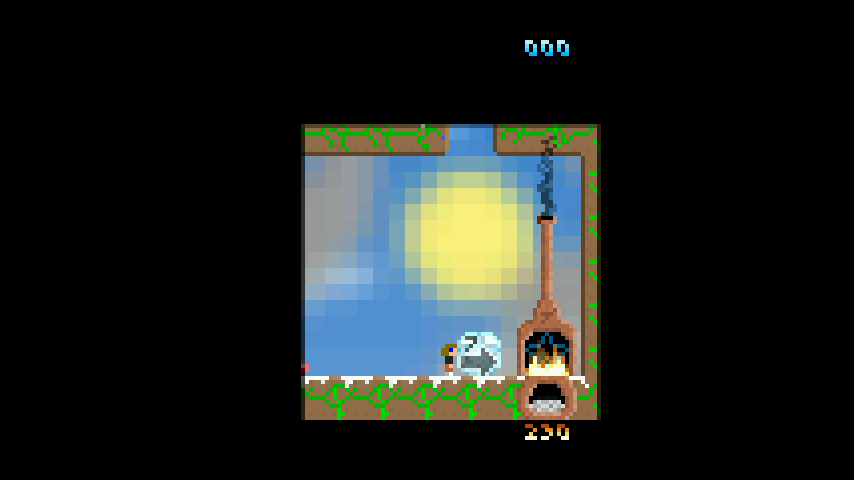
●ASTEROIDSのような宇宙ゲーム
いん石を撃って全部消します。大きないん石を撃つと小さないん石に分かれます。
宇宙船はバックしません。向きを変えて前進することで逆方向に進みます。
【基本】[Pause]:一時停止 [Esc]:終了
【操作】[Tab]:撃つ [space]:シールド [↑]:前進 [←]:左回転 [→]:右回転
Brainでも十分な速度でプレイできます。
(初回起動時には時間がかかるようです)
Cキーでキーカスタマイズも可能です。
Pキーでゲームスタートです。
漂ってくるのは隕石だけではなくて、破壊出来ない玉(球を当てると軌道がずれる)やアイテムなどもあります。
また、弾を撃って攻撃してくるUFO(複数弾を当てないと破壊出来ない) や、破壊すると得点になる彗星等なんかも出てきて、かなりアレンジされているようです。
インストール:APT経由 ”sudo apt install maelstrom”
[bookworm 以降でSDL2に移行済。t64のライブラリと依存なし。]
[trixieベースのBrainuxでは、sudo apt -t bullseye install maelstromで導入可能]
———–
◎ epiphany Boulder Dash ゲームクローン(アクションパズル)
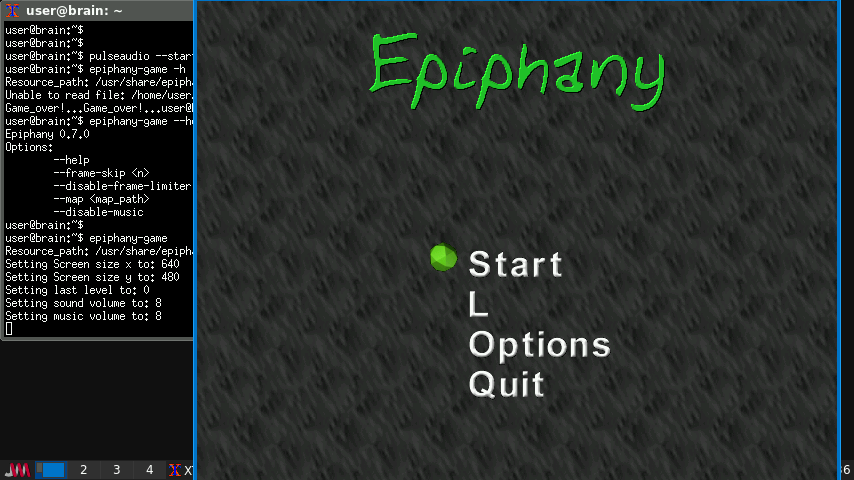

https://packages.debian.org/bullseye/epiphany
起動:epiphany-game
Epiphany は Boulder Dash のマルチプラットフォームなクローンです。 このゲームでは、プレイヤは各レベルに散らばった全ての大事な鉱物を 収集しつつ、落ちてくる岩を避けつつ出口に向かっていきます。
Boulder Dash は Commodore 64 向けに製作されたベストゲームの一つです。
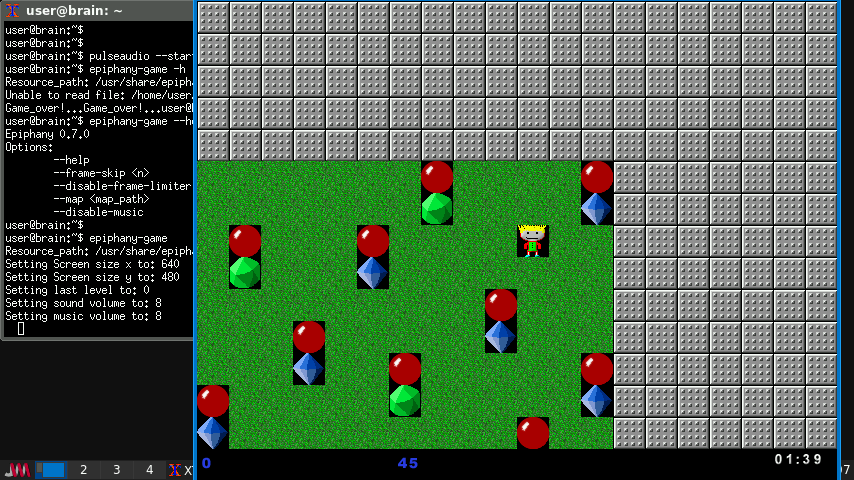
●穴を掘って鉱物を集めるゲーム
Commodore64向けに製作されたBoulder Dashのクローンです。
↑↓←→キーで穴を掘って鉱物を収集します。
穴ができると岩や爆弾が落下してきます。岩につぶされたり爆風にやられるとゲームオーバーです。制限時間内に、全ての鉱物を集めて出口まで行けばクリアです。
爆弾以外に、岩でつぶれてしまう鉱石や、落ちると3x3の範囲が爆破される爆弾もあり、
爆弾じゃないと破壊出来ない壁なんてものもありました。
ステージが進むと敵も出てきます。
時間制限があるので、時間内にゴールにたどりつけなかったらゲームオーバです。
岩で鉱石をつぶしてしまったり、爆弾で鉱石を排してしまったりすると、集める鉱石が足りなくでゴールに行けなくなります。
ESCキーでギブアップ出来ます。
ゲームオーバーやギブアップ後にSpaceキーでタイトル画面に戻ります。
(Startからリトライ出来ます。)
サウンドを鳴らせるようにしていた場合少し動作が遅くなりますが、その場合はコマンドラインオプションで音楽再生を無効化できます。(epiphany-game –disable-music)
インストール:APT経由 ”sudo apt install epiphany”
———–
◎ numptyphysics crayon ベースの物理パズルゲーム

https://packages.debian.org/bullseye/numptyphysics
起動:numptyphysics
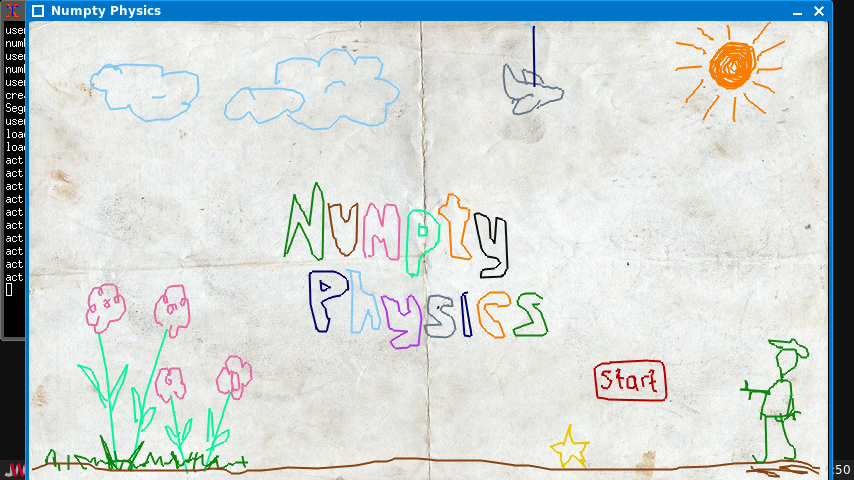
●クレヨン風お絵描き物理パズルゲーム
マウスのドラッグで絵を描いて、黄色い星をつぶします。
最初の画面から、もうゲームに入っています。星をつぶせば次に進みます。
ブロック・坂道・レバー・滑車など、必要な道具をキャンパスに描き入れます。
エスケープキーを押すと直前の描画を消去しますが、これはUNDOではありません。
描く前の状態に戻るわけではなく、直前に描いた絵が消えるだけです。
【操作】 [←]:前頁へ [→]:次頁へ [↑]:リスタート [space]:一時停止 [q]:終了
スタートするには、[Start]の上に横線を書くと[Start]が落下して黄色い星をつぶされてゲームがスタートします。
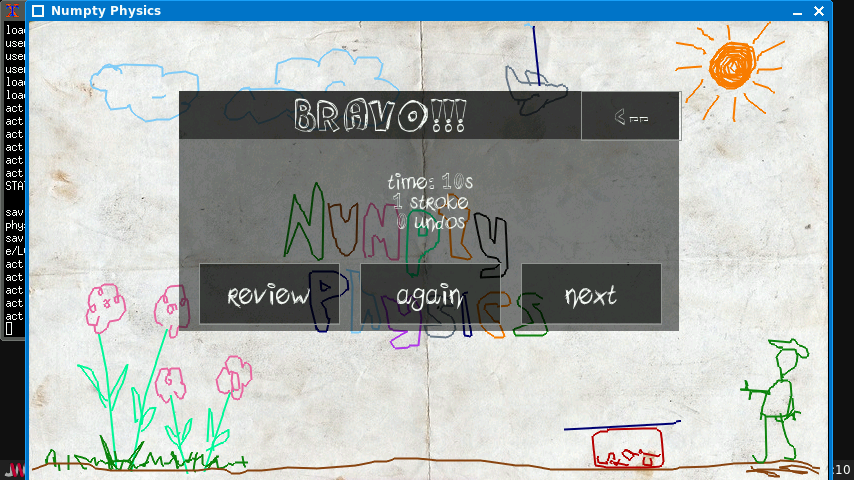
画面を落書きすると、物理演算で状況が変わってきます。
黄色の部分に、何らかの方法で干渉すれば、次のステージに進みます。
また画面の左、右にカーソルを移動すると、(左) Game Option / (右) Play Optionが現れます。
(右) Game Option Pen / Tool / Pause / Resume / Undo
(左) Play Option Menu / Reset / Skip / Edit
その他ショートカットキーも使えます。
Space Pause
U , backspace , 下キー Undo
R , 上キー Reset
N , 右キー Skip to next level
P , 左キー Go back to Previous level
物理演算っぽいことをしているので、Brainでの動作は難しいかと思ったのですが、
そんなことはなくスムーズに動きます。
インストール:APT経由 ”sudo apt install numptyphysics”
[trixie以降でSDL2に移行済。t64のライブラリと依存あり。]
[trixieベースのBrainuxでは、bookwormからソースを入手してビルドの必要あり]
———-
△ alienblaster クラシックな2Dシューティングゲーム

https://packages.debian.org/bullseye/alienblaster
起動:alienblaster
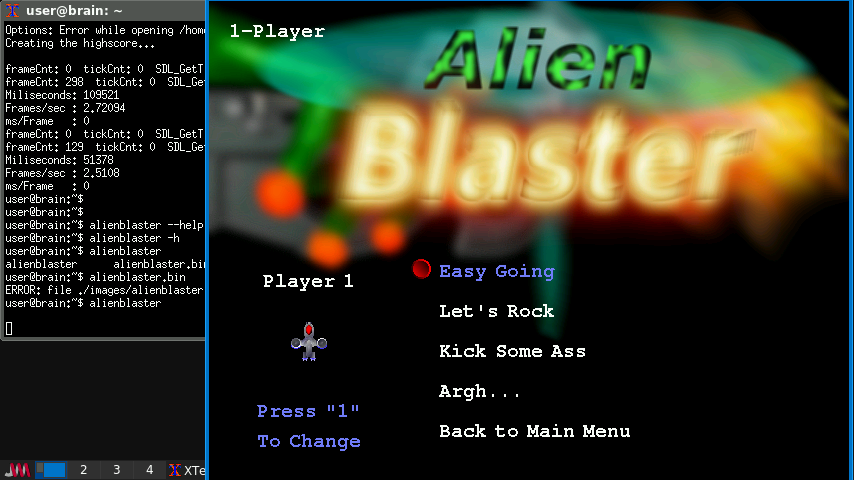
あなたの使命はシンプルです: エイリアンの侵略を阻止し、爆破することです!
Alien Blaster は、さまざまな武器、特別なアイテム、爆破するエイリアン、強力なボスが登場する古典的な 2D シューティング ゲームです。
シングル プレイヤー モードと、1 台のコンピューターで 2 人がプレイする協力型 2 プレイヤー モードの両方をサポートしています。
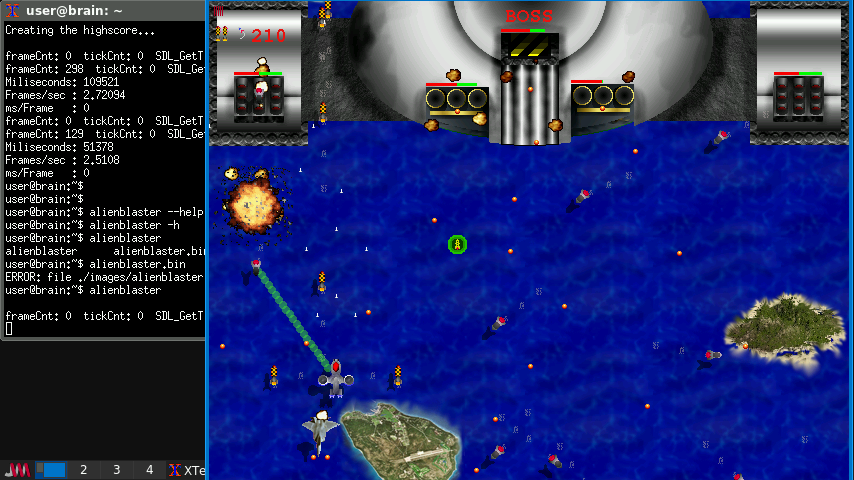
●縦スクロールシューティング
上方向から来る敵を撃ちます。ボスもいます。
エスケープキーを押すとメニューが表示されます。
【操作1】[←]:左へ [→]:右へ [↑]:上へ [↓]:下へ
【操作2】[s]:左へ [f]:右へ [e]:上へ [d]:下へ
【共通】[左Shift]:武器選択 [y]:特殊選択 [左Ctrl]:攻撃 [左Alt]:特殊攻撃
Brainでもプレイそのものは可能ですが、 2-3FPSぐらいしか出ないため
かなりコマ落ちした状態になります。それ以外は問題なくプレイできます。
ダメージはシールド制なので、シューティンが苦手な方でも大丈夫だと思います。
キーのカスタマイズも可能です。
その他以下のようなキーも使えます。
F1: Configre keys
F5:Full Screen (Toggle)
F6:Display Enemy Stats (Toggle)
F7:Toggle Music
F10:Pause Game
インストール:APT経由 ”sudo apt install alienblaster”
———-
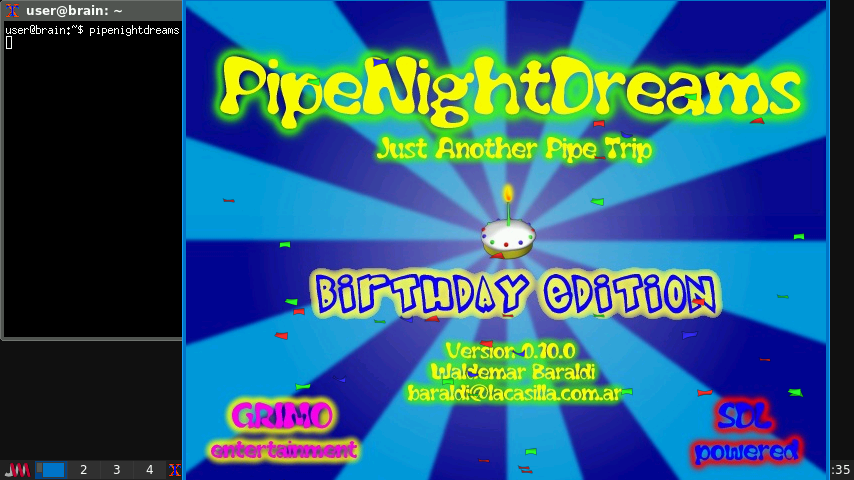
◎ pipenightdreams 水が入り口から出口まで流れるようにパイプをつなぐ
https://packages.debian.org/bullseye/pipenightdreams
https://www.libsdl.org/projects/pipenightdreams/
起動:pipenightdreams
昔のアーケードゲーム “Pipe Dreams” を知っているなら、すぐに気づくでしょう。 異なる種類のパイプをつないで、入り口から水をできるだけ多くのパイプを通して 流し、最後に出口まで到達させることが目的です。スピード、技術、そして 長期的な視点の組み合わせの釣り合いが要求されます。
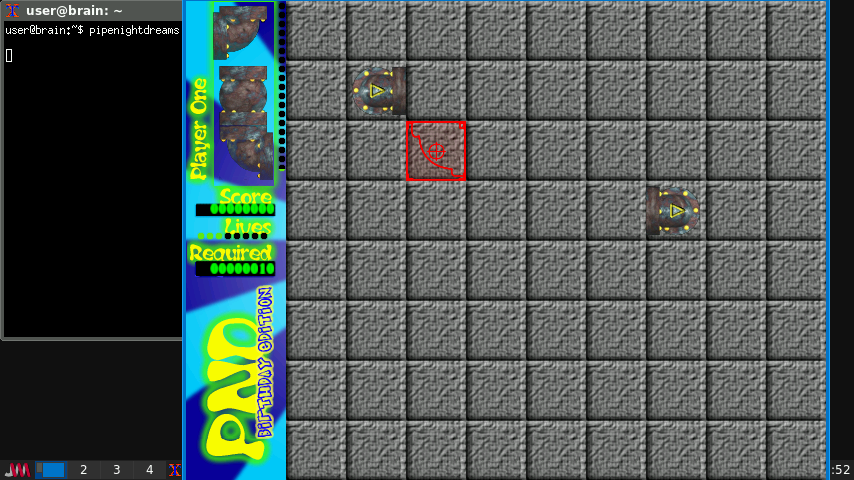
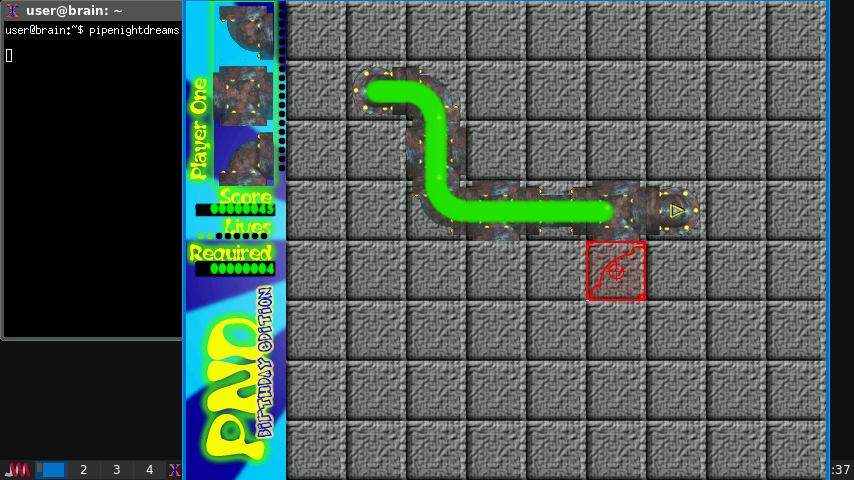
●水が出口まで流れるようにパイプをつなぐゲーム
昔のアーケードゲーム「Pipe Dreams」です。
異なる種類のパイプをつないで、できるだけ多くのパイプを通して水を流します。
水が出口まで到達すればクリアです。
↑↓←→キーで移動してスペースキーを押してパイプを置きます。
スペースキーを押すごとに、左側に表示されているパイプが順番に現れます。
エスケープキーを押すと最初の画面に戻ります。
Cursor keys Move pointer
Space Change pipe
Enter Speed up liquid
Escape Back
インストール:APT経由 ”sudo apt install pipenightdreams”
———-
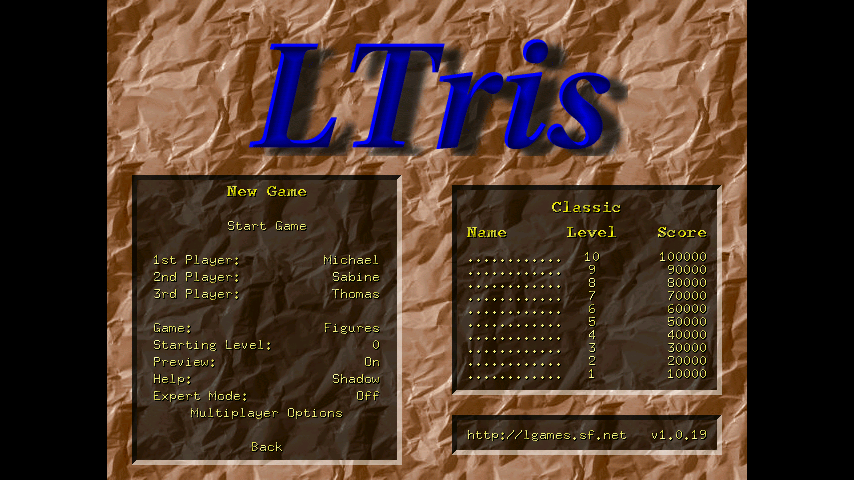
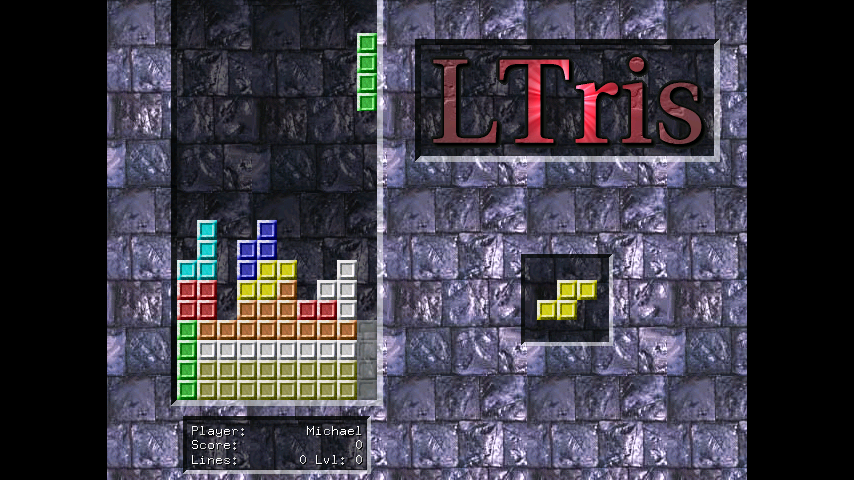
◎ LTris CPU に優しいテトリスクローン
https://packages.debian.org/bullseye/ltris
LTris は、非常に洗練されたテトリスクローンであり、 古典モード、全てのレベルで異なる図形が現れる figures モード、 そしてマルチプレイヤーモードといった三種類のゲームを提供します。 LTris は、メニューシステムを通じて高度な設定が可能です。
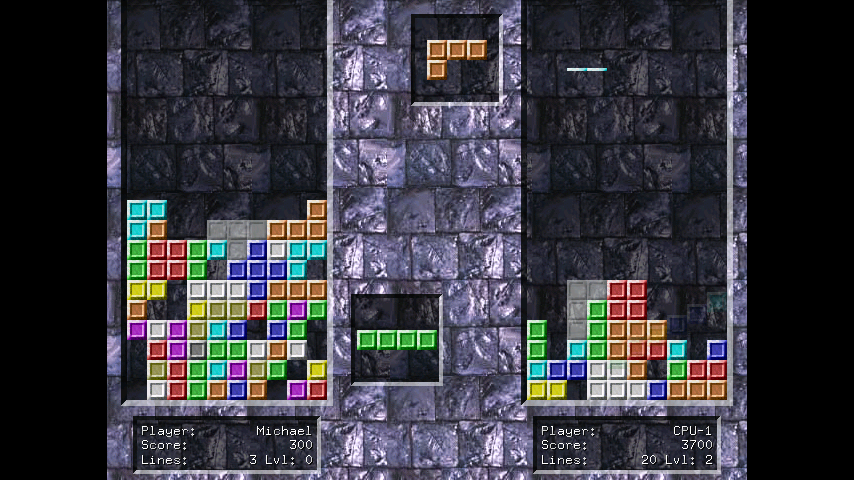
●対戦型テトリス
「New Game」をクリックして次に進み、ゲームの種類を選択します。
「Game:」をクリックするとゲームの種類が順番に表示されます。 この画面は [Classic]です。
「Start Game」をクリックして開始します。
【操作】 [←]:左へ [→]:右へ [↑]:回転 [↓]:落とす [p]:一時停止/再開 [Esc]:終了
Brain上でも快適にプレイできます。
ゲームモードがいくつかあります。
1人モード Demo / Classic / Figures /
2人モード Vs Human / Vs CPU /
3人モード Vs Human&Human /Vs Human&CPU / Vs CPU&CPU
最大3人プレイまで可能と、様々なモードで遊べます。
アニメーションも凝っているので、デモやCPUだけの対戦画面を見ていても面白いです。
(アニメーションは無効にも出来ます)
インストール:APT経由 ”sudo apt install ltris”
[trixie 以降でSDL2に移行済(ltris2)。t64のライブラリと依存なし。]
[trixieベースのBrainuxでは、sudo apt -t bookworm install ltrisで導入可能]
———-
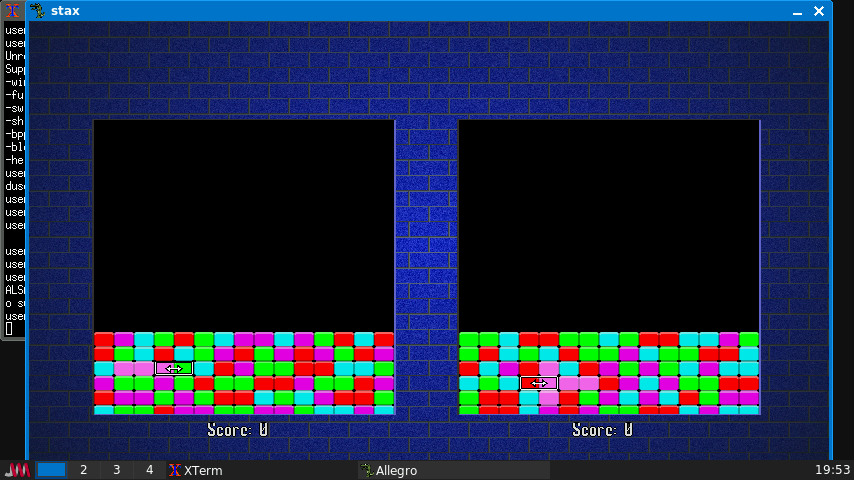
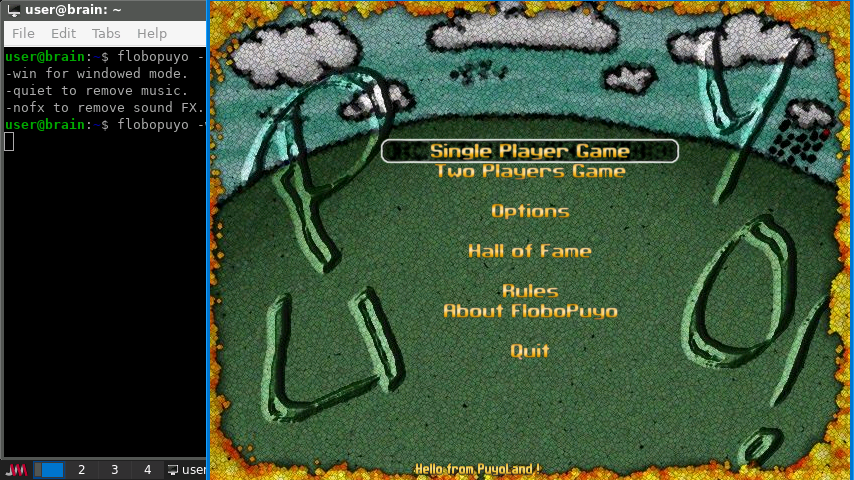
◎ flobopuyo ぷよぷよゲームのクローン

https://packages.debian.org/bullseye/flobopuyo
起動:flobopuyo
FloboPuyo の目的は、4 個以上のぷよ (色付きの泡) をグループ化して破裂さ せ、対戦相手に邪悪な幽霊ぷよを送りつけることです。対戦相手のボードで、 ぷよが天井に到達したらあなたの勝利です。コンピュータあるいは人間相手で プレイできます。
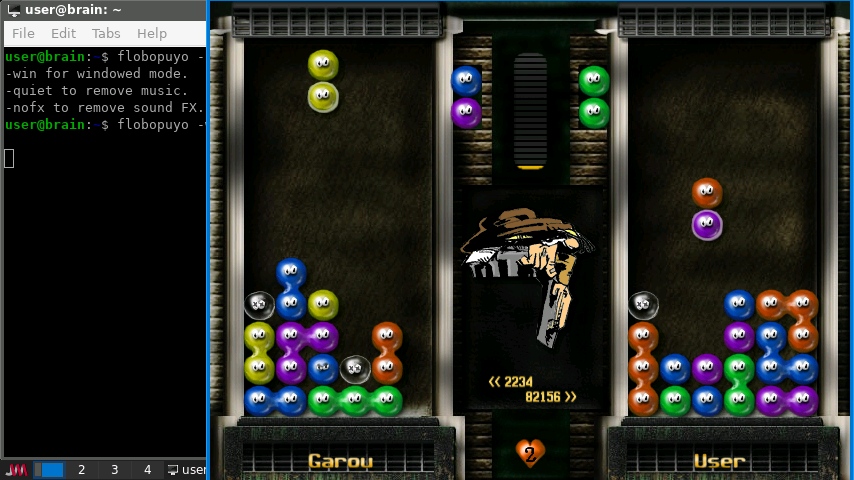
●ぷよぷよゲームのクローン
同じ色のぷよを4つ以上まとめて破裂させ、対戦相手に邪悪な幽霊ぷよを送りつけます。
コンピュータあるいは人間と対戦できます。
対戦相手のぷよが上まで埋まれば勝ちです。
逆に自分のぷよが上まで埋まってしまうとゲームオーバーです(3回コンティニュー可能)。
【操作】 1P [←]:左へ [→]:右へ [↑]:回転 [↓]:下へ
2P [S]:左へ [F]:右へ [E]:回転 [D]:下へ
メニュー [↑] [↓]移動、選択[Enter]
Brainでも快適にプレイできます。
ただ、USBオーディオデバイスを付けている場合音がぶつ切り状態になるので、
無効にしたほうがいいかもしれません(オプションで変更できます)。
インストール:APT経由 ”sudo apt install flobopuyo”
———-
◎ biniax2 アーケードモードとタクティクスモードを備えたロジックゲーム
https://packages.debian.org/bullseye/biniax2
http://biniax.com/index2.html
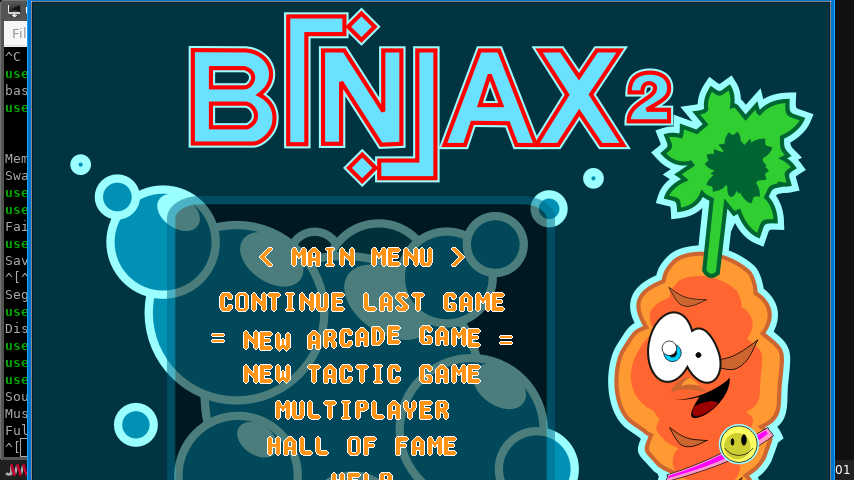
Biniax-2は、独創的で楽しいゲームです。ルールを覚えるのにほんの1分しかかからず、何時間でも遊べます。3つのゲームモード(シングルプレイヤー2つとマルチプレイヤー1つ)、殿堂入りシステム、ダイナミックな音楽、そして可愛らしいカートゥーン調のグラフィックが特徴です。
●同じ色を持つペアを消すゲーム
↑↓キーで「NEW ARCADE GAME」を選び、エンターキーを押して開始します。
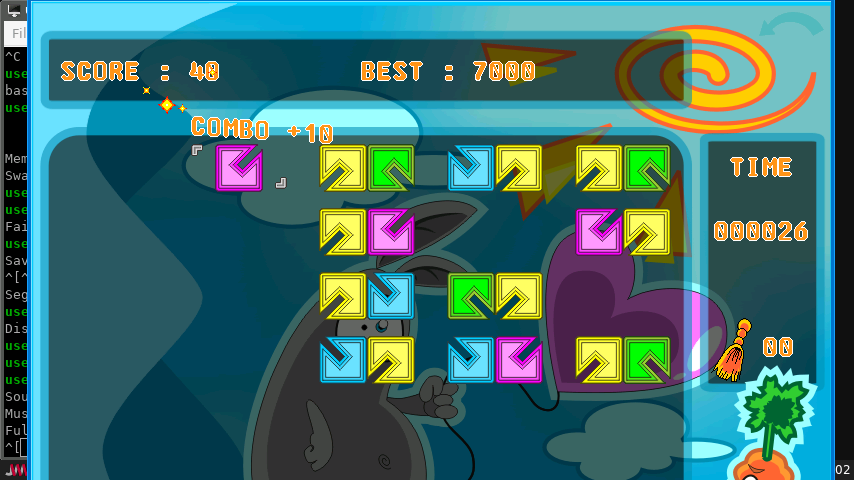
自分と同じ色を持つペアにぶつかればそのペアが2つとも消えます。
その後、自分はペアの相棒の色になります。
周囲のペアに自分の色がなくなり、動けなくなればゲームオーバーです。
操作は↑↓←→キーで自分のブロックを移動させるだけです。
Brainでもプレイは可能ですが、縦解像度が600以上を想定されているようで、
縦480しかないBrainでの実行では下側が隠れた状態でのプレイになります。
スコアが見えないことを了承のうえで、Windowを上のほうに移動することで、
ゲーム画面全体を表示することができるので、プレイそのものは可能です。
プレイ自体はスムーズに動くので、十分遊べます。
結構忙しいゲームです。
自分が動ける範囲を確保しつつ進んでいきます。
移動できず自分が一番下まで来てしまうとゲームオーバーです。
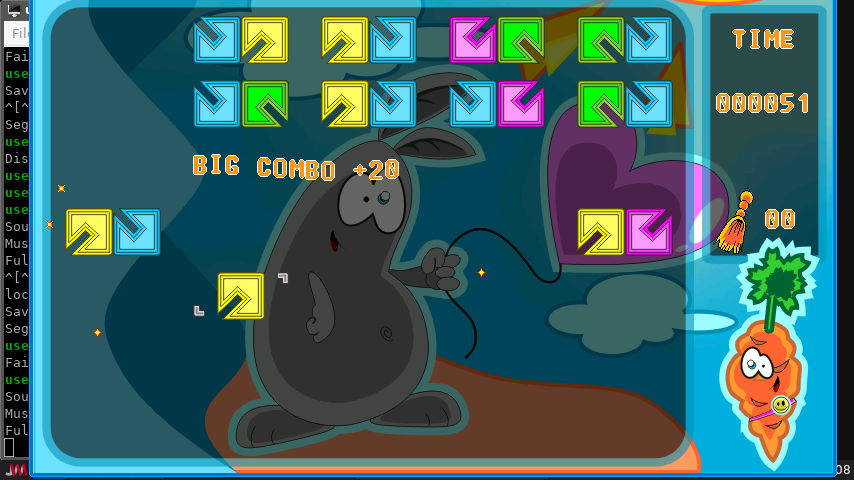
3連続以上でペアを消すと、コンボボーナスがもらえます。
(COMBO, BIG COMBO,MEGA COMBO)
Biniax-2には、プレイスタイルに合わせて楽しめるアーケードモードとタクティクスモードの2種類(シングルプレイ時)があります。それぞれの主な違いは「スピード感」と「制限」にあります。
- アーケードモード (Arcade Mode)
アクション性を重視した、標準的なモードです。
時間制限: 画面が時間経過とともに自動で下にスクロールしていきます。
目的: ブロックが画面の一番下に到達してゲームオーバーになる前に、素早くペアを消して生き残り続け、ハイスコアを目指します。
特徴: スピード感があり、反射神経と瞬時の判断が求められます。コンボを繋げることでボーナススコアを獲得できます。- タクティクスモード (Tactics Mode)
じっくり考えて進める、パズル性を重視したモードです。
ターン制(移動制限): 時間経過による自動スクロールやタイマーはありません。
目的: 限られた「移動回数(ステップ数)」の中で、いかに効率よくブロックを消していくかを競います。
インストール:APT経由 ”sudo apt install biniax2″
———–
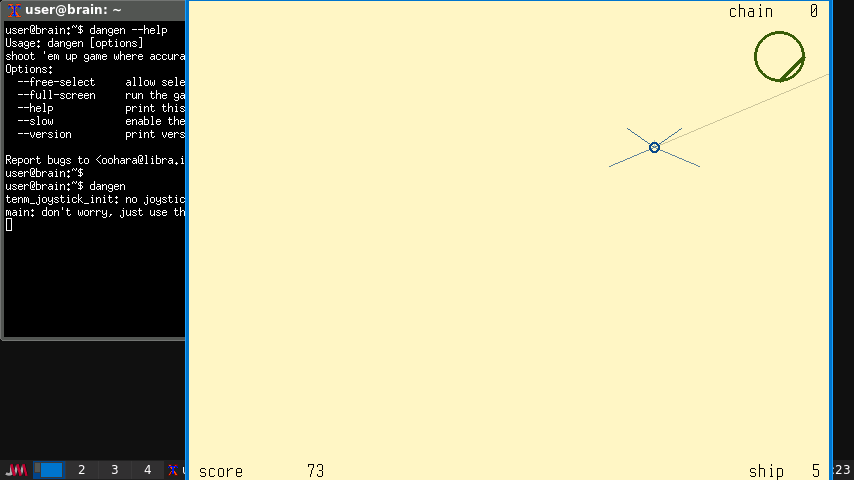
◎ dangen 正確な射撃が要求されるシューティングゲーム
https://packages.debian.org/bullseye/dangen
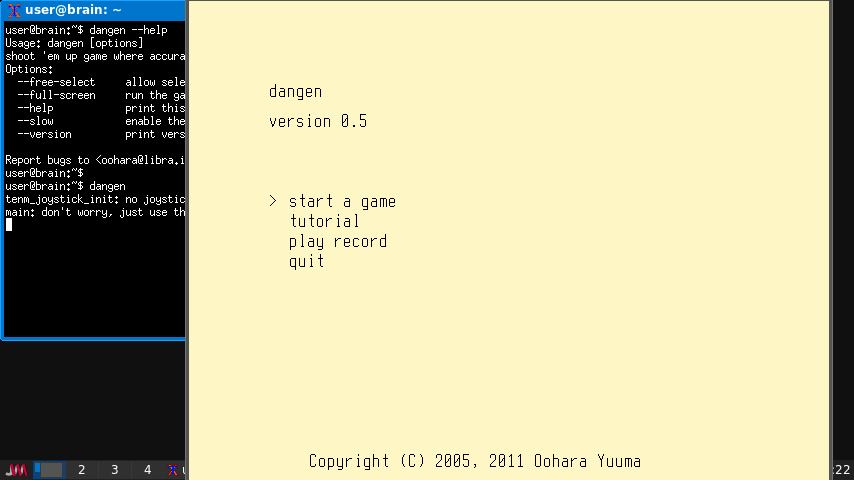
起動:dangen
dangen はシューティングゲームであり、射撃の正確性が重要視されます。 カーソルキーと射撃ボタンの組み合わせにより、側面や背面の敵さえも射撃できます。 ミス無しで敵を倒すことにより、ボーナスポイントをゲットしましょう。 難易度が異なるステージを選択できます。
●正確な射撃が要求されるシューティングゲーム
カーソルキーと射撃ボタンの組み合わせにより、側面や背面の敵さえも射撃できます。
ミス無しで敵を倒すことにより、ボーナスポイントをゲットしましょう。
↑↓キーで「start a game」を選び、スペースキーを押して次に進みます。
ステージを選び、スペースキーを押して開始します。
↑↓←→キーで移動します。スペースキーを押して敵を破壊します。
ルールについては「tutorial」に説明があります。英語です。
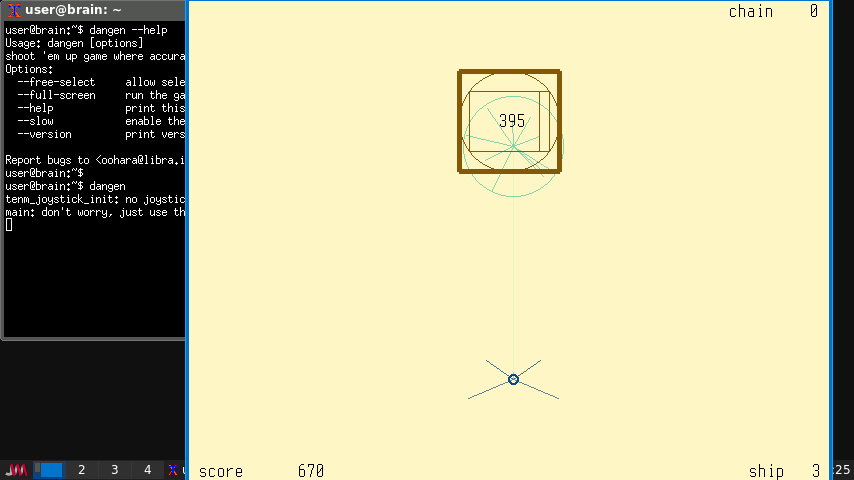
Brainでも快適にプレイできるワイヤーフレーム描写のシューティングゲームです。
カーソルキーで移動、スペースキーでレーザーを発射します。
キーを押しながらスペースを押すことで、レーザーの発射の向きを変えることが出来ます。
レーザーが敵に当たると、円状に展開されたものが残り、それが敵に当たることで破壊出来ます。
レーザは同時に1発までなので、発射タイミングを見定めないといけません。
複数のステージがあり、特に[hard]はかなり激しい攻撃になります。
インストール:APT経由 ”sudo apt install dangen”
———–
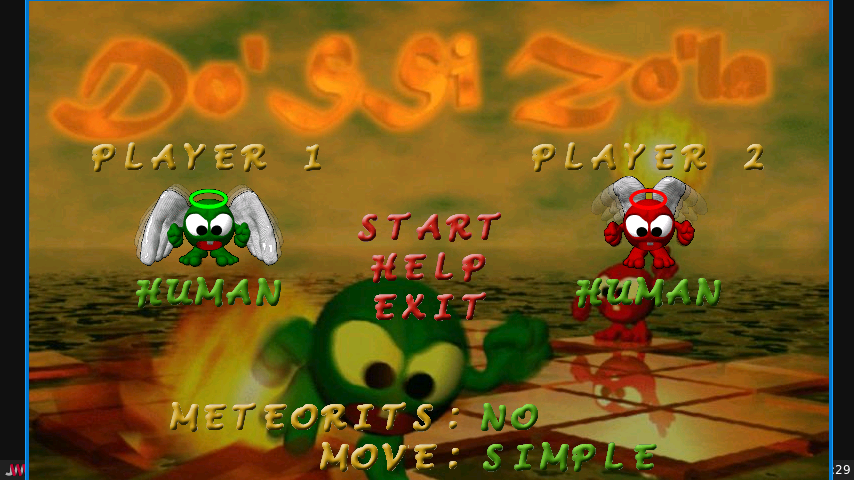
△ dossizola 素敵なグラフィックのIsolaボードゲーム
https://packages.debian.org/bullseye/dossizola
起動:dossizola
Do’SSi Zo’laは、ボードゲーム「Isola」をSDLで実装したもので、美しいアニメーションが特徴で、子供たちにも魅力的なゲームとなっています。
基本的なイソラゲームの目的は、相手の周囲にあるマスを破壊して相手の動きを封じることです。各ターン、プレイヤーはまず自分の現在位置の隣接するマスに移動し、次に好きなマスを破壊します。移動できなくなったプレイヤーが負けとなります。
Do’SSi Zo’laは、標準ルールの様々なバリエーションを提供している。
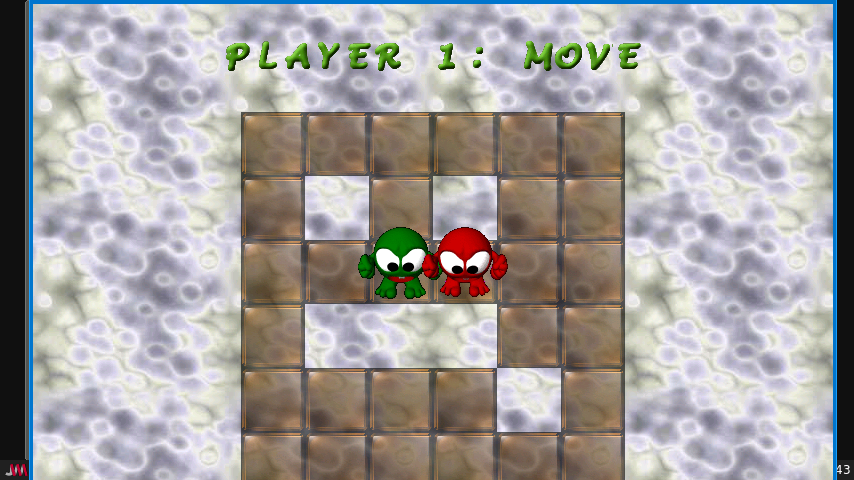
●周囲を爆破して孤立させるゲーム
1人で遊ぶ場合は「PLAYER 2」をクリックして相手をコンピューターにします。
「START」をクリックして開始します。
最初は適当なマスをクリックして自分を置きます。
次のターンからは1マス移動して爆弾を投げます。
上下左右と斜めの8方向に移動できます。 爆弾は好きな所に投げることができます。
移動と爆破の位置はマスをクリックして指定します。
相手が移動できなくなれば勝ちです。
Brainでの稼働は、少し遅いですがプレイはできます。
ただ、縦解像度が600以上を想定されているようで、
縦480しかないBrainでの実行では下側が隠れた状態でのプレイになります。
Windowを上のほうに移動することで、ゲームの盤面全体を表示することができるので、
プレイそのものは可能です。
また、一番下にメニュー(EXIT,MENU,RESTART,ADVICE)があるので、
これを使うのであれば、ここまで表示できるように表示しましょう。
メニュー画面では、GAMESPEED(FPS)やGRIDSIZE(標準:6×6)なんかにも変更できます。
インストール:APT経由 ”sudo apt install biniax2″
———–
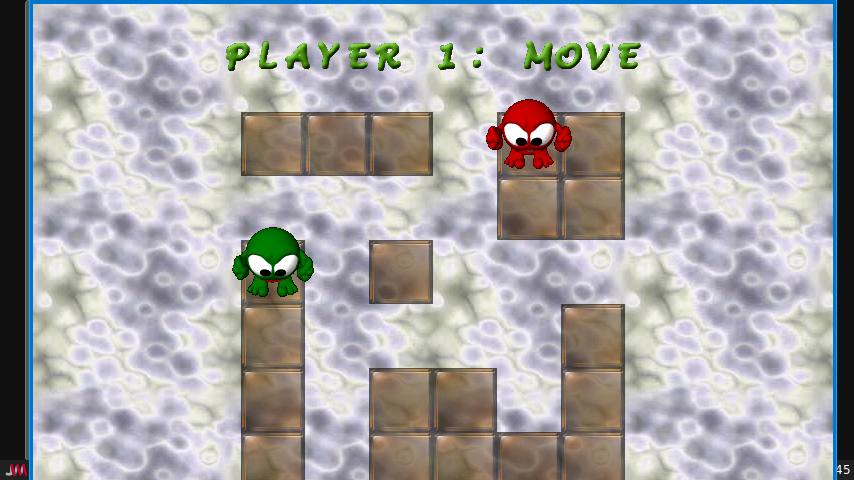
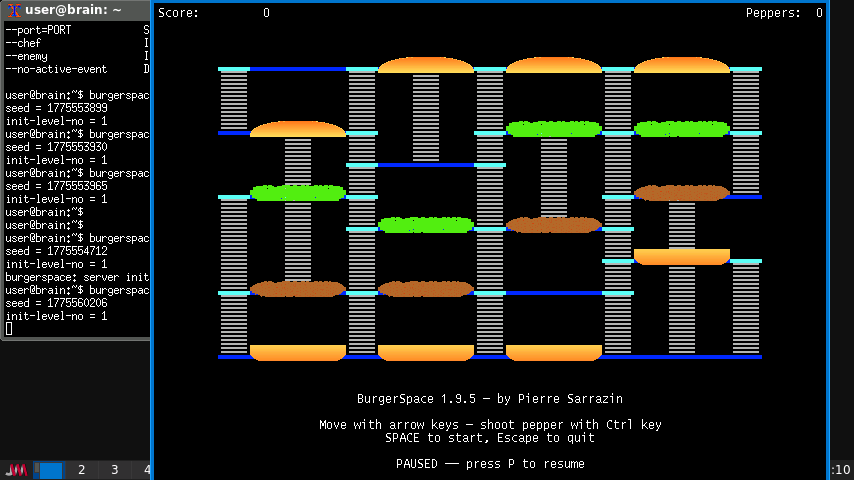
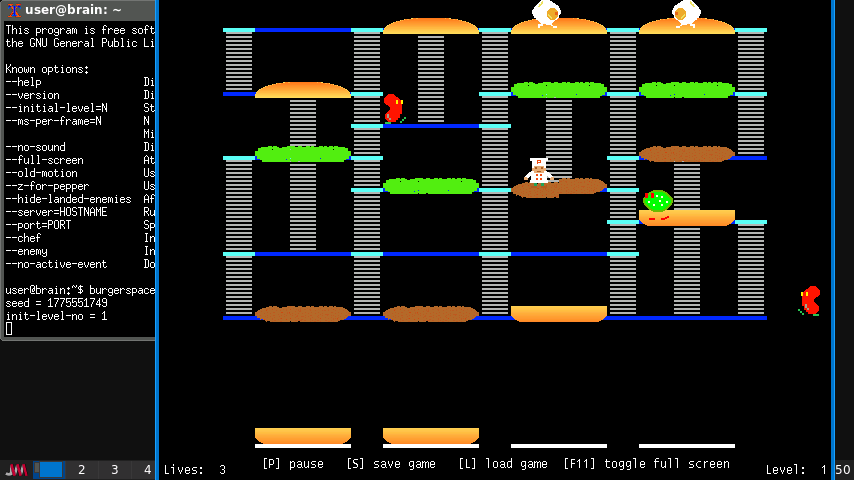
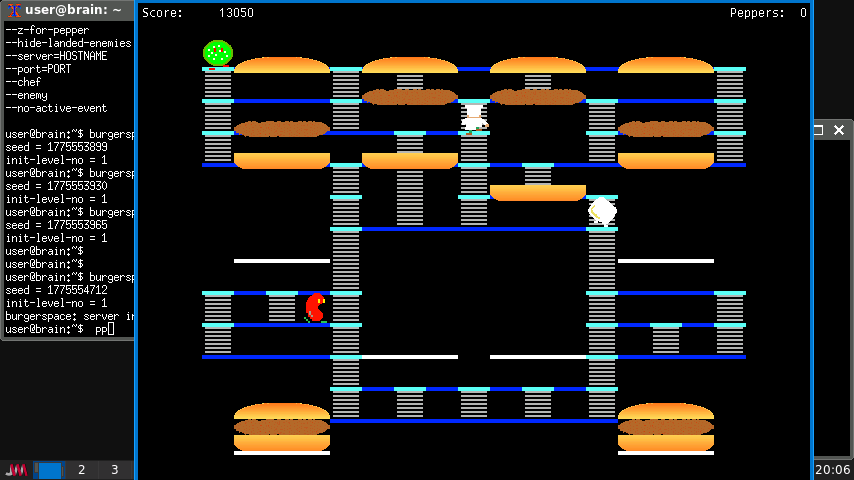
◎ burgerspace 体に悪い食べ物を避けてハンバーガーを作ろう
https://packages.debian.org/bullseye/burgerspace
起動:burgerspace –no-sound –ms-per-frame=110
これは、名作ゲーム「バーガータイム」のクローンゲームです。プレイヤーはシェフとなり、食材を何度も踏みつけてハンバーガーを作り上げていきます。さらに、頼れるのは頼りになるコショウ入れだけ。この作業中は、邪悪な動く食べ物を避けながら進めなければなりません。
●ハンバーガーを作るゲーム
↑↓←→キーで動き回って、ハンバーガーのパーツを下に落とします。
敵の食品に捕まったら、Livesが1つ減ります。
コントロールキーでペッパーを掛けると、一時的に敵が無力になります。
パーツを落とした時に敵が下にいれば、つぶれてポイントが入ります。
全てのハンバーガーを完成させればクリアです。
brainでも速度調整すればプレイ可能です。
ただし、縦解像度がちょっと足りないので、どっちかを優先する形になります。
上側を表示:SCORE、Pepporsを表示 (個人的おすすめ)
下側を表示:Lives、Levelを表示
起動時オプションで、実行時の調整を行うことができます。
よく使うと思われるのは、このあたりになります。
(すべてのオプションは–helpで確認できます。)
–initial-level=N スタートLEVEL設定
–ms-per-frame=N アニメーションのフレームレート設定(Default50で20fps弱)
–no-sound サウンドを無効化
–z-for-pepper 胡椒を掛けるキーをZボタンにする
Brainでの実行だと、–ms-per-frame=110あたりにするといい感じになります。
–no-soundを付けると、サウンドも無効化になるので、もう少し軽くなります。
$ burgerspace –no-sound –ms-per-frame=110
(JWMのメニューからの起動では、/usr/share/applications/burgerspace.desktopを編集)
インストール:APT経由 ”sudo apt install burgerspace”
[trixie 以降でSDL2に移行済。t64のライブラリと依存なし。]
[trixieベースのBrainuxでは、sudo apt -t bookworm install burgerspaceで導入可能]
———-
◎ cuyo 非常に印象的な効果を備えたぷよぷよパズル(謎ぷよ)似のゲーム
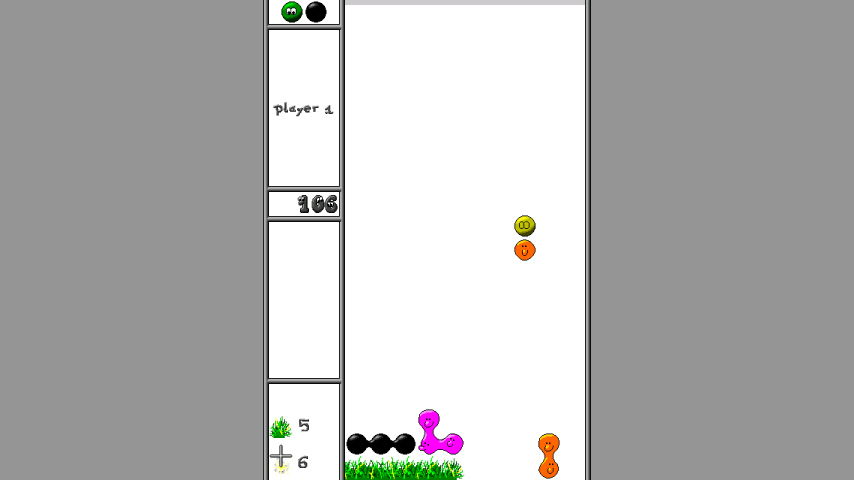
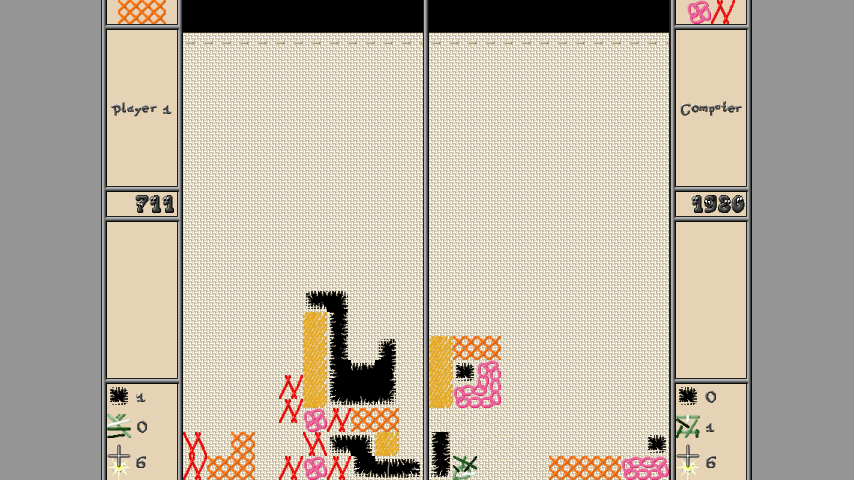
https://packages.debian.org/bullseye/cuyo
起動:cuyo -f
uyo – スペイン語の関係形容詞にちなんで名付けられました – は、落ちて くるものをいかにして誘導するかという点で、ぷよぷよに似ています。
充分な 数の “同じ種類のもの” が “一緒に” 並ぶと、それらは破裂します。
各レベ ルの目的は、開始時に存在する特別な “石” を吹き飛ばすことです。
しかし “同じ種類のもの” を “一緒に” するという意味は、レベル毎に異なります。
●非常に印象的な効果を備えたぷよぷよ似のゲーム
落ちてくるブロックをいかにして誘導するかという点ではぷよぷよと同じです。
充分な数の「同じ種類」のブロックが揃うと破裂します。
各レベルの目的は、開始時に存在する特別なブロックを吹き飛ばすことです。
【操作1】[a]:左へ [d]:右へ [w]:回転 [s]:落とす
【操作2】[←]:左へ [→]:右へ [↑]:回転 [↓]:落とす
[ESC]ポーズ or 終了
Brainでもプレイ可能です。
オプションなしだとWindowモードで立ち上がりますが、ウィンドウサイズを調整すると表示が縮小されてしまうようなので、-f でフルスクリーン表示推奨です。
ゲームは、1プレイ、2プレイ、1プレイ(VSコンピュータ)が選べます。
ルール的にはぷよぷよですが、同じブロックをいくつつなげるかについてはステージごとに変わります。(左下の数値(下側)の数つなげると消えるようです。)
ステージクリアの目的は初期からある特定のブロックを指定数消すことです。
子のブロックがその周囲でブロックが消えれば、つられて消えます。
(左下の数値(上側)の数が残っている消さなければならないブロックの数です。)
インストール:APT経由 ”sudo apt install cuyo”
———–
△ crack-attack ”Tetris Attack” に似たマルチプレイヤ OpenGL パズルゲーム
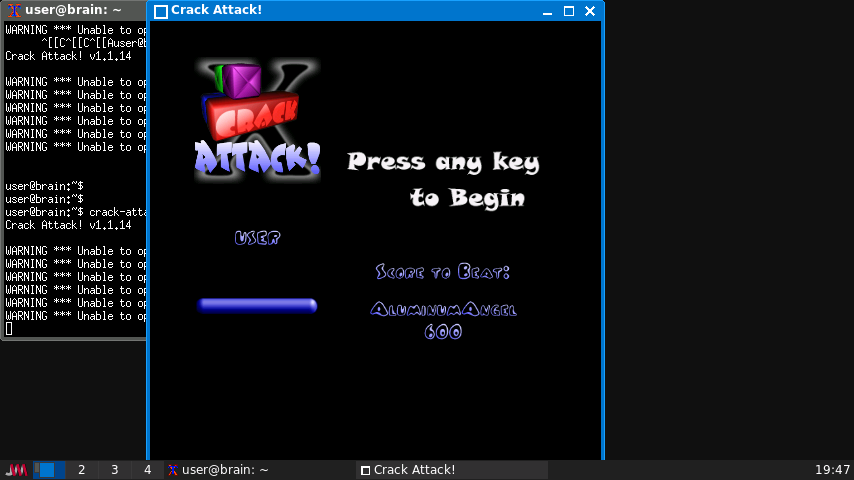
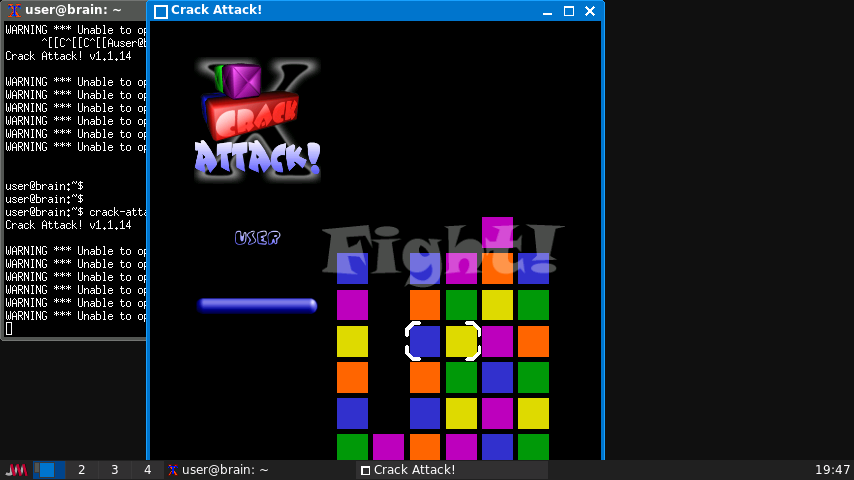
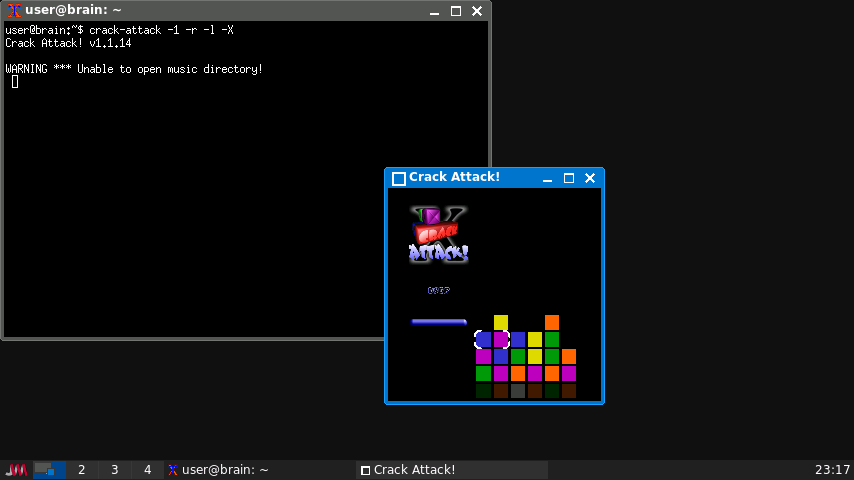
https://packages.debian.org/bullseye/crack-attack
起動:crack-attack -1 -r -l -X
Crack Attack はスーパーファミコンの “Tetris Attack” に似た OpenGL パズルゲームです。ゆっくりと、色付きブロックの積み重なりが底からだんだん せり上がってきますので、それらが頂上まで届かないようにしなければなりません。 そうなったら負けです。ブロックを重なりから消すには、少なくても 3色のうち 1色 のブロックを水平又は垂直に一行並べなければなりません。 そうしたら、その行のブロックは消え去り、不可避な終了をちょっと延期できます。
Crack Attack は、ハードウェアアクセラレーション機能がなければ非常に低速 です。Xorg ユーザにとって、DRI を有効にする必要があることを意味しています。
★同じ色をまとめて消すゲーム
「Start Game」をクリックし、キーを押してゲームを開始します。
↑↓←→キーで移動し、スペースキーを押して横に並んだ2つのコマを入れ替えます。
縦方向に並んだコマは入れ替えられないようです。
エスケープキーを押すと終了します。[p]キーで一時停止/再開します。
縦または横に同じ色を3つ以上並べれば消えます。
空いている所とコマを入れ替えることができます。その場合はコマが下まで落ちます。
コマは下から1行ずつ増えていきます。
一番上のコマが上に行けなくなったらゲームオーバーです。
OPENGLが必須なような説明になっていますが、
オプションでOPENGLを無効にすることで、
Brainでもかろうじてプレイできるレベルでの稼働ができました。
(1Playモード)
crack-attack -1 -r -l -X
もちろん快適なプレイではなく、キー入力も甘いですが、
ゲームの雰囲気は感じることが出来ます。
画面を小さくすると、ちょっとだけ早くなるような気がします。
カーソルキー:移動
Space :入れ替え
ESC :中断(ゲーム終了)
インストール:APT経由 ”sudo apt install crack-attack”
また、aptパッケージにwavサウンドデータが含まれていないようです。
既に、githubにもsourceforge.netにも元ソースは残っていないっぽいので、
無理やり似た音を作って配置するのも手です。
サウンドデータインストール手順詳細(クリックで表示)
$ cd
$ mkdir crack-attack
$ cd crack-attack
$ vi generate_crack_attack_sounds.py
#!/usr/bin/env python3
import wave, struct, math, os

os.makedirs("crack-attack-sounds", exist_ok=True)

def write_wav(filename, samples, rate=44100):
    with wave.open(filename, "w") as w:
        w.setnchannels(1)
        w.setsampwidth(2)
        w.setframerate(rate)
        for s in samples:
            w.writeframes(struct.pack("<h", int(s)))

def beep(freq, duration, volume=8000, rate=44100):
    samples = []
    for i in range(int(duration * rate)):
        samples.append(volume * math.sin(2 * math.pi * freq * i / rate))
    return samples

# countdown.wav(ピッ・ピッ・ピッ・ポーン)
samples = []
for f in [1000, 1000, 1000, 1500]:
    samples += beep(f, 0.1)
write_wav("crack-attack-sounds/countdown.wav", samples)

# block_fallen.wav(軽いコトッ)
samples = beep(200, 0.05, volume=5000)
write_wav("crack-attack-sounds/block_fallen.wav", samples)

# block_awaking.wav(ピコッ)
samples = beep(1200, 0.07, volume=6000)
write_wav("crack-attack-sounds/block_awaking.wav", samples)

# block_dying.wav(パリン)
samples = beep(3000, 0.03, volume=7000)
samples += beep(1500, 0.05, volume=4000)
write_wav("crack-attack-sounds/block_dying.wav", samples)

# garbage_fallen.wav(重いドスッ)
samples = beep(80, 0.1, volume=12000)
write_wav("crack-attack-sounds/garbage_fallen.wav", samples)

# garbage_shattering.wav(ガシャーン)
samples = beep(2500, 0.03, volume=9000)
samples += beep(1800, 0.05, volume=6000)
samples += beep(1200, 0.05, volume=4000)
write_wav("crack-attack-sounds/garbage_shattering.wav", samples)

print("WAV 生成完了: crack-attack-sounds/")
$ python3 generate_crack_attack_sounds.py
$ sudo mkdir -p /usr/share/games/crack-attack/sounds
$ sudo cp crack-attack-sounds/*.wav /usr/share/games/crack-attack/sounds/
———–
◎ supertransball2 スラストタイプのゲーム
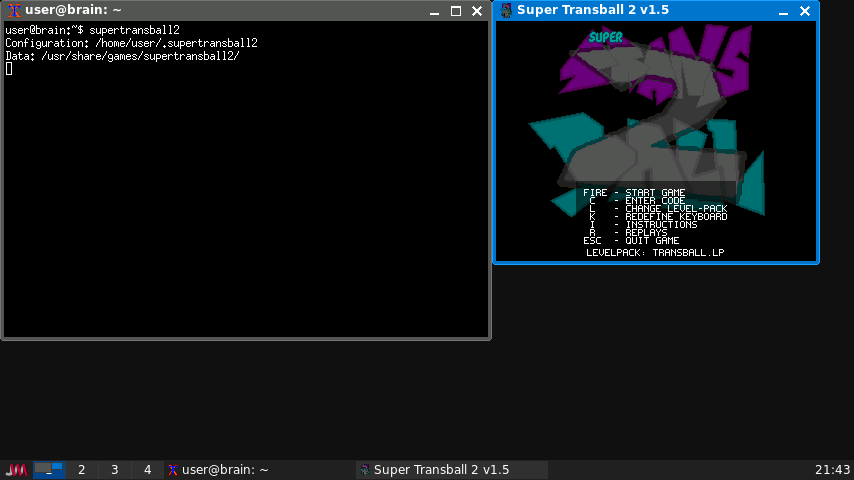
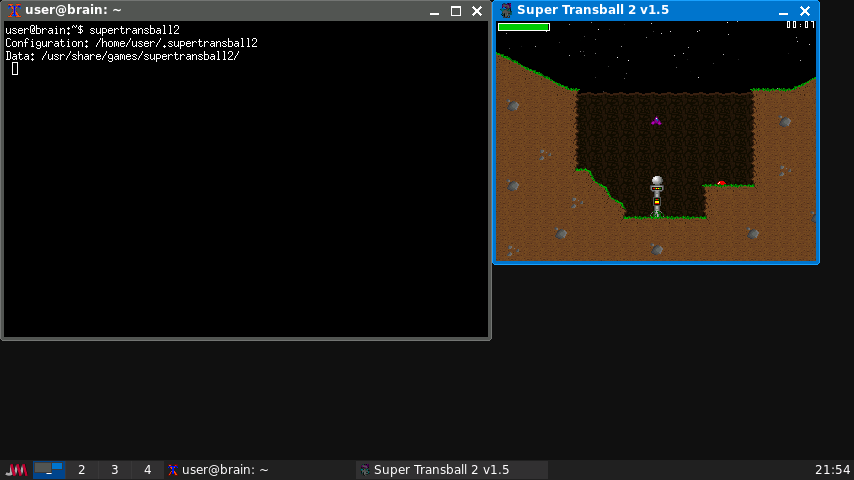
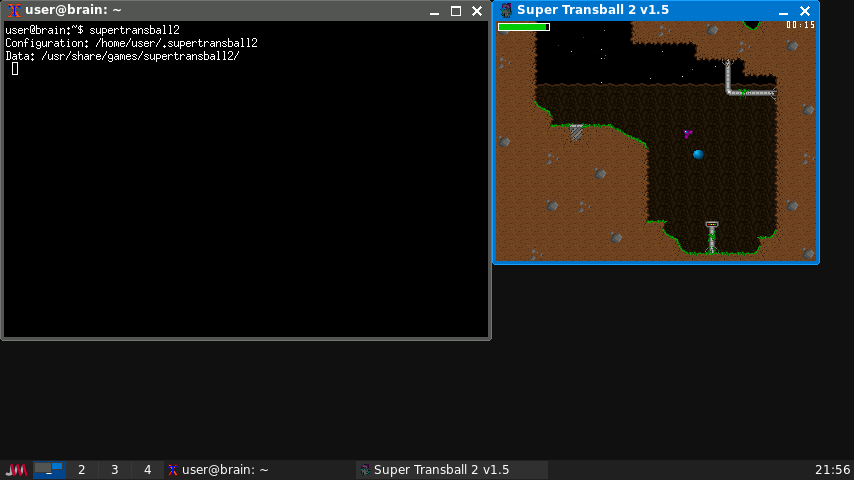
https://packages.debian.org/bullseye/supertransball2
起動:supertransball2
Super Transball 2は、Amiga 500用のZARA THRUSTAにインスパイアされたゲームです。各レベルの目標は、球体を見つけて捕獲し、レベルの上部まで運ぶことです。最大の難関は、宇宙船を引き付ける重力です。そのため、宇宙船の推力を制御することが不可欠です。大砲、戦車、ドア、レーザーなど、他にも多くの障害物があなたの旅を困難にしようとします。スラスターや武器を無駄遣いすると、あっという間に燃料切れになってしまうので注意しましょう。
●船を操ってボールを取るゲーム
推進力と方向変換だけで、船をボールの上まで誘導します。
ボールに近づいたら、エンターキーを押してボールを上空に引っ張り上げます。
ボールを落とさないように上まで持っていければクリアです。
スペースキーを押して次の画面に進み、船を選んでスペースキーを押します。
一番上の「SHADOW RUNNER」は操作が難しいらしいです。
スペースキーを押して開始します。
エスケープキーを押してからスペースキーを押すと最初の画面に戻ります。
最初の画面で [i]キーを押すと指令が表示されます。操作キーの説明もあります。
【操作】[q]:推進 [o]:左旋回 [p]:右旋回 [Enter]:ボール牽引 [space]:撃つ
デフォルトでは、320×240のウィンドウサイズになります。
本来はALt+1,2,3,4 でサイズをx1からx4までサイズ変更できますが、
WindowモードではJWMのほう反応してしまいます。
Brainの解像度だと、Alt + Enterでフルスクリーンにすると
ALt+2でx2まで拡大出来ますが、その分速度は遅くなります。
インストール:APT経由 ”sudo apt install supertransball2″
◎ tecnoballz Amiga プラットフォームから移植されたブロック崩しゲーム
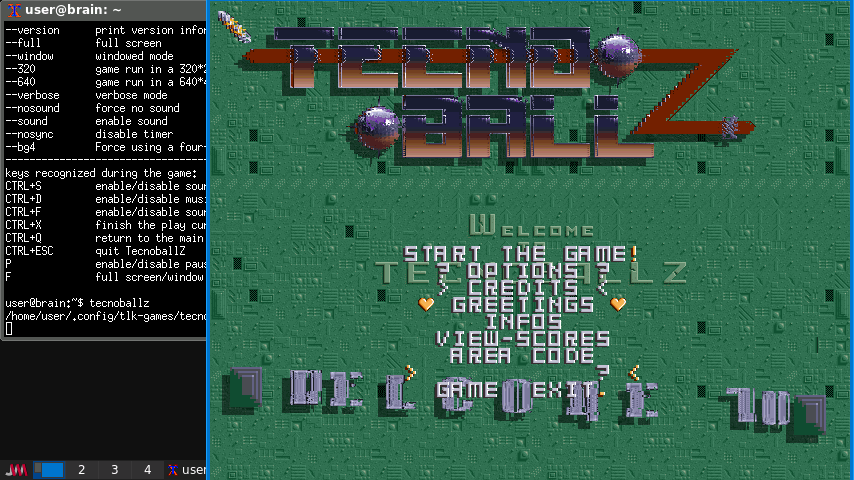
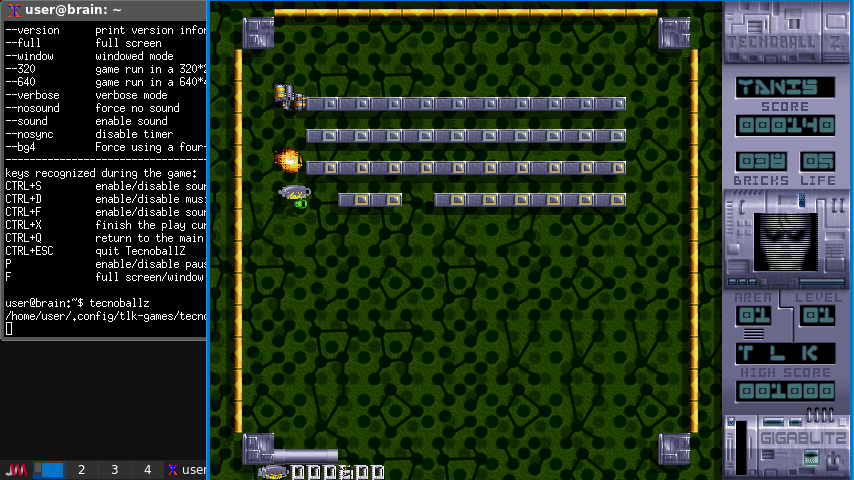
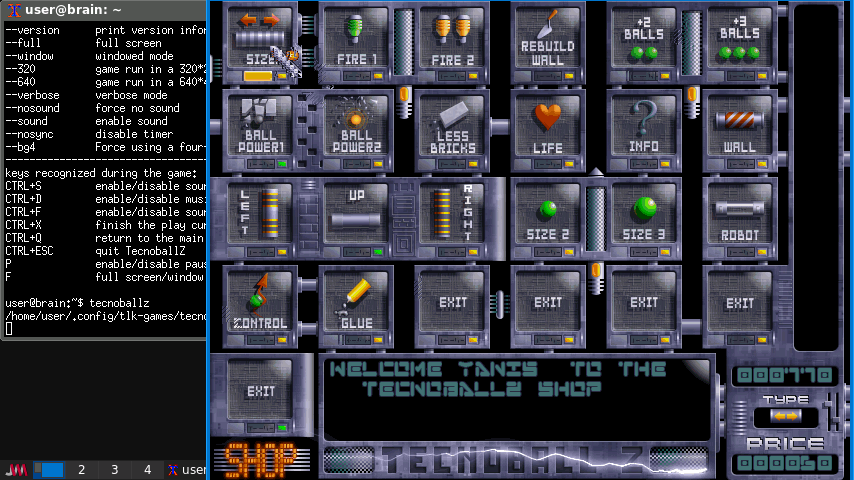
https://packages.debian.org/bullseye/tecnoballz
https://linux.tlk.fr/games/TecnoballZ/
起動:tecnoballz
これは多くのボーナスステージを持つ Breakout やアルカノイドに似たゲーム です。ステージ間で拭きやボーナスを買えます。 時々守護者を倒す必要があります。 このゲームは C++ で書かれており、SDL ライブラリを利用します
●ブロック崩しゲーム
多くのボーナスステージを持つブレークアウトやアルカノイドに似たゲームです。
ステージ間に武器やボーナスを買うことができます。時々守護者を倒す必要があります。
マウスの右クリックでボールを打ちます。
はね返ってきたら、マウスを動かしてボールを打ち返します。
攻撃できるようになるタイミングは分かりませんが、クリックすると撃ちます。
[p]ボタンを押すと一時停止します。もう一度押すと再開します。
コントロールキーを押しながら[q]キーを押すと、終了してメニューに戻ります。
ステージをクリアするとお店の画面が開きます。武器などの買い物ができます。
商品にマウスのカーソルを合わせると右下に値段が表示されます。
商品をクリックすると買うことができます。右側に買った商品が表示されます。
お店を出る時は「EXIT」をクリックします。
敵や、アイテムがたくさん出現するブロックくずしゲームです。
USB Soundデバイスを付けている場合、綺麗に曲が演奏されます。
Musicが有効ですと少し遅いですが、Ctrl+DでMusicを無効にすれば、少し速くなります。
起動時に–nosyncオプションでも早くなるみたいです。
マウスでバーを操作し、球を跳ね返してすべてのブロックを消せばクリアです。
コンティニューはありませんが、AREA CODEというものを入れると、
対象の面からプレイできるようです。が、ゲー、宇宙では調べられず、康太y九サイトなどで知られなければいけないようです。
インストール:APT経由 ”sudo apt install tecnoballz”
———-
○ tuxpuck 一人用エアホッケーゲーム
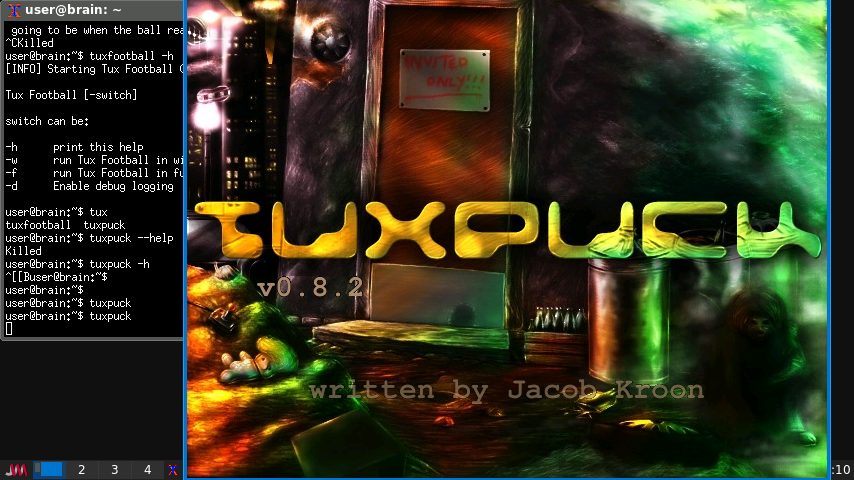

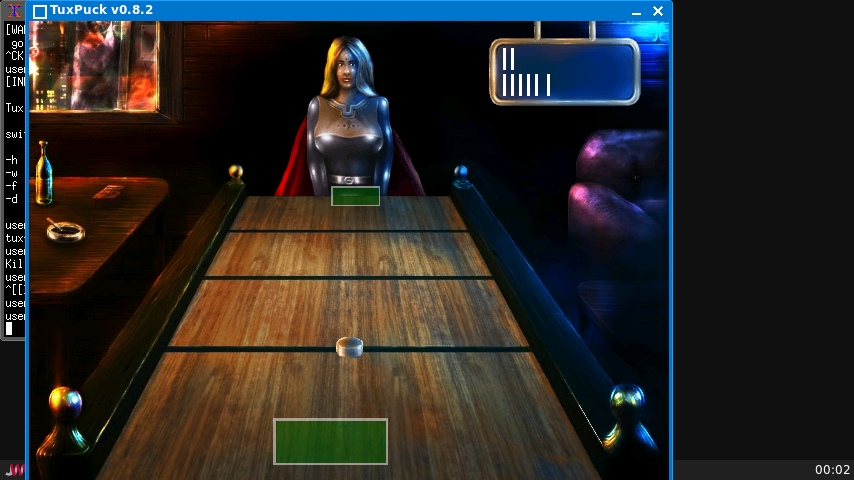
https://packages.debian.org/bullseye/tuxpuck
起動:tuxpuck
TuxPuckはエアホッケーゲームで、Amiga/Atari ST用ゲーム「Shufflepuck Café」のクローンです。プレイヤーはテーブルの上でバットを動かし、パックを相手のディフェンスを越えて打ち込むことを目指します。どちらかのプレイヤーが15ポイントに達すると試合終了です。
●エアホッケー
クリックするとメニューが表示されます。
↑↓キーで「Play Match」を赤色にし、エンターキーを押して次に進みます。
対戦相手(ペンギンかアルカナ)を赤色にし、エンターキーを押して開始します。
(うちン環境だと、USBキーボードのEnterでhあダメで、BrainのキーボードのEnter[改行]だと反応しました。)
マウスをパッドで動かしてパックを打ち合います。
エスケープキーを押すとメニューが表示されます。
Brainでも快適にプレイできます。
結構敵が強いので、なかなか勝てません。
反射神経勝負です。
インストール:APT経由 ”sudo apt install tuxpuck”
———-
◎ Teeter Torture シーソーの上に設置された砲台からモンスターを撃つゲーム
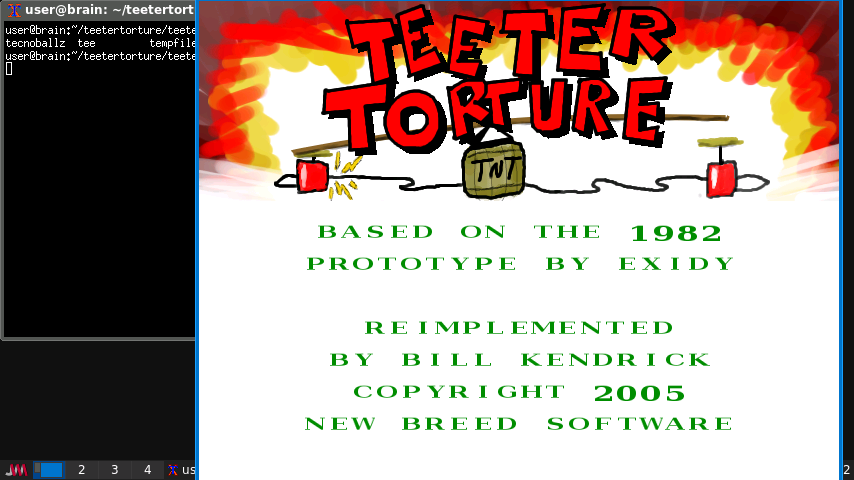
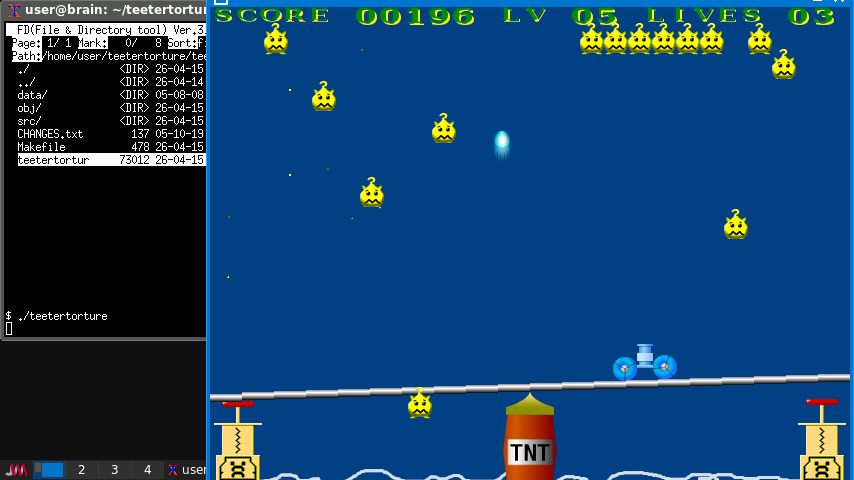
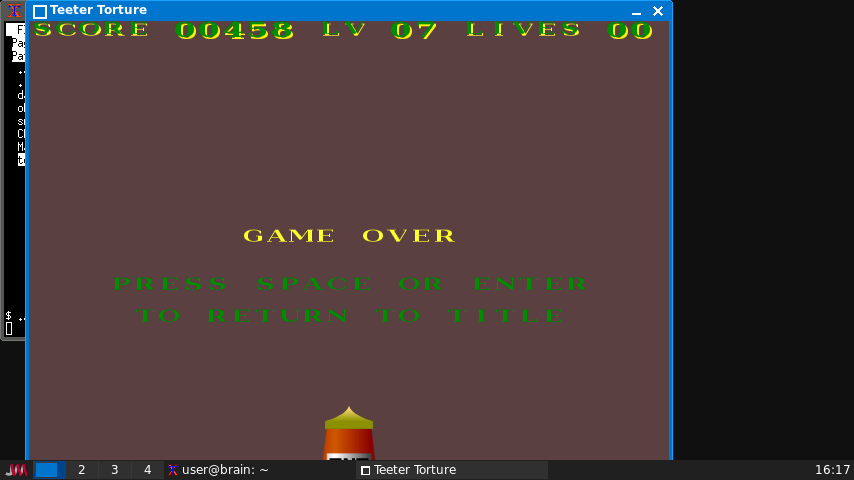
http://www.newbreedsoftware.com/teetertorture/
起動:cd ~/teetertorture/teetertorture-2005-10-18; ./teetertorture
Teeter Tortureは、シンプルなシューティングゲーム(「スペースインベーダー」「ギャラガ」「ギャラクシアン」など)ですが、独特のひねりが加えられています。あなたの砲はシーソーの上に設置されています。どちらかの方向に傾きすぎると、TNTの樽が爆発します!
画面上部に「重りモンスター」が現れ、ランダムにシーソーに向かって落下してきます。モンスターがシーソーに付着すると、シーソーが重くなり、バランスを保つのが難しくなります。(モンスターが大砲に当たると、大砲が爆発してライフを失います。)
注:これは、New Breed SoftwareがExidyのラリー・ハッチャーソンが1982年に制作した同名のクラシックアーケードゲームのプロトタイプを再現したものです。
Brainでも快適に動かすためにソースの改造を行っています。
また、ゲームオーバー処理などがありませんでしたので、こちらも追加して
ゲームとしてでっち上げています。
インストール:ソースからインストール
インストール手順詳細(クリックで表示)
$ cd
$ mkdir teetertorture
$ cd teetertorture
$ wget https://tuxpaint.org/ftp/unix/x/teetertorture/source/teetertorture-2005-10-18.tar.gz
$ tar zxvf teetertorture-2005-10-18.tar.gz
vcd teetertorture-2005-10-18
$ make
$ sudo make install
実行すると、以下のようにエラーになります。
user@brain:~/teetertorture/teetertorture-2005-10-18$ ./teetertorture
munmap_chunk(): invalid pointer
IOT Trap
ソースを確認すると怪しそうなものが2か所見つかりました。
(開放してはいけないものを開放しようとしてましたのでコメントアウトします。)
$ vi src/teetertorture.c
boolean setup(int argc, char * argv[])
・・・
 char * home;
・・・
  home = getenv("HOME");
・・・
 free(home);
 ↓
 /* free(home); */

void do_shutdown(void)
・・・
 free(home);
 ↓
 /* free(home); */
こちらを直して、再ビルドします。
$ make
$ ./teetertorture
これでゲーム自体はできるようになりましたが、4点ほど難点が・・・
・TNT でやられたときの「フリーズしたように見える時間」が長い(1つ目)
・モンスターに当たったとき(自機爆発)のアニメーションが長い(2つ目)(3つ目)
・残機表示がない(4つ目)
・ゲームオーバー処理がない(5つ目以降)
とりあえずいつも通り、動けばいいやな精神で修正していきます。
$ vi src/teetertorture.c
int huge_explosion(void)
・・・
  for (i = 0; i < 32 && cmd == CMD_GAME; i++)
  for (i = 0; i <  0 && cmd == CMD_GAME; i++)
・・・
  return(cmd);
}
↓
int huge_explosion(void)
・・・
  for (i = 0; i <  0 && cmd == CMD_GAME; i++)
・・・
  /* 画面を明るくフラッシュして少し待つだけの簡易演出にする */
  SDL_FillRect(screen, NULL, SDL_MapRGB(screen->format, 255, 255, 255));
  SDL_Flip(screen);
  SDL_Delay(500);

  clear_screen(level_colors[(level - 1) / 2][0],
               level_colors[(level - 1) / 2][1],
               level_colors[(level - 1) / 2][2]);

  return(cmd);
}
void explode_player(int x)
・・・
player_exploding = 128;
}
↓
void explode_player(int x)
・・・
player_exploding = 30;
}void add_explosion(int x1, int y1, int x2, int y2, int expl_type)
・・・
explosion[found].active = 128;
・・・
↓
void add_explosion(int x1, int y1, int x2, int y2, int expl_type)
・・・
explosion[found].active = 30;
・・・
void draw_score(boolean draw)
・・・
   sprintf(str, "SCORE %05d  LEVEL %2d", score, level);
・・・
}

void draw_score(boolean draw)
・・・
   sprintf(str, "SCORE %05d LV %02d LIVES %02d", score, level, lives);
・・・
}
void draw_score(boolean draw)
・・・
}
↓
void draw_score(boolean draw)
・・・
}

int draw_game_over(void)
{
  int ch = images[IMG_LETTERS]->h;

  /* 画面中央に GAME OVER を表示 */
  draw_text(TEXT_CENTERED, (screen->h / 2) - (ch * 2), "GAME OVER", TRUE);
  draw_text(TEXT_CENTERED, (screen->h / 2) + (ch * 1), "PRESS SPACE OR ENTER", FALSE);
  draw_text(TEXT_CENTERED, (screen->h / 2) + (ch * 3), "TO RETURN TO TITLE", FALSE);

  SDL_Flip(screen);

  SDL_Event event;
  int wait = 1;

  while (wait)
  {
      while (SDL_PollEvent(&event))
      {
          if (event.type == SDL_KEYDOWN)
          {
              SDLKey key = event.key.keysym.sym;
              if (key == SDLK_SPACE || key == SDLK_RETURN || key == SDLK_ESCAPE)
                  wait = 0;
                  return CMD_MENU;
          }
          else if (event.type == SDL_QUIT)
          {
              wait = 0;
              return CMD_QUIT;
          }
      }
      SDL_Delay(10);
  }
}
boolean game_loop(void)
・・・
cmd = huge_explosion();
・・・
explode_player(cannon_x);
・・・
↓
・・・
cmd = huge_explosion();
/* TNT 爆発で残機を減らす */
lives--;
/* ゲームオーバー判定 */
if (lives <= 0)
cmd = draw_game_over();
・・・
explode_player(cannon_x);
/* 自機爆発で残機を減らす */
lives--;
/* ゲームオーバー判定 */
if (lives <= 0)
{
cmd = draw_game_over();
if (cmd == CMD_MENU)
done = TRUE;
else if (cmd == CMD_QUIT)
{
done = TRUE;
quit = TRUE;
}
}
・・・void draw_score(boolean draw);
↓
void draw_score(boolean draw);
int draw_game_over(void);$ make clean
$ make
$ ./teetertorture
あとはおなじみの最適化設定
$ vi Makefile
CFLAGS=-O2 -march=armv5te -mtune=arm926ej-s -msoft-float -fomit-frame-pointer -Wall $(SDL_CFLAGS)
LDFLAGS += -Wl,--as-needed
動きをもう少し早くしたいときには、以下を変更すると変わります
$ vi src/teetertorture.c
#define FPS 60
↓
#define FPS 30
$ make clean
$ make
$ ./teetertorture
———-
○ Entombed! Atari 2600の名作ゲームEntombedクローン
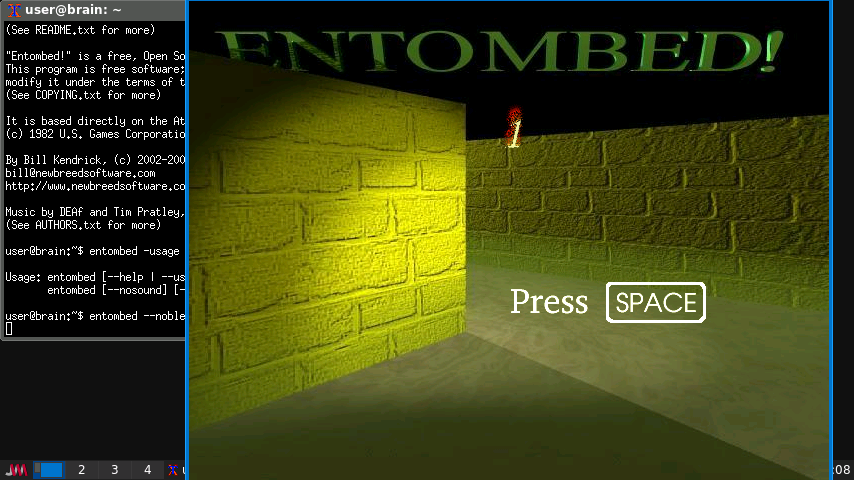
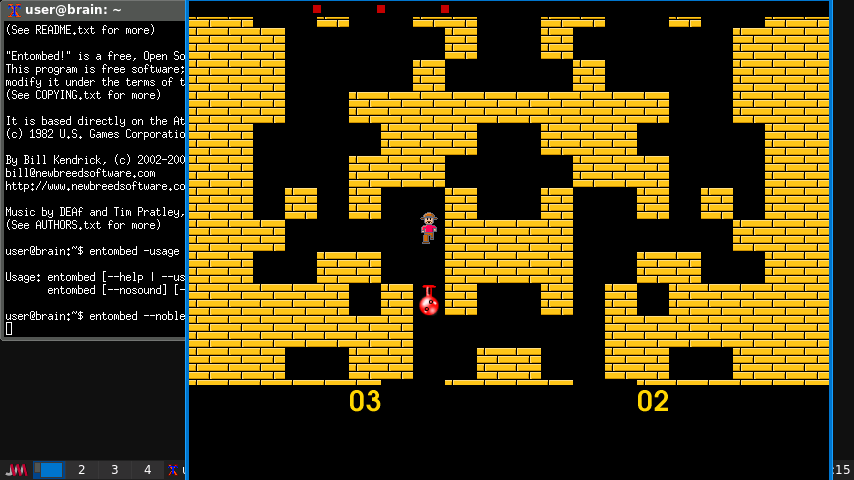
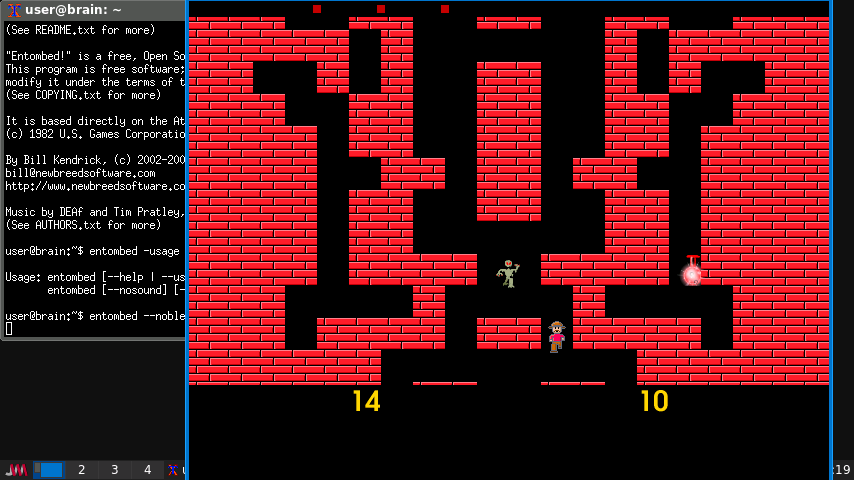
http://www.newbreedsoftware.com/entombed/
起動:entombed
「Entombed!」は、1人または2人でプレイできる迷路ゲームで、Atari 2600の名作ゲーム「Entombed」(©1982 US Games)をベースにしています。
あなたとあなたの考古学者チームは、「ゾンビの地下墓地」に迷い込んでしまった。しかし、調査をしている暇はない。壁が迫り、ゾンビたちが動き出したのだ!
幸運なことに、あなたは壁を作り出したり破壊したりできる古代の神秘的な薬を発見しました。この薬の瓶は地下墓地のあちこちに散らばっています。それらを手に入れれば、行き詰まった時に壁を破壊したり、追われている時に背後に壁を作ったりすることができます。
生き延びる時間が長ければ長いほど、より速く動かなければならない。
下に向かって、どんどん進んでいきます。
もし行き止まりになったときには、Spaceキーで破壊/復元できますが、回数に制限があります(瓶のアイテムを取ると回数を回復できます。)
敵に当たったり、自分が一番上まで行ってしまうとミスになり、
残機がなくなるとゲームオーバーです。
キー操作:
1 プレイモード(カーソルキーで移動、パンチはSPACE)
2 プレイモード(テンキーで操作、パンチはテンキーの0)
SPACE ゲーム開始
コマンドラインオプション
–fullscreen Run full-screen (640×480), instead of in a window.
–nosound Disable sound effects and music.
–noblend Disable atmospheric alphablending (for slower systems).
–usage Display brief usage options.
–help Display more verbose help.
インストール:ソースからインストール
インストール手順詳細(クリックで表示)
$ cd
$ mkdir entombed
$ cd entombed
$ wget https://tuxpaint.org/ftp/unix/x/entombed/entombed-2007.07.04.tar.gz
$ tar zxvf entombed-2007.07.04.tar.gz
$ cd entombed-2007.07.04
$ make
$ sudo make install
———–
◎ vodovod パズルゲームでは、水を貯水槽まで導かなければなりません。
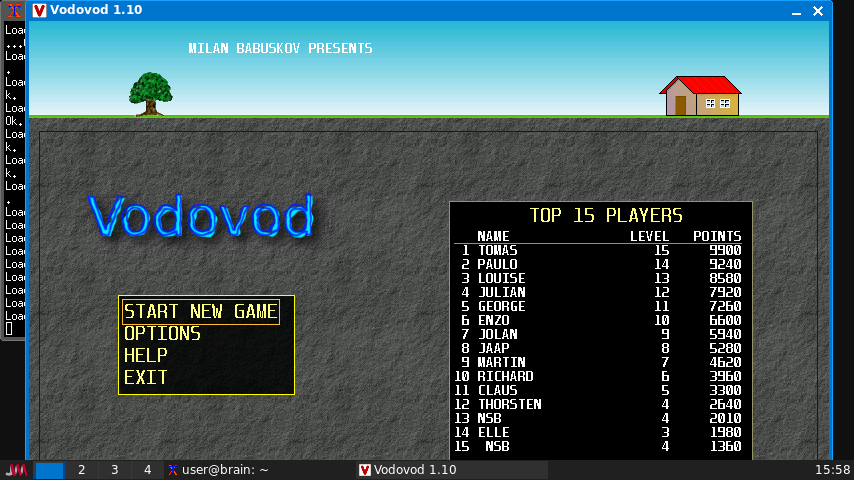

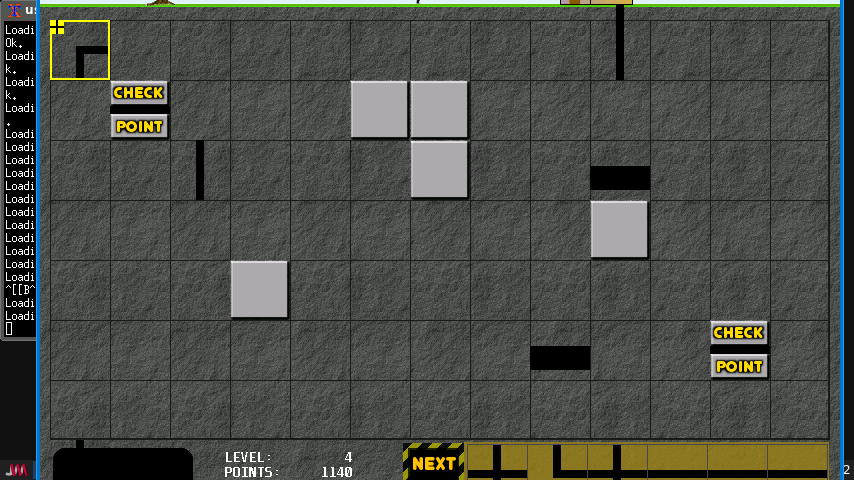
https://packages.debian.org/bullseye/vodovod
起動:vodovod
Vodovodは、Pipe ManiaやPipe Dreamに似たゲームで、家から貯水タンクまで水を運ぶのが目的です。各レベルで使えるパイプの数は限られており、それらを組み合わせて画面上部の家から下部の貯水タンクまで水を運ぶ必要があります。ジョイスティック/ジョイパッドに対応しています。
●パイプをつなぐゲーム
家からタンクまでパイプをつないで水を送ります。
ブロックされた領域はパイプを通せません。
チェックポイントは必ずパイプを通さなければいけません。
地面の中には穴もあります。そこでは流れが遅くなります。
スペースキーを押すと右下に出ているパイプが順番に表示されます。
水が流れる前に、家からタンクまでパイプがつながればクリアです。
【操作】[←]:左へ [→]:右へ [↑]:上へ [↓]:下へ [space]:DROP [Enter]:FLOOD
[P]:pause [ESC]:ゲーム終了
800×600の解像度が必要なのでBrainでの実行では縦解像度が足りないのですが、
最前面表示にして、上の家がギリギリ見える位置までWindowを上に移動すると、
ギリギリですがプレイできるようになります。
(下にある次のブロックがかろうじて判別可能になります。)
OPTIONSから、設定変更が出来ます。
(キー変更やMUSICの無効化などが出来ます。)
インストール:APT経由 ”sudo apt install vodovod”
———-
○ xwelltris Welltris に似た3Dテトリスとは別の立体テトリスゲーム
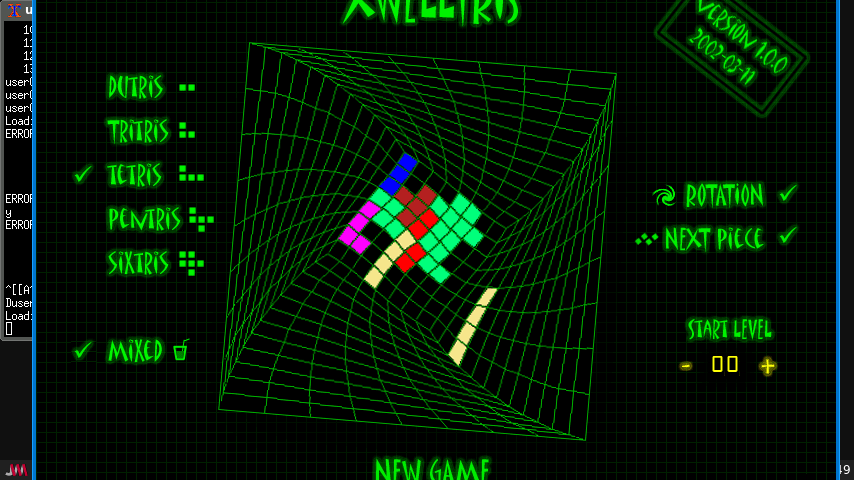
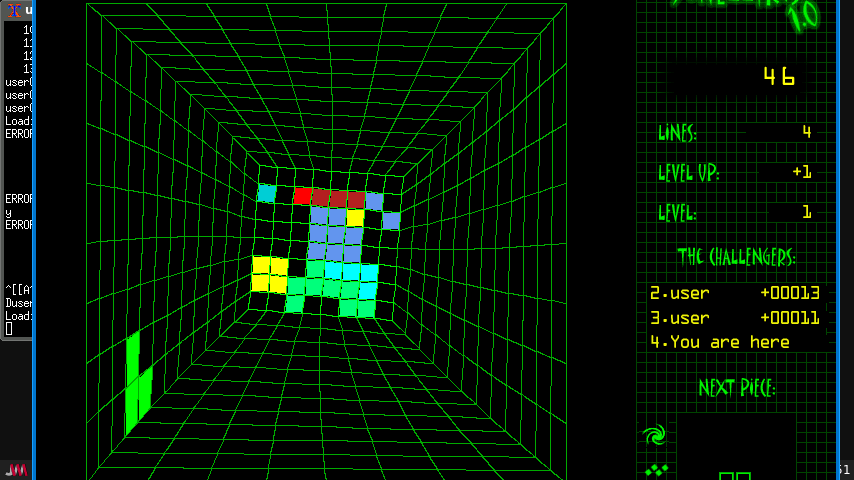
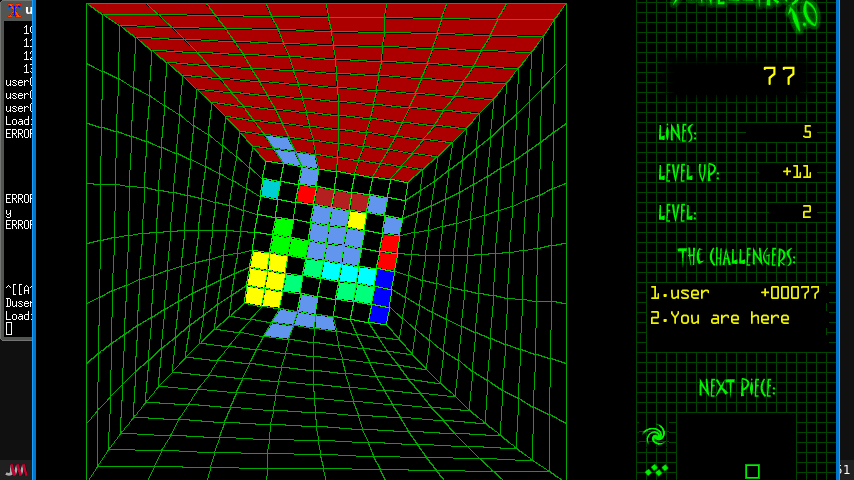
https://packages.debian.org/bullseye/xwelltris
起動:xwelltris
このゲームの概念はロシア人プログラマ Pogitnov により考案されました。 Tetris と同じゲームコンセプトを有しています。
あなたは上からコップを覗き込んでいることを想像してください。 4 つの壁と底が見えるはずです。壁から一つずつフラットな二次元図形が 落ちてきます。それらの図形を一つの壁から別の壁に移動したり、図形を回転 できます。図が壁から離れると、底が持ち上がり、他の図形がプッシュされます。 底の上に図形を一列又は一行だけ積み上げる必要があります。そうすると、 図形は消滅し、底が下がってスコアが得られます 🙂
●3Dテトリスとは別の立体テトリス
「NEW GAME」をクリックして名前を入力し、エンターキーを押して開始します。
落ちてくるブロックを底面で並べ、縦または横の1列を埋めて消します。
壁を下降している間、ブロックは左右に横移動できます。
隣の壁に移ることもできますが、固定された壁には入れません。
ブロック全体が底面に入ると左右の移動はできなくなります。回転はいつでもできます。
移動は中心を向いた状態の左と右になるので、上側の壁では左右が見た目と逆になります。
ブロックが一番下に届くと、底面を横切って反対側の端まで行って止まります。
ブロックが底面に入り切らずに壁にはみ出すと、その壁は固定されて赤くなります。
壁の固定はブロックが3つ落ちると解除されます。
4つの壁が全て固定されたらゲームオーバーです。
【操作】[←]:左へ [→]:右へ [↑]/[↓]:回転 [space]:落とす [p]:一時停止 [Esc]:終了
800×600の解像度が必要なゲームですが、
BrainでもWindowの移動をすることでプレイすることは出来ます。
Window右上のXマークが隠れている場合にゲームを終了するには、
画面右下のEXITを押すか、起動元のshellでCtrl+Cで終了できます。
説明を読んだだけだとわかりにくかったですが、実際に動いているところを見れば理解できます。が、操作方向が、4面の壁ごとに変わるので、頭が混乱します。
インストール:APT経由 ”sudo apt install xwelltris”
———-
◎ xye パズルゲーム – 部屋に宝石を全部入れよう
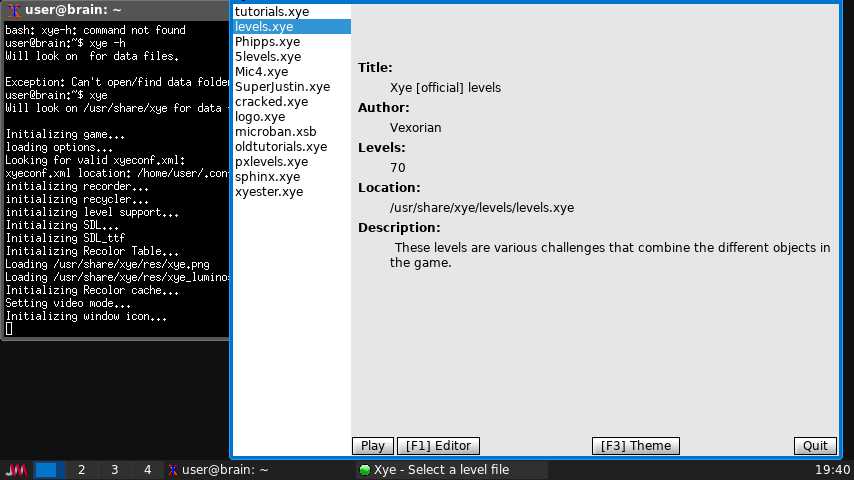
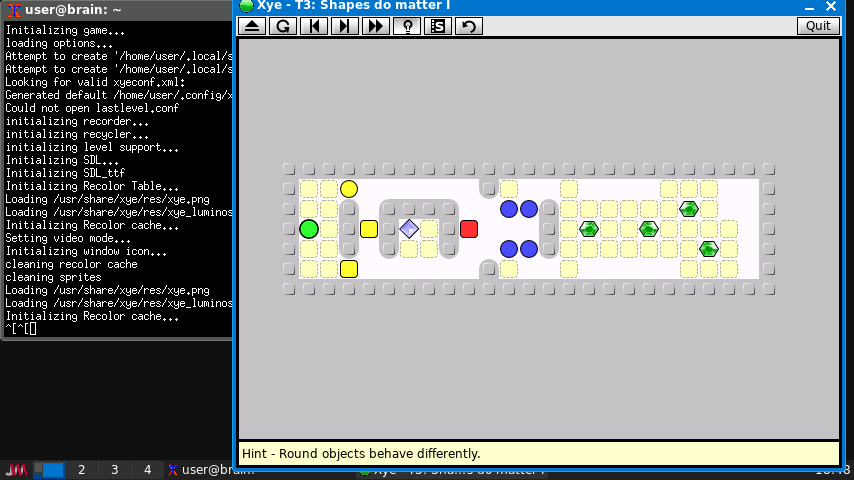
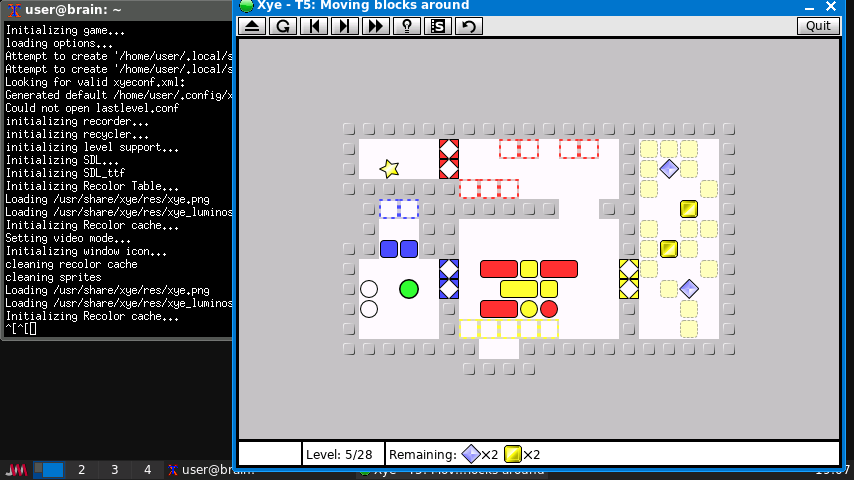
https://packages.debian.org/bullseye/xye
起動:xye
Xye はパズルゲームです。緑色の円のような見掛けのキャラクターを助けて、宝石 を全部部屋に入れるのが目的です。これはもちろん聞いて受ける印象に比べて簡単 ではありません。様々な種類の罠や猛獣を全て避けながら幅広いパズルを解かなく てはなりません。
Xye は sokoban や boulderdash のような他のパズルゲームと似ていますが、アー ケードゲームの要素を追加してあります。
Xye は古典的なウィンドウズのゲーム Kye の派生で、ゲームのプレイ感と視覚的要 素はこれに基いています。Kye と Sokoban 用のレベルファイルを遊ぶこともできま す。より豊富なレベルフォーマットであり、新しいオブジェクトや機能があるカス タム .xye ファイルを遊ぶこともできます。このファイルは手書きすることもゲー ムにビルトインのエディタを使って編集することもできます。
●宝石を集めるパズル
テーマを選んで [Use theme]で次に進み、[Play]で開始します。
ルールに従って、↑↓←→キーで移動しながら宝石を集めます。
・ブロックは押すことができます。時には引くこともできます。
・ブロックは異なる形とサイズを持っていて、決められた動きをします。
・磁石はブロックを引くのに役立ちます。
・特定のブロックを特定の場所に置くと扉が開きます。
・モンスターが追いかけてきます。
緑の丸を操作します。
四角いブロックは倉庫番と同じように真っすぐしか押せません。
丸いブロックは曲線に押し付けるとカーブに沿って移動します。
矢印のブロックは矢印の向きに滑ります。ぶつかるまで止まりません。
ブロックは点線の黄色マスを通れません。
点線の黄色マスはその上を通れば消すことができます。
四角い点線ブロックのすべてに同じ色のブロックを乗せると、
シャッター(四角の中にひし形)が空きます。
全ての宝石を集めるとクリアです。星を取らなくてもクリアになります。
Brainでプレイする場合はテーマでDefault(600×440)かdetailed20(600×440)を選びましょう。default.xmlかdetailed20.xmlを選んで「Use theme」で進めます。
標準でレベルファイルが13用意されており、それぞれのレベルファイルに複数のレベルが登録されています。
tutorials(28)、levels(70)、ohipps(42)等
レベルについては、まずは動かしてみて動きの法則を覚える系です。
いろいろ試してみていると、クリアへの道筋が見えてきます。
クリアしたら、N or + キーで次に進めます。
インストール:APT経由 ”sudo apt install xye”
———-
◎ Pop Star 飛び回る星をつなげて多角形を作ってすべての星を消すゲーム
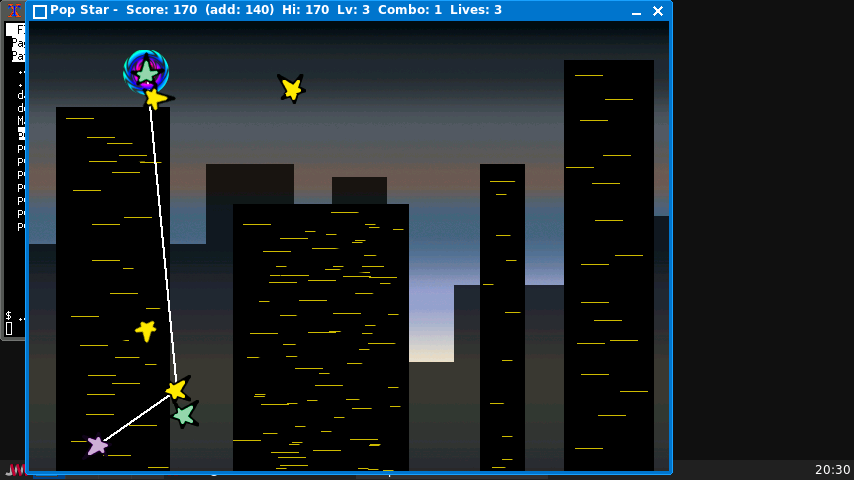
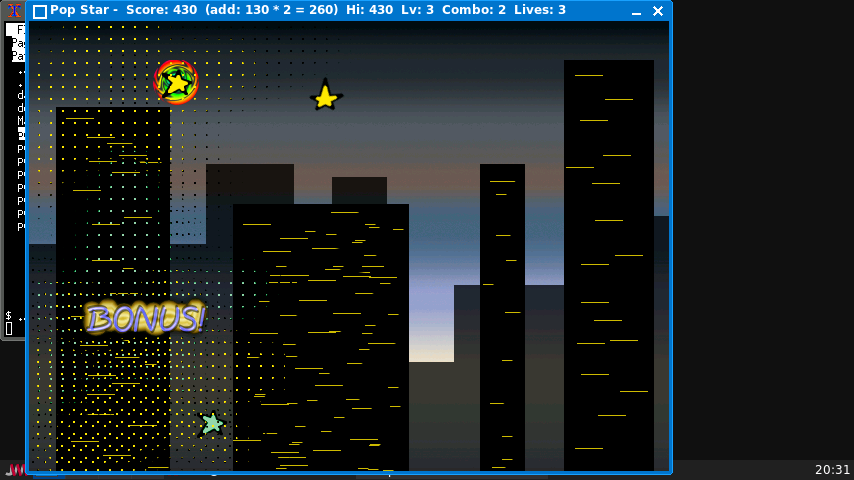
http://www.newbreedsoftware.com/popstar/
起動:popstar
Pop Starは、飛び回る星をつなげて多角形を作るシンプルなパズルゲームです。
注: 2007年9月現在、Pop Starは未完成ですが、アルファテスト版が利用可能です。
・キーボードまたはマウスによる操作
・オリジナルサウンドトラック
・ベータ版!スコアリングやゲームオーバーはまだ実装されていません!:^)
公開されているソースでは、
飛び回る星を線でつなげて多角形を作って消すゲームですが、
フリーの星を作った多角形で囲して消すと、ボーナスと表示されます。
線は交差してしまったりすると切れてしまいます。
すべて星を消すことができればクリアです。
また、残った星が多角形を作れない2つ以下になってしまうとMISSと表示されます。
クリア・ミスにかかわらず、レベルは無条件に上がっていきます。
スコアもゲームオーバ処理もありません。
ビルドは普通にできますが、
今回は、追加で以下のカスタマイズを行っています。
- タイトル画面で、Mキーを押すとBGMのOFF/ON
- タイトル画面からゲーム開始するのに、Space,Enterだけでなく、マウスクリックも追加
- スコア加算を追加
・多角形でつなげて星を消すと+10点
・多角形で星を囲んで消すと+100点
・星を囲んで消し続けると、コンボになり、取得するスコアをn倍化- クリアしたときのみレベルが上がるように変更
- 残数とゲームオーバーを追加(ミスすると、残数が減り、残数がなくなるとゲームオーバ)
- ウィンドウタイトルにスコア、取得スコア、ハイスコア、レベル、コンボ、残数を表示
- その他速度調整や最適化
この修正で、ハイスコアを狙うために消し方の戦略が必要になるようにしてみました。
(クリアするだけなら簡単だけど点数が伸びない感じ)
インストール:ソースからインストール
インストール手順詳細(クリックで表示)
$ cd
$ mkdir popstar
$ cd popstar
$ wget https://tuxpaint.org/ftp/unix/x/popstar/popstar-0.0.2.tar.gz
$ tar zxvf popstar-0.0.2.tar.gz
$ cd popstar-0.0.2
$ make
$ sudo make install
これで、用意された段階まではビルドしてプレイできますが、
スコアもゲームオーバ処理も出来ません。
変更部分
$ vi popstart.c.patch
--- popstar.c   2026-04-16 15:58:26.015460714 +0900
+++ popstar.c   2026-04-18 17:46:56.678209242 +0900
@@ -54,12 +54,12 @@
 /* Configuration options; could be useful for platform ports: */

 #define WIDTH 640 /* Screen size... */
-#define HEIGHT 480
+#define HEIGHT 450
 #define FPS 20 /* Frame rate */
 #define MAX_STARS 16 /* Max # of stars on screen */
 #define MAX_BROKENLINES 20 /* Max # of broken lines on screen */
 #define POP_TIME (2 * FPS) /* How long stars take to pop */
-#define LEVEL_TEXT_TIME (5 * FPS) /* How long between levels */
+#define LEVEL_TEXT_TIME (2 * FPS) /* How long between levels */
 #define TRANSITION_THICKNESS 16 /* How many steps in level bkgd transition */

 #define MAX_X_SPEED (star_width >> 2)
@@ -196,6 +196,11 @@ int cursor_star, cursor_spin, blink;
 int level;
 int advance_level;
 int score;
+int highscore;
+int addscore;
+int combo;
+int lives;
+int bgm_enabled = 1;   /* ★ BGM専用フラグ(1=ON, 0=OFF) */
 int current_game_music, current_game_bkgd;


@@ -219,11 +224,12 @@ void draw_line_piece(int x, int y, Uint3
 int intersect(int ax1, int ay1, int ax2, int ay2,
               int bx1, int by1, int bx2, int by2);
 int inside(int x, int y);
+void update_window_title(void);
 int kill_intersections(void);
 void add_line_debris(int x1, int y1, int x2, int y2);
 void add_brokenline(int x1, int y1, int x2, int y2);
 void select_star(void);
-
+void update_bgm(void);

 /* --- MAIN! --- */

@@ -269,11 +275,16 @@ int title(void)
   SDL_Flip(screen);

   if (use_sound)
-    Mix_PlayMusic(musics[MUSIC_TITLE], -1);
+    if (bgm_enabled)
+       Mix_PlayMusic(musics[MUSIC_TITLE], -1);

   quit = 0;
   done = 0;

+  lives = 0;
+
+  update_window_title();
+
   do
   {
     SDL_WaitEvent(&event);
@@ -288,6 +299,19 @@ int title(void)
        done = 1;
       else if (key == SDLK_ESCAPE)
        done = quit = 1;
+      else if (key == SDLK_m)
+      {
+       bgm_enabled = !bgm_enabled;
+        if (bgm_enabled)
+            Mix_PlayMusic(musics[MUSIC_TITLE], -1);
+        else
+            Mix_HaltMusic();
+      }
+    }
+    else if (event.type == SDL_MOUSEBUTTONDOWN)
+    {
+      /* ★ マウスクリックでゲーム開始 */
+      done = 1;
     }
   }
   while (!done);
@@ -315,6 +339,8 @@ int game(void)
   quit = 0;
   done = 0;
   cursor_spin = 0;
+
+  /* level/score は init_game() / init_level() 内で初期化される */
   blink = 0;
   advance_level = 0;

@@ -355,6 +381,15 @@ int game(void)

          done = 1;
        }
+        /* ★ Mキーでゲーム中のBGM ON/OFF */
+        if (key == SDLK_m)
+        {
+         bgm_enabled = !bgm_enabled;
+
+          update_bgm();   /* BGM の再生/停止を反映 */
+          update_window_title();
+        }
+
       }
       else if (event.type == SDL_MOUSEBUTTONDOWN)
       {
@@ -435,6 +470,7 @@ int game(void)

     /* Switch to next level if there aren't enough stars left to make a poly: */

+    /*
     if (num_stars_left < 3 && advance_level == 0)
     {
       advance_level = LEVEL_TEXT_TIME;
@@ -442,7 +478,39 @@ int game(void)
       if (use_sound)
         Mix_PlayChannel(-1, sounds[SND_MISSED1], 0);
     }
+    */

+    /* --- NEW LOGIC ---
+       星が 0 個 → 成功(レベルアップ)
+       星が 1〜2 個 → 失敗(レベル据え置き)
+    ---------------------------------------- */
+
+    if (advance_level == 0)
+    {
+      if (num_stars_left == 0)
+      {
+        /* ★ 成功:レベルアップ */
+        advance_level = LEVEL_TEXT_TIME;
+
+        if (use_sound)
+          Mix_PlayChannel(-1, sounds[SND_POP], 0);
+      }
+      else if (num_stars_left < 3)
+      {
+        /* ★ 失敗:レベルは上げない */
+        advance_level = LEVEL_TEXT_TIME;
+
+        if (use_sound)
+          Mix_PlayChannel(-1, sounds[SND_MISSED1], 0);
+
+        /* レベルを据え置くため、advance_level が 0 になったときに
+           level++ しないようにする */
+        /* → init_level() の直前で level-- して相殺する */
+        level--;  /* 一時的に減らしておき、後で +1 されて元に戻る */
+        combo = 0;
+       lives--;
+      }
+    }

     /* Move pops and bonuses: */

@@ -487,8 +555,18 @@ int game(void)

       if (advance_level == 0)
       {
-        level++;
-        init_level();
+        if (lives >= 0)
+       {
+          /* Clear / Miss */
+          level++;
+          init_level();
+       }
+       else
+       {
+         /* GameOver */
+          SDL_Delay(10000);
+          done = 1;
+       }
       }
     }

@@ -653,8 +731,12 @@ int game(void)
       if (num_stars_left == 0)
         img = IMG_LEVEL_COMPLETE;
       else
-        img = IMG_LEVEL_INCOMPLETE;
-
+      {
+        if (lives >= 0)
+             img = IMG_LEVEL_INCOMPLETE;
+       else
+             img = IMG_GAMEOVER;
+      }
       dest.x = (WIDTH - images[img]->w) / 2;
       dest.y = (HEIGHT - images[img]->h) / 2;

@@ -687,6 +769,8 @@ int game(void)
 void select_star(void)
 {
   int i;
+  int removed;
+  int bonus_count;
   int got_bonus;


@@ -706,7 +790,10 @@ void select_star(void)
   else if (cursor_star == stars_selected[0] &&
           num_stars_selected >= 3)
   {
-    /* If we select the first star again, and make a polygon! */
+    removed = 0;
+    bonus_count = 0;
+
+       /* If we select the first star again, and make a polygon! */

     stars[cursor_star].selected = 1;

@@ -724,6 +811,8 @@ void select_star(void)
          stars[i].alive = 0;
          stars[i].selected = 0;

+          bonus_count++;
+
          add_bonus(stars[i].x >> 4, stars[i].y >> 4);
          add_pop(stars[i].x >> 4, stars[i].y >> 4,
                  stars[i].xm >> 4, stars[i].ym >> 4,
@@ -740,6 +829,8 @@ void select_star(void)
        stars[stars_selected[i]].alive = 0;
        stars[stars_selected[i]].selected = 0;

+        removed++;
+
        add_pop(stars[stars_selected[i]].x >> 4,
                stars[stars_selected[i]].y >> 4,
                stars[stars_selected[i]].xm >> 4,
@@ -750,6 +841,37 @@ void select_star(void)
       }
       num_stars_selected = 0;

+      /* スコア計算:
+         - ポリゴンを構成した星: 1 個あたり 10 点
+         - 内側にいた星(ボーナス): 1 個あたり 50 点
+         - コンボボーナス: 連続成功回数 * 5 点
+       */
+
+      if (removed > 0)
+      {
+       addscore = 0;
+        addscore += removed * 10;
+        addscore += bonus_count * 100;
+
+        /* ★ コンボ条件を「ボーナス取得時」に変更 */
+        if (bonus_count > 0)
+        {
+          combo++;   /* ボーナスがあればコンボ継続 */
+          score += addscore * combo;
+       }
+        else
+        {
+          combo = 0; /* ボーナスが無ければコンボ途切れ */
+          score += addscore;
+       }
+
+
+       if (score > highscore)
+        {
+          highscore = score;
+        }
+        update_window_title();
+      }

       /* Play sound: */

@@ -784,60 +906,45 @@ void select_star(void)

 void draw_line(int x1, int y1, int x2, int y2, Uint8 r, Uint8 g, Uint8 b)
 {
-  int dx, dy, y;
-  Uint32 rgb;
-  float m, bi; /* FIXME: Literally... use fixed point math ;^) */
+  /* --- NEW: Integer Bresenham line algorithm (fast on ARMv5) --- */

-  rgb = SDL_MapRGB(screen->format, r, g, b);
+  Uint32 rgb = SDL_MapRGB(screen->format, r, g, b);

+  /* Convert from <<4 fixed point */
   x1 >>= 4;
   y1 >>= 4;
   x2 >>= 4;
   y2 >>= 4;

-  dx = x2 - x1;
-  dy = y2 - y1;
+  int dx = abs(x2 - x1);
+  int sx = (x1 < x2) ? 1 : -1;
+  int dy = -abs(y2 - y1);
+  int sy = (y1 < y2) ? 1 : -1;
+  int err = dx + dy;
+  int e2;

-  if (dx != 0)
+  while (1)
   {
-    m = ((float) dy) / ((float) dx);
-    bi = y1 - m * x1;;
+    draw_line_piece(x1, y1, rgb);

-    if (x2 >= x1)
-      dx = 1;
-    else
-      dx = -1;
-
-    while (x1 != x2)
-    {
-      y1 = m * x1 + bi;
-      y2 = m * (x1 + dx) + bi;
-
-      if (y1 > y2)
-      {
-       y = y1;
-       y1 = y2;
-       y2 = y;
-      }
+    if (x1 == x2 && y1 == y2)
+      break;

-      for (y = y1; y <= y2; y++)
-        draw_line_piece(x1, y, rgb);
+    e2 = 2 * err;

-      x1 = x1 + dx;
-    }
-  }
-  else
-  {
-    if (y1 > y2)
+    if (e2 >= dy)
     {
-      y = y1;
-      y1 = y2;
-      y2 = y;
+      err += dy;
+      x1 += sx;
     }

-    for (y = y1; y <= y2; y++)
-      draw_line_piece(x1, y, rgb);
+    if (e2 <= dx)
+    {
+      err += dx;
+      y1 += sy;
+    }
   }
+
 }


@@ -928,8 +1035,12 @@ void init_game(void)
 {
   level = 1;
   score = 0;
+  lives = 3;
+  addscore = 0;
+  combo = 0;
   current_game_music = -1;
   current_game_bkgd = -1;
+  update_window_title();
 }


@@ -985,7 +1096,8 @@ void init_level(void)
     if (level_music != current_game_music)
     {
       Mix_HaltMusic();
-      Mix_PlayMusic(musics[level_music], -1);
+      if (bgm_enabled)
+        Mix_PlayMusic(musics[level_music], -1);
       current_game_music = level_music;
     }
   }
@@ -1042,6 +1154,7 @@ void init_level(void)

     current_game_bkgd = level_bkgd;
   }
+  update_window_title();
 }


@@ -1360,6 +1473,38 @@ void setdown(void)
 }


+void update_window_title(void)
+{
+  char buf[128];
+  if (combo < 2)
+    snprintf(buf, sizeof(buf), "Pop Star -  Score: %d  (add: %d)  Hi: %d  Lv: %d  Combo: %d  Lives: %d", score, addscore, highscore, level, combo, lives);
+  else
+    snprintf(buf, sizeof(buf), "Pop Star -  Score: %d  (add: %d * %d = %d)  Hi: %d  Lv: %d  Combo: %d  Lives: %d", score, addscore, combo, addscore*combo, highscore, level, combo, lives);
+
+  SDL_WM_SetCaption(buf, NULL);
+}
+
+
+void update_bgm(void)
+{
+    if (!use_sound) return;  /* 効果音は use_sound に依存 */
+
+    if (bgm_enabled)
+    {
+        /* BGM ON → 再生(current_game_music を使用) */
+        if (!Mix_PlayingMusic())
+            Mix_PlayMusic(musics[current_game_music], -1);
+    }
+    else
+    {
+        /* BGM OFF → 停止 */
+        if (Mix_PlayingMusic())
+            Mix_HaltMusic();
+    }
+}
+
+
+
 /* Random number: */

 int myrand(int max)
@@ -1551,3 +1696,4 @@ void add_brokenline(int x1, int y1, int
   brokenlines[found].y2m = myrand(BROKENLINE_SPEED_X2) - BROKENLINE_SPEED;
 }

+
$ vi Makefile
CFLAGS=-Wall -O3 -march=armv5te -mtune=arm926ej-s -fomit-frame-pointer -ffast-math -fno-strict-aliasing -funsafe-math-optimizations -frename-registers -fweb `sdl-config --cflags` -DDATA_PREFIX=\"$(DATA_PREFIX)\"
LIBS=-Wl,-O1 -Wl,--as-needed -s `sdl-config --libs` -lSDL_image -lSDL_mixer -lm
$ make
$ sudo make install
———-
△ lierolibre 昔ながらのミミズアクションゲーム
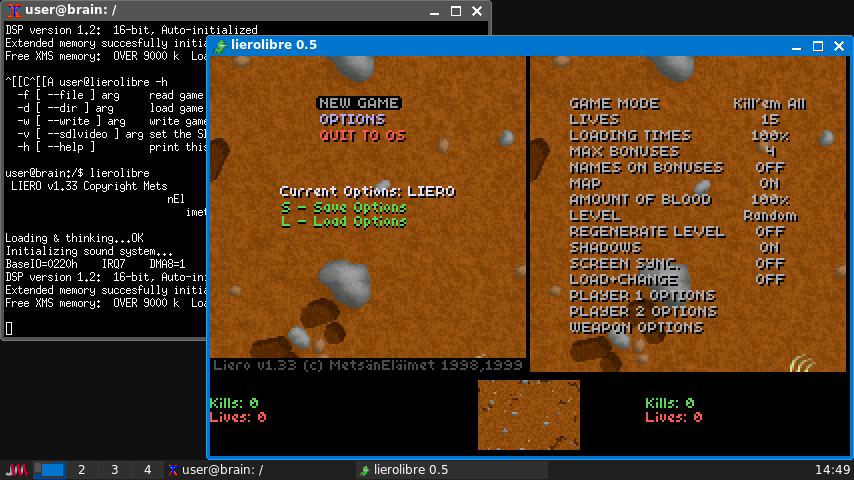
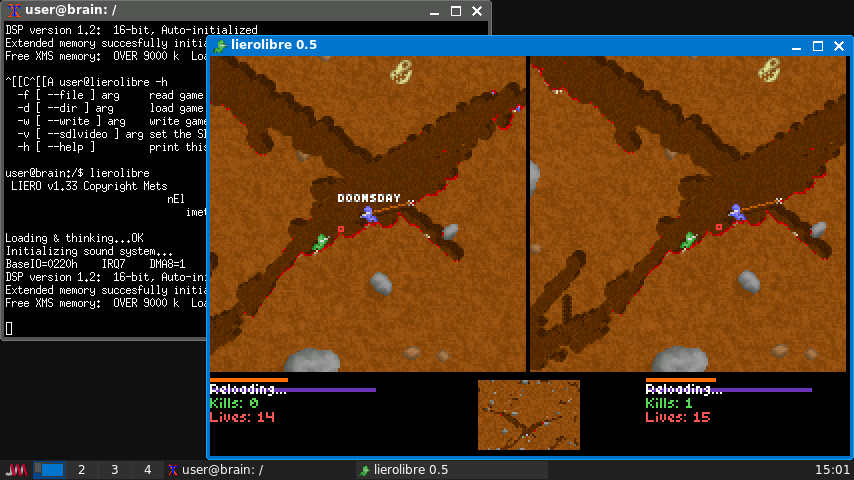
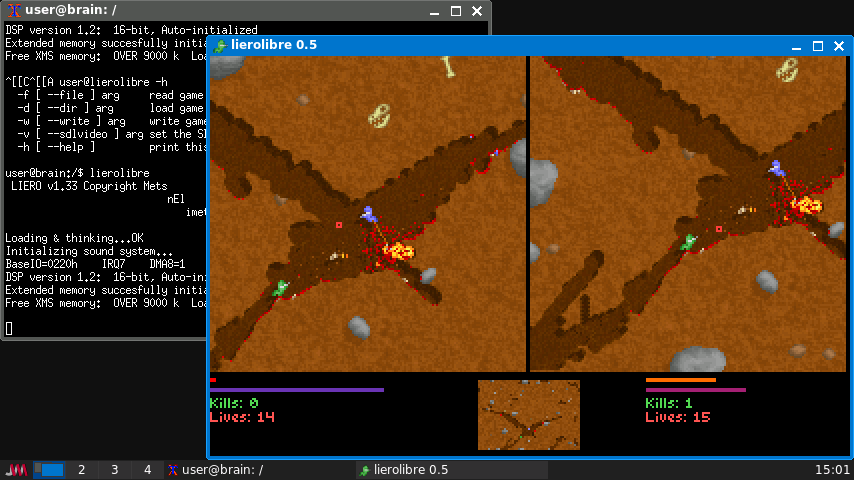
https://packages.debian.org/bullseye/lierolibre
https://www.liero.be/
lierolibreは、昔ながらのミミズアクションゲームです。Liero(OpenLiero)の直接的な派生版です。
特徴:
- 2匹のワーム、40種類の武器、優れたプレイアビリティ、2つのゲームモード:キルエムオールとゲームタグに加えて、真の知能を持たないAIプレイヤーも登場!
- そのノスタルジア
- 隠しF1メニューから拡張機能にアクセス
- リプレイ
- ゲームコントローラー対応
- パワーレベルパレット
- ゲーム変数をプレーンテキストファイルに書き込む機能
- EXEファイルとプレーンテキストファイルの両方からゲーム変数を読み込む機能
- 新しいフリーライセンスのオーディオ
- グラフィック、サウンド、レベルを抽出して再パッケージ化するスクリプト
●武器を選んで撃ち合うゲーム
「NEW GAME」を選択し、エンターキーを押して次に進みます。
5種類の武器を選択できます。
武器を変更する場合は、←→キーを押して目的の武器を表示します。
↑↓キーで「DONE!」を選び、右のコントロールキーを押して開始します。
初期値ではプレイヤー2が自分です。プレイヤー1のCPUと戦います。
↑↓キーで撃つ角度を決めます。向いている方向しか動きません。
忍者ロープやタイマー付き武器などもあるようですが、操作が分かりません。
エスケープキーを押すとメニューに戻ります。
【操作1】[d]:左 [g]:右 [r]:上向き [f]:下向き [左Ctrl]:撃つ [左Alt]:ジャンプ
【操作2】[←]:左 [→]:右 [↑]:上向き [↓]:下向き [右Ctrl]:撃つ [右Shift]:ジャンプ
Brainでも動作はしますが、かなり遅いです。
Brainでは右コントロール、右シフトなどのキーがないので、
Options -> Player2 Optionからキーバインドを変えましょう。
武器を変更する場合は、CHANGEに割り当てたキーを押しながら←→キーです。
なお、Player1をCPU設定することで1人プレイにすることも可能です。
キルエムオールで対戦したり、その他いろいろなゲームルールが選択できます。
インストール:APT経由 ”sudo apt install lierolibre”
———–
◎ Chocolate Doom バニラDoomと互換性のあるDoomエンジン
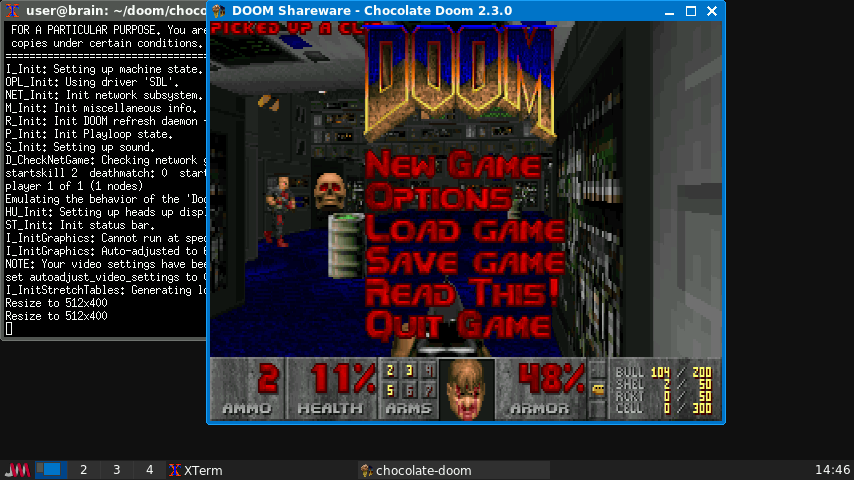
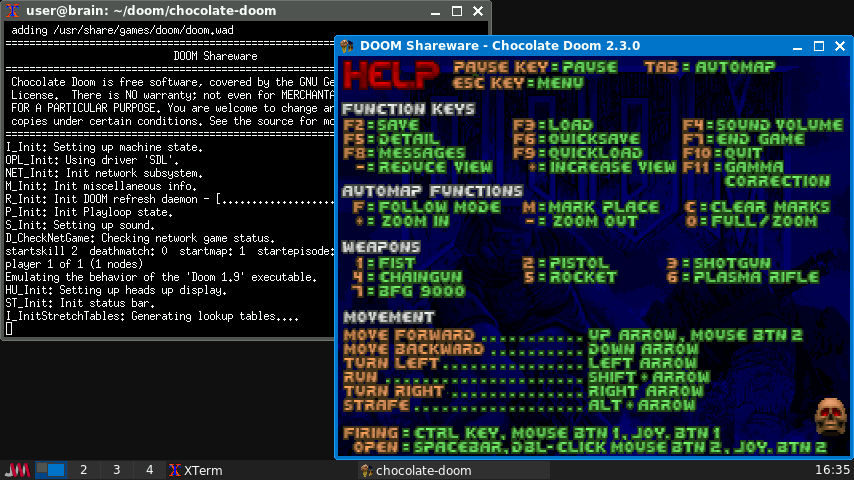
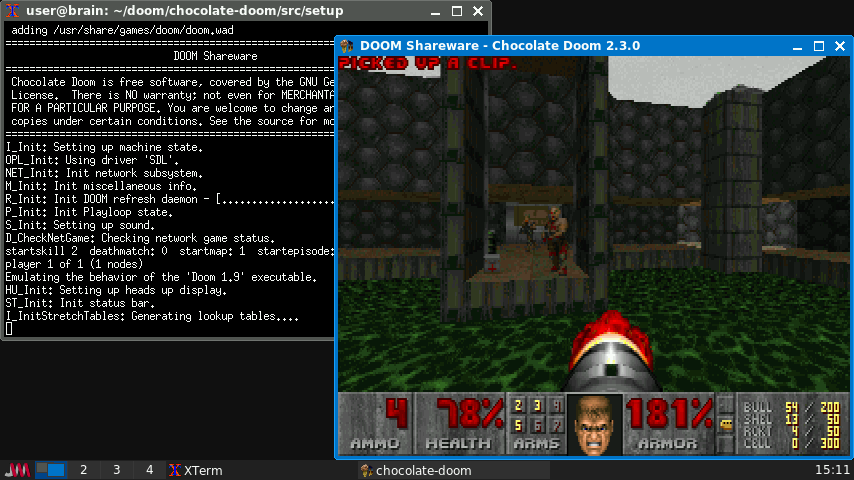
起動:
chocolate-doom (chocolate-doom-setup)
chocolate-heretic (chocolate-heretic-setup)
chocolate-hexen (chocolate-hexen-setup)
chocolate-strife (chocolate-strife-setup)
Chocolate Doomは、オリジナルのDOS版DoomやDoomエンジンをベースにした他のゲームを、現代のコンピュータで実行可能な形で正確に再現することを目指しています。多くの現代のDoomエンジンとは異なり、Chocolate DoomはBoomのソースポートから派生したものではなく、その機能(またはバグ)を継承していません。
このパッケージには以下が含まれます:
* Chocolate Doom、Id Software の「Doom」(1993)の移植
* Chocolate Heretic、Raven Software の「Heretic」(1994 年)の移植版
* Chocolate Hexen、Raven Software の「Hexen」(1995 年)の移植
* チョコレート・ストライフ、ローグ・エンターテインメントの「ストライフ」(1996年)の再現
これらのゲームは、可能な限りオリジナルの DOS バージョンと同じように動作するように設計されています。
Chocolate Doom は、The Ultimate Doom、Doom 2、Final Doom のほか、Chex(R) Quest、HACX、FreeDM など、Doom のすべてのフレーバーをサポートしています。
すべてのChocolateゲームエンジンは、プレイするためにゲームデータが必要です。Chocolate Doomの場合、無料のゲームデータはfreedmパッケージで入手できます。
●DOS版FPSゲームのDOOMを再現
【基本】[F1]:HELP [F2]:SAVE [F3]:LOAD [F4]:SOUND [F10]:QUIT [Esc]:メニュー表示
【移動】[←]:左へ [→]:右へ [↑]:前進 [↓]:後退 [Alt]:横移動 [Shift]:走る
【操作】[Ctrl]:撃つ [space]:扉開閉 [Tab]:地図 [1]-[6]:武器切替
APTで導入できるDoomはSDL2版なので古いSDL1.2版をソースからビルドします。
Brain上でも快適にプレイできますが、Musicについては無効化推奨です(効果音は有効で問題ないです)。
設定は 後ろに-setupのコマンド(chocolate-doom-setup等)を実行すると、
設定変更(Video,Sound,操作設定等)や、標準wadやステージセレクト(F2)ができます。
もし、動作が重かったらScreen modeでサイズを縮小すると軽くなります。
フルスクリーン/ウィンド設定や、サウンドの無効化などはこのコマンドで変更できます。
なお-setupコマンドでなくても、画面サイズの変更やサウンドボリュームレベルであれば、ゲーム中のメニューから自変更できますし、ゲームによってはタイトルメニューのHELPなどでキー操作説明を確認することも出来ます。
インストール:ソースからコンパイル&データ入手
ゲームエンジンのビルド
インストール手順詳細(クリックで表示)
$ mkdir doom
$ cd doom
$ sudo apt update
$ sudo apt install build-essential libsdl1.2-dev libsdl-net1.2-dev libsdl-mixer1.2-dev libsdl-ttf2.0-dev libpng-dev libasound2-dev git
$ git clone https://github.com/chocolate-doom/chocolate-doom.git
$ cd chocolate-doom
$ git checkout chocolate-doom-2.3.0
$ ./autogen.sh
#一部リンクエラーが出るので、ソースを修正する
$ vi /home/user/doom/chocolate-doom/src/hexen/g_game.c:100:
100: boolean demoextend;
→ extern boolean demoextend;
# CPU最適化設定変更
$ find . -name Makefile | xargs sed -i “s/-O2 -g/-O3 -march=native -g/g”
# ビルドします(1時間以上かかるので気長に待ちましょう)
$ make
$ sudo make install
# これで、以下の実行ファイルと、設定ツールなどがインストールされます。
chocolate-doom (chocolate-doom-setup)
chocolate-heretic (chocolate-heretic-setup)
chocolate-hexen (chocolate-hexen-setup)
chocolate-strife (chocolate-strife-setup)
#これで実行ファイルは用意できましたが、
ゲームプレイにはゲームデータファイルが別途必要になります。
#freedm Doom互換エンジン向けのマルチプレイヤーデスマッチゲームのゲームデータ
導入方法詳細
$ sudo apt install freedm
$ sudo apt install freedoom
これで、/usr/share/games/doom/freedm.wad がインストールされます。
Doom用のwadファイルが1つだけなら、chocolate-doom実行でプレイできます。
複数のwadがある場合は、chocolate-doom-setup 起動して、
F2 -> Game:FreeDM選択してF10:Startでプレイできます。
また、chocolate-doomn -iwad freedm.wad でもプレイ可能です。そのほか以下からでもFreedoom1,Freedoom2も併せてダウンロードできるようです。(freedoom1.wad, freedoom2.wad, freedm.wad およびマニュアルがダウンロード可能のようです。)
https://freedoom.github.io/download.html
#Shareware版Doomのゲームデータ
導入方法詳細
$ sudo apt install doom-wad-shareware
これで、/usr/share/games/doom/doom1.wad がインストールされます。
複数のwadがある場合は、chocolate-doom-setup 起動して、
F2 -> Game:Doom Shareware選択してF10:Startでプレイできます。
また、chocolate-doomn -iwad doom1.wad でもプレイ可能です。他にもBrain wikiにある brainのwindowsce版Doomの中にも入っていました。
・doom.wad
データフォルダにコピーすればプレイできます(doom1.wadにリネームを推奨します)。
$ sudo cp doom.wad /usr/share/games/doom/doom1.wad
$ chocolate-doomn -iwad doom1.wad
#その他ネット上にいろんなwadファイルがありますので探してみてください。
(出元が怪しそうなものもありますが、そこは自己責任で)
https://www.wad-archive.com/
https://www.doomworld.com/
https://github.com/Akbar30Bill/DOOM_wads
https://github.com/dabignerd/doom-wads
———-
◎ sdlquake クラシックなゴシック/ホラーをテーマにした一人称シューティングゲーム
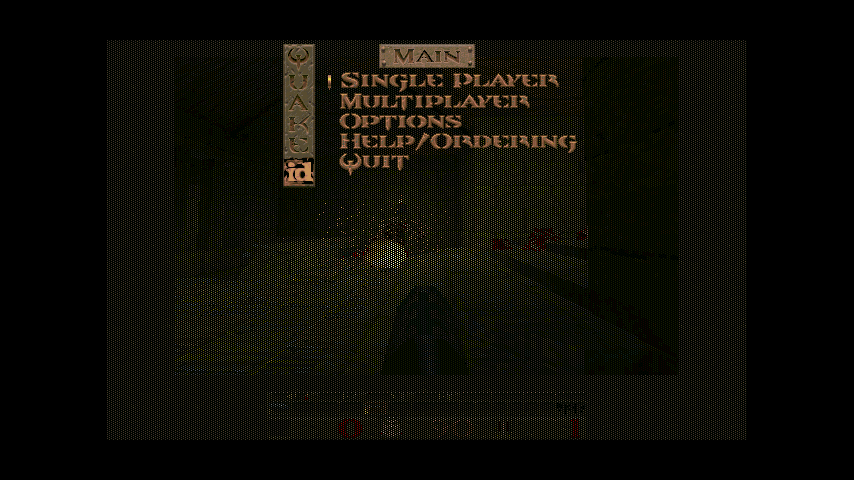
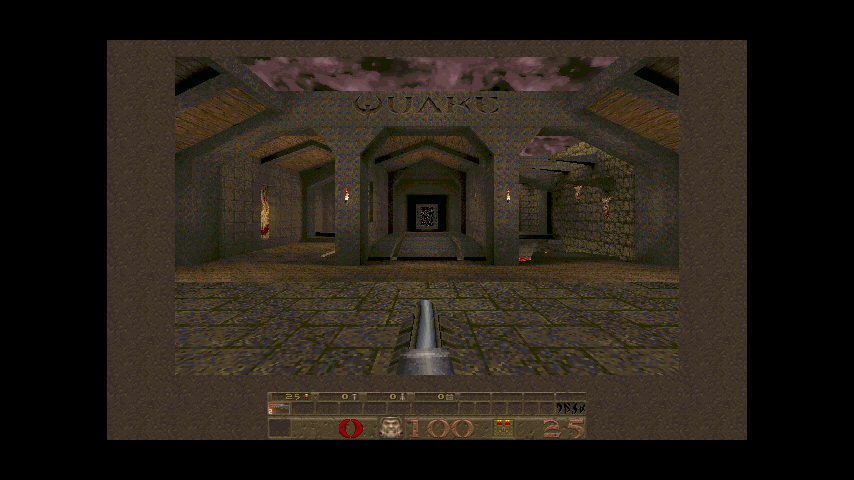
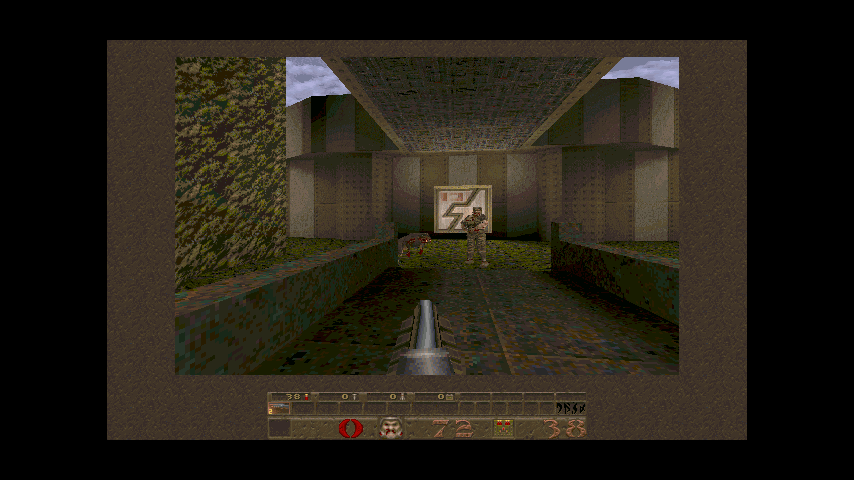
ソース
GitHub – ahefner/sdlquake: More Quake. Less bullshit.
ゲームデータ
https://github.com/pweil-/origin-quake
起動:cd ~/quake/sdlquake; ./sdlquake
Quakeはid Softwareによるクラシックな一人称シューティングゲームです。 1996年にリリースされました。このパッケージにはランチャースクリプトとメニューが含まれています 適切なエンジンでQuakeをプレイするための入場権を得られるようでした。
このパッケージを使いやすくするためには、 配布不可のQuake登録またはQuake-Sharewareパッケージは、 game-data-packager パッケージ。
quake-registeredを作成するには、Quakeインストールからのデータファイルが必要です。 CD-ROMです。
quake-sharewareを作成するには、Quakeのシェアウェア版が必要です。
game-data-packager(>= 45)も公式エピソード用のパッケージを作成できます 5, Dimensions of the Past(Quakeの20周年を記念してMachineGamesが開発) 記念日)、そして公式ミッションのために Hipnotic Software開発のScourge of ArmagonとDissolution 『of Eternity』(ローグ・エンターテインメント開発)。追加メニュー それらの拡張がインストールされていれば自動的に表示されます。
Brainでの動作は遅いですが、何とかプレイできるよ言った感じです。
起動時のデモ画面では結構動いているようにも見えます。
画面が遅い場合は、-.+キーで画面表示サイズを変更することで、ある程度速度調整できます。
キー操作は、id1フォルダ内のconfig.cfgで確認できますが、
こんな感じみたいです。
左右 方向転換
上下 進む/戻る
Space ジャンプ
Ctrl 射撃
A,Z 上を向く/下を向く
, . 左移動/右移動
ESC メニュー
インストール:ソースをダウンロードしてビルド
導入方法詳細
$ sudo apt install build-essential git libsdl1.2-dev libsdl-mixer1.2-dev libsdl-net1.2-dev libmad0-dev libvorbis-dev
$ mkdir quake
$ cd quake
$ git clone https://github.com/ahefner/sdlquake.git
$ cd sdlquake
$ touch README
$ ./autogen.sh
$ ./configure
#最適化
$ vi Makefile
306: CFLAGS = -g -O2 -ffast-math -funroll-loops -fomit-frame-pointer -fexpensive-optimizations -D_GNU_SOURCE=1 -D_REENTRANT -I/usr/include/SDL
  ↓
  CFLAGS = -g O2 -march=native -msoft-float -fstrict-aliasing -finline-functions -fno-tree-vectorize -fno-strict-volatile-bitfields -fomit-frame-pointer -fexpensive-optimizations -D_GNU_SOURCE=1 -D_REENTRANT -I/usr/include/SDL
#なお、以下のオプションがあると特定のマップの場所で[segmentation fault]が出たので外してます。-ffast-math -funroll-loops
#ビルド時にエラーが出るので修正していきます。
$ vi d_local.h
69: fixed16_t sadjust, tadjust;
  fixed16_t bbextents, bbextentt;
  ↓
  extern fixed16_t sadjust, tadjust;
  extern fixed16_t bbextents, bbextentt;

83: void (*prealspandrawer)(void);
  ↓
  extern void (*prealspandrawer)(void);
$ vi d_vars.c
40: fixed16_t sadjust, tadjust, bbextents, bbextentt;
  ↓
  fixed16_t sadjust, tadjust, bbextents, bbextentt;
  void (*prealspandrawer)(void);
$ vi d_edge.c
28: int screenwidth;
  ↓
  extern int screenwidth;
$ vi menu.c
26: void (vid_menudrawfn)(void);
  void (vid_menukeyfn)(int key);
  ↓
  extern void (vid_menudrawfn)(void);
  extern void (vid_menukeyfn)(int key);
$ vi vid_sdl.c
7: viddef_t vid; // global video state
  ↓
 extern viddef_t vid; // global video state
$ make clean
$ make
$ sudo make install
#ゲームデータ入手(シェアウェア版)
$ cd quake
$ git clone https://github.com/pweil-/origin-quake.git
$ cd origin-quake
$ cp -r id1 ../sdlquake/
$ mkdir -p ~/.quake/id1/
$ cp -r id1 ~/.quake/
#実行
$ cd ~/quake/sdlquake/
$ ./sdlquake
or
$ sdlquake -basedir ~/.quake
———-
△ tennix 2D テニスゲーム
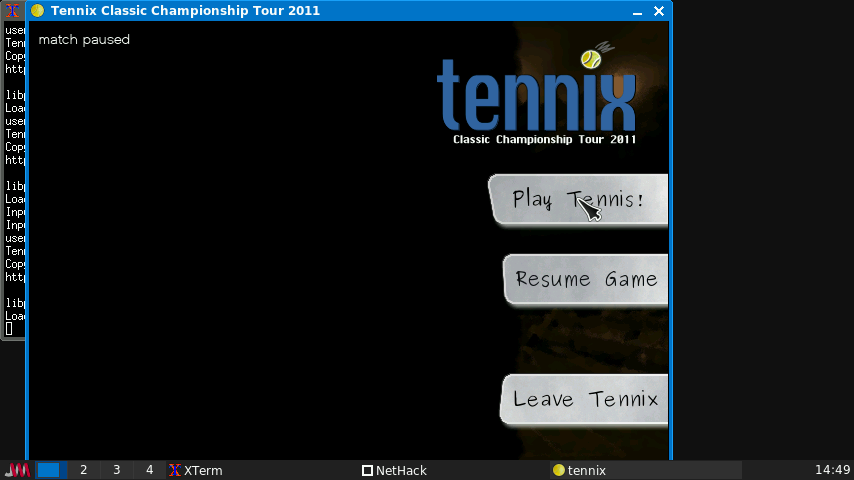
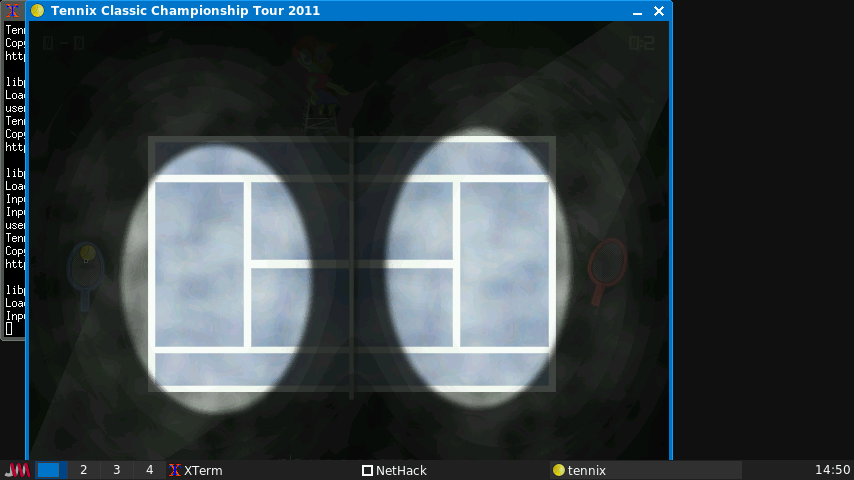
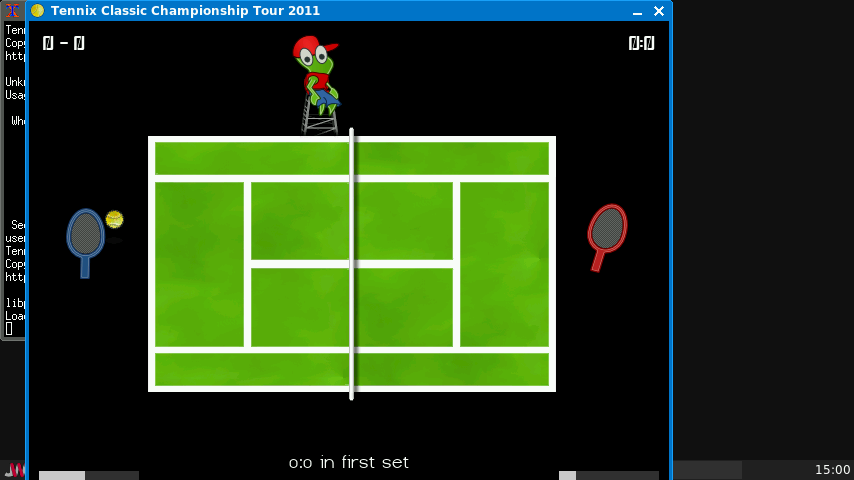
https://packages.debian.org/bullseye/tennix
起動:tennix
Tennix はたのしい 2D テニスゲームです。キーボードを使って、対 CPU 戦や対人 戦ができます。640×480 の解像度のウィンドウ内もしくはフルスクリーンで走らせ ることができます。
ゲームプレイガイドとコマンドラインオプションについては man ページ tennix (6) を参照してください。
●2Dテニスゲーム
地図上の赤い点をクリックして開始します。
スペースキーを押してサーブを打ちます。キーを押している時間が長ければ強くなります。
打ち返す時は↑↓キーで移動し、スペースキーを押して強さを調整します。
スペースキーを離した時にラケットを振ります。
スペースキーを押しっぱなしにして移動しないと、間に合わないような気がします。
Brain上でtennix -bでのデモは問題なく表示されましたが、
tennix で起動してのプレイでは、画面全体が暗くてちょっと見にくいです。
カーソル&スペースかマウスで操作できますが、かなりタイミングがシビアです。
インストール:APT経由 ”sudo apt install tennix”
Trixieでのパッケージでは、SDL2.0に移行済
bookwormのライブラリだとSDL1.2ですが、
t64ライブラリとの衝突があるため、aptでのインストール不可。
ソースからのインストールが必要と思われます。
———–
◎ komi 宇宙ガエルの Komi を操るシングルプレイヤアーケードゲーム
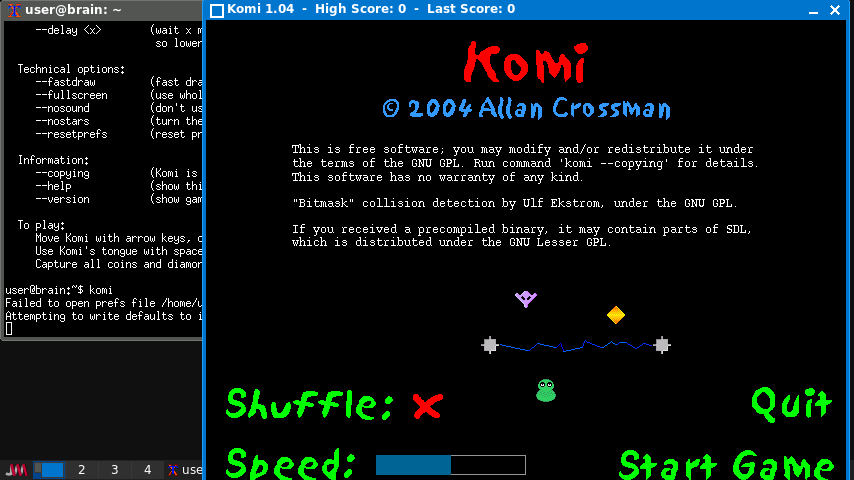
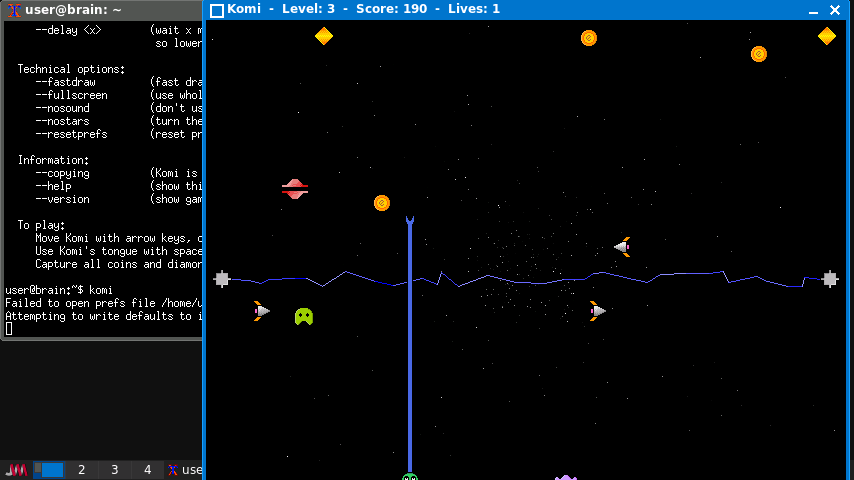
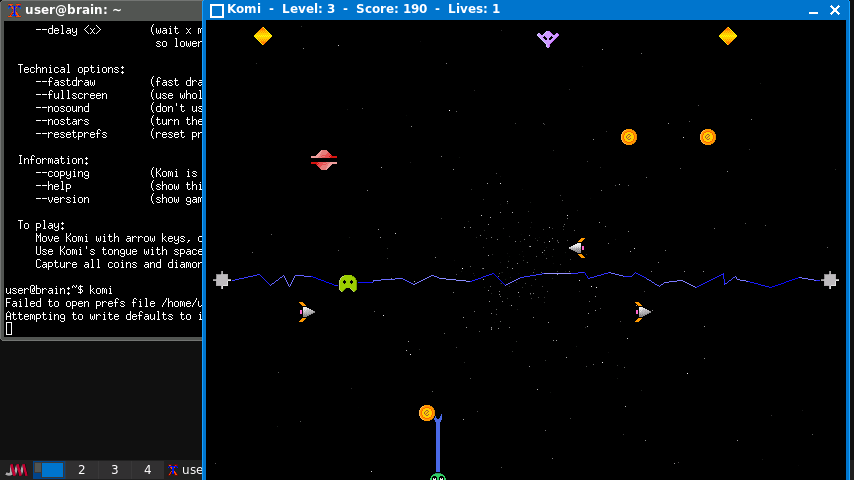
https://packages.debian.org/bullseye/komi
Komi は宇宙ガエルです。このシングルプレイヤアーケードゲームでのプレイヤの 目的は、大きな舌を使って食べ物を捕まえて Komi に食べさせることです。
エネルギーバリアや他の不快な物にぶつかるのを避けながら、全ての食べ物を食べ ましょう。
●宇宙ガエルが餌を食べるゲーム
「Start Game」をクリックして開始します。
←→キーで左右に移動し、敵にぶつからないようにします。
スペースキーを押している間はカエルの舌が上に伸び、キーを離すと縮みます。
舌先でオレンジ色の●と◆を食べます。舌の途中がぶつかっても食べられません。
食べ物以外は全て敵です。カエルの舌がぶつかってもアウトです。
「Speed」の右の青いバーをクリックすると、速さが調節できます。
遅くすると舌が出ている時間も長くなり、敵にぶつかりやすくなります。
オレンジ色の食べ物(●と◆)を全て食べればクリアです。次のステージに進みます。
【操作】[←→]:左右移動 [space]:舌を出す [p]:一時停止 [Esc]:終了
Brainでも快適にプレイできます。
Windowモードでは、最上位表示にすれば、自機がギリギリですが表示されます。
もう少し早くしたかったりフルスクリーン表示する場合は、起動オプションで調整できます。
タイトル画面でShuffleにチェックを入れるといろんな敵がでるようになります。
–fastdraw 遅いPC用の描画設定
–fullscreen フルスクリーン(かわりにLevel,Score,Livesの表示はなくなります)
その他オプションは、–helpで表示されます。
インストール:APT経由 ”sudo apt install komi”
———–
○ qonk 資源管理、都市建設、軍事拡張を組み合わせたストラテジー・スタイルの戦略ゲーム
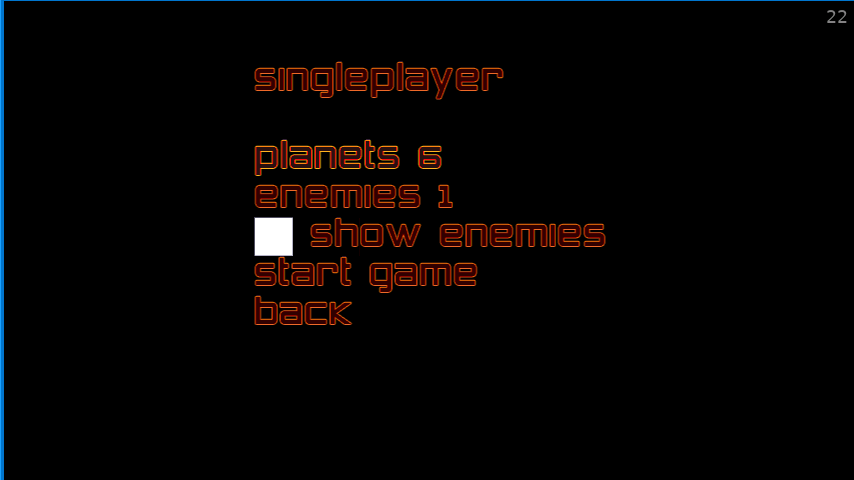
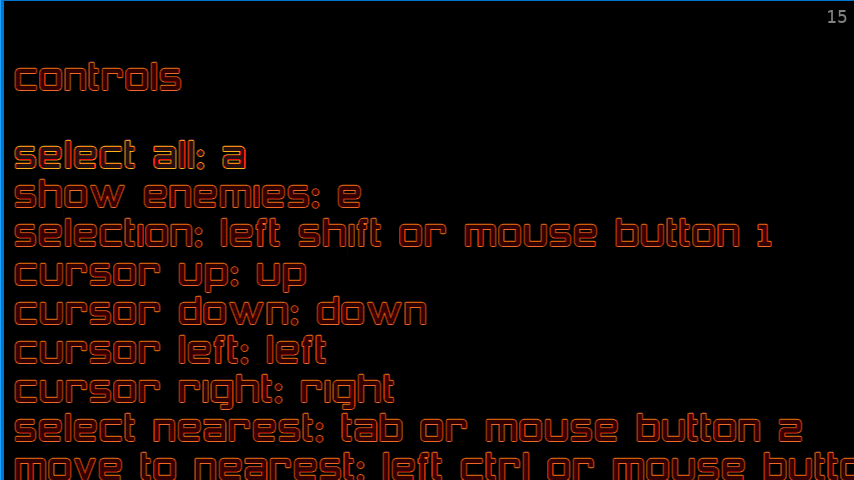
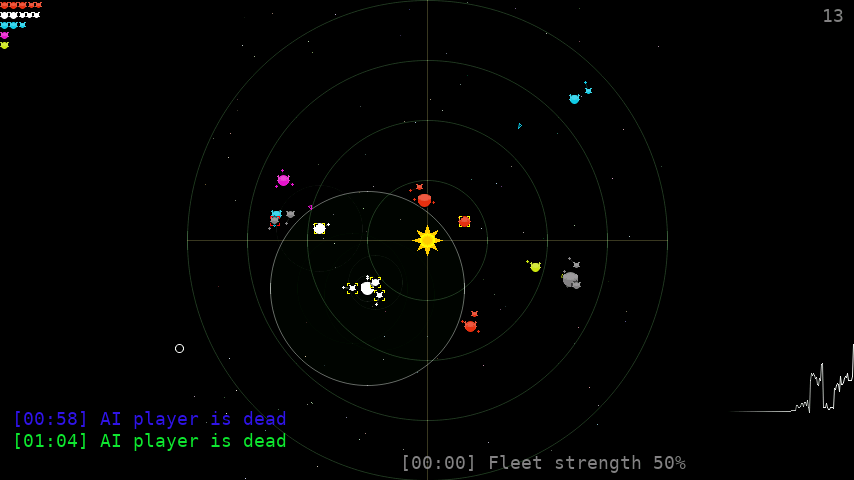
https://packages.debian.org/bullseye/qonk
起動:qonk
このゲームの舞台は太陽系です。宇宙船を送り込むことで全ての惑星を占領することが 目標です。ユーザが支配する惑星では、宇宙船を新造できます。シンプルな AI プレイヤと対戦します。ゲームを通じて経験を積むごとに、より多くの AI プレイヤをより大きな大きな太陽系から叩き出す必要があります。
●船を送って惑星を占領するゲーム
宇宙船を送り込んで全ての惑星を占領します。
太陽の周りを周回する惑星と、惑星の周りを周回する月があります。
自分は白陣営で、白い惑星と白い船をコントロールします。
灰色はどちらでもないので簡単に征服できます。
その他の色が付いた惑星は敵陣営です。
↑↓キーで「singleplayer」を選び、エンターキーを押して次に進みます。
←→キーで「show enemies」にチェックを入れると敵の船を表示します。
「start game」でエンターキーを押してゲームを開始します。
全ての敵を白にすればクリアです。[n]キーを押して次に進みます。
負けた場合は[r]キーを押して、もう一度同じレベルで戦います。
ドラッグして範囲を指定し、その中の惑星を選択します。
[a]ボタンを押すと自分の全惑星を選択できます。
選択した惑星は目的地に向けて船を送り出します。
目的地はマウスの右ボタンを押して指定します。
船を送り出し他惑星で戦いが起こり、占領できれば
エスケープキーを押すと終了します。
【操作?】[e]:敵の船の表示/非表示 [s]:単船モード [Tab]:最も近い
[a]:全手の自陣営をまとめて指定
インストール:APT経由 ”sudo apt install qonk”
———–
○ mousetrap ボールを追いかけるシンプルなゲーム
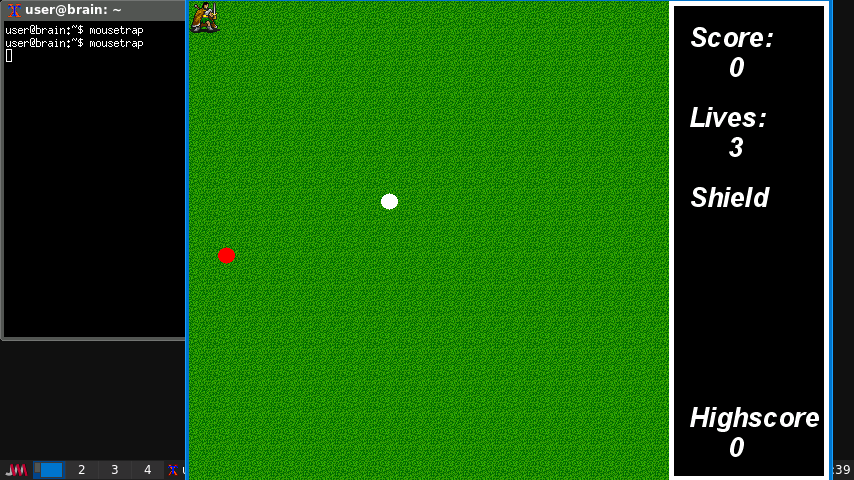
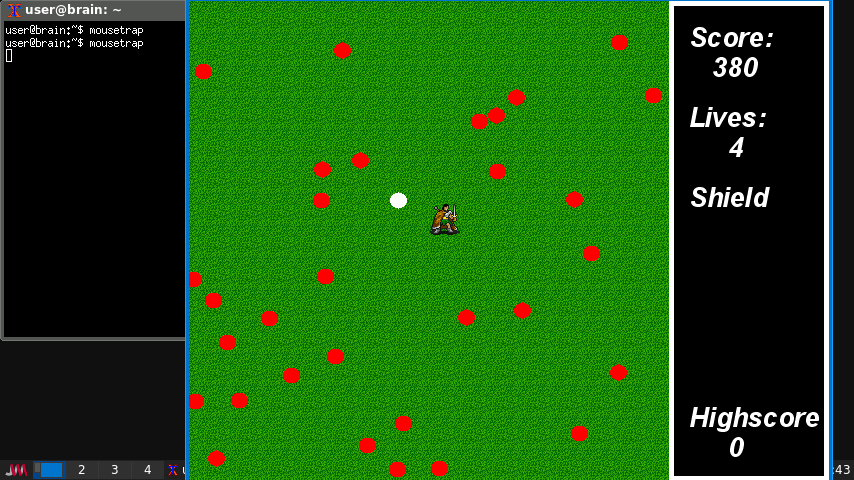
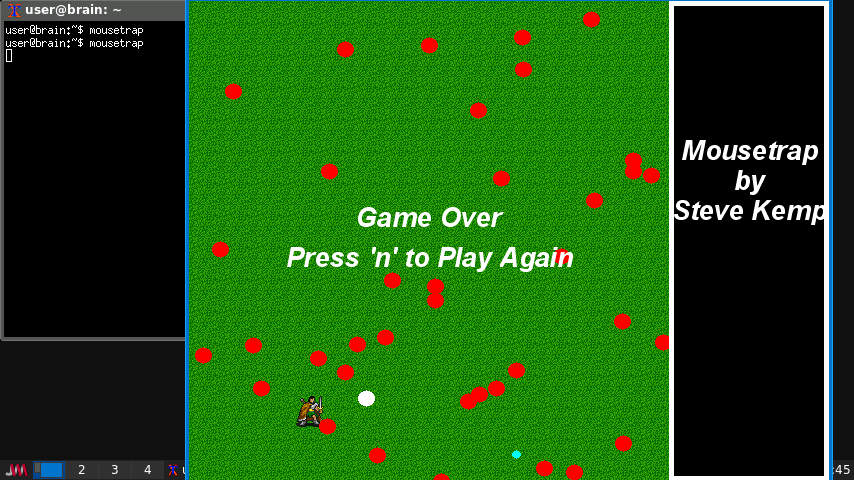
https://packages.debian.org/bullseye/mousetrap
起動:mousetrap
これは、プレイヤーがキャラクターを動かして白いボールを捕獲し、赤いボールを避けるというシンプルなゲームです。
●白いボールを捕まえるゲーム
キャラクターを↑↓←→キーで動かします。
白ボールを捕まえると新しい白ボールが現れ、赤ボールが1つ増えます。
水色の小さなボールを取ると、数秒だけシールドが有効になります。
赤ボールにぶつかるとLivesが1つ減り、なくなるとゲームオーバーです。
【操作】[n]:開始 [space]:一時停止 [q]:終了
インストール:APT経由 ”sudo apt install mousetrap”
———–
◎ noiz2sa 抽象化アーケードシューティングゲーム
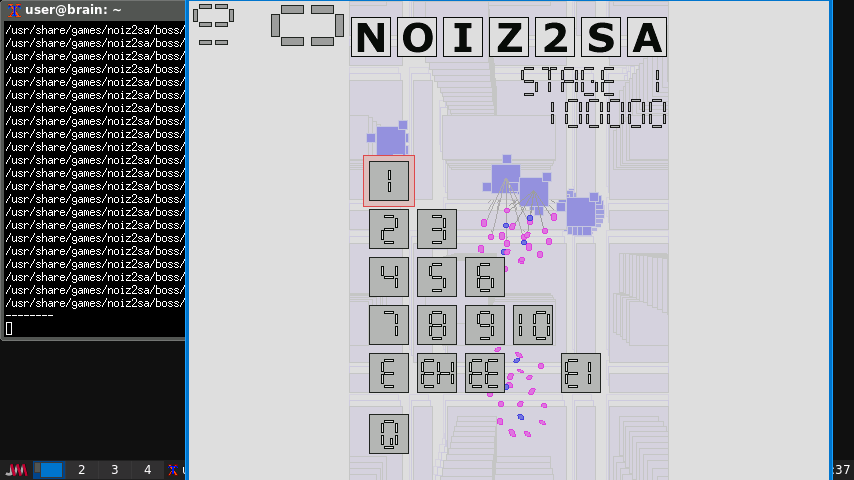
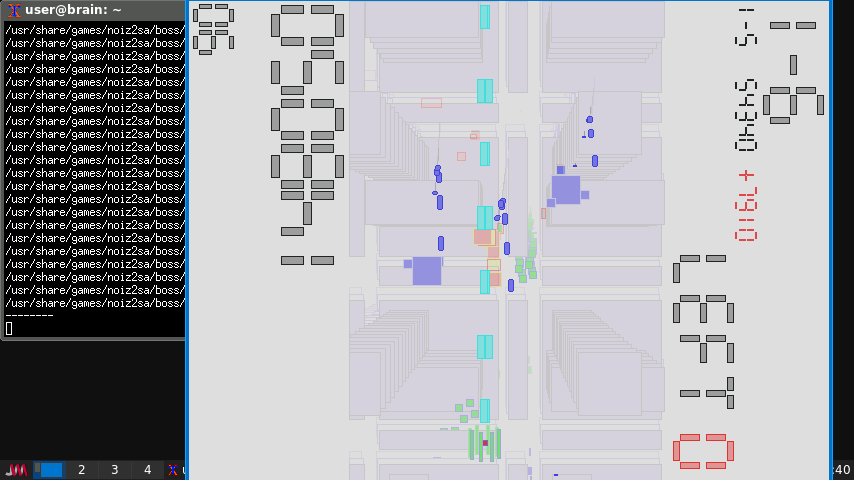
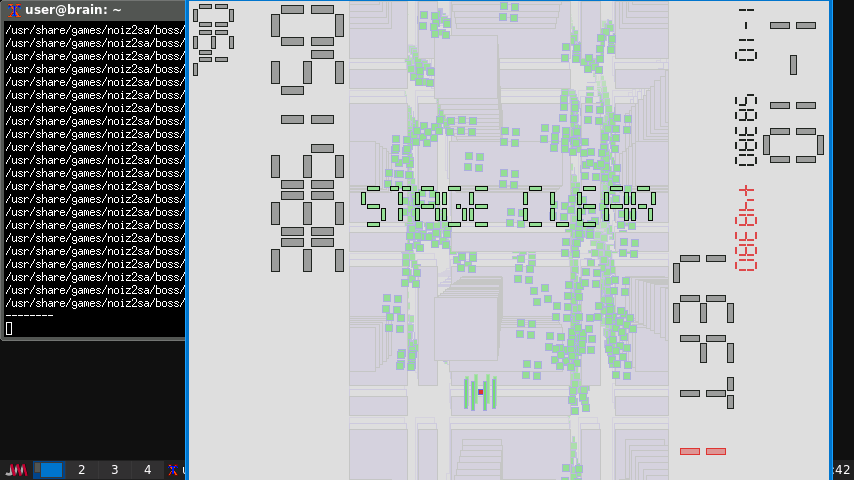
https://packages.debian.org/bullseye/noiz2sa
起動:noiz2sa -nosound -window -nowait
抽象的なテーマとテーマにマッチした電子音楽を持つ古典的な縦型アーケード シューティングゲームです。
●抽象化アーケードゲーム
古典的な縦型アーケードシューティングゲームです。
抽象的なテーマと、それにマッチした電子音楽が流れます。
滑らかで、とても心地よいシューティング感です。
スローキーを押している間は船がゆっくり移動します。
メニューは [z]キーを押して決定します。
【操作】[z]:撃つ [x]:スロー [p]:一時停止 [Esc]:メニュー [↑↓←→]:移動
Brainでも起動オプションを調整すれば問題なくプレイ出来ます。
おすすめは、以下のオプションです。
noiz2sa -nosound -window -nowait
起動オプション:
-nosound Stop the sound.
-window Launch the game in the window, not use the full-screen.
-reverse Reverse the fire key and the slowdown key.
-brightness n Set the brightness of the sceen(n=0-256).
-accframe Use the alternative framerate management algorithm.
(If you have a problem with framerate, try this option.)
インストール:APT経由 ”sudo apt install noiz2sa”
———-
○ starvoyager ’スタートレック’ がテーマの二次元宇宙空間アーケードゲーム
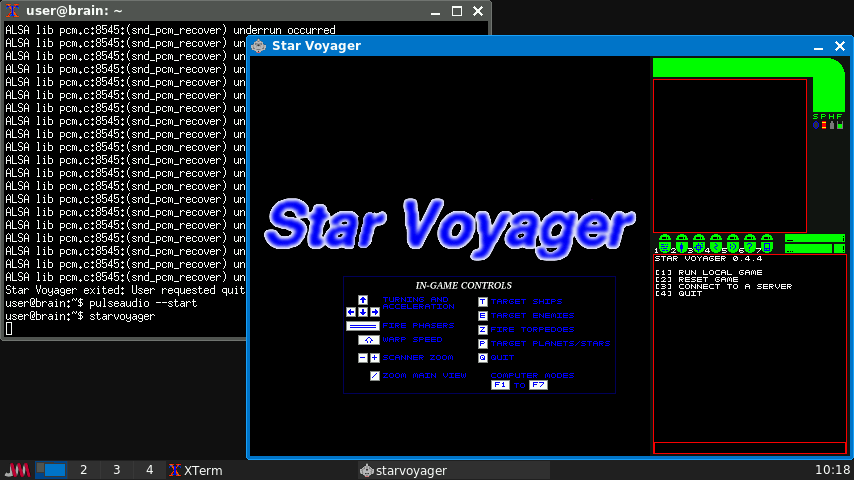
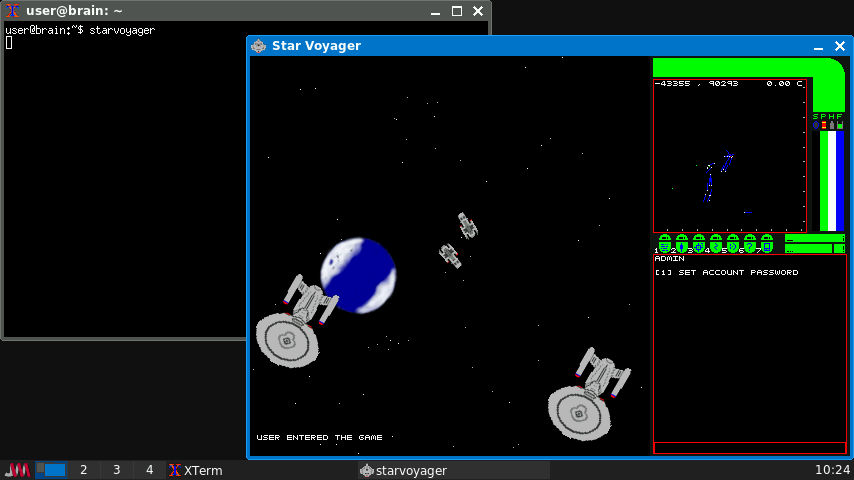
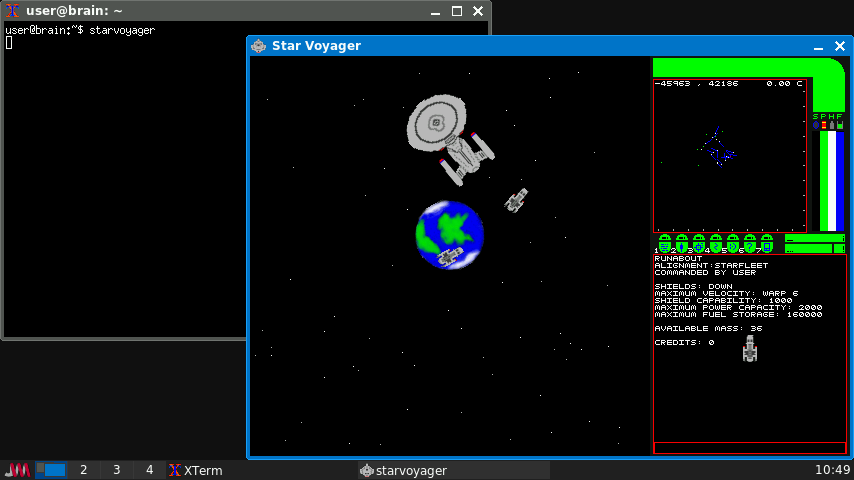
https://packages.debian.org/bullseye/starvoyager
https://github.com/solbu/starvoyager
Star Borager はアーケードスタイルの二次元環境における Frountier/Elite クラスの ゲームであり、’スタートレック’ の宇宙が舞台です。移植性を持たせるため、 SDL ライブラリを利用しています。
●二次元宇宙空間アーケードゲーム
スタートレックの宇宙が舞台の二次元宇宙空間アーケードゲームです。
[1]キーを押してから、ユーザー名を入力してエンターキーを押します。
[0]~[5]のキー押して船を選択すると開始します。
[q]キーを押すと最初の画面に戻ります。
- Run
starvoyager- ローカルゲームについては、1をクリックしてください。
- プレイヤー名を入力してください
- 同盟(連邦、クリンゴンなど)を選択してください。
- パスワードの入力を求められたら設定してください。
コントロール
動き
矢印キー- 加速と方向転換
Shift + 矢印キー- ワープスピード遷移
Shiftキーを押しながら下へ- 逆推力
戦闘
Space- エネルギー兵器(フェイザー/ディスラプター)を発射する
Z – 魚雷発射
ターゲティング
T – 近くの船を巡回する
E – 敵艦のみをターゲットにする
P – ターゲット惑星
シフト + T/E/P – 逆サイクル
インタフェース
F1 – 船の状態
F2 – 内部システム(シールド、クローキング)
F3 – スキャナーコントロール
F4 – 雹の標的
F5 – チャット(マルチプレイヤー)
F6 – プレイヤー情報
F7 – ゲームオプション
画面
-/+ – ズームセンサー表示
/ – メインビューを拡大
Q – ゲームを終了する
- シールド– オン/オフ切り替え(エネルギーを消費し、転送装置をブロックします)
- エネルギー– 武器、シールド、移動の動力源
- 船体– 船体の健全性(友好惑星で修理可能)
- 燃料– 発電に必要
- エネルギー兵器は選択された敵を自動的にターゲットします
- 魚雷には視線と射程距離が必要です
- シールドはエネルギーを消費するが、防御力を提供する。
- クローキングは探知されにくくするが、電力を消費する
- 敵艦艇を破壊してクレジットを獲得しよう
- 惑星で燃料、弾薬、アップグレードを購入しましょう
- 居住可能な惑星に話しかけてサービスにアクセスしましょう
- 同盟惑星へ転送して進行状況を保存する
- センサーを使用して長距離をナビゲートする
- 星間旅行のためのワープスピード
- 質量ロックにより惑星付近でのワープが防止される
- 航行支援の対象となる惑星
詳しくは以下のページをご確認ください。
https://github.com/solbu/starvoyager
インストール:APT経由 ”sudo apt install starvoyager”
———-
○ gav GPLアーケードバレーボール

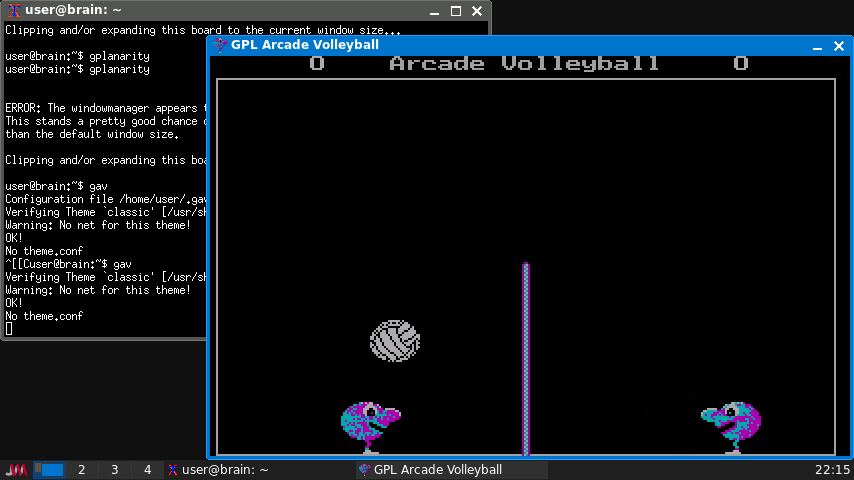
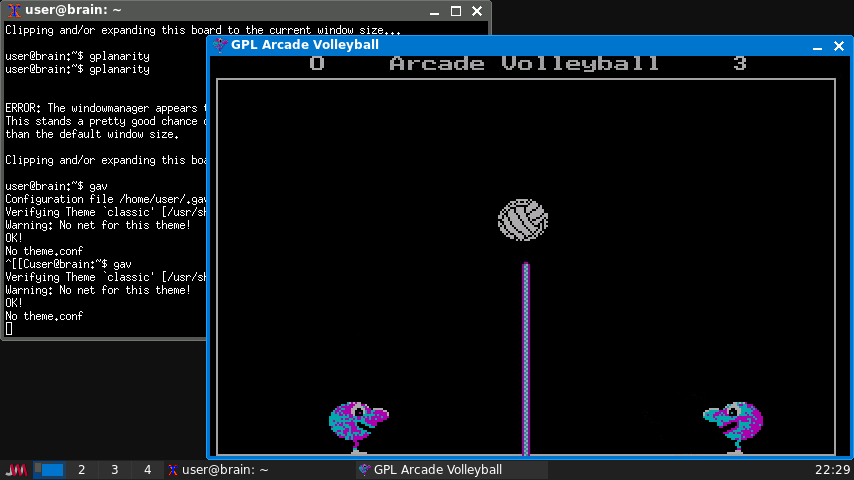
https://packages.debian.org/bullseye/gav
起動:gav
GAVはGPL Arcade Volleyballの略で、昔のDOSゲーム「Arcade Volleyball」をSDLでリメイクしたものです。マルチプレイヤー、ネットワーク機能、テーマ変更可能なグラフィックをサポートしています。
●シンプルなバレーボール
左右に移動してボールを打ちます。
【操作】[z]:左へ [c]:右へ [Shift]:ジャンプ (キー設定変更可能)
[Esc]:終了
Brainでも実行できますが、Shiftキーがトグルになってしまう場合があるので
その場合は機設定を変更しましょう。
インストール:APT経由 ”sudo apt install gav”
———-
△ triplane 横スクロール型ドッグファイトゲーム
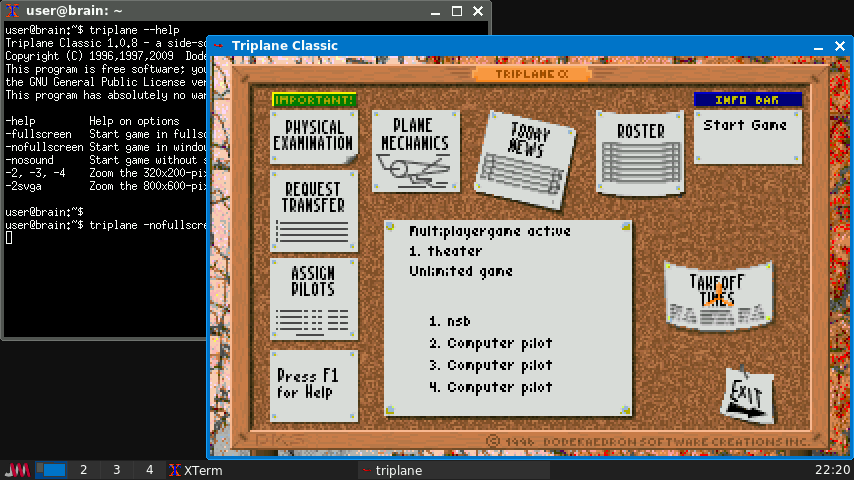
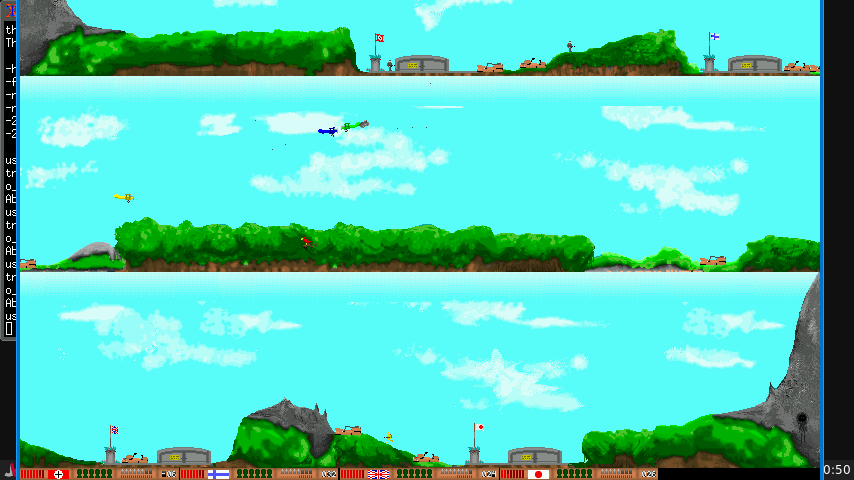

https://packages.debian.org/bullseye/triplane
起動:triplane -nofullscreen -2
Triplane Classicは、ソロミッションと最大4人までプレイ可能なマルチプレイヤーモードを備えた横スクロール型ドッグファイトゲームです。DOS版Triplane Turmoilの移植版であり、オリジナル版と完全に同じゲーム体験を提供することを目指しているため、ハイスコアもオリジナル版と遜色ありません。
●ドッグファイトゲーム
クリックしてメニューを表示します。
最初はパイロットがいないので、「ASSIGN PILOTS」で登録する必要があります。
「TAKE OFF TIMES」をクリックしてゲームを開始します。
エスケープキーを押すとメニューに戻ります。
3分割の画面は、上段の右端が中段の左端に、中段の右端が下段の左端に続いています。
タブキーを押すと飛行機が格納庫から出て飛び立ちます。
【操作】[x]:上へ [w]:下へ [s]:回転 [Tab]:パワー [1]:爆弾 [2]:銃
プレイは快適ですが,縦方向の解像度が足りないためフルスクリーンだと
プレイ画面で異常終了します。
このため、triplane -nofullscreenで起動する必要があるようです。
そのうえで、ゲーム画面を最上位化した上で画面を上方向に移動しておきましょう。
ASSIGN PILOTSで、飛行機ごとに乗せるパイロットを選択します。
4つ縦に並んでいる上から以下のような意味になります。
・無効化
・ソロ指定(その他すべて無効化)
・コンピュータ操作
・プレイヤー
選択したら、「ASSIGN PLAYER」で、メニューに戻ります。
あとは、「PLAME MECHAMIC」でキー設定して、
「TAKE OFF TIMES」でスタートします。
赤い飛行機のデフォルトキーバインドは以下になります。
[x]:上へ [w]:下へ [s]:回転 [Tab]:パワー [1]:爆弾 [2]:銃
青い飛行機のデフォルトキーバインドは以下になります。
[Down]:上へ [Up]:下へ [5]:回転 [+]:パワー [Left]:爆弾 [home]:銃
インストール:APT経由 ”sudo apt install triplane”
———-
○ airstrike 『Biplanes』や『BIP』の流れを汲む2Dドッグファイトゲーム
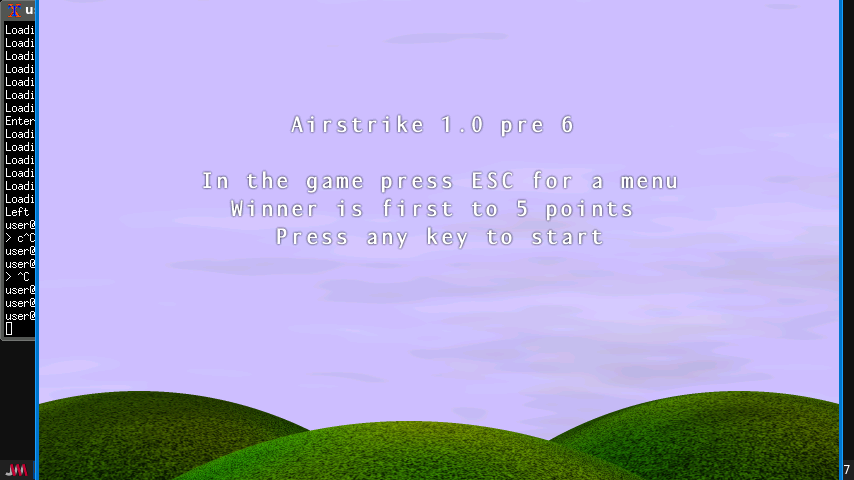
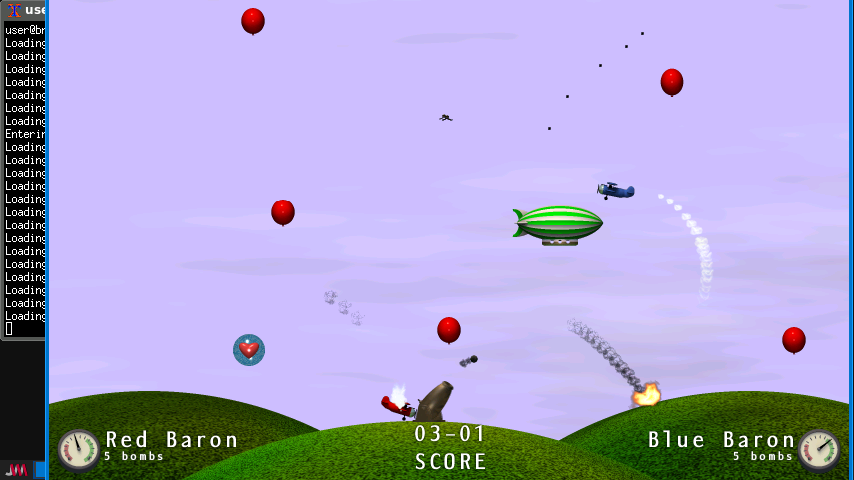
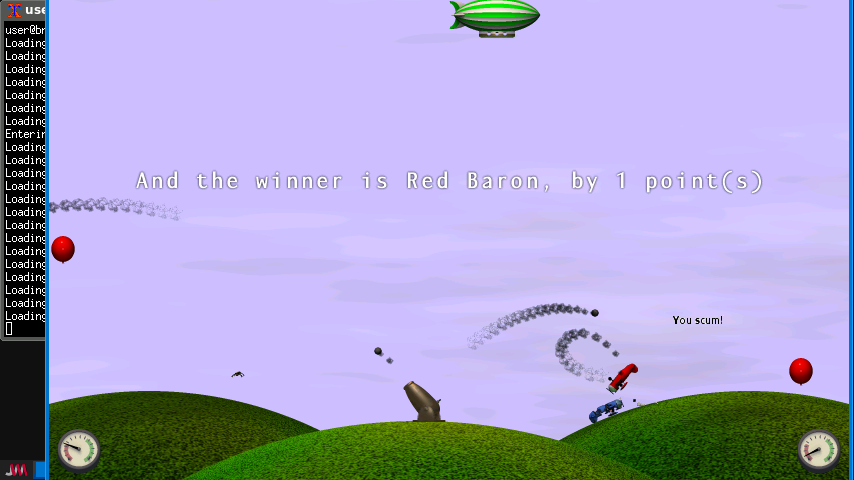
https://packages.debian.org/bullseye/airstrike
起動:airstrike
Airstrikeは、IntellivisionやAmigaのゲーム「Biplanes」や「BIP」の流れを汲む2Dドッグファイトゲームです。強力な物理エンジンを搭載し、オリジナルゲームからの様々な拡張機能も備えています。1人または2人でプレイ可能です。
brainでも快適にプレイできますが、
画面解像度は600を想定しているようですので、最上位表示&ウィンドウを上に移動して
下部を見えるようにしましょう。
デフォルトでは、RedがAI、Blueが自機です。両方AIにすることも出来ます。
相手とドックファイトして、相手を撃墜したら1ポイントです。
5ポイント先取したほうが勝利です。
Red :[left shift]Fire [d]turn ccw [f]turn cw [left ctrl]accelerate [tab]bomb
Blue:[.]Fire [←]turn ccw [→]turn cw [,]accelerate [space]bomb
(キーバインドはESCキーメニューから変更可能です。)
まずは動かして、自機の動かし方を覚えましょう。
インストール:APT経由 ”sudo apt install airstrike”
———-
△ biloba 最大4人までプレイ可能なターン制戦略ボードゲーム
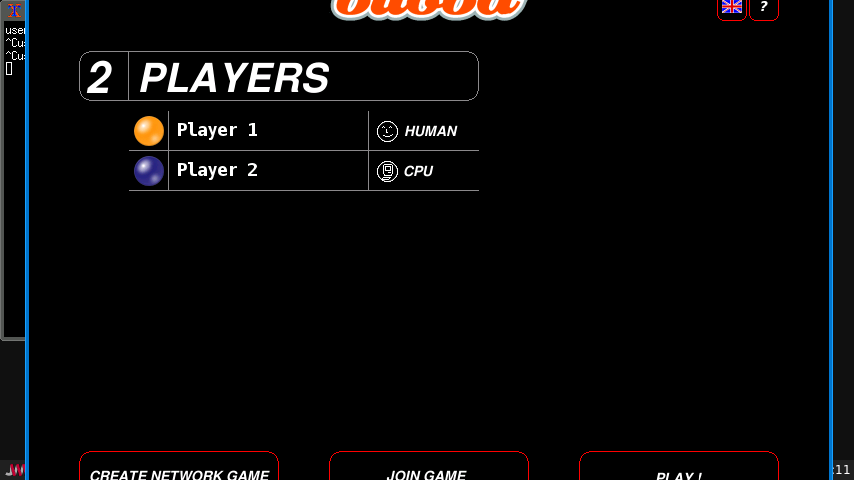
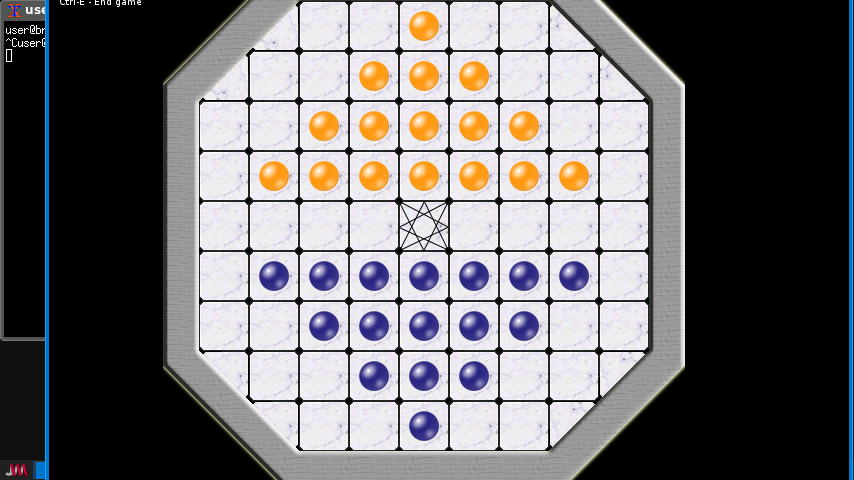
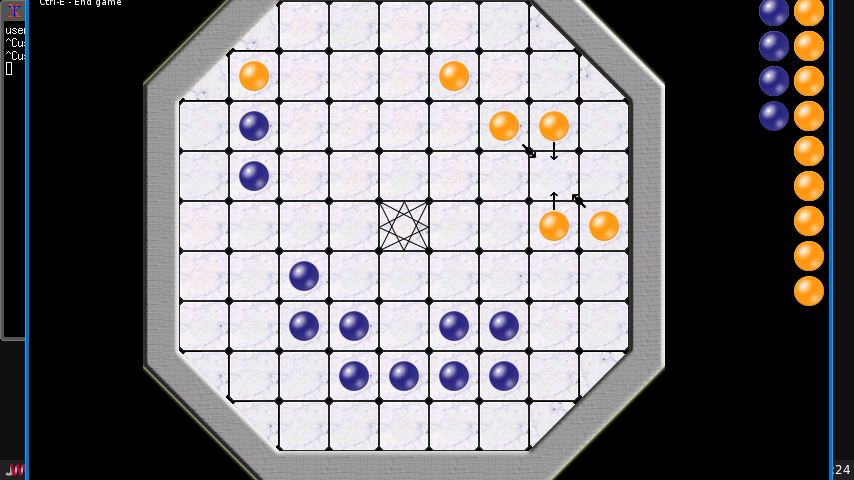
https://packages.debian.org/bullseye/games/biloba
起動:biloba
Bilobaは、1~4人で遊べる抽象戦略ボードゲームです。各ターン、プレイヤーは八角形のボード(マス目は正方形)上で駒を動かし、相手の駒をボードから取り除くことを目指します。
Bilobaにはシングルプレイヤーモード用のAI対戦相手が含まれており、2人以上(最大4人)でのローカルプレイまたはネットワークプレイに対応しています。
Brainの場合、縦解像度が足りないようですが、全画面化&ウィンドウ移動でゲームの盤面を表示することは可能です。
(ただ、ゲームの終了ができないので、起動したコンソールからCtrl+Cで終了できます。)
動かしたいボールを選ぶと移動できる方向に矢印が出るので、動かし先をクリックすれば移動できます。
相手のボールを自分のボールで挟めば取り除くことができます。
その場合、取り除いた場所に自分のボールを移動しなければいけません。
また、中央のマークに移動した場合は、もう一回移動できます。
最初は、CPU vs CPUにして対戦を観戦するとルールがわかりやすいかもしれません。
インストール:APT経由 ”sudo apt install biloba”
———–
○ crimson 六角形タイルを使った戦術ゲーム
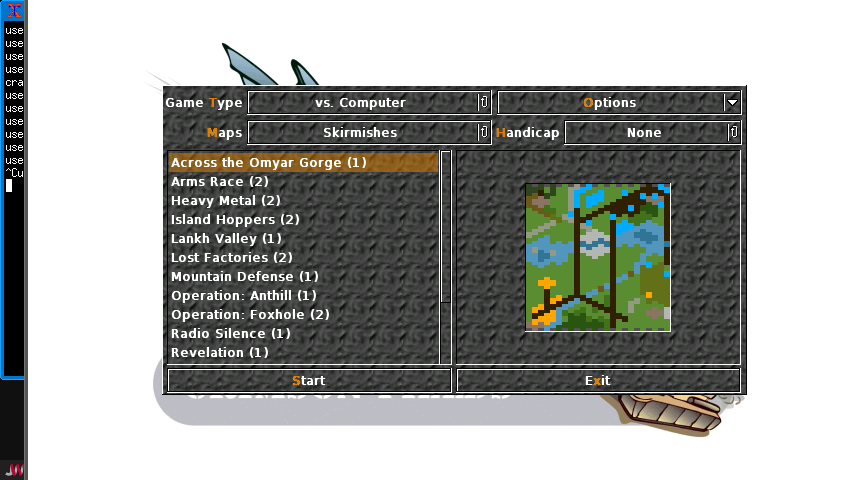
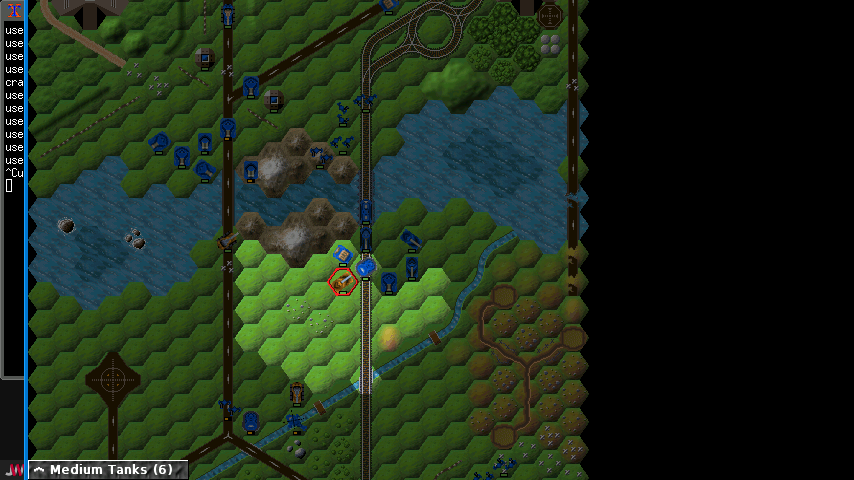
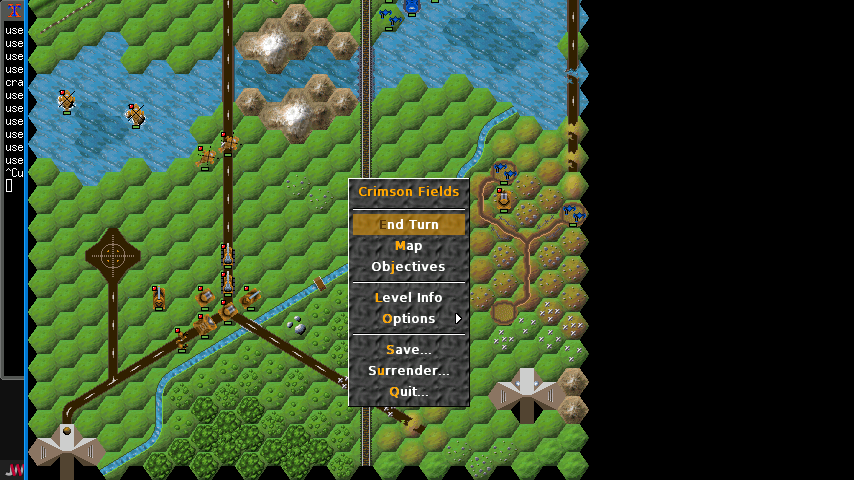
https://packages.debian.org/bullseye/games/crimson
起動:crimson
Crimson Fieldsは、Battle Isle™の流れを汲む六角形マップベースの戦術ウォーゲームです。2人のプレイヤーは六角形のマップ上で部隊を指揮し、重要な拠点の防衛から敵部隊の殲滅まで、様々なミッション目標の達成を目指します。ゲームは「ホットシート」モード、メール、またはコンピュータ対戦でプレイできます。カスタムマップやキャンペーンを作成するためのツールも用意されています。Battle Isleのオリジナル版をお持ちの場合は、オリジナルのマップでプレイすることも可能です。
クリックしてゲームルールを表示
Crimson(Crimson Fields)の基本ルール
ターン制で進行
プレイヤーと敵が 交互にターンを実行。
1ターンでできる行動:
ユニットの移動
攻撃
補給・修理
新ユニットの生産(マップによる)
勝利条件
シナリオによって異なるが、主に以下のいずれか:
敵軍の全滅
特定の拠点を占領
輸送目標の護衛/破壊
制限ターン内に目的達成
ユニットの特徴
ユニットには以下のパラメータがある:
移動力(地形によって変化)
攻撃力 / 防御力
射程(近接 / 遠距離)
燃料・弾薬
視界
ユニットは地形の影響を受ける:
森・山:防御力アップ、移動コスト増
道路:移動が速い
水上:専用ユニットのみ移動可能
補給・修理
補給車や基地で 燃料・弾薬を補充。
修理は基地で行われる。
補給が切れると移動不能・攻撃不能になる。
ユニット生産
一部のマップでは工場でユニットを生産可能。
資源ポイントを消費して新ユニットを作る。
戦闘ルール
攻撃側と防御側のステータス・地形補正でダメージが決まる。
乱数要素あり。
反撃は射程内なら発生。
デフォルトでは縦解像度600を想定しているようですが、Brainでプレイする場合は
Option -> Videoから、854x480に合わせれば 画面サイズを変更することが出来ます。
MAPを選んでStartでゲームスタートできます。
インストール:APT経由 ”sudo apt install crimson”
———-
○ gearhead-sdl ローグライクメカRPG、SDL版
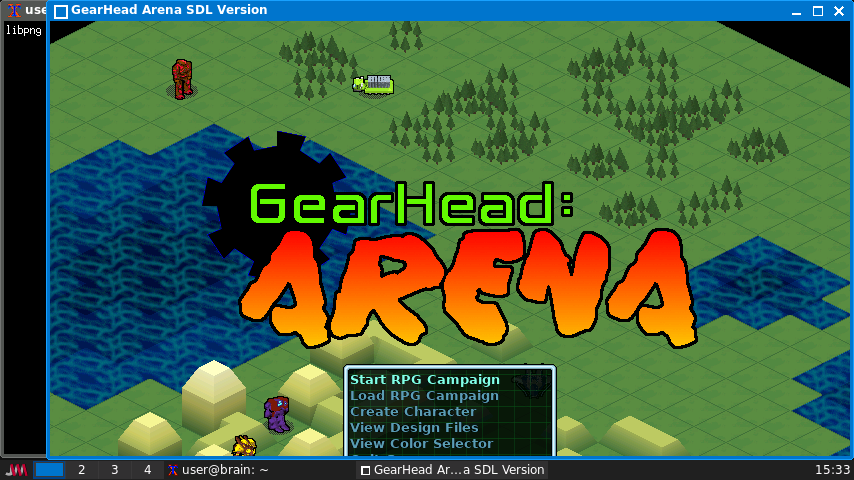
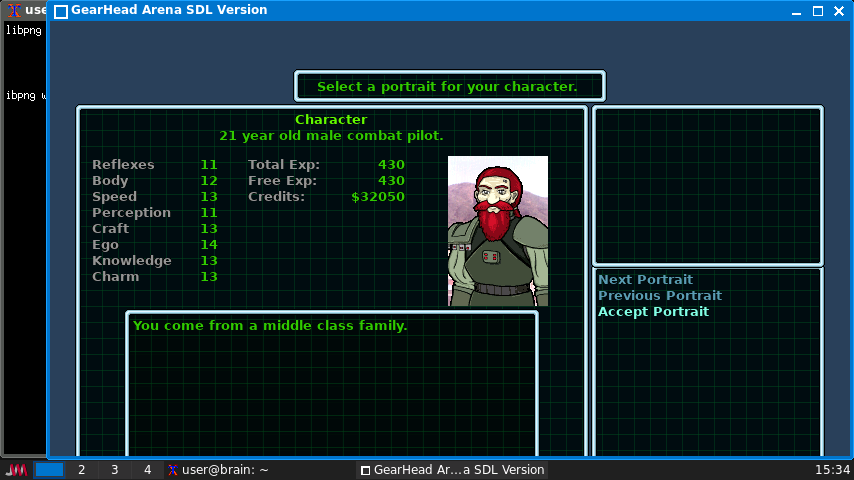
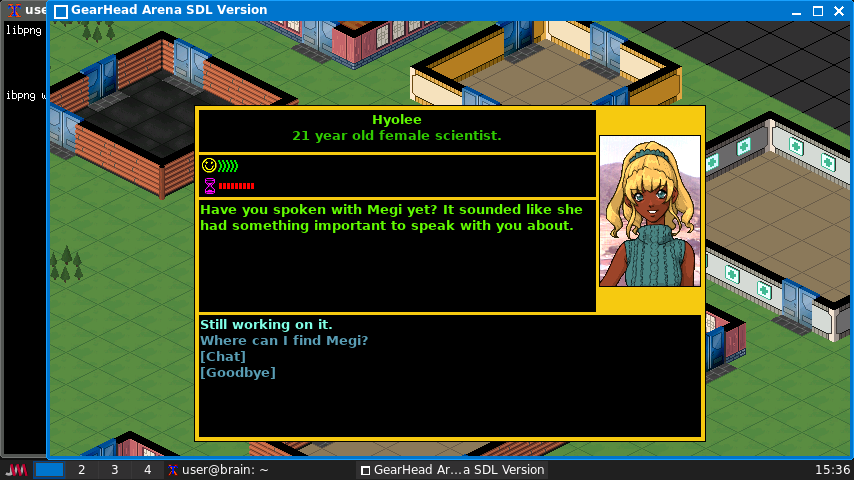
https://packages.debian.org/bullseye/games/gearhead-sdl
1世紀半前、地球は核戦争によって壊滅寸前にまで追い込まれた。今、自由都市国家の連邦が文明の復興に着手した。しかし、闇の中で暗躍する勢力が、人類の未来を決定づけるため、過去の恐怖を再び解き放とうとしている。
このゲームの特徴としては、ランダムなストーリー生成、非常に詳細なキャラクター生成、複雑なNPCとのやり取り、そしてもちろん、ジェット戦闘機から巨大ロボット、都市破壊戦車まで、150種類以上の異なるメカニックデザインが挙げられます。
これはSDL版です。コンソール版の場合は、Gearheadをご利用ください。
○ gearhead ローグライクメカRPGゲーム、コンソール版
キーボードでもマウスでも操作できます。
瀬部て英語なので、その辺は注意
インストール:APT経由 ”sudo apt install gearhead-sdl”
———-
△ late ボールを捕まえるシンプルなゲーム
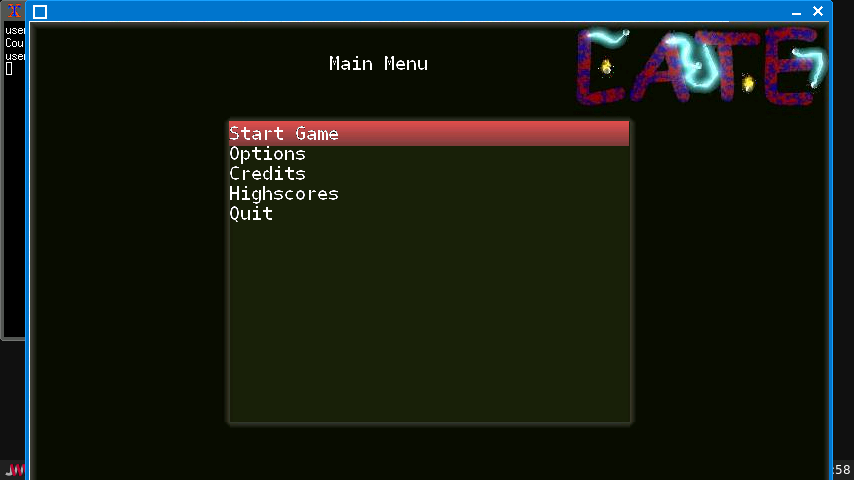
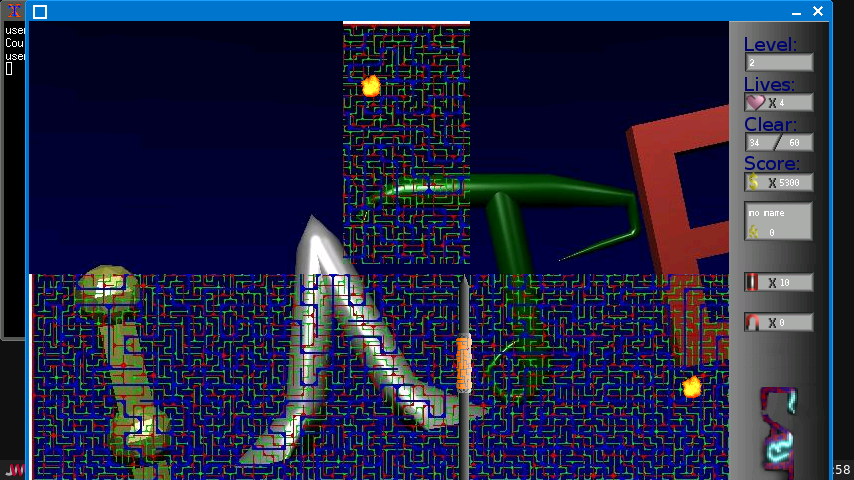
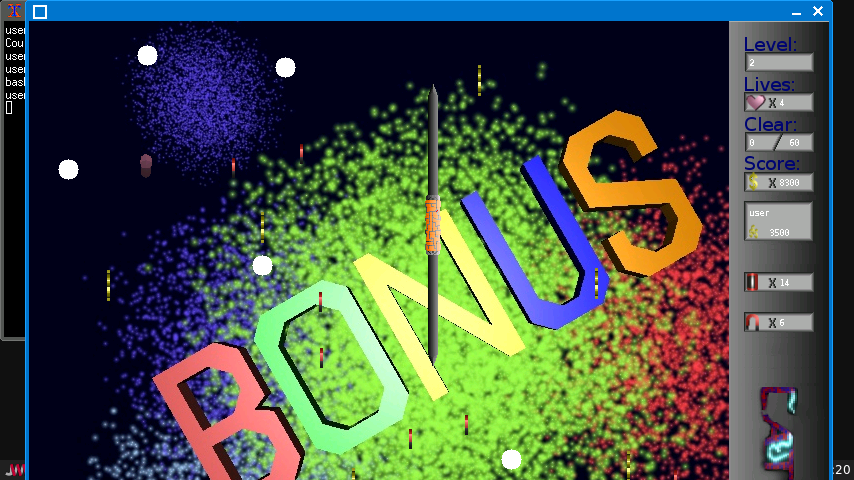
https://packages.debian.org/bullseye/games/late
これはシンプルかつ楽しいゲームであり、飛び回るボールを捕まえるために マウスベースのギロチンを使います。
ギロチンを下ろしてプレイエリアを小さな箱に区切ることにより跳ね回るボールを 捕まえることができます。画面を充分囲えば次のレベルに進めます。
Full Screenモードにするには800×600の解像度が必要なためBrainではエラーになります。
Windowモードでも画面がすべて表示されないですが、その辺を考慮すればプレイできなくはないです。
インストール:APT経由 ”sudo apt install late”
———-
SDL2ライブラリを利用したソフトウェア
SDl2を利用したアプリケーションについては、
今のところ快適に動作するアプリケーションが見つかっていません。
以前試したエミュレータ系のいくつか(openmsxとか)が使っていましたが、
すべて動作が重かったです。
SDL_VIDEODRIVERで、バックエンドのビデオドライバをしてできるようですが、
少しでも軽くなるかと、directfbの設定をして切り替えてみてもどうもうまくいきません(SDL2再構築時にdirectfb有効化しているはずのなのだがNG)
SDL 2.0 FAQ: ユーザ 特定のビデオドライバを選択する方法は?
SDL_VIDEODRIVER=directfb
(そもそも directfbがうまく動いていない?)
/etc/directfbrcの設定は以下で試してます。
system = fbdev
fbdev = /dev/fb0
mode = 854×480
depth = 16
試しに
sudo dfbg -c 0xFFFF0000
で一瞬画面全体が赤くなるけど、すぐに消えちゃうのは、正常なのか不明。
———-
Views: 862