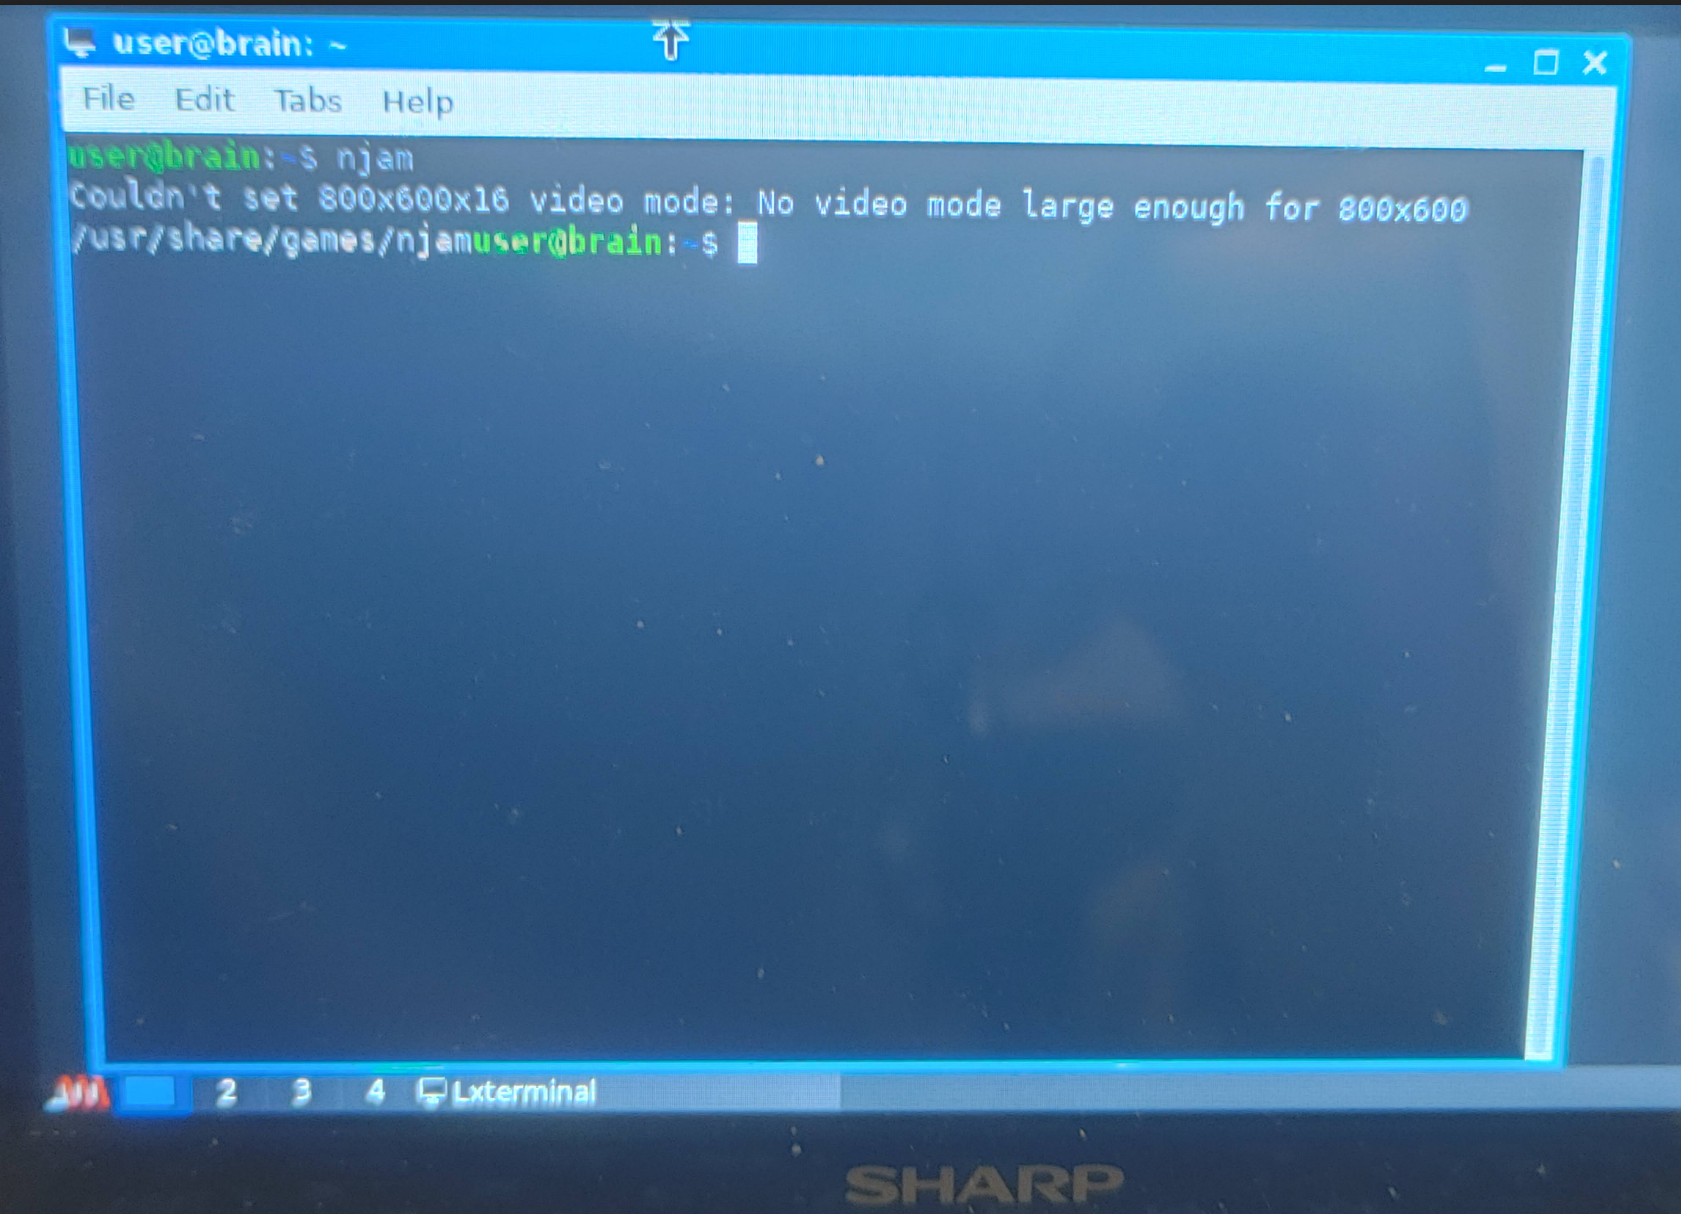
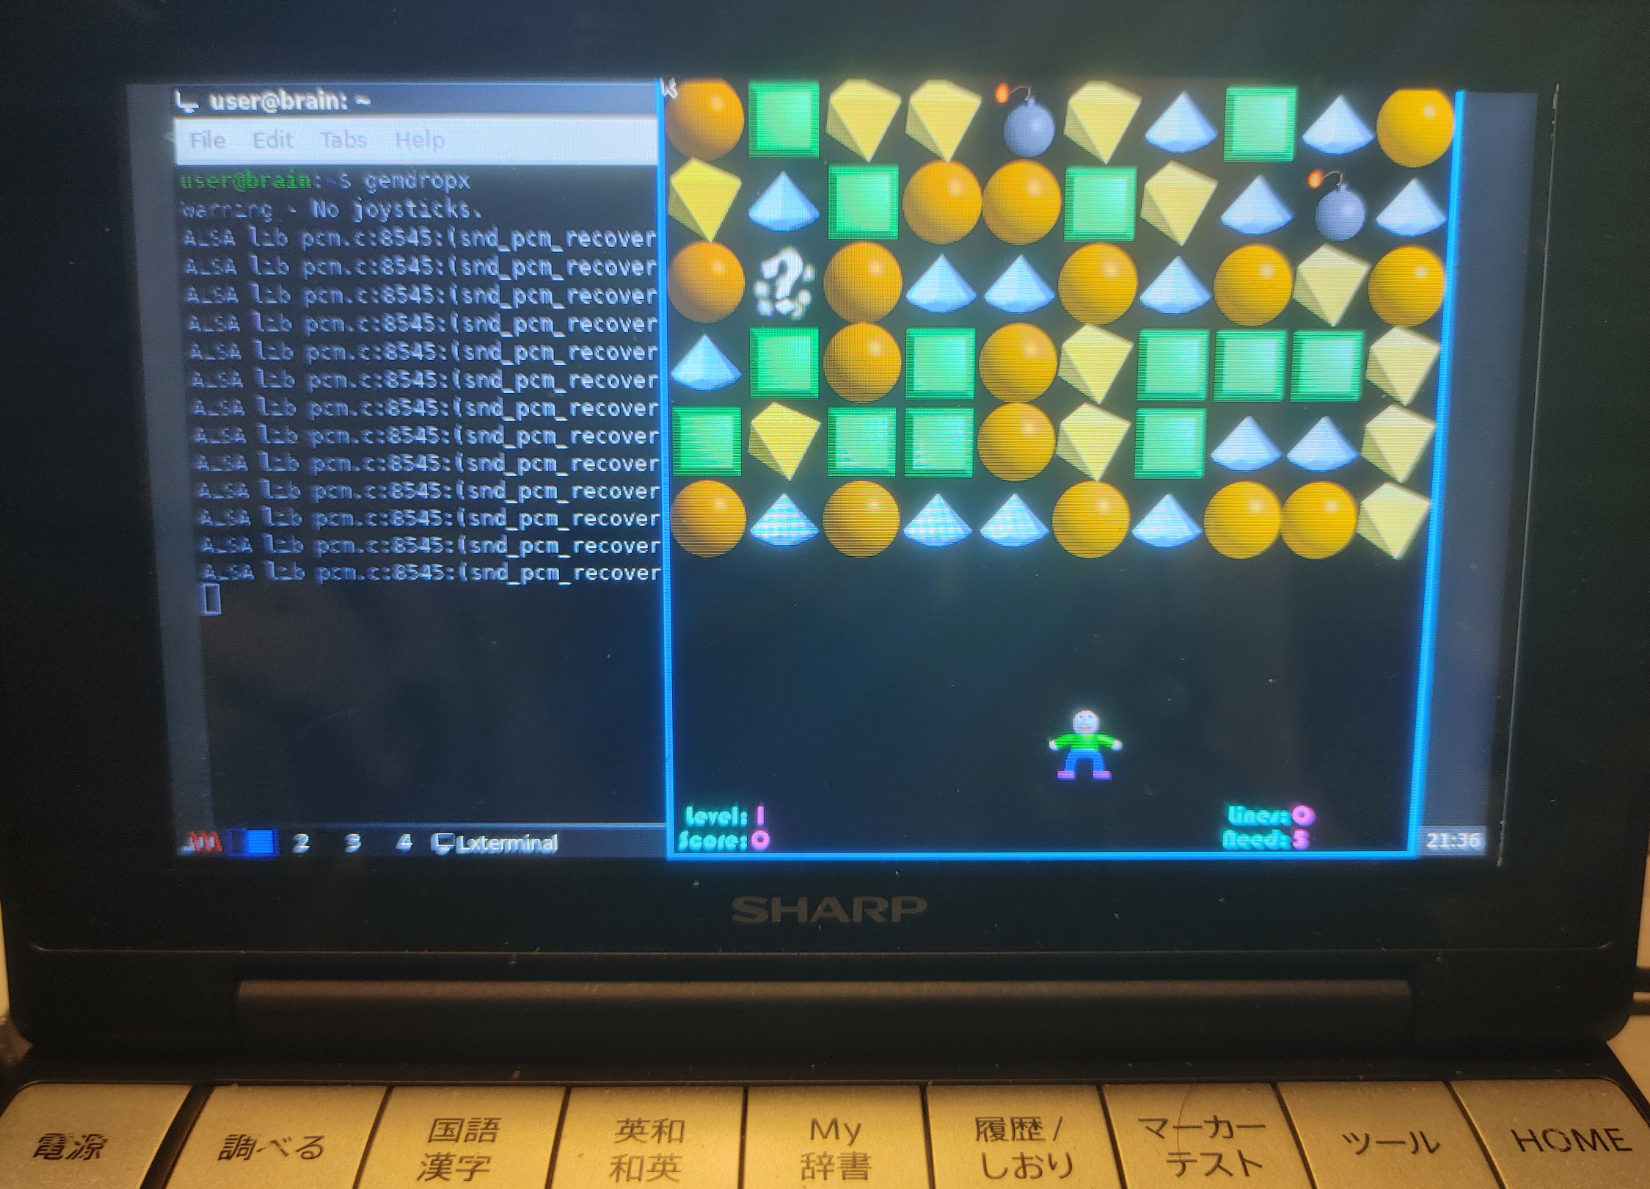
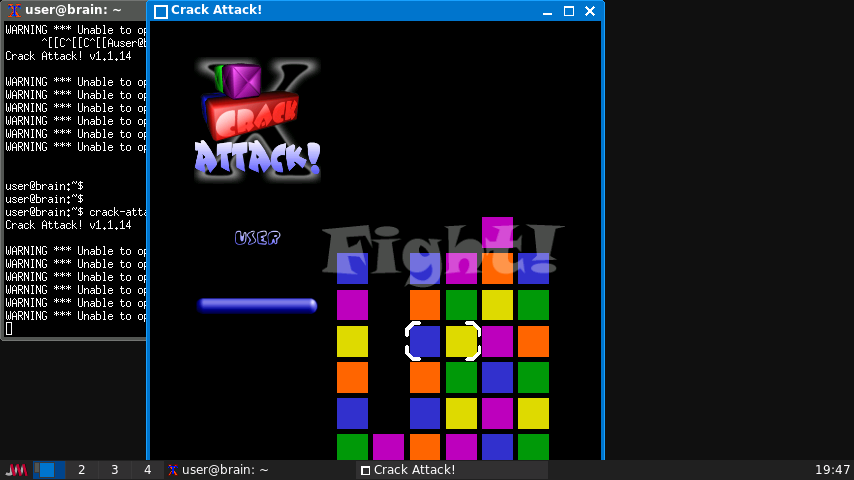
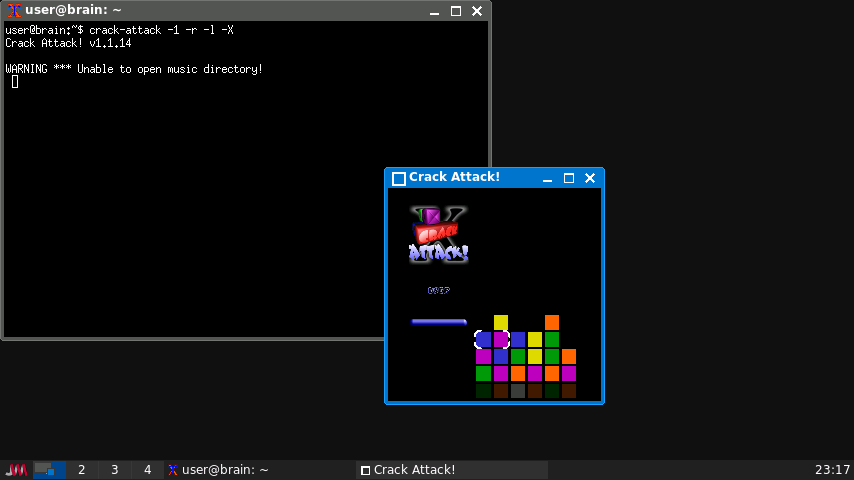
X Error of failed request: BadMatch (invalid parameter attributes) Major opcode of failed request: 1 (X_CreateWindow) Serial number of failed request: 18 Current serial number in output stream: 22
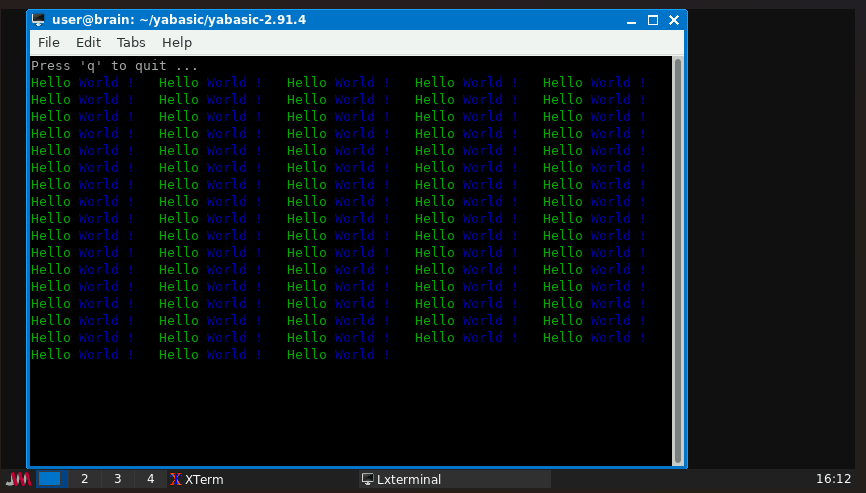
#!/usr/bin/yabasic
clear screen
print "Press 'q' to quit ..."
label again
print color("green") "Hello ";
print color("blue") "World !   ";
if (inkey$(1)="q") exit
goto again
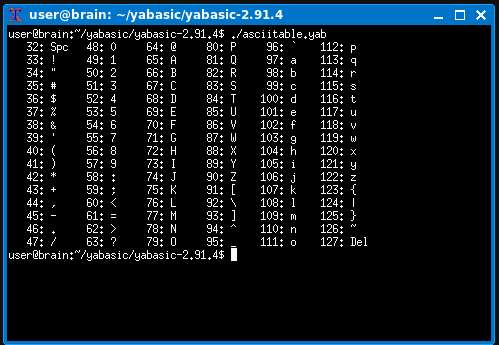
asciitable.yab アスキーコード表示
#!/usr/bin/yabasic
for i = 32 to 47
    for j = i to i + 80 step 16
	    s$ = chr$(j) + "  "
        if j = 32  s$ = "Spc"
        if j = 127 s$ = "Del"
		print str$(j, "#####"), ": ", s$;
    next j
    print
next i
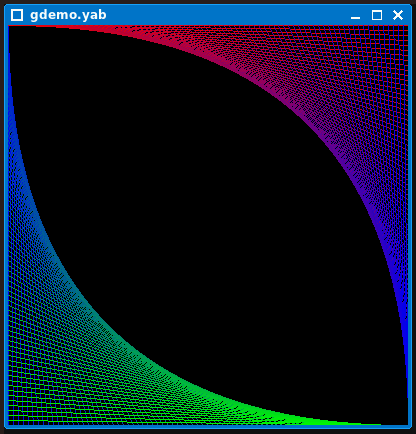
gdemo.yab グラフィック表示デモ
#!/usr/bin/yabasic
w = 400
open window w, w
sleep 1
label again
backcolour 0,0,0
clear window
for i=0 to w step 5
  v = 255 * i / w
  color 0, v, (255 - v)
  line 0, i, i, w
  color (255 - v), 0, v
  line i, 0, w, i
  pause 0.025
next i
sleep 3
goto again
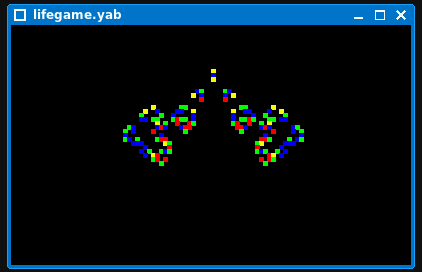
lifegame.yab ライフゲーム
#!/usr/bin/yabasic
// Game_of_Life

X = 59 : Y = 35 : H = 4

open window X*H,Y*H
backcolor 0, 0, 0

dim c(X,Y) : dim cn(X,Y) : dim cl(X,Y)

// Thunderbird methuselah
c(X/2-1,Y/3+1) = 1 : c(X/2,Y/3+1) = 1 : c(X/2+1,Y/3+1) = 1
c(X/2,Y/3+3) = 1 : c(X/2,Y/3+4) = 1 : c(X/2,Y/3+5) = 1

s = 0
repeat
    clear window
    alive = 0 : stable = 1
    s = s + 1
    for y = 0 to Y-1
        for x = 0 to X-1
            xm1 = mod(x-1+X, X) : xp1 = mod(x+1+X, X)
            ym1 = mod(y-1+Y, Y) : yp1 = mod(y+1+Y, Y)
            cn(x,y) = c(xm1,y) + c(xp1,y)
            cn(x,y) = c(xm1,ym1) + c(x,ym1) + c(xp1,ym1) + cn(x,y)
            cn(x,y) = c(xm1,yp1) + c(x,yp1) + c(xp1,yp1) + cn(x,y)
            if c(x,y) = 1 then
                if cn(x,y) < 2 or cn(x,y) > 3 then
                    cn(x,y) = 0
                else
                    cn(x,y) = 1
                    alive = alive + 1
                end if
            else
                if cn(x,y) = 3 then
                    cn(x,y) = 1
                    alive = alive + 1
                else
                    cn(x,y) = 0
                end if
            end if
            if c(x,y) then
                if cn(x,y) then
                    if cl(x,y) color 0, 0, 255          // adult
                    if not cl(x,y) color 0, 255, 0      // newborn
                else
                    if cl(x,y) color 255, 0, 0          // old
                    if not cl(x,y) color 255, 255, 0    // shortlived
                end if
                fill rect x*H,y*H,x*H+H,y*H+H
            end if
        next x
    next y

    pause 0.06
    // Copy arrays
    for i = 0 to X-1
        for j = 0 to Y-1
            if cl(i,j)<>cn(i,j) stable = 0
            cl(i,j) = c(i,j)
            c(i,j) = cn(i,j)
        next j
    next i
until(not alive or stable)

if not alive then
    print "Died in ", s, " iterations"
    clear window
else
    print "Stabilized in ", s-2, " iterations"
end if
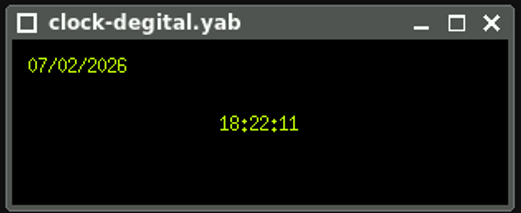
clock-degital.yab デジタル時計
#!/usr/bin/yabasic
clear screen
open window 300,100
backcolor 0, 0, 0
window origin "cc"

// Display digital clock
sub digital_clock()
    local t$(1), void
    static as$

    void = token(time$, t$(), "-")

    if t$(3) <> as$ then
        draw_clock(t$(1), t$(2), t$(3))
        as$ = t$(3)
    end if
end sub

sub draw_clock(hour$, mint$, ssec$)
    local d$(1), void

    void = token(date$, d$(), "-")
    clear window
    color 200, 255, 0
    text -140, -30, d$(3) + "/" + d$(2) + "/" + d$(4), ""
    text 0, 0, hour$ + ":" + mint$ + ":" + ssec$, "cc", ""
end sub

if peek$("library") = "main" then
    repeat
        digital_clock()
    until(upper$(inkey$(.01))="ESC")
    exit
end if
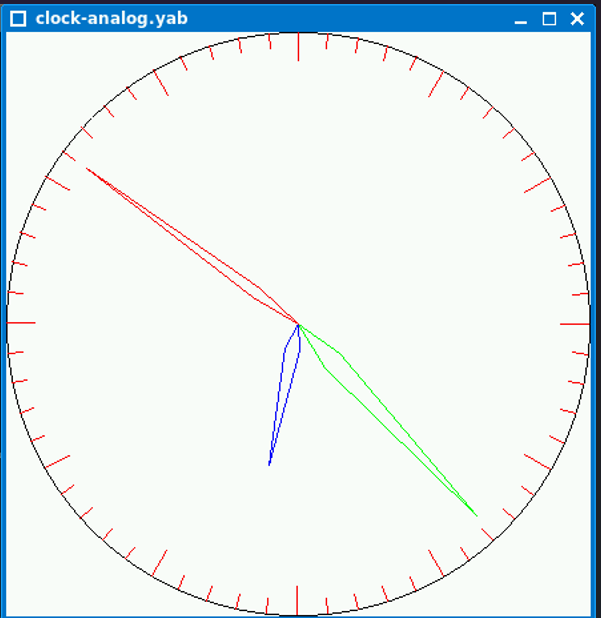
clock-analog.yab アナログ時計
#!/usr/bin/yabasic
REM yaclock
DEG_PER_RAD = 57.257751

winx = 440
winy = 440

radius = min(winx,winy) / 2 - 1
hx = (winx/2) - 1
hy = (winy/2) - 1

REM length of the hands (90% of the radius of the clock face)
shand = int(radius * .9)
mhand = int(radius * .9)
hhand = int(radius * .5)

REM drop coords by one since graphics are 0 based

winx = winx - 1
winy = winy - 1

clear screen

open window winx,winy

clockface()

do

    hour = val(mid$(time$,1,2))
    mins = val(mid$(time$,4,2))
    sec  = val(mid$(time$,7,2))

    updatehand("sec")
    updatehand("mins")
    updatehand("hour")

    pause .25

loop

sub updatehand(hand$)

    switch(hand$)
        case "sec"
            h_len = shand
            angle = sec * 6
            width = 6
            color 255,0,0
            ox = osx
            oy = osy
            oxm1 = osxm1
            oxm2 = osxm2
            oym1 = osym1
            oym2 = osym2
            break
        case "mins"
            h_len = mhand
            angle = mins * 6 + int(sec/10)
            width = 12
            color 0,255,0
            ox = omx
            oy = omy
            oxm1 = omxm1
            oxm2 = omxm2
            oym1 = omym1
            oym2 = omym2
            break
        case "hour"
            h_len = hhand
            angle = ((hour * 30) + (minutes / 12) * 6) + int(mins/2)
            width = 15
            color 0,0,255
            ox = ohx
            oy = ohy
            oxm1 = ohxm1
            oxm2 = ohxm2
            oym1 = ohym1
            oym2 = ohym2
            break
    end switch

    h_angle1 = angle - width
    if h_angle1 < 0 then
        h_angle1 = h_angle1 + 360
    endif
    h_angle1 = h_angle1 / DEG_PER_RAD

    h_angle2 = angle + width
    if h_angle2 > 360 then
        h_angle2 = h_angle2 - 360
    endif
    h_angle2 = h_angle2 / DEG_PER_RAD

    angle = angle / DEG_PER_RAD

    x = (hx + (sin(angle) * h_len))
    xm1 = (hx + (sin(h_angle1) * int(h_len * .2)))
    xm2 = (hx + (sin(h_angle2) * int(h_len * .2)))

    y = (hy - (cos(angle) * h_len))
    ym1 = (hy - (cos(h_angle1) * int(h_len * .2)))
    ym2 = (hy - (cos(h_angle2) * int(h_len * .2)))

    clear line hx,hy,oxm1,oym1
    clear line hx,hy,oxm2,oym2
    clear line oxm1,oym1,ox,oy
    clear line oxm2,oym2,ox,oy
    line hx,hy,xm1,ym1
    line hx,hy,xm2,ym2
    line xm1,ym1,x,y
    line xm2,ym2,x,y

    REM save off the old vals
    switch(hand$)
        case "sec"
            osx = x
            osy = y
            osxm1 = xm1
            osxm2 = xm2
            osym1 = ym1
            osym2 = ym2
            break
        case "mins"
            omx = x
            omy = y
            omxm1 = xm1
            omxm2 = xm2
            omym1 = ym1
            omym2 = ym2
            break
        case "hour"
            ohx = x
            ohy = y
            ohxm1 = xm1
            ohxm2 = xm2
            ohym1 = ym1
            ohym2 = ym2
            break
    end switch
end sub

sub clockface()
    circle hx,hy,radius

    htick = radius / 10
    mtick = htick / 2

    for z=0 to 360 step 6
        REM  Begin at zero deg and stop before 360 deg

        REM draw the hour markers
        angle = z
        angle = angle / DEG_PER_RAD
        x2 = (hx + (sin(angle) * radius))
        y2 = (hy - (cos(angle) * radius))
        if mod(z,30) = 0 then
            tick = htick
        else
            tick = mtick
        endif
        x3 = (hx + (sin(angle) * (radius - tick)))
        y3 = (hy - (cos(angle) * (radius - tick)))
        color 255,0,0
        line x2,y2,x3,y3
        color 0,0,0
    next z
end sub
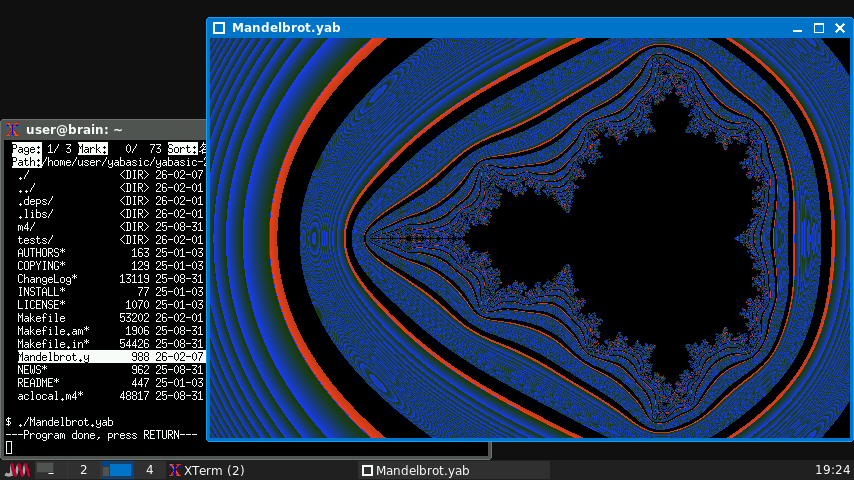
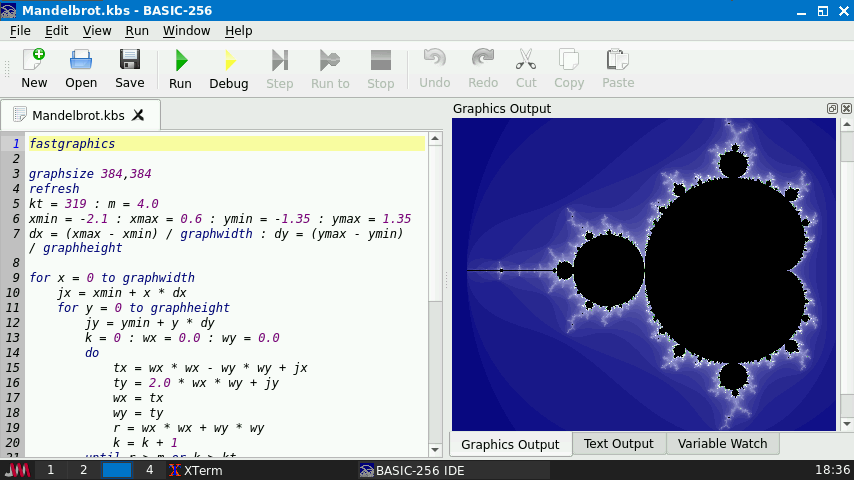
Mandelbrot.yab マンデルブロート集合描画
#!/usr/bin/yabasic
open window 640, 400
wid = 4
xcenter = -1: ycenter = 0
ms = 0
for xcoord = 0 to 639
   for ycoord = 0 to 200
       ms = 0
       ca =(xcoord-320)/640*wid+xcenter
       cb =(ycoord-200)/640*wid+ycenter
       x = 0: y=0

       for t = 1 to 20
           xnew = x*x-y*y+ca
           ynew = 2*x*y+cb
           x=xnew:y=ynew
           magnitudesquared=x*x+y*y
           ms = magnitudesquared
           if (magnitudesquared > 100) break
           //if(magnitudesquared < 100) then : color 0,0,0 : dot xcoord, ycoord : end if
       next t
       ms = ms+1
       if(ms > 250) then
       	    color 32,64,mod(ms,255)
            dot xcoord, ycoord
            dot xcoord, 400- ycoord
        elseif (ms > 150) then
            color mod(ms,255),64,32
            dot xcoord, ycoord
            dot xcoord, 400-ycoord
        else
            color 0,0,0
            dot xcoord, ycoord
            dot xcoord, 400-ycoord
        end if
    next ycoord
next xcoord
user@brain:~$ sudo apt install git build-essential libusb-1.0-0-dev libglib2.0-dev libreadline-dev libtool
[sudo] password for user:
Reading package lists... Done
Building dependency tree... Done
Reading state information... Done
build-essential is already the newest version (12.9).
git is already the newest version (1:2.30.2-1+deb11u2).
libglib2.0-dev is already the newest version (2.66.8-1+deb11u4).
libglib2.0-dev set to manually installed.
libtool is already the newest version (2.4.6-15).
The following additional packages will be installed:
  libncurses-dev
Suggested packages:
  ncurses-doc readline-doc
Recommended packages:
  libusb-1.0-doc
The following NEW packages will be installed:
  libncurses-dev libreadline-dev libusb-1.0-0-dev
0 upgraded, 3 newly installed, 0 to remove and 2 not upgraded.
Need to get 516 kB of archives.
After this operation, 2,707 kB of additional disk space will be used.
Do you want to continue? [Y/n] Y
Get:1 http://archive.debian.org/debian bullseye/main armel libncurses-dev armel 6.2+20201114-2+deb11u2 [305 kB]
Get:2 http://archive.debian.org/debian bullseye/main armel libreadline-dev armel 8.1-1 [134 kB]
Get:3 http://archive.debian.org/debian bullseye/main armel libusb-1.0-0-dev armel 2:1.0.24-3 [76.1 kB]
Fetched 516 kB in 2s (207 kB/s)
Selecting previously unselected package libncurses-dev:armel.
(Reading database ... 59923 files and directories currently installed.)
Preparing to unpack .../libncurses-dev_6.2+20201114-2+deb11u2_armel.deb ...
Unpacking libncurses-dev:armel (6.2+20201114-2+deb11u2) ...
Selecting previously unselected package libreadline-dev:armel.
Preparing to unpack .../libreadline-dev_8.1-1_armel.deb ...
Unpacking libreadline-dev:armel (8.1-1) ...
Selecting previously unselected package libusb-1.0-0-dev:armel.
Preparing to unpack .../libusb-1.0-0-dev_2%3a1.0.24-3_armel.deb ...
Unpacking libusb-1.0-0-dev:armel (2:1.0.24-3) ...
Setting up libncurses-dev:armel (6.2+20201114-2+deb11u2) ...
Setting up libusb-1.0-0-dev:armel (2:1.0.24-3) ...
Setting up libreadline-dev:armel (8.1-1) ...
Processing triggers for man-db (2.9.4-2) ...
user@brain:~$
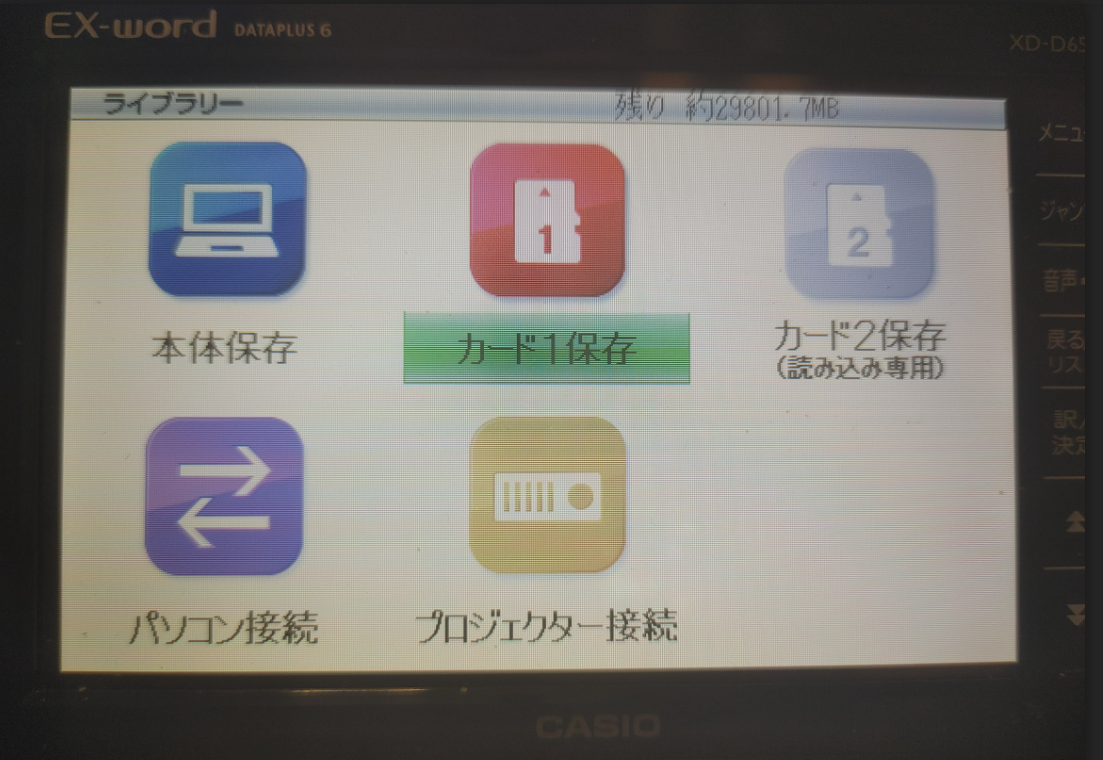
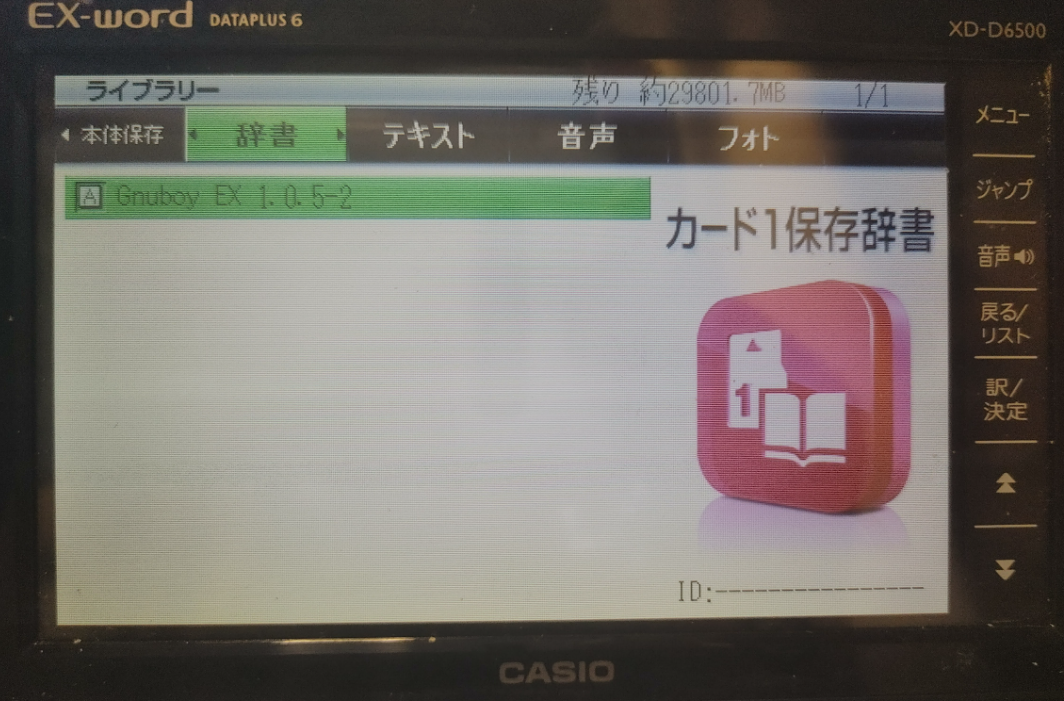
libexword のソースコードを取得
libexword のソースコードを取得します
cd
mkdir libexword
cd libexword/
git clone --depth 1 -b '2.0-dev' https://github.com/brijohn/libexword.git
cd libexword/
$ ./autogen.sh $ make $ sudo make install $ sudo ldconfig $ sudo mkdir -p /root/.local/share/exword/ja
user@brain:~/libexword/libexword$ ./autogen.sh
libtoolize: putting auxiliary files in '.'.
libtoolize: linking file './ltmain.sh'
libtoolize: putting macros in AC_CONFIG_MACRO_DIRS, 'm4'.
libtoolize: linking file 'm4/libtool.m4'
libtoolize: linking file 'm4/ltoptions.m4'
libtoolize: linking file 'm4/ltsugar.m4'
libtoolize: linking file 'm4/ltversion.m4'
libtoolize: linking file 'm4/lt~obsolete.m4'
configure.ac:15: installing './ar-lib'
configure.ac:15: installing './compile'
configure.ac:16: installing './config.guess'
configure.ac:16: installing './config.sub'
configure.ac:6: installing './install-sh'
configure.ac:6: installing './missing'
Makefile.am: installing './INSTALL'
Makefile.am: installing './COPYING' using GNU General Public License v3 file
Makefile.am:     Consider adding the COPYING file to the version control system
Makefile.am:     for your code, to avoid questions about which license your project uses
src/Makefile.am: installing './depcomp'
src/swig/Makefile.am:6: installing './py-compile'
checking for a BSD-compatible install... /usr/bin/install -c
checking whether build environment is sane... yes
checking for a thread-safe mkdir -p... /usr/bin/mkdir -p
checking for gawk... no
checking for mawk... mawk
checking whether make sets $(MAKE)... yes
checking whether make supports nested variables... yes
checking whether make supports the include directive... yes (GNU style)
checking for gcc... gcc
checking whether the C compiler works... yes
checking for C compiler default output file name... a.out
checking for suffix of executables...
checking whether we are cross compiling... no
checking for suffix of object files... o
checking whether we are using the GNU C compiler... yes
checking whether gcc accepts -g... yes
checking for gcc option to accept ISO C89... none needed
checking whether gcc understands -c and -o together... yes
checking dependency style of gcc... gcc3
checking for ar... ar
checking the archiver (ar) interface... ar
checking build system type... armv5tejl-unknown-linux-gnueabi
checking host system type... armv5tejl-unknown-linux-gnueabi
checking how to print strings... printf
checking for a sed that does not truncate output... /usr/bin/sed
checking for grep that handles long lines and -e... /usr/bin/grep
checking for egrep... /usr/bin/grep -E
checking for fgrep... /usr/bin/grep -F
checking for ld used by gcc... /usr/bin/ld
checking if the linker (/usr/bin/ld) is GNU ld... yes
checking for BSD- or MS-compatible name lister (nm)... /usr/bin/nm -B
checking the name lister (/usr/bin/nm -B) interface... BSD nm
checking whether ln -s works... yes
checking the maximum length of command line arguments... 1572864
checking how to convert armv5tejl-unknown-linux-gnueabi file names to armv5tejl-unknown-linux-gnueabi format... func_convert_file_noop
checking how to convert armv5tejl-unknown-linux-gnueabi file names to toolchain format... func_convert_file_noop
checking for /usr/bin/ld option to reload object files... -r
checking for objdump... objdump
checking how to recognize dependent libraries... pass_all
checking for dlltool... no
checking how to associate runtime and link libraries... printf %s\n
checking for archiver @FILE support... @
checking for strip... strip
checking for ranlib... ranlib
checking command to parse /usr/bin/nm -B output from gcc object... ok
checking for sysroot... no
checking for a working dd... /usr/bin/dd
checking how to truncate binary pipes... /usr/bin/dd bs=4096 count=1
checking for mt... mt
checking if mt is a manifest tool... no
checking how to run the C preprocessor... gcc -E
checking for ANSI C header files... yes
checking for sys/types.h... yes
checking for sys/stat.h... yes
checking for stdlib.h... yes
checking for string.h... yes
checking for memory.h... yes
checking for strings.h... yes
checking for inttypes.h... yes
checking for stdint.h... yes
checking for unistd.h... yes
checking for dlfcn.h... yes
checking for objdir... .libs
checking if gcc supports -fno-rtti -fno-exceptions... no
checking for gcc option to produce PIC... -fPIC -DPIC
checking if gcc PIC flag -fPIC -DPIC works... yes
checking if gcc static flag -static works... yes
checking if gcc supports -c -o file.o... yes
checking if gcc supports -c -o file.o... (cached) yes
checking whether the gcc linker (/usr/bin/ld) supports shared libraries... yes
checking whether -lc should be explicitly linked in... no
checking dynamic linker characteristics... GNU/Linux ld.so
checking how to hardcode library paths into programs... immediate
checking whether stripping libraries is possible... yes
checking if libtool supports shared libraries... yes
checking whether to build shared libraries... yes
checking whether to build static libraries... yes
checking for doxygen... /usr/bin/doxygen
checking for swig... no
checking for swig2.0... no
checking for stdlib.h... (cached) yes
checking for string.h... (cached) yes
checking readline/readline.h usability... yes
checking readline/readline.h presence... yes
checking for readline/readline.h... yes
checking for readline in -lreadline... yes
checking for iconv_open... yes
checking for pkg-config... /usr/bin/pkg-config
checking pkg-config is at least version 0.9.0... yes
checking for libusb-1.0 >= 1.0... yes
checking that generated files are newer than configure... done
configure: creating ./config.status
config.status: creating Makefile
config.status: creating src/Makefile
config.status: creating src/swig/Makefile
config.status: creating docs/Makefile
config.status: creating libexword.pc
config.status: creating config.h
config.status: executing depfiles commands
config.status: executing libtool commands
user@brain:~/libexword/libexword$
user@brain:~/libexword/libexword$
user@brain:~/libexword/libexword$
user@brain:~/libexword/libexword$ make
make  all-recursive
make[1]: Entering directory '/home/user/libexword/libexword'
Making all in src
make[2]: Entering directory '/home/user/libexword/libexword/src'
gcc -DHAVE_CONFIG_H -I. -I..      -g -O2 -MT exword-main.o -MD -MP -MF .deps/exword-main.Tpo -c -o exword-main.o `test -f 'main.c' || echo './'`main.c
mv -f .deps/exword-main.Tpo .deps/exword-main.Po
gcc -DHAVE_CONFIG_H -I. -I..      -g -O2 -MT exword-content.o -MD -MP -MF .deps/exword-content.Tpo -c -o exword-content.o `test -f 'content.c' || echo './'`content.c
mv -f .deps/exword-content.Tpo .deps/exword-content.Po
gcc -DHAVE_CONFIG_H -I. -I..      -g -O2 -MT exword-util.o -MD -MP -MF .deps/exword-util.Tpo -c -o exword-util.o `test -f 'util.c' || echo './'`util.c
mv -f .deps/exword-util.Tpo .deps/exword-util.Po
/bin/bash ../libtool  --tag=CC   --mode=compile gcc -DHAVE_CONFIG_H -I. -I..    -I/usr/include/libusb-1.0   -g -O2 -MT libexword_la-exword.lo -MD -MP -MF .deps/libexword_la-exword.Tpo -c -o libexword_la-exword.lo `test -f 'exword.c' || echo './'`exword.c
libtool: compile:  gcc -DHAVE_CONFIG_H -I. -I.. -I/usr/include/libusb-1.0 -g -O2 -MT libexword_la-exword.lo -MD -MP -MF .deps/libexword_la-exword.Tpo -c exword.c  -fPIC -DPIC -o .libs/libexword_la-exword.o
libtool: compile:  gcc -DHAVE_CONFIG_H -I. -I.. -I/usr/include/libusb-1.0 -g -O2 -MT libexword_la-exword.lo -MD -MP -MF .deps/libexword_la-exword.Tpo -c exword.c -o libexword_la-exword.o >/dev/null 2>&1
mv -f .deps/libexword_la-exword.Tpo .deps/libexword_la-exword.Plo
/bin/bash ../libtool  --tag=CC   --mode=compile gcc -DHAVE_CONFIG_H -I. -I..    -I/usr/include/libusb-1.0   -g -O2 -MT libexword_la-crypt.lo -MD -MP -MF .deps/libexword_la-crypt.Tpo -c -o libexword_la-crypt.lo `test -f 'crypt.c' || echo './'`crypt.c
libtool: compile:  gcc -DHAVE_CONFIG_H -I. -I.. -I/usr/include/libusb-1.0 -g -O2 -MT libexword_la-crypt.lo -MD -MP -MF .deps/libexword_la-crypt.Tpo -c crypt.c  -fPIC -DPIC -o .libs/libexword_la-crypt.o
libtool: compile:  gcc -DHAVE_CONFIG_H -I. -I.. -I/usr/include/libusb-1.0 -g -O2 -MT libexword_la-crypt.lo -MD -MP -MF .deps/libexword_la-crypt.Tpo -c crypt.c -o libexword_la-crypt.o >/dev/null 2>&1
mv -f .deps/libexword_la-crypt.Tpo .deps/libexword_la-crypt.Plo
/bin/bash ../libtool  --tag=CC   --mode=compile gcc -DHAVE_CONFIG_H -I. -I..    -I/usr/include/libusb-1.0   -g -O2 -MT libexword_la-obex.lo -MD -MP -MF .deps/libexword_la-obex.Tpo -c -o libexword_la-obex.lo `test -f 'obex.c' || echo './'`obex.c
libtool: compile:  gcc -DHAVE_CONFIG_H -I. -I.. -I/usr/include/libusb-1.0 -g -O2 -MT libexword_la-obex.lo -MD -MP -MF .deps/libexword_la-obex.Tpo -c obex.c  -fPIC -DPIC -o .libs/libexword_la-obex.o
libtool: compile:  gcc -DHAVE_CONFIG_H -I. -I.. -I/usr/include/libusb-1.0 -g -O2 -MT libexword_la-obex.lo -MD -MP -MF .deps/libexword_la-obex.Tpo -c obex.c -o libexword_la-obex.o >/dev/null 2>&1
mv -f .deps/libexword_la-obex.Tpo .deps/libexword_la-obex.Plo
/bin/bash ../libtool  --tag=CC   --mode=compile gcc -DHAVE_CONFIG_H -I. -I..    -I/usr/include/libusb-1.0   -g -O2 -MT libexword_la-databuffer.lo -MD -MP -MF .deps/libexword_la-databuffer.Tpo -c -o libexword_la-databuffer.lo `test -f 'databuffer.c' || echo './'`databuffer.c
libtool: compile:  gcc -DHAVE_CONFIG_H -I. -I.. -I/usr/include/libusb-1.0 -g -O2 -MT libexword_la-databuffer.lo -MD -MP -MF .deps/libexword_la-databuffer.Tpo -c databuffer.c  -fPIC -DPIC -o .libs/libexword_la-databuffer.o
libtool: compile:  gcc -DHAVE_CONFIG_H -I. -I.. -I/usr/include/libusb-1.0 -g -O2 -MT libexword_la-databuffer.lo -MD -MP -MF .deps/libexword_la-databuffer.Tpo -c databuffer.c -o libexword_la-databuffer.o >/dev/null 2>&1
mv -f .deps/libexword_la-databuffer.Tpo .deps/libexword_la-databuffer.Plo
/bin/bash ../libtool  --tag=CC   --mode=link gcc -I/usr/include/libusb-1.0   -g -O2 -version-info 2:0:0   -o libexword.la -rpath /usr/local/lib libexword_la-exword.lo libexword_la-crypt.lo libexword_la-obex.lo libexword_la-databuffer.lo -lusb-1.0
libtool: link: gcc -shared  -fPIC -DPIC  .libs/libexword_la-exword.o .libs/libexword_la-crypt.o .libs/libexword_la-obex.o .libs/libexword_la-databuffer.o   -lusb-1.0  -g -O2   -Wl,-soname -Wl,libexword.so.2 -o .libs/libexword.so.2.0.0
libtool: link: (cd ".libs" && rm -f "libexword.so.2" && ln -s "libexword.so.2.0.0" "libexword.so.2")
libtool: link: (cd ".libs" && rm -f "libexword.so" && ln -s "libexword.so.2.0.0" "libexword.so")
libtool: link: ar cr .libs/libexword.a  libexword_la-exword.o libexword_la-crypt.o libexword_la-obex.o libexword_la-databuffer.o
libtool: link: ranlib .libs/libexword.a
libtool: link: ( cd ".libs" && rm -f "libexword.la" && ln -s "../libexword.la" "libexword.la" )
/bin/bash ../libtool  --tag=CC   --mode=link gcc   -g -O2   -o exword exword-main.o exword-content.o exword-util.o -lreadline libexword.la
libtool: link: gcc -g -O2 -o .libs/exword exword-main.o exword-content.o exword-util.o  -lreadline ./.libs/libexword.so
make[2]: Leaving directory '/home/user/libexword/libexword/src'
Making all in src/swig
make[2]: Entering directory '/home/user/libexword/libexword/src/swig'
make  all-am
make[3]: Entering directory '/home/user/libexword/libexword/src/swig'
make[3]: Nothing to be done for 'all-am'.
make[3]: Leaving directory '/home/user/libexword/libexword/src/swig'
make[2]: Leaving directory '/home/user/libexword/libexword/src/swig'
Making all in docs
make[2]: Entering directory '/home/user/libexword/libexword/docs'
Creating Documentation
warning: Tag 'TCL_SUBST' at line 203 of file 'doxy.cfg' has become obsolete.
         To avoid this warning please remove this line from your configuration file or upgrade it using "doxygen -u"
warning: Tag 'SYMBOL_CACHE_SIZE' at line 336 of file 'doxy.cfg' has become obsolete.
         To avoid this warning please remove this line from your configuration file or upgrade it using "doxygen -u"
warning: Tag 'COLS_IN_ALPHA_INDEX' at line 848 of file 'doxy.cfg' has become obsolete.
         To avoid this warning please remove this line from your configuration file or upgrade it using "doxygen -u"
warning: Tag 'XML_SCHEMA' at line 1403 of file 'doxy.cfg' has become obsolete.
         To avoid this warning please remove this line from your configuration file or upgrade it using "doxygen -u"
warning: Tag 'XML_DTD' at line 1409 of file 'doxy.cfg' has become obsolete.
         To avoid this warning please remove this line from your configuration file or upgrade it using "doxygen -u"
warning: Tag 'PERL_PATH' at line 1570 of file 'doxy.cfg' has become obsolete.
         To avoid this warning please remove this line from your configuration file or upgrade it using "doxygen -u"
warning: Tag 'MSCGEN_PATH' at line 1591 of file 'doxy.cfg' has become obsolete.
         To avoid this warning please remove this line from your configuration file or upgrade it using "doxygen -u"
warning: argument 'a4wide' for option PAPER_TYPE is not a valid enum value
Using the default: a4!
warning: doxygen no longer ships with the FreeSans font.
You may want to clear or change DOT_FONTNAME.
Otherwise you run the risk that the wrong font is being used for dot generated graphs.
make[2]: Leaving directory '/home/user/libexword/libexword/docs'
make[2]: Entering directory '/home/user/libexword/libexword'
make[2]: Leaving directory '/home/user/libexword/libexword'
make[1]: Leaving directory '/home/user/libexword/libexword'
user@brain:~/libexword/libexword$
user@brain:~/libexword/libexword$
user@brain:~/libexword/libexword$
user@brain:~/libexword/libexword$ sudo make install
[sudo] password for user:
Making install in src
make[1]: Entering directory '/home/user/libexword/libexword/src'
make[2]: Entering directory '/home/user/libexword/libexword/src'
 /usr/bin/mkdir -p '/usr/local/lib'
 /bin/bash ../libtool   --mode=install /usr/bin/install -c   libexword.la '/usr/local/lib'
libtool: install: /usr/bin/install -c .libs/libexword.so.2.0.0 /usr/local/lib/libexword.so.2.0.0
libtool: install: (cd /usr/local/lib && { ln -s -f libexword.so.2.0.0 libexword.so.2 || { rm -f libexword.so.2 && ln -s libexword.so.2.0.0 libexword.so.2; }; })
libtool: install: (cd /usr/local/lib && { ln -s -f libexword.so.2.0.0 libexword.so || { rm -f libexword.so && ln -s libexword.so.2.0.0 libexword.so; }; })
libtool: install: /usr/bin/install -c .libs/libexword.lai /usr/local/lib/libexword.la
libtool: install: /usr/bin/install -c .libs/libexword.a /usr/local/lib/libexword.a
libtool: install: chmod 644 /usr/local/lib/libexword.a
libtool: install: ranlib /usr/local/lib/libexword.a
libtool: finish: PATH="/usr/local/sbin:/usr/local/bin:/usr/sbin:/usr/bin:/sbin:/bin:/sbin" ldconfig -n /usr/local/lib
----------------------------------------------------------------------
Libraries have been installed in:
   /usr/local/lib

If you ever happen to want to link against installed libraries
in a given directory, LIBDIR, you must either use libtool, and
specify the full pathname of the library, or use the '-LLIBDIR'
flag during linking and do at least one of the following:
   - add LIBDIR to the 'LD_LIBRARY_PATH' environment variable
     during execution
   - add LIBDIR to the 'LD_RUN_PATH' environment variable
     during linking
   - use the '-Wl,-rpath -Wl,LIBDIR' linker flag
   - have your system administrator add LIBDIR to '/etc/ld.so.conf'

See any operating system documentation about shared libraries for
more information, such as the ld(1) and ld.so(8) manual pages.
----------------------------------------------------------------------
 /usr/bin/mkdir -p '/usr/local/bin'
  /bin/bash ../libtool   --mode=install /usr/bin/install -c exword '/usr/local/bin'
libtool: install: /usr/bin/install -c .libs/exword /usr/local/bin/exword
 /usr/bin/mkdir -p '/usr/local/include'
 /usr/bin/install -c -m 644 exword.h '/usr/local/include'
make[2]: Leaving directory '/home/user/libexword/libexword/src'
make[1]: Leaving directory '/home/user/libexword/libexword/src'
Making install in src/swig
make[1]: Entering directory '/home/user/libexword/libexword/src/swig'
make  install-am
make[2]: Entering directory '/home/user/libexword/libexword/src/swig'
make[3]: Entering directory '/home/user/libexword/libexword/src/swig'
make[3]: Leaving directory '/home/user/libexword/libexword/src/swig'
make[2]: Leaving directory '/home/user/libexword/libexword/src/swig'
make[1]: Leaving directory '/home/user/libexword/libexword/src/swig'
Making install in docs
make[1]: Entering directory '/home/user/libexword/libexword/docs'
Creating Documentation
warning: Tag 'TCL_SUBST' at line 203 of file 'doxy.cfg' has become obsolete.
         To avoid this warning please remove this line from your configuration file or upgrade it using "doxygen -u"
warning: Tag 'SYMBOL_CACHE_SIZE' at line 336 of file 'doxy.cfg' has become obsolete.
         To avoid this warning please remove this line from your configuration file or upgrade it using "doxygen -u"
warning: Tag 'COLS_IN_ALPHA_INDEX' at line 848 of file 'doxy.cfg' has become obsolete.
         To avoid this warning please remove this line from your configuration file or upgrade it using "doxygen -u"
warning: Tag 'XML_SCHEMA' at line 1403 of file 'doxy.cfg' has become obsolete.
         To avoid this warning please remove this line from your configuration file or upgrade it using "doxygen -u"
warning: Tag 'XML_DTD' at line 1409 of file 'doxy.cfg' has become obsolete.
         To avoid this warning please remove this line from your configuration file or upgrade it using "doxygen -u"
warning: Tag 'PERL_PATH' at line 1570 of file 'doxy.cfg' has become obsolete.
         To avoid this warning please remove this line from your configuration file or upgrade it using "doxygen -u"
warning: Tag 'MSCGEN_PATH' at line 1591 of file 'doxy.cfg' has become obsolete.
         To avoid this warning please remove this line from your configuration file or upgrade it using "doxygen -u"
warning: argument 'a4wide' for option PAPER_TYPE is not a valid enum value
Using the default: a4!
warning: doxygen no longer ships with the FreeSans font.
You may want to clear or change DOT_FONTNAME.
Otherwise you run the risk that the wrong font is being used for dot generated graphs.
make[2]: Entering directory '/home/user/libexword/libexword/docs'
make[2]: Nothing to be done for 'install-exec-am'.
make[2]: Nothing to be done for 'install-data-am'.
make[2]: Leaving directory '/home/user/libexword/libexword/docs'
make[1]: Leaving directory '/home/user/libexword/libexword/docs'
make[1]: Entering directory '/home/user/libexword/libexword'
make[2]: Entering directory '/home/user/libexword/libexword'
make[2]: Nothing to be done for 'install-exec-am'.
 /usr/bin/mkdir -p '/usr/local/share/exword'
 /usr/bin/install -c -m 644 models.txt '/usr/local/share/exword'
 /usr/bin/mkdir -p '/usr/local/lib/pkgconfig'
 /usr/bin/install -c -m 644 libexword.pc '/usr/local/lib/pkgconfig'
make[2]: Leaving directory '/home/user/libexword/libexword'
make[1]: Leaving directory '/home/user/libexword/libexword'
user@brain:~/libexword/libexword$ sudo ldconfig
user@brain:~/libexword/libexword$ sudo mkdir -p /root/.local/share/exword/ja
user@brain:~/libexword/libexword$
コマンドが実行出来るか確認
試しに実行して見ます
$ sudo bash # exword
まずは動いてますね。
user@brain:/home/user/libexword/libexword# sudo bash
root@brain:/home/user/libexword/libexword# exword
Exword dictionary tool.
Type 'help' for a list of commands.
>> help
connect [mode] [region] - connect to attached dictionary
disconnect              - disconnect from dictionary
model                   - display model information
capacity                - display medium capacity
format                  - format SD card
list                    - list files
delete <filename>       - delete a file
send <filename>         - upload a file
get <filename>          - download a file
setpath <path>          - changes directory on dictionary
cd <sub-function>       - audio cd commands
dict <sub-function>     - add-on dictionary commands
set <option> [value]    - sets program options
exit                    - exits program
>>exit
root@brain:/home/user/libexword/libexword#
BrainからEX-wordに接続してみる
まずは、EX-Word側の1番側スロットにSdカード入れておきます。
・電源を入れて、ライブラリーボタン -> ライブラリー ボタン -> パソコン接続を起動します。
・Brain側のUSBホストアダプタと、EX wordをUSBケーブルで接続します。
・USBケーブルで接続すると、Brain側では、Ex wordをusbデバイスとして認識します。
$ lsusb Bus 001 Device 007: ID 07cf:6101 Casio Computer Co., Ltd fx-9750gII
user@brain:~/libexword/libexword$ lsusb
Bus 001 Device 006: ID 0b95:772b ASIX Electronics Corp. AX88772B
Bus 001 Device 005: ID 1997:2433 Shenzhen Riitek Technology Co., Ltd wireless mini keyboard with touchpad
Bus 001 Device 004: ID 413c:301a Dell Computer Corp. Dell MS116 Optical Mouse
Bus 001 Device 007: ID 07cf:6101 Casio Computer Co., Ltd fx-9750gII
Bus 001 Device 002: ID 05e3:0610 Genesys Logic, Inc. Hub
Bus 001 Device 001: ID 1d6b:0002 Linux Foundation 2.0 root hub
user@brain:~/libexword/libexword$ sudo apt show p7zip-full
Package: p7zip-full
Version: 16.02+dfsg-8
Priority: optional
Section: utils
Source: p7zip
Maintainer: Robert Luberda <robert@debian.org>
Installed-Size: 3,932 kB
Depends: p7zip (= 16.02+dfsg-8), libc6 (>= 2.7), libgcc-s1 (>= 3.5), libstdc++6 (>= 5)
Suggests: p7zip-rar
Breaks: p7zip (<< 15.09+dfsg-3~)
Replaces: p7zip (<< 15.09+dfsg-3~)
Homepage: http://p7zip.sourceforge.net/
Tag: admin::file-distribution, implemented-in::c++, interface::commandline,
 role::program, scope::utility, use::checking, use::compressing,
 works-with-format::tar, works-with-format::zip, works-with::archive,
 works-with::file
Download-Size: 931 kB
APT-Sources: http://archive.debian.org/debian bullseye/main armel Packages
Description: 7z and 7za file archivers with high compression ratio
 p7zip is the Unix command-line port of 7-Zip, a file archiver that
 handles the 7z format which features very high compression ratios.
 .
 p7zip-full provides utilities to pack and unpack 7z archives within
 a shell or using a GUI (such as Ark, File Roller or Nautilus).
 .
 Installing p7zip-full allows File Roller to use the very efficient 7z
 compression format for packing and unpacking files and directories.
 Additionally, it provides the 7z and 7za commands.
 .
 List of supported formats:
   - Packing / unpacking: 7z, ZIP, GZIP, BZIP2, XZ and TAR
   - Unpacking only: APM, ARJ, CAB, CHM, CPIO, CramFS, DEB, DMG, FAT,
     HFS, ISO, LZH, LZMA, LZMA2, MBR, MSI, MSLZ, NSIS, NTFS, RAR (only
     if non-free p7zip-rar package is installed), RPM, SquashFS, UDF,
     VHD, WIM, XAR and Z.
 .
 The dependent package, p7zip, provides 7zr, a light version of 7za,
 and p7zip, a gzip-like wrapper around 7zr.


user@brain:~/libexword/libexword$ sudo apt install p7zip-full
Reading package lists... Done
Building dependency tree... Done
Reading state information... Done
The following additional packages will be installed:
  p7zip
Suggested packages:
  p7zip-rar
The following NEW packages will be installed:
  p7zip p7zip-full
0 upgraded, 2 newly installed, 0 to remove and 2 not upgraded.
Need to get 1,240 kB of archives.
After this operation, 4,753 kB of additional disk space will be used.
Do you want to continue? [Y/n] Y
Get:1 http://archive.debian.org/debian bullseye/main armel p7zip armel 16.02+dfsg-8 [309 kB]
Get:2 http://archive.debian.org/debian bullseye/main armel p7zip-full armel 16.02+dfsg-8 [931 kB]
Fetched 1,240 kB in 3s (439 kB/s)
Selecting previously unselected package p7zip.
(Reading database ... 60037 files and directories currently installed.)
Preparing to unpack .../p7zip_16.02+dfsg-8_armel.deb ...
Unpacking p7zip (16.02+dfsg-8) ...
Selecting previously unselected package p7zip-full.
Preparing to unpack .../p7zip-full_16.02+dfsg-8_armel.deb ...
Unpacking p7zip-full (16.02+dfsg-8) ...
Setting up p7zip (16.02+dfsg-8) ...
Setting up p7zip-full (16.02+dfsg-8) ...
Processing triggers for man-db (2.9.4-2) ...
user@brain:~/libexword/libexword$
設定ファイルの作成と、ダウンロードした”GNUBY.7z”を解凍します。
$ cd /home/user/libexword/
#GNUBOYの定義ファイルを用意します。 vi /home/user/libexword/gnuboy.rc
set romdir \\\\drv0\\  # Where to place the ROM
set savedir \\\\drv0\\  # Where to place the save data
# set skin \\\\drv0\\zelda.gra  # Which skin to load
set sprsort 0  # Improve performance
$cp rom.gbc /home/user/libexword/
$ 7z x GNUBY.7z $ sudo cp -r /home/user/libexword/GNUBY /root/.local/share/exword/ja/GNUBY
$ cd /home/user/libexword/

$ 7z x GNUBY.7z

7-Zip [32] 16.02 : Copyright (c) 1999-2016 Igor Pavlov : 2016-05-21
p7zip Version 16.02 (locale=en_US.UTF-8,Utf16=on,HugeFiles=on,32 bits,1 CPU LE)

Scanning the drive for archives:
1 file, 43892 bytes (43 KiB)

Extracting archive: GNUBY.7z
--
Path = GNUBY.7z
Type = 7z
Physical Size = 43892
Headers Size = 247
Method = LZMA2:96k
Solid = +
Blocks = 1

Everything is Ok

Folders: 1
Files: 5
Size:       95621
Compressed: 43892

$ sudo cp -r  /home/user/libexword/GNUBY  /root/.local/share/exword/ja/GNUBY
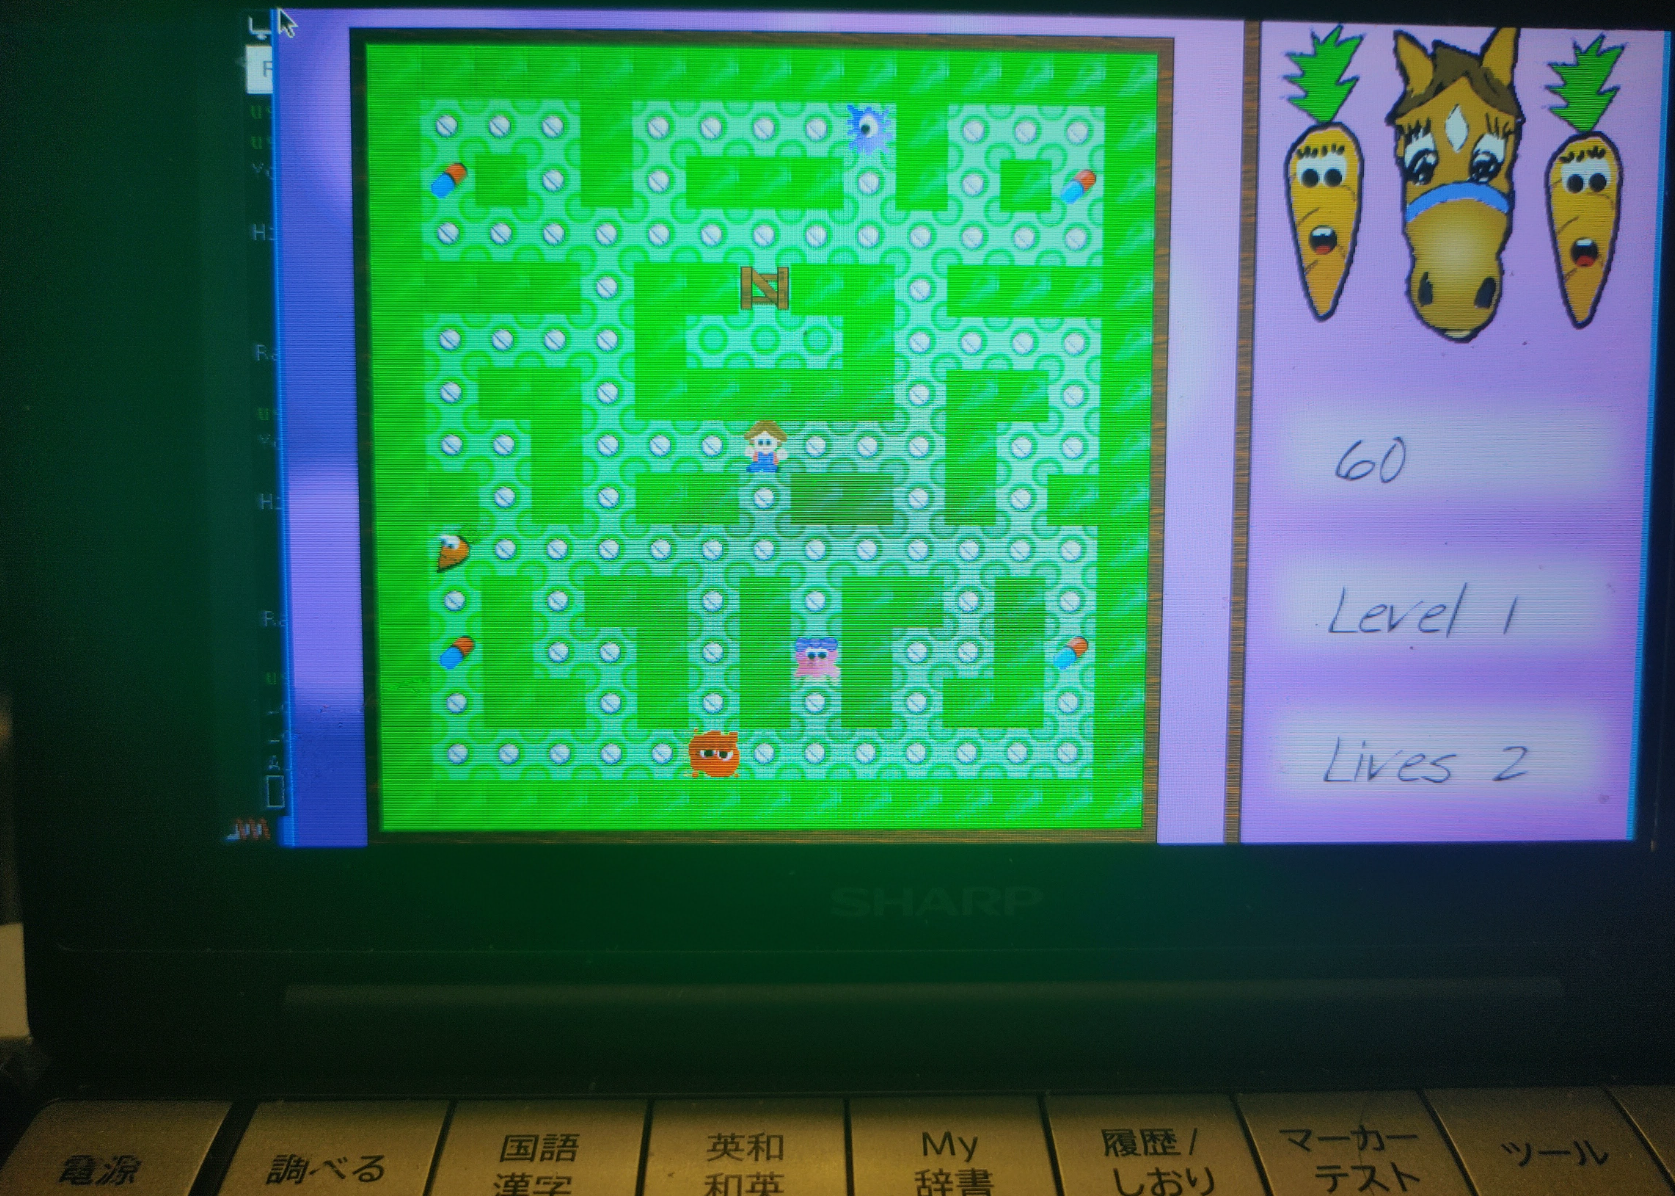
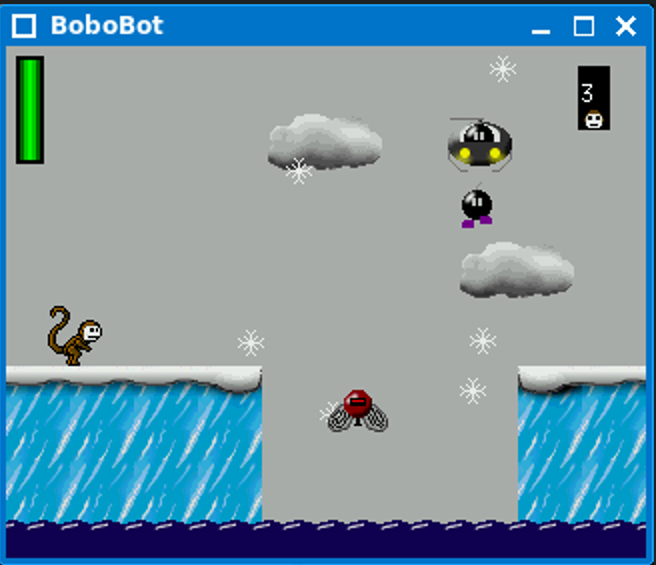
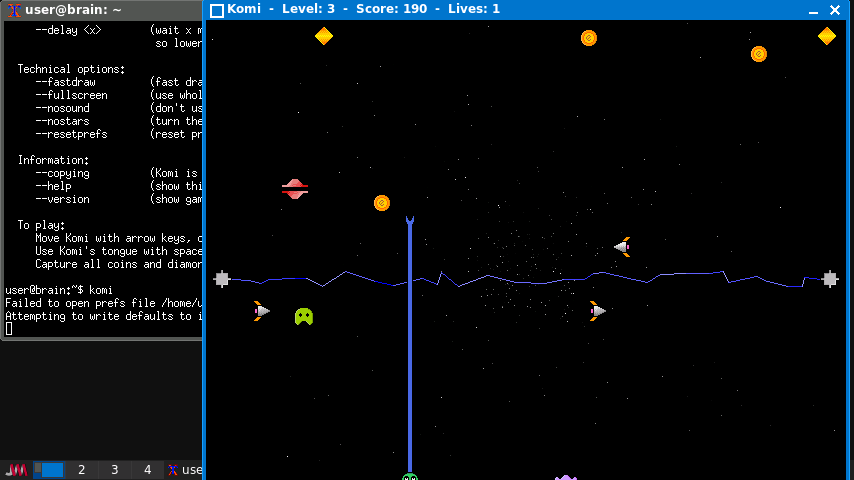
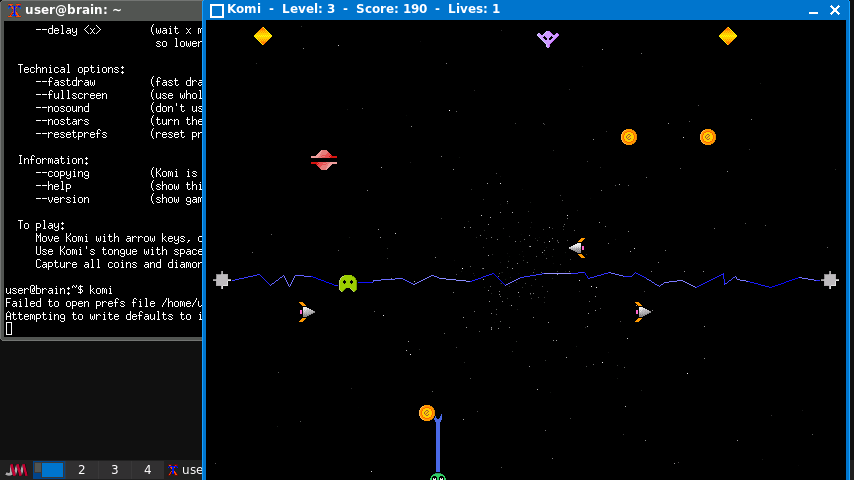
ぶっちゃけロックマンです。 カーソルの左右で移動、SPC or 上でジャンプします。 Zで弾を打ちます(TABでポーズ&武器選択)
キー操作が独特なので、なれるまでは難しいです。
インストール:ソースを入手してインストール
インストール手順詳細(クリックで表示)
インストール手順詳細(クリックで表示)
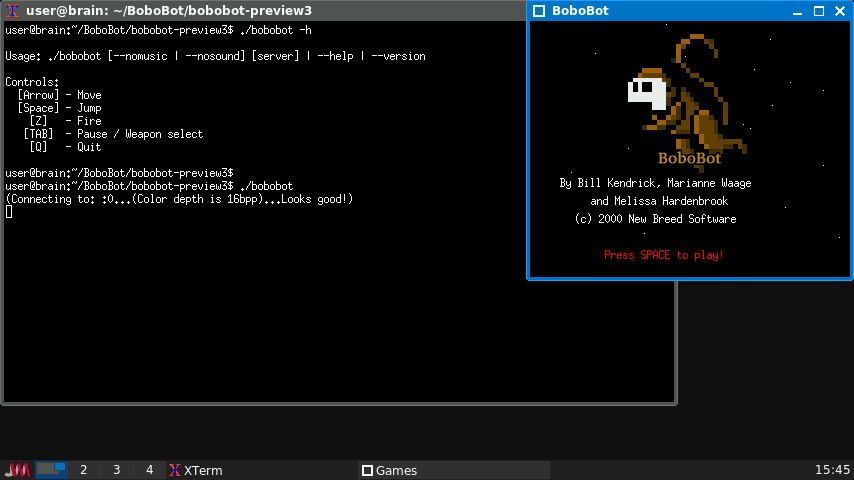
$ cd $ mkdir BoboBot $ cd BoboBot $ wget https://tuxpaint.org/ftp/unix/x/bobobot/src/bobobot-preview3.tar.gz $ tar zxf bobobot-preview3.tar.gz $ cd bobobot-preview3 $ make
デフォルトのインストール先=ビルドしているカレントフォルダのようで、 make 実行時の最後にエラーになりますが、実行時フォルダの下に bobobot ファイルが作成されていて実行属性がついていれば,OKです。
Game controls:(キー操作の他にジョイパッドも対応しているようです。) Up/Down Move up/down Left/Right Face/move left/right Space/FireB Fire lasers Alt/FireA Detonate Smart Bomb 1/FireC Thrust 2/FireD Reverse P/Tab Pause/Unpause Escape Abort game
インストール:ソースを入手してインストール (ビルド時に最適化オプションを追加しています。)
インストール手順詳細(クリックで表示)
インストール手順詳細(クリックで表示)
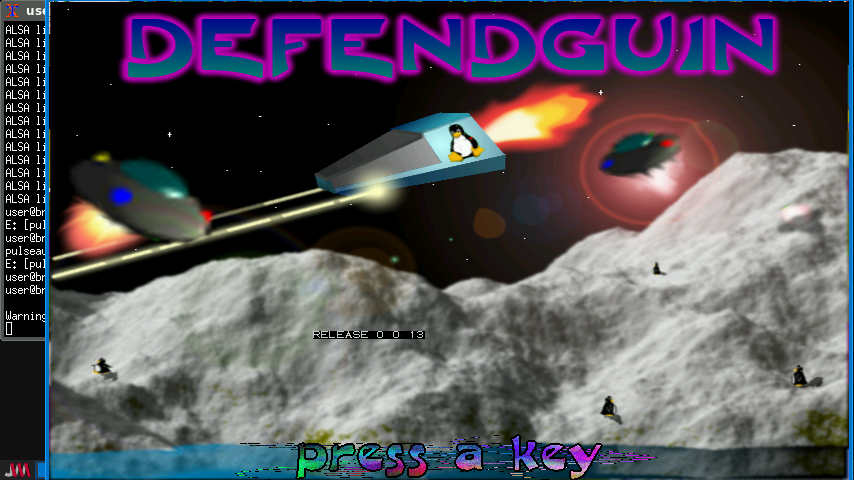
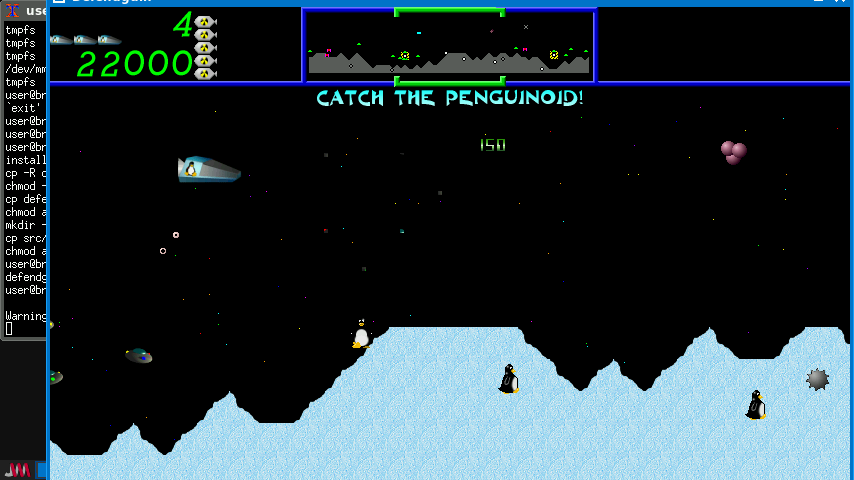
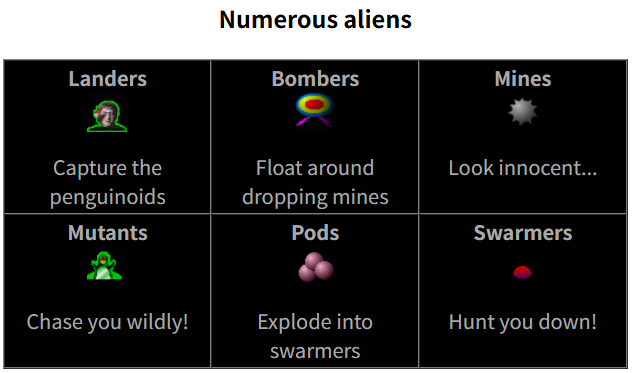
$ cd $ mkdir Defendguin $ cd Defendguin $ wget https://tuxpaint.org/ftp/unix/x/defendguin/src/defendguin-0.0.13.tar.gz $ tar zxf defendguin-0.0.13.tar.gz $ cd defendguin-0.0.13
$ cd $ mkdir pdamaze $ cd pdamaze $ wget https://tuxpaint.org/ftp/unix/agenda/pdamaze/src/pdamaze-2001.10.05.tar.gz $ tar zxf pdamaze-2001.10.05.tar.gz $ cd pdamaze-2001.10.05
// insert into music list std::pair<std::map<std::string, MusicResource>::iterator, bool> result = musics.insert( std::make_pair<std::string, MusicResource> (file, MusicResource())); ↓ // insert into music list std::pair<std::map<std::string, MusicResource>::iterator, bool> result = musics.insert( std::make_pair(file, MusicResource()));
Tile World は “Chip’s Challenge” ゲームのエミュレーションです。 “Chip’s Challenge” はオリジナルは Atari Lynx 用に Chunk Sommerville により作成され、後に (他の移植に加え) Microsoft により MS Windows に移植されました。
注意: Tile World はゲームエンジンのみの移植です。オリジナルのレベルセットに 含まれる chips.dat ファイルは含まれません。このファイルには著作権があり、 フリーで配布できません。chips.dat ファイルは元々は “Chip’s Challenge’ の MS 版の 一部です。個のバージョンのゲームのコピーを持っているならば、Tile World で ゲームを楽しむためにファイルを利用できます。だけども、このファイルのコピーを持って いなくても、CCLP2 を含むオリジナルのゲームのファンにより作成された多くのフリーで 利用可能なレベルセットを使って Tile World を楽しめます。 Microsoft がリリースしたバージョンはゲームのルールに多くの変更点を加えていますので、 Tile World は MS 版もオリジナルの Atari Lynx 版のどちらもエミュレートできます。
ソースを変更したら、再度make xbatしてください。 実行に問題なくなったら、sudo make installでインストールです。
なお、参考までにエラーがあったときは以下のように調査します。 (不具合2の場合)
$ gdb .\xbat (gdb) run
エラーが発生したら、実行がストップします。 バックトレースログを表示するには、以下のように入力します。 (gdb) backtrace #0 0x00408c9c in JikiBomb (i=i@entry=5) at bomb.c:144 #1 0x00402b00 in Explosion (nokori=3) at xev.c:234 #2 0x00403084 in Play () at xev.c:449 #3 0x00401efc in main (argc=, argv=) at xev.c:560
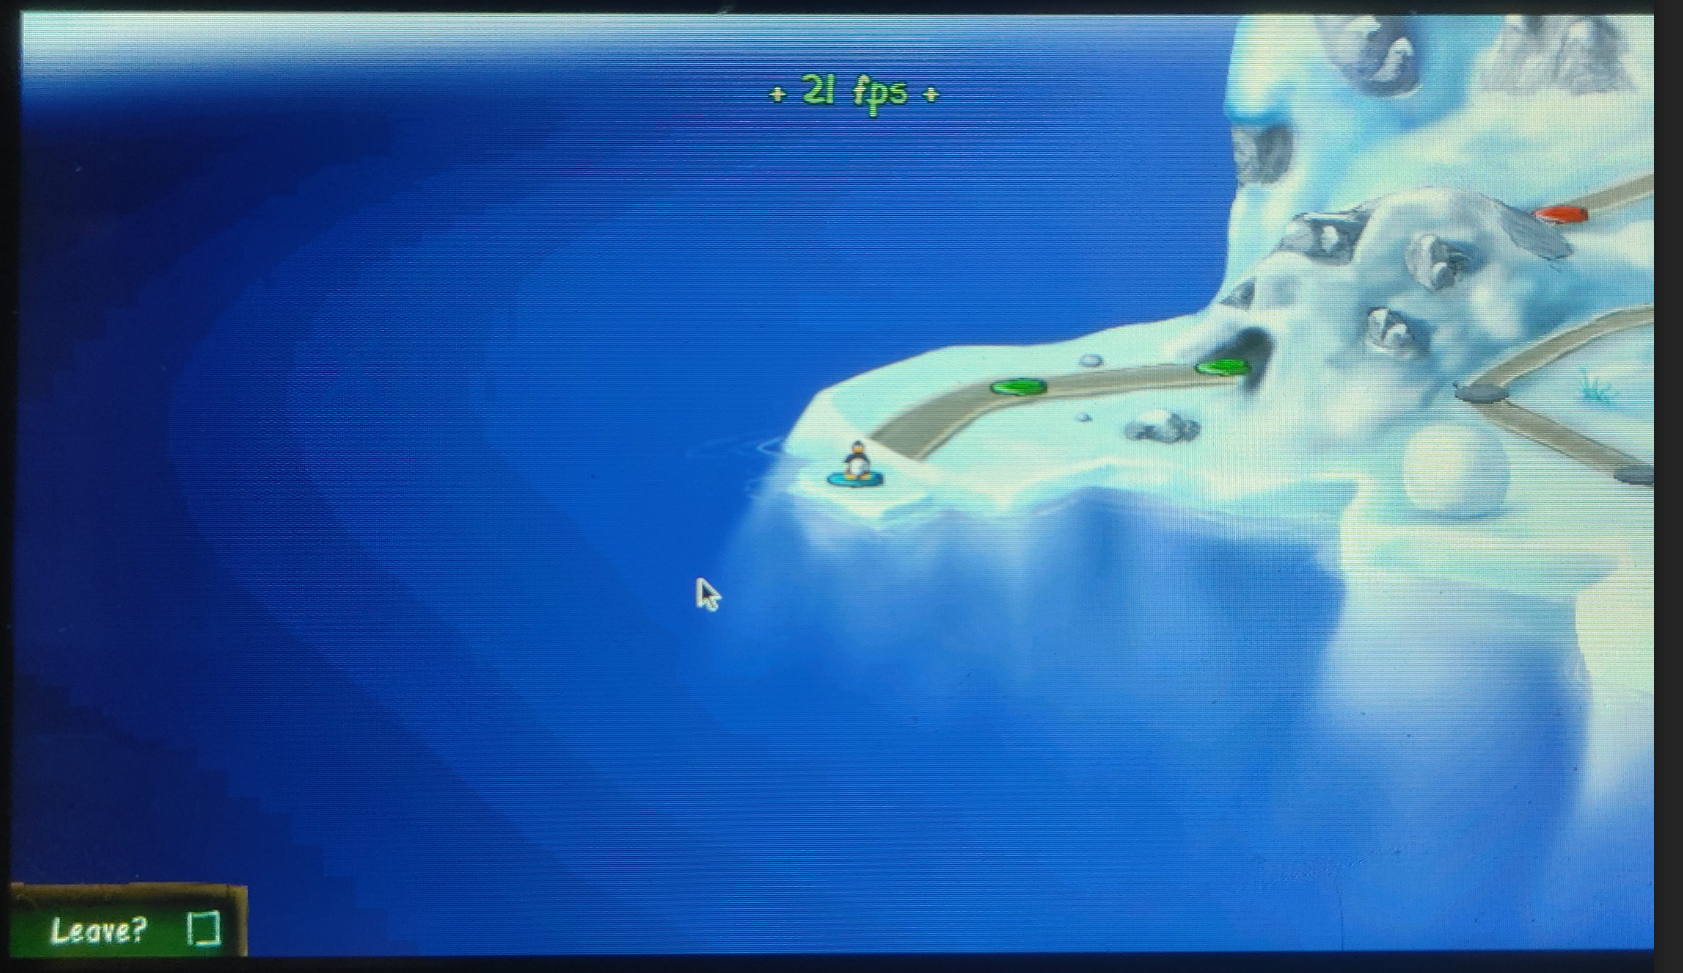
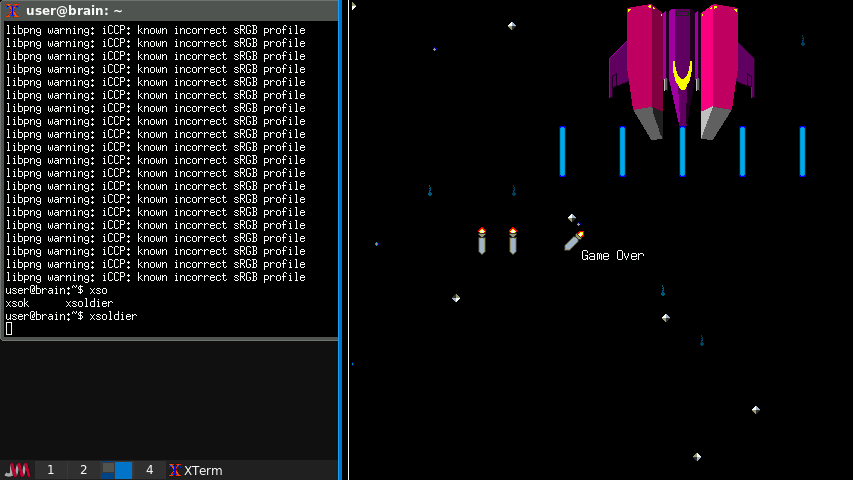
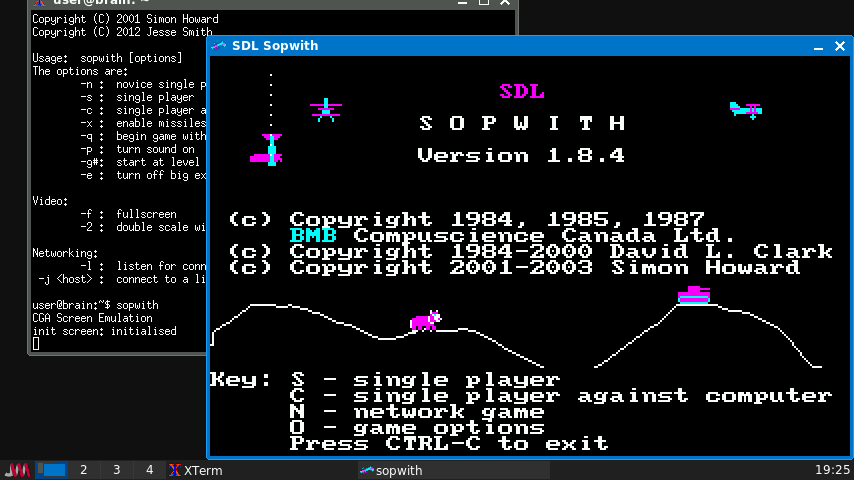
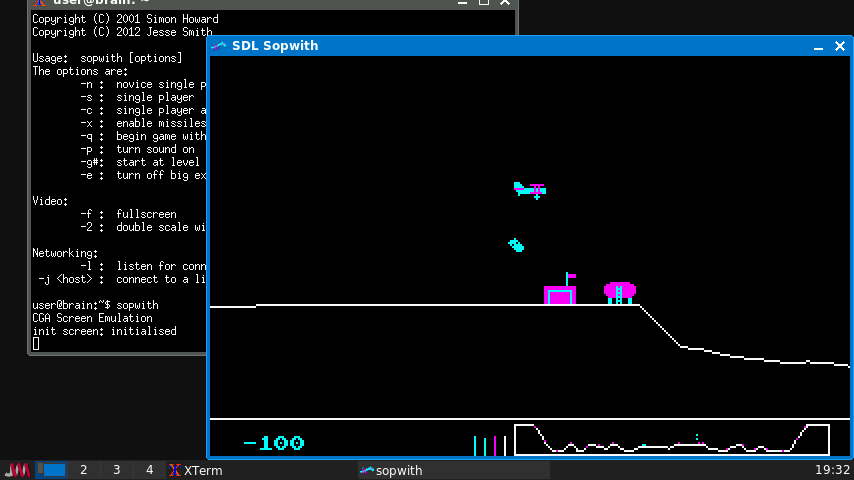
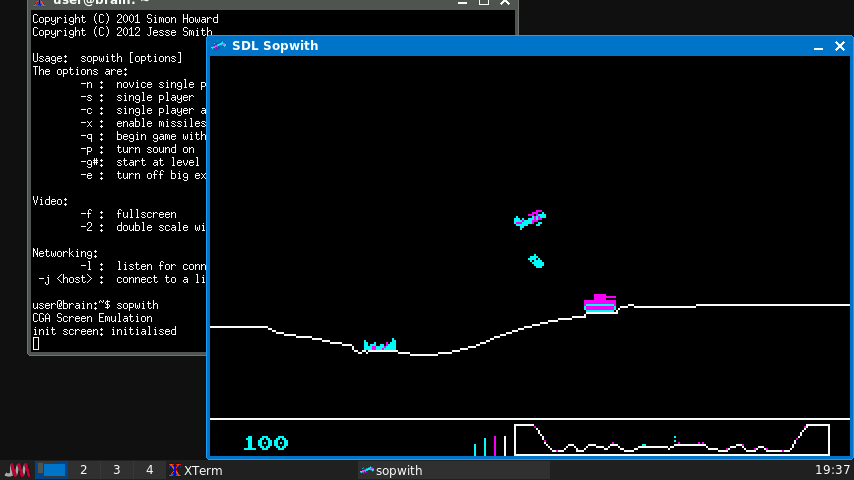
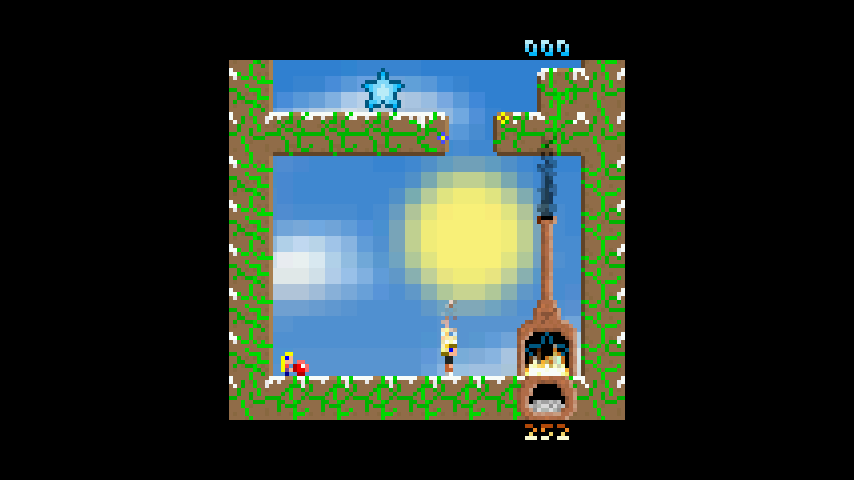
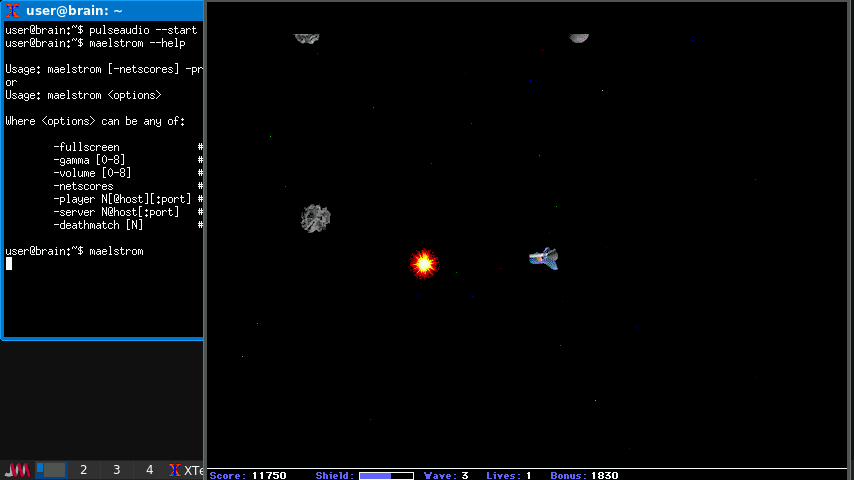
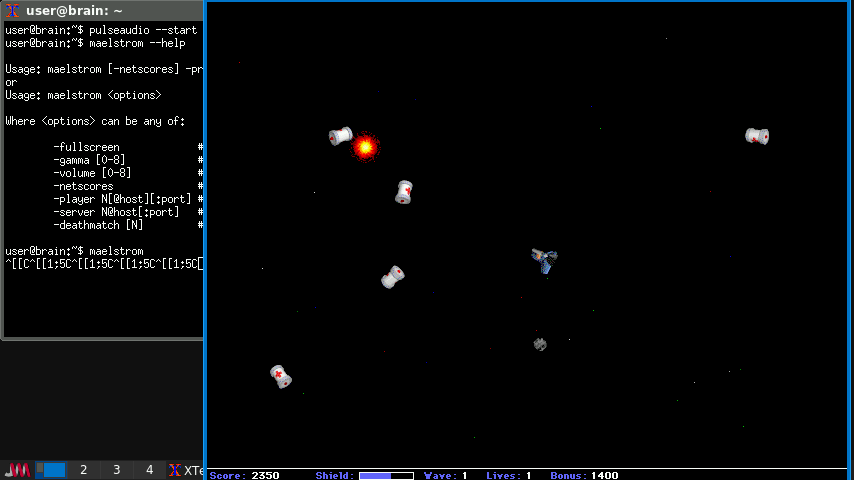
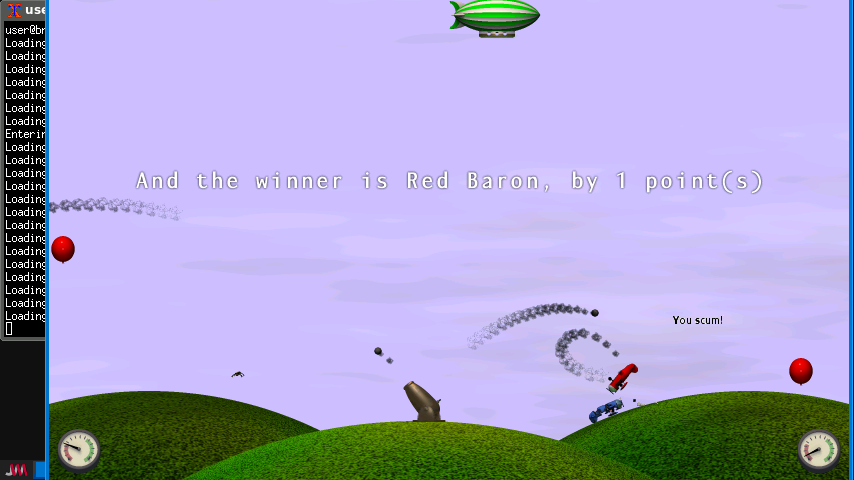
これは、BMB Compuscience CanadaのDavid L. Clark氏が開発した1980年代のゲームのアップデート版です。SDLツールキットを使用して*nix環境で動作するように調整されています。粗いグラフィック、お粗末なAI、そしてひどいサウンドがあなたを待っています。ゲームプレイはシンプルで中毒性があり、楽しいです。「横スクロール」ゲームで、複葉機を操縦して静止したフィールドを横切り、敵の陣地や飛行機を破壊します。
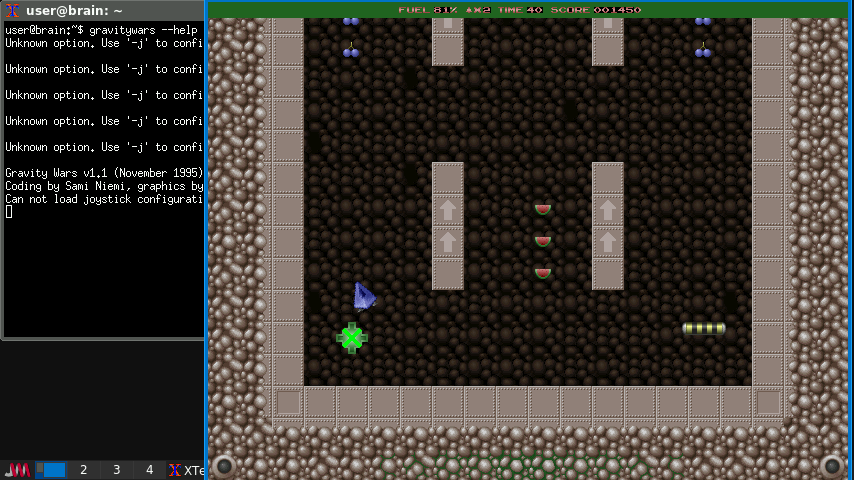
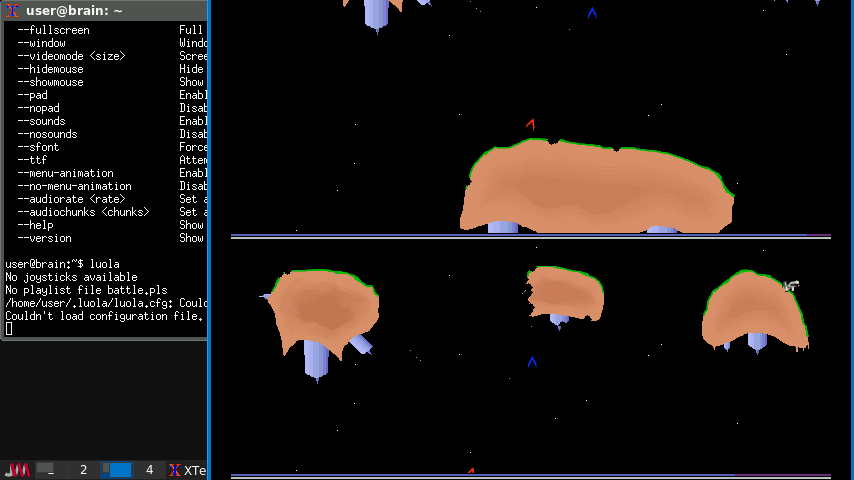
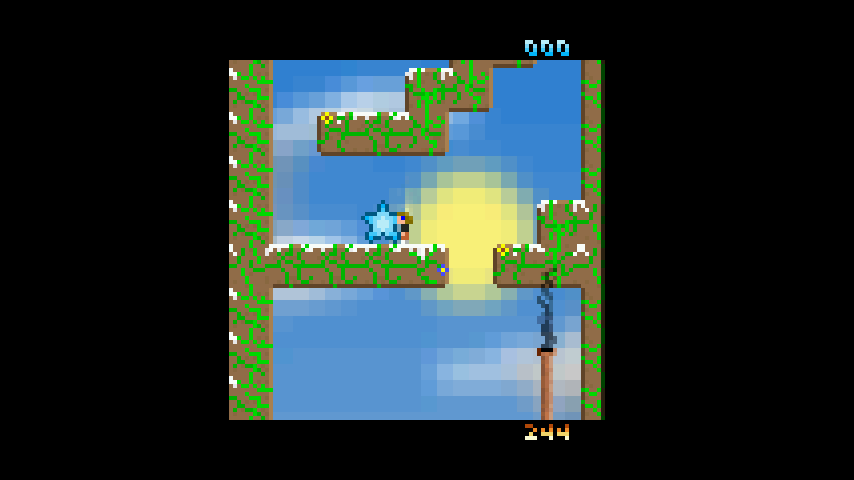
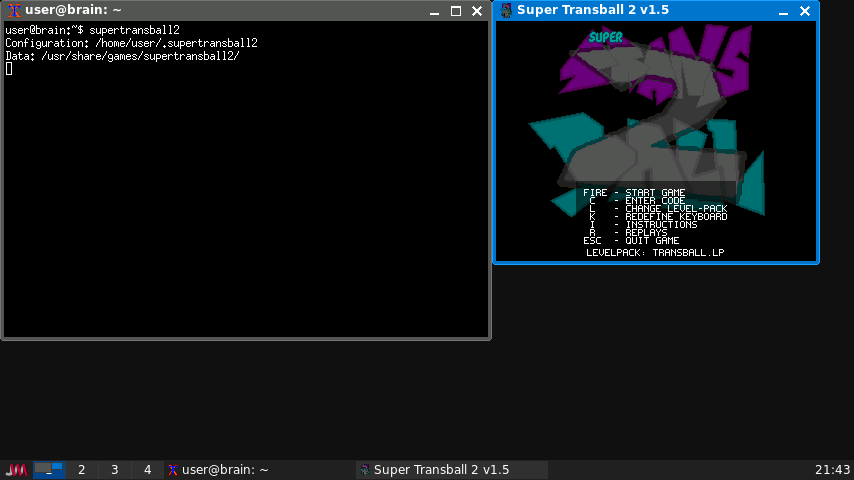
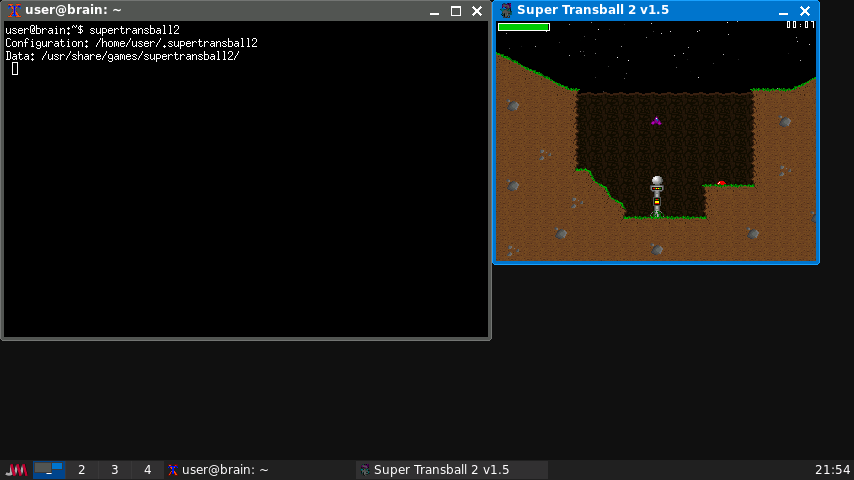
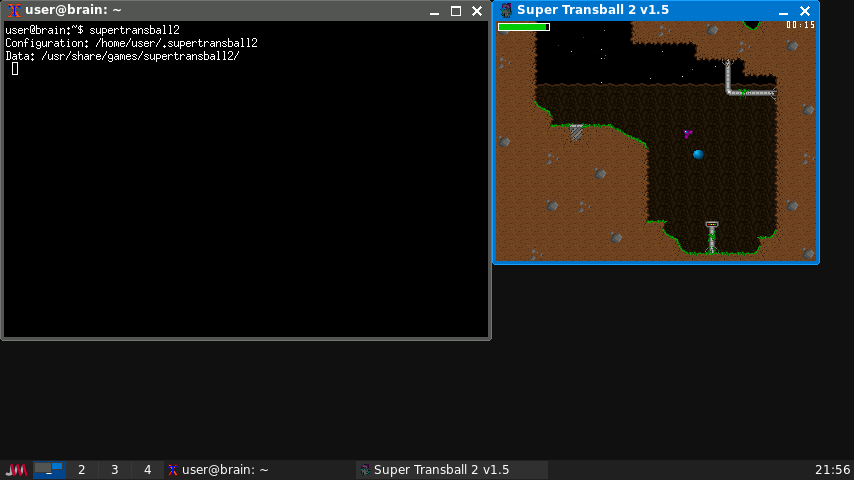
Super Transball 2は、Amiga 500用のZARA THRUSTAにインスパイアされたゲームです。各レベルの目標は、球体を見つけて捕獲し、レベルの上部まで運ぶことです。最大の難関は、宇宙船を引き付ける重力です。そのため、宇宙船の推力を制御することが不可欠です。大砲、戦車、ドア、レーザーなど、他にも多くの障害物があなたの旅を困難にしようとします。スラスターや武器を無駄遣いすると、あっという間に燃料切れになってしまうので注意しましょう。
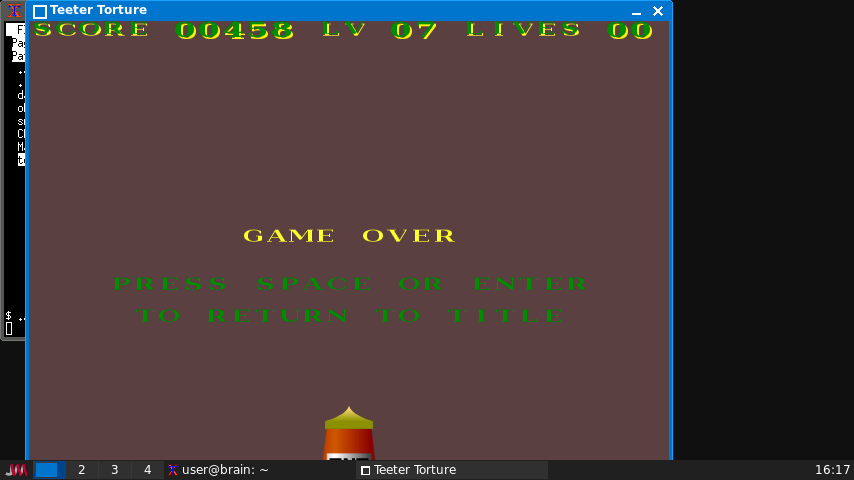
$ cd $ mkdir teetertorture $ cd teetertorture $ wget https://tuxpaint.org/ftp/unix/x/teetertorture/source/teetertorture-2005-10-18.tar.gz $ tar zxvf teetertorture-2005-10-18.tar.gz vcd teetertorture-2005-10-18 $ make $ sudo make install
void add_explosion(int x1, int y1, int x2, int y2, int expl_type)
・・・
explosion[found].active = 128;
・・・
↓
void add_explosion(int x1, int y1, int x2, int y2, int expl_type)
・・・
explosion[found].active = 30;
・・・
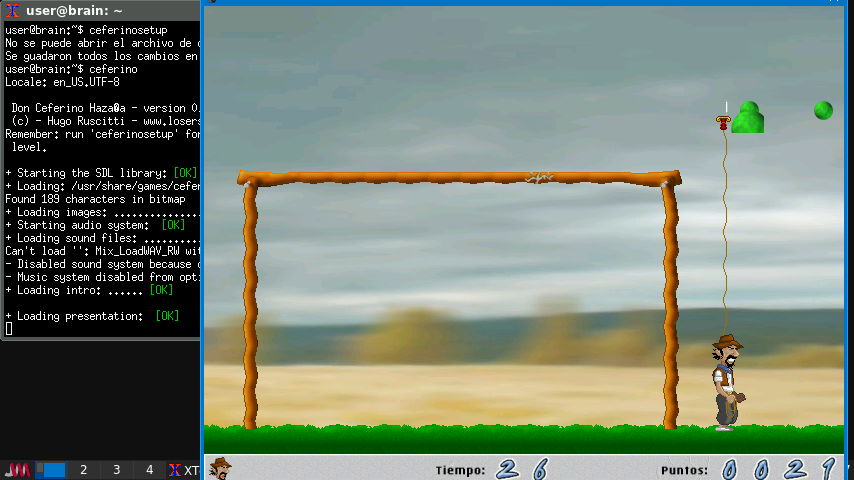
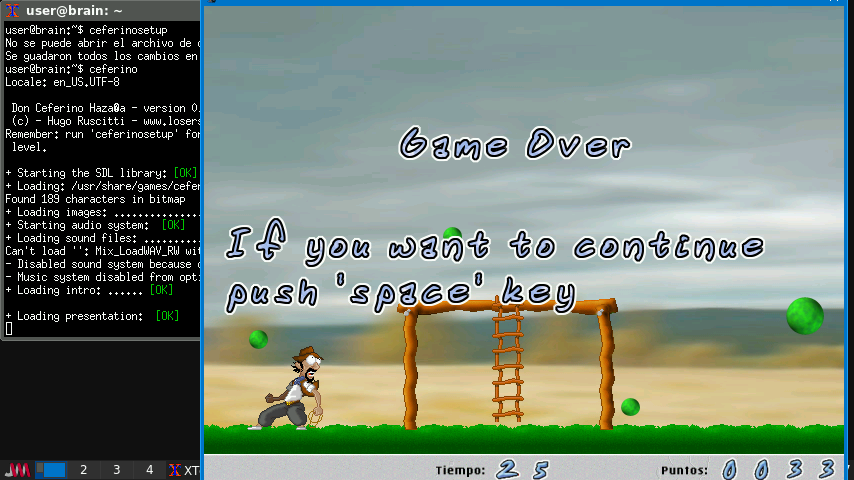
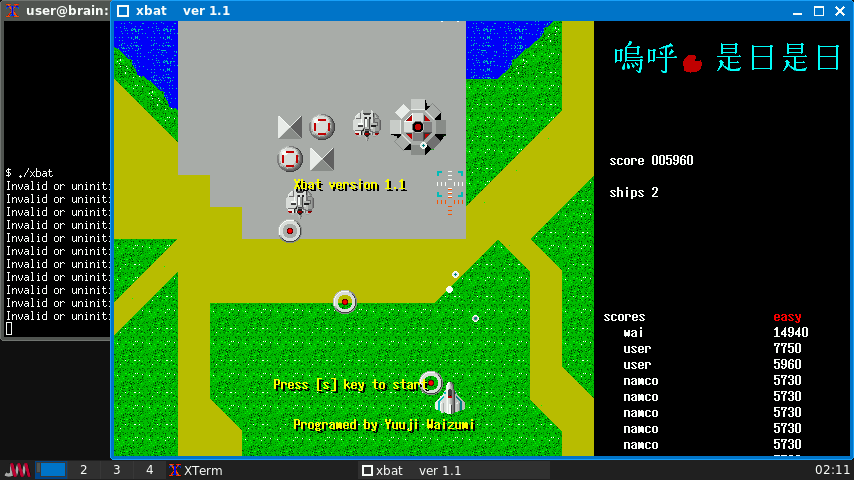
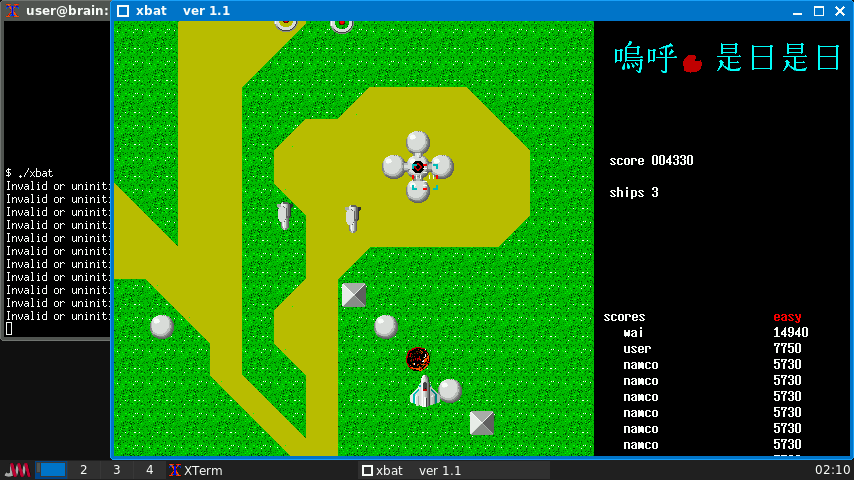
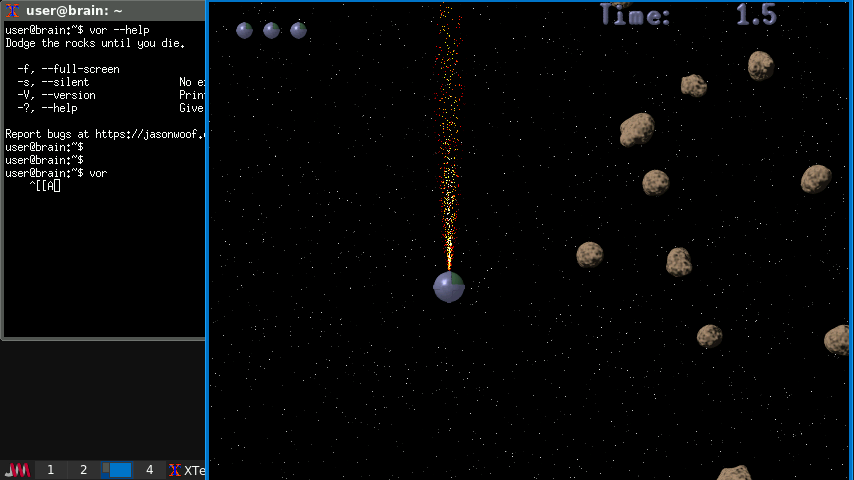
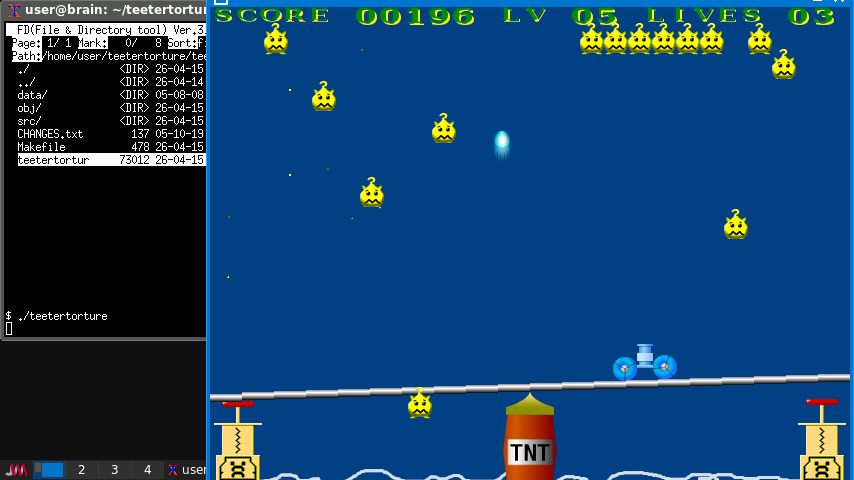
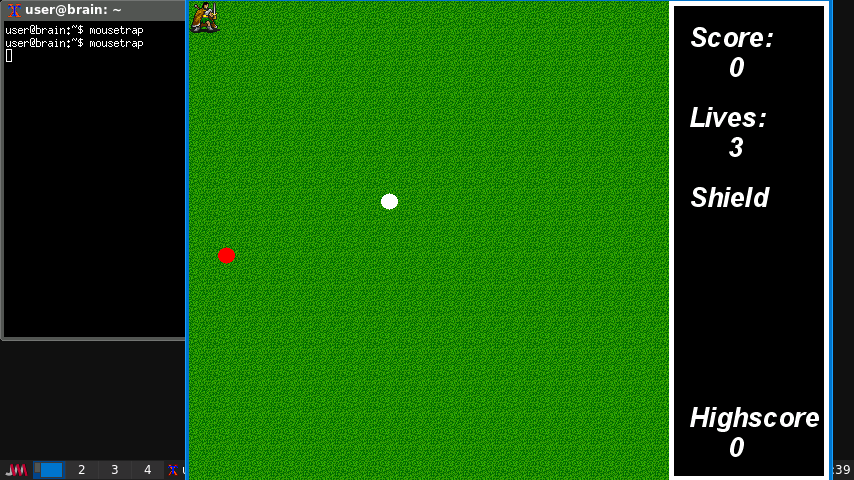
キー操作: 1 プレイモード(カーソルキーで移動、パンチはSPACE) 2 プレイモード(テンキーで操作、パンチはテンキーの0) SPACE ゲーム開始
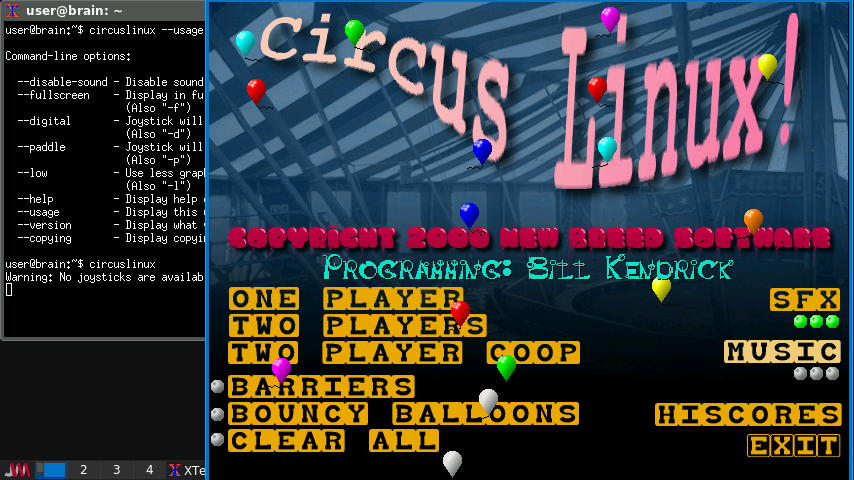
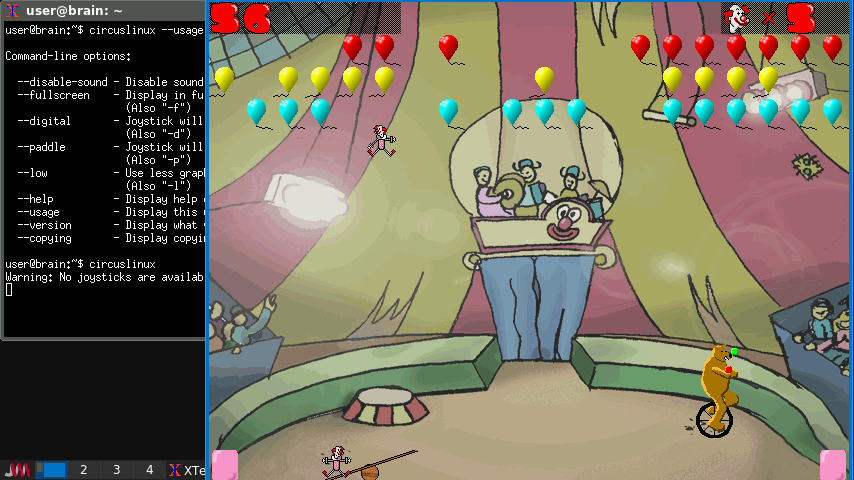
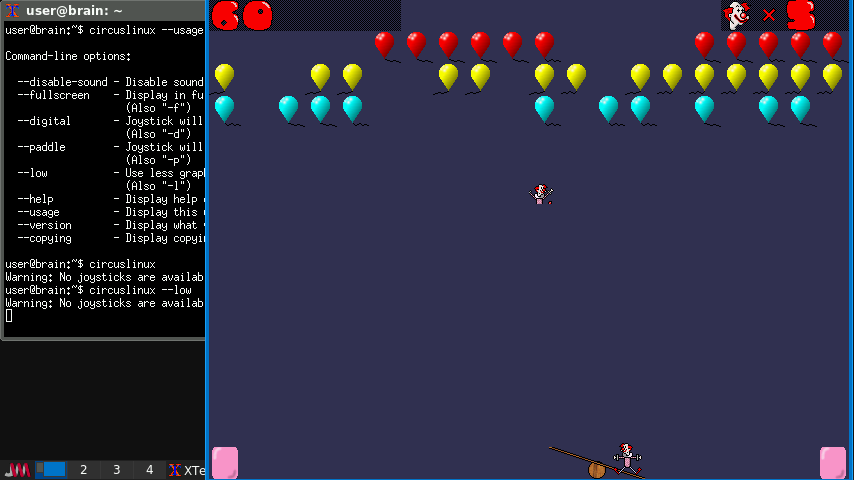
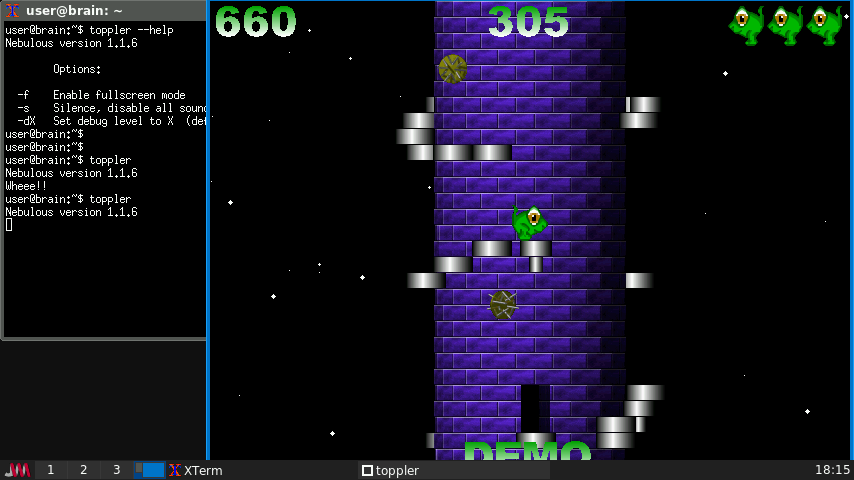
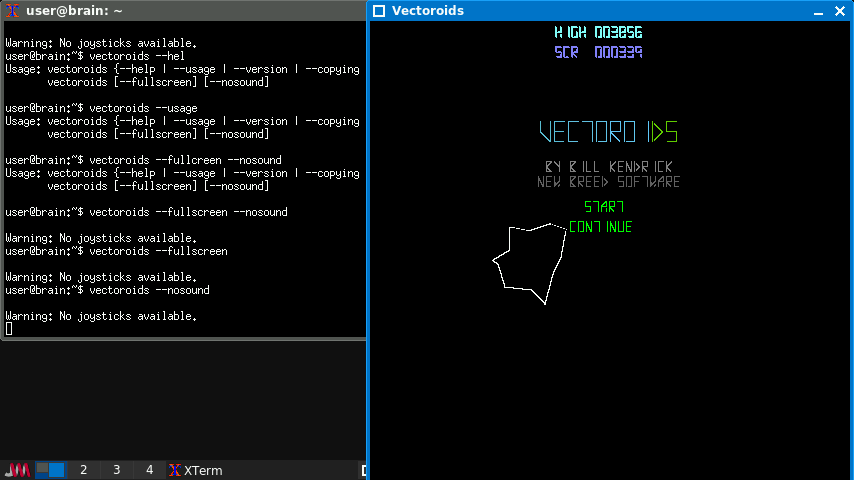
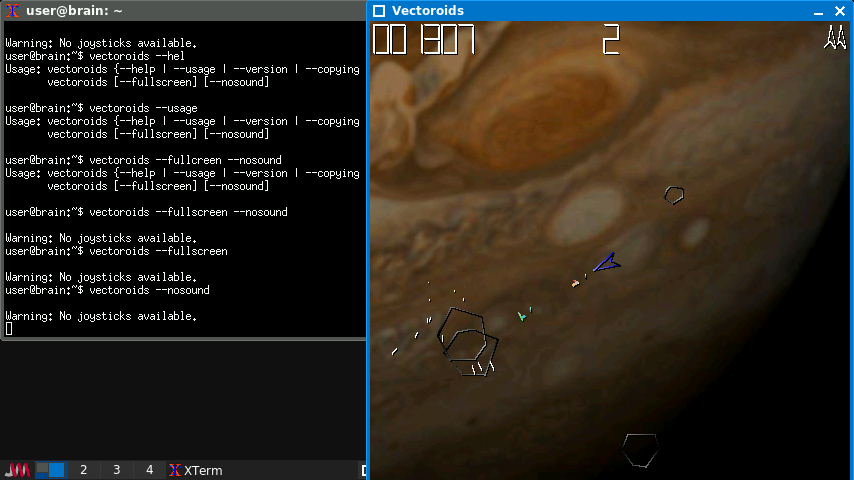
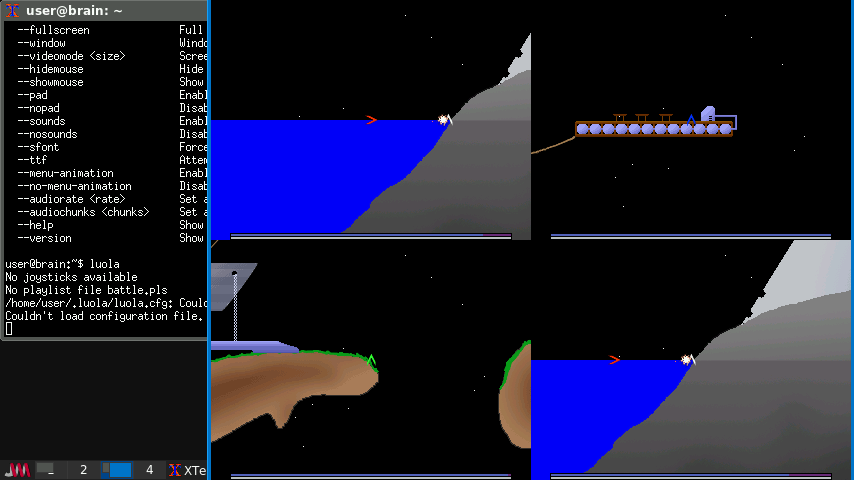
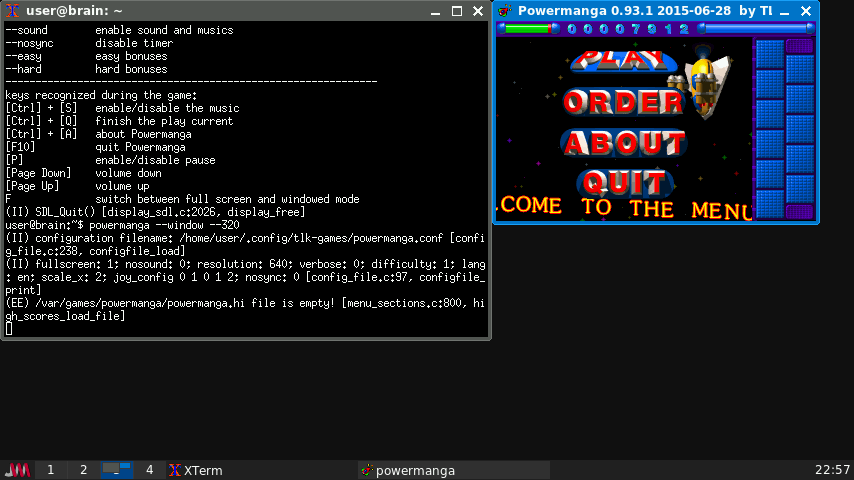
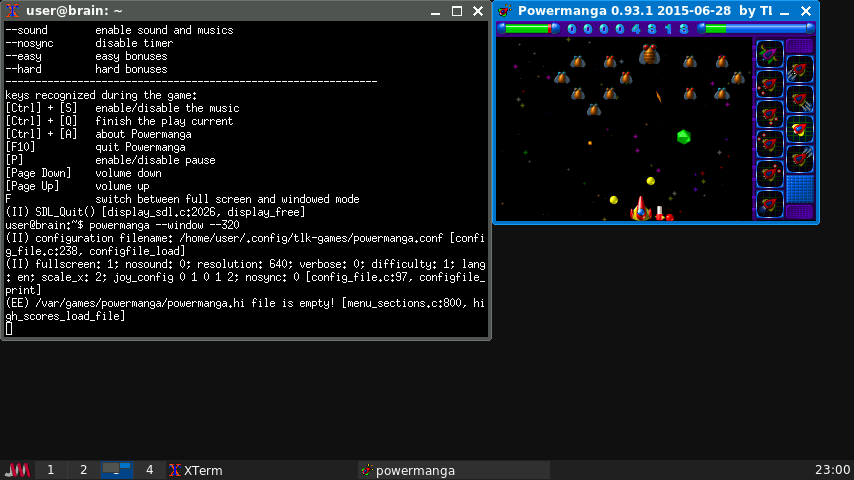
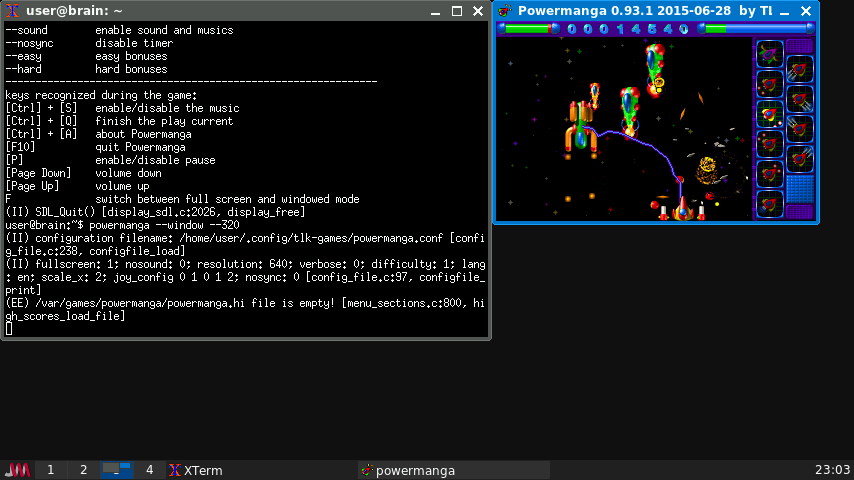
コマンドラインオプション –fullscreen Run full-screen (640×480), instead of in a window. –nosound Disable sound effects and music. –noblend Disable atmospheric alphablending (for slower systems). –usage Display brief usage options. –help Display more verbose help.
インストール:ソースからインストール
インストール手順詳細(クリックで表示)
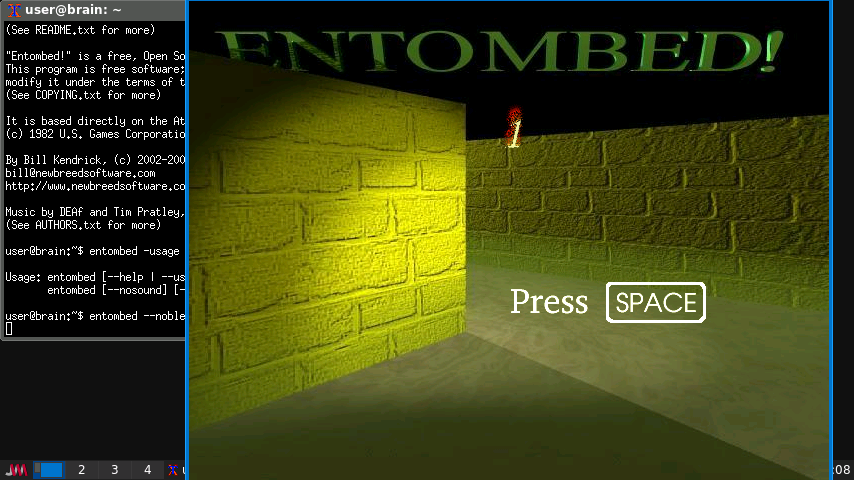
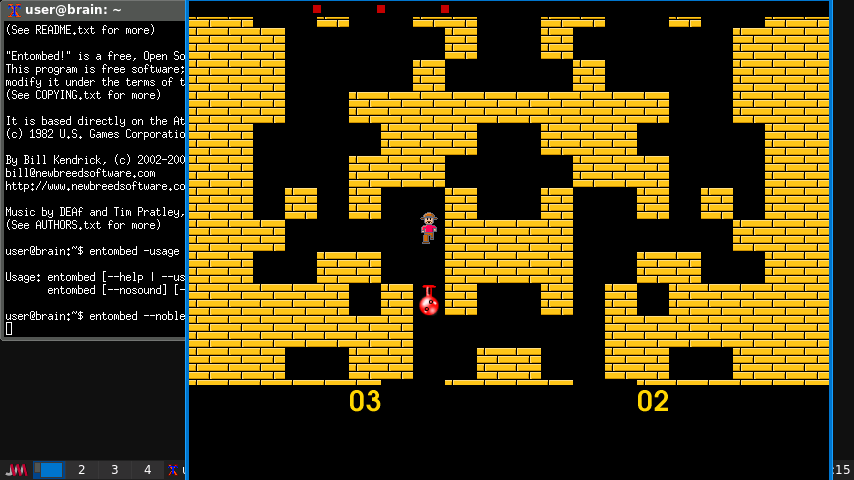
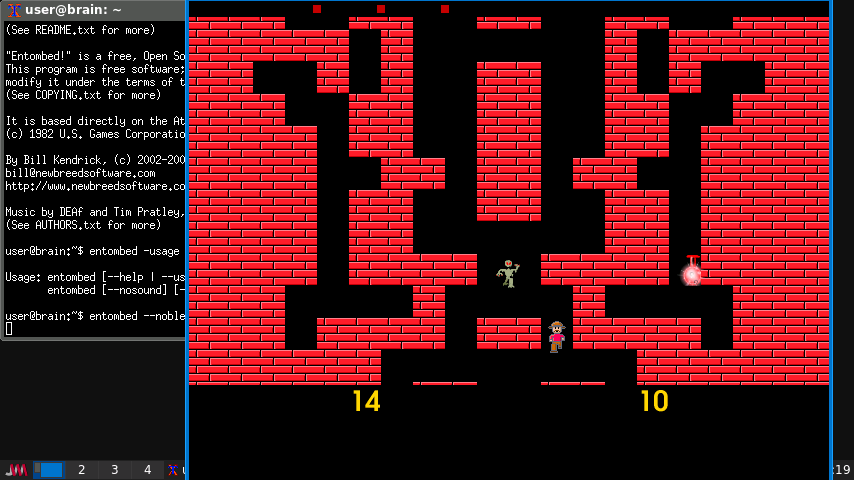
$ cd $ mkdir entombed $ cd entombed $ wget https://tuxpaint.org/ftp/unix/x/entombed/entombed-2007.07.04.tar.gz $ tar zxvf entombed-2007.07.04.tar.gz $ cd entombed-2007.07.04 $ make $ sudo make install
$ cd $ mkdir popstar $ cd popstar $ wget https://tuxpaint.org/ftp/unix/x/popstar/popstar-0.0.2.tar.gz $ tar zxvf popstar-0.0.2.tar.gz $ cd popstar-0.0.2
$ make $ sudo make install
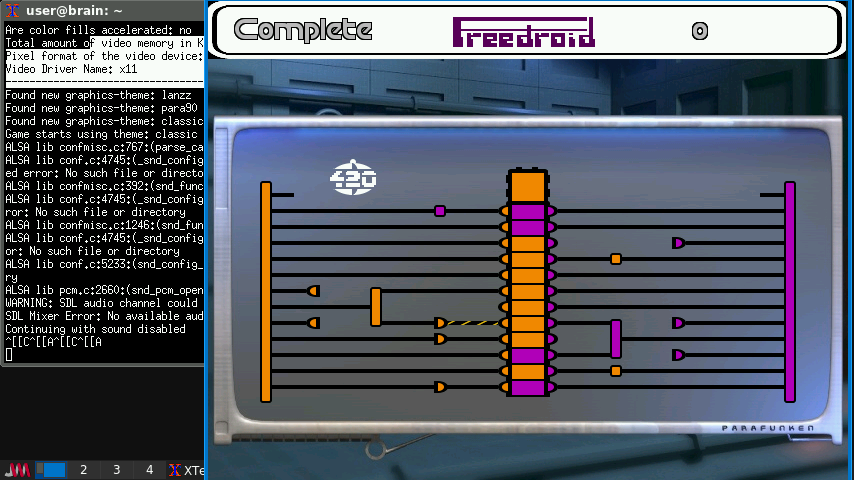
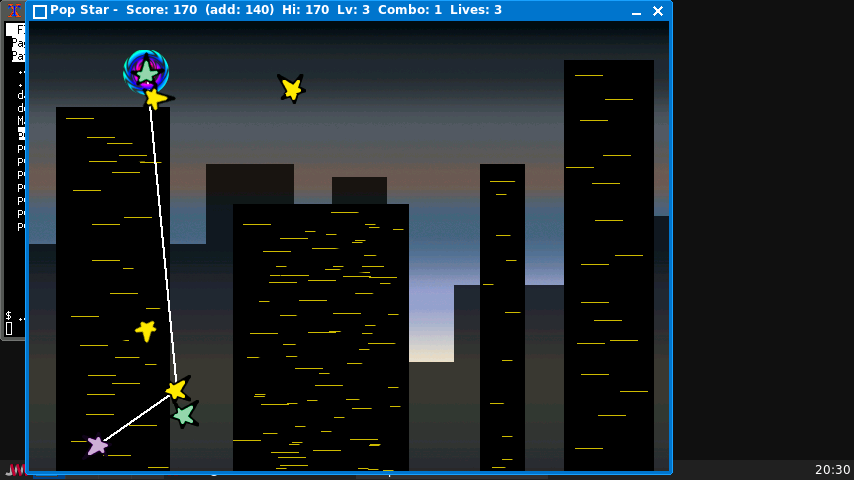
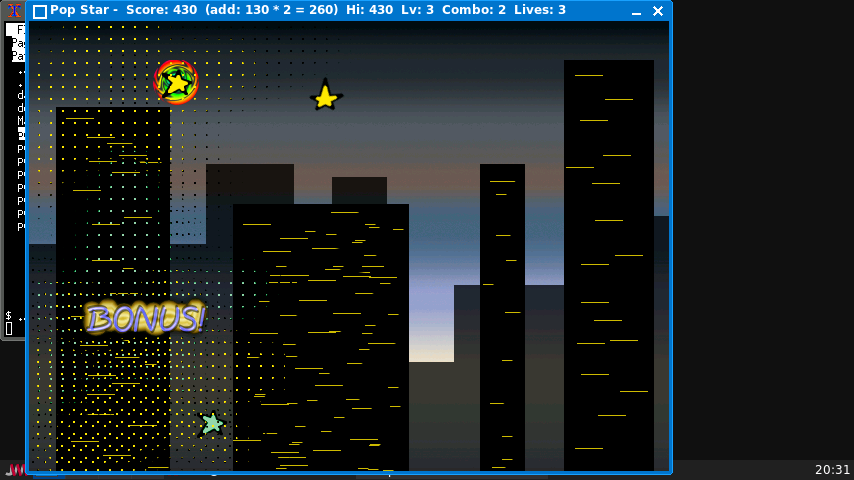
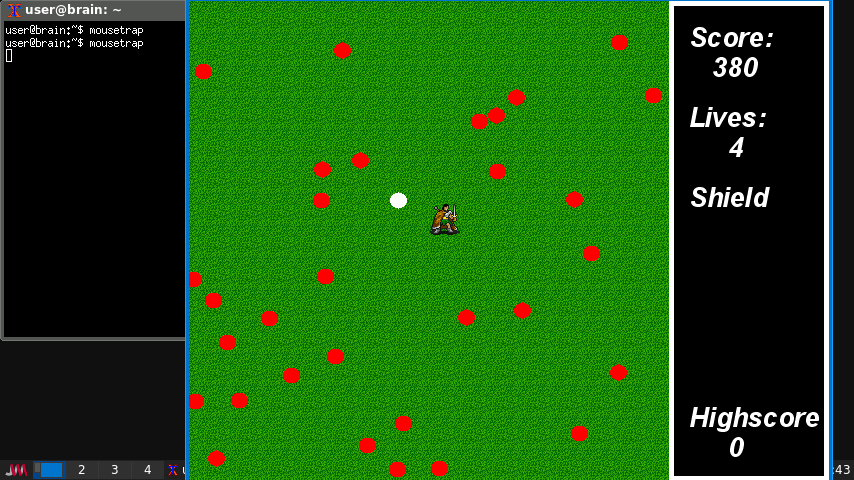
これで、用意された段階まではビルドしてプレイできますが、 スコアもゲームオーバ処理も出来ません。
変更部分
$ vi popstart.c.patch
--- popstar.c 2026-04-16 15:58:26.015460714 +0900
+++ popstar.c 2026-04-18 17:46:56.678209242 +0900
@@ -54,12 +54,12 @@
/* Configuration options; could be useful for platform ports: */
#define WIDTH 640 /* Screen size... */
-#define HEIGHT 480
+#define HEIGHT 450
#define FPS 20 /* Frame rate */
#define MAX_STARS 16 /* Max # of stars on screen */
#define MAX_BROKENLINES 20 /* Max # of broken lines on screen */
#define POP_TIME (2 * FPS) /* How long stars take to pop */
-#define LEVEL_TEXT_TIME (5 * FPS) /* How long between levels */
+#define LEVEL_TEXT_TIME (2 * FPS) /* How long between levels */
#define TRANSITION_THICKNESS 16 /* How many steps in level bkgd transition */
#define MAX_X_SPEED (star_width >> 2)
@@ -196,6 +196,11 @@ int cursor_star, cursor_spin, blink;
int level;
int advance_level;
int score;
+int highscore;
+int addscore;
+int combo;
+int lives;
+int bgm_enabled = 1; /* ★ BGM専用フラグ(1=ON, 0=OFF) */
int current_game_music, current_game_bkgd;
@@ -219,11 +224,12 @@ void draw_line_piece(int x, int y, Uint3
int intersect(int ax1, int ay1, int ax2, int ay2,
int bx1, int by1, int bx2, int by2);
int inside(int x, int y);
+void update_window_title(void);
int kill_intersections(void);
void add_line_debris(int x1, int y1, int x2, int y2);
void add_brokenline(int x1, int y1, int x2, int y2);
void select_star(void);
-
+void update_bgm(void);
/* --- MAIN! --- */
@@ -269,11 +275,16 @@ int title(void)
SDL_Flip(screen);
if (use_sound)
- Mix_PlayMusic(musics[MUSIC_TITLE], -1);
+ if (bgm_enabled)
+ Mix_PlayMusic(musics[MUSIC_TITLE], -1);
quit = 0;
done = 0;
+ lives = 0;
+
+ update_window_title();
+
do
{
SDL_WaitEvent(&event);
@@ -288,6 +299,19 @@ int title(void)
done = 1;
else if (key == SDLK_ESCAPE)
done = quit = 1;
+ else if (key == SDLK_m)
+ {
+ bgm_enabled = !bgm_enabled;
+ if (bgm_enabled)
+ Mix_PlayMusic(musics[MUSIC_TITLE], -1);
+ else
+ Mix_HaltMusic();
+ }
+ }
+ else if (event.type == SDL_MOUSEBUTTONDOWN)
+ {
+ /* ★ マウスクリックでゲーム開始 */
+ done = 1;
}
}
while (!done);
@@ -315,6 +339,8 @@ int game(void)
quit = 0;
done = 0;
cursor_spin = 0;
+
+ /* level/score は init_game() / init_level() 内で初期化される */
blink = 0;
advance_level = 0;
@@ -355,6 +381,15 @@ int game(void)
done = 1;
}
+ /* ★ Mキーでゲーム中のBGM ON/OFF */
+ if (key == SDLK_m)
+ {
+ bgm_enabled = !bgm_enabled;
+
+ update_bgm(); /* BGM の再生/停止を反映 */
+ update_window_title();
+ }
+
}
else if (event.type == SDL_MOUSEBUTTONDOWN)
{
@@ -435,6 +470,7 @@ int game(void)
/* Switch to next level if there aren't enough stars left to make a poly: */
+ /*
if (num_stars_left < 3 && advance_level == 0)
{
advance_level = LEVEL_TEXT_TIME;
@@ -442,7 +478,39 @@ int game(void)
if (use_sound)
Mix_PlayChannel(-1, sounds[SND_MISSED1], 0);
}
+ */
+ /* --- NEW LOGIC ---
+ 星が 0 個 → 成功(レベルアップ)
+ 星が 1〜2 個 → 失敗(レベル据え置き)
+ ---------------------------------------- */
+
+ if (advance_level == 0)
+ {
+ if (num_stars_left == 0)
+ {
+ /* ★ 成功:レベルアップ */
+ advance_level = LEVEL_TEXT_TIME;
+
+ if (use_sound)
+ Mix_PlayChannel(-1, sounds[SND_POP], 0);
+ }
+ else if (num_stars_left < 3)
+ {
+ /* ★ 失敗:レベルは上げない */
+ advance_level = LEVEL_TEXT_TIME;
+
+ if (use_sound)
+ Mix_PlayChannel(-1, sounds[SND_MISSED1], 0);
+
+ /* レベルを据え置くため、advance_level が 0 になったときに
+ level++ しないようにする */
+ /* → init_level() の直前で level-- して相殺する */
+ level--; /* 一時的に減らしておき、後で +1 されて元に戻る */
+ combo = 0;
+ lives--;
+ }
+ }
/* Move pops and bonuses: */
@@ -487,8 +555,18 @@ int game(void)
if (advance_level == 0)
{
- level++;
- init_level();
+ if (lives >= 0)
+ {
+ /* Clear / Miss */
+ level++;
+ init_level();
+ }
+ else
+ {
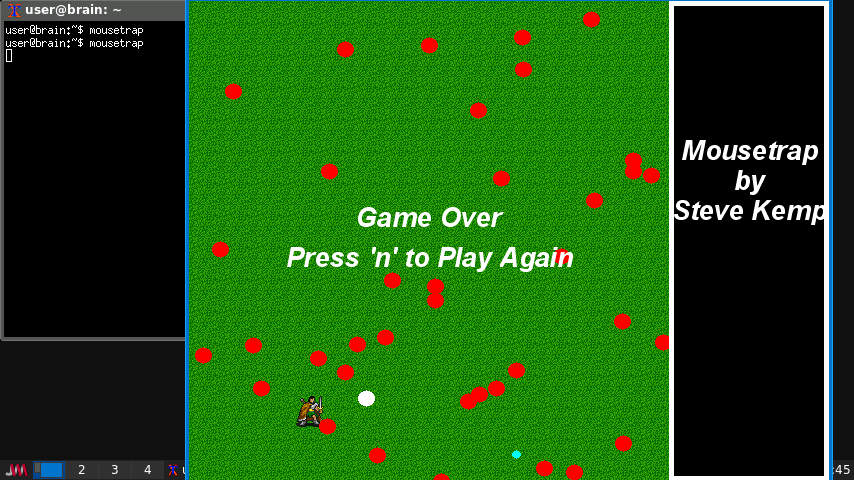
+ /* GameOver */
+ SDL_Delay(10000);
+ done = 1;
+ }
}
}
@@ -653,8 +731,12 @@ int game(void)
if (num_stars_left == 0)
img = IMG_LEVEL_COMPLETE;
else
- img = IMG_LEVEL_INCOMPLETE;
-
+ {
+ if (lives >= 0)
+ img = IMG_LEVEL_INCOMPLETE;
+ else
+ img = IMG_GAMEOVER;
+ }
dest.x = (WIDTH - images[img]->w) / 2;
dest.y = (HEIGHT - images[img]->h) / 2;
@@ -687,6 +769,8 @@ int game(void)
void select_star(void)
{
int i;
+ int removed;
+ int bonus_count;
int got_bonus;
@@ -706,7 +790,10 @@ void select_star(void)
else if (cursor_star == stars_selected[0] &&
num_stars_selected >= 3)
{
- /* If we select the first star again, and make a polygon! */
+ removed = 0;
+ bonus_count = 0;
+
+ /* If we select the first star again, and make a polygon! */
stars[cursor_star].selected = 1;
@@ -724,6 +811,8 @@ void select_star(void)
stars[i].alive = 0;
stars[i].selected = 0;
+ bonus_count++;
+
add_bonus(stars[i].x >> 4, stars[i].y >> 4);
add_pop(stars[i].x >> 4, stars[i].y >> 4,
stars[i].xm >> 4, stars[i].ym >> 4,
@@ -740,6 +829,8 @@ void select_star(void)
stars[stars_selected[i]].alive = 0;
stars[stars_selected[i]].selected = 0;
+ removed++;
+
add_pop(stars[stars_selected[i]].x >> 4,
stars[stars_selected[i]].y >> 4,
stars[stars_selected[i]].xm >> 4,
@@ -750,6 +841,37 @@ void select_star(void)
}
num_stars_selected = 0;
+ /* スコア計算:
+ - ポリゴンを構成した星: 1 個あたり 10 点
+ - 内側にいた星(ボーナス): 1 個あたり 50 点
+ - コンボボーナス: 連続成功回数 * 5 点
+ */
+
+ if (removed > 0)
+ {
+ addscore = 0;
+ addscore += removed * 10;
+ addscore += bonus_count * 100;
+
+ /* ★ コンボ条件を「ボーナス取得時」に変更 */
+ if (bonus_count > 0)
+ {
+ combo++; /* ボーナスがあればコンボ継続 */
+ score += addscore * combo;
+ }
+ else
+ {
+ combo = 0; /* ボーナスが無ければコンボ途切れ */
+ score += addscore;
+ }
+
+
+ if (score > highscore)
+ {
+ highscore = score;
+ }
+ update_window_title();
+ }
/* Play sound: */
@@ -784,60 +906,45 @@ void select_star(void)
void draw_line(int x1, int y1, int x2, int y2, Uint8 r, Uint8 g, Uint8 b)
{
- int dx, dy, y;
- Uint32 rgb;
- float m, bi; /* FIXME: Literally... use fixed point math ;^) */
+ /* --- NEW: Integer Bresenham line algorithm (fast on ARMv5) --- */
- rgb = SDL_MapRGB(screen->format, r, g, b);
+ Uint32 rgb = SDL_MapRGB(screen->format, r, g, b);
+ /* Convert from <<4 fixed point */
x1 >>= 4;
y1 >>= 4;
x2 >>= 4;
y2 >>= 4;
- dx = x2 - x1;
- dy = y2 - y1;
+ int dx = abs(x2 - x1);
+ int sx = (x1 < x2) ? 1 : -1;
+ int dy = -abs(y2 - y1);
+ int sy = (y1 < y2) ? 1 : -1;
+ int err = dx + dy;
+ int e2;
- if (dx != 0)
+ while (1)
{
- m = ((float) dy) / ((float) dx);
- bi = y1 - m * x1;;
+ draw_line_piece(x1, y1, rgb);
- if (x2 >= x1)
- dx = 1;
- else
- dx = -1;
-
- while (x1 != x2)
- {
- y1 = m * x1 + bi;
- y2 = m * (x1 + dx) + bi;
-
- if (y1 > y2)
- {
- y = y1;
- y1 = y2;
- y2 = y;
- }
+ if (x1 == x2 && y1 == y2)
+ break;
- for (y = y1; y <= y2; y++)
- draw_line_piece(x1, y, rgb);
+ e2 = 2 * err;
- x1 = x1 + dx;
- }
- }
- else
- {
- if (y1 > y2)
+ if (e2 >= dy)
{
- y = y1;
- y1 = y2;
- y2 = y;
+ err += dy;
+ x1 += sx;
}
- for (y = y1; y <= y2; y++)
- draw_line_piece(x1, y, rgb);
+ if (e2 <= dx)
+ {
+ err += dx;
+ y1 += sy;
+ }
}
+
}
@@ -928,8 +1035,12 @@ void init_game(void)
{
level = 1;
score = 0;
+ lives = 3;
+ addscore = 0;
+ combo = 0;
current_game_music = -1;
current_game_bkgd = -1;
+ update_window_title();
}
@@ -985,7 +1096,8 @@ void init_level(void)
if (level_music != current_game_music)
{
Mix_HaltMusic();
- Mix_PlayMusic(musics[level_music], -1);
+ if (bgm_enabled)
+ Mix_PlayMusic(musics[level_music], -1);
current_game_music = level_music;
}
}
@@ -1042,6 +1154,7 @@ void init_level(void)
current_game_bkgd = level_bkgd;
}
+ update_window_title();
}
@@ -1360,6 +1473,38 @@ void setdown(void)
}
+void update_window_title(void)
+{
+ char buf[128];
+ if (combo < 2)
+ snprintf(buf, sizeof(buf), "Pop Star - Score: %d (add: %d) Hi: %d Lv: %d Combo: %d Lives: %d", score, addscore, highscore, level, combo, lives);
+ else
+ snprintf(buf, sizeof(buf), "Pop Star - Score: %d (add: %d * %d = %d) Hi: %d Lv: %d Combo: %d Lives: %d", score, addscore, combo, addscore*combo, highscore, level, combo, lives);
+
+ SDL_WM_SetCaption(buf, NULL);
+}
+
+
+void update_bgm(void)
+{
+ if (!use_sound) return; /* 効果音は use_sound に依存 */
+
+ if (bgm_enabled)
+ {
+ /* BGM ON → 再生(current_game_music を使用) */
+ if (!Mix_PlayingMusic())
+ Mix_PlayMusic(musics[current_game_music], -1);
+ }
+ else
+ {
+ /* BGM OFF → 停止 */
+ if (Mix_PlayingMusic())
+ Mix_HaltMusic();
+ }
+}
+
+
+
/* Random number: */
int myrand(int max)
@@ -1551,3 +1696,4 @@ void add_brokenline(int x1, int y1, int
brokenlines[found].y2m = myrand(BROKENLINE_SPEED_X2) - BROKENLINE_SPEED;
}
+
game-data-packager(>= 45)も公式エピソード用のパッケージを作成できます 5, Dimensions of the Past(Quakeの20周年を記念してMachineGamesが開発) 記念日)、そして公式ミッションのために Hipnotic Software開発のScourge of ArmagonとDissolution 『of Eternity』(ローグ・エンターテインメント開発)。追加メニュー それらの拡張がインストールされていれば自動的に表示されます。
起動オプション: -nosound Stop the sound. -window Launch the game in the window, not use the full-screen. -reverse Reverse the fire key and the slowdown key. -brightness n Set the brightness of the sceen(n=0-256). -accframe Use the alternative framerate management algorithm. (If you have a problem with framerate, try this option.)