
Brainuxにエミュレータをインストール
———-
higan マルチゲームコンソールエミュレータ(動作はするが遅すぎる)
マルチコンソールゲーム機のエミュレータです。
正確な動作を目標に作成されたエミュレータとのことです。
インストールはApt経由で可能です。
sudo apt install higan
インストール自体は成功して、実行してみましたが、
Brainuxで動作はするが、1FPSくらいしか出ないので、実用上は難しいです。
user@brain:~$ sudo apt show higan
Package: higan
Version: 106-2
Priority: optional
Section: otherosfs
Maintainer: Debian Games Team <pkg-games-devel@lists.alioth.debian.org>
Installed-Size: 5,794 kB
Provides: nes-emulator
Depends: libao4 (>= 1.1.0), libasound2 (>= 1.0.16), libatk1.0-0 (>= 1.12.4), libc6 (>= 2.17), libcairo2 (>= 1.2.4), libfontconfig1 (>= 2.12), libfreetype6 (>= 2.2.1), libgcc1 (>= 1:3.5), libgdk-pixbuf2.0-0 (>= 2.22.0), libgl1, libglib2.0-0 (>= 2.16.0), libgomp1 (>= 4.9), libgtk2.0-0 (>= 2.24.0), libopenal1 (>= 1.14), libpango-1.0-0 (>= 1.14.0), libpangocairo-1.0-0 (>= 1.14.0), libpangoft2-1.0-0 (>= 1.14.0), libpulse0 (>= 0.99.1), libsdl1.2debian (>= 1.2.11), libstdc++6 (>= 5), libudev1 (>= 183), libx11-6, libxext6, libxv1
Homepage: http://byuu.org/emulation/higan/
Tag: uitoolkit::gtk, uitoolkit::sdl
Download-Size: 1,365 kB
APT-Sources: http://archive.debian.org/debian bullseye/main armel Packages
Description: Accurate multi-system emulator
 higan is an emulator for systems from Nintendo (SNES, NES, Gameboy,
 Gameboy Color, Gameboy Advance), Sega (Master System, Game Gear),
 NEC (PC Engine, SuperGrafx) and Bandai (WonderSwan, WonderSwan Color).
 It was formerly called bsnes and the SNES emulation is especially
 complete and polished.
 .
 higan strives to provide the most faithful hardware emulation possible.
 It focuses on accuracy and clean code, rather than speed and special
 features. It is meant as a reference emulator to document how the underlying
 hardware works. As a result the minimum system requirements are high.


user@brain:~$ sudo apt install higan
Reading package lists... Done
Building dependency tree... Done
Reading state information... Done
The following additional packages will be installed:
  libao-common libao4 libopenal-data libopenal1 libsdl1.2debian libsndio7.0
Suggested packages:
  libaudio2 libsndio6.1 libportaudio2 sndiod
The following NEW packages will be installed:
  higan libao-common libao4 libopenal-data libopenal1 libsdl1.2debian libsndio7.0
0 upgraded, 7 newly installed, 0 to remove and 1 not upgraded.
Need to get 2,252 kB of archives.
After this operation, 7,628 kB of additional disk space will be used.
Do you want to continue? [Y/n] Y
Get:1 http://archive.debian.org/debian bullseye/main armel libao-common all 1.2.2+20180113-1.1 [11.7 kB]
~
Processing triggers for libc-bin (2.31-13+deb11u11) ...
———–
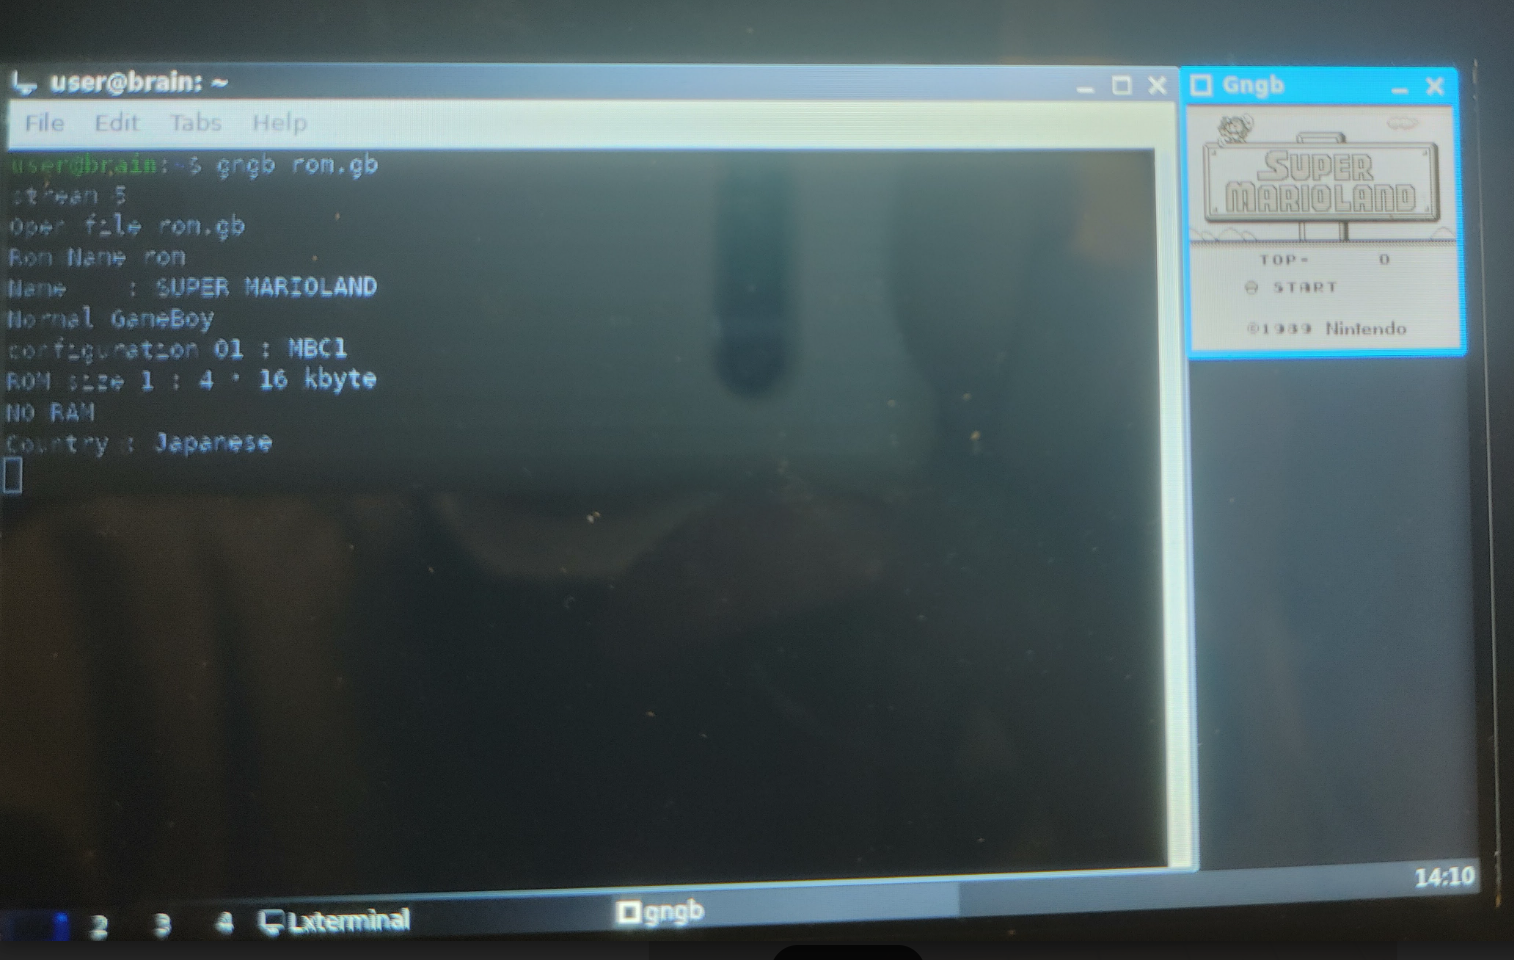
gngb GAME BOY エミュレータ
gngbは、GAMEBOY エミュレータです。
画面は小さいですが、結構まともに動きました。
インストールはApt経由で可能です。
sudo apt install gngb
とりあえず、以下のコマンドでも手持ちのGBカードリッジのデータで実行したところ、以下で普通に動きます(音なし)。
gngb “rom.gb”
デフォルト操作
Start Enter(決定)
Select Right Shift(Brainにキーなし)
移動 カーソルキー
A X
B W
Menu TAB(国語辞典)
終了 ESC(戻る,調べる)
快適に動かすため、以下のように実行パラメータを指定して、動作を確認してみました。
FDcloneに”.gb”の拡張子で、使用するオプション込みで追加すれば、便利ですよ。
(.gb: gngb –autoframeskip –sound –sample_rate=11025 –fps )
パラメータ調整(–fps は、フレームレート表示確認用です。)
・音無しで 43-60fps
gngb –autoframeskip –no-sound –fps “.rom.gb”
・音あり(usbサウンドデバイス必須)で 28-35fips
gngb –autoframeskip –sound –sample_rate=11025 –fps “.rom.gb”
デフォルト設定を変えるには、「/usr/share/doc/gngb/examples/sample_gngbrc」を、「$HOME/.gngb/gngbrc」にコピーして、編集してください。
例えば、Setartを「m」、Selectを「n」に割り当てするには以下のように変更します。
(キーコードはこちらを参照)
#map_key 273,274,276,275,120,119,13,303
map_key 273,274,276,275,120,119,109,110
/usr/share/doc/gngb/にドキュメントが保存されているので、参考にしてください。
user@brain:~$ sudo apt show gngb
[sudo] password for user:
Package: gngb
Version: 20060309-5
Priority: optional
Section: x11
Maintainer: Debian Games Team <pkg-games-devel@lists.alioth.debian.org>
Installed-Size: 223 kB
Depends: libc6 (>= 2.28), libgl1, libsdl1.2debian (>= 1.2.11), zlib1g (>= 1:1.1.4)
Homepage: http://m.peponas.free.fr/gngb/
Tag: hardware::emulation, hardware::input:joystick, hardware::input:keyboard,
 interface::commandline, interface::graphical, interface::x11,
 role::program, scope::utility, uitoolkit::sdl, use::gameplaying,
 x11::application
Download-Size: 74.1 kB
APT-Sources: http://archive.debian.org/debian bullseye/main armel Packages
Description: Color Gameboy emulator
 Gngb is an emulator for GameBoy Classic, Color and others.
 .
 It uses the SDL library and OpenGL. This software supports joystick
 and keyboard as input.


user@brain:~$ sudo apt install gngb
Reading package lists... Done
Building dependency tree... Done
Reading state information... Done
The following NEW packages will be installed:
  gngb
0 upgraded, 1 newly installed, 0 to remove and 1 not upgraded.
Need to get 74.1 kB of archives.
After this operation, 223 kB of additional disk space will be used.
Get:1 http://archive.debian.org/debian bullseye/main armel gngb armel 20060309-5 [74.1 kB]
Fetched 74.1 kB in 1s (53.2 kB/s)
Selecting previously unselected package gngb.
(Reading database ... 53441 files and directories currently installed.)
Preparing to unpack .../gngb_20060309-5_armel.deb ...
Unpacking gngb (20060309-5) ...
Setting up gngb (20060309-5) ...
Processing triggers for man-db (2.9.4-2) ...
user@brain:~$


user@brain:~$ gngb
Usage: gngb [OPTION]... FILE
Emulate the GameBoy rom pointed by FILE

  -h, --help                 print this help and exit
  -a, --autoframeskip        turn on autoframeskip
      --sleep_idle           sleep when idle
      --color_filter         turn on the color filter
  -r, --rumble               turn on the rumble simulation
      --filter=X             Set the filter to apply (only for standard mode)
                              0 = none
                              1 = scanline
                              2 = scanline 50%
                              3 = smooth
                              4 = pseudo cell shading
  -R, --res=WxH              set the resolution to WxH (for YUV and GL mode)
  -Y, --yuv                  turn YUV mode on
      --yuv_type             set the type of the YUV overlay
                              0 = YV12
                              1 = YUY2
  -o, --opengl               turn OpenGL mode on (if conpiled in)
  -f, --fullscreen           run gngb in fullscreen
      --fps                  show frame/sec
  -s, --sound                turn on sound
      --sample_rate=RATE     set the sample rate to RATE
  -C, --color_gb             force to color gameboy mode
  -G, --normal_gb            force to normal gameboy mode
  -S, --super_gb             force to super gameboy mode (experimental)
      --auto_gb              turn on automatique detection
  -j, --joy_dev=N            use the Nth joystick
  -g, --gdma_cycle           cpu stop during gdma transfer (experimental)
  -v, --version              printf gngb number version

Most options can be disabled with --no-OPTION (Ex: --no-sound turn sound off)
———-
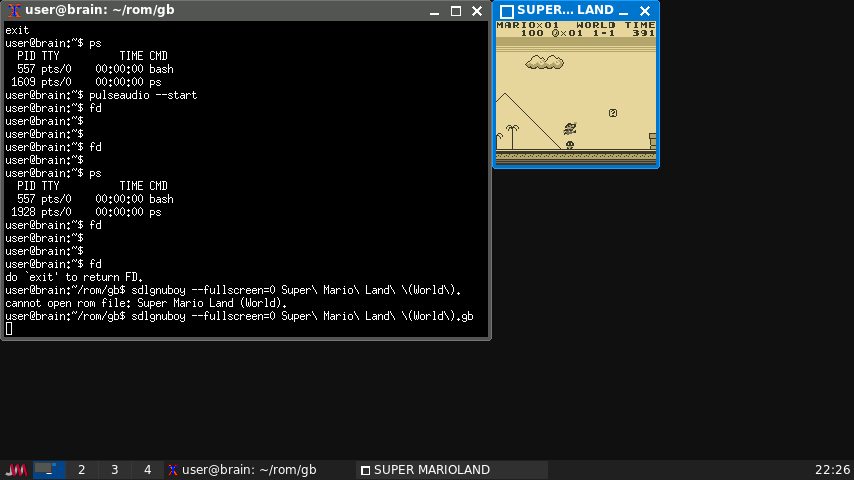
gnuboy-sdl gnuboy – ゲームボーイエミュレータ – 用 SDL 版バイナリ
https://packages.debian.org/bullseye/games/gnuboy-sdl
起動:sdlgnuboy
Gnuboy は移植性の高いゲームボーイエミュレータです。基本的にゲームボーイおよび ゲームボーイカラー向けに設計されたほとんどのゲームを PC 又はワークステーション上 でプレイできます。
本パッケージには SDL 版バイナリが含まれます。
Brainでも稼働しますが、USB Audioデバイスがついているとサウンドが有効になり、
実行結果が遅くなります。
デフォルト操作
Start Enter(決定)
Select Space(多分)
移動 カーソルキー
A D
B S
終了 ESC(戻る,調べる)
オプションで、動きを指定できます。
#オプションサンプル (フレームスキップ=3,サウンド有効、Window表示)
sdlgnuboy –frameskip=3 –sound=1 –fullscreen=0 sample.rom
#オプション一覧
sdlgnuboy –showvars
インストール:APT経由 ”sudo apt install gnuboy-sdl”
————
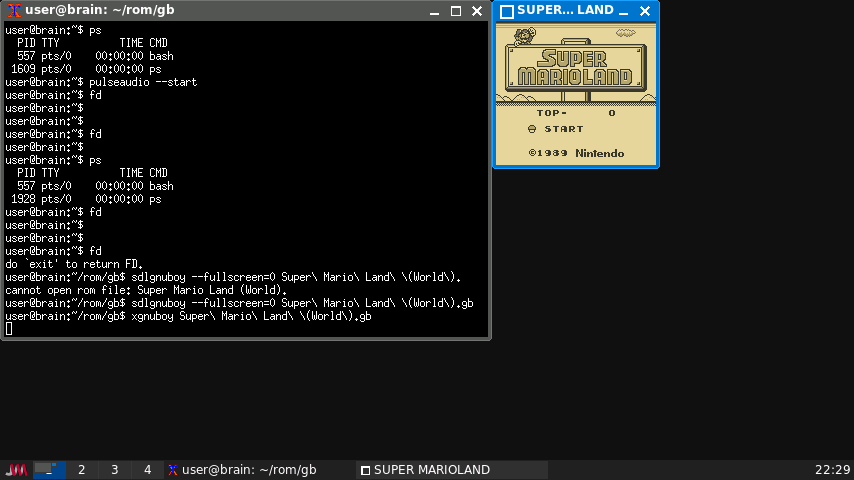
gnuboy-x gnuboy 用 X 向けバイナリ – ゲームボーイエミュレータ
https://packages.debian.org/bullseye/games/gnuboy-x
起動:xgnuboy
Gnuboy は移植性の高いゲームボーイエミュレータです。基本的にゲームボーイおよび ゲームボーイカラー向けに設計されたほとんどのゲームを PC 又はワークステーション上 でプレイできます。
本パッケージには X 向けバイナリが含まれます。
Brainでも稼働しますが、音のならせ方がわかりませんでした。
サウンドが無効になっているので、実行速度は十分です。
デフォルト操作
Start Enter(決定)
Select Space(多分)
移動 カーソルキー
A D
B S
終了 ESC(戻る,調べる)
オプションで、動きを指定できます。
#オプションサンプル (フレームスキップ=3,Window表示)
xgnuboy –frameskip=3 –fullscreen=0 sample.rom
#オプション一覧
xgnuboy –showvars
インストール:APT経由 ”sudo apt install gnuboy-x”
————
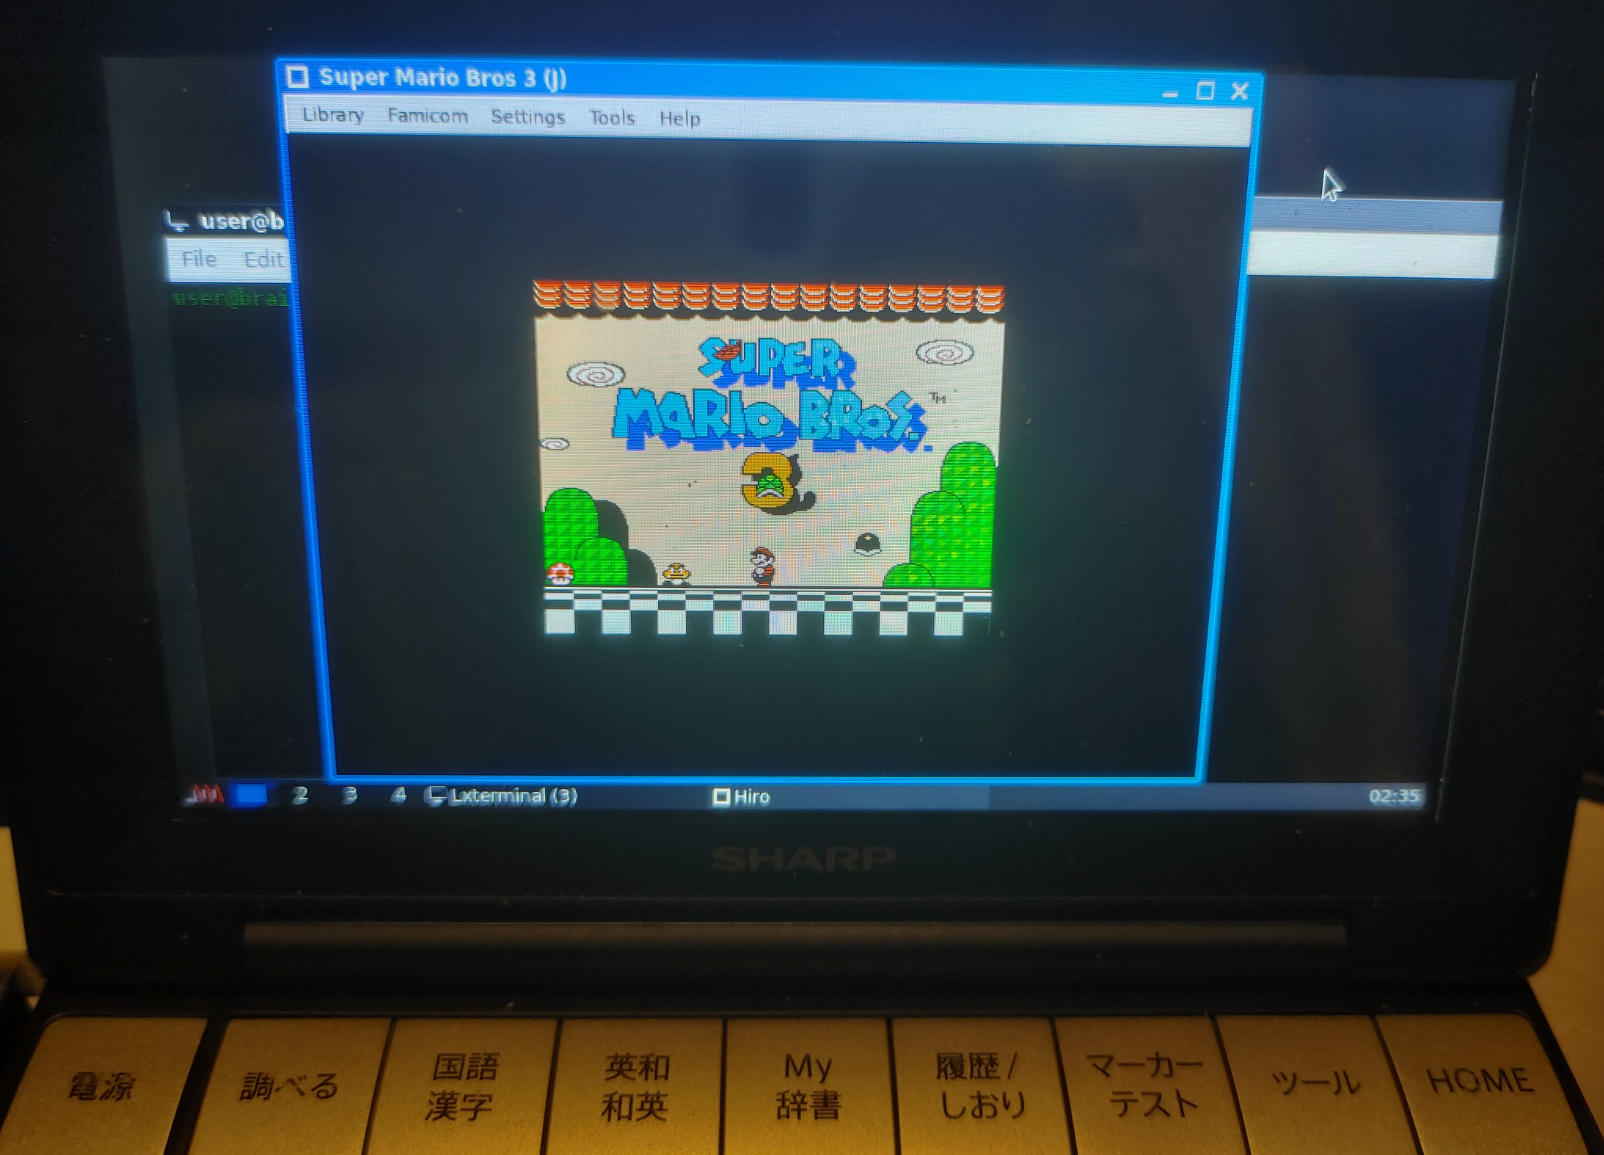
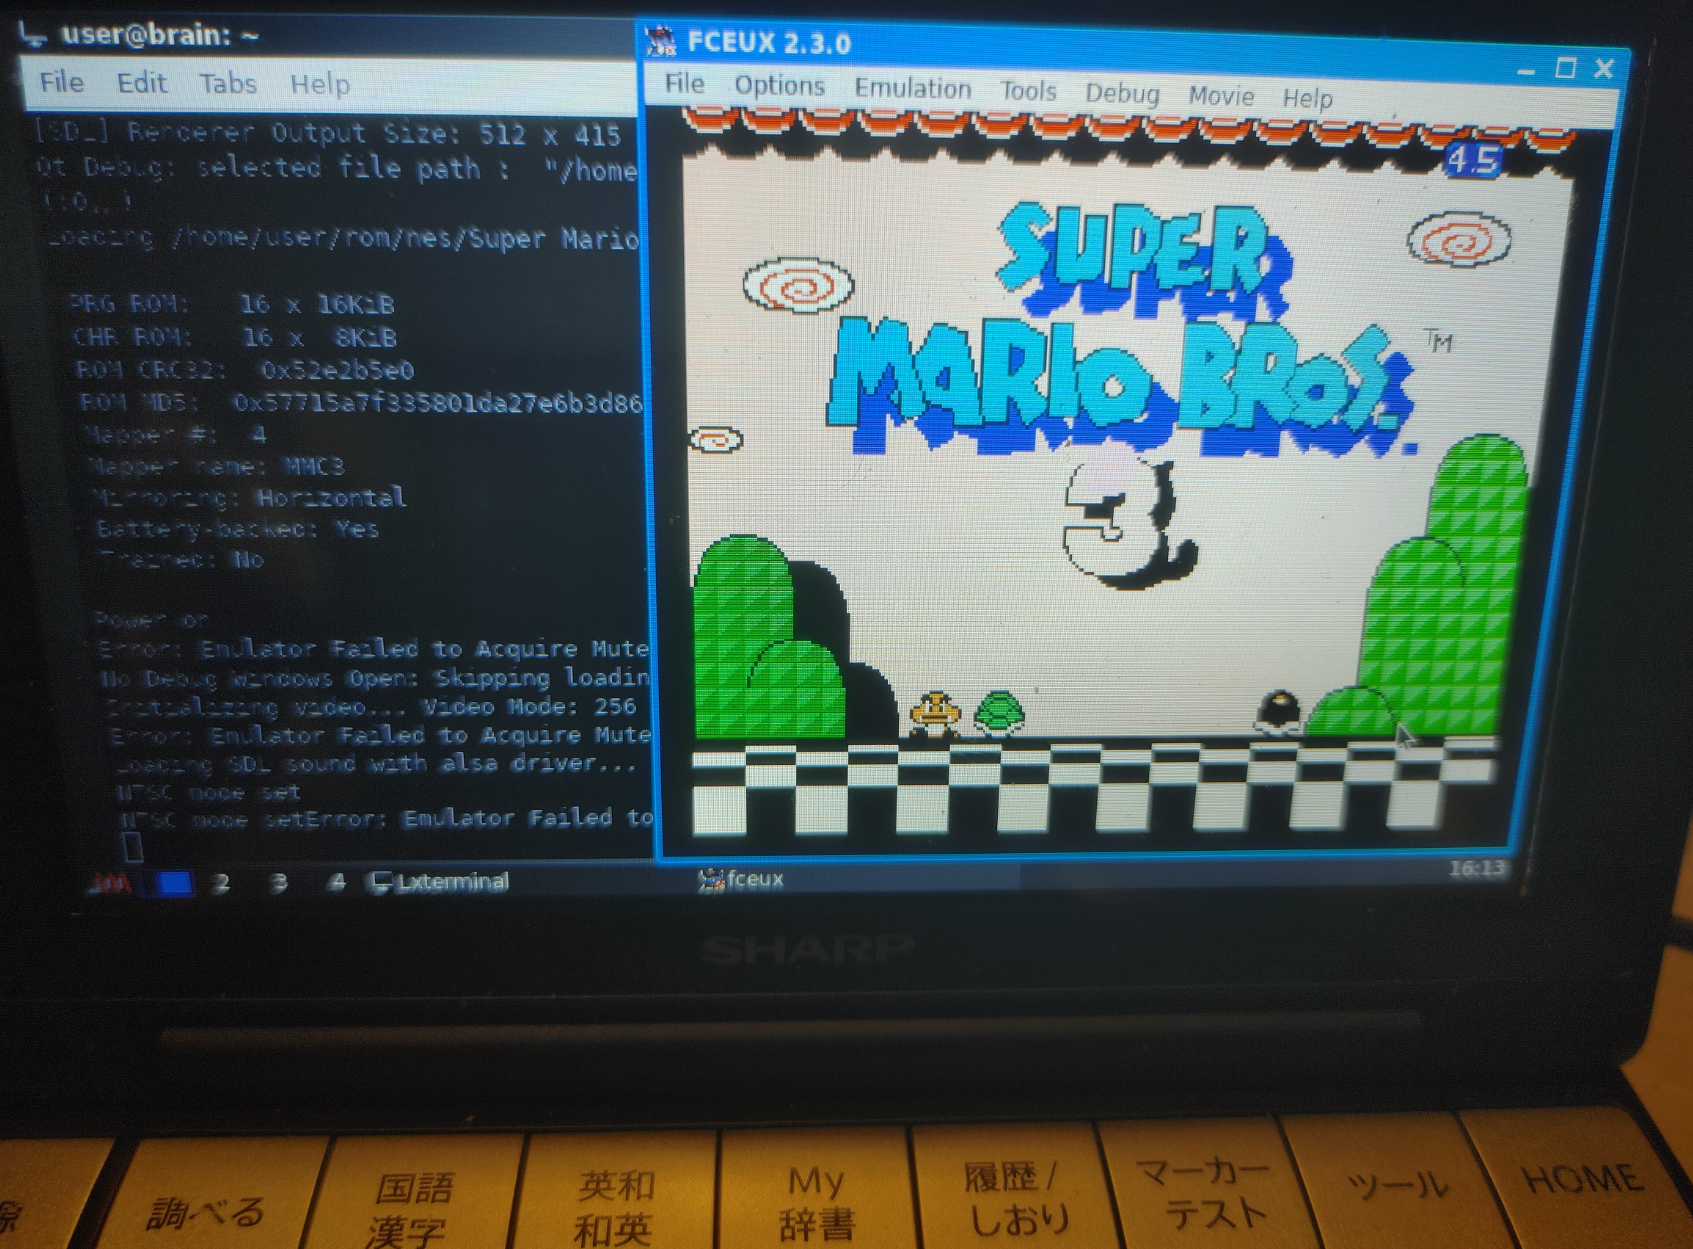
fceux ファミコンエミュレータ(動作は遅いです。->SDL1.2版では動きます。)
インストールはApt経由で可能です。
sudo apt install fceux
X11環境で、Shellから”fceux”で起動できます。
(libSDL2の再構築が必要です。再構築していないと、Illegal instruction エラーになります)
Optionから設定変更できますが、Video configからDriverをSDLにしたりしたけど、4-5fpsぐらいしか出ませんでした。チューニング次第で、もう少しあげられるのだろうか?
キー入力も何とか反応するレベルでした。
user@brain:~$ sudo apt show fceux
[sudo] password for user:
Package: fceux
Version: 2.3.0+dfsg1-3
Priority: optional
Section: games
Maintainer: Joseph Nahmias <jello@debian.org>
Installed-Size: 3,077 kB
Provides: nes-emulator
Depends: libc6 (>= 2.29), libgcc-s1 (>= 3.5), liblua5.1-0, libminizip1 (>= 1.1), libopengl0, libqt5core5a (>= 5.5.0), libqt5gui5 (>= 5.11.0~rc1) | libqt5gui5-gles (>= 5.11.0~rc1), libqt5widgets5 (>= 5.15.1), libsdl2-2.0-0 (>= 2.0.12), libstdc++6 (>= 5.2), zlib1g (>= 1:1.1.4)
Suggests: efp
Homepage: http://fceux.com/
Tag: uitoolkit::gtk, uitoolkit::sdl
Download-Size: 1,014 kB
APT-Sources: http://archive.debian.org/debian bullseye/main armel Packages
Description: all-in-one NES/Famicom Emulator
 FCE Ultra X [FCEUX] is an emulator of the original (8-bit) Nintendo
 Entertainment System (NES) released under the GNU General Public License
 (GPL).  It includes the following features (and many more):
 .
       * fully customizable color palette rendering engine
       * complete sound emulation (all five channels)
       * support for up to four joystick controllers
       * zapper emulation for the mouse
       * GameGenie emulation
       * accepts compressed (PKZIP, gzip) ROM images
       * TCP/IP network play
       * Lua scripting


user@brain:~$ sudo apt install fceux
Reading package lists... Done
Building dependency tree... Done
Reading state information... Done
The following additional packages will be installed:
  liblua5.1-0 libminizip1 libopengl0
Suggested packages:
  efp
The following NEW packages will be installed:
  fceux liblua5.1-0 libminizip1 libopengl0
0 upgraded, 4 newly installed, 0 to remove and 1 not upgraded.
Need to get 1,155 kB of archives.
After this operation, 3,647 kB of additional disk space will be used.
Do you want to continue? [Y/n] Y
Get:1 http://archive.debian.org/debian bullseye/main armel liblua5.1-0 armel 5.1.5-8.1+b3 [83.5 kB]
~
Processing triggers for libc-bin (2.31-13+deb11u11) ...
user@brain:~$


user@brain:~$ fceux --help
Usage is as follows:
fceux <options> filename

Option         Value   Description
--pal          {0|1}   Use PAL timing.
--newppu       {0|1}   Enable the new PPU core. (WARNING: May break savestates)
--input(1,2)   d       Set which input device to emulate for input 1 or 2.
                         Devices:  gamepad zapper powerpad.0 powerpad.1
                         arkanoid
--input(3,4)   d       Set the famicom expansion device to emulate for
                       input(3, 4)
                          Devices: quizking hypershot mahjong toprider ftrainer
                          familykeyboard oekakids arkanoid shadow bworld
                          4player
--gamegenie    {0|1}   Enable emulated Game Genie.
--frameskip    x       Set # of frames to skip per emulated frame.
--xres         x       Set horizontal resolution for full screen mode.
--yres         x       Set vertical resolution for full screen mode.
--autoscale    {0|1}   Enable autoscaling in fullscreen.
--keepratio    {0|1}   Keep native NES aspect ratio when autoscaling.
--(x/y)scale   x       Multiply width/height by x.
                         (Real numbers >0 with OpenGL, otherwise integers >0).
--(x/y)stretch {0|1}   Stretch to fill surface on x/y axis (OpenGL only).
--fullscreen   {0|1}   Enable full screen mode.
--noframe      {0|1}   Hide title bar and window decorations.
--special      {1-4}   Use special video scaling filters
                         (1 = hq2x; 2 = Scale2x; 3 = NTSC 2x; 4 = hq3x;
                         5 = Scale3x; 6 = Prescale2x; 7 = Prescale3x; 8=Precale4x; 9=PAL)
--palette      f       Load custom global palette from file f.
--sound        {0|1}   Enable sound.
--soundrate    x       Set sound playback rate to x Hz.
--soundq      {0|1|2}  Set sound quality. (0 = Low 1 = High 2 = Very High)
--soundbufsize x       Set sound buffer size to x ms.
--volume      {0-256}  Set volume to x.
--soundrecord  f       Record sound to file f.
--playmov      f       Play back a recorded FCM/FM2/FM3 movie from filename f.
--pauseframe   x       Pause movie playback at frame x.
--fcmconvert   f       Convert fcm movie file f to fm2.
--ripsubs      f       Convert movie's subtitles to srt
--subtitles    {0|1}   Enable subtitle display
--fourscore    {0|1}   Enable fourscore emulation
--no-config    {0|1}   Use default config file and do not save
--net          s       Connect to server 's' for TCP/IP network play.
--port         x       Use TCP/IP port x for network play.
--user         x       Set the nickname to use in network play.
--pass         x       Set password to use for connecting to the server.
--netkey       s       Use string 's' to create a unique session for the
                       game loaded.
--players      x       Set the number of local players in a network play
                       session.
--rp2mic       {0|1}   Replace Port 2 Start with microphone (Famicom).
--4buttonexit {0|1}    exit the emulator when A+B+Select+Start is pressed
--loadstate {0-9|>9}   load from the given state when the game is loaded
--savestate {0-9|>9}   save to the given state when the game is closed
                         to not save/load automatically provide a number
                         greater than 9
--periodicsaves {0|1}  enable automatic periodic saving.  This will save to
                         the state passed to --savestate

--loadlua      f       Loads lua script from filename f.
--style=KEY            Use Qt GUI Style based on supplied key. Available system style keys are:

           Windows              Fusion

 Custom Qt stylesheets (.qss files) may be used by setting an
 environment variable named FCEUX_QT_STYLESHEET equal to the
 full (absolute) path to the qss file.

Compiled with SDL version 2.0.14
Linked with SDL version 2.0.14
Compiled with QT version 5.15.2
git URL: https://github.com/TASVideos/fceux.git
git Rev: 65c5b0d2a1c08db75bb41340bfa5534578926944
user@brain:~$
———-
fceux 2.2.3 (SDL1.2版) ファミコンエミュレータ(音無しであれば実用的な速度で動作)
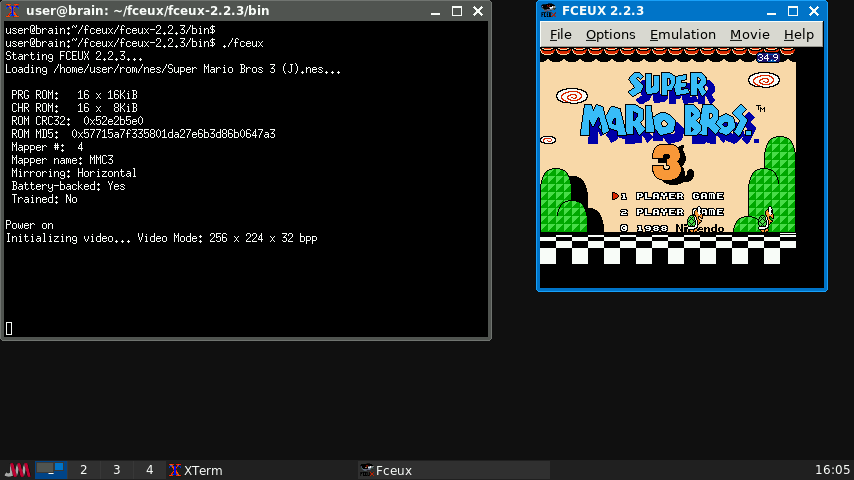
Brainでapt経由でインストールできる fceux2.3.0(SDL2.0版)だと動作速度遅すぎて、4-5fpsしかでない&キー入力も怪しいという状況でした。
で、先日同様に動作が重かったopenMSXをSDL1.2でビルドしてみたところ動作が改善したということで、fceuxもSDL1.2で構築してみました。
結果的に音無しでですが、調子のよいときは最大38 fpsぐらい出るときもあります。
これくらいfpsが出れば、十分遊べる範囲です。
(なんらかの条件で遅かったり早かったりします。条件不明。)
(plusaudio起動している確率があがるような気が・・・)
(10fps or 20fps or 40fps)
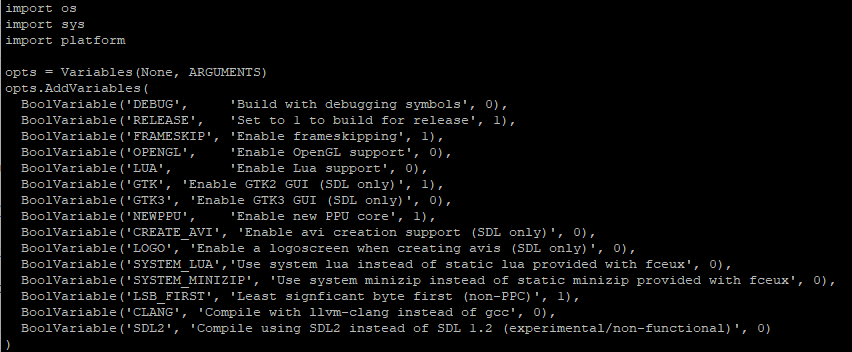
インストールは、SDl1.2をサポートする最終バージョンである2.2.3のソースを元にビルドします。
公式サイト
https://fceux.com/web/download.html
$ cd
$ mkdir fcmux
$ cd fcmux
$ wget https://github.com/TASEmulators/fceux/archive/refs/tags/fceux-2.2.3.tar.gz
$ tar zxf fceux-2.2.3.src.tar.gz
$ cd fceux-2.2.3
インストールの仕方の詳細は、README-SDLを確認してください。
まずは、ビルドパラメータを修正します。
いったん、以下のように修正してみました。
$ vi SConstruct
また、最適化も追記設定しておきます(“-O2” -> “-O3 -march=native”)

Fceux 2.2.3 のビルドシステムは sconsを利用します(2.3.0からはcmakeです。)。
が、現行のpython3ではなく、python2版のsconsが必要になります。
ですので、以下のようにpython2環境を作成してsconsを導入、ビルドします。。
$ sudo apt install python2
$ curl -sS https://bootstrap.pypa.io/pip/2.7/get-pip.py | sudo python2
$ sudo python2 -m pip install
$ virtualenvvirtualenv -p python2 ~/fceux-py2env
$ source ~/fceux-py2env/bin/activate
$ pip install ‘scons<3.0’
$ cd ~/fcmux/fceux-2.2.3
$ scons -c && rm -rf .scon* # ビルド情報をクリア
$ scons # ビルド(約3時間程度)
$ deactivate
テスト実行
$ cd bin
$ ./fceux
システムにインストール
$ sudo bash
$ source /home/user/fceux-py2env/bin/activate
$ scons install
$ deactivate
これで、/user/local/bin/に実行ファイルがインストールされ、fceuxできるようになります。
もし、JWMのメニューから起動したければdesktopファイルが以下にインストールされているのでこれをベースにアプリのインストール先などを変更してください(Exec,Icon)。
sudo vi /usr/local/share/application/fceux.desktop
Exec=/usr/local/bin/fceux
Icon=/usr/local/share/pixmaps/fceux.png
———-
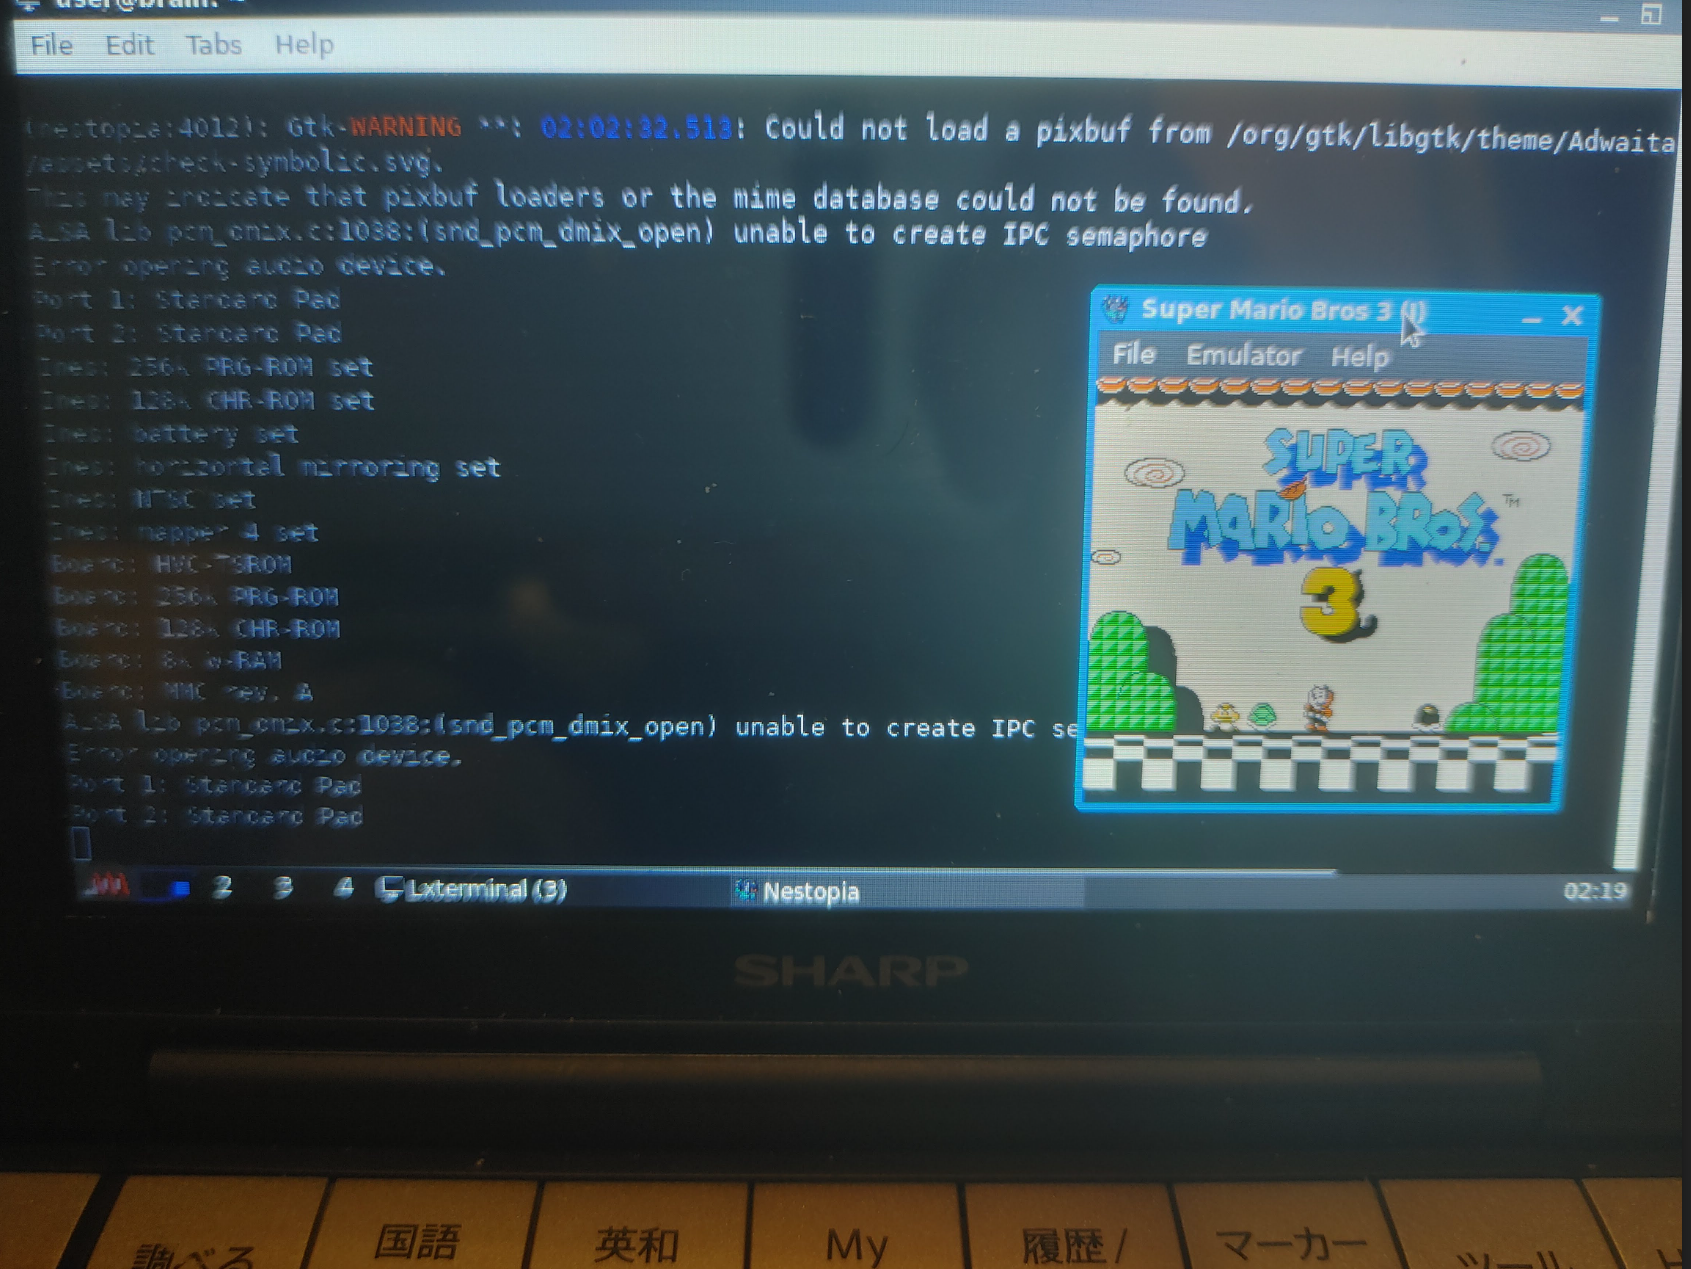
nestopia ファミコンエミュレータ(動作は遅いです。キー入力反応なし?)
インストールはApt経由で可能です。
sudo apt install nestopia
X11環境で、Shellから”nestopia”で起動できます。
(libSDL2の再構築が必要です。再構築していないと、Illegal instruction エラーになります)
設定変更はEmurator -> Configurationからできます。
FPSは出ていませんし、キー入力も受け付けていないように見えます。
user@brain:~$ sudo apt show nestopia
[sudo] password for user:
Package: nestopia
Version: 1.50-2
Priority: optional
Section: games
Maintainer: Debian Games Team <pkg-games-devel@lists.alioth.debian.org>
Installed-Size: 3,532 kB
Provides: nes-emulator
Depends: libao4 (>= 1.1.0), libarchive13 (>= 3.0.4), libc6 (>= 2.29), libepoxy0 (>= 1.0), libgcc-s1 (>= 3.5), libgdk-pixbuf-2.0-0 (>= 2.22.0), libglib2.0-0 (>= 2.31.8), libgtk-3-0 (>= 3.21.4), libjack-jackd2-0 (>= 1.9.10+20150825) | libjack-0.125, libsdl2-2.0-0 (>= 2.0.12), libstdc++6 (>= 5.2), zlib1g (>= 1:1.1.4)
Homepage: http://0ldsk00l.ca/nestopia/
Tag: uitoolkit::gtk, uitoolkit::sdl
Download-Size: 824 kB
APT-Sources: http://archive.debian.org/debian bullseye/main armel Packages
Description: Nintendo Entertainment System/Famicom emulator
 Nestopia is a cycle-accurate NES/Famicom emulator. It has a high
 compatibility rate and support for many peripherals and input
 devices.
 .
 Features:
    * Save states
    * Movie recording
    * Game rewinding
    * GUI or command line interface
    * Emulation of NTSC, PAL, and Dendy systems
    * Support for NES Zapper games
    * Support for Famicom Disk System games
 .
 Nestopia requires OpenGL 3.2 or later.


user@brain:~$ sudo apt install nestopia
Reading package lists... Done
Building dependency tree... Done
Reading state information... Done
The following additional packages will be installed:
  libarchive13
Suggested packages:
  lrzip
The following NEW packages will be installed:
  libarchive13 nestopia
0 upgraded, 2 newly installed, 0 to remove and 1 not upgraded.
Need to get 1,124 kB of archives.
After this operation, 4,314 kB of additional disk space will be used.
Do you want to continue? [Y/n] Y
Get:1 http://archive.debian.org/debian bullseye/main armel libarchive13 armel 3.4.3-2+deb11u1 [300 kB]
Get:2 http://archive.debian.org/debian bullseye/main armel nestopia armel 1.50-2 [824 kB]
Fetched 1,124 kB in 3s (350 kB/s)
Selecting previously unselected package libarchive13:armel.
(Reading database ... 53453 files and directories currently installed.)
Preparing to unpack .../libarchive13_3.4.3-2+deb11u1_armel.deb ...
Unpacking libarchive13:armel (3.4.3-2+deb11u1) ...
Selecting previously unselected package nestopia.
Preparing to unpack .../nestopia_1.50-2_armel.deb ...
Unpacking nestopia (1.50-2) ...
Setting up libarchive13:armel (3.4.3-2+deb11u1) ...
Setting up nestopia (1.50-2) ...
Processing triggers for man-db (2.9.4-2) ...
Processing triggers for hicolor-icon-theme (0.17-2) ...
Processing triggers for libc-bin (2.31-13+deb11u11) ...
user@brain:~$


user@brain:~$ nestopia --help
Usage: nestopia [options] [FILE]

Options:
  -f, --fullscreen        Fullscreen mode
  -w, --window            Window mode

  -l, --filter            Video Filter
                          (0=None, 1=NTSC, 2=xBR, 3=HqX, 4=2xSaI, 5=ScaleX)

  -m, --maskoverscan      Mask overscan areas
  -n, --no-maskoverscan   Disable overscan masking

  -o, --stretchfs         Stretch to native resolution in fullscreen mode
  -p, --preserveaspect    Preserve aspect ratio in fullscreen mode

  -s, --scalefactor       Video scale factor (1-4)

  -t, --tvaspect          TV aspect ratio
  -r, --no-tvaspect       Regular aspect ratio

  -u, --unlimitedsprites  Remove sprite limit
  -q, --spritelimit       Enable sprite limit

  -v, --version           Show version information

More options can be set in the configuration file.
Options are saved, and do not need to be set on future invocations.

user@brain:~$
———-
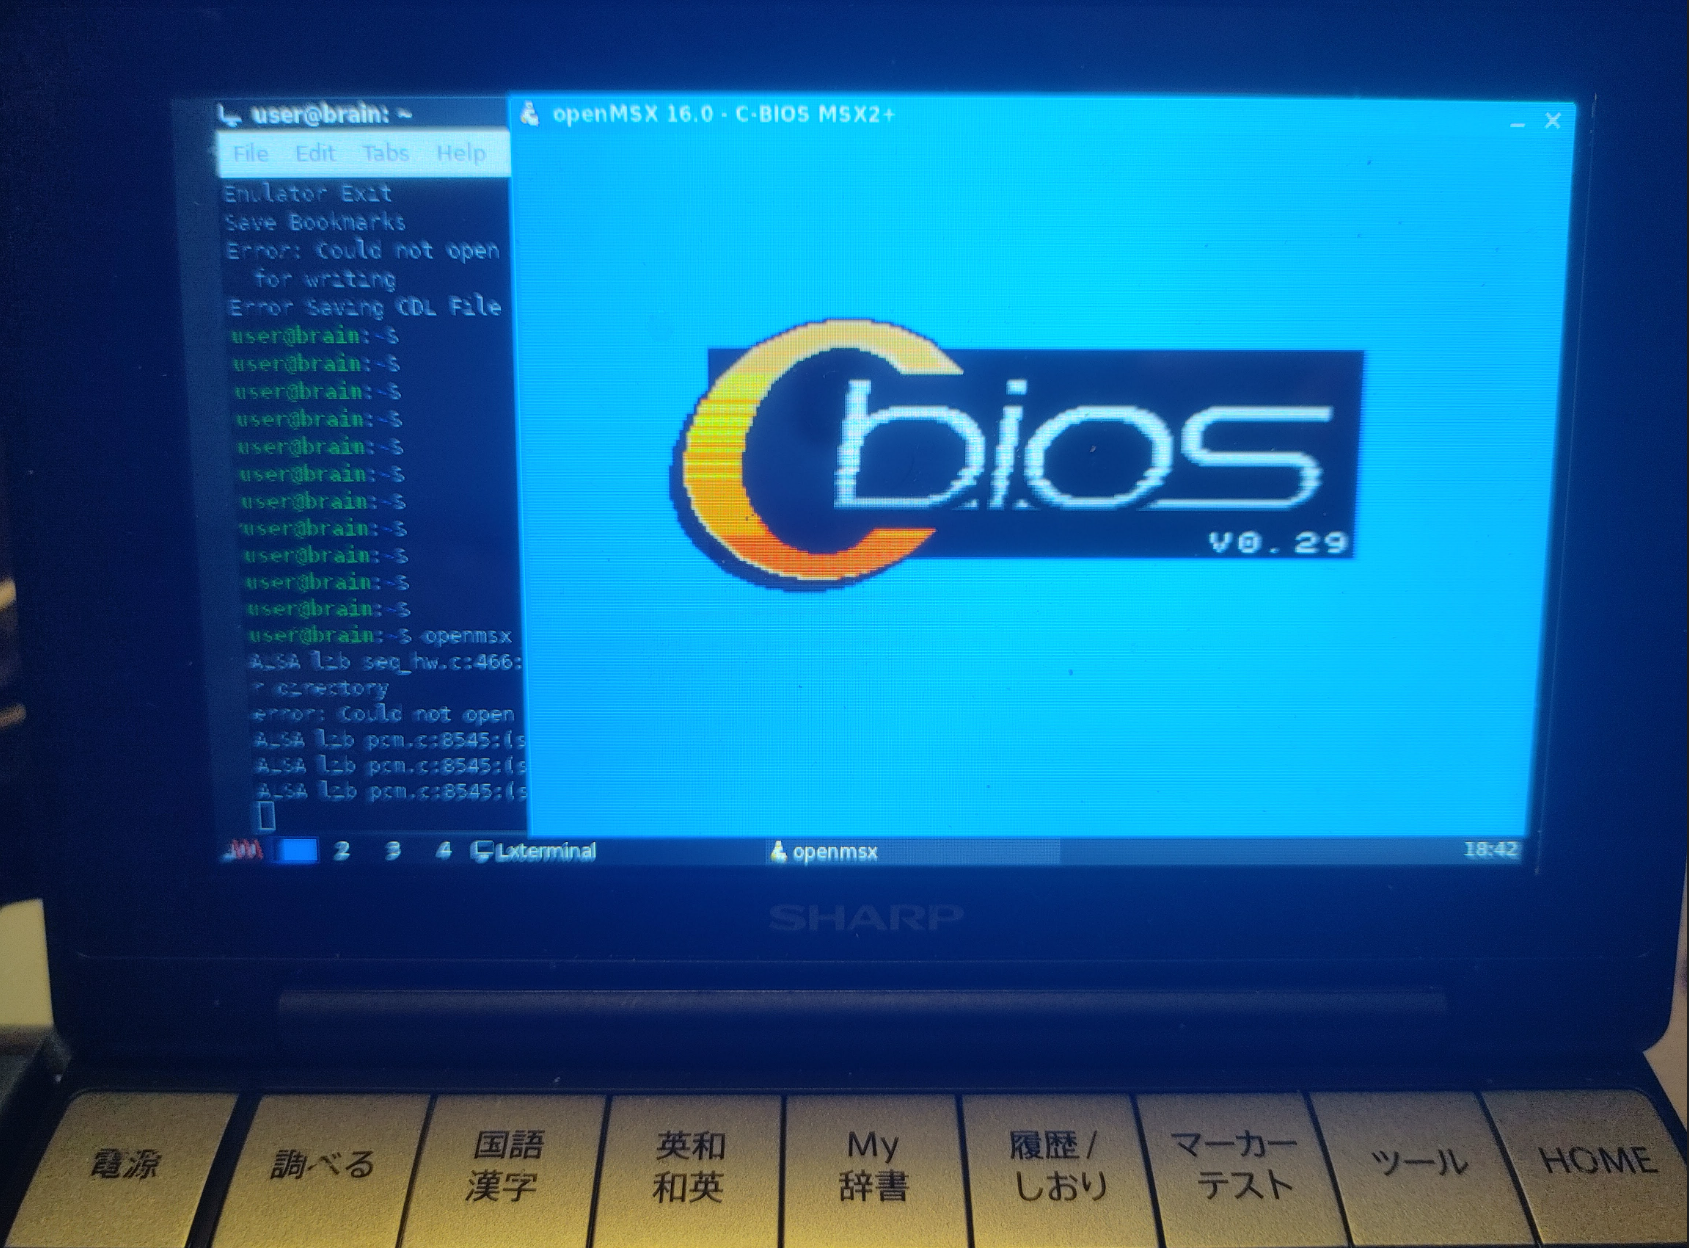
openmsx MSXエミュレータ(動作は遅い->SDL1.2版で現実的な速度に。)
インストールはApt経由で可能です。
sudo apt-get install openmsx openmsx-catapult openmsx-data cbios
X11環境で、Shellから”openmsx”で起動できます。
(libSDL2の再構築が必要です。再構築していないと、Illegal instruction エラーになります)
また、専用ランチャである”openmsx-catapult”を起動すると、ROM指定を含めてGUIで操作できます(初回起動時は各種チェック処理が入ります)。
とりあえず、ROM起動しましたレベルまでの確認です。やはり遅いです。
user@brain:~$ sudo apt show openmsx
Package: openmsx
Version: 16.0-1
Priority: optional
Section: otherosfs
Maintainer: Bas Wijnen <wijnen@debian.org>
Installed-Size: 6,851 kB
Provides: msx-emulator
Depends: openmsx-data (= 16.0-1), cbios (>= 0.23), libasound2 (>= 1.0.16), libc6 (>= 2.30), libgcc-s1 (>= 3.5), libgl1, libglew2.1 (>= 1.12.0), libogg0 (>= 1.0rc3), libpng16-16 (>= 1.6.2-1), libsdl2-2.0-0 (>= 2.0.12+dfsg1), libsdl2-ttf-2.0-0 (>= 2.0.14), libstdc++6 (>= 6), libtcl8.6 (>= 8.6.0), libtheora0 (>= 1.0), libvorbis0a (>= 1.1.2), zlib1g (>= 1:1.1.4)
Suggests: openmsx-catapult, openmsx-debugger, dmktools
Replaces: openmsx-data (<< 16.0-1)
Homepage: https://openmsx.org
Tag: hardware::emulation, implemented-in::c++, implemented-in::tcl,
 interface::3d, interface::graphical, interface::x11, role::program,
 uitoolkit::sdl, uitoolkit::tk, use::gameplaying, works-with::audio,
 works-with::video, x11::application
Download-Size: 1,720 kB
APT-Sources: http://archive.debian.org/debian bullseye/main armel Packages
Description: MSX emulator that aims for perfection
 openMSX is an open source MSX emulator that uses a unique emulation model,
 which tries to achieve the highest level of accuracy possible. It allows
 emulating a large number of different MSX machines. Combined with the
 C-BIOS ROM-files that are available in a separate package, you can run game
 ROM-files without the need for non-free BIOS ROM files.


user@brain:~$
user@brain:~$ sudo apt show openmsx-debubber
N: Unable to locate package openmsx-debubberN: Unable to locate package openmsx-debubber
E: No packages found
user@brain:~$
user@brain:~$
user@brain:~$ sudo apt show openmsx-catapult
Package: openmsx-catapult
Version: 16.0-1
Priority: optional
Section: otherosfs
Maintainer: Bas Wijnen <wijnen@debian.org>
Installed-Size: 1,069 kB
Depends: libc6 (>= 2.4), libgcc-s1 (>= 3.5), libstdc++6 (>= 5.2), libwxbase3.0-0v5 (>= 3.0.5.1+dfsg), libwxgtk3.0-gtk3-0v5 (>= 3.0.5.1+dfsg), libxml2 (>= 2.7.4), openmsx (>= 16.0), openmsx (<< 16.1~)
Homepage: http://openmsx.org
Tag: hardware::emulation, implemented-in::c++, interface::graphical,
 interface::x11, role::program, uitoolkit::wxwidgets, x11::application
Download-Size: 376 kB
APT-Sources: http://archive.debian.org/debian bullseye/main armel Packages
Description: GUI for openMSX
 OpenMSX catapult is a graphical frontend for starting the openMSX emulator.


user@brain:~$ sudo apt show openmsx-data
Package: openmsx-data
Version: 16.0-1
Priority: optional
Section: otherosfs
Source: openmsx
Maintainer: Bas Wijnen <wijnen@debian.org>
Installed-Size: 5,322 kB
Depends: ttf-bitstream-vera
Recommends: openmsx
Homepage: https://openmsx.org
Tag: hardware::emulation, role::app-data, works-with-format::xml
Download-Size: 1,400 kB
APT-Sources: http://archive.debian.org/debian bullseye/main armel Packages
Description: datafiles for openMSX, an MSX emulator
 openMSX is an open source MSX emulator that uses a unique emulation model,
 which tries to achieve the highest level of accuracy possible.
 .
 This package provides data that openmsx needs to run.


user@brain:~$ sudo apt show cbios

Package: cbios
Version: 0.28-1.1
Priority: optional
Section: misc
Maintainer: Bas Wijnen <wijnen@debian.org>
Installed-Size: 483 kB
Recommends: openmsx | msx-emulator
Homepage: http://cbios.sf.net
Tag: hardware::emulation, role::app-data
Download-Size: 30.1 kB
APT-Sources: http://archive.debian.org/debian bullseye/main armel Packages
Description: open source MSX BIOS roms
 C-BIOS is an open source BIOS for MSX computers.
 .
 C-BIOS can be shipped with MSX emulators so they are usable
 out-of-the-box. It comes readily configured for the openMSX
 emulator.


user@brain:~$ sudo apt-get install openmsx openmsx-catapult openmsx-data cbios
Reading package lists... Done
Building dependency tree... Done
Reading state information... Done
The following additional packages will be installed:
  libglew2.1 libnotify4 libsdl2-ttf-2.0-0 libtcl8.6 libwxbase3.0-0v5
  libwxgtk3.0-gtk3-0v5 ttf-bitstream-vera
Suggested packages:
  glew-utils tcl8.6 openmsx-debugger dmktools
Recommended packages:
  notification-daemon
The following NEW packages will be installed:
  cbios libglew2.1 libnotify4 libsdl2-ttf-2.0-0 libtcl8.6 libwxbase3.0-0v5
  libwxgtk3.0-gtk3-0v5 openmsx openmsx-catapult openmsx-data
  ttf-bitstream-vera
0 upgraded, 11 newly installed, 0 to remove and 1 not upgraded.
Need to get 9,423 kB of archives.
After this operation, 35.7 MB of additional disk space will be used.
Do you want to continue? [Y/n] Y
Get:1 http://archive.debian.org/debian bullseye/main armel cbios all 0.28-1.1 [30.1 kB]
~

Get:2 http://archive.debian.org/debian bullseye/main armel libglew2.1 armel 2.1.0-4+b1 [159 kB]
Get:3 http://archive.debian.org/debian bullseye/main armel libnotify4 armel 0.7.9-3 [21.7 kB]
Get:4 http://archive.debian.org/debian bullseye/main armel libsdl2-ttf-2.0-0 armel 2.0.15+dfsg1-1 [15.4 kB]
Get:5 http://archive.debian.org/debian bullseye/main armel libtcl8.6 armel 8.6.11+dfsg-1 [894 kB]
~
Processing triggers for fontconfig (2.13.1-4.2) ...
user@brain:~$


user@brain:~$ openmsx --help
openMSX 16.0
============

usage: openmsx [arguments]
  an argument is either an option or a filename

  this is the list of supported options:
    --help, -h      Shows this text
    --version, -v   Prints openMSX version and exits
    -cart, -carta,
    -cartb, -cartc,
    -cartd          Insert the ROM file (cartridge) specified in
                    argument
    -cassetteplayer Put cassette image specified in argument in
                    virtual cassetteplayer
    -cda            Use iso image in argument for the CDROM extension
    -command        Run Tcl command at startup (see also -script)
    -control        Enable external control of openMSX process
    -diska, -diskb  Insert the disk image specified in argument
    -ext, -exta,
    -extb, -extc,
    -extd           Insert the extension specified in argument
    -hda            Use hard disk image in argument for the IDE or
                    SCSI extensions
    -ips            Apply the given IPS patch to the ROM or disk
                    image specified in the preceding option
    -laserdisc      Put LaserDisc image specified in argument in
                    virtual LaserDisc player
    -machine        Use machine specified in argument
    -replay         Load replay and start replaying it in view only
                    mode
    -romtype        Specify the rom type for the ROM image specified
                    in the preceding option
    -savestate      Load savestate and start emulation from there
    -script         Run extra startup script
    -setting        Load an alternative settings file
    -testconfig     Test if the specified config works and exit

  this is the list of supported file types:
    cas, wav        Cassette image, raw recording or fMSX CAS image
    di1, di2, dmk,
    dsk, fd1, fd2,
    xsa             Disk image
    mx1, mx2, ri, rom ROM image of a cartridge
    ogv             LaserDisc image, Ogg Vorbis/Theora
    omr             openMSX replay
    oms             openMSX savestate
    tcl             Extra Tcl script to run at startup
user@brain:~$
なお、Illegal instructionエラーを調査する段階で、ソースからのコンパイルも試してみましたが同じエラーになりました。ちなみにBrainux上でのコンパイルには20時間以上かかりました(マジ)。
———-
openmsx 0.15 (SDL1.2版) インストール 2025/12/22追記
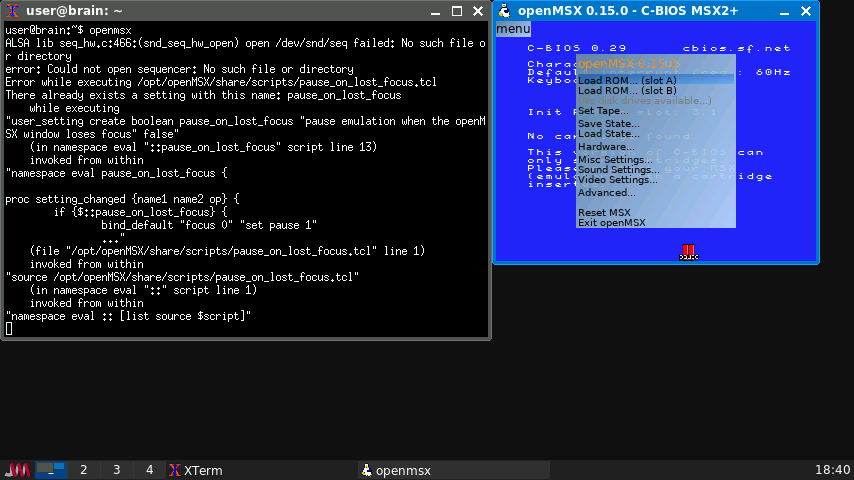
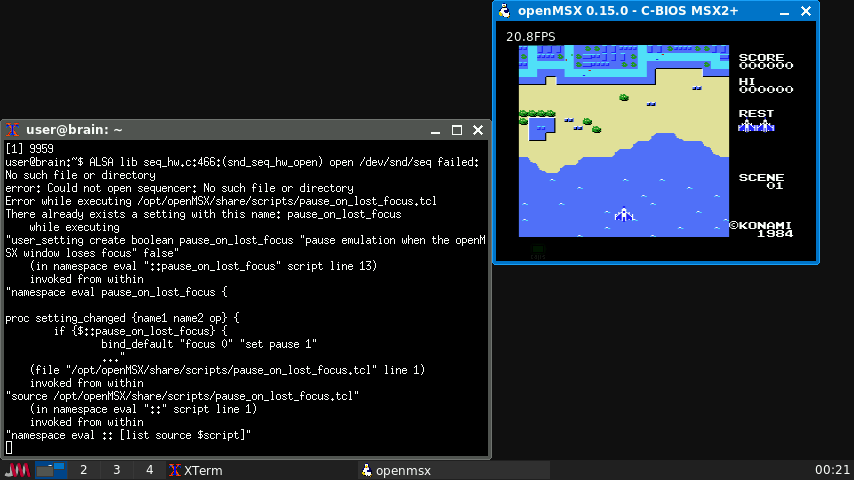
いろいろアプリケーションをインストールしてみた傾向から、やはりSDL2.0が重いのではないか、ということでSDL2.0移行前のSDL1.2を使っている最後のバージョンである「openMSX0.15」をソールからビルトインストールして上書きインストールしてみます。
$ sudo apt-get install openmsx openmsx-catapult openmsx-data cbios
$ cd
$ mkdir openmsx15
$ cd openmsx15
$ tar zxvf openmsx-0.15.0.tar.gz
$ cd openmsx-0.15.0
$ sudo apt install python-dev # openmsx 0.15での./configureの実行に必要
$ sudo apt install libasound2-dev
$ sudo apt install libglew-dev
$ sudo apt install libogg-dev
$ sudo apt install libtheora-dev
$ sudo apt install libvorbis-dev
$ sudo apt install libsdl2-dev
$ sudo apt install libsdl2-ttf-dev
$ sudo apt install tcl tcl8.6-dev
$ ./configure # ビルドに必要なライブラリをチェック。不足している場合は追加
user@brain:~/openmsx15/openmsx-0.15.0$ ./configure
Using Python: python
Probing target system...
Creating derived/arm-linux-opt/config/probed_defs.mk...
Creating derived/arm-linux-opt/config/systemfuncs.hh...

Found libraries:
  ALSA:             version 1.2.4
  GLEW:             version unknown
  libogg:           version unknown
  libpng:           version 1.6.37
  libtheora:        version unknown
  libvorbis:        version unknown
  OpenGL:           version 4.6
  SDL:              version 1.2.15
  SDL_ttf:          version 2.0.11
  Tcl:              version 8.6.11
  zlib:             version 1.2.11

Components overview:
  Emulation core:   yes
  GL renderer:      yes
  Laserdisc:        yes
  ALSA MIDI:        yes

Customisable options:
  Install to        /opt/openMSX
  (you can edit these in build/custom.mk)

All required and optional components can be built.

If the detected libraries differ from what you think is installed on this system, please check the log file: derived/arm-linux-opt/config/probe.log
$ make #Brainの実機ビルトで約15時間
$ sudo make install
起動は、ターミナル上で、「openmsx &」 か、
一度aptでインストール済であれば、JWMメニューから、「games -> openMSX」で起動です
なお注意点として、インストール先が違うことです。
aptでインストールしたopenmsx(バージョンは16.0)のインストール先:
/usr/bin/openmsx
自ビルドしたopenmsx(0.15)のインストール先(シンボリックリンク):
/usr/local/bin/openmsx
Path優先順位は、/usr/local/bin/ -> /usr/bin/なので、自ビルドしたほうが優先順位が高いですが、openmsx-catapultでのopenmsxの場所を変えないと、aptでインストールしたopenmsx16.0が起動してしまう場合があるので、気を付けてください。
(不要であれば、/usr/bin/openmsx を削除でもいいと思います。)
起動押したら、カーソルを左上にもっていくと出てくる menuをクリックすると、
メニューが開いて、romの指定などができます。
おすすめは、
「misc Settings->Minimal Frameskip: 0」
「misc Settings->Maximal Frameskip: 30」
「Sound Settings->Resampler: fast (but low quality)」
あたりを設定しておくと、音ありでもそれなりの速度で動いてくれます。
なお、USBサウンドデバイスを付けてい場合は、別途pulseaudioを起動しておいてください。
なぜか安定して音が鳴ります。
pulseaudio –start
openmsx
pulseaudio -k
標準では、CBIOSで起動しますが、
必要に応じて、MSX実機から取得したのBIOSを
/opt/openMSX/share/systemromsにコピーすればBASICやDiskも使えるようになります。
(ファイルのチェックサムで識別しているようで、ファイル名は任意だそうです。)
コピーしたら、menu -> hardware -> change machine で抜き出した機種名を選んでください。
詳しい説明はこちら
https://openmsx.org/manual
2026/01/05追加
現在、CPU最適化オプションを付けて再ビルド中
結果は15時間後・・・
$ cd
$ cd openmsx15/openmsx-0.15.0
$ cd build
$ vi main.mk
CXXFLAGS:=
↓
CXXFLAGS:=-O3 -match=native
$ make clean
$ make
$ sudo make install
ビルドに16-17時間かかりました。
結果として、心持ち速度が上がった気がします。
———-
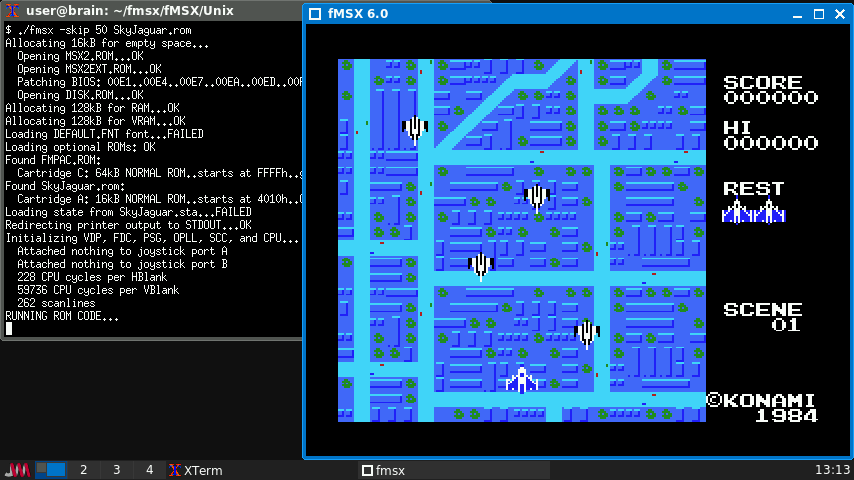
fMSX MSXエミュレータ(MSX1/2/2+)
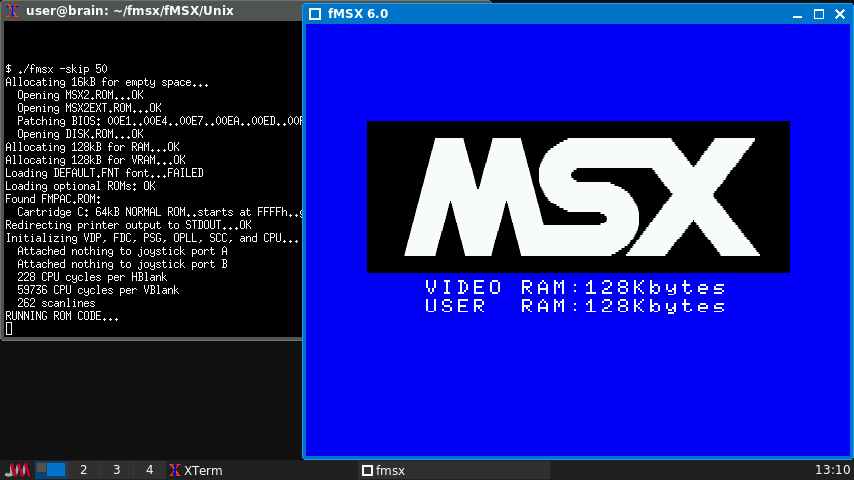
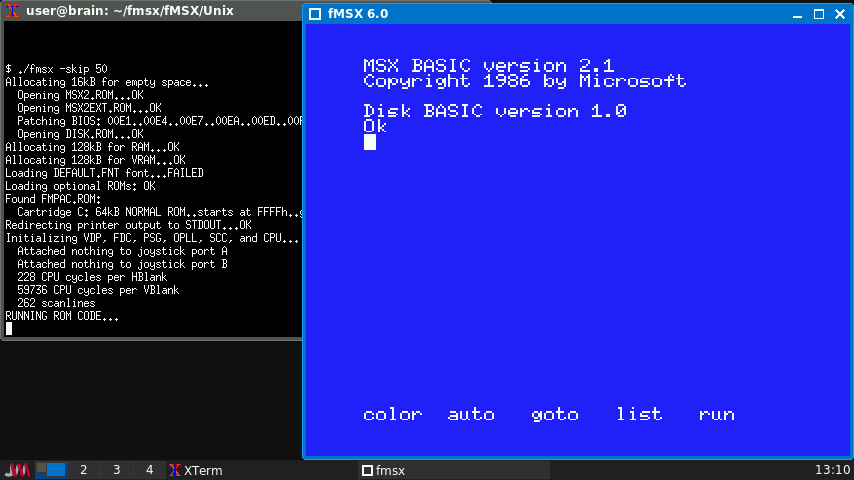
OpenMSXではSDL2を使っているせいか、動作が遅かったのですが、
SDL2を使っていないMSXエミュレータを探したところ、fmsxを見つけました。
これならワンチャン!ということで試してみます。
インストールソールからのビルドになります。
必要に応じて、ライブラリの追加が必要がある場合があります。
$ cd
$ mkdir fmsx
$ cd fmsx
$ wget https://fms.komkon.org/fMSX/fMSX60.zip
$ unzip fMSX60.zip
$ cd fmsx
$ cd fMSX/Unix
$ sudo apt install g++ build-essential libpulse-dev
$ make
ただ、このままでは、build最後のリンク時に大量のエラーになります。/usr/bin/ld: ../../EMULib/Sound.o:(.bss+0x230): multiple definition of ARGV'; ../../EMULib/EMULib.o:(.bss+0x218): first defined here /usr/bin/ld: ../../EMULib/Sound.o:(.bss+0x234): multiple definition ofARGC'; ../../EMULib/EMULib.o:(.bss+0x21c): first defined here
~
このエラーは、簡単に言うと、”ARGC”,”ARGV”の変数が複数のソースで定義されており、
最後のリンク時に重複していてビルドできないといった感じの意味なります。
ソールをgrepで調べたところ、ARGC、RGCGは以下のファイルに存在していました。
user@brain:~/fmsx$ grep -r “ARG” *
EMULib/Unix/LibUnix.c: if(ARGC&&ARGV)
EMULib/Unix/LibUnix.c: P=strrchr(ARGV[0],’/’);
EMULib/Unix/LibUnix.c: ClassHint.res_name = P? P+1:ARGV[0];
EMULib/Unix/LibUnix.c: ClassHint.res_class = P? P+1:ARGV[0];
EMULib/Unix/LibUnix.c: XSetCommand(Dsp,Wnd,ARGV,ARGC);
EMULib/Unix/LibUnix.c: if(ARGC&&ARGV)
EMULib/Unix/LibUnix.h:extern int ARGC;
EMULib/Unix/LibUnix.h:extern char *ARGV;
fMSX/fMSX.c:int ARGC; /* argc/argv from main (#ifdef UNIX) */
fMSX/fMSX.c:char **ARGV;
fMSX/fMSX.c: ARGC = argc;
fMSX/fMSX.c: ARGV = argv;
これで定義部分を抽出すると・・・
EMULib/Unix/LibUnix.h:
int ARGC;
char *ARGV; grep: fMSX/Unix/fmsx: binary file matches
fMSX/fMSX.c:
extern int ARGC; /* argc/argv from main (#ifdef UNIX) */
extern char **ARGV;
これを見ると、
各ソースファイルにインクルードされるヘッダファイル(LibUnix.h)で変数を定義
メインとなるfMSX.cでは変数外部参照になっていました。
これでは、ヘッダファイル(LibUnix.h)をインクルードしている各ソースファイルごとに変数が定義されることになるので、以下のように定義と外部参照を逆に変更します。
EMULib/Unix/LibUnix.h:
extern int ARGC;
extern char *ARGV
fMSX/fMSX.c:
int ARGC; /* argc/argv from main (#ifdef UNIX) */
char **ARGV;
これで、再度コンパイルすると、ビルドできました。
$ make clean
$ make
出来た実行ファイルは、。~/fmsx/fMSX/Unix/fmsx です。
~/fmsx/fMSX/Unix/の下に、MSXのBIOSROMを保存します(別フォルダ指定する場合は)。
MSX.ROM MSX2.ROM MSX2EXT.ROM MSX2P.ROM MSX2PEXT.ROM
FMPAC.ROM DISK.ROM
これで、fmsxが起動します(ちょっと遅く感じたので-skip 50オプション追加)。
./fmsx -skip 50 game.rom
ビルド時にPlusaudioをリンクされていますが現状Pulseaudioの設定していないので音は出ないようですが、問題ないレベルの速度は出ているようです。
(PulseAudio有効にしましたが音なりませんでした。fMSX v5.1でPulseAudioに切り替えしているみたいなので、それより前のバージョンなら音が鳴るかもしれません。)
———–
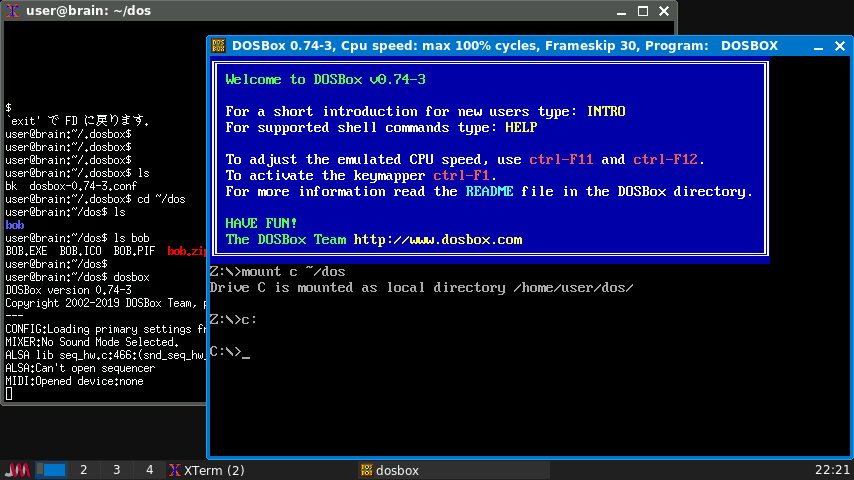
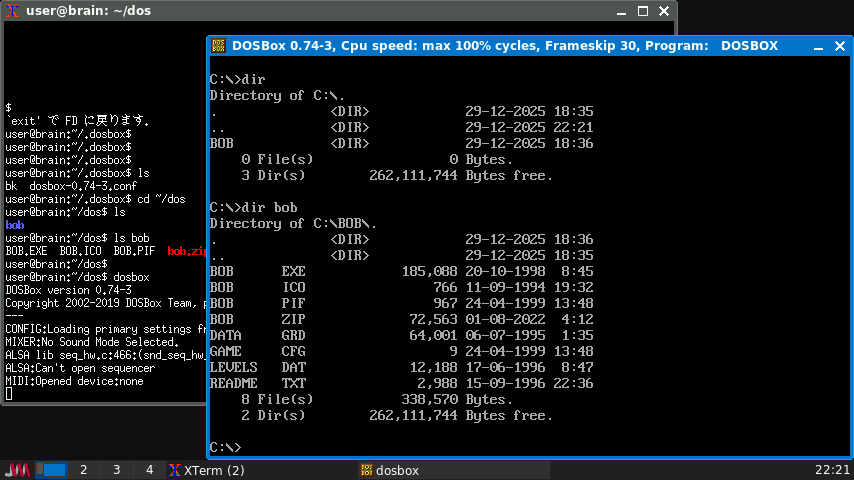
dosbox グラフィックス、サウンド、DOS を備えた x86 エミュレータ(Brainでは厳しい)
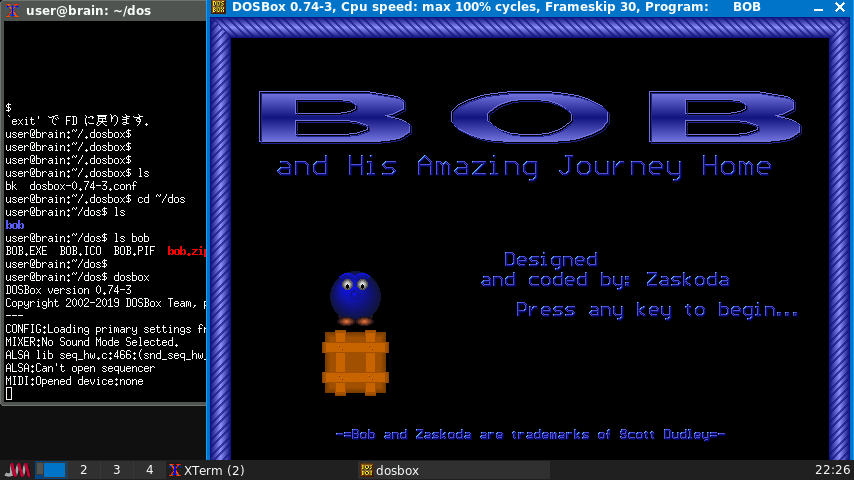
公式サイト:https://www.dosbox.com/DOSBoxManual.html
DOSBoxは、Tandy/Hercules/CGA/EGA/VGA/SVGAグラフィック、サウンド、そしてDOSを搭載したx86エミュレータです。DOSをサポートしていないプラットフォームでも古いDOSゲームを実行できるように設計されています。
以下のレガシーサウンドデバイスがエミュレートされます:PCスピーカー、Creative CMS/Gameblaster、Tandy 3 voice、Adlib、Sound Blaster Pro/16、Disney Soundsource、Gravis Ultrasound。MPU-401はホストに転送されます。
Brainuxでx86のDOSをエミュレートします。
ただ、かなり遅いです。
フレームレートスキップ設定して、CPUサイクルを最大にして、音をなくして、
やっとアクションを伴わないパズルゲームなら、何とか動かせるかも・・・
といったレベルです(ソフトにもよりますが)。
なお、一度dosboxを起動すると、~/.dosbox/dosbox-0.74-3.conf が作成されますので、
このファイルを編集することでいろいろ定義できます。
例)
[render]
frameslip=30
[cpu]
cycles=max
[mixer]
nosounf=true
[autoexec]
mount c ~/dos
c:
[autoexec]にて、上記のように記載すると、
DOSBOX起動時にBranix上の~/dos ディレクトリを
Cドライブとしてマウントして、Cドライブへの移動まで実行してくれます。
インストールはApt経由で可能です。
sudo apt install dosbox
快適な実行は、通常のパソコンレベルのCPU性能がないと厳しいですね。
多分もっと軽くする設定があると思うけど今はこれが精いっぱい。
(参考)
https://www.dosgamesarchive.com/download/bob-and-his-amazing-journey-home
———–
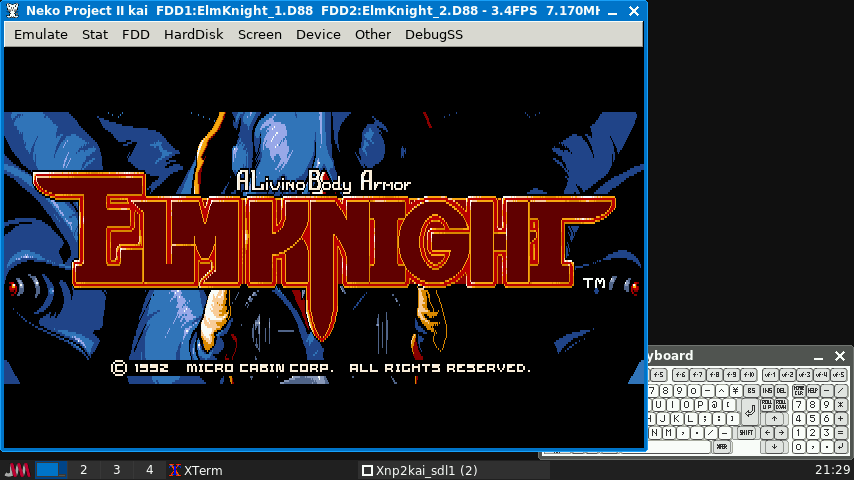
Neko Project 2 kai PC9801/9821 エミュレータ

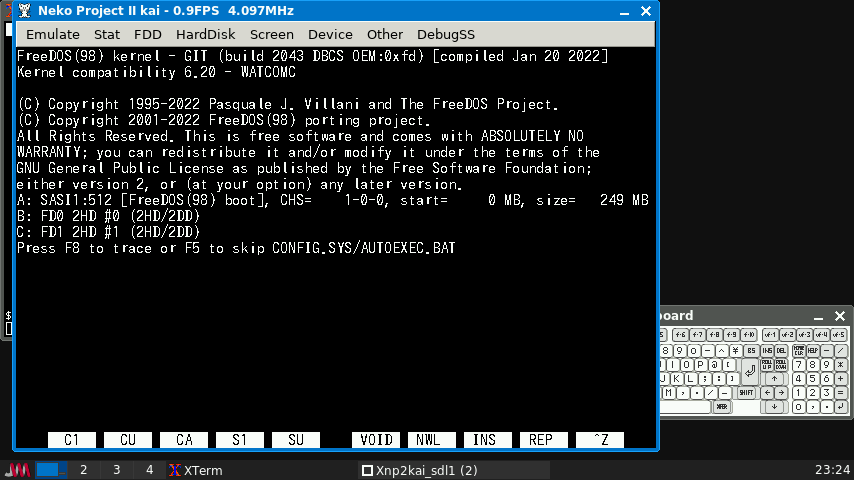
公式サイト:https://domisan.sakura.ne.jp/article/np2kai/np2kai.html
Neco Project をRaspberry Piに移植したものを0.86化していろいろ改善したバージョンとのことです。
このバージョンではSDL1.2を利用したX11ポートが利用できるので、こちらをビルドしてみました。
起動は、xnp2kai-sdl1です(PC9801エミュレート、X11ポートのSDL1バージョン)
結果として音無し設定あれば、i286 5-7Mhz前後の速度が出るようです。(Autoframe設定)
(Device->Sound option->Driverから無効にできます。)
(音ありだと速度が安定せずに全体的に遅くなるので無効推奨です。要pulseAudio)
BrainのCE版にもNP2がありますが、そちらのほうがBrainに特化した修正がされているようで動きもいいです。がこちらのX11版ではUSBキーボード、マウスが使えるのがメリットです。バーチャルキーボードもありますが、X11版にはカーソルキーをテンキーにする機能はないのでそこは残念。
インストールはソースからのビルドになります。
必要に応じて、ライブラリの追加が必要がある場合があります。
$ cd
$ mkdir np2
$ cd np2
$ git clone https://github.com/AZO234/NP2kai.git
$ cd NP2kai
$ sudo apt install git cmake ninja-build build-essential libx11-dev libglib2.0-dev libgtk2.0-dev libsdl2-dev libsdl2-mixer-dev libsdl2-ttf-dev libsdl1.2-dev libsdl-mixer1.2-dev libsdl-ttf2.0-dev libusb-1.0-0-dev libfreetype-dev libfontconfig1-dev libssl-dev
$ mkdir build
$ cd build
$ cmake .. -D BUILD_X=ON -D USE_SDL2=OFF -D BUILD_I286=ON
$ make
$ sudo make install
これで、xnp2kai-sdl1 がビルドされます。
(この方法だと一緒にxnp21kai-sdl1も作成されるようです。)
cmakeのオプションについては、githubのページに詳細が書かれています。
xnp2kai-sdl1 pc9801エミュレータ(CPU i286)
xnp21kai-sdl1 pc9821エミュレータ(CPU i386以上)
Brain実機ビルドには全部で4-5時間かかりますのでご注意を。
xnp2kai-sdl1では、設定ファイルは、以下にあります。
xnp2kai_sdl1 ~/.config/xnp2kai/
xnp21kai_sdl1 ~/.config/xnp21kai/
フォルダがない場合は、一度xnp2kai-sdl1、xnp21kai-sdl1を起動すれば
作成されると思います。
このままだと、画面のフォントが文字化けするのでフォントの用意が必要です。
PC9801から吸い出したFONT.ROMを使ってもいいのですがない場合は、
Brainuxにインストールしたフォントからも生成できます。
cd ~/.config/xnp2kai/
sudo apt install fonts-ipafont
ln -s /usr/share/fonts/opentype/ipafont-gothic/ipag.ttf default.ttf
rm font.tmp
これで、xnp2kai-sdl1を起動すると、最初にNP2用のフォントが生成されます。
なお、設定ファイルは、xnp2kaircになります。
(2026/01/04追記)
試しに、BrainのCPUに最適化したビルドをやってみます。
/home/user/np2/NP2kai/build/CMakeFiles/xnp2kai_sdl1.dir/flags.make
C_FLAGS = -Wno-incompatible-function-pointer-types -Wno-int-conversion -O2 -g -DNDEBUG
↓
C_FLAGS = -Wno-incompatible-function-pointer-types -Wno-int-conversion -O3 -march=native -DNDEBUG
CXX_FLAGS = -Og -g -Wall -DNDEBUG
↓
CXX_FLAGS = -O3 -march=native -Wall -DNDEBUG
この後、一度Build状況を初期化してmakeします(xnp2kai-sdl1だけで2.5時間くらい)
cd ~/np2/np2kai/build
make clean
make xnp2kai_sdl1
./xnp2kai-sdl1
結果として、ちょびっとだけCPUクロックが上がりました(0.1-0.5Mhzくらい?)
不具合が起こる可能性もあるので、もう少し触ってみます。
———-
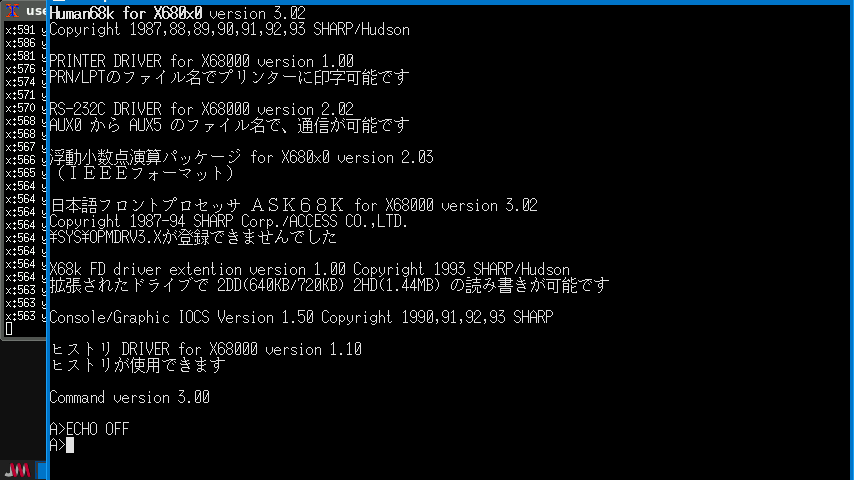
px68k X68000エミュレータ
ソース入手先:GitHub – hissorii/px68k: Portable SHARP X68000 Emulator
起動: ./px68k
X68000エミュレータです。
速度はかなり遅いです。
Human68kを起動して、コマンド操作するくらいならかろうじて可能かなといったレベルです。(マウス操作が実装されていないっぽいので注意)
Human68kの起動+ドライバ組み込み完了までで、リセットから20秒弱といったところです。
あとBrainの画面解像度だと縦の解像度がちょっと足りません。
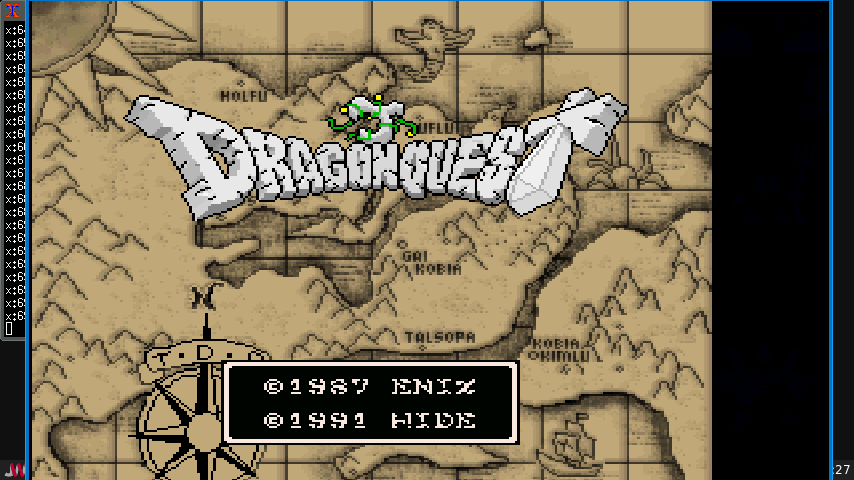
メモリ設定を2MB以上にすれば、Nemesis改デモの実行や、
TDQ1でのタイトル画面までは表示できました。
(NumlockがPX68Kでは、10キーのCLRに割り当たっているので、10キー付きのUSBキーボードか、スクリーンキーボードを使う必要があるかもしれません。)
メニューは、F12キーで開きます。
ここで、リセットや、FD,HDDの設定、FPS設定や、サウンド設定が可能です。
サウンド設定は無効化推奨です。
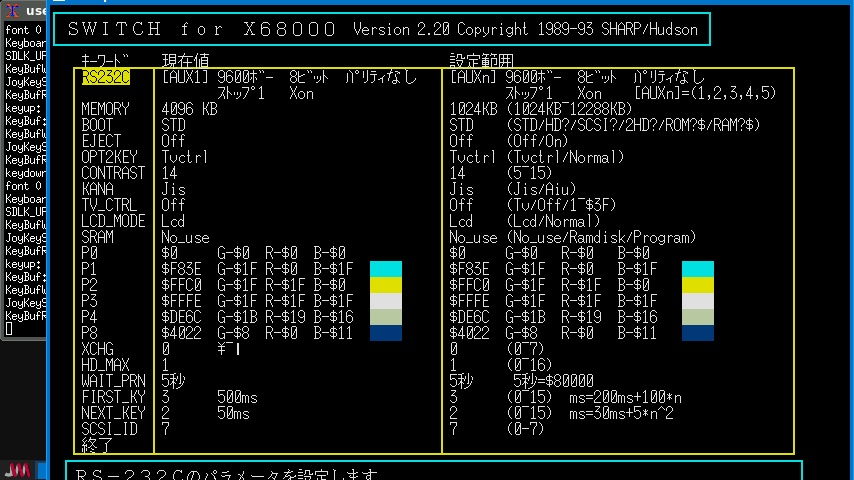
なお、標準ではメモリ1MBで稼働しますので、メモリ設定を変更するには、
Human68K3.0.2を起動して、switchコマンドで、MEMORYを1024->4096KBに変更できます。設定変更したら「終了」->Yで設定が保存されます。
上記について詳しくは、readme.txtに記載があります。
インストール:ソースを入手してインストール
(ビルド時に最適化オプションを追加しています。)
$ cd
$ mkdir px68k
$ cd px68k
$ git clone https://github.com/hissorii/px68k.git
$ cd px68k
$ sudo apt install git cmake ninja-build build-essential libx11-dev libglib2.0-dev libgtk2.0-dev libsdl2-dev libsdl2-mixer-dev libsdl2-ttf-dev libsdl1.2-dev libsdl-mixer1.2-dev libsdl-ttf2.0-dev
$ vi Makefile
CDEBUGFLAGS = -g -O0 -fno-strict-aliasing
↓
CDEBUGFLAGS = -O3 -march=native -fno-strict-aliasing
ifeq ($(shell uname -m),armv6l)
MOPT=
else
MOPT= -m32
endif
↓
ifeq ($(shell uname -m),armv6l)
MOPT=
else
MOPT=
endif
$ make #実機ビルト約40分程度
起動前にX68000のBIOS ROM、フォントファイルを~/.keropi に 保存します。
・iplrom.dat - X68000 BIOS
・cgrom.dat - Font file (cgrom.tmpでも可)
biosROMについては、シャープから公開されたものがこちらから入手可能です。
(今回はX68000 EXPERT用のものをiplrom.datにリネームして使いました)
fontfileについては、実機から入手するか、疑似的に作成する必要があります。
(フォントファイルがない場合は PC 上で WinX68k 高速版を実行すると、
cgrom.tmp が生成されますので、それを使ってくださいとのことです。)
起動
$ ./px68k
———-
Views: 591