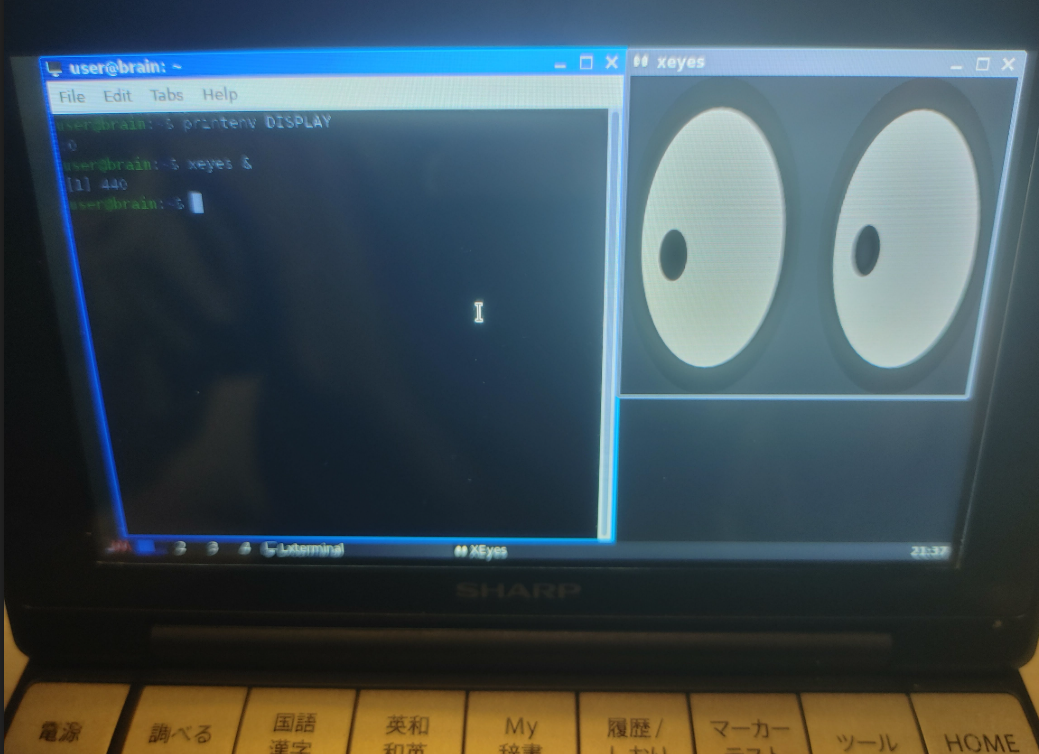
user@brain:~$ sudo apt show higan
Package: higan
Version: 106-2
Priority: optional
Section: otherosfs
Maintainer: Debian Games Team <pkg-games-devel@lists.alioth.debian.org>
Installed-Size: 5,794 kB
Provides: nes-emulator
Depends: libao4 (>= 1.1.0), libasound2 (>= 1.0.16), libatk1.0-0 (>= 1.12.4), libc6 (>= 2.17), libcairo2 (>= 1.2.4), libfontconfig1 (>= 2.12), libfreetype6 (>= 2.2.1), libgcc1 (>= 1:3.5), libgdk-pixbuf2.0-0 (>= 2.22.0), libgl1, libglib2.0-0 (>= 2.16.0), libgomp1 (>= 4.9), libgtk2.0-0 (>= 2.24.0), libopenal1 (>= 1.14), libpango-1.0-0 (>= 1.14.0), libpangocairo-1.0-0 (>= 1.14.0), libpangoft2-1.0-0 (>= 1.14.0), libpulse0 (>= 0.99.1), libsdl1.2debian (>= 1.2.11), libstdc++6 (>= 5), libudev1 (>= 183), libx11-6, libxext6, libxv1
Homepage: http://byuu.org/emulation/higan/
Tag: uitoolkit::gtk, uitoolkit::sdl
Download-Size: 1,365 kB
APT-Sources: http://archive.debian.org/debian bullseye/main armel Packages
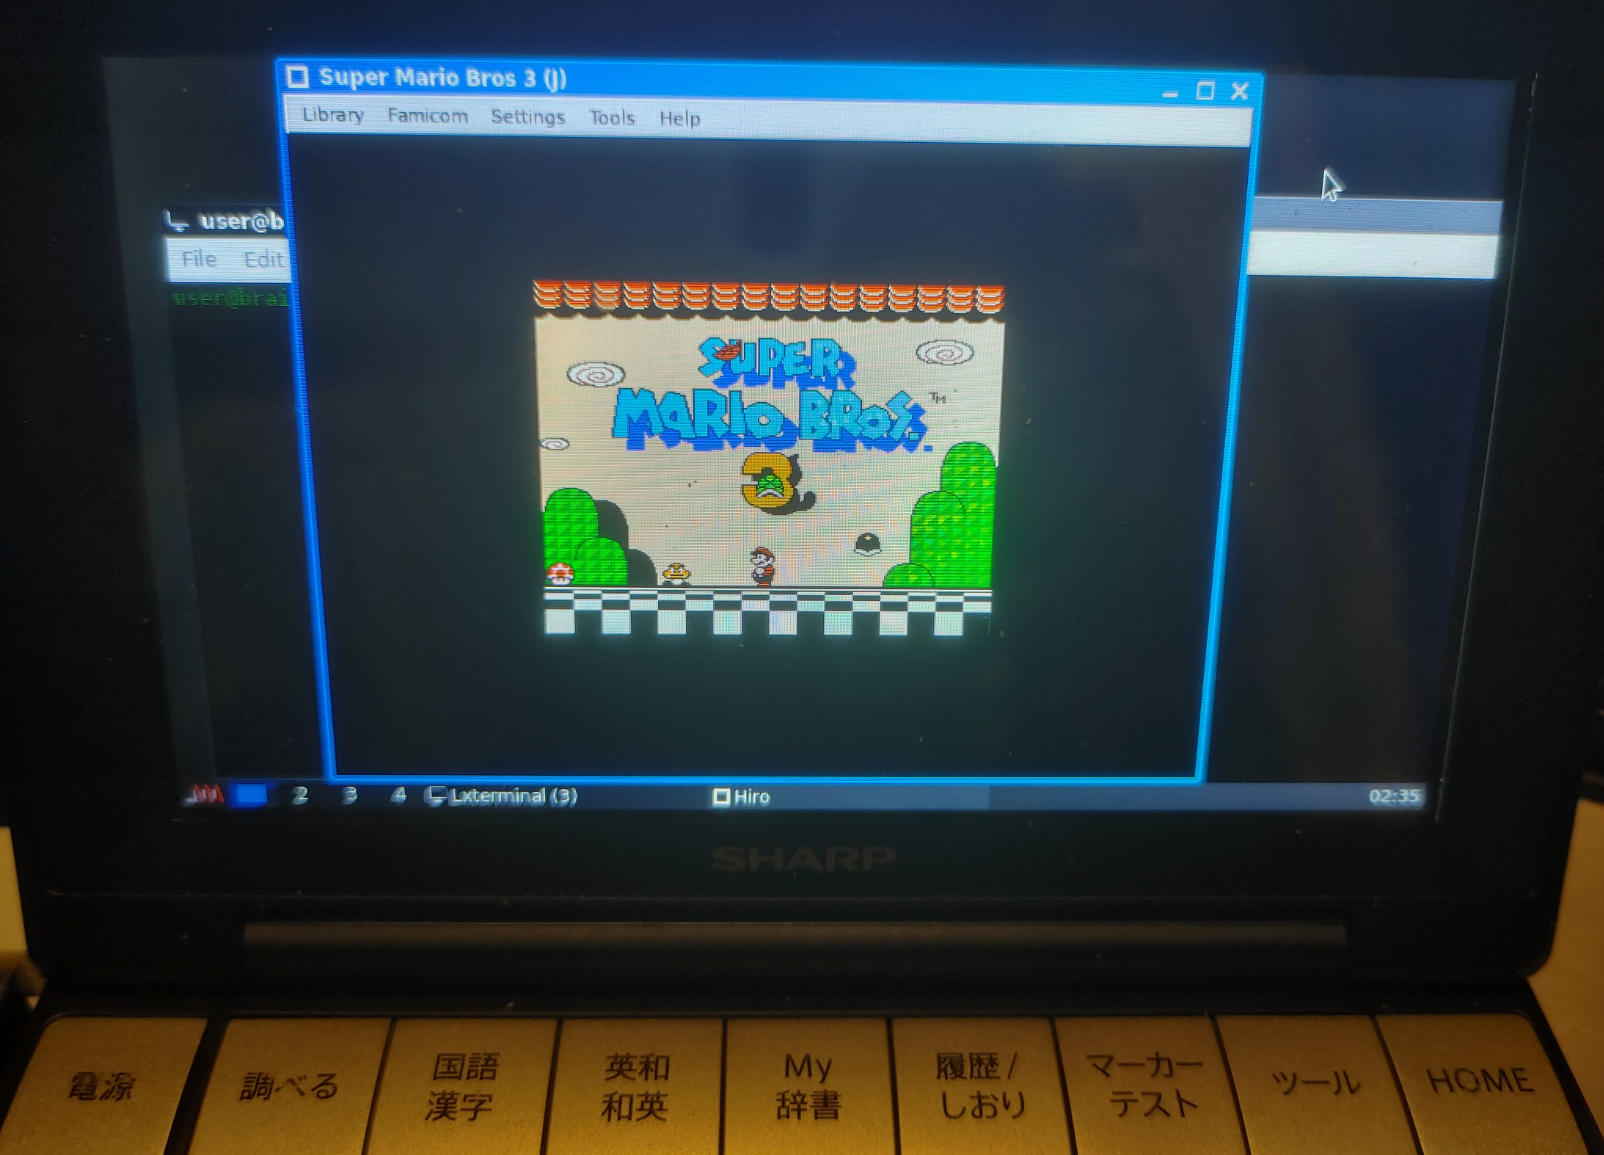
Description: Accurate multi-system emulator
higan is an emulator for systems from Nintendo (SNES, NES, Gameboy,
Gameboy Color, Gameboy Advance), Sega (Master System, Game Gear),
NEC (PC Engine, SuperGrafx) and Bandai (WonderSwan, WonderSwan Color).
It was formerly called bsnes and the SNES emulation is especially
complete and polished.
.
higan strives to provide the most faithful hardware emulation possible.
It focuses on accuracy and clean code, rather than speed and special
features. It is meant as a reference emulator to document how the underlying
hardware works. As a result the minimum system requirements are high.
user@brain:~$ sudo apt install higan
Reading package lists... Done
Building dependency tree... Done
Reading state information... Done
The following additional packages will be installed:
libao-common libao4 libopenal-data libopenal1 libsdl1.2debian libsndio7.0
Suggested packages:
libaudio2 libsndio6.1 libportaudio2 sndiod
The following NEW packages will be installed:
higan libao-common libao4 libopenal-data libopenal1 libsdl1.2debian libsndio7.0
0 upgraded, 7 newly installed, 0 to remove and 1 not upgraded.
Need to get 2,252 kB of archives.
After this operation, 7,628 kB of additional disk space will be used.
Do you want to continue? [Y/n] Y
Get:1 http://archive.debian.org/debian bullseye/main armel libao-common all 1.2.2+20180113-1.1 [11.7 kB]
~
Processing triggers for libc-bin (2.31-13+deb11u11) ...
user@brain:~$ sudo apt show gngb
[sudo] password for user:
Package: gngb
Version: 20060309-5
Priority: optional
Section: x11
Maintainer: Debian Games Team <pkg-games-devel@lists.alioth.debian.org>
Installed-Size: 223 kB
Depends: libc6 (>= 2.28), libgl1, libsdl1.2debian (>= 1.2.11), zlib1g (>= 1:1.1.4)
Homepage: http://m.peponas.free.fr/gngb/
Tag: hardware::emulation, hardware::input:joystick, hardware::input:keyboard,
interface::commandline, interface::graphical, interface::x11,
role::program, scope::utility, uitoolkit::sdl, use::gameplaying,
x11::application
Download-Size: 74.1 kB
APT-Sources: http://archive.debian.org/debian bullseye/main armel Packages
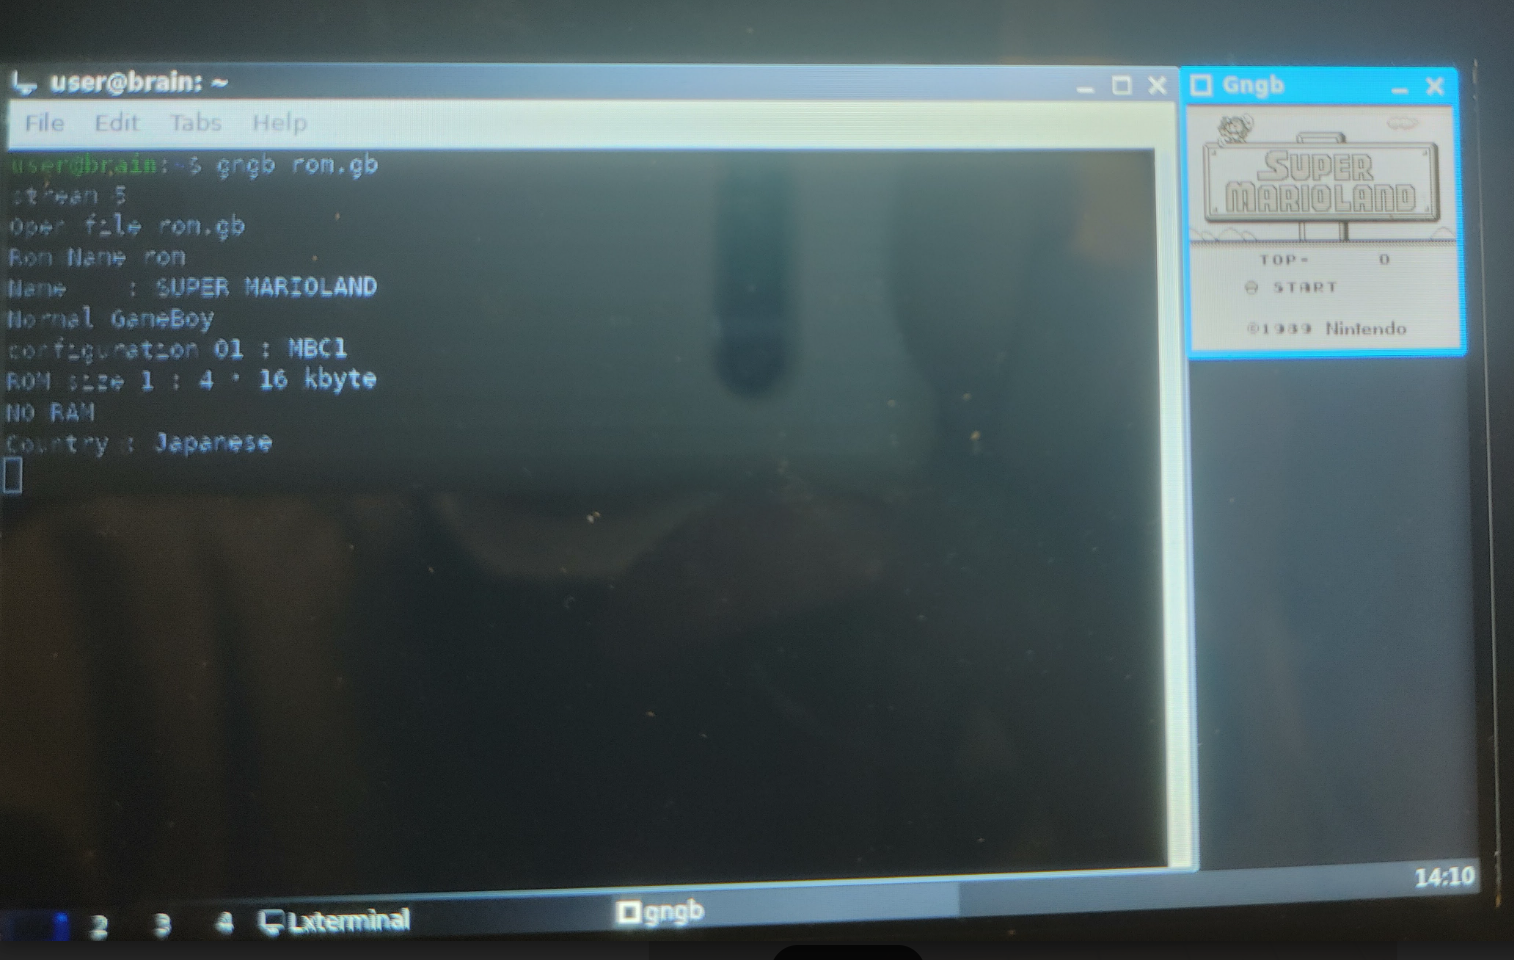
Description: Color Gameboy emulator
Gngb is an emulator for GameBoy Classic, Color and others.
.
It uses the SDL library and OpenGL. This software supports joystick
and keyboard as input.
user@brain:~$ sudo apt install gngb
Reading package lists... Done
Building dependency tree... Done
Reading state information... Done
The following NEW packages will be installed:
gngb
0 upgraded, 1 newly installed, 0 to remove and 1 not upgraded.
Need to get 74.1 kB of archives.
After this operation, 223 kB of additional disk space will be used.
Get:1 http://archive.debian.org/debian bullseye/main armel gngb armel 20060309-5 [74.1 kB]
Fetched 74.1 kB in 1s (53.2 kB/s)
Selecting previously unselected package gngb.
(Reading database ... 53441 files and directories currently installed.)
Preparing to unpack .../gngb_20060309-5_armel.deb ...
Unpacking gngb (20060309-5) ...
Setting up gngb (20060309-5) ...
Processing triggers for man-db (2.9.4-2) ...
user@brain:~$
user@brain:~$ gngb
Usage: gngb [OPTION]... FILE
Emulate the GameBoy rom pointed by FILE
-h, --help print this help and exit
-a, --autoframeskip turn on autoframeskip
--sleep_idle sleep when idle
--color_filter turn on the color filter
-r, --rumble turn on the rumble simulation
--filter=X Set the filter to apply (only for standard mode)
0 = none
1 = scanline
2 = scanline 50%
3 = smooth
4 = pseudo cell shading
-R, --res=WxH set the resolution to WxH (for YUV and GL mode)
-Y, --yuv turn YUV mode on
--yuv_type set the type of the YUV overlay
0 = YV12
1 = YUY2
-o, --opengl turn OpenGL mode on (if conpiled in)
-f, --fullscreen run gngb in fullscreen
--fps show frame/sec
-s, --sound turn on sound
--sample_rate=RATE set the sample rate to RATE
-C, --color_gb force to color gameboy mode
-G, --normal_gb force to normal gameboy mode
-S, --super_gb force to super gameboy mode (experimental)
--auto_gb turn on automatique detection
-j, --joy_dev=N use the Nth joystick
-g, --gdma_cycle cpu stop during gdma transfer (experimental)
-v, --version printf gngb number version
Most options can be disabled with --no-OPTION (Ex: --no-sound turn sound off)
user@brain:~$ sudo apt show fceux
[sudo] password for user:
Package: fceux
Version: 2.3.0+dfsg1-3
Priority: optional
Section: games
Maintainer: Joseph Nahmias <jello@debian.org>
Installed-Size: 3,077 kB
Provides: nes-emulator
Depends: libc6 (>= 2.29), libgcc-s1 (>= 3.5), liblua5.1-0, libminizip1 (>= 1.1), libopengl0, libqt5core5a (>= 5.5.0), libqt5gui5 (>= 5.11.0~rc1) | libqt5gui5-gles (>= 5.11.0~rc1), libqt5widgets5 (>= 5.15.1), libsdl2-2.0-0 (>= 2.0.12), libstdc++6 (>= 5.2), zlib1g (>= 1:1.1.4)
Suggests: efp
Homepage: http://fceux.com/
Tag: uitoolkit::gtk, uitoolkit::sdl
Download-Size: 1,014 kB
APT-Sources: http://archive.debian.org/debian bullseye/main armel Packages
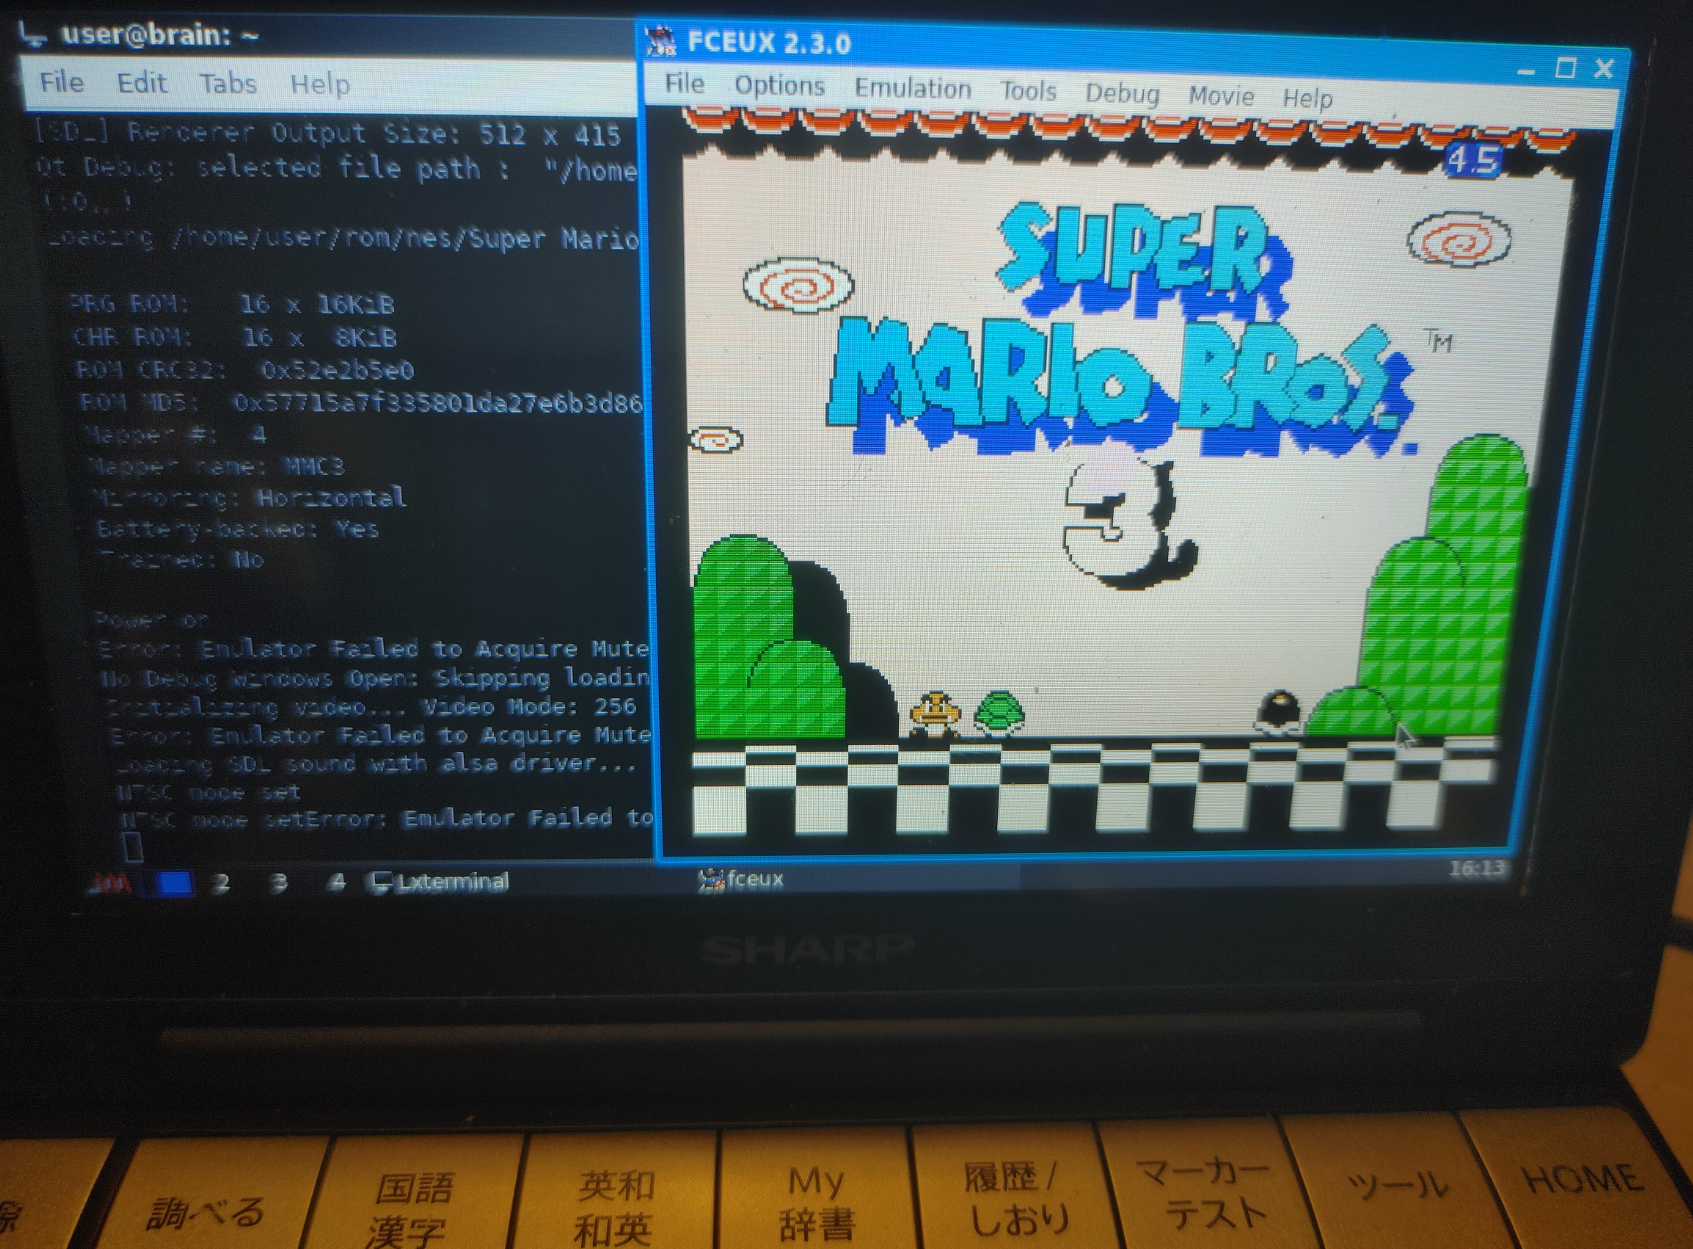
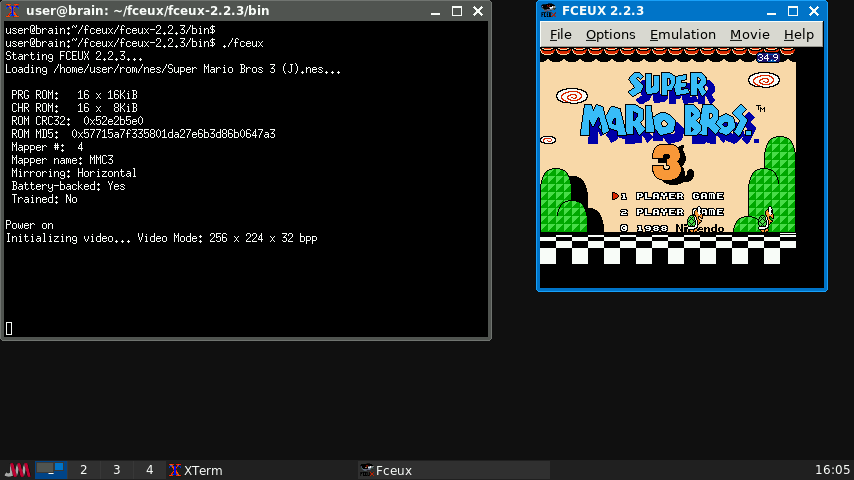
Description: all-in-one NES/Famicom Emulator
FCE Ultra X [FCEUX] is an emulator of the original (8-bit) Nintendo
Entertainment System (NES) released under the GNU General Public License
(GPL). It includes the following features (and many more):
.
* fully customizable color palette rendering engine
* complete sound emulation (all five channels)
* support for up to four joystick controllers
* zapper emulation for the mouse
* GameGenie emulation
* accepts compressed (PKZIP, gzip) ROM images
* TCP/IP network play
* Lua scripting
user@brain:~$ sudo apt install fceux
Reading package lists... Done
Building dependency tree... Done
Reading state information... Done
The following additional packages will be installed:
liblua5.1-0 libminizip1 libopengl0
Suggested packages:
efp
The following NEW packages will be installed:
fceux liblua5.1-0 libminizip1 libopengl0
0 upgraded, 4 newly installed, 0 to remove and 1 not upgraded.
Need to get 1,155 kB of archives.
After this operation, 3,647 kB of additional disk space will be used.
Do you want to continue? [Y/n] Y
Get:1 http://archive.debian.org/debian bullseye/main armel liblua5.1-0 armel 5.1.5-8.1+b3 [83.5 kB]
~
Processing triggers for libc-bin (2.31-13+deb11u11) ...
user@brain:~$
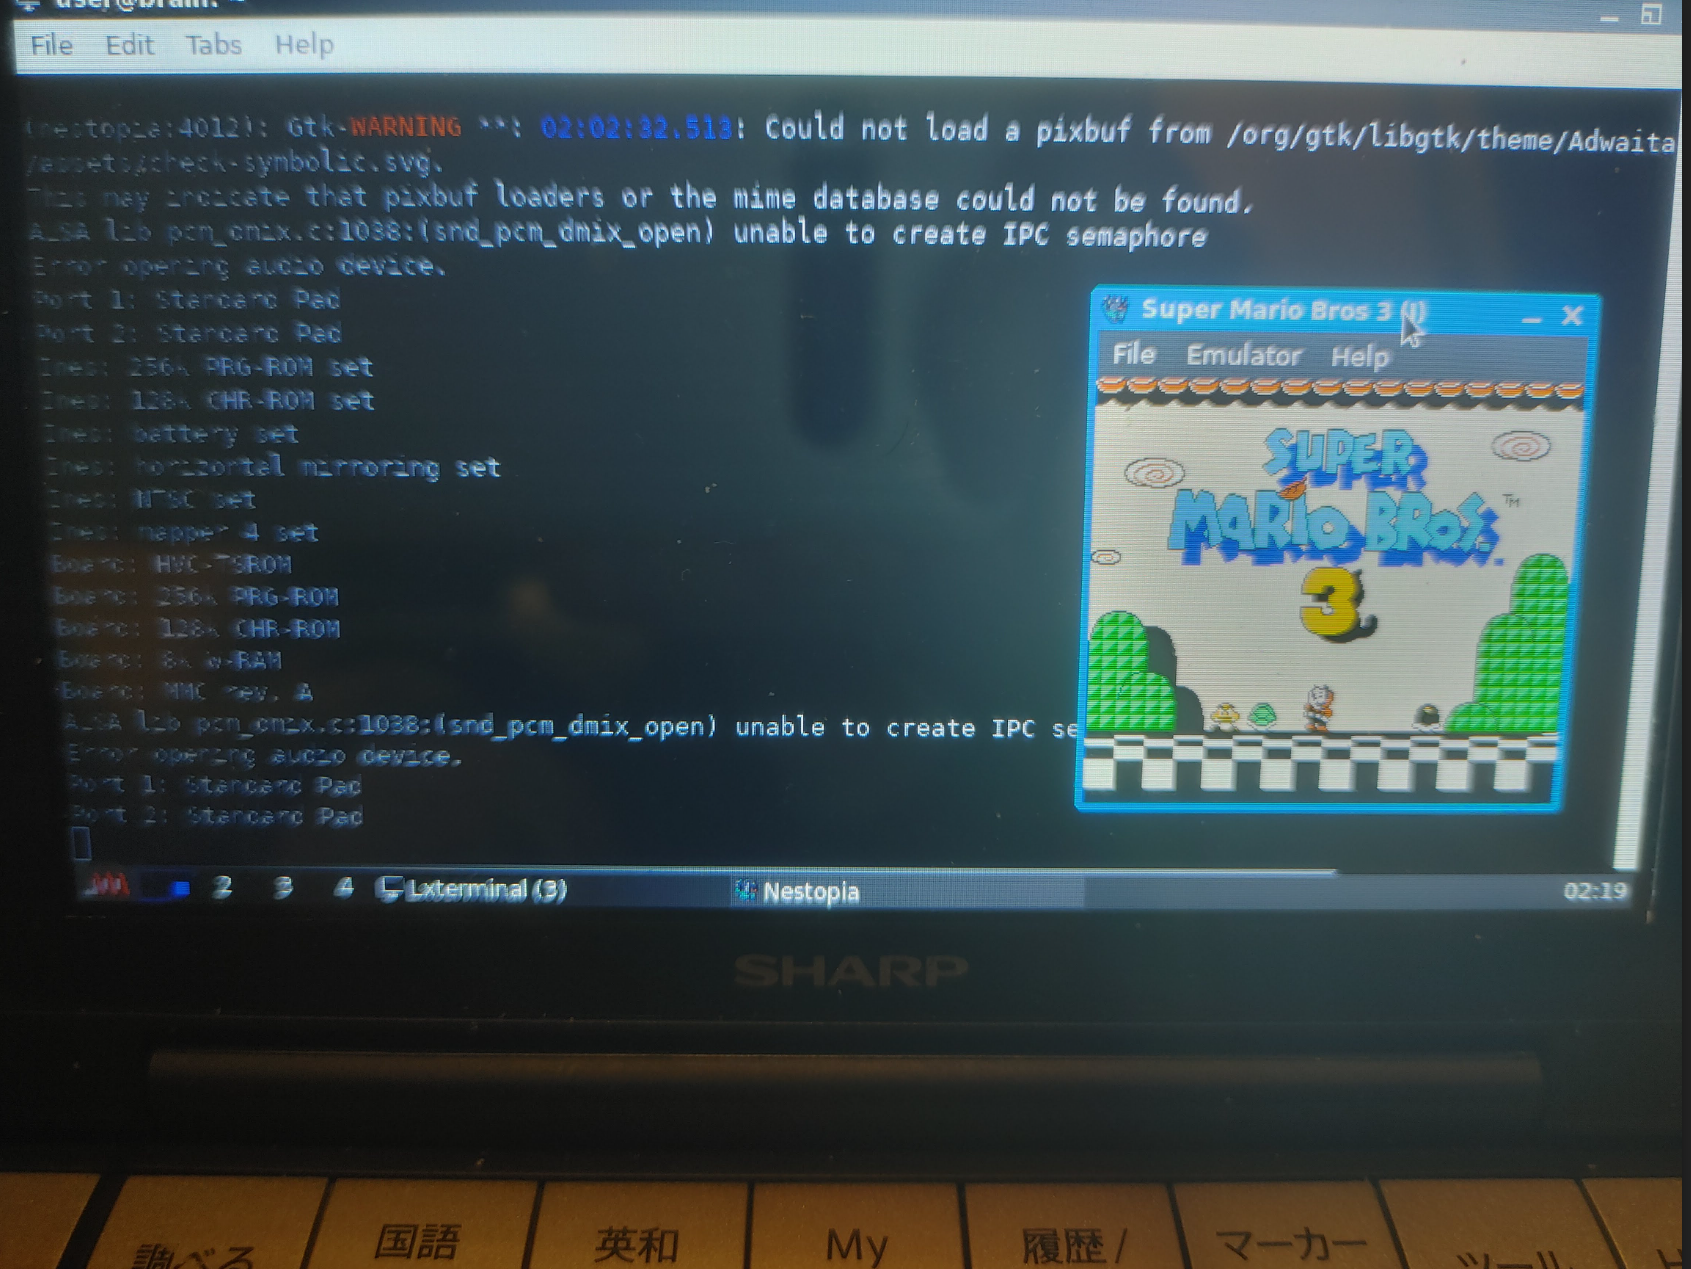
user@brain:~$ fceux --help
Usage is as follows:
fceux <options> filename
Option Value Description
--pal {0|1} Use PAL timing.
--newppu {0|1} Enable the new PPU core. (WARNING: May break savestates)
--input(1,2) d Set which input device to emulate for input 1 or 2.
Devices: gamepad zapper powerpad.0 powerpad.1
arkanoid
--input(3,4) d Set the famicom expansion device to emulate for
input(3, 4)
Devices: quizking hypershot mahjong toprider ftrainer
familykeyboard oekakids arkanoid shadow bworld
4player
--gamegenie {0|1} Enable emulated Game Genie.
--frameskip x Set # of frames to skip per emulated frame.
--xres x Set horizontal resolution for full screen mode.
--yres x Set vertical resolution for full screen mode.
--autoscale {0|1} Enable autoscaling in fullscreen.
--keepratio {0|1} Keep native NES aspect ratio when autoscaling.
--(x/y)scale x Multiply width/height by x.
(Real numbers >0 with OpenGL, otherwise integers >0).
--(x/y)stretch {0|1} Stretch to fill surface on x/y axis (OpenGL only).
--fullscreen {0|1} Enable full screen mode.
--noframe {0|1} Hide title bar and window decorations.
--special {1-4} Use special video scaling filters
(1 = hq2x; 2 = Scale2x; 3 = NTSC 2x; 4 = hq3x;
5 = Scale3x; 6 = Prescale2x; 7 = Prescale3x; 8=Precale4x; 9=PAL)
--palette f Load custom global palette from file f.
--sound {0|1} Enable sound.
--soundrate x Set sound playback rate to x Hz.
--soundq {0|1|2} Set sound quality. (0 = Low 1 = High 2 = Very High)
--soundbufsize x Set sound buffer size to x ms.
--volume {0-256} Set volume to x.
--soundrecord f Record sound to file f.
--playmov f Play back a recorded FCM/FM2/FM3 movie from filename f.
--pauseframe x Pause movie playback at frame x.
--fcmconvert f Convert fcm movie file f to fm2.
--ripsubs f Convert movie's subtitles to srt
--subtitles {0|1} Enable subtitle display
--fourscore {0|1} Enable fourscore emulation
--no-config {0|1} Use default config file and do not save
--net s Connect to server 's' for TCP/IP network play.
--port x Use TCP/IP port x for network play.
--user x Set the nickname to use in network play.
--pass x Set password to use for connecting to the server.
--netkey s Use string 's' to create a unique session for the
game loaded.
--players x Set the number of local players in a network play
session.
--rp2mic {0|1} Replace Port 2 Start with microphone (Famicom).
--4buttonexit {0|1} exit the emulator when A+B+Select+Start is pressed
--loadstate {0-9|>9} load from the given state when the game is loaded
--savestate {0-9|>9} save to the given state when the game is closed
to not save/load automatically provide a number
greater than 9
--periodicsaves {0|1} enable automatic periodic saving. This will save to
the state passed to --savestate
--loadlua f Loads lua script from filename f.
--style=KEY Use Qt GUI Style based on supplied key. Available system style keys are:
Windows Fusion
Custom Qt stylesheets (.qss files) may be used by setting an
environment variable named FCEUX_QT_STYLESHEET equal to the
full (absolute) path to the qss file.
Compiled with SDL version 2.0.14
Linked with SDL version 2.0.14
Compiled with QT version 5.15.2
git URL: https://github.com/TASVideos/fceux.git
git Rev: 65c5b0d2a1c08db75bb41340bfa5534578926944
user@brain:~$
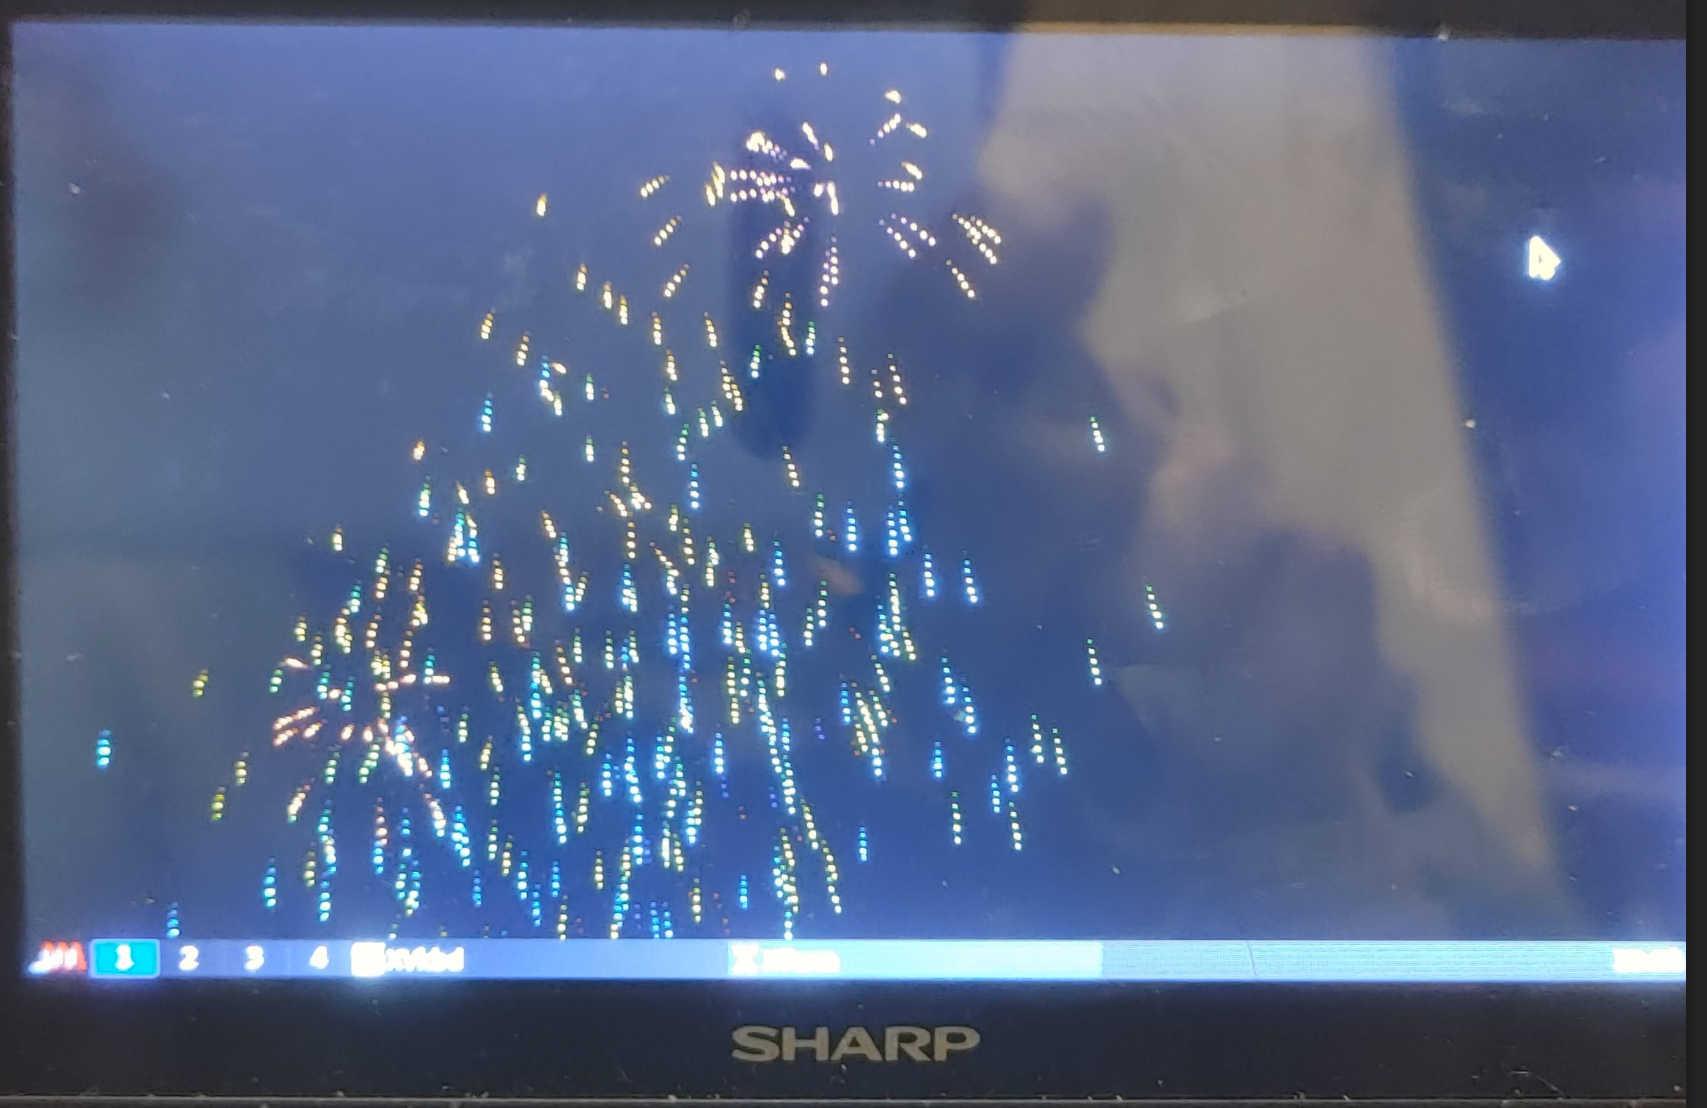
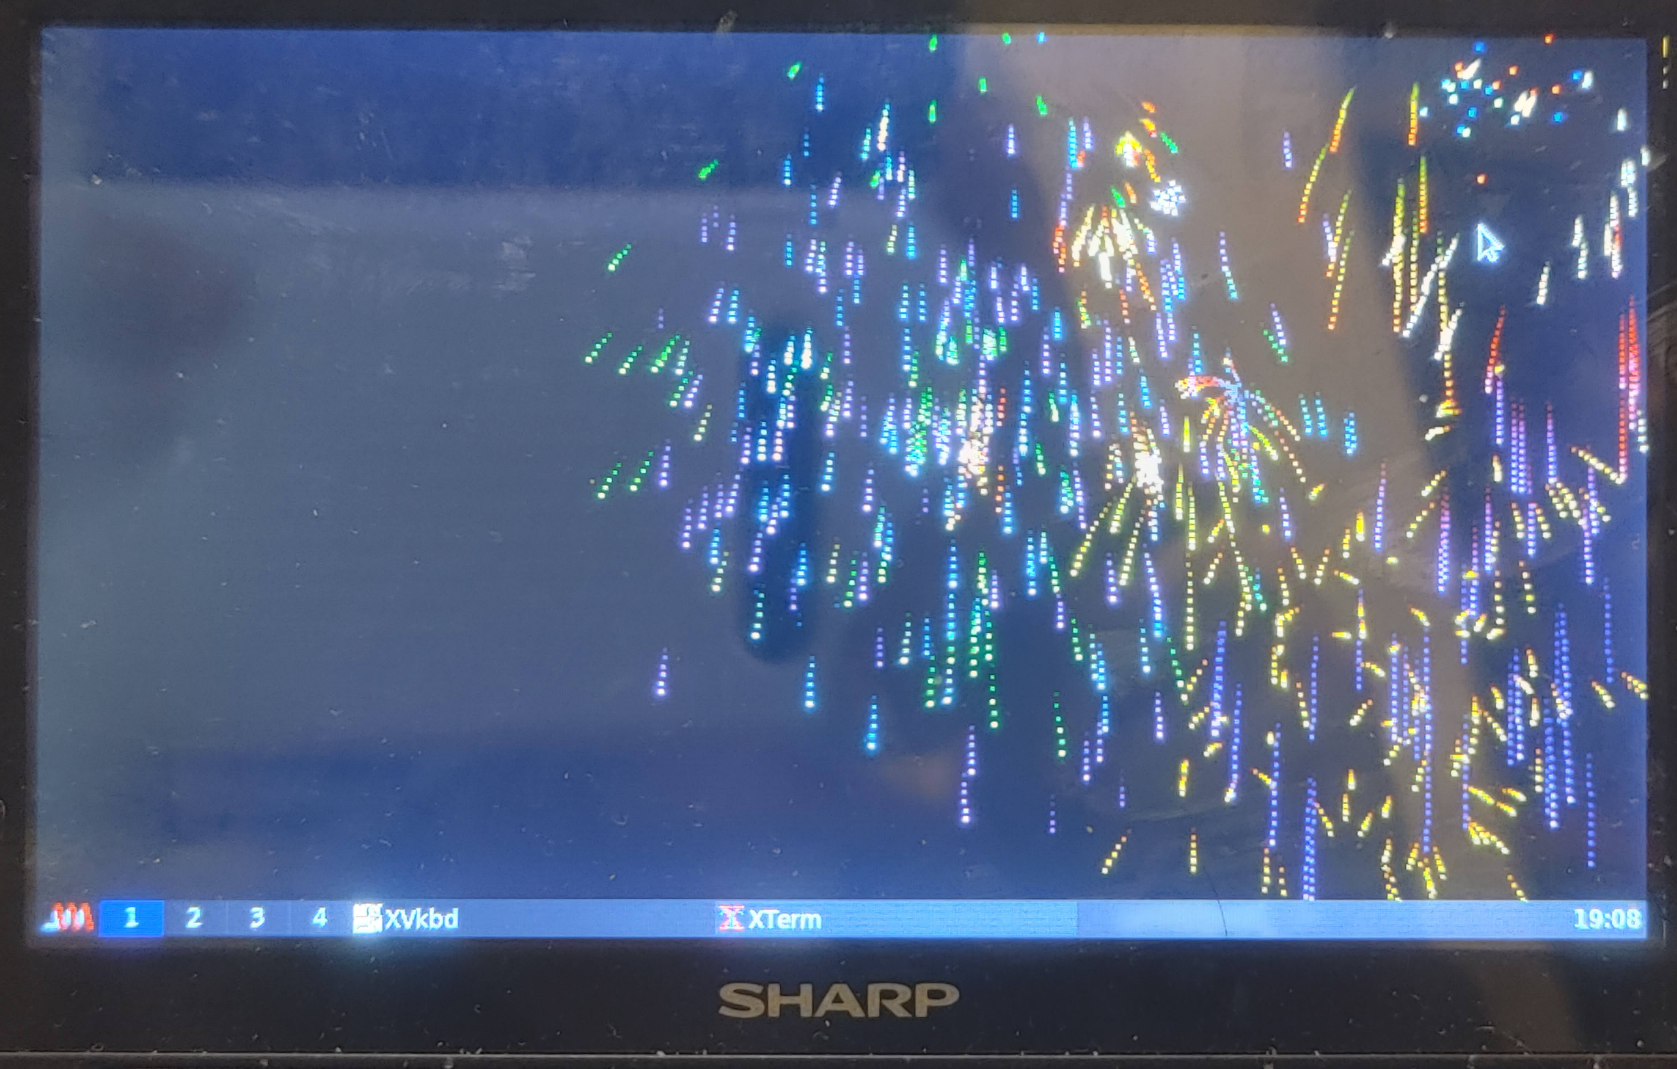
結果的に音無しでですが、調子のよいときは最大38 fpsぐらい出るときもあります。 これくらいfpsが出れば、十分遊べる範囲です。 (なんらかの条件で遅かったり早かったりします。条件不明。) (plusaudio起動している確率があがるような気が・・・) (10fps or 20fps or 40fps)
$ cd $ mkdir fcmux $ cd fcmux $ wget https://github.com/TASEmulators/fceux/archive/refs/tags/fceux-2.2.3.tar.gz $ tar zxf fceux-2.2.3.src.tar.gz $ cd fceux-2.2.3
インストールの仕方の詳細は、README-SDLを確認してください。
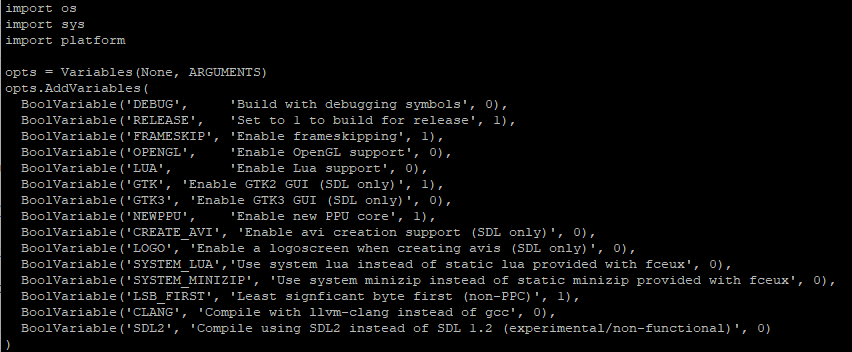
まずは、ビルドパラメータを修正します。 いったん、以下のように修正してみました。 $ vi SConstruct
user@brain:~$ sudo apt show nestopia
[sudo] password for user:
Package: nestopia
Version: 1.50-2
Priority: optional
Section: games
Maintainer: Debian Games Team <pkg-games-devel@lists.alioth.debian.org>
Installed-Size: 3,532 kB
Provides: nes-emulator
Depends: libao4 (>= 1.1.0), libarchive13 (>= 3.0.4), libc6 (>= 2.29), libepoxy0 (>= 1.0), libgcc-s1 (>= 3.5), libgdk-pixbuf-2.0-0 (>= 2.22.0), libglib2.0-0 (>= 2.31.8), libgtk-3-0 (>= 3.21.4), libjack-jackd2-0 (>= 1.9.10+20150825) | libjack-0.125, libsdl2-2.0-0 (>= 2.0.12), libstdc++6 (>= 5.2), zlib1g (>= 1:1.1.4)
Homepage: http://0ldsk00l.ca/nestopia/
Tag: uitoolkit::gtk, uitoolkit::sdl
Download-Size: 824 kB
APT-Sources: http://archive.debian.org/debian bullseye/main armel Packages
Description: Nintendo Entertainment System/Famicom emulator
 Nestopia is a cycle-accurate NES/Famicom emulator. It has a high
 compatibility rate and support for many peripherals and input
 devices.
 .
 Features:
    * Save states
    * Movie recording
    * Game rewinding
    * GUI or command line interface
    * Emulation of NTSC, PAL, and Dendy systems
    * Support for NES Zapper games
    * Support for Famicom Disk System games
 .
 Nestopia requires OpenGL 3.2 or later.


user@brain:~$ sudo apt install nestopia
Reading package lists... Done
Building dependency tree... Done
Reading state information... Done
The following additional packages will be installed:
  libarchive13
Suggested packages:
  lrzip
The following NEW packages will be installed:
  libarchive13 nestopia
0 upgraded, 2 newly installed, 0 to remove and 1 not upgraded.
Need to get 1,124 kB of archives.
After this operation, 4,314 kB of additional disk space will be used.
Do you want to continue? [Y/n] Y
Get:1 http://archive.debian.org/debian bullseye/main armel libarchive13 armel 3.4.3-2+deb11u1 [300 kB]
Get:2 http://archive.debian.org/debian bullseye/main armel nestopia armel 1.50-2 [824 kB]
Fetched 1,124 kB in 3s (350 kB/s)
Selecting previously unselected package libarchive13:armel.
(Reading database ... 53453 files and directories currently installed.)
Preparing to unpack .../libarchive13_3.4.3-2+deb11u1_armel.deb ...
Unpacking libarchive13:armel (3.4.3-2+deb11u1) ...
Selecting previously unselected package nestopia.
Preparing to unpack .../nestopia_1.50-2_armel.deb ...
Unpacking nestopia (1.50-2) ...
Setting up libarchive13:armel (3.4.3-2+deb11u1) ...
Setting up nestopia (1.50-2) ...
Processing triggers for man-db (2.9.4-2) ...
Processing triggers for hicolor-icon-theme (0.17-2) ...
Processing triggers for libc-bin (2.31-13+deb11u11) ...
user@brain:~$


user@brain:~$ nestopia --help
Usage: nestopia [options] [FILE]

Options:
  -f, --fullscreen        Fullscreen mode
  -w, --window            Window mode

  -l, --filter            Video Filter
                          (0=None, 1=NTSC, 2=xBR, 3=HqX, 4=2xSaI, 5=ScaleX)

  -m, --maskoverscan      Mask overscan areas
  -n, --no-maskoverscan   Disable overscan masking

  -o, --stretchfs         Stretch to native resolution in fullscreen mode
  -p, --preserveaspect    Preserve aspect ratio in fullscreen mode

  -s, --scalefactor       Video scale factor (1-4)

  -t, --tvaspect          TV aspect ratio
  -r, --no-tvaspect       Regular aspect ratio

  -u, --unlimitedsprites  Remove sprite limit
  -q, --spritelimit       Enable sprite limit

  -v, --version           Show version information

More options can be set in the configuration file.
Options are saved, and do not need to be set on future invocations.

user@brain:~$
user@brain:~$ sudo apt show openmsx
Package: openmsx
Version: 16.0-1
Priority: optional
Section: otherosfs
Maintainer: Bas Wijnen <wijnen@debian.org>
Installed-Size: 6,851 kB
Provides: msx-emulator
Depends: openmsx-data (= 16.0-1), cbios (>= 0.23), libasound2 (>= 1.0.16), libc6 (>= 2.30), libgcc-s1 (>= 3.5), libgl1, libglew2.1 (>= 1.12.0), libogg0 (>= 1.0rc3), libpng16-16 (>= 1.6.2-1), libsdl2-2.0-0 (>= 2.0.12+dfsg1), libsdl2-ttf-2.0-0 (>= 2.0.14), libstdc++6 (>= 6), libtcl8.6 (>= 8.6.0), libtheora0 (>= 1.0), libvorbis0a (>= 1.1.2), zlib1g (>= 1:1.1.4)
Suggests: openmsx-catapult, openmsx-debugger, dmktools
Replaces: openmsx-data (<< 16.0-1)
Homepage: https://openmsx.org
Tag: hardware::emulation, implemented-in::c++, implemented-in::tcl,
interface::3d, interface::graphical, interface::x11, role::program,
uitoolkit::sdl, uitoolkit::tk, use::gameplaying, works-with::audio,
works-with::video, x11::application
Download-Size: 1,720 kB
APT-Sources: http://archive.debian.org/debian bullseye/main armel Packages
Description: MSX emulator that aims for perfection
openMSX is an open source MSX emulator that uses a unique emulation model,
which tries to achieve the highest level of accuracy possible. It allows
emulating a large number of different MSX machines. Combined with the
C-BIOS ROM-files that are available in a separate package, you can run game
ROM-files without the need for non-free BIOS ROM files.
user@brain:~$
user@brain:~$ sudo apt show openmsx-debubber
N: Unable to locate package openmsx-debubberN: Unable to locate package openmsx-debubber
E: No packages found
user@brain:~$
user@brain:~$
user@brain:~$ sudo apt show openmsx-catapult
Package: openmsx-catapult
Version: 16.0-1
Priority: optional
Section: otherosfs
Maintainer: Bas Wijnen <wijnen@debian.org>
Installed-Size: 1,069 kB
Depends: libc6 (>= 2.4), libgcc-s1 (>= 3.5), libstdc++6 (>= 5.2), libwxbase3.0-0v5 (>= 3.0.5.1+dfsg), libwxgtk3.0-gtk3-0v5 (>= 3.0.5.1+dfsg), libxml2 (>= 2.7.4), openmsx (>= 16.0), openmsx (<< 16.1~)
Homepage: http://openmsx.org
Tag: hardware::emulation, implemented-in::c++, interface::graphical,
interface::x11, role::program, uitoolkit::wxwidgets, x11::application
Download-Size: 376 kB
APT-Sources: http://archive.debian.org/debian bullseye/main armel Packages
Description: GUI for openMSX
OpenMSX catapult is a graphical frontend for starting the openMSX emulator.
user@brain:~$ sudo apt show openmsx-data
Package: openmsx-data
Version: 16.0-1
Priority: optional
Section: otherosfs
Source: openmsx
Maintainer: Bas Wijnen <wijnen@debian.org>
Installed-Size: 5,322 kB
Depends: ttf-bitstream-vera
Recommends: openmsx
Homepage: https://openmsx.org
Tag: hardware::emulation, role::app-data, works-with-format::xml
Download-Size: 1,400 kB
APT-Sources: http://archive.debian.org/debian bullseye/main armel Packages
Description: datafiles for openMSX, an MSX emulator
openMSX is an open source MSX emulator that uses a unique emulation model,
which tries to achieve the highest level of accuracy possible.
.
This package provides data that openmsx needs to run.
user@brain:~$ sudo apt show cbios
Package: cbios
Version: 0.28-1.1
Priority: optional
Section: misc
Maintainer: Bas Wijnen <wijnen@debian.org>
Installed-Size: 483 kB
Recommends: openmsx | msx-emulator
Homepage: http://cbios.sf.net
Tag: hardware::emulation, role::app-data
Download-Size: 30.1 kB
APT-Sources: http://archive.debian.org/debian bullseye/main armel Packages
Description: open source MSX BIOS roms
C-BIOS is an open source BIOS for MSX computers.
.
C-BIOS can be shipped with MSX emulators so they are usable
out-of-the-box. It comes readily configured for the openMSX
emulator.
user@brain:~$ sudo apt-get install openmsx openmsx-catapult openmsx-data cbios
Reading package lists... Done
Building dependency tree... Done
Reading state information... Done
The following additional packages will be installed:
libglew2.1 libnotify4 libsdl2-ttf-2.0-0 libtcl8.6 libwxbase3.0-0v5
libwxgtk3.0-gtk3-0v5 ttf-bitstream-vera
Suggested packages:
glew-utils tcl8.6 openmsx-debugger dmktools
Recommended packages:
notification-daemon
The following NEW packages will be installed:
cbios libglew2.1 libnotify4 libsdl2-ttf-2.0-0 libtcl8.6 libwxbase3.0-0v5
libwxgtk3.0-gtk3-0v5 openmsx openmsx-catapult openmsx-data
ttf-bitstream-vera
0 upgraded, 11 newly installed, 0 to remove and 1 not upgraded.
Need to get 9,423 kB of archives.
After this operation, 35.7 MB of additional disk space will be used.
Do you want to continue? [Y/n] Y
Get:1 http://archive.debian.org/debian bullseye/main armel cbios all 0.28-1.1 [30.1 kB]
~
Get:2 http://archive.debian.org/debian bullseye/main armel libglew2.1 armel 2.1.0-4+b1 [159 kB]
Get:3 http://archive.debian.org/debian bullseye/main armel libnotify4 armel 0.7.9-3 [21.7 kB]
Get:4 http://archive.debian.org/debian bullseye/main armel libsdl2-ttf-2.0-0 armel 2.0.15+dfsg1-1 [15.4 kB]
Get:5 http://archive.debian.org/debian bullseye/main armel libtcl8.6 armel 8.6.11+dfsg-1 [894 kB]
~
Processing triggers for fontconfig (2.13.1-4.2) ...
user@brain:~$
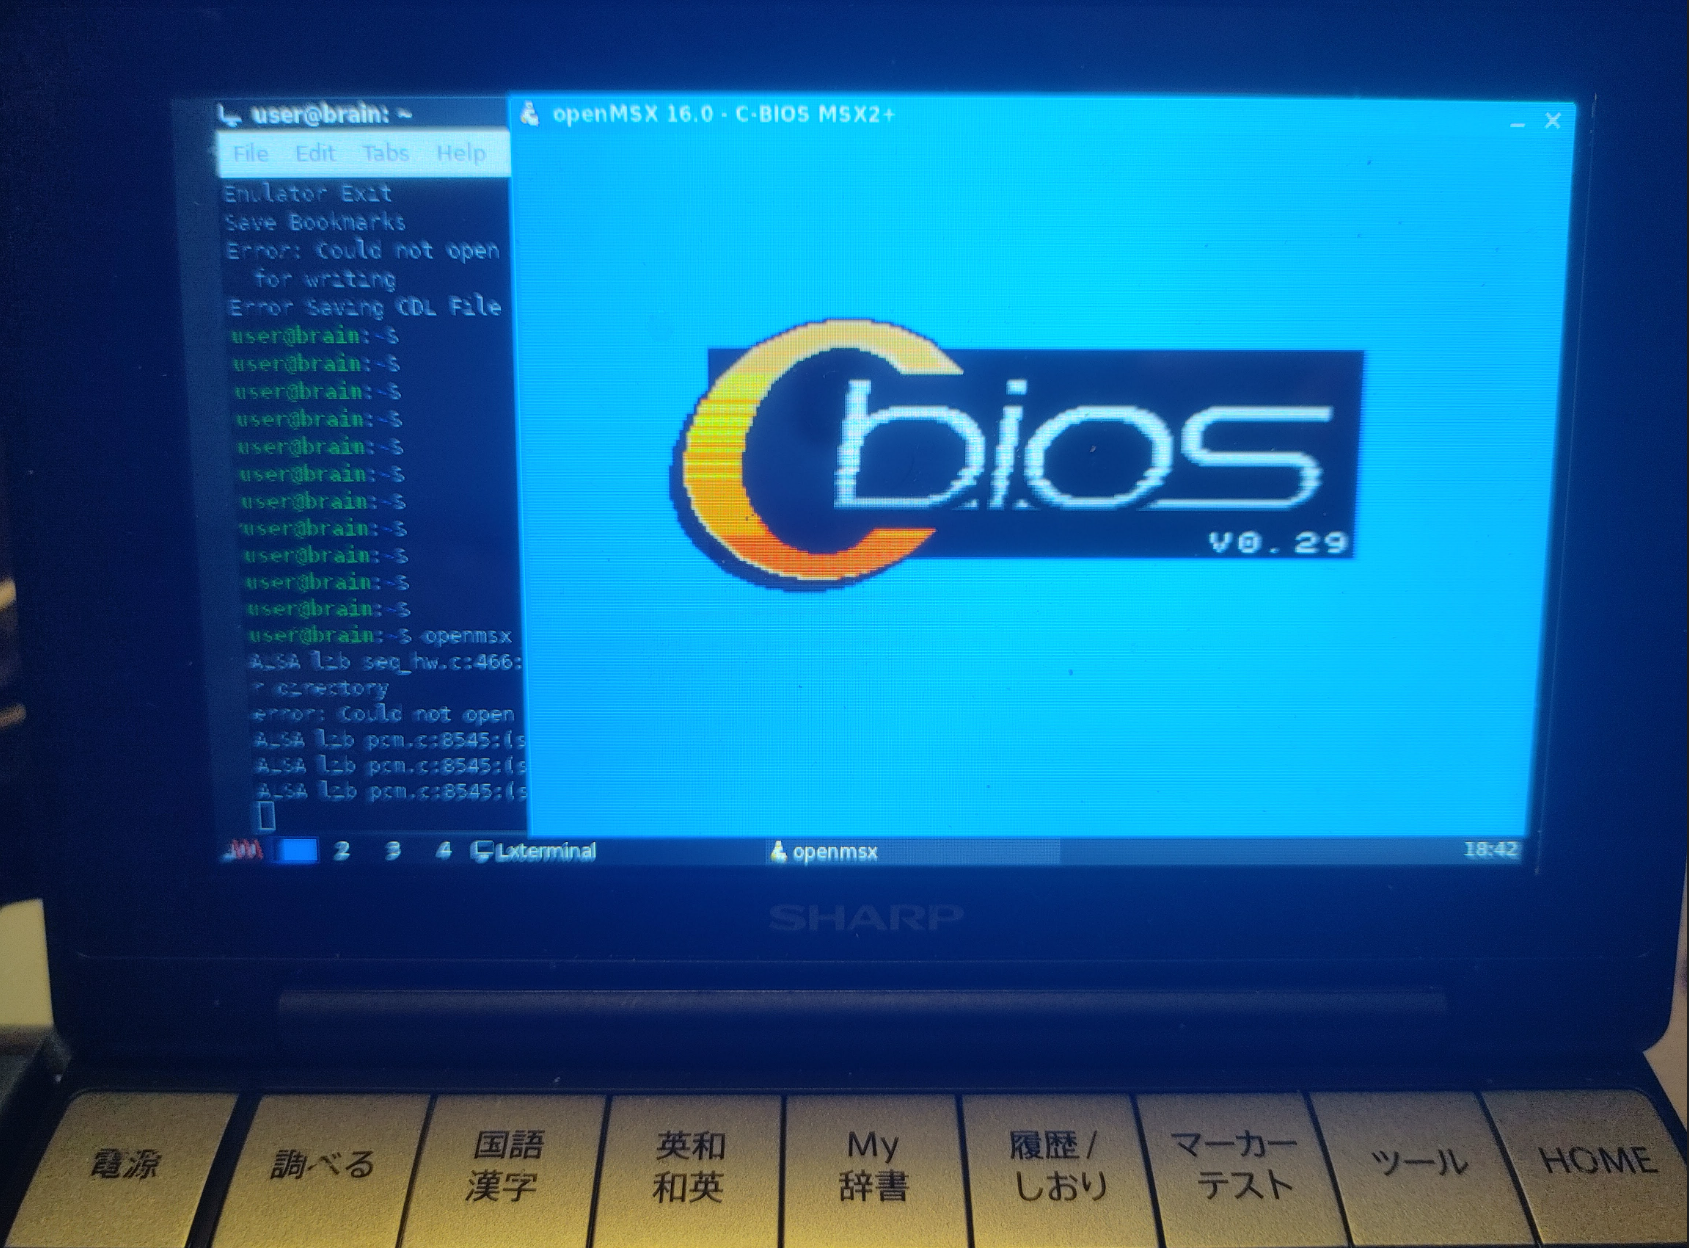
user@brain:~$ openmsx --help
openMSX 16.0
============
usage: openmsx [arguments]
an argument is either an option or a filename
this is the list of supported options:
--help, -h Shows this text
--version, -v Prints openMSX version and exits
-cart, -carta,
-cartb, -cartc,
-cartd Insert the ROM file (cartridge) specified in
argument
-cassetteplayer Put cassette image specified in argument in
virtual cassetteplayer
-cda Use iso image in argument for the CDROM extension
-command Run Tcl command at startup (see also -script)
-control Enable external control of openMSX process
-diska, -diskb Insert the disk image specified in argument
-ext, -exta,
-extb, -extc,
-extd Insert the extension specified in argument
-hda Use hard disk image in argument for the IDE or
SCSI extensions
-ips Apply the given IPS patch to the ROM or disk
image specified in the preceding option
-laserdisc Put LaserDisc image specified in argument in
virtual LaserDisc player
-machine Use machine specified in argument
-replay Load replay and start replaying it in view only
mode
-romtype Specify the rom type for the ROM image specified
in the preceding option
-savestate Load savestate and start emulation from there
-script Run extra startup script
-setting Load an alternative settings file
-testconfig Test if the specified config works and exit
this is the list of supported file types:
cas, wav Cassette image, raw recording or fMSX CAS image
di1, di2, dmk,
dsk, fd1, fd2,
xsa Disk image
mx1, mx2, ri, rom ROM image of a cartridge
ogv LaserDisc image, Ogg Vorbis/Theora
omr openMSX replay
oms openMSX savestate
tcl Extra Tcl script to run at startup
user@brain:~$
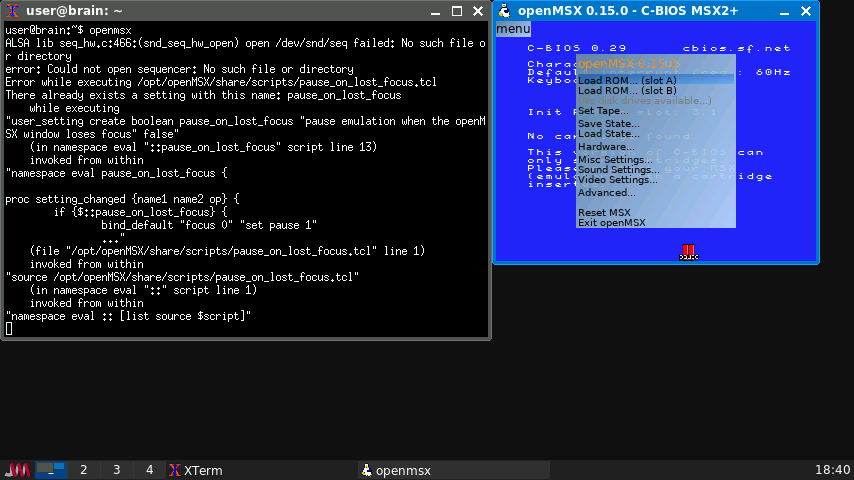
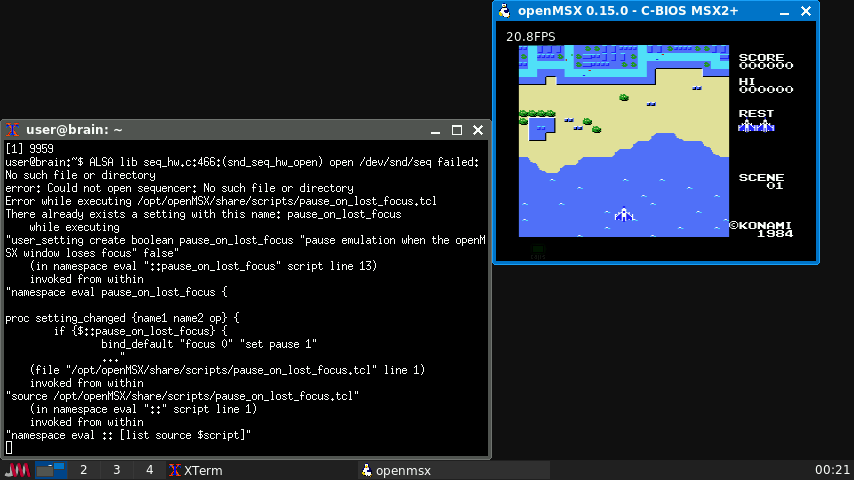
user@brain:~/openmsx15/openmsx-0.15.0$ ./configure
Using Python: python
Probing target system...
Creating derived/arm-linux-opt/config/probed_defs.mk...
Creating derived/arm-linux-opt/config/systemfuncs.hh...

Found libraries:
  ALSA:             version 1.2.4
  GLEW:             version unknown
  libogg:           version unknown
  libpng:           version 1.6.37
  libtheora:        version unknown
  libvorbis:        version unknown
  OpenGL:           version 4.6
  SDL:              version 1.2.15
  SDL_ttf:          version 2.0.11
  Tcl:              version 8.6.11
  zlib:             version 1.2.11

Components overview:
  Emulation core:   yes
  GL renderer:      yes
  Laserdisc:        yes
  ALSA MIDI:        yes

Customisable options:
  Install to        /opt/openMSX
  (you can edit these in build/custom.mk)

All required and optional components can be built.

If the detected libraries differ from what you think is installed on this system, please check the log file: derived/arm-linux-opt/config/probe.log
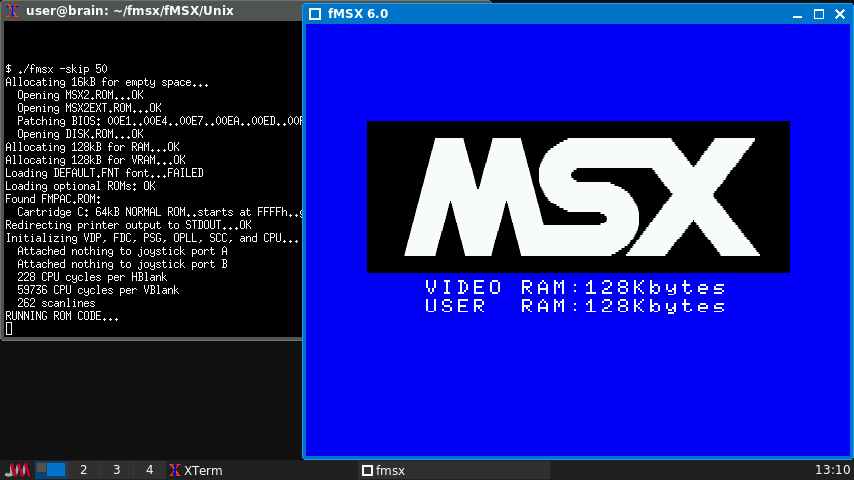
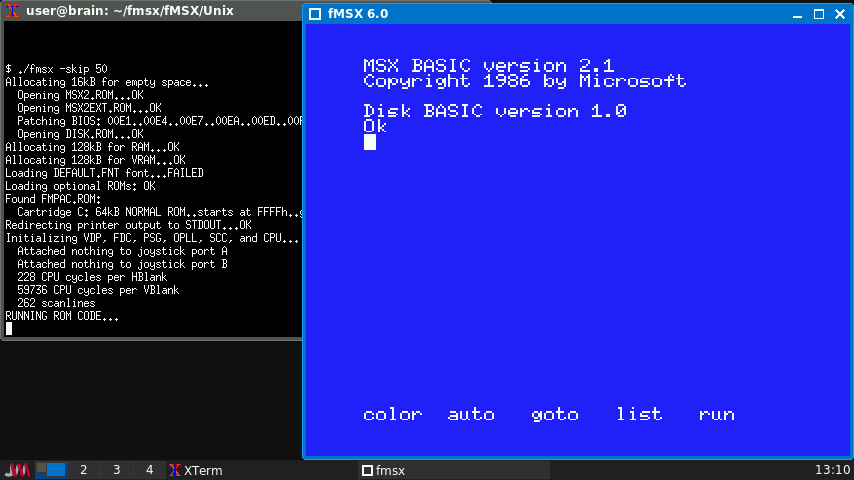
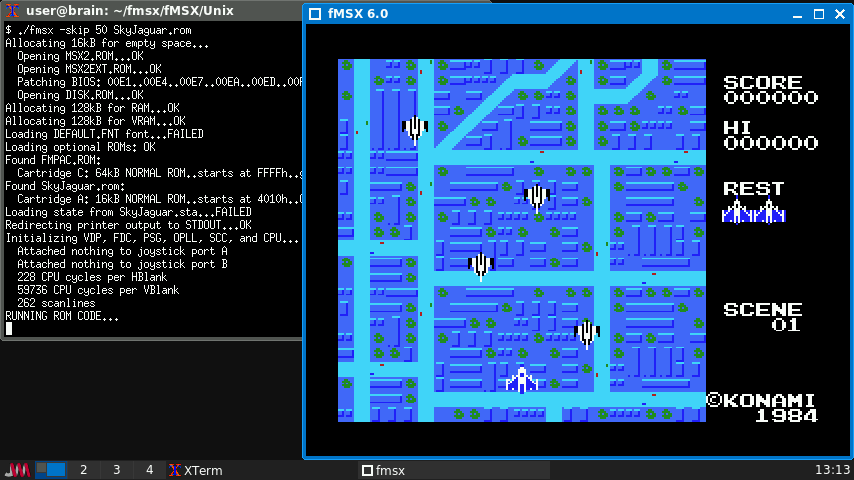
$ cd $ mkdir fmsx $ cd fmsx $ wget https://fms.komkon.org/fMSX/fMSX60.zip $ unzip fMSX60.zip $ cd fmsx $ cd fMSX/Unix $ sudo apt install g++ build-essential libpulse-dev $ make
ただ、このままでは、build最後のリンク時に大量のエラーになります。
/usr/bin/ld: ../../EMULib/Sound.o:(.bss+0x230): multiple definition of ARGV'; ../../EMULib/EMULib.o:(.bss+0x218): first defined here /usr/bin/ld: ../../EMULib/Sound.o:(.bss+0x234): multiple definition ofARGC'; ../../EMULib/EMULib.o:(.bss+0x21c): first defined here ~
cabファイルへの変換もしたいのであれば、「gcab」パッケージをaptでインストールすれば、gcabコマンドで圧縮(-c)、解凍(-x)、リスト表示(-t or -l)ができるようになります。
sudo apt install cabextract
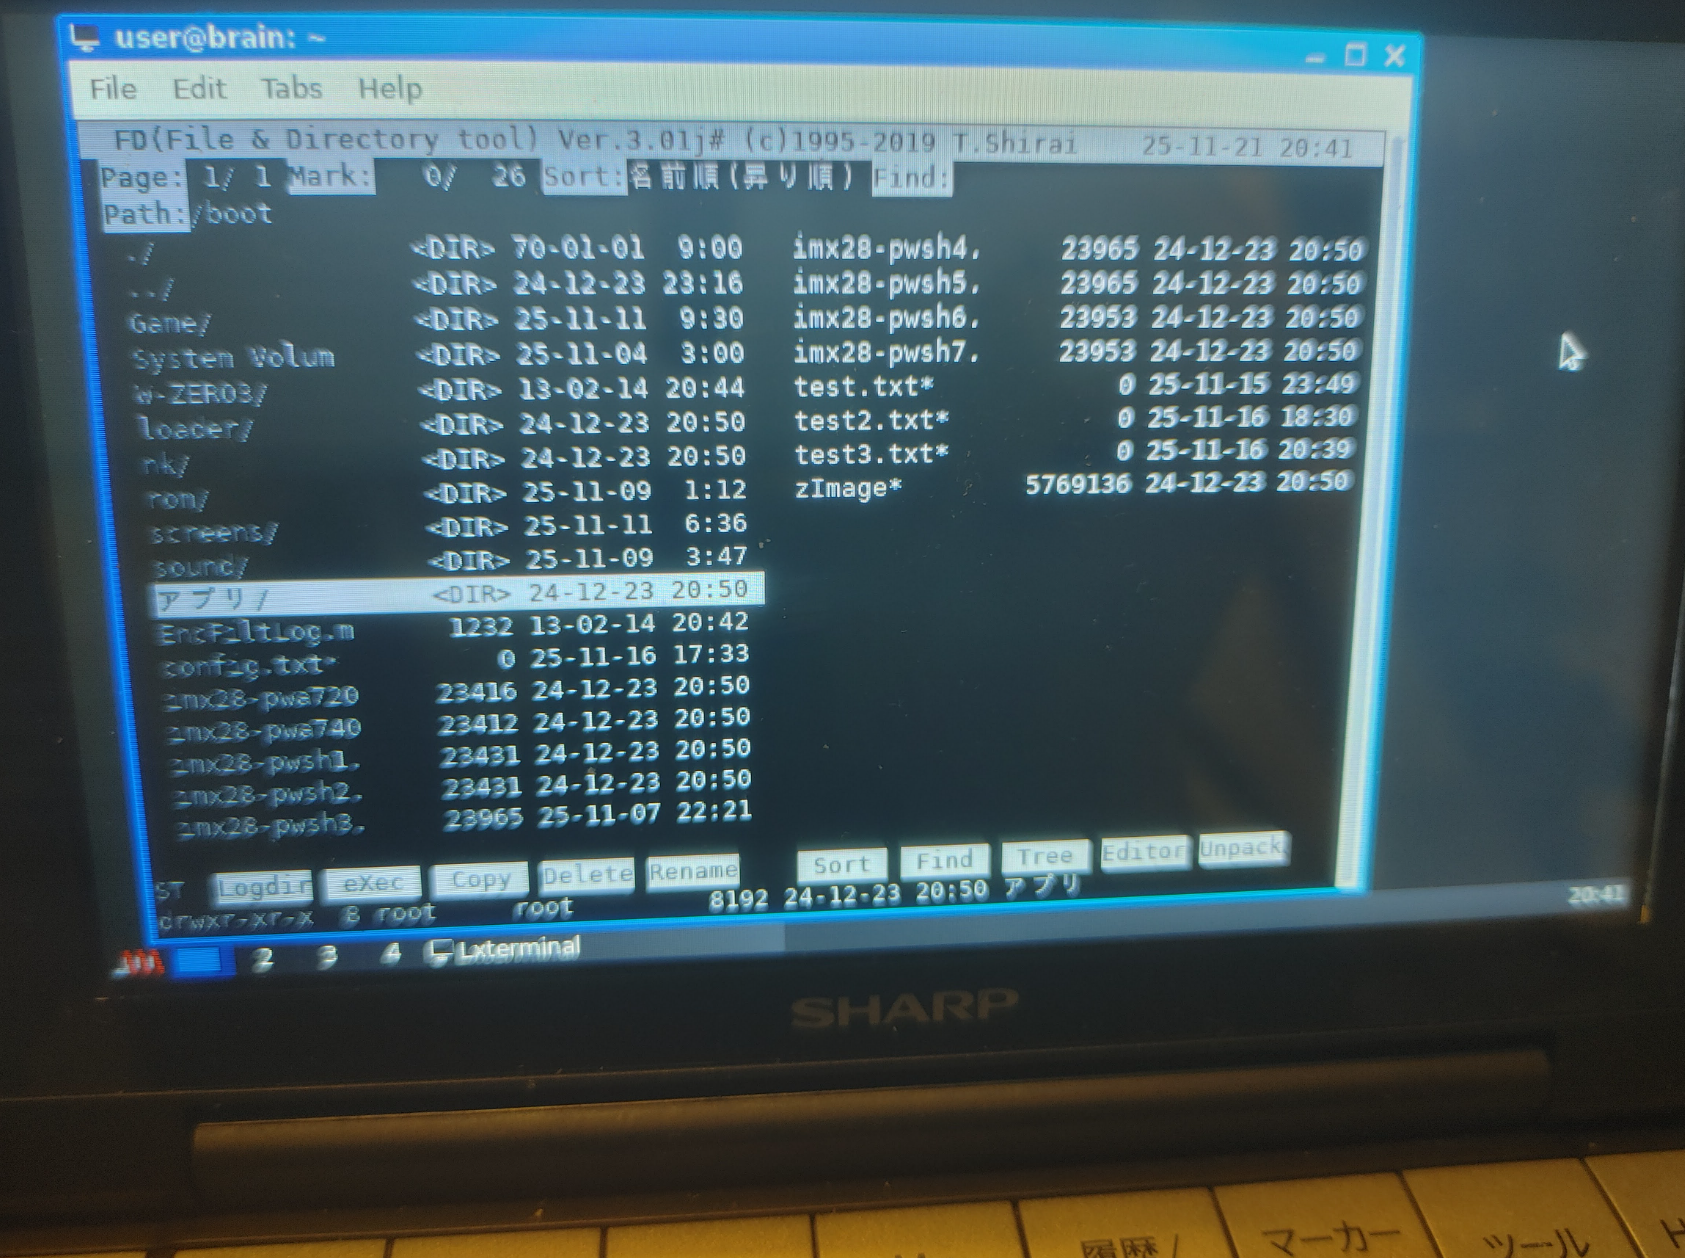
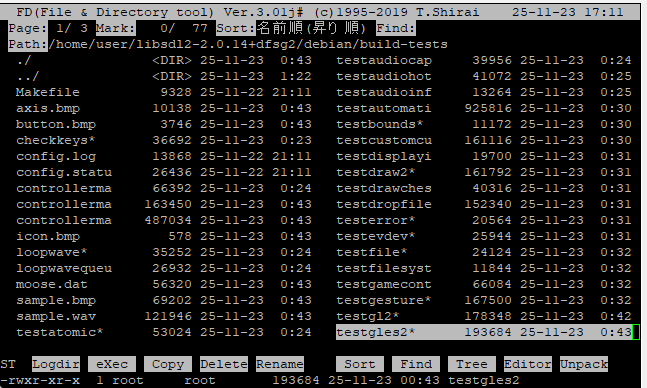
user@brain:~$ sudo apt show fdclone
[sudo] password for user:
Package: fdclone
Version: 3.01j-1
Priority: optional
Section: shells
Maintainer: Elías Alejandro Año Mendoza <ealmdz@gmail.com>
Installed-Size: 1,103 kB
Depends: libc6 (>= 2.28), libtinfo6 (>= 6)
Homepage: http://hp.vector.co.jp/authors/VA012337/soft/fd/
Tag: interface::shell, interface::text-mode, role::program,
 scope::application, uitoolkit::ncurses, use::browsing, use::organizing,
 works-with::file
Download-Size: 504 kB
APT-Sources: http://archive.debian.org/debian bullseye/main armel Packages
Description: console-base lightweight file manager
 FD (FD represents "File and Directory") is an easy-to-use
 file management tool for Un*x newbies.  As its name shows,
 this is a rewrite from scratch - the original version was written
 by Atsushi Idei for MS-DOS(tm) and once very popular in Japan.
 Messages are available either in English or in Japanese.

user@brain:~$ sudo apt install fdclone
Reading package lists... Done
Building dependency tree... Done
Reading state information... Done
The following NEW packages will be installed:
  fdclone
0 upgraded, 1 newly installed, 0 to remove and 1 not upgraded.
Need to get 504 kB of archives.
After this operation, 1,103 kB of additional disk space will be used.
Get:1 http://archive.debian.org/debian bullseye/main armel fdclone armel 3.01j-1 [504 kB]
Fetched 504 kB in 2s (287 kB/s)
Selecting previously unselected package fdclone.
(Reading database ... 46263 files and directories currently installed.)
Preparing to unpack .../fdclone_3.01j-1_armel.deb ...
Unpacking fdclone (3.01j-1) ...
Setting up fdclone (3.01j-1) ...
Processing triggers for man-db (2.9.4-2) ...
user@brain:~$
user@brain:/etc/apt$ sudo apt show xtightvncviewer
Package: xtightvncviewer
Version: 1:1.3.10-3
Priority: optional
Section: x11
Source: tightvnc
Maintainer: Debian Remote Maintainers <debian-remote@lists.debian.org>
Installed-Size: 171 kB
Provides: vnc-viewer, vncviewer
Depends: libc6 (>= 2.28), libjpeg62-turbo (>= 1.3.1), libx11-6, libxaw7, libxext6, libxmu6, libxt6, zlib1g (>= 1:1.1.4)
Recommends: xfonts-base
Suggests: ssh, tightvncserver
Homepage: https://www.tightvnc.com
Tag: interface::graphical, interface::x11, network::client, role::program,
uitoolkit::athena, use::login, use::viewing, x11::application
Download-Size: 87.2 kB
APT-Sources: http://archive.debian.org/debian bullseye/main armel Packages
Description: virtual network computing client software for X
VNC stands for Virtual Network Computing. It is, in essence, a remote
display system which allows you to view a computing `desktop' environment
not only on the machine where it is running, but from anywhere on the
Internet and from a wide variety of machine architectures.
.
It is implemented in a client/server model. This package provides a client
for X, with this you can connect to a vncserver somewhere in the network
and display its content in a window. There are vncserver available for other
operating systems.
.
The difference between the xtightvncviewer and the normal vncviewer is the
data encoding, optimized for low bandwidth connections. If the client do not
support jpeg or zlib encoding it can use the default one. Later versions of
xvncviewer (> 3.3.3r2) support a new automatic encoding that should be equally
good as the tightvnc encoding.
user@brain:/etc/apt$ sudo apt install xtightvncviewer
Reading package lists... Done
Building dependency tree... Done
Reading state information... Done
Suggested packages:
tightvncserver
Recommended packages:
xfonts-base
The following NEW packages will be installed:
xtightvncviewer
0 upgraded, 1 newly installed, 0 to remove and 1 not upgraded.
Need to get 87.2 kB of archives.
After this operation, 171 kB of additional disk space will be used.
Get:1 http://archive.debian.org/debian bullseye/main armel xtightvncviewer armel 1:1.3.10-3 [87.2 kB]
Fetched 87.2 kB in 1s (64.1 kB/s)
Selecting previously unselected package xtightvncviewer.
(Reading database ... 44210 files and directories currently installed.)
Preparing to unpack .../xtightvncviewer_1%3a1.3.10-3_armel.deb ...
Unpacking xtightvncviewer (1:1.3.10-3) ...
Setting up xtightvncviewer (1:1.3.10-3) ...
update-alternatives: using /usr/bin/xtightvncviewer to provide /usr/bin/vncviewer (vncviewer) in auto mode
Processing triggers for man-db (2.9.4-2) ...
user@brain:/etc/apt$ apt list | grep xtightvncviewer
WARNING: apt does not have a stable CLI interface. Use with caution in scripts.
xtightvncviewer/oldstable,now 1:1.3.10-3 armel [installed]
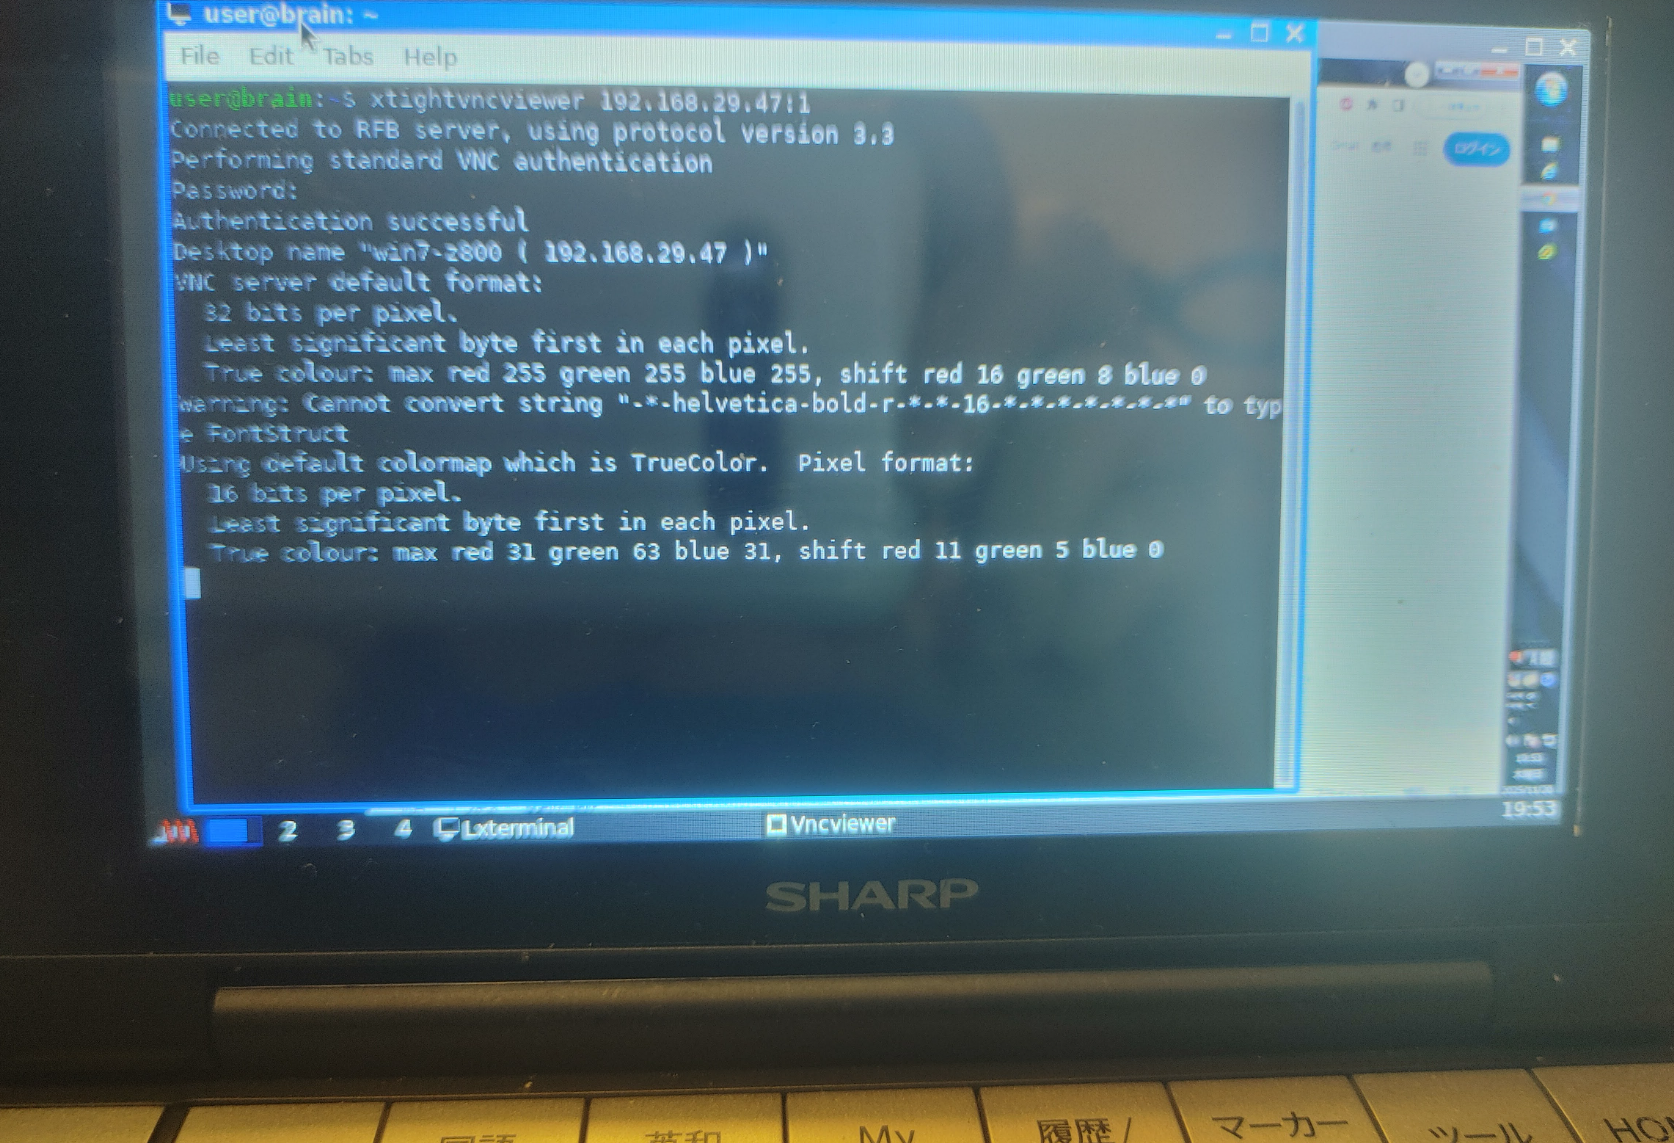
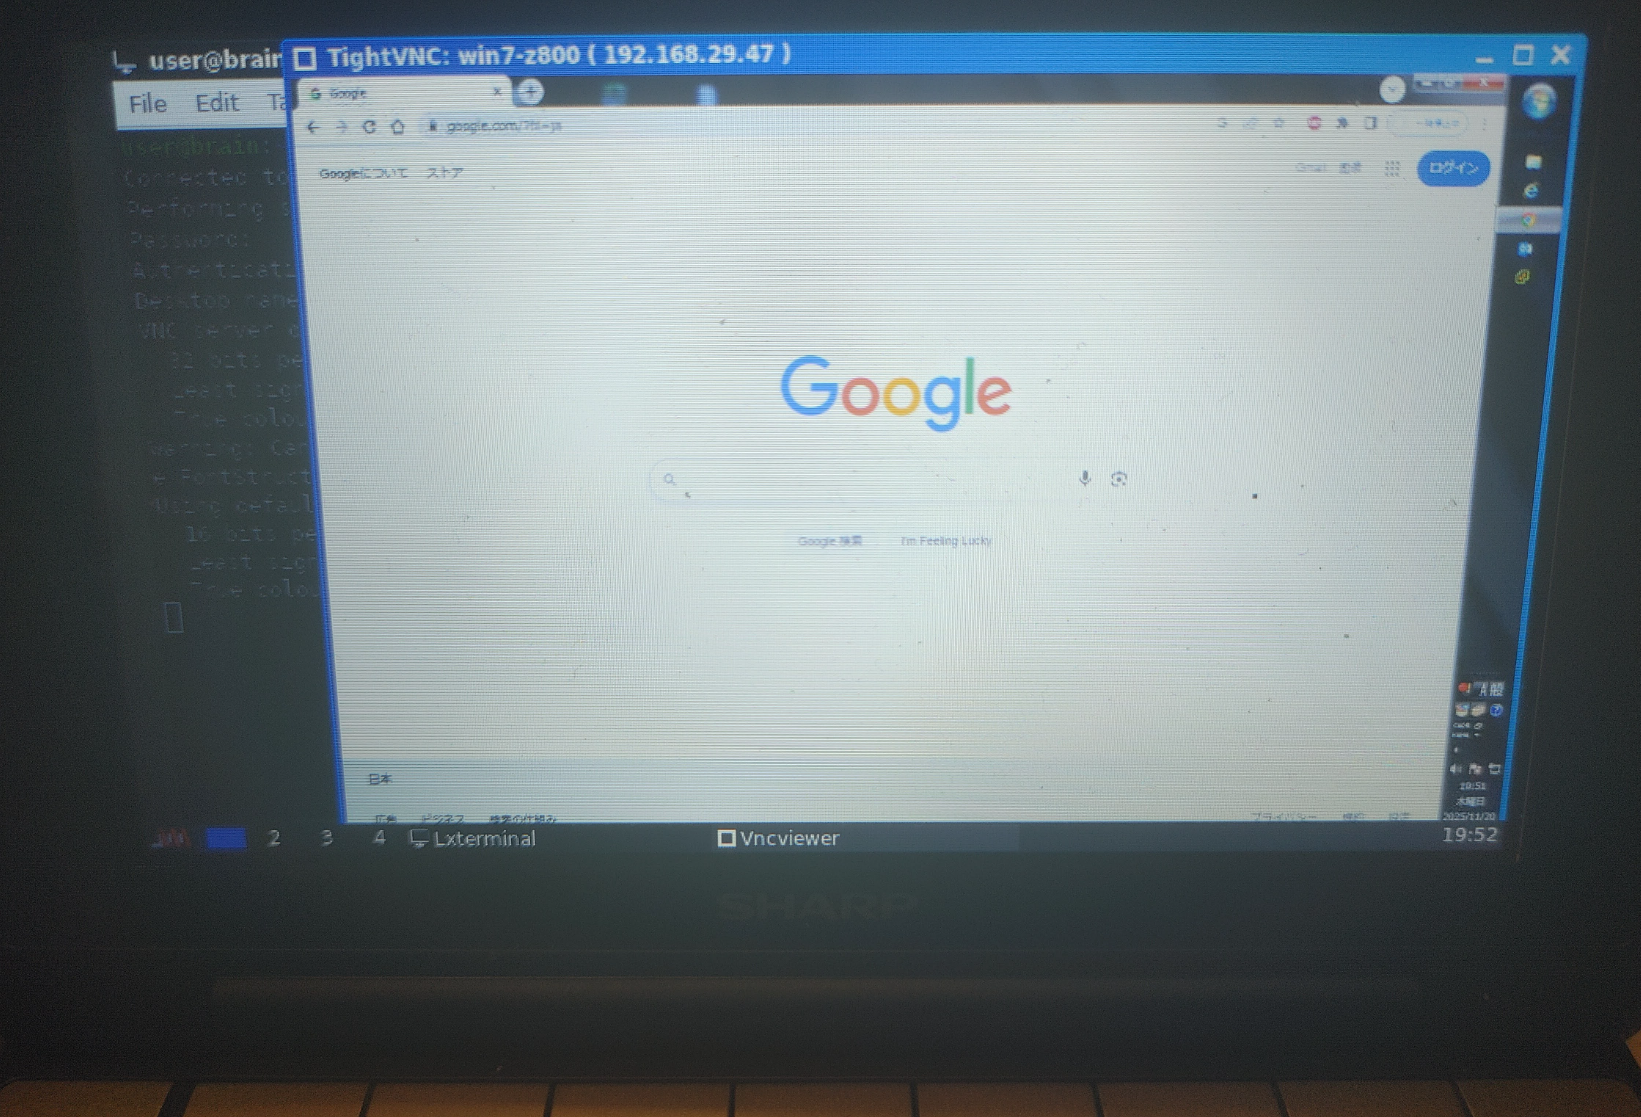
user@brain:~$ xtightvncviewer 192.168.29.47:1
Connected to RFB server, using protocol version 3.3
Performing standard VNC authentication
Password:
Authentication successful
Desktop name "win10-z800 ( 192.168.29.47 )"
VNC server default format:
32 bits per pixel.
Least significant byte first in each pixel.
True colour: max red 255 green 255 blue 255, shift red 16 green 8 blue 0
Warning: Cannot convert string "-*-helvetica-bold-r-*-*-16-*-*-*-*-*-*-*" to type FontStruct
Using default colormap which is TrueColor. Pixel format:
16 bits per pixel.
Least significant byte first in each pixel.
True colour: max red 31 green 63 blue 31, shift red 11 green 5 blue 0
user@brain:~$ xtightvncviewer --help
TightVNC Viewer version 1.3.10
Usage: xtightvncviewer [<OPTIONS>] [<HOST>][:<DISPLAY#>]
xtightvncviewer [<OPTIONS>] [<HOST>][::<PORT#>]
xtightvncviewer [<OPTIONS>] -listen [<DISPLAY#>]
xtightvncviewer -help
<OPTIONS> are standard Xt options, or:
-via <GATEWAY>
-shared (set by default)
-noshared
-viewonly
-fullscreen
-noraiseonbeep
-passwd <PASSWD-FILENAME> (standard VNC authentication)
-encodings <ENCODING-LIST> (e.g. "tight copyrect")
-bgr233
-owncmap
-truecolour
-depth <DEPTH>
-compresslevel <COMPRESS-VALUE> (0..9: 0-fast, 9-best)
-quality <JPEG-QUALITY-VALUE> (0..9: 0-low, 9-high)
-nojpeg
-nocursorshape
-x11cursor
-autopass
Option names may be abbreviated, e.g. -bgr instead of -bgr233.
See the manual page for more information.
user@brain:~$
user@brain:~$ sudo apt show rdesktop
Package: rdesktop
Version: 1.9.0-2+b1
Priority: optional
Section: x11
Source: rdesktop (1.9.0-2)
Maintainer: Laszlo Boszormenyi (GCS) <gcs@debian.org>
Installed-Size: 701 kB
Depends: libasound2 (>= 1.0.16), libc6 (>= 2.28), libgmp10, libgnutls30 (>= 3.6.14), libgssapi-krb5-2 (>= 1.17), libhogweed6, libnettle8, libpcsclite1 (>= 1.3.3), libtasn1-6 (>= 4.14), libx11-6, libxcursor1 (>> 1.1.2), libxrandr2
Suggests: pcscd
Homepage: https://www.rdesktop.org/
Tag: interface::graphical, interface::x11, network::client, protocol::ssl,
 role::program, scope::utility, uitoolkit::xlib, use::login,
 x11::application
Download-Size: 212 kB
APT-Sources: http://archive.debian.org/debian bullseye/main armel Packages
Description: RDP client for Windows NT/2000 Terminal Server and Windows Servers
 rdesktop is an open source client for Windows NT/2000 Terminal Server and
 Windows Server 2003/2008. Capable of natively speaking its Remote Desktop
 Protocol (RDP) in order to present the user's Windows desktop. Unlike Citrix
 ICA, no server extensions are required.


user@brain:~$ sudo apt install rdesktop
Reading package lists... Done
Building dependency tree... Done
Reading state information... Done
Suggested packages:
  pcscd
The following NEW packages will be installed:
  rdesktop
0 upgraded, 1 newly installed, 0 to remove and 1 not upgraded.
Need to get 212 kB of archives.
After this operation, 701 kB of additional disk space will be used.
Get:1 http://archive.debian.org/debian bullseye/main armel rdesktop armel 1.9.0-2+b1 [212 kB]
Fetched 212 kB in 1s (244 kB/s)
Selecting previously unselected package rdesktop.
(Reading database ... 44348 files and directories currently installed.)
Preparing to unpack .../rdesktop_1.9.0-2+b1_armel.deb ...
Unpacking rdesktop (1.9.0-2+b1) ...
Setting up rdesktop (1.9.0-2+b1) ...
Processing triggers for man-db (2.9.4-2) ...


user@brain:~$ rdesktop
rdesktop: A Remote Desktop Protocol client.
Version 1.9.0. Copyright (C) 1999-2016 Matthew Chapman et al.
See http://www.rdesktop.org/ for more information.

Usage: rdesktop [options] server[:port]
   -u: user name
   -d: domain
   -s: shell / seamless application to start remotely
   -c: working directory
   -p: password (- to prompt)
   -n: client hostname
   -k: keyboard layout on server (en-us, de, sv, etc.)
   -g: desktop geometry (WxH[@DPI][+X[+Y]])
   -i: enables smartcard authentication, password is used as pin
   -f: full-screen mode
   -b: force bitmap updates
   -L: local codepage
   -A: path to SeamlessRDP shell, this enables SeamlessRDP mode
   -V: tls version (1.0, 1.1, 1.2, defaults to negotiation)
   -B: use BackingStore of X-server (if available)
   -e: disable encryption (French TS)
   -E: disable encryption from client to server
   -m: do not send motion events
   -M: use local mouse cursor
   -C: use private colour map
   -D: hide window manager decorations
   -K: keep window manager key bindings
   -S: caption button size (single application mode)
   -T: window title
   -t: disable use of remote ctrl
   -N: enable numlock synchronization
   -X: embed into another window with a given id.
   -a: connection colour depth
   -z: enable rdp compression
   -x: RDP5 experience (m[odem 28.8], b[roadband], l[an] or hex nr.)
   -P: use persistent bitmap caching
   -r: enable specified device redirection (this flag can be repeated)
         '-r comport:COM1=/dev/ttyS0': enable serial redirection of /dev/ttyS0 to COM1
             or      COM1=/dev/ttyS0,COM2=/dev/ttyS1
         '-r disk:floppy=/mnt/floppy': enable redirection of /mnt/floppy to 'floppy' share
             or   'floppy=/mnt/floppy,cdrom=/mnt/cdrom'
         '-r clientname=<client name>': Set the client name displayed
             for redirected disks
         '-r lptport:LPT1=/dev/lp0': enable parallel redirection of /dev/lp0 to LPT1
             or      LPT1=/dev/lp0,LPT2=/dev/lp1
         '-r printer:mydeskjet': enable printer redirection
             or      mydeskjet="HP LaserJet IIIP" to enter server driver as well
         '-r sound:[local[:driver[:device]]|off|remote]': enable sound redirection
                     remote would leave sound on server
                     available drivers for 'local':
                     alsa:      ALSA output driver, default device: default
         '-r clipboard:[off|PRIMARYCLIPBOARD|CLIPBOARD]': enable clipboard
                      redirection.
                      'PRIMARYCLIPBOARD' looks at both PRIMARY and CLIPBOARD
                      when sending data to server.
                      'CLIPBOARD' looks at only CLIPBOARD.
         '-r scard[:"Scard Name"="Alias Name[;Vendor Name]"[,...]]
          example: -r scard:"eToken PRO 00 00"="AKS ifdh 0"
                   "eToken PRO 00 00" -> Device in GNU/Linux and UNIX environment
                   "AKS ifdh 0"       -> Device shown in Windows environment
          example: -r scard:"eToken PRO 00 00"="AKS ifdh 0;AKS"
                   "eToken PRO 00 00" -> Device in GNU/Linux and UNIX environment
                   "AKS ifdh 0"       -> Device shown in Microsoft Windows environment
                   "AKS"              -> Device vendor name
   -0: attach to console
   -4: use RDP version 4
   -5: use RDP version 5 (default)
   -o: name=value: Adds an additional option to rdesktop.
           sc-csp-name        Specifies the Crypto Service Provider name which
                              is used to authenticate the user by smartcard
           sc-container-name  Specifies the container name, this is usually the username
           sc-reader-name     Smartcard reader name to use
           sc-card-name       Specifies the card name of the smartcard to use
   -v: enable verbose logging
user@brain:~$ sudo apt show freerdp2-x11
Package: freerdp2-x11
Version: 2.3.0+dfsg1-2+deb11u1
Priority: optional
Section: x11
Source: freerdp2
Maintainer: Debian Remote Maintainers <debian-remote@lists.debian.org>
Installed-Size: 553 kB
Provides: freerdp
Depends: libc6 (>= 2.4), libfreerdp-client2-2 (= 2.3.0+dfsg1-2+deb11u1), libfreerdp2-2 (>= 2.3.0+dfsg1), libwinpr2-2 (>= 2.1.0+dfsg1), libx11-6 (>= 2:1.2.99.901), libxcursor1 (>> 1.1.2), libxext6, libxfixes3, libxi6 (>= 2:1.2.99.4), libxinerama1, libxrandr2 (>= 2:1.5.0), libxrender1
Conflicts: freerdp-x11
Replaces: freerdp-x11
Homepage: https://www.freerdp.com/
Download-Size: 97.6 kB
APT-Sources: http://archive.debian.org/debian bullseye/main armel Packages
Description: RDP client for Windows Terminal Services (X11 client)
FreeRDP is a libre client/server implementation of the Remote
Desktop Protocol (RDP).
.
Currently, the FreeRDP client supports the following Windows Versions:
.
* Windows NT Server
* Windows 2000 Terminal Server
* Windows XP
* Windows 2003 Server
* Windows Vista
* Windows 2008/2008r2/2011SBS Server
* Windows 7
* Windows 2012/2012r2 Server
* Windows 8
* Windows 10
.
This package contains the X11 based client.
user@brain:~$ sudo apt install freerdp2-x11
Reading package lists... Done
Building dependency tree... Done
Reading state information... Done
The following additional packages will be installed:
libaom0 libavcodec58 libavutil56 libcodec2-0.9 libdav1d4 libfreerdp-client2-2 libfreerdp2-2 libgsm1 libopenjp2-7 libshine3 libsnappy1v5 libsoxr0
libswresample3 libswscale5 libva-drm2 libva-x11-2 libva2 libvdpau1 libwebpmux3 libwinpr2-2 libx264-160 libx265-192 libxvidcore4 libzvbi-common libzvbi0
ocl-icd-libopencl1
Suggested packages:
opencl-icd
Recommended packages:
va-driver-all | va-driver vdpau-driver-all | vdpau-driver
The following NEW packages will be installed:
freerdp2-x11 libaom0 libavcodec58 libavutil56 libcodec2-0.9 libdav1d4 libfreerdp-client2-2 libfreerdp2-2 libgsm1 libopenjp2-7 libshine3 libsnappy1v5
libsoxr0 libswresample3 libswscale5 libva-drm2 libva-x11-2 libva2 libvdpau1 libwebpmux3 libwinpr2-2 libx264-160 libx265-192 libxvidcore4 libzvbi-common
libzvbi0 ocl-icd-libopencl1
0 upgraded, 27 newly installed, 0 to remove and 1 not upgraded.
Need to get 17.4 MB of archives.
After this operation, 45.1 MB of additional disk space will be used.
~
Processing triggers for libc-bin (2.31-13+deb11u11) ...
user@brain:~$ xfreerdp
FreeRDP - A Free Remote Desktop Protocol Implementation
See www.freerdp.com for more information
Usage: xfreerdp [file] [options] [/v:<server>[:port]]
Syntax:
/flag (enables flag)
/option:<value> (specifies option with value)
+toggle -toggle (enables or disables toggle, where '/' is a synonym of '+')
/a:<addin>[,<options>] Addin
/action-script:<file-name> Action script
/admin Admin (or console) session
+aero Enable desktop composition
/app:<path> or ||<alias> Remote application program
/app-cmd:<parameters> Remote application command-line parameters
/app-file:<file-name> File to open with remote application
/app-guid:<app-guid> Remote application GUID
/app-icon:<icon-path> Remote application icon for user interface
/app-name:<app-name> Remote application name for user interface
/app-workdir:<workspace path> Remote application workspace path
/assistance:<password> Remote assistance password
/auto-request-control Automatically request remote assistance
input control
+async-channels Enable Asynchronous channels
(experimental)
+async-input Enable Asynchronous input
+async-update Enable Asynchronous update
/audio-mode:<mode> Audio output mode
+auth-only Enable Authenticate only
-authentication Disable Authentication (experimental)
+auto-reconnect Enable Automatic reconnection
/auto-reconnect-max-retries:<retries>
Automatic reconnection maximum retries, 0
for unlimited [0,1000]
+bitmap-cache Enable bitmap cache
/bpp:<depth> Session bpp (color depth)
/buildconfig Print the build configuration
/cert:[deny,ignore,name:<name>,tofu,fingerprint:<hash>:<hash as hex>
[,fingerprint:<hash>:<another hash>]]
Certificate accept options. Use with care!
* deny ... Automatically abort
connection if the certificate does not
match, no user interaction. *
ignore ... Ignore the certificate
checks altogether (overrules all other
options) * name
... Use the alternate <name>
instead of the certificate subject to
match locally stored certificates * tofu
... Accept certificate
unconditionally on first connect and deny
on subsequent connections if the
certificate does not match * fingerprints
... A list of certificate hashes that are
accepted unconditionally for a connection
/cert-deny [deprecated, use /cert:deny] Automatically
abort connection for any certificate that
can not be validated.
/cert-ignore [deprecated, use /cert:ignore] Ignore
certificate
/cert-name:<name> [deprecated, use /cert:name:<name>]
Certificate name
/cert-tofu [deprecated, use /cert:tofu] Automatically
accept certificate on first connect
/client-build-number:<number> Client Build Number sent to server
(influences smartcard behaviour, see
[MS-RDPESC])
/client-hostname:<name> Client Hostname to send to server
-clipboard[:[use-selection:<atom>]]
Disable Redirect clipboard.
* use-selection:<atom> ... (X11) Specify
which X selection to access. Default is
CLIPBOARD. PRIMARY is the X-style
middle-click selection.
/codec-cache:[rfx|nsc|jpeg] Bitmap codec cache
-compression Disable compression
/compression-level:<level> Compression level (0,1,2)
+credentials-delegation Enable credentials delegation
/d:<domain> Domain
-decorations Disable Window decorations
/disp Display control
/drive:<name>,<path> Redirect directory <path> as named share
<name>. Hotplug support is enabled with
/drive:hotplug,*. This argument provides
the same function as "Drives that I plug
in later" option in MSTSC.
+drives Enable Redirect all mount points as shares
/dvc:<channel>[,<options>] Dynamic virtual channel
/dynamic-resolution Send resolution updates when the window is
resized
/echo Echo channel
-encryption Disable Encryption (experimental)
/encryption-methods:[40,][56,][128,][FIPS]
RDP standard security encryption methods
/f Fullscreen mode (<Ctrl>+<Alt>+<Enter>
toggles fullscreen)
-fast-path Disable fast-path input/output
+fipsmode Enable FIPS mode
/floatbar[:sticky:[on|off],default:[visible|hidden],show:
[always|fullscreen||window]]
floatbar is disabled by default (when
enabled defaults to sticky in fullscreen
mode)
-fonts Disable smooth fonts (ClearType)
/frame-ack:<number> Number of frame acknowledgement
/from-stdin[:force] Read credentials from stdin. With <force>
the prompt is done before connection,
otherwise on server request.
/g:<gateway>[:<port>] Gateway Hostname
/gateway-usage-method:[direct|detect]
Gateway usage method
/gd:<domain> Gateway domain
/gdi:sw|hw GDI rendering
/geometry Geometry tracking channel
+gestures Enable Consume multitouch input locally
/gfx[:[[RFX|AVC420|AVC444],mask:<value>]]
RDP8 graphics pipeline
/gfx-h264[:[[AVC420|AVC444],mask:<value>]
[DEPRECATED] use /gfx:avc420 instead]
RDP8.1 graphics pipeline using H264 codec
+gfx-progressive Enable RDP8 graphics pipeline using progressive
codec
+gfx-small-cache Enable RDP8 graphics pipeline using small cache
mode
+gfx-thin-client Enable RDP8 graphics pipeline using thin client
mode
+glyph-cache Enable Glyph cache (experimental)
/gp:<password> Gateway password
-grab-keyboard Disable Grab keyboard
/gt:[rpc|http[,no-websockets]|auto[,no-websockets]]
Gateway transport type
/gu:[[<domain>\]<user>|<user>[@<domain>]]
Gateway username
/gat:<access token> Gateway Access Token
/h:<height> Height
-heartbeat Disable Support heartbeat PDUs
/help Print help
+home-drive Enable Redirect user home as share
/ipv6 Prefer IPv6 AAA record over IPv4 A record
/jpeg JPEG codec support
/jpeg-quality:<percentage> JPEG quality
/kbd:0x<id> or <name> Keyboard layout
/kbd-lang:0x<id> Keyboard active language identifier
/kbd-fn-key:<value> Function key value
/kbd-list List keyboard layouts
/kbd-lang-list List keyboard languages
/kbd-remap:List of <key>=<value>,... pairs to remap scancodes
Keyboard scancode remapping
/kbd-subtype:<id> Keyboard subtype
/kbd-type:<id> Keyboard type
/load-balance-info:<info-string> Load balance info
/log-filters:<tag>:<level>[,<tag>:<level>[,...]]
Set logger filters, see wLog(7) for
details
/log-level:[OFF|FATAL|ERROR|WARN|INFO|DEBUG|TRACE]
Set the default log level, see wLog(7) for
details
/max-fast-path-size:<size> Specify maximum fast-path update size
/max-loop-time:<time> Specify maximum time in milliseconds spend
treating packets
+menu-anims Enable menu animations
/microphone[:[sys:<sys>,][dev:<dev>,][format:<format>,][rate:<rate>,]
[channel:<channel>]] Audio input (microphone)
/monitor-list List detected monitors
/monitors:<id>[,<id>[,...]] Select monitors to use
-mouse-motion Disable Send mouse motion
/multimon[:force] Use multiple monitors
+multitouch Enable Redirect multitouch input
+multitransport Enable Support multitransport protocol
-nego Disable protocol security negotiation
/network:[modem|broadband|broadband-low|broadband-high|wan|lan|auto]
Network connection type
/nsc NSCodec support
+offscreen-cache Enable offscreen bitmap cache
/orientation:[0|90|180|270] Orientation of display in degrees
+old-license Enable Use the old license workflow (no CAL and
hwId set to 0)
/p:<password> Password
/parallel[:<name>[,<path>]] Redirect parallel device
/parent-window:<window-id> Parent window id
+password-is-pin Enable Use smart card authentication with
password as smart card PIN
/pcb:<blob> Preconnection Blob
/pcid:<id> Preconnection Id
/pheight:<height> Physical height of display (in
millimeters)
/play-rfx:<pcap-file> Replay rfx pcap file
/port:<number> Server port
-suppress-output Disable suppress output when minimized
+print-reconnect-cookie Enable Print base64 reconnect cookie after
connecting
/printer[:<name>[,<driver>]] Redirect printer device
/proxy:[<proto>://][<user>:<password>@]<host>:<port>
Proxy settings: override env. var (see
also environment variable below). Protocol
"socks5" should be given explicitly where
"http" is default.
/pth:<password-hash> Pass the hash (restricted admin mode)
/pwidth:<width> Physical width of display (in millimeters)
/rdp2tcp:<executable path[:arg...]>
TCP redirection
/reconnect-cookie:<base64-cookie> Pass base64 reconnect cookie to the
connection
/redirect-prefer:<FQDN|IP|NETBIOS>,[...]
Override the preferred redirection order
/relax-order-checks Do not check if a RDP order was announced
during capability exchange, only use when
connecting to a buggy server
/restricted-admin Restricted admin mode
/rfx RemoteFX
/rfx-mode:[image|video] RemoteFX mode
/scale:[100|140|180] Scaling factor of the display
/scale-desktop:<percentage> Scaling factor for desktop applications
(value between 100 and 500)
/scale-device:100|140|180 Scaling factor for app store applications
/sec:[rdp|tls|nla|ext] Force specific protocol security
+sec-ext Enable NLA extended protocol security
-sec-nla Disable NLA protocol security
-sec-rdp Disable RDP protocol security
-sec-tls Disable TLS protocol security
/serial[:<name>[,<path>[,<driver>[,permissive]]]]
Redirect serial device
/shell:<shell> Alternate shell
/shell-dir:<dir> Shell working directory
/size:<width>x<height> or <percent>%[wh]
Screen size
/smart-sizing[:<width>x<height>] Scale remote desktop to window size
/smartcard[:<str>[,<str>...]] Redirect the smartcard devices containing
any of the <str> in their names.
/smartcard-logon Activates Smartcard Logon authentication.
(EXPERIMENTAL: NLA not supported)
/sound[:[sys:<sys>,][dev:<dev>,][format:<format>,][rate:<rate>,]
[channel:<channel>,][latency:<latency>,][quality:<quality>]]
Audio output (sound)
/span Span screen over multiple monitors
/spn-class:<service-class> SPN authentication service class
/ssh-agent SSH Agent forwarding channel
/t:<title> Window title
-themes Disable themes
/timeout:<time in ms> Advanced setting for high latency links:
Adjust connection timeout, use if you
encounter timeout failures with your
connection
/tls-ciphers:[netmon|ma|ciphers] Allowed TLS ciphers
/tls-seclevel:<level> TLS security level - defaults to 1
-toggle-fullscreen Disable Alt+Ctrl+Enter to toggle
fullscreen
/tune:<setting:value>,<setting:value>
[experimental] directly manipulate freerdp
settings, use with extreme caution!
/tune-list Print options allowed for /tune
/u:[[<domain>\]<user>|<user>[@<domain>]]
Username
+unmap-buttons Enable Let server see real physical pointer
button
/usb:[dbg,][id:<vid>:<pid>#...,][addr:<bus>:<addr>#...,][auto]
Redirect USB device
/v:<server>[:port] Server hostname
/vc:<channel>[,<options>] Static virtual channel
/version Print version
/video Video optimized remoting channel
/vmconnect[:<vmid>] Hyper-V console (use port 2179, disable
negotiation)
/w:<width> Width
-wallpaper Disable wallpaper
+window-drag Enable full window drag
/window-position:<xpos>x<ypos> window position
/wm-class:<class-name> Set the WM_CLASS hint for the window
instance
/workarea Use available work area
Examples:
xfreerdp connection.rdp /p:Pwd123! /f
xfreerdp /u:CONTOSO\JohnDoe /p:Pwd123! /v:rdp.contoso.com
xfreerdp /u:JohnDoe /p:Pwd123! /w:1366 /h:768 /v:192.168.1.100:4489
xfreerdp /u:JohnDoe /p:Pwd123! /vmconnect:C824F53E-95D2-46C6-9A18-23A5BB403532 /v:192.168.1.100
Clipboard Redirection: +clipboard
Drive Redirection: /drive:home,/home/user
Smartcard Redirection: /smartcard:<device>
Serial Port Redirection: /serial:<name>,<device>,[SerCx2|SerCx|Serial],[permissive]
Serial Port Redirection: /serial:COM1,/dev/ttyS0
Parallel Port Redirection: /parallel:<name>,<device>
Printer Redirection: /printer:<device>,<driver>
TCP redirection: /rdp2tcp:/usr/bin/rdp2tcp
Audio Output Redirection: /sound:sys:oss,dev:1,format:1
Audio Output Redirection: /sound:sys:alsa
Audio Input Redirection: /microphone:sys:oss,dev:1,format:1
Audio Input Redirection: /microphone:sys:alsa
Multimedia Redirection: /video
USB Device Redirection: /usb:id:054c:0268#4669:6e6b,addr:04:0c
For Gateways, the https_proxy environment variable is respected:
export https_proxy=http://proxy.contoso.com:3128/
xfreerdp /g:rdp.contoso.com ...
More documentation is coming, in the meantime consult source files
user@brain:~$
user@brain:~$ sudo apt show remmina
[sudo] password for user:
Package: remmina
Version: 1.4.11+dfsg-3
Priority: optional
Section: x11
Maintainer: Debian Remote Maintainers <debian-remote@lists.debian.org>
Installed-Size: 478 kB
Depends: libavahi-client3 (>= 0.6.16), libavahi-common3 (>= 0.6.16), libavahi-ui-gtk3-0 (>= 0.6.30), libayatana-appindicator3-1 (>= 0.4.90), libc6 (>= 2.28), libcairo2 (>= 1.6.0), libgcrypt20 (>= 1.8.0), libglib2.0-0 (>= 2.55.1), libgtk-3-0 (>= 3.21.5), libjson-glib-1.0-0 (>= 1.5.2), libpango-1.0-0 (>= 1.14.0), libsodium23 (>= 1.0.10), libsoup2.4-1 (>= 2.41.90), libssh-4 (>= 0.8.1), libssl1.1 (>= 1.1.0), libvte-2.91-0 (>= 0.51.90), remmina-common (= 1.4.11+dfsg-3), default-dbus-session-bus | dbus-session-bus
Recommends: remmina-plugin-rdp, remmina-plugin-vnc, remmina-plugin-secret
Suggests: remmina-plugin-exec, remmina-plugin-kwallet, remmina-plugin-nx, remmina-plugin-spice, remmina-plugin-www, remmina-plugin-xdmcp
Homepage: https://www.remmina.org/
Tag: interface::graphical, interface::x11, protocol::ssh, role::program,
 uitoolkit::gtk, x11::application
Download-Size: 161 kB
APT-Sources: http://archive.debian.org/debian bullseye/main armel Packages
Description: GTK+ Remote Desktop Client
 Remmina is a remote desktop client written in GTK+, aiming to be
 useful for system administrators and travellers, who need to work
 with lots of remote computers in front of either large monitors or
 tiny netbooks.
 .
 Remmina supports multiple network protocols in an integrated and
 consistent user interface.
 .
 Currently RDP, VNC, SPICE, WWW, NX, XDMCP, EXEC and SSH are supported.

user@brain:~$
user@brain:~$
user@brain:~$ sudo apt install remmina
Reading package lists... Done
Building dependency tree... Done
Reading state information... Done
The following additional packages will be installed:
  libavahi-glib1 libavahi-ui-gtk3-0 libayatana-appindicator3-1
  libayatana-ido3-0.4-0 libayatana-indicator3-7 libdbusmenu-glib4
  libdbusmenu-gtk3-4 libsodium23 libssh-4 remmina-common
Suggested packages:
  remmina-plugin-exec remmina-plugin-kwallet remmina-plugin-nx
  remmina-plugin-spice remmina-plugin-www remmina-plugin-xdmcp
Recommended packages:
  remmina-plugin-rdp remmina-plugin-vnc remmina-plugin-secret
The following NEW packages will be installed:
  libavahi-glib1 libavahi-ui-gtk3-0 libayatana-appindicator3-1
  libayatana-ido3-0.4-0 libayatana-indicator3-7 libdbusmenu-glib4
  libdbusmenu-gtk3-4 libsodium23 libssh-4 remmina remmina-common
0 upgraded, 11 newly installed, 0 to remove and 1 not upgraded.
Need to get 1,476 kB of archives.
After this operation, 5,820 kB of additional disk space will be used.
Do you want to continue? [Y/n] Y
Get:1 http://archive.debian.org/debian bullseye/main armel libavahi-glib1 armel 0.8-5+deb11u2 [44.0 kB]
~
Processing triggers for shared-mime-info (2.0-1) ...


user@brain:~$ sudo apt show remmina-plugin-rdp
Package: remmina-plugin-rdp
Version: 1.4.11+dfsg-3
Priority: optional
Section: gnome
Source: remmina
Maintainer: Debian Remote Maintainers <debian-remote@lists.debian.org>
Installed-Size: 132 kB
Depends: libc6 (>= 2.28), libcairo2 (>= 1.6.0), libcups2 (>= 1.6.0), libfreerdp-client2-2 (>= 2.2.0~), libfreerdp2-2 (>= 2.2.0~), libgdk-pixbuf-2.0-0 (>= 2.22.0), libglib2.0-0 (>= 2.41.1), libgtk-3-0 (>= 3.19.12), libwinpr2-2 (>= 2.0.0~git20160317.1.75ae3f5+dfsg1), libx11-6, remmina (= 1.4.11+dfsg-3)
Homepage: https://www.remmina.org/
Tag: role::plugin, uitoolkit::gtk
Download-Size: 51.2 kB
APT-Sources: http://archive.debian.org/debian bullseye/main armel Packages
Description: RDP plugin for Remmina
 Remmina is a remote desktop client written in GTK+, aiming to be
 useful for system administrators and travellers, who need to work
 with lots of remote computers in front of either large monitors or
 tiny netbooks.
 .
 Remmina supports multiple network protocols in an integrated and
 consistent user interface.
 .
 Currently RDP, VNC, SPICE, WWW, NX, XDMCP, EXEC and SSH are supported.
 .
 This package contains the RDP plugin for Remmina.


user@brain:~$ sudo apt install remmina-plugin-rdp
Reading package lists... Done
Building dependency tree... Done
Reading state information... Done
The following NEW packages will be installed:
  remmina-plugin-rdp
0 upgraded, 1 newly installed, 0 to remove and 1 not upgraded.
Need to get 51.2 kB of archives.
After this operation, 132 kB of additional disk space will be used.
Get:1 http://archive.debian.org/debian bullseye/main armel remmina-plugin-rdp armel 1.4.11+dfsg-3 [51.2 kB]
Fetched 51.2 kB in 1s (54.9 kB/s)
Selecting previously unselected package remmina-plugin-rdp:armel.
(Reading database ... 45099 files and directories currently installed.)
Preparing to unpack .../remmina-plugin-rdp_1.4.11+dfsg-3_armel.deb ...
Unpacking remmina-plugin-rdp:armel (1.4.11+dfsg-3) ...
Setting up remmina-plugin-rdp:armel (1.4.11+dfsg-3) ...


user@brain:~$ sudo apt show remmina-plugin-vnc
Package: remmina-plugin-vnc
Version: 1.4.11+dfsg-3
Priority: optional
Section: gnome
Source: remmina
Maintainer: Debian Remote Maintainers <debian-remote@lists.debian.org>
Installed-Size: 68.6 kB
Depends: libc6 (>= 2.28), libcairo2 (>= 1.6.0), libgdk-pixbuf-2.0-0 (>= 2.22.0), libglib2.0-0 (>= 2.26.0), libgtk-3-0 (>= 3.9.12), libvncclient1 (>= 0.9.10), remmina (= 1.4.11+dfsg-3)
Homepage: https://www.remmina.org/
Tag: role::plugin, uitoolkit::gtk
Download-Size: 31.1 kB
APT-Sources: http://archive.debian.org/debian bullseye/main armel Packages
Description: VNC plugin for Remmina
 Remmina is a remote desktop client written in GTK+, aiming to be
 useful for system administrators and travellers, who need to work
 with lots of remote computers in front of either large monitors or
 tiny netbooks.
 .
 Remmina supports multiple network protocols in an integrated and
 consistent user interface.
 .
 Currently RDP, VNC, SPICE, WWW, NX, XDMCP, EXEC and SSH are supported.
 .
 This package contains the VNC plugin for Remmina.


user@brain:~$ sudo apt install remmina-plugin-vnc
Reading package lists... Done
Building dependency tree... Done
Reading state information... Done
The following additional packages will be installed:
  liblzo2-2 libvncclient1
The following NEW packages will be installed:
  liblzo2-2 libvncclient1 remmina-plugin-vnc
0 upgraded, 3 newly installed, 0 to remove and 1 not upgraded.
Need to get 248 kB of archives.
After this operation, 501 kB of additional disk space will be used.
Do you want to continue? [Y/n] Y
Get:1 http://archive.debian.org/debian bullseye/main armel liblzo2-2 armel 2.10-2 [48.5 kB]
Get:2 http://archive.debian.org/debian bullseye/main armel libvncclient1 armel 0.9.13+dfsg-2+deb11u1 [168 kB]
Get:3 http://archive.debian.org/debian bullseye/main armel remmina-plugin-vnc armel 1.4.11+dfsg-3 [31.1 kB]
Fetched 248 kB in 3s (89.2 kB/s)
Selecting previously unselected package liblzo2-2:armel.
(Reading database ... 45107 files and directories currently installed.)
Preparing to unpack .../liblzo2-2_2.10-2_armel.deb ...
Unpacking liblzo2-2:armel (2.10-2) ...
Selecting previously unselected package libvncclient1:armel.
Preparing to unpack .../libvncclient1_0.9.13+dfsg-2+deb11u1_armel.deb ...
Unpacking libvncclient1:armel (0.9.13+dfsg-2+deb11u1) ...
Selecting previously unselected package remmina-plugin-vnc:armel.
Preparing to unpack .../remmina-plugin-vnc_1.4.11+dfsg-3_armel.deb ...
Unpacking remmina-plugin-vnc:armel (1.4.11+dfsg-3) ...
Setting up liblzo2-2:armel (2.10-2) ...
Setting up libvncclient1:armel (0.9.13+dfsg-2+deb11u1) ...
Setting up remmina-plugin-vnc:armel (1.4.11+dfsg-3) ...
Processing triggers for libc-bin (2.31-13+deb11u11) ...
user@brain:~$
dpkg-source: info: local changes detected, the modified files are:
libsdl2-2.0.14+dfsg2/include/SDL_atomic.h
libsdl2-2.0.14+dfsg2/include/SDL_atomic.h.org
dpkg-source: info: you can integrate the local changes with dpkg-source --commit
dpkg-source: error: aborting due to unexpected upstream changes, see /tmp/libsdl2_2.0.14+dfsg2-3+deb11u1.diff.sPjez4
dpkg-buildpackage: error: dpkg-source -b . subprocess returned exit status 2
修正のコミットは以下のコマンドを実行します。 $ dpkg-source –commit
以下のように表示されるので、「Enter the desired patch name」はbrainと入力しています。 エディタが立ち上がったら、ctal-xで終了する
dpkg-source: info: local changes detected, the modified files are:
libsdl2-2.0.14+dfsg2/include/SDL_atomic.h
libsdl2-2.0.14+dfsg2/include/SDL_atomic.h.org
Enter the desired patch name: brain
dpkg-source: info: local changes have been recorded in a new patch: libsdl2-2.0.14+dfsg2/debian/patches/brain
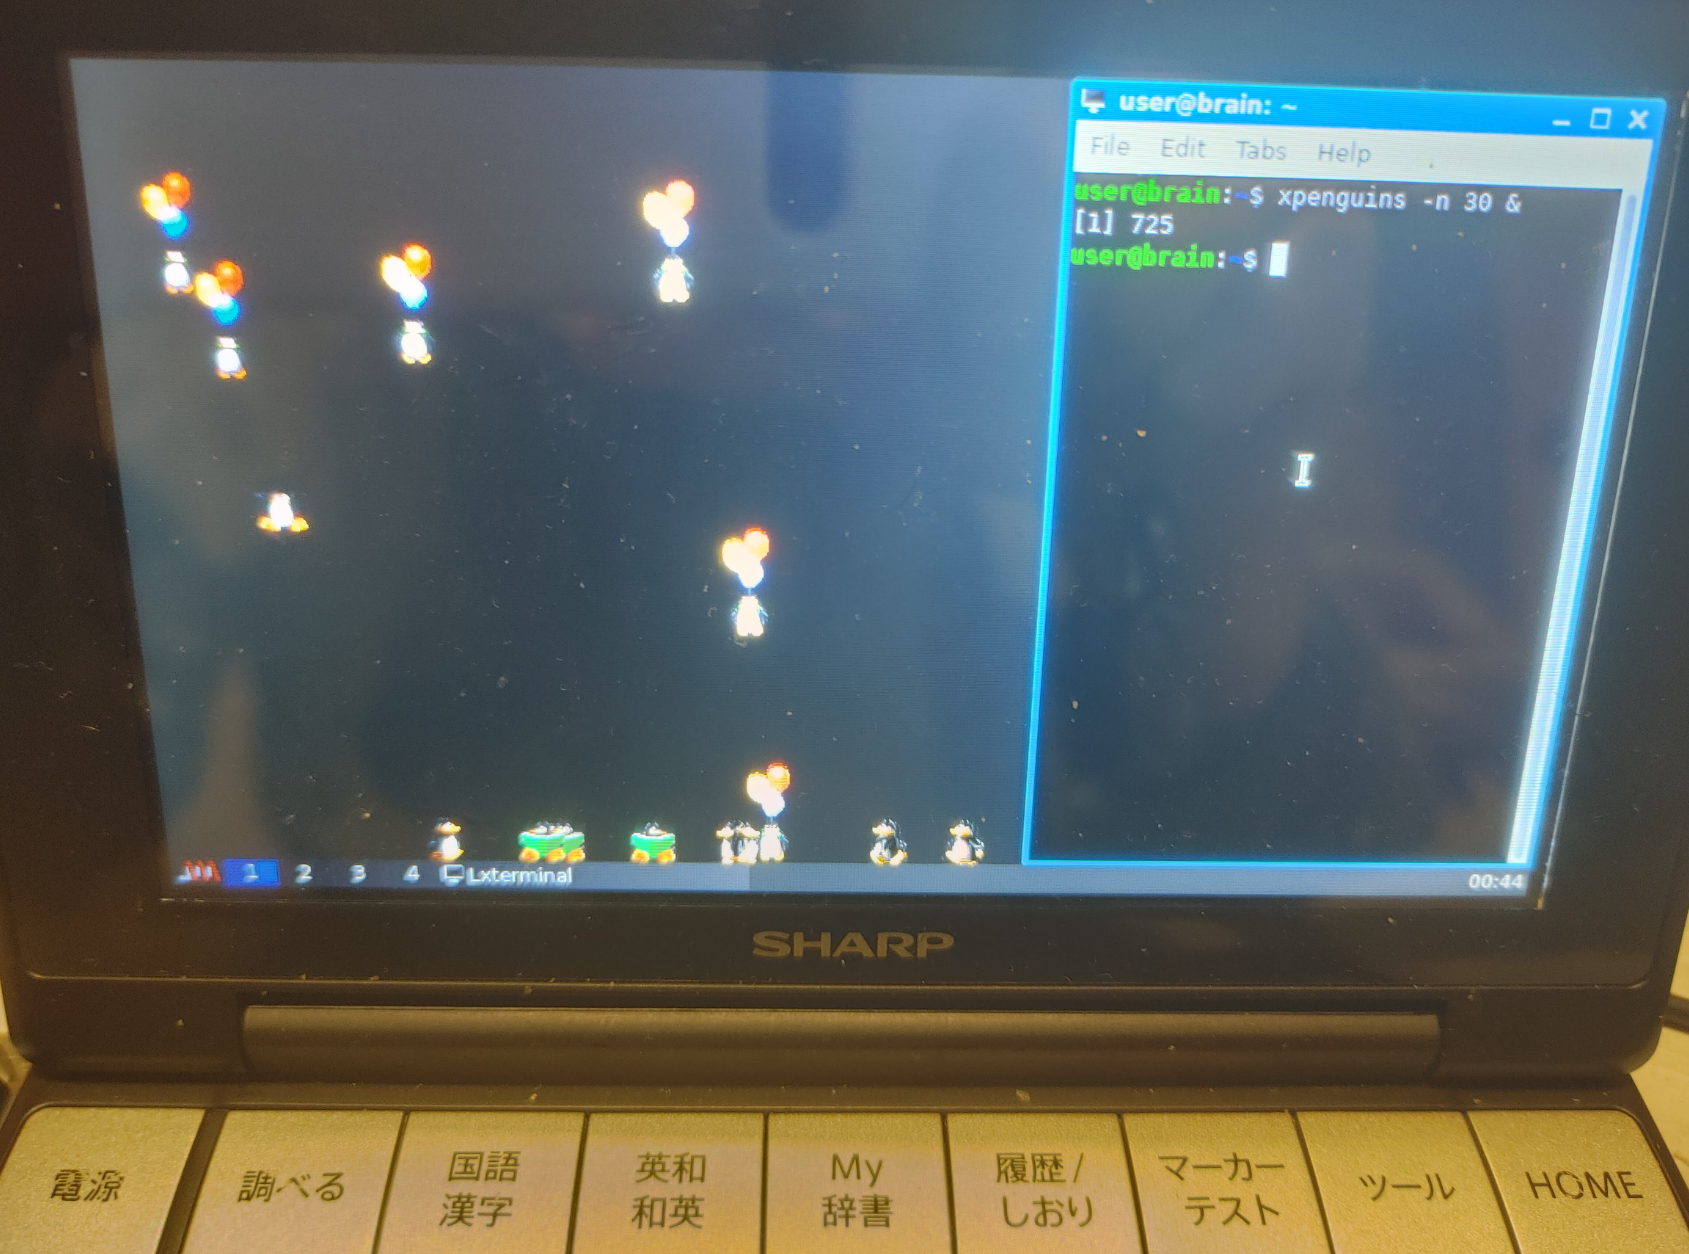
user@brain:~$ sudo apt show xpenguins
Package: xpenguins
Version: 2.2-11
Priority: optional
Section: games
Maintainer: Debian Games Team <pkg-games-devel@lists.alioth.debian.org>
Installed-Size: 1,139 kB
Depends: libc6 (>= 2.7), libx11-6, libxext6, libxpm4
Homepage: http://xpenguins.seul.org/
Tag: game::toys, interface::graphical, interface::x11, role::program,
 scope::utility, uitoolkit::xlib, use::entertaining, x11::screensaver
Download-Size: 172 kB
APT-Sources: http://archive.debian.org/debian bullseye/main armel Packages
Description: little penguins walk on your windows
 Ever wanted cute little penguins walking along the tops of your
 windows? Ever wanted to send an army of cute little penguins to invade
 the screen of someone else on your network? Probably not, but why not
 try this program out anyway, it's cool!


user@brain:~$
user@brain:~$ sudo apt install xpenguins
Reading package lists... Done
Building dependency tree... Done
Reading state information... Done
The following NEW packages will be installed:
  xpenguins
0 upgraded, 1 newly installed, 0 to remove and 2 not upgraded.
Need to get 172 kB of archives.
After this operation, 1,139 kB of additional disk space will be used.
Get:1 http://archive.debian.org/debian bullseye/main armel xpenguins armel 2.2-11 [172 kB]
Fetched 172 kB in 1s (131 kB/s)
Selecting previously unselected package xpenguins.
(Reading database ... 60135 files and directories currently installed.)
Preparing to unpack .../xpenguins_2.2-11_armel.deb ...
Unpacking xpenguins (2.2-11) ...
Setting up xpenguins (2.2-11) ...
Processing triggers for man-db (2.9.4-2) ...
user@brain:~$


user@brain:~$ xpenguins -h
XPenguins 2.2 (1 October 2001) by Robin Hogan
Usage: xpenguins [options]
Options:
  -d, --display        <display>    Send the penguins to specified display
  -m, --delay          <millisecs>  Set delay between frames
  -n, --penguins       <n>          Create <n> penguins (max 256)
  -q, --quiet                       Suppress all non-fatal messages
  -v, --version                     Show version information
  -h, --help                        Show this message
  -c, --config-dir     <dir>        Look for config files (and themes) in <dir>
  -p, --ignorepopups                Penguins ignore "popup" windows
  -r, --rectwin                     Regard shaped windows as rectangular
  -t, --theme          <theme>      Use named <theme>
  -l, --list-themes                 List available themes
  -i, --theme-info                  Describe a theme and exit (use with -t)
  -b, --no-blood                    Do not show any gory images
  -a, --no-angels                   Do not show any cherubim
  -s, --squish                      kill penguins with mouse
      --all                         Run all available themes simultaneously
      --random-theme                Choose a random theme
      --id             <window id>  Send penguins to window with this ID
      --nice           <ld1> <ld2>  Start killing penguins when load reaches
                                       <ld1>, kill all if load reches <ld2>
("--" can be replaced with "-" in all cases)
System data directory: /usr/share/xpenguins
user@brain:~$

user@brain:~$ xpenguins -l
Big Penguins
Bill
Classic Penguins
Penguins
Turtles
また、xmkmf -a のように -aオプションを付けると、 make Makefiles、make includes、make depend まで自動的に実行します。
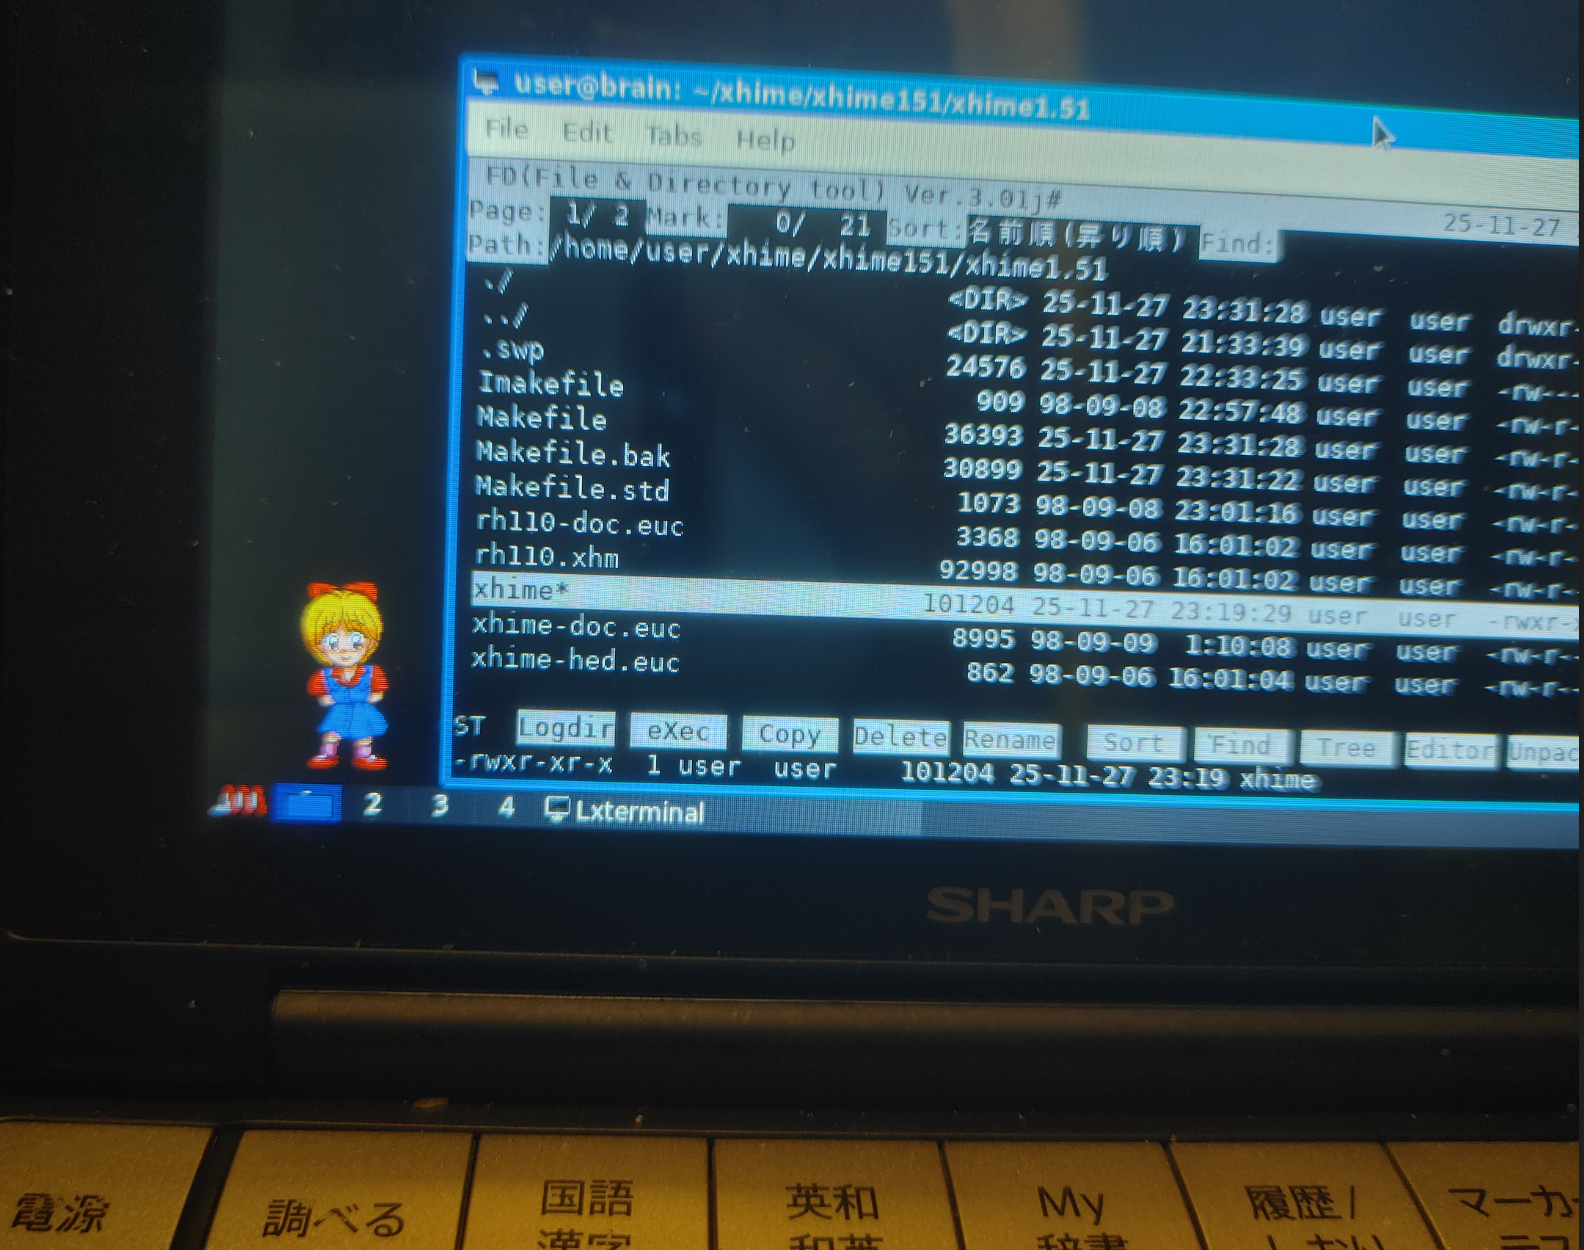
user@brain:~/xhime/xhime151/xhime1.51$ xmkmf -a
mv -f Makefile Makefile.bak
imake -DUseInstalled -I/usr/lib/X11/config
make Makefiles
make: Nothing to be done for 'Makefiles'.
make includes
make: Nothing to be done for 'includes'.
make depend
gccmakedep  --      -Dlinux -D__arm__ -D__arm32__ -U__arm -Uarm -D_POSIX_C_SOURCE=199309L                              -D_POSIX_SOURCE -D_XOPEN_SOURCE                          -D_BSD_SOURCE -D_SVID_SOURCE                                 -D_LARGEFILE_SOURCE -D_FILE_OFFSET_BITS=64                                                                   -DFUNCPROTO=15 -DNARROWPROTO   -DSHAPE  -DAUDIO_DEVICE=\"/dev/audio\"  -DMAILSPOOL_PATH=\"/usr/spool/mail/\" -DXHIMEDAT_PATH=\"/usr/lib/X11/xhime\" -DXSYSV_SIG   -- xhime.c
user@brain:~/xhime/xhime151/xhime1.51$
あとは、通常通り、以下でビルド&インストールです。 make make install
インストールログ
user@brain:~/xhime/xhime151/xhime1.51$ sudo apt show xutils-dev
Package: xutils-dev
Version: 1:7.7+5+b1
Priority: optional
Section: x11
Source: xutils-dev (1:7.7+5)
Maintainer: Debian X Strike Force <debian-x@lists.debian.org>
Installed-Size: 1,489 kB
Depends: libc6 (>= 2.7), cpp
Tag: devel::buildtools, devel::lang:c, devel::library, implemented-in::c,
 interface::commandline, role::devel-lib, role::program, scope::utility,
 works-with::software:source
Download-Size: 239 kB
APT-Sources: http://archive.debian.org/debian bullseye/main armel Packages
Description: X Window System utility programs for development
 xutils-dev provides a set of utility programs shipped with the X Window System
 that do not require the X libraries; many of these programs are useful
 even on a system that does not have any X clients or X servers installed.
 .
 The programs in this package include:
  - imake, a C preprocessor interface to the make utility;
  - lndir, a tool that creates a shadow directory of symbolic links to
    another directory tree;
  - makedepend, a tool to create dependencies in makefiles;
  - makeg, a tool for making debuggable executables.
 .
 This package also lscontains xorg-macros.m4, a set of macros used in configure
 scripts of X.Org packages.


user@brain:~/xhime/xhime151/xhime1.51$ sudo apt install xutils-dev
Reading package lists... Done
Building dependency tree... Done
Reading state information... Done
The following NEW packages will be installed:
  xutils-dev
0 upgraded, 1 newly installed, 0 to remove and 2 not upgraded.
Need to get 239 kB of archives.
After this operation, 1,489 kB of additional disk space will be used.
Get:1 http://archive.debian.org/debian bullseye/main armel xutils-dev armel 1:7.7+5+b1 [239 kB]
Fetched 239 kB in 1s (200 kB/s)
Selecting previously unselected package xutils-dev.
(Reading database ... 60570 files and directories currently installed.)
Preparing to unpack .../xutils-dev_1%3a7.7+5+b1_armel.deb ...
Unpacking xutils-dev (1:7.7+5+b1) ...
Setting up xutils-dev (1:7.7+5+b1) ...
Processing triggers for man-db (2.9.4-2) ...
user@brain:~/xhime/xhime151/xhime1.51$


user@brain:~/xhime/xhime151/xhime1.51$ xmkmf --help
usage:  /usr/bin/xmkmf [-a] [top_of_sources_pathname [current_directory]]
user@brain:~/xhime/xhime151/xhime1.51$
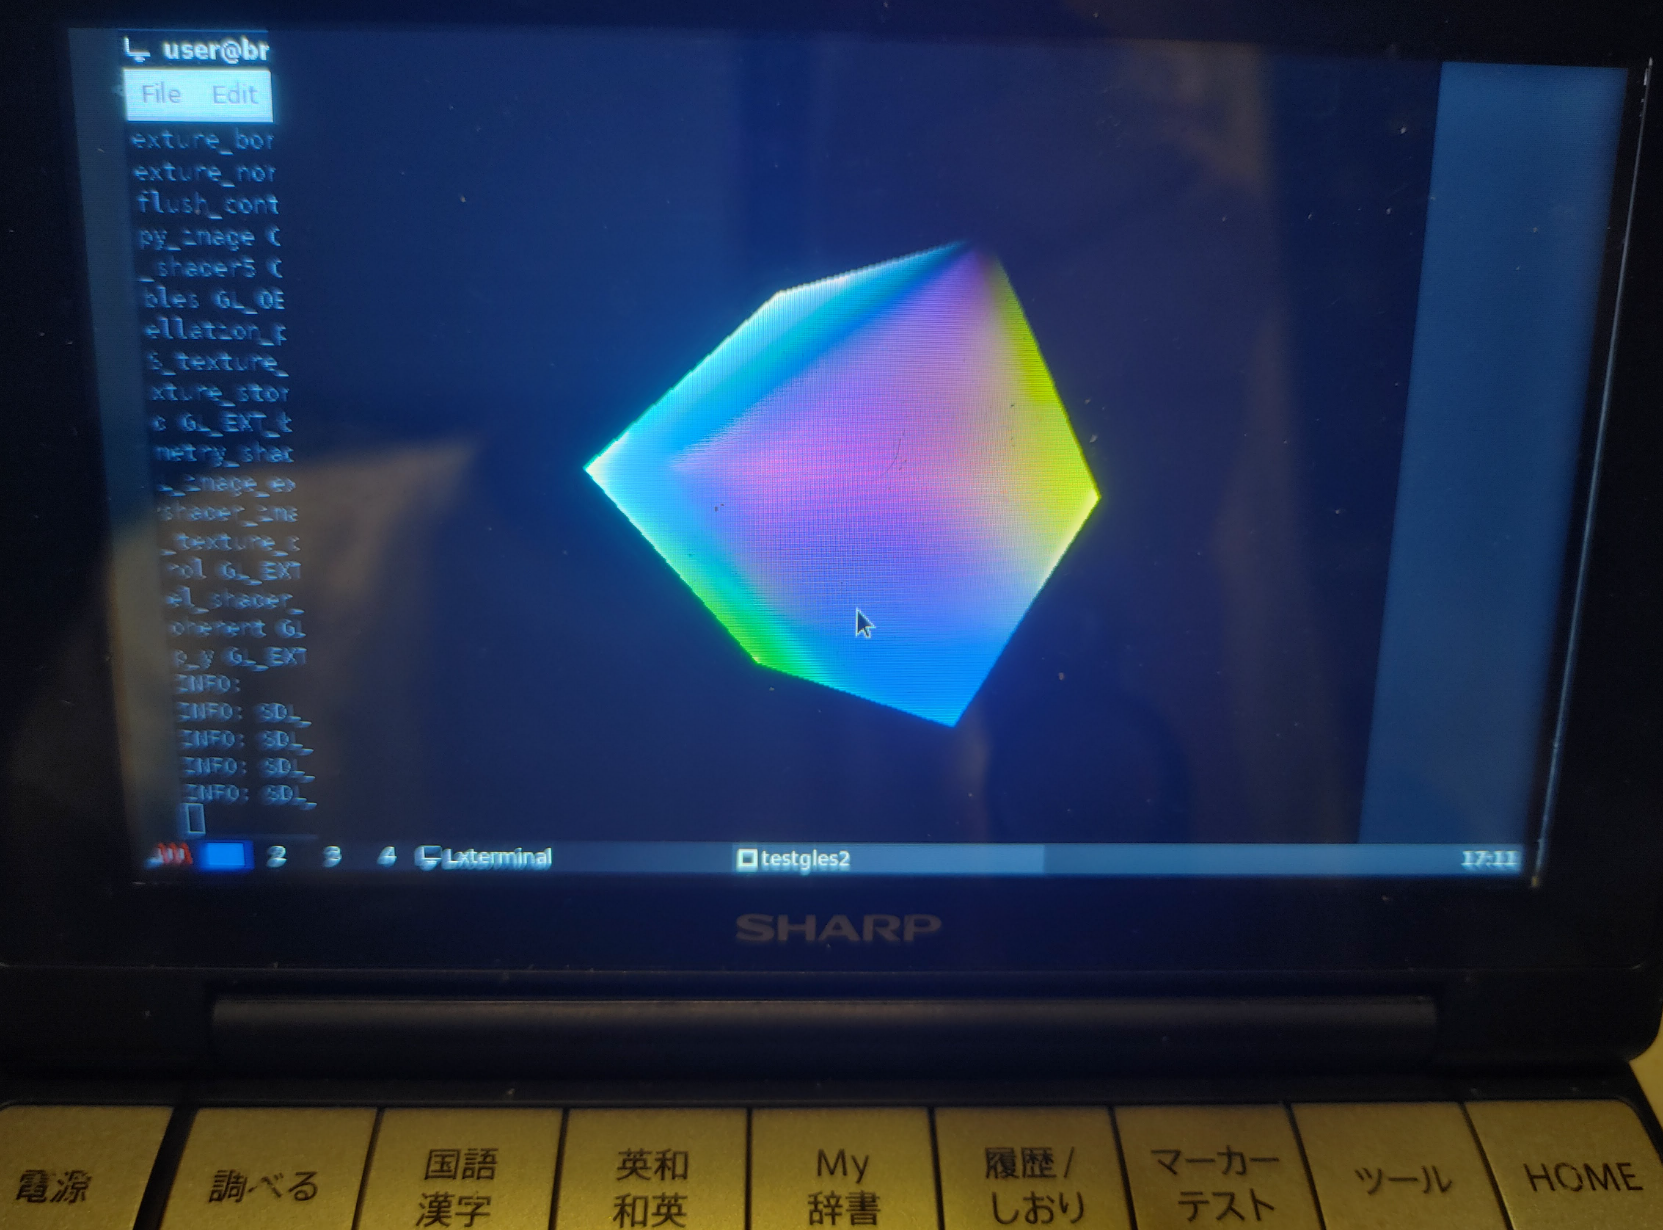
user@brain:~/oneko-git/oneko/build$ cmake ..
-- The C compiler identification is GNU 10.2.1
-- Detecting C compiler ABI info
-- Detecting C compiler ABI info - done
-- Check for working C compiler: /usr/bin/cc - skipped
-- Detecting C compile features
-- Detecting C compile features - done
-- Configuring done
-- Generating done
-- Build files have been written to: /home/user/oneko-git/oneko/build

user@brain:~/oneko-git/oneko/build$ cmake --build .
Scanning dependencies of target oneko
[ 50%] Building C object CMakeFiles/oneko.dir/oneko.c.o
[100%] Linking C executable oneko
[100%] Built target oneko
インストールログ
user@brain:~$ apt show cmake
Package: cmake
Version: 3.18.4-2+deb11u1
Priority: optional
Section: devel
Maintainer: Debian CMake Team <pkg-cmake-team@lists.alioth.debian.org>
Installed-Size: 19.4 MB
Depends: cmake-data (= 3.18.4-2+deb11u1), procps, libarchive13 (>= 3.3.3), libc6 (>= 2.28), libcurl4 (>= 7.16.2), libexpat1 (>= 2.0.1), libgcc-s1 (>= 3.5), libjsoncpp24 (>= 1.9.4), librhash0 (>= 1.2.6), libstdc++6 (>= 9), libuv1 (>= 1.11.0), zlib1g (>= 1:1.2.3.3)
Recommends: gcc, make
Suggests: cmake-doc, ninja-build
Homepage: https://cmake.org/
Tag: devel::buildtools, implemented-in::c++, interface::commandline,
 interface::text-mode, role::program, scope::utility,
 uitoolkit::ncurses, works-with::software:source
Download-Size: 3,384 kB
APT-Sources: http://archive.debian.org/debian bullseye/main armel Packages
Description: cross-platform, open-source make system
 CMake is used to control the software compilation process using
 simple platform and compiler independent configuration files. CMake
 generates native makefiles and workspaces that can be used in the
 compiler environment of your choice. CMake is quite sophisticated: it
 is possible to support complex environments requiring system
 configuration, pre-processor generation, code generation, and template
 instantiation.
 .
 CMake was developed by Kitware as part of the NLM Insight
 Segmentation and Registration Toolkit project. The ASCI VIEWS project
 also provided support in the context of their parallel computation
 environment. Other sponsors include the Insight, VTK, and VXL open
 source software communities.


user@brain:~$ apt install cmake
E: Could not open lock file /var/lib/dpkg/lock-frontend - open (13: Permission denied)
E: Unable to acquire the dpkg frontend lock (/var/lib/dpkg/lock-frontend), are you root?
user@brain:~$ sudo apt install cmake
[sudo] password for user:
Reading package lists... Done
Building dependency tree... Done
Reading state information... Done
The following additional packages will be installed:
  cmake-data libjsoncpp24 librhash0
Suggested packages:
  cmake-doc ninja-build
The following NEW packages will be installed:
  cmake cmake-data libjsoncpp24 librhash0
0 upgraded, 4 newly installed, 0 to remove and 2 not upgraded.
Need to get 5,317 kB of archives.
After this operation, 29.0 MB of additional disk space will be used.
Do you want to continue? [Y/n] Y
Get:1 http://archive.debian.org/debian bullseye/main armel cmake-data all 3.18.4-2+deb11u1 [1,725 kB]
Get:2 http://archive.debian.org/debian bullseye/main armel libjsoncpp24 armel 1.9.4-4 [66.9 kB]
Get:3 http://archive.debian.org/debian bullseye/main armel librhash0 armel 1.4.1-2 [141 kB]
Get:4 http://archive.debian.org/debian bullseye/main armel cmake armel 3.18.4-2+deb11u1 [3,384 kB]
Fetched 5,317 kB in 5s (1,066 kB/s)
Selecting previously unselected package cmake-data.
(Reading database ... 60811 files and directories currently installed.)
Preparing to unpack .../cmake-data_3.18.4-2+deb11u1_all.deb ...
Unpacking cmake-data (3.18.4-2+deb11u1) ...
Selecting previously unselected package libjsoncpp24:armel.
Preparing to unpack .../libjsoncpp24_1.9.4-4_armel.deb ...
Unpacking libjsoncpp24:armel (1.9.4-4) ...
Selecting previously unselected package librhash0:armel.
Preparing to unpack .../librhash0_1.4.1-2_armel.deb ...
Unpacking librhash0:armel (1.4.1-2) ...
Selecting previously unselected package cmake.
Preparing to unpack .../cmake_3.18.4-2+deb11u1_armel.deb ...
Unpacking cmake (3.18.4-2+deb11u1) ...
Setting up libjsoncpp24:armel (1.9.4-4) ...
Setting up librhash0:armel (1.4.1-2) ...
Setting up cmake-data (3.18.4-2+deb11u1) ...
Setting up cmake (3.18.4-2+deb11u1) ...
Processing triggers for man-db (2.9.4-2) ...
Processing triggers for libc-bin (2.31-13+deb11u11) ...
user@brain:~$
cbp2make Code::Blocks IDE project (.cbp)からMakefileを生成するためのツール(2025/12/13追加)
アプリケーションのソースを確認した際に、 「*.cbp」ファイル(Code::Blocks IDE project 、workspace files)があれば、 ここからMakefileを生成してビルドできます。
user@brain:~$ apt show cbp2make
Package: cbp2make
Version: 147+dfsg-4
Priority: optional
Section: devel
Maintainer: Debian Science Team <debian-science-maintainers@lists.alioth.debian.org>
Installed-Size: 400 kB
Depends: libc6 (>= 2.4), libgcc-s1 (>= 3.5), libstdc++6 (>= 5.2), libtinyxml2.6.2v5
Homepage: https://sourceforge.net/projects/cbp2make/
Download-Size: 115 kB
APT-Sources: http://archive.debian.org/debian bullseye/main armel Packages
Description: Makefile generation tool for the Code::Blocks IDE
 cbp2make is a stand-alone build tool that allows you
 to generate makefile(s) for GNU Make out of Code::Blocks
 IDE project or workspace files.

user@brain:~$ sudo apt install cbp2make
[sudo] password for user:
Reading package lists... Done
Building dependency tree... Done
Reading state information... Done
The following NEW packages will be installed:
  cbp2make
0 upgraded, 1 newly installed, 0 to remove and 3 not upgraded.
Need to get 115 kB of archives.
After this operation, 400 kB of additional disk space will be used.
Get:1 http://archive.debian.org/debian bullseye/main armel cbp2make armel 147+dfsg-4 [115 kB]
Fetched 115 kB in 1s (91.0 kB/s)
Selecting previously unselected package cbp2make.
(Reading database ... 92070 files and directories currently installed.)
Preparing to unpack .../cbp2make_147+dfsg-4_armel.deb ...
Unpacking cbp2make (147+dfsg-4) ...
Setting up cbp2make (147+dfsg-4) ...
Processing triggers for man-db (2.9.4-2) ...

ser@brain:~$ cbp2make -in Bomberman.cbp -out Makefile
Starting cbp2make rev.147...
Using default configuration.
Loading file 'Bomberman.cbp': [DONE]
Generating makefile(s): Makefile: [DONE]
user@brain:~$
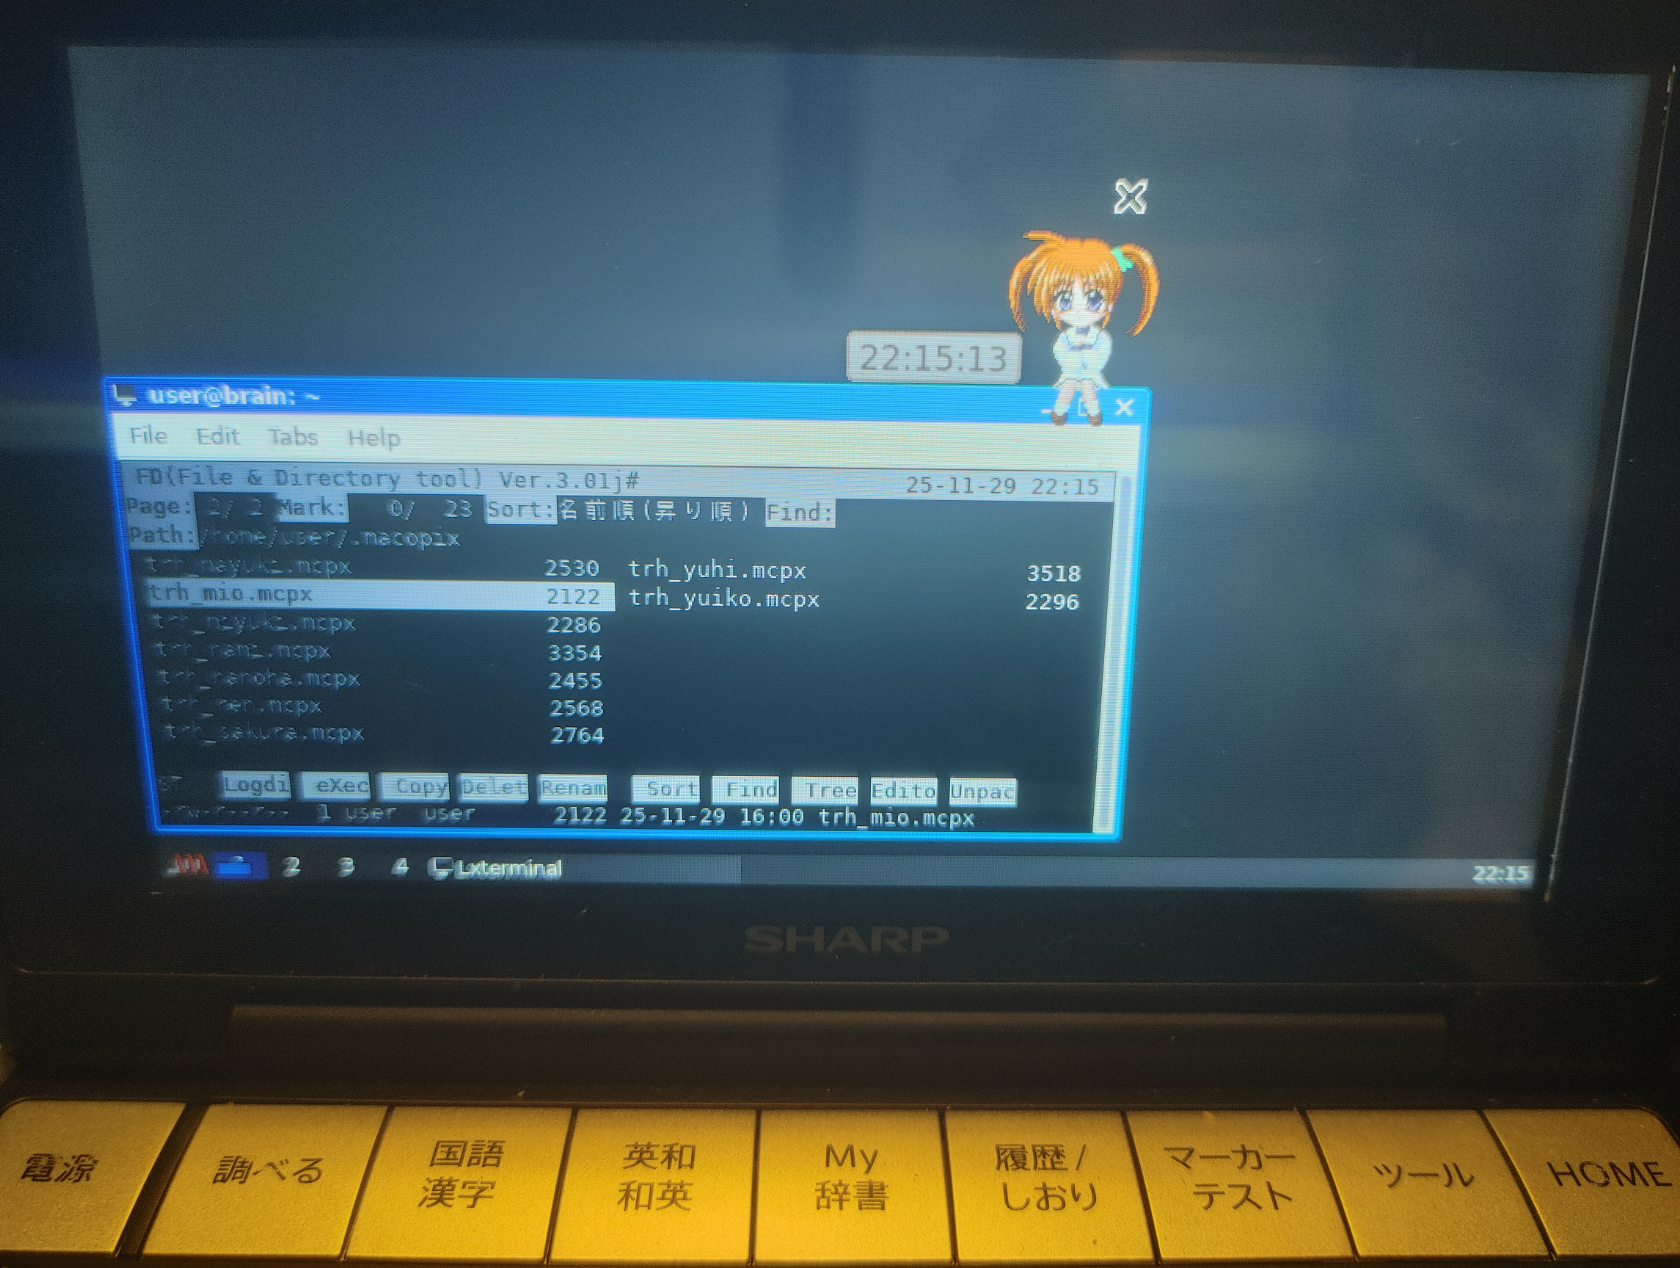
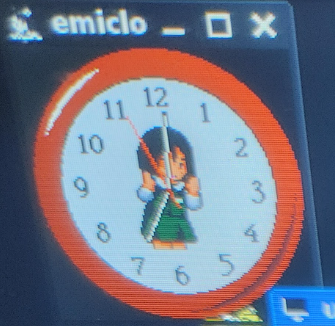
で、Brainuxにアクセスして、macopix &で起動します。 あとはマスコットを右クリックして、Configから「Resource」->「Font/Color」画面で、 「Default for Clock」と「Default for Balloon」のフォントを日本語文字列対応の「IPAGithic Regular」あたりに変更します。
user@brain:~$ apt show macopix
Package: macopix
Version: 3.4.0+dfsg.1-3
Priority: optional
Section: games
Maintainer: Ying-Chun Liu (PaulLiu) <paulliu@debian.org>
Installed-Size: 4,962 kB
Depends: libc6 (>= 2.28), libcairo2 (>= 1.10.0), libgdk-pixbuf-2.0-0 (>= 2.25.2), libglib2.0-0 (>= 2.35.9), libgtk-3-0 (>= 3.21.5), libpango-1.0-0 (>= 1.14.0), libssl1.1 (>= 1.1.0), libx11-6
Breaks: macopix-gtk2 (<< 3.4.0-1)
Replaces: macopix-gtk2 (<< 3.4.0-1)
Homepage: http://rosegray.sakura.ne.jp/macopix/
Tag: uitoolkit::gtk
Download-Size: 381 kB
APT-Sources: http://archive.debian.org/debian bullseye/main armel Packages
Description: Mascot Constructive Pilot for X
 MaCoPiX (Mascot Constructive Pilot for X) is a desktop mascot application for
 UNIX / X Window system. You can make window sitters, fixed desktop mascots,
 and, furthermore, desktop clock mascots, using MaCoPiX.


user@brain:~$ sudo apt install macopix
[sudo] password for user:
Reading package lists... Done
Building dependency tree... Done
Reading state information... Done
The following NEW packages will be installed:
  macopix
0 upgraded, 1 newly installed, 0 to remove and 2 not upgraded.
Need to get 381 kB of archives.
After this operation, 4,962 kB of additional disk space will be used.
Get:1 http://archive.debian.org/debian bullseye/main armel macopix armel 3.4.0+dfsg.1-3 [381 kB]
Fetched 381 kB in 1s (377 kB/s)
Selecting previously unselected package macopix.
(Reading database ... 63691 files and directories currently installed.)
Preparing to unpack .../macopix_3.4.0+dfsg.1-3_armel.deb ...
Unpacking macopix (3.4.0+dfsg.1-3) ...
Setting up macopix (3.4.0+dfsg.1-3) ...
Processing triggers for man-db (2.9.4-2) ...
user@brain:~$


(macopix:2313): Gtk-WARNING **: 15:50:50.278: cannot open display:
user@brain:~$ macopix --help
 macopix : Mascot Constructive Pilot for X   Ver3.4.0
  [usage] % macopix [options] (mascot file)
     -h, --help               : Print this message
     -c, --common-dir         : Print COMMON Directory
     -b, --biff               : Turn on the biff function
     -s, --signal             : Turn on the time signal
     -o, --offset offset[%]   : Set offset-value for Focus Following
     -r, --rcfile rc-file     : Set the resource file
     -m, --menu   menu-file   : Set the file for quick menu
     -mg --mag    magnify     : Set magnification percentage of mascot
     -i, --ip-style (0|1|2|3) : Set interpolation style for magnification
## For Installation
     -a, --auto-install       : Set mascot auto install ON
     -na --no-auto-install    : Set mascot auto install OFF
     -O, --over-write         : Permit to overwrite files in user dir
     --install-user-mascot (mascot)  : Mascot Installation to User Dir.
     --install-user-menu (menu)      : Menu Installation to User Dir.
     --install-common-mascot (mascot): Mascot Installation to Common Dir.
     --install-common-menu (menu)    : Menu Installation to Common Dir.
## For Socket Message
     --sockmsg                : Start MaCoPiX as Socket Message Receiver
     --message (text)         : Send Message to Socket Message Receiver
     --message-expire (time)  : Socket Message Expire Time[ms]
     --message-type-lump      : Force to Set Lump Sum Balloon
     --message-type-step      : Force to Set Stepping Balloon
     --message-step (frame)   : Stepping Interval Frame for SockeMsg
     -nc, --no-duet-click     : Duet Animation [Click] OFF
     -nr, --no-duet-random    : Duet Animation [Random] OFF

 ================== Installed Menus ==================
   !!! Common Directory - /usr/share/macopix/ - does not exist.

  !!! User Directory - /home/user/.macopix/ - does not exist.
user@brain:~$
インストールは、aptなどでのインストールはできず、ソースからコンパイルする必要があります。 xhime – 常駐姫ちゃん X Window System 版 – からソース アーカイブを入手し、 解凍したものをBrainxに転送して、コンパイルするのですが、 まずは Imakefileから Makefileを生成します。 xmkmf -a
user@brain:~/xhime/xhime151/xhime1.51$ xmkmf -a
mv -f Makefile Makefile.bak
imake -DUseInstalled -I/usr/lib/X11/config
make Makefiles
make: Nothing to be done for 'Makefiles'.
make includes
make: Nothing to be done for 'includes'.
make depend
gccmakedep  --      -Dlinux -D__arm__ -D__arm32__ -U__arm -Uarm -D_POSIX_C_SOURCE=199309L                              -D_POSIX_SOURCE -D_XOPEN_SOURCE                          -D_BSD_SOURCE -D_SVID_SOURCE                                 -D_LARGEFILE_SOURCE -D_FILE_OFFSET_BITS=64                                                                   -DFUNCPROTO=15 -DNARROWPROTO   -DSHAPE  -DAUDIO_DEVICE=\"/dev/audio\"  -DMAILSPOOL_PATH=\"/usr/spool/mail/\" -DXHIMEDAT_PATH=\"/usr/lib/X11/xhime\" -DXSYSV_SIG   -- xhime.c

In file included from xhime.c:28:
/usr/lib/gcc/arm-linux-gnueabi/10/include/varargs.h:4:2: error: #error "GCC no longer implements <varargs.h>."
    4 | #error "GCC no longer implements <varargs.h>."
      |  ^~~~~
/usr/lib/gcc/arm-linux-gnueabi/10/include/varargs.h:5:2: error: #error "Revise your code to use <stdarg.h>."
    5 | #error "Revise your code to use <stdarg.h>."
      |  ^~~~~
user@brain:~/xhime/xhime151/xhime1.51$
user@brain:~$ apt show xfishtank
Package: xfishtank
Version: 2.5-1+b1
Priority: optional
Section: games
Source: xfishtank (2.5-1)
Maintainer: Marius Gavrilescu <marius@ieval.ro>
Installed-Size: 449 kB
Depends: libc6 (>= 2.10), libimlib2 (>= 1.4.5), libx11-6
Homepage: http://jim.rees.org/computers/xfishtank.html
Tag: game::toys, interface::graphical, interface::x11, role::program,
 scope::utility, uitoolkit::xlib, use::entertaining, x11::screensaver
Download-Size: 77.7 kB
APT-Sources: http://archive.debian.org/debian bullseye/main armel Packages
Description: turns your X root into an aquarium
 Enjoy an animated aquarium background with a variety of tropical fish
 swimming in it on your screen.


user@brain:~$ sudo apt install xfishtank
Reading package lists... Done
Building dependency tree... Done
Reading state information... Done
The following additional packages will be installed:
  libid3tag0 libimlib2
The following NEW packages will be installed:
  libid3tag0 libimlib2 xfishtank
0 upgraded, 3 newly installed, 0 to remove and 3 not upgraded.
Need to get 293 kB of archives.
After this operation, 1,129 kB of additional disk space will be used.
Do you want to continue? [Y/n] Y
Get:1 http://archive.debian.org/debian bullseye/main armel libid3tag0 armel 0.15.1b-14 [29.9 kB]
Get:2 http://archive.debian.org/debian bullseye/main armel libimlib2 armel 1.7.1-2+deb11u1 [185 kB]
Get:3 http://archive.debian.org/debian bullseye/main armel xfishtank armel 2.5-1+b1 [77.7 kB]
Fetched 293 kB in 2s (125 kB/s)
Selecting previously unselected package libid3tag0:armel.
(Reading database ... 73715 files and directories currently installed.)
Preparing to unpack .../libid3tag0_0.15.1b-14_armel.deb ...
Unpacking libid3tag0:armel (0.15.1b-14) ...
Selecting previously unselected package libimlib2:armel.
Preparing to unpack .../libimlib2_1.7.1-2+deb11u1_armel.deb ...
Unpacking libimlib2:armel (1.7.1-2+deb11u1) ...
Selecting previously unselected package xfishtank.
Preparing to unpack .../xfishtank_2.5-1+b1_armel.deb ...
Unpacking xfishtank (2.5-1+b1) ...
Setting up libid3tag0:armel (0.15.1b-14) ...
Setting up libimlib2:armel (1.7.1-2+deb11u1) ...
Setting up xfishtank (2.5-1+b1) ...
Processing triggers for man-db (2.9.4-2) ...
Processing triggers for libc-bin (2.31-13+deb11u11) ...


user@brain:~$ xfishtank --help
xfishtank: invalid option -- '-'
usage: xfishtank
                [-c color]  background color
                [-b limit]  number of bubbles (default 32)
                [-f limit]  number of fish (default 10)
                [-i mult]   move interval (default 0.2)
                [-r rate]   move frequency (default 0.2)
                [-m num]    median cut to this many colors
                [-C num]    use only this many color cells
                [-d]        clip fish, swim on root window
                [-p file]   fish swim on picture in file
                [host:display]
user@brain:~$
$ cd $ mkdir XMascot $ cd XMascot $ wget https://cclub-flying.dsl.gr.jp/products/xmascot/xmascot2.6a.tar.gz $ wget https://cclub-flying.dsl.gr.jp/products/xmascot/dokyu2/dokyu2mas.tar.gz $ wget https://cclub-flying.dsl.gr.jp/~sage/bin/kakyumas.tar.gz
$ tar zxvf xmascot2.6a.tar.gz $ cd xmascot2.6a $ cd mascots $ tar zxvf ../../dokyu2mas.tar.gz $ mv dokyusei2 dokyu2 $ mkdir kakyu $ cd kakyu $ tar zxvf ../../../kakyumas.tar.gz $ cd ../../
$ cd $ mkdir mxclock $ cd mxclock/ $ wget https://ftp.vector.co.jp/05/92/1347/mxclock.taz $ tar xf mxclock.taz $ cd mxclock.d $ xmkmf -a $ make $ sudo make install
$ cd $ mkdir xantfarm $ cd xantfarm $ wget https://www.acme.com/software/xantfarm/xantfarm_14Aug2014.tar.gz $ tar zxf xantfarm_14Aug2014.tar.gz $ cd xantfarm $ xmkmf -a $ make $ sudo make install
$ cd $ mkdir XMangekyou $ cd XMangekyou $ wget https://kozos.jp/myfreesoft/xmangekyou-2.0.1.tar.gz $ tar zxf xmangekyou-2.0.1.tar.gz $ cd xmangekyou-2.0.1
user@brain:~$ sudo apt update
Hit:1 http://archive.debian.org/debian bullseye InRelease
Hit:2 https://packagecloud.io/brainhackers/brainux/any any InRelease
Reading package lists... Done
Building dependency tree... Done
Reading state information... Done
1 package can be upgraded. Run 'apt list --upgradable' to see it.


user@brain:~$ sudo apt show x11-xserver-utils
Package: x11-xserver-utils
Version: 7.7+8
Priority: optional
Section: x11
Maintainer: Debian X Strike Force <debian-x@lists.debian.org>
Installed-Size: 476 kB
Depends: libc6 (>= 2.26), libice6 (>= 1:1.0.0), libx11-6, libxaw7, libxcursor1 (>> 1.1.2), libxext6, libxi6, libxmu6, libxmuu1, libxrandr2 (>= 2:1.5.0), libxrender1, libxt6, libxxf86vm1, cpp
Suggests: nickle, cairo-5c, xorg-docs-core
Conflicts: iceauth, sessreg, xgamma, xhost, xmodmap, xrandr, xrdb, xrefresh, xrgb, xset, xsetmode, xsetpointer, xsetroot, xstdcmap, xvidtune
Breaks: arandr (<< 0.1.9)
Replaces: iceauth, sessreg, xbase-clients (<< 1:7.3), xgamma, xhost, xmodmap, xrandr, xrdb, xrefresh, xrgb, xset, xsetmode, xsetpointer, xsetroot, xstdcmap, xutils (<< 1:7.2), xvidtune
Tag: implemented-in::c, interface::commandline, role::program,
 uitoolkit::TODO, x11::xserver
Download-Size: 158 kB
APT-Sources: http://archive.debian.org/debian bullseye/main armel Packages
Description: X server utilities
 An X client is a program that interfaces with an X server (almost always via
 the X libraries), and thus with some input and output hardware like a
 graphics card, monitor, keyboard, and pointing device (such as a mouse).
 .
 This package provides a miscellaneous assortment of X Server utilities
 that ship with the X Window System, including:
  - iceauth, a tool for manipulating ICE protocol authorization records;
  - rgb;
  - sessreg, a simple program for managing utmp/wtmp entries;
  - xcmsdb, a device color characteristic utility for the X Color Management
    System;
  - xgamma, a tool for querying and setting a monitor's gamma correction;
  - xhost, a very dangerous program that you should never use;
  - xmodmap, a utility for modifying keymaps and pointer button mappings in X;
  - xrandr, a command-line interface to the RandR extension;
  - xrdb, a tool to manage the X server resource database;
  - xrefresh, a tool that forces a redraw of the X screen;
  - xset, a tool for setting miscellaneous X server parameters;
  - xsetmode and xsetpointer, tools for handling X Input devices;
  - xsetroot, a tool for tailoring the appearance of the root window;
  - xstdcmap, a utility to selectively define standard colormap properties;
  - xvidtune, a tool for customizing X server modelines for your monitor.


user@brain:~$ sudo apt install x11-xserver-utils
Reading package lists... Done
Building dependency tree... Done
Reading state information... Done
Suggested packages:
  nickle cairo-5c xorg-docs-core
The following NEW packages will be installed:
  x11-xserver-utils
0 upgraded, 1 newly installed, 0 to remove and 1 not upgraded.
Need to get 158 kB of archives.
After this operation, 476 kB of additional disk space will be used.
Get:1 http://archive.debian.org/debian bullseye/main armel x11-xserver-utils armel 7.7+8 [158 kB]
Fetched 158 kB in 1s (127 kB/s)
Selecting previously unselected package x11-xserver-utils.
(Reading database ... 44310 files and directories currently installed.)
Preparing to unpack .../x11-xserver-utils_7.7+8_armel.deb ...
Unpacking x11-xserver-utils (7.7+8) ...
Setting up x11-xserver-utils (7.7+8) ...
Processing triggers for man-db (2.9.4-2) ...


user@brain:~$ xhost
access control enabled, only authorizaed clients cat connect
user@brain:~$ xhost
access control enabled, only authorizaed clients cat connect
SI:localuser:user

user@brain:~$ xhost +192.168.29.19
192.168.29.19 being added to access contol list

user@brain:~$ xhost
access control enabled, only authorizaed clients cat connect
INET:192.168.29.19
SI:localuser:user
Bus 001 Device 004: ID 0d8c:000c C-Media Electronics, Inc. Audio Adapter
ターミナル上でのコマンド上では使用できましたが、一部ノイズが乗ります。
user@brain:~$ sudo lsusb
Bus 001 Device 003: ID 0b95:772b ASIX Electronics Corp. AX88772B
Bus 001 Device 004: ID 0d8c:000c C-Media Electronics, Inc. Audio Adapter
Bus 001 Device 002: ID 05e3:0610 Genesys Logic, Inc. Hub
Bus 001 Device 001: ID 1d6b:0002 Linux Foundation 2.0 root hub


user@brain:~$ aplay -l
**** List of PLAYBACK Hardware Devices ****
card 0: Set [C-Media USB Headphone Set], device 0: USB Audio [USB Audio]
  Subdevices: 1/1
  Subdevice #0: subdevice #0


user@brain:~$ aplay -L
null
    Discard all samples (playback) or generate zero samples (capture)
default
    Default Audio Device
sysdefault
    Default Audio Device
hw:CARD=Set,DEV=0
    C-Media USB Headphone Set, USB Audio
    Direct hardware device without any conversions
plughw:CARD=Set,DEV=0
    C-Media USB Headphone Set, USB Audio
    Hardware device with all software conversions
default:CARD=Set
    C-Media USB Headphone Set, USB Audio
    Default Audio Device
sysdefault:CARD=Set
    C-Media USB Headphone Set, USB Audio
    Default Audio Device
front:CARD=Set,DEV=0
    C-Media USB Headphone Set, USB Audio
    Front output / input
surround21:CARD=Set,DEV=0
    C-Media USB Headphone Set, USB Audio
    2.1 Surround output to Front and Subwoofer speakers
surround40:CARD=Set,DEV=0
    C-Media USB Headphone Set, USB Audio
    4.0 Surround output to Front and Rear speakers
surround41:CARD=Set,DEV=0
    C-Media USB Headphone Set, USB Audio
    4.1 Surround output to Front, Rear and Subwoofer speakers
surround50:CARD=Set,DEV=0
    C-Media USB Headphone Set, USB Audio
    5.0 Surround output to Front, Center and Rear speakers
surround51:CARD=Set,DEV=0
    C-Media USB Headphone Set, USB Audio
    5.1 Surround output to Front, Center, Rear and Subwoofer speakers
surround71:CARD=Set,DEV=0
    C-Media USB Headphone Set, USB Audio
    7.1 Surround output to Front, Center, Side, Rear and Woofer speakers
iec958:CARD=Set,DEV=0
    C-Media USB Headphone Set, USB Audio
    IEC958 (S/PDIF) Digital Audio Output
dmix:CARD=Set,DEV=0
    C-Media USB Headphone Set, USB Audio
    Direct sample mixing device


user@brain:~$ amixer -c0
Simple mixer control 'Headphone',0
  Capabilities: pvolume pswitch pswitch-joined
  Playback channels: Front Left - Front Right
  Limits: Playback 0 - 151
  Mono:
  Front Left: Playback 44 [29%] [-20.13dB] [on]
  Front Right: Playback 44 [29%] [-20.13dB] [on]
Simple mixer control 'Mic',0
  Capabilities: pvolume pvolume-joined cvolume cvolume-joined pswitch pswitch-joined cswitch cswitch-joined
  Playback channels: Mono
  Capture channels: Mono
  Limits: Playback 0 - 32 Capture 0 - 16
  Mono: Playback 23 [72%] [34.36dB] [off] Capture 0 [0%] [0.00dB] [on]
Simple mixer control 'Auto Gain Control',0
  Capabilities: pswitch pswitch-joined
  Playback channels: Mono
  Mono: Playback [on]


user@brain:~$ speaker-test -t sine -c 2 -f 220

speaker-test 1.2.4

Playback device is default
Stream parameters are 48000Hz, S16_LE, 2 channels
Sine wave rate is 220.0000Hz
Rate set to 48000Hz (requested 48000Hz)
Buffer size range from 2048 to 16384
Period size range from 1024 to 1024
Using max buffer size 16384
Periods = 4
was set period_size = 1024
was set buffer_size = 16384
 0 - Front Left
 1 - Front Right
^CTime per period = 4.344596
user@brain:~$

user@brain:~$ aplay sample.wav
user@brain:~$ sudo apt show mplayer
[sudo] password for user:
Package: mplayer
Version: 2:1.4+ds1-1+deb11u1
Priority: optional
Section: video
Maintainer: Debian Multimedia Maintainers <debian-multimedia@lists.debian.org>
Installed-Size: 4,301 kB
Depends: liba52-0.7.4 (>= 0.7.4), libaa1 (>= 1.4p5), libasound2 (>= 1.0.16), libass9 (>= 1:0.13.6), libaudio2, libavcodec58 (>= 7:4.2), libavformat58 (>= 7:4.2), libavutil56 (>= 7:4.0), libbluray2 (>= 1:0.2.2), libbs2b0, libc6 (>= 2.29), libcaca0 (>= 0.99.beta17-1), libcdio-cdda2 (>= 10.2+2.0.0), libcdio-paranoia2 (>= 10.2+2.0.0), libcdio19 (>= 2.1.0), libdca0 (>= 0.0.5), libdv4 (>= 1.0.0), libdvdnav4 (>= 4.1.3), libdvdread8 (>= 4.1.3), libegl1, libenca0 (>= 1.9), libfaad2 (>= 2.7), libfontconfig1 (>= 2.12.6), libfreetype6 (>= 2.2.1), libfribidi0 (>= 0.19.2), libgif7 (>= 5.1), libgl1, libjack-jackd2-0 (>= 1.9.10+20150825) | libjack-0.125, libjpeg62-turbo (>= 1.3.1), liblirc-client0, libmad0 (>= 0.15.1b-3), libmng1 (>= 1.0.10), libmpeg2-4 (>= 0.5.1), libmpg123-0 (>= 1.13.7), libogg0 (>= 1.0rc3), libopenal1 (>= 1.14), libpng16-16 (>= 1.6.2-1), libpostproc55 (>= 7:4.0), libpulse0 (>= 0.99.1), libsdl1.2debian (>= 1.2.11), libsmbclient (>= 2:4.0.3+dfsg1), libspeex1 (>= 1.2~beta3-1), libswresample3 (>= 7:4.0), libswscale5 (>= 7:4.0), libtheora0 (>= 1.0), libtinfo6 (>= 6), libvdpau1 (>= 0.2), libvorbisidec1 (>= 1.2.1+git20180316), libx11-6, libxext6, libxinerama1, libxss1, libxv1, libxvidcore4 (>= 1.2.2), libxvmc1 (>= 2:1.0.12), libxxf86dga1, libxxf86vm1, zlib1g (>= 1:1.1.4)
Suggests: bzip2, fontconfig, fonts-freefont-ttf, mplayer-doc, netselect | fping
Homepage: https://www.mplayerhq.hu
Tag: interface::graphical, interface::x11, role::program, uitoolkit::sdl,
 x11::application
Download-Size: 2,057 kB
APT-Sources: http://archive.debian.org/debian bullseye/main armel Packages
Description: movie player for Unix-like systems
 MPlayer plays most MPEG, VOB, AVI, Ogg/OGM, VIVO,
 ASF/WMA/WMV, QT/MOV/MP4, FLI, RM, NuppelVideo, yuv4mpeg, FILM, RoQ, PVA files,
 supported by many native, XAnim, RealPlayer, and Win32 DLL codecs. It can
 also play VideoCD, SVCD, DVD, 3ivx, RealMedia, and DivX movies.
 .
 Another big feature of MPlayer is the wide range of supported output
 drivers. It works with X11, Xv, DGA, OpenGL, SVGAlib, fbdev,
 but also SDL.
 .
 Not all of the upstream code is distributed in the source tarball.
 See the README.Debian and copyright files for details.


user@brain:~$ sudo apt install mplayer
Reading package lists... Done
Building dependency tree... Done
Reading state information... Done
The following additional packages will be installed:
  liba52-0.7.4 libass9 libaudio2 libavformat58 libbluray2 libbs2b0
  libcdio-cdda2 libcdio-paranoia2 libcdio19 libchromaprint1 libdca0 libdvdnav4
  libdvdread8 libenca0 libfaad2 libgif7 libgme0 libldb2 liblirc-client0
  libmad0 libmng1 libmpeg2-4 libnorm1 libopenmpt0 libpgm-5.3-0 libpostproc55
  librabbitmq4 libsmbclient libsrt1.4-gnutls libssh-gcrypt-4 libtalloc2
  libtdb1 libtevent0 libudfread0 libvorbisfile3 libvorbisidec1 libwbclient0
  libzmq5 python3-ldb python3-talloc samba-libs
Suggested packages:
  nas libbluray-bdj libdvdcss2 lirc fonts-freefont-ttf mplayer-doc netselect
  | fping
Recommended packages:
  libaacs0
The following NEW packages will be installed:
  liba52-0.7.4 libass9 libaudio2 libavformat58 libbluray2 libbs2b0
  libcdio-cdda2 libcdio-paranoia2 libcdio19 libchromaprint1 libdca0 libdvdnav4
  libdvdread8 libenca0 libfaad2 libgif7 libgme0 libldb2 liblirc-client0
  libmad0 libmng1 libmpeg2-4 libnorm1 libopenmpt0 libpgm-5.3-0 libpostproc55
  librabbitmq4 libsmbclient libsrt1.4-gnutls libssh-gcrypt-4 libtalloc2
  libtdb1 libtevent0 libudfread0 libvorbisfile3 libvorbisidec1 libwbclient0
  libzmq5 mplayer python3-ldb python3-talloc samba-libs
0 upgraded, 42 newly installed, 0 to remove and 1 not upgraded.
Need to get 12.1 MB of archives.
After this operation, 39.5 MB of additional disk space will be used.
Do you want to continue? [Y/n] Y
Get:1 http://archive.debian.org/debian bullseye/main armel libtalloc2 armel 2.3.1-2+b1 [26.5 kB]
~
Processing triggers for libc-bin (2.31-13+deb11u11) ...


user@brain:~$ sudo apt show smplayer
Package: smplayer
Version: 20.6.0~ds0-1
Priority: optional
Section: video
Maintainer: Debian Multimedia Maintainers <debian-multimedia@lists.debian.org>
Installed-Size: 4,357 kB
Depends: mpv (>= 0.6.2) | mplayer, libc6 (>= 2.28), libgcc-s1 (>= 3.5), libqt5core5a (>= 5.14.1), libqt5dbus5 (>= 5.14.1), libqt5gui5 (>= 5.14.1) | libqt5gui5-gles (>= 5.14.1), libqt5network5 (>= 5.14.1), libqt5widgets5 (>= 5.14.1), libqt5xml5 (>= 5.1), libstdc++6 (>= 5), libx11-6, zlib1g (>= 1:1.1.4)
Recommends: smplayer-themes, smplayer-l10n
Homepage: http://smplayer.sourceforge.net/
Tag: interface::graphical, interface::x11, role::program, uitoolkit::qt,
 use::playing, works-with::audio, works-with::video, x11::application
Download-Size: 1,873 kB
APT-Sources: http://archive.debian.org/debian bullseye/main armel Packages
Description: Complete front-end for MPlayer and mpv
 Qt5 front-end for mplayer and forks, with basic features like playing
 videos, DVDs, and VCDs to more advanced features like support
 for MPlayer filters and more. One of the most interesting features
 of SMPlayer: it remembers the settings of all files you play.
 So you start to watch a movie but you have to leave... don't
 worry, when you open that movie again it will resume at the same
 point you left it, and with the same settings: audio track,
 subtitles, volume...


user@brain:~$ sudo apt install smplayer
Reading package lists... Done
Building dependency tree... Done
Reading state information... Done
The following additional packages will be installed:
  libdouble-conversion3 libinput-bin libinput10 libmd4c0 libpcre2-16-0
  libqt5core5a libqt5dbus5 libqt5gui5 libqt5network5 libqt5widgets5 libqt5xml5
  libwacom-common libwacom2 libxcb-icccm4 libxcb-image0 libxcb-keysyms1
  libxcb-randr0 libxcb-render-util0 libxcb-shape0 libxcb-util1
  libxcb-xinerama0 libxcb-xinput0 libxkbcommon-x11-0
Suggested packages:
  qt5-image-formats-plugins qtwayland5
Recommended packages:
  qttranslations5-l10n libqt5svg5 qt5-gtk-platformtheme libwacom-bin
  smplayer-themes smplayer-l10n
The following NEW packages will be installed:
  libdouble-conversion3 libinput-bin libinput10 libmd4c0 libpcre2-16-0
  libqt5core5a libqt5dbus5 libqt5gui5 libqt5network5 libqt5widgets5 libqt5xml5
  libwacom-common libwacom2 libxcb-icccm4 libxcb-image0 libxcb-keysyms1
  libxcb-randr0 libxcb-render-util0 libxcb-shape0 libxcb-util1
  libxcb-xinerama0 libxcb-xinput0 libxkbcommon-x11-0 smplayer
0 upgraded, 24 newly installed, 0 to remove and 1 not upgraded.
Need to get 10.2 MB of archives.
After this operation, 34.0 MB of additional disk space will be used.
Do you want to continue? [Y/n] Y
Get:1 http://archive.debian.org/debian bullseye/main armel libdouble-conversion3 armel 3.1.5-6.1 [39.6 kB]
~
Processing triggers for hicolor-icon-theme (0.17-2) ...
user@brain:~$


user@brain:~$ mplayer
MPlayer 1.4 (Debian), built with gcc-10 (C) 2000-2019 MPlayer Team
Usage:   mplayer [options] [url|path/]filename

Basic options: (complete list in the man page)
 -vo <drv>        select video output driver ('-vo help' for a list)
 -ao <drv>        select audio output driver ('-ao help' for a list)
 vcd://<trackno>  play (S)VCD (Super Video CD) track (raw device, no mount)
 dvd://<titleno>  play DVD title from device instead of plain file
 -alang/-slang    select DVD audio/subtitle language (by 2-char country code)
 -ss <position>   seek to given (seconds or hh:mm:ss) position
 -nosound         do not play sound
 -fs              fullscreen playback (or -vm, -zoom, details in the man page)
 -x <x> -y <y>    set display resolution (for use with -vm or -zoom)
 -sub <file>      specify subtitle file to use (also see -subfps, -subdelay)
 -playlist <file> specify playlist file
 -vid x -aid y    select video (x) and audio (y) stream to play
 -fps x -srate y  change video (x fps) and audio (y Hz) rate
 -pp <quality>    enable postprocessing filter (details in the man page)
 -framedrop       enable frame dropping (for slow machines)

Basic keys: (complete list in the man page, also check input.conf)
 <-  or  ->       seek backward/forward 10 seconds
 down or up       seek backward/forward  1 minute
 pgdown or pgup   seek backward/forward 10 minutes
 < or >           step backward/forward in playlist
 p or SPACE       pause movie (press any key to continue)
 q or ESC         stop playing and quit program
 + or -           adjust audio delay by +/- 0.1 second
 o                cycle OSD mode:  none / seekbar / seekbar + timer
 * or /           increase or decrease PCM volume
 x or z           adjust subtitle delay by +/- 0.1 second
 r or t           adjust subtitle position up/down, also see -vf expand

 * * * SEE THE MAN PAGE FOR DETAILS, FURTHER (ADVANCED) OPTIONS AND KEYS * * *

user@brain:~$
user@brain:~$
user@brain:/boot/sound$ mplayer pianos-by-jtwayne-7-174717.mp3
MPlayer 1.4 (Debian), built with gcc-10 (C) 2000-2019 MPlayer Team
do_connect: could not connect to socket
connect: No such file or directory
Failed to open LIRC support. You will not be able to use your remote control.

Playing pianos-by-jtwayne-7-174717.mp3.
libavformat version 58.45.100 (external)
Audio only file format detected.
Load subtitles in ./
==========================================================================
Opening audio decoder: [mpg123] MPEG 1.0/2.0/2.5 layers I, II, III
AUDIO: 44100 Hz, 2 ch, s16le, 256.0 kbit/18.14% (ratio: 32000->176400)
Selected audio codec: [mpg123] afm: mpg123 (MPEG 1.0/2.0/2.5 layers I, II, III)
==========================================================================
AO: [pulse] Init failed: Connection refused
Failed to initialize audio driver 'pulse'
AO: [alsa] 48000Hz 2ch s16le (2 bytes per sample)
Video: no video
Starting playback...
A:  18.5 (18.5) of 18.0 (18.0) 75.0%


Exiting... (End of file)
user@brain:/boot/sound$